Welcome to the User Guide for Personnel Manager! In this comprehensive guide, we’ll walk you through the essential steps to efficiently manage your activities, crew, clients, bookings and scheduling. Whether you’re a seasoned professional or just getting started, this breakdown will provide you with the necessary tools and guidance to simplify your workflow and maximise productivity. Let’s dive in and explore how Personnel Manager can revolutionise the way you manage your personnel and operations.
Let’s Get Started!
Step 1 Add Activities (roles, skills)
To add a new activity, click “Add New Activity”.

Fill out the form and once completed click “Save” button.
Step 2 Add Crew
Hover your cursor over the “+ Add Staff” option in Contacts Menu.

Add Crew Window will open.

Enter the crew details and use the arrow buttons to select their activities, these activities that are available in the list are from the activities uploaded through the settings.
Once the information is entered, you have the option to either save and exit or proceed to open the crew profile to complete the uploading process.
Step 3 Add Clients (may be actual clients or internal managers at your company)
Click on the button labeled “Add Client or Add Project Managers“.

Fill in the client’s details and generate their login credentials. It is recommended to utilize the client’s number if they haven’t specified a password. Clients have the autonomy to modify their passwords via their personal accounts.

Select ‘Save & Exit’ to go back to the client list, or opt for ‘Save & Open Profile’ to directly access the Client Profile.
Step 4 Add Booking
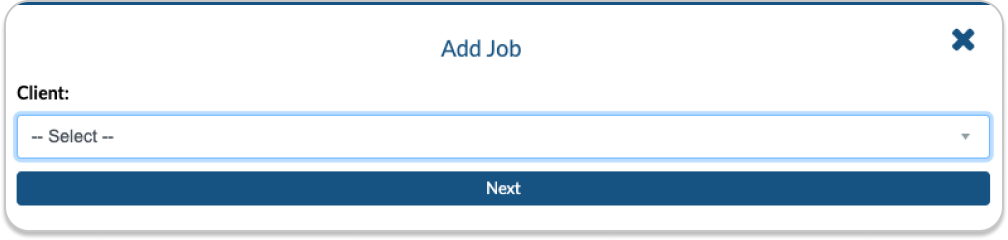
To initiate the process, hover your cursor over the “Add Jobs” option on the CNB (Client Navigation Bar) and proceed to click on “Add Job”.

A window labeled “Add Job” will appear. Choose the client from the list and click on the “Next” button.

This action will direct you to a new page titled “Add Booking”. Proceed to complete all required fields.

Once all fields are filled, click on the “Next” button.

You’ll then be redirected to the “Job Details” page, where individual shift information is displayed. You have the option to edit any necessary details.

After clicking “Next”, you’ll be directed to an overview of the job.

Click “Next” again to proceed to the ‘Final Info’ page.

Finally, click “Confirm Booking” to create the job.

A confirmation message will appear, including the job reference number for your records.
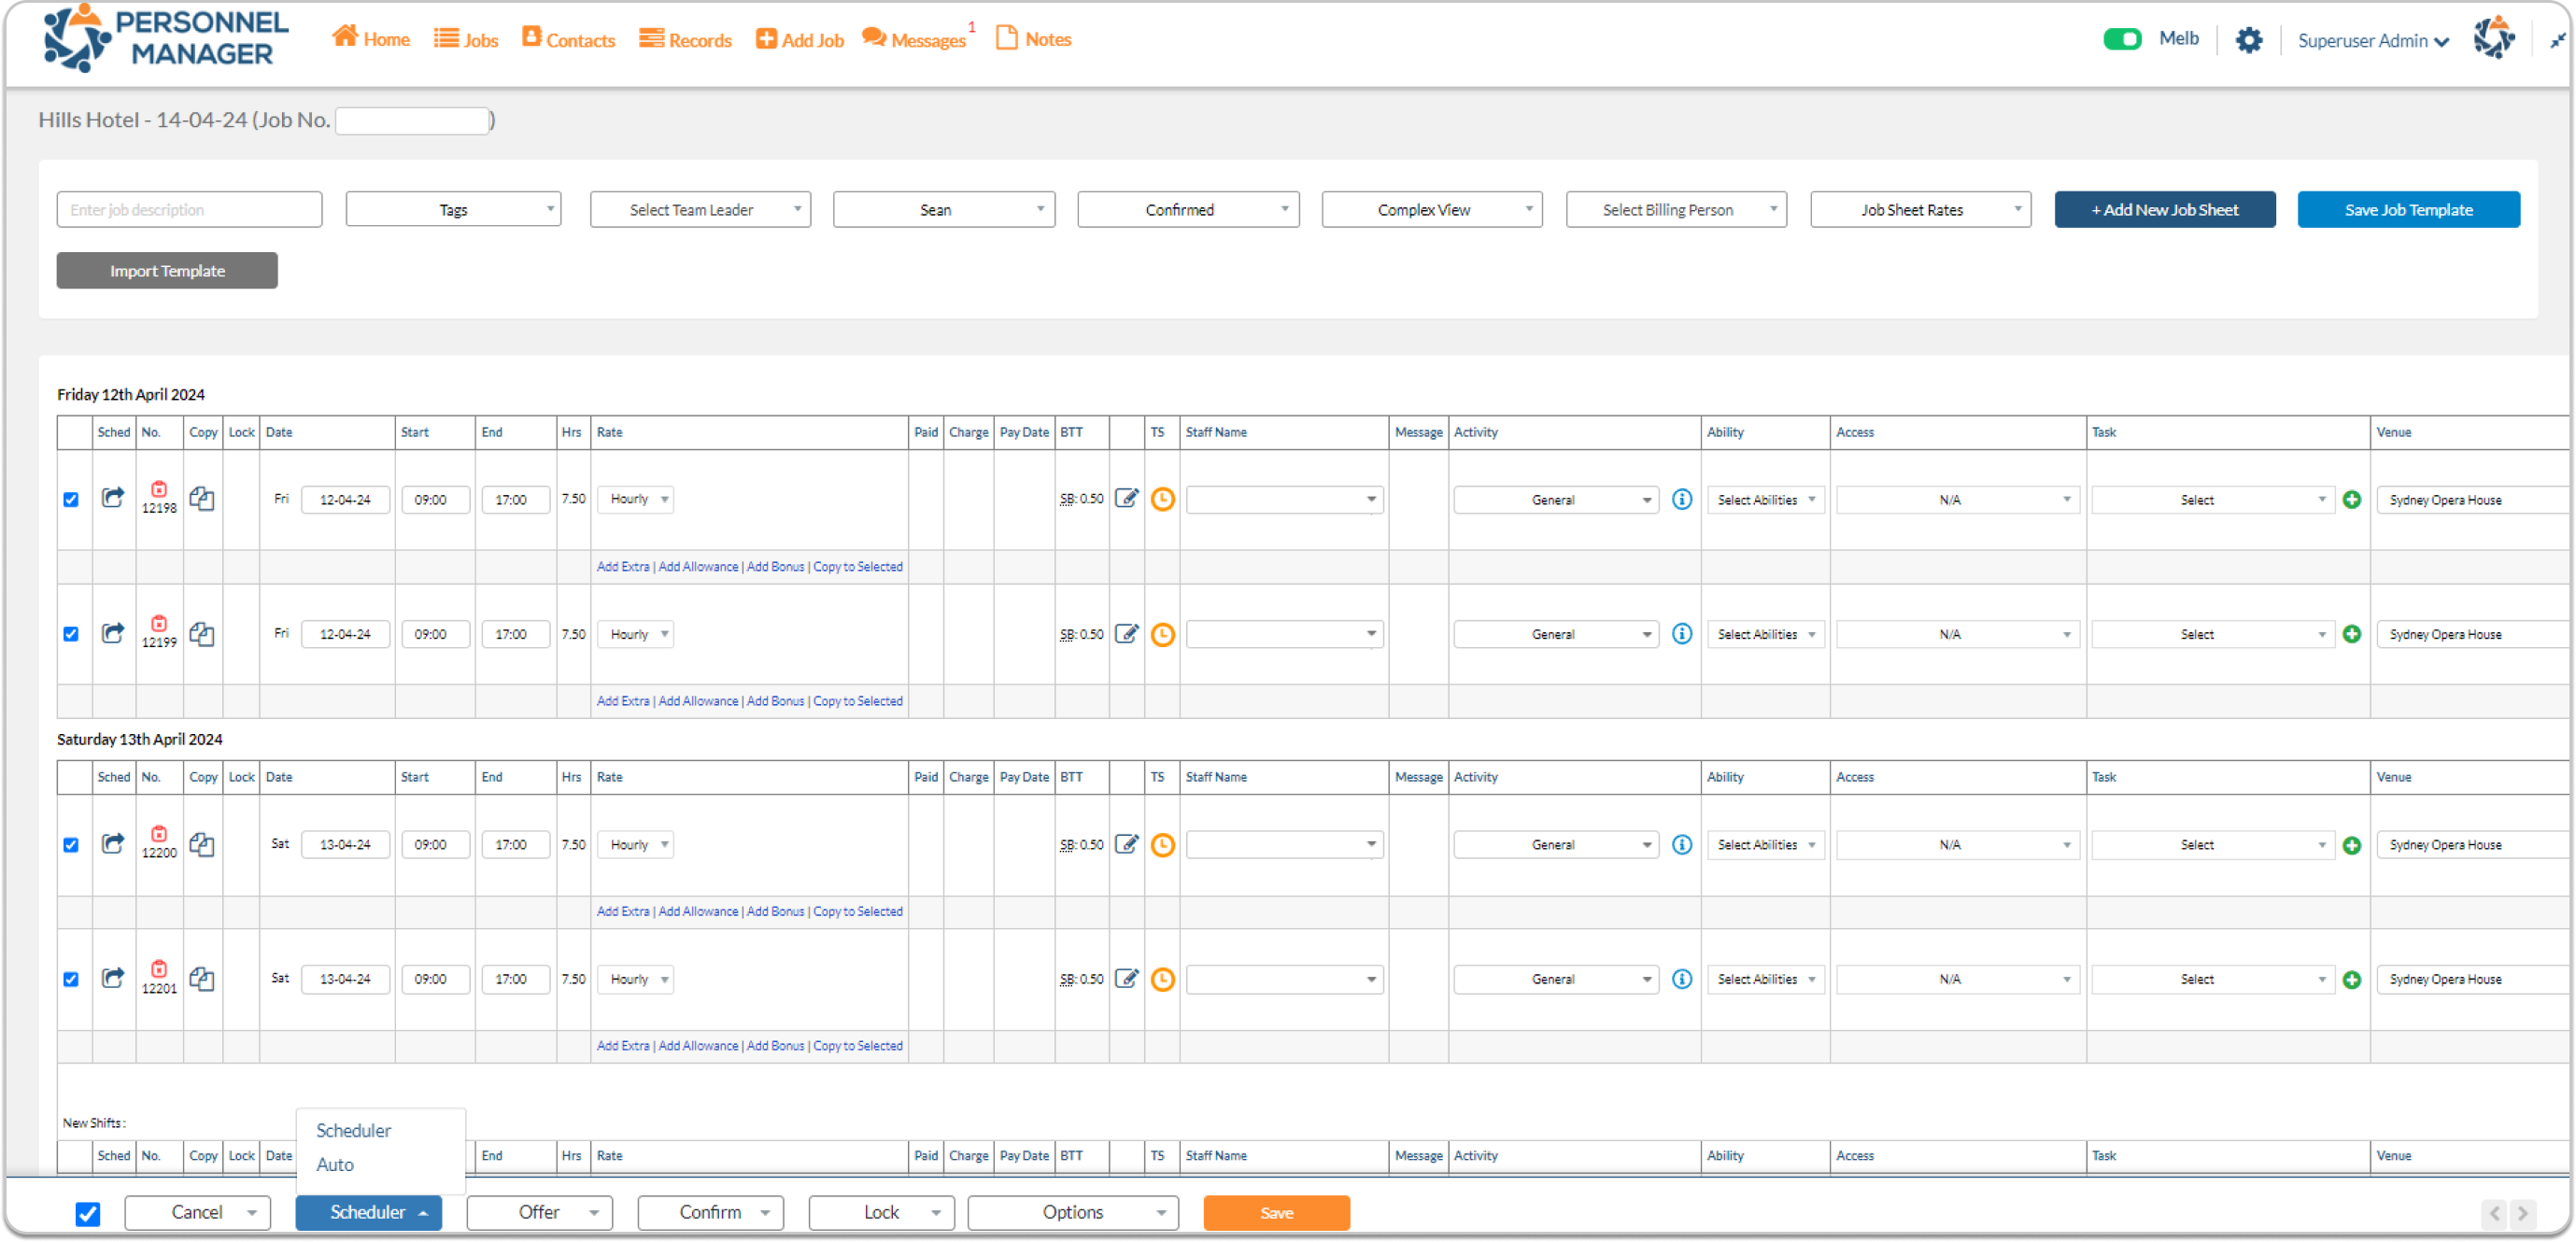
Step 5 Open Job Sheet or Shifts Page, select shifts you want to allocate and use Scheduler
After successfully creating the booking or job, simply click on the provided link to open the Jobsheet page.
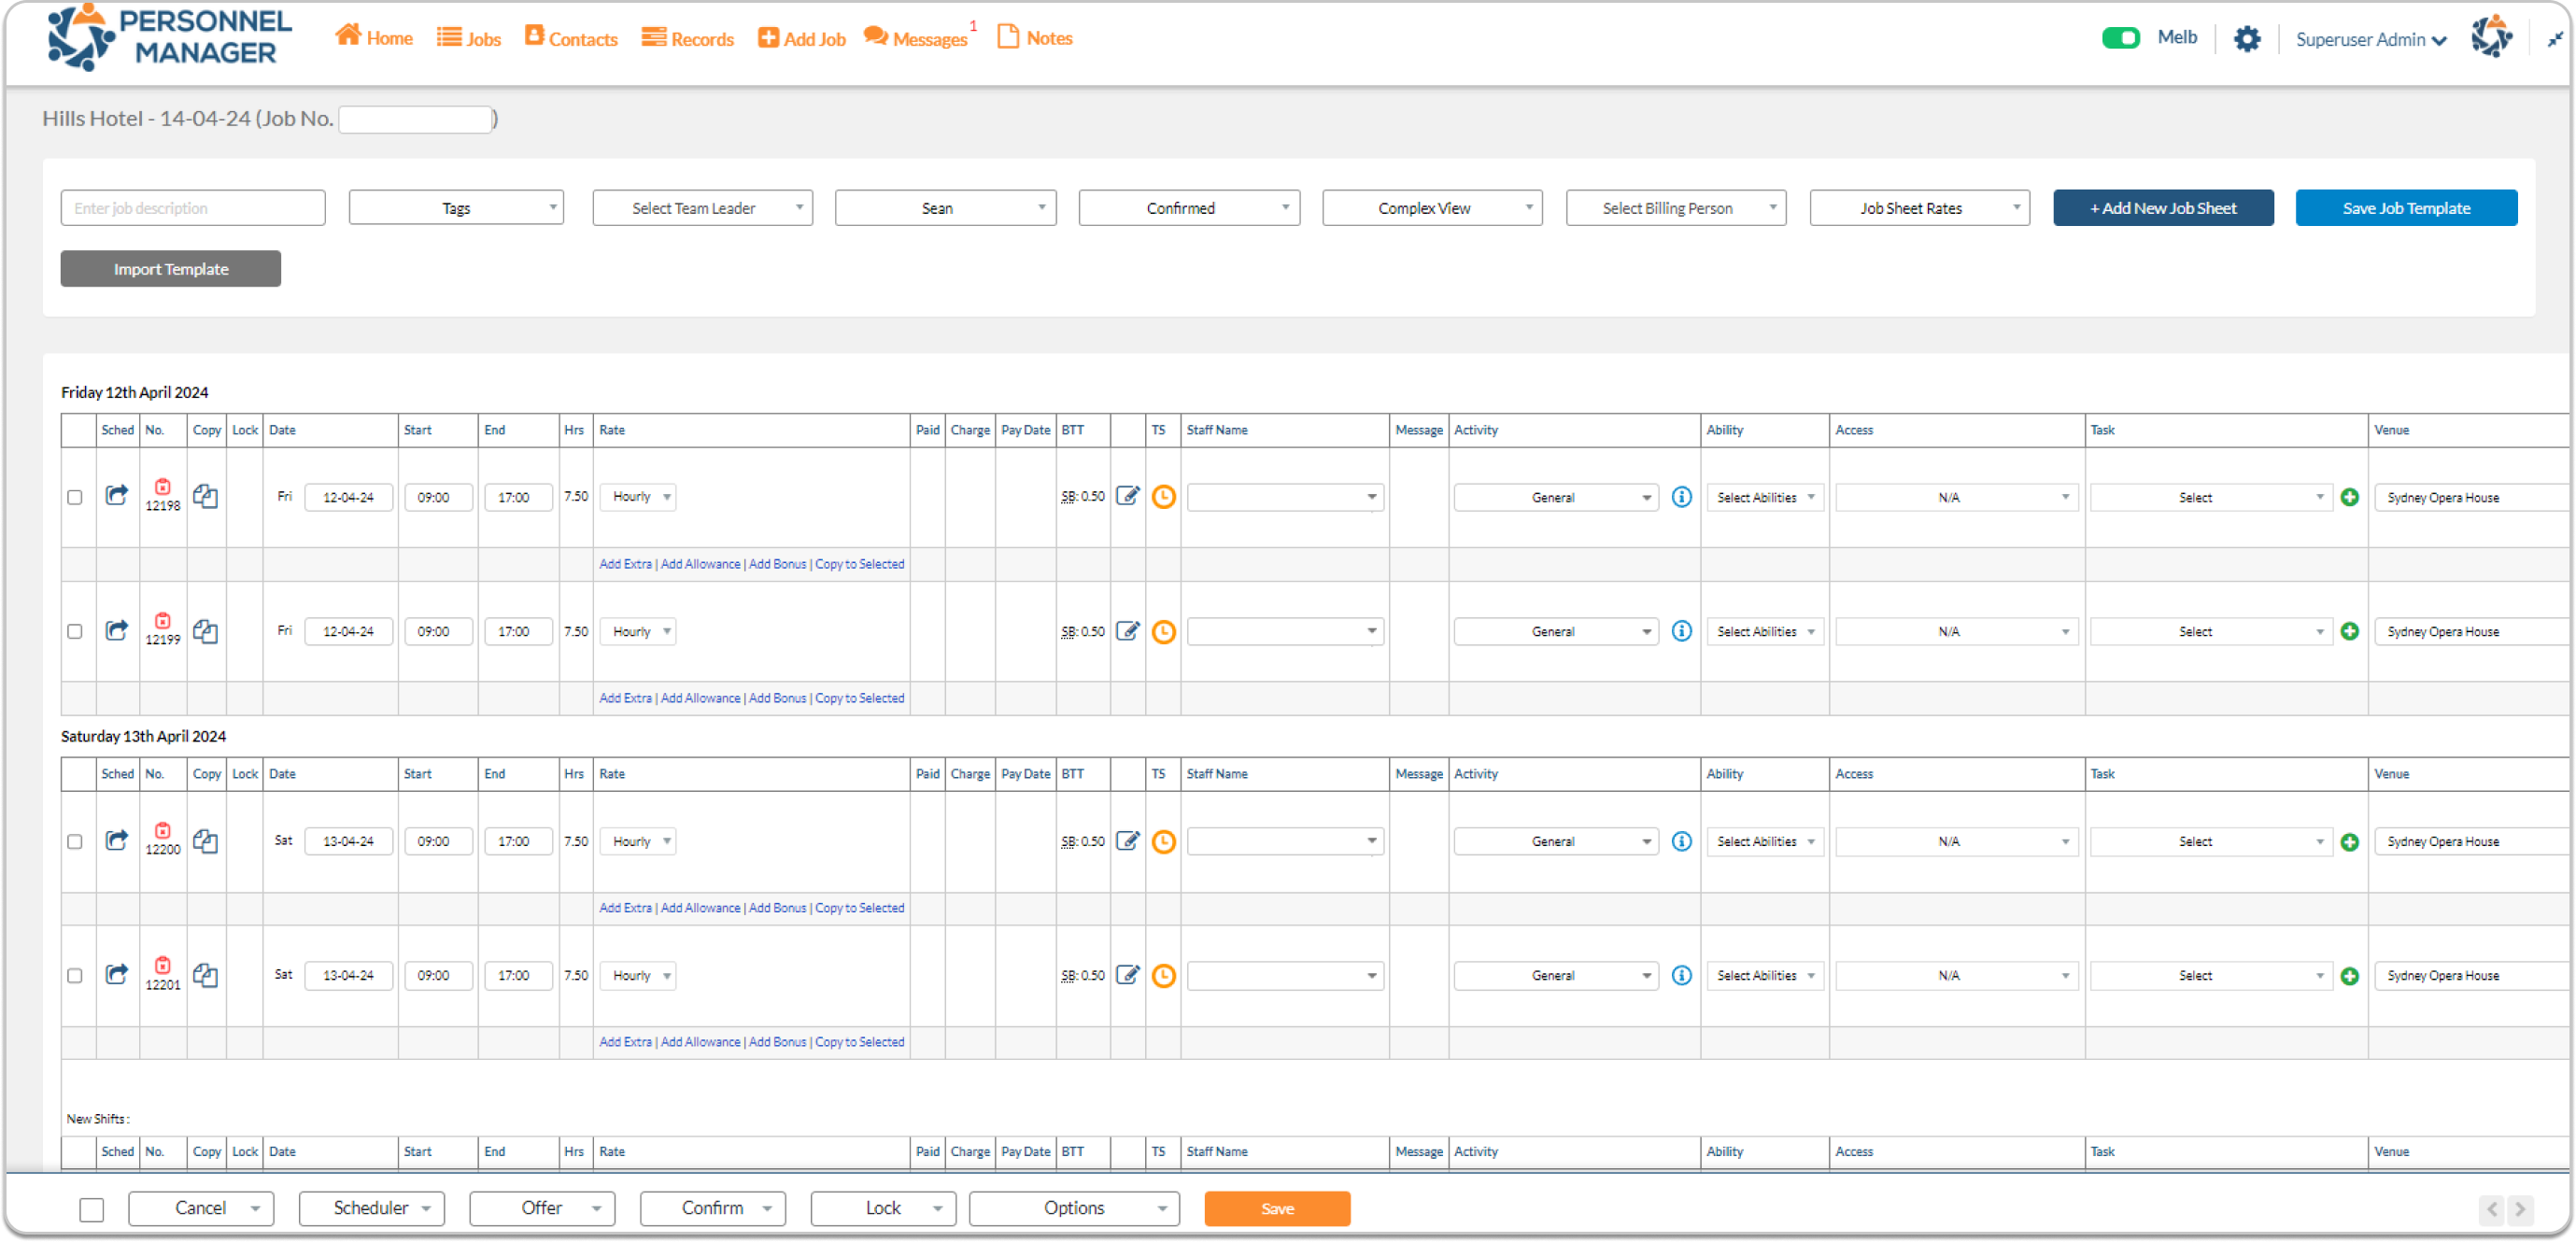
This will allow you to access and review all pertinent details and information related to the newly created booking or job. Choose the shifts you wish to assign and utilize the Scheduler to manage them effectively.
This manual is created to provide guidance and reference to the users of Personnel Manager (PM), it gives users a depth of understanding its functions and capabilities.
Key
All functions are marked with the following letters that indicate that only these user types have access to that particular page/action.
| Key | User Type |
| A | Administrator |
| C | Crew |
| CL | Client |
| DM | Duty Manager |
| M | Manager |
CNB – Central Navigation Bar
Central Navigation Bar is on the top of the page.
Hover your mouse over the icons to show dropdown menu lists. See sample below:
Drop Down Menu Features:
Jobs
| Daily |
| Jobs |
| Shifts |
| Calendar |
| Weekly |
| Graphs |
| Events |
| Maps |
| Statistics |
| Deleted |
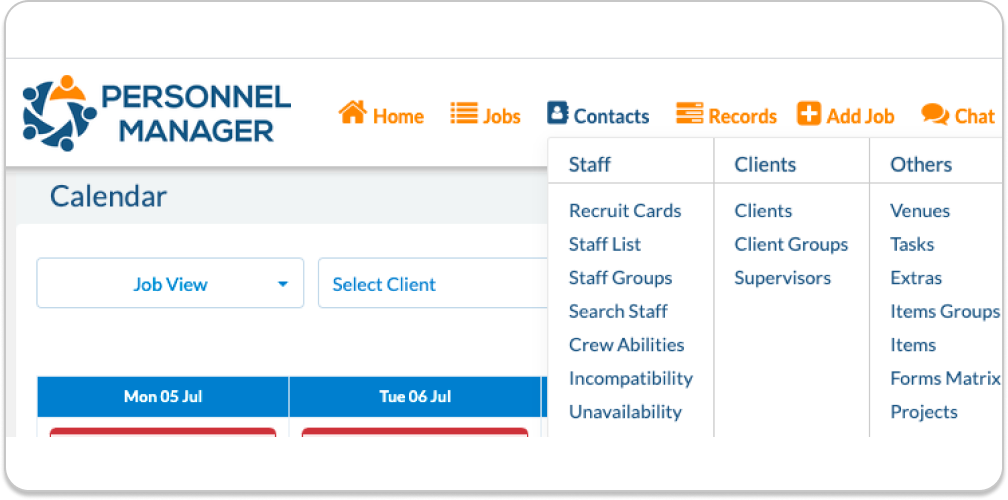
Contacts
Contacts
| Staff | Client | Other |
| Recruit cards | Client | Venus |
| Staff List | Client Groups | Tasks |
| Staff Group | Supervisors | Extras |
| Search Staff | Items Groups | |
| Crew Abilities | Items | |
| Incompatibility | Forms Matrix | |
| Unavailability | Projects |
Records
| Messages | Logs |
| Credits: 4425 | Shift History |
| Send an SMS | Processes |
| MESSAGE Logs | |
| Client MESSAGE | |
| Bulk Email | |
| Purchase Credits |
Add Job will route you to Add Job screen
AM – Administration Menu
Located on the upper right corner
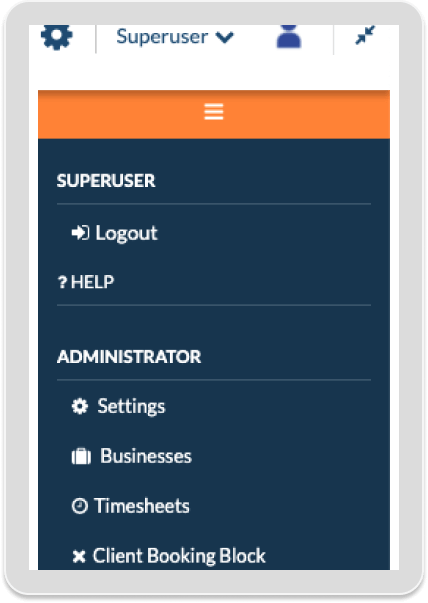
Contains links to the following pages:
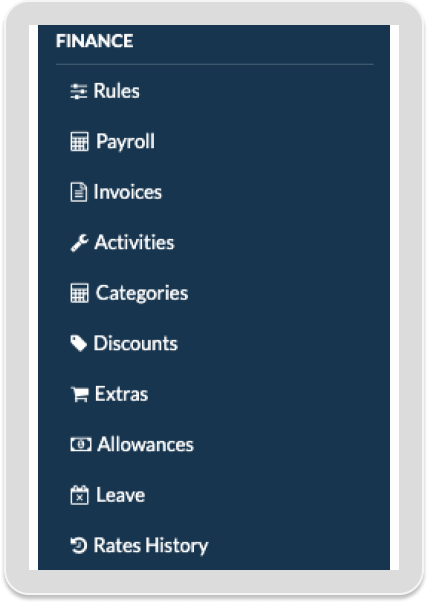
| SUPERUSER | Administrator | Finance | View All Business |
| Logout | Settings | Rules | On/Off |
| Help | Businesses | Payroll | |
| Timesheets | Invoices | ||
| Client Booking Block | Activities | ||
| Categories | |||
| Discounts | |||
| Extras | |||
| Allowances | |||
| Leave | |||
| Rates History |

