3.7 Clients
CNB > Clients A / DM / M
Clients Page is found on the Contacts dropdown menu.

A Client is the entity on whose behalf all the work is being conducted. In Ops Home, a Client must be selected in order to create a job sheet. For Labour Hire companies the clients of the company can be listed here or some businesses may prefer to enter their account managers or supervisors as clients. It is possible to change the word Client to another word in Global Settings.
Client records can be search by entering first few letters of the name then selecting from the list that appears. Once selected click “Search” to bring up the records. Search by “Postcode” can also be performed on this page.
▪”Anti-smiley face” button disables the client records but keeps them stored in the data base.
▪Eye icon opens client’s records
▪Pencil icon opens client’s records in edit mode. (Admin user only)
▪Cross (X) deletes the client records permanently.
3.7.1 Adding a new client
On the Client Page, you can Add a New Client but in order to do this, you must have “View All Company Details” (Superuser mode) switched to ON at the top right of the screen in Admin Login. Once you have created a Client, you can assign all their details, give them booking/edit delete permissions, assign certain Crew Members that can work for those clients. Clients also have the ability to Login to the Personnel Manager with their own Access where they can View Upcoming Shifts, Make Bookings (optional).
Click “Add a New Client Record”: Fill out the client details as desired.
Short Name: Short name is the name that will appear in all outgoing SMS’s (or email) sent to crew pointing out who the client is for that specific shift. This is also the “username” for clients when they log in online to make bookings to view them. See “Client Log in” for more information.
TIP: If no “password” is entered, PM assigns the “Short Name” as the password as well when record is saved.
Enable Online Client Booking: When enabled this client will be able to make bookings online. If not enabled, client will still be able to log in to “Client’s Page” but “Make a Booking” button will not appear (See “Client Log in” for more information).
Default Instructions, Client Payment Terms for Invoices: Each time an invoice is sent to clients PM includes a default message which looks like the following:
If you have any questions regarding this invoice, email [ACCOUNTS_EMAIL] or phone [BUSINESS_PHONE].[PERCENTAGE_INTEREST]% interest (per annum) will be charged on overdue Invoices [GRACE_PERIOD] days after receipt.All invoices are payable within [PAYMENT_TERMS_X_DAYS] Days – You have 24 hours from the receipt of this invoice to query any times.
This message would apply to all invoices sent out automatically (Editable in Global Settings).
AUB > Global Settings > Email Messages A
If any client’s invoices need to have a different message than the default one it can be entered in these boxes.
Crew Groups: Clients can be assigned to “Crew Groups” using this table. See “Crew Groups” for more info.
Additional Information: For more info please see “Client additional information fields” in Global Settings.
Associated Discount: Associated Discount allows discounts stored in the Discounts Page to be associated permanently with a particular Client.
“Add/ Edit Button”: Saves any changes that’s made on the clients page.
Accounts Names and Email Addresses: This is where all client contacts are organised. They can be added as new contacts, deleted or added in the invoice loop. To add any contact in the invoice loop click the “Envelope icon with red X” on it. Any contact that has a “Green Envelope with check sign” would be in the invoice loop, which means their names will automatically be selected by PM before sending the invoice (See Sending Invoices under “Ops Home Page” for more info).
Add Client Booking Emails: Using this link new contact persons can be added to client records. Contact types are “Accounts” (usually to send invoices), booking person (booking person details which will appear on the “Online Booking Form” as one of the selectable booking persons) or Admin CC. Any client contact can also be selected to be in the invoice loop by ticking the box “Include this person in the Invoice Loop”, so then these contacts will be automatically chosen when invoices are being sent to this client.
Client Notes: Any notes that can be entered here regarding clients. Or it can be used as a log (For example: -sent invoice on xx/xx/xx –sent statement on xx/xx/xx –New account manager “John Smith”, -still owe $xxx on xx/xx/xx…)
Associated Onsite Contacts: When bookings are made online PM asks to fill in the details of an onsite contact. All onsite contacts that are entered for each client are stored and can be edited in this section of Client Page.
Edit Custom Clients Charge Rates: When clicked, a list of all activities appears at the bottom of the Client Page. All rates belonging to each activity appears blank, which indicates that currently default rates are being applied. If any client is needed to be charged differently than the default rates, they can be entered here.
3.7.2 Client Logo
Client Details Page, Logo field is available to upload logo that display on Client’s Login. Click Choose file to upload any artwork in recommended format in JPEG/GIF/PNG/TIFF/EPS.
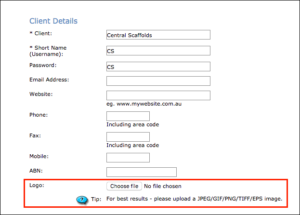
Uploaded logo will display on Client’s home page.

N 3.7.3 Deleted Clients Page
To view the deleted clients, click View Deleted Client.

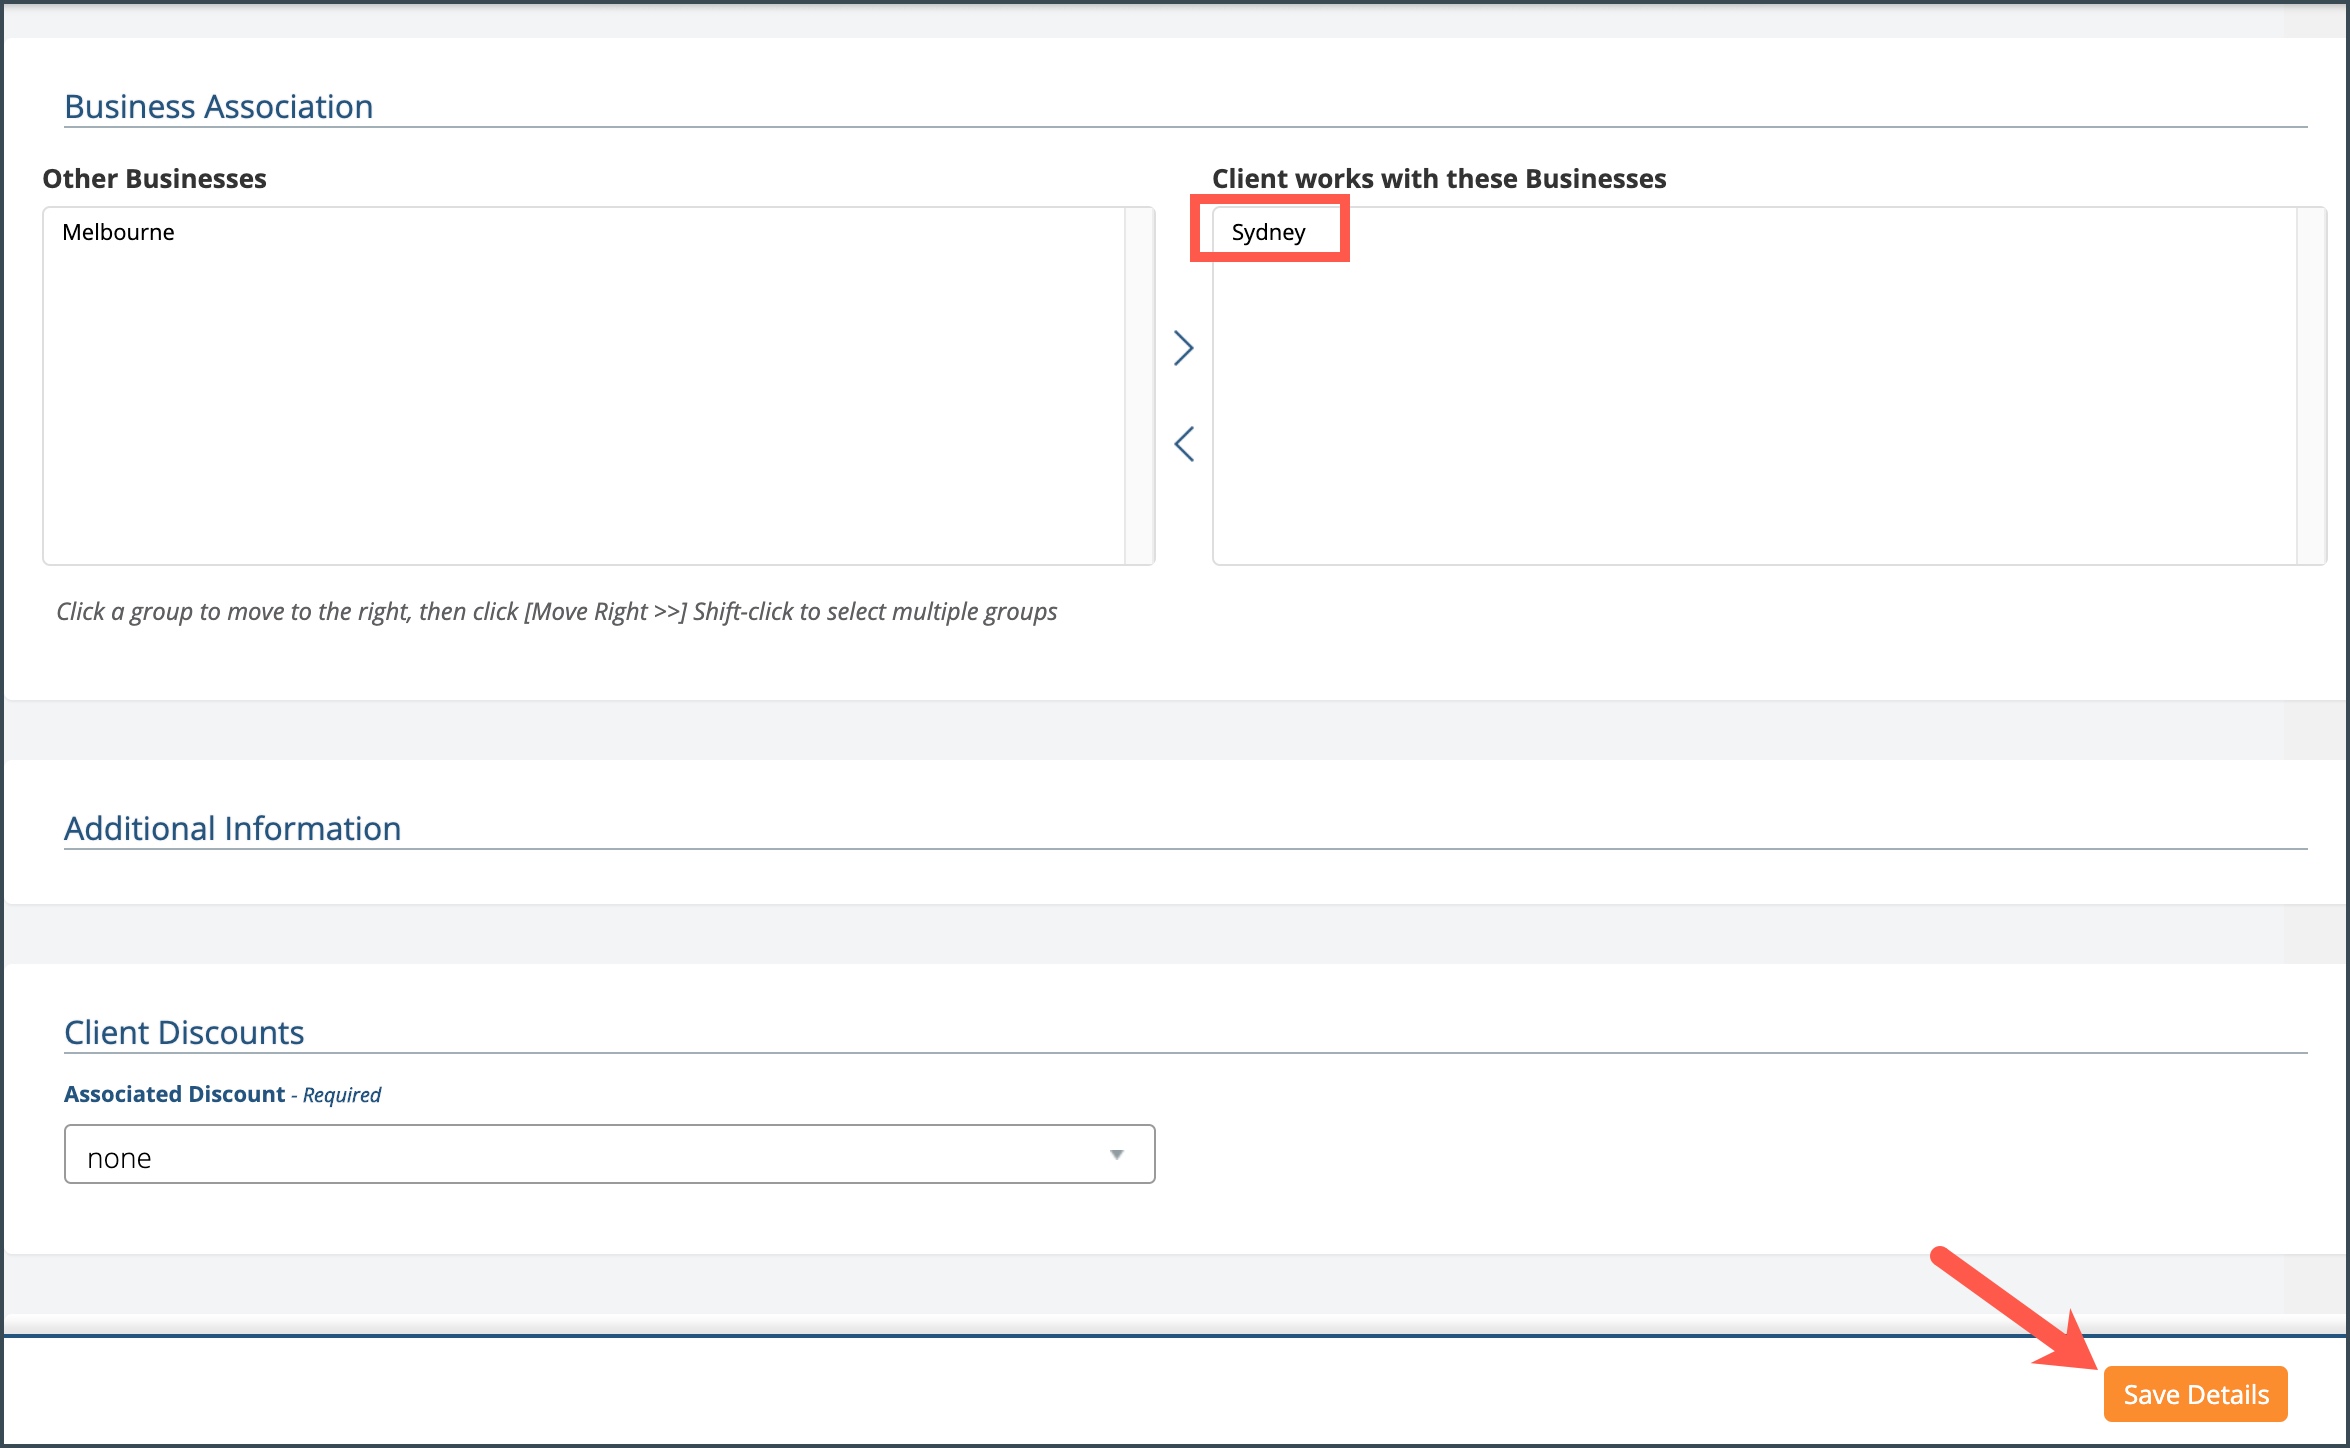
3.7.X Client Business Association
You can easily map a client with a business. Follow the following steps:
If there are no businesses under the “Client works with these Businesses” column, it means clients can work with all business.
You can select a Business and click the right arrow key.
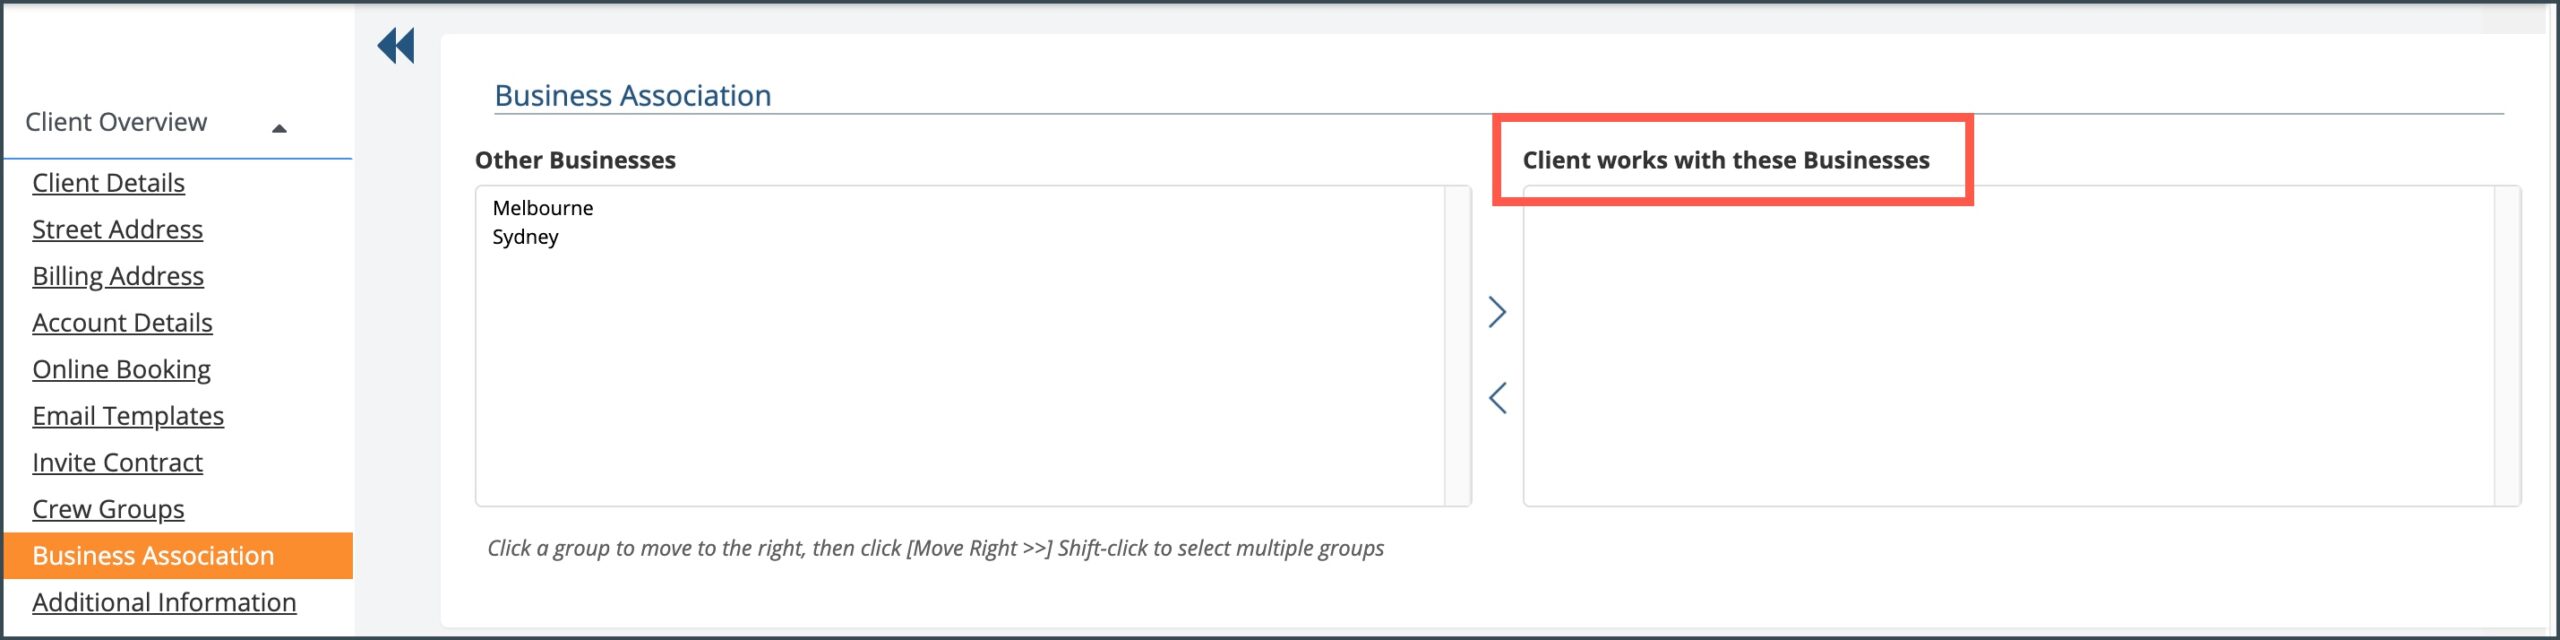
This means this client can only work for Sydney Business.
Click Save Details.