3.0 Adding Jobs in the PM Client App
STEP 1
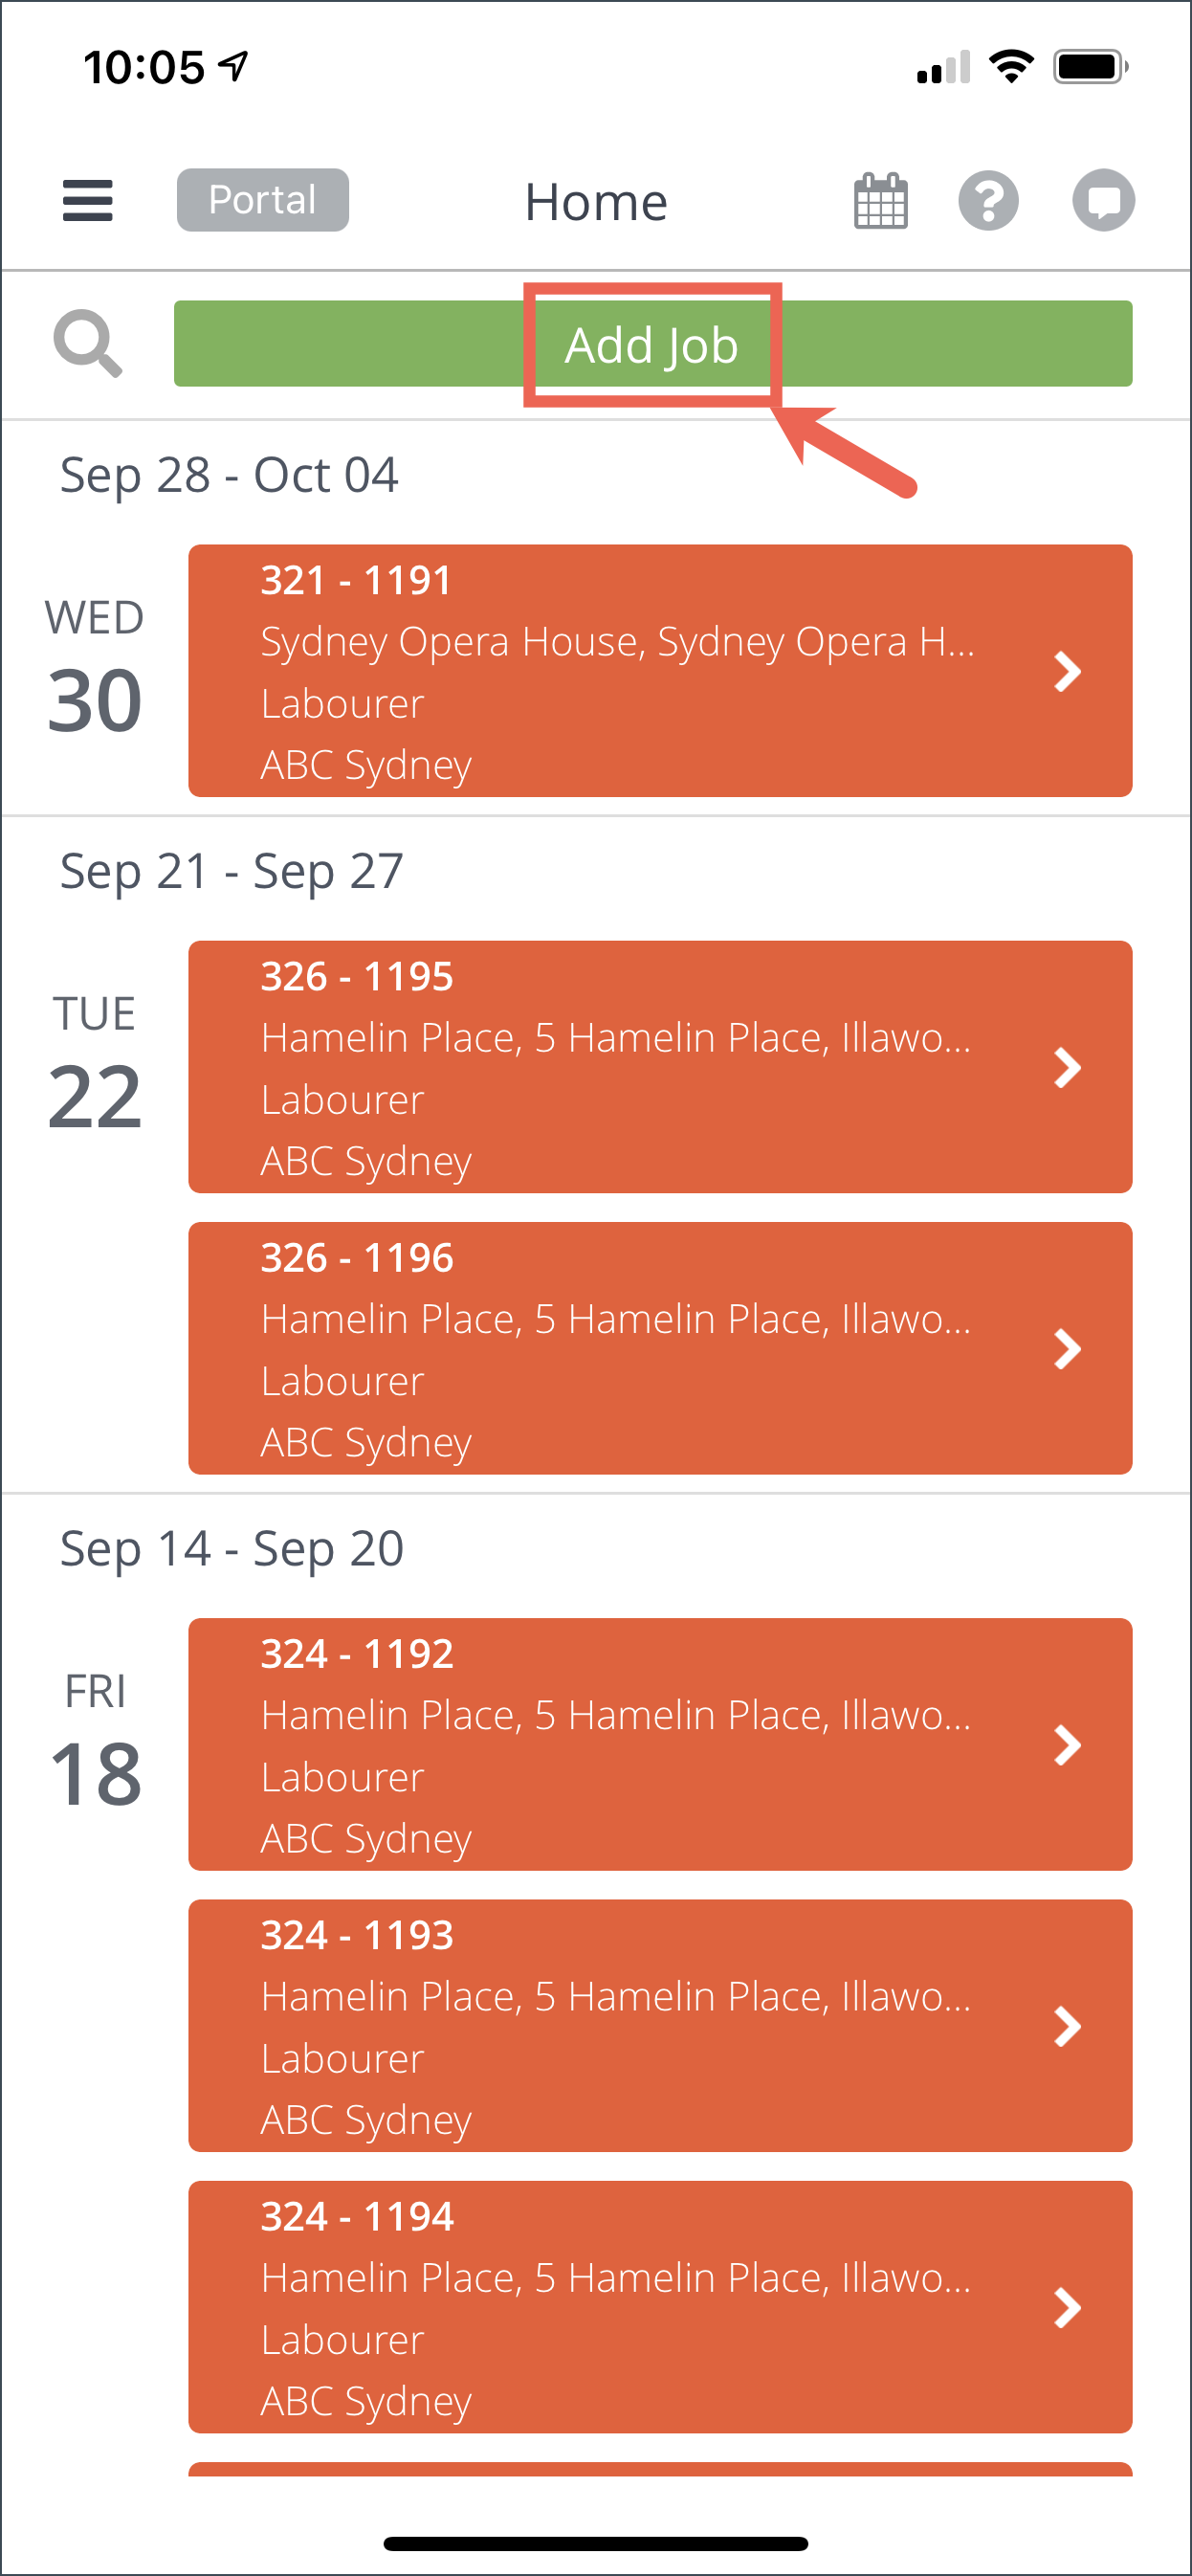
Tap the Add Job button on the Job List page. This will open the Client Portal page where you can start adding / booking jobs.
Booking Person: Select the booking person from the dropdown menu.
Job Location: Select the job location from the dropdown menu.
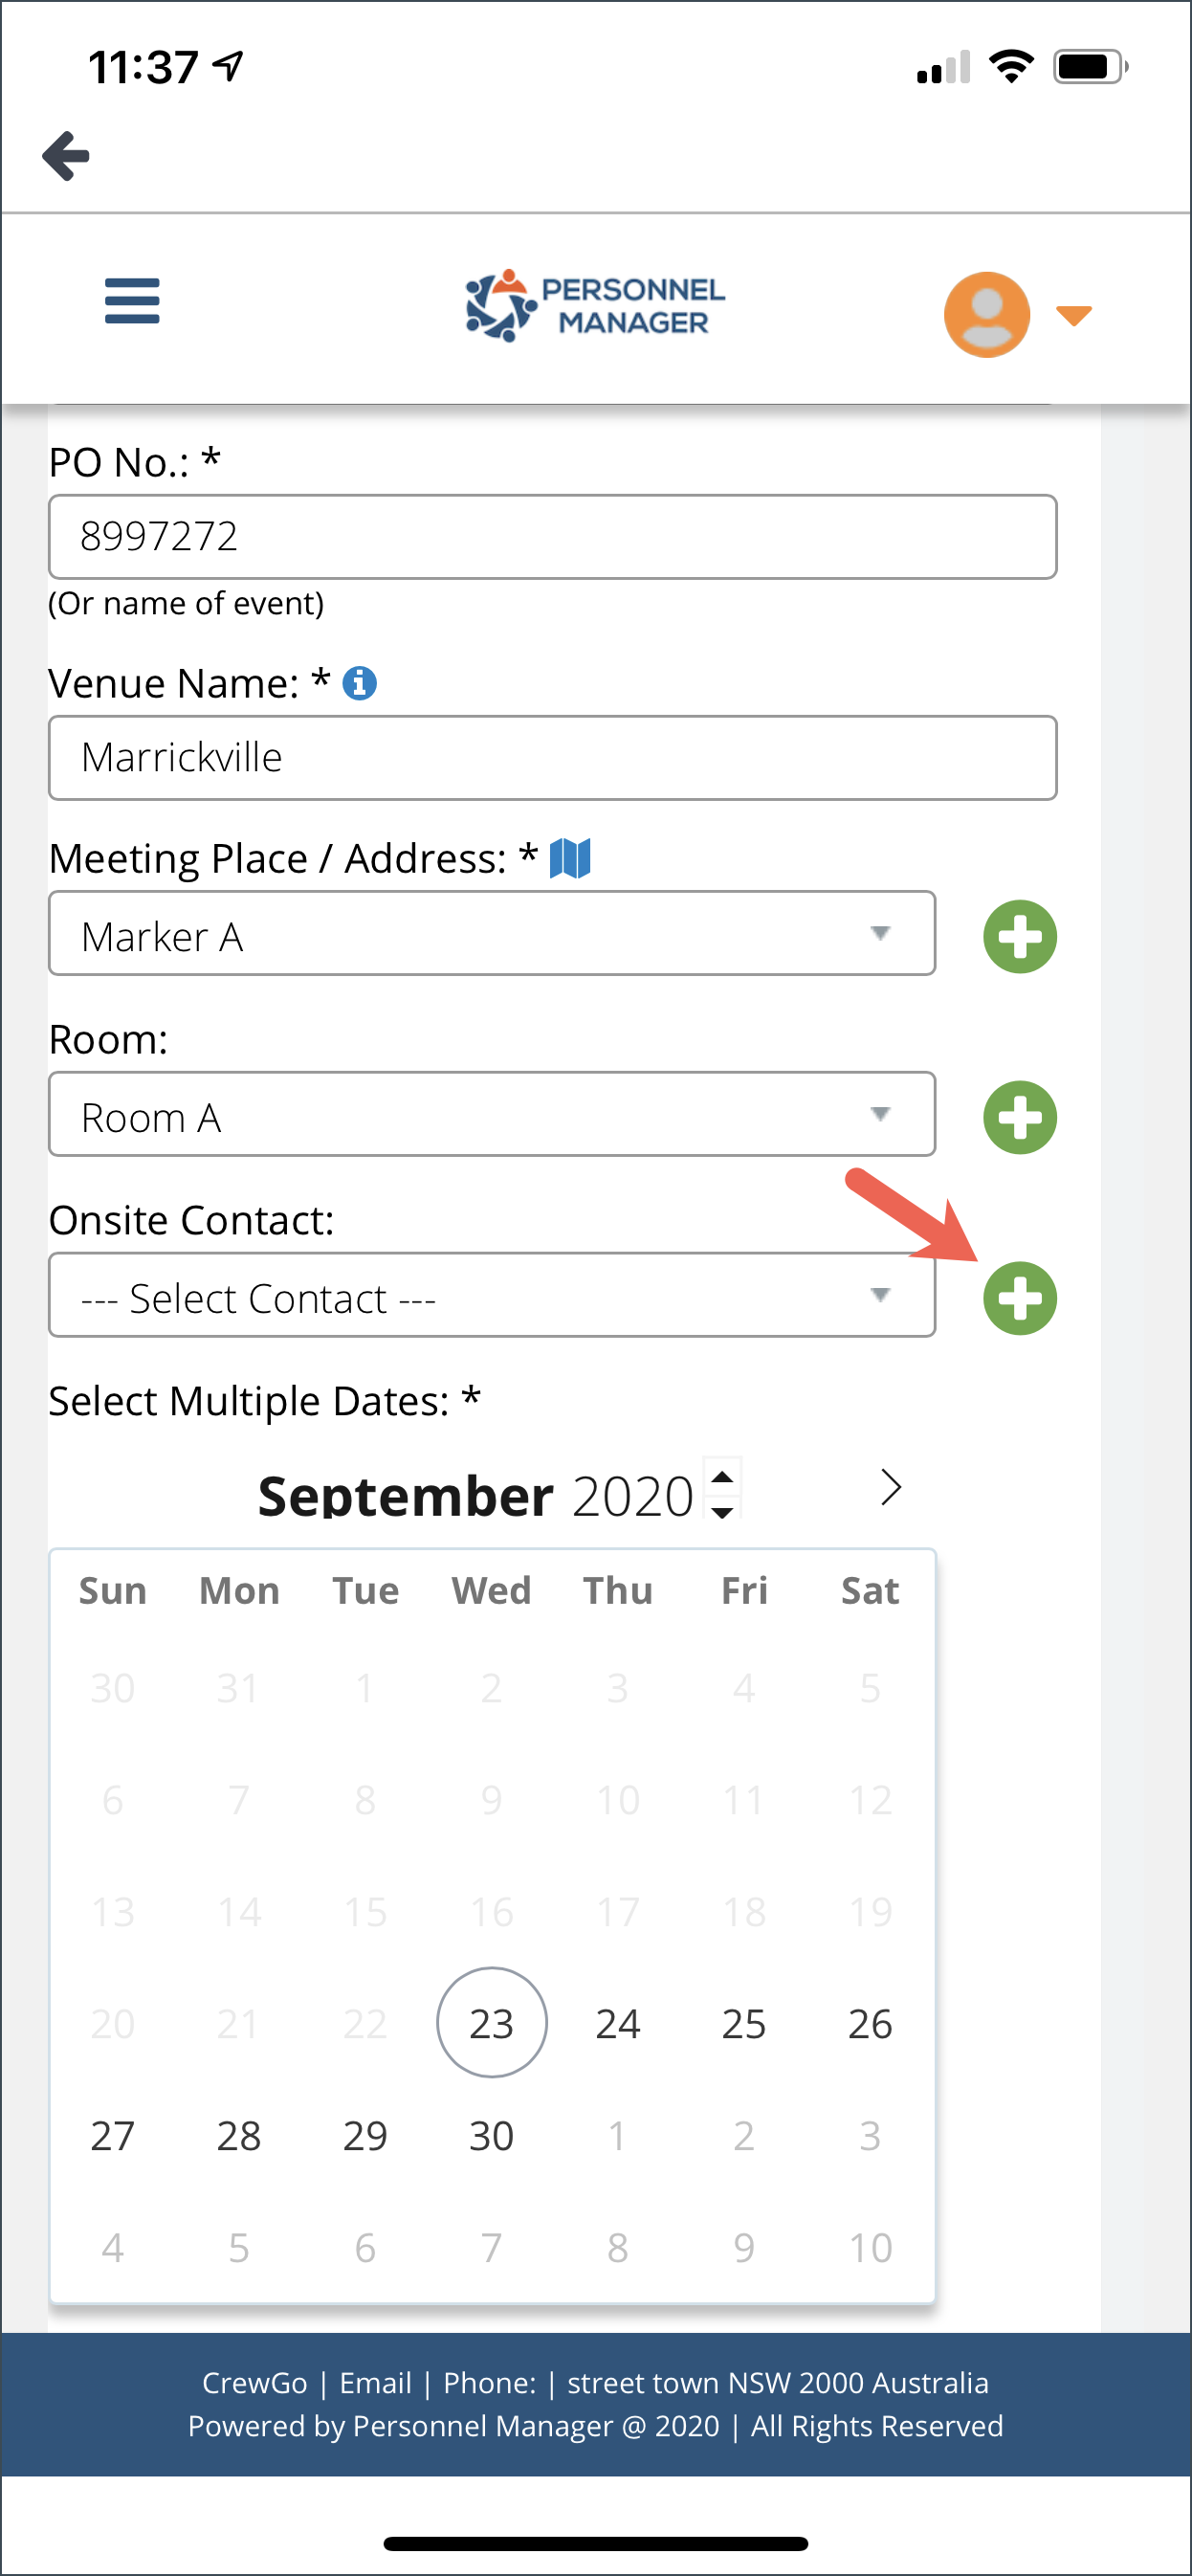
PO No: Enter the PO Number on this field.
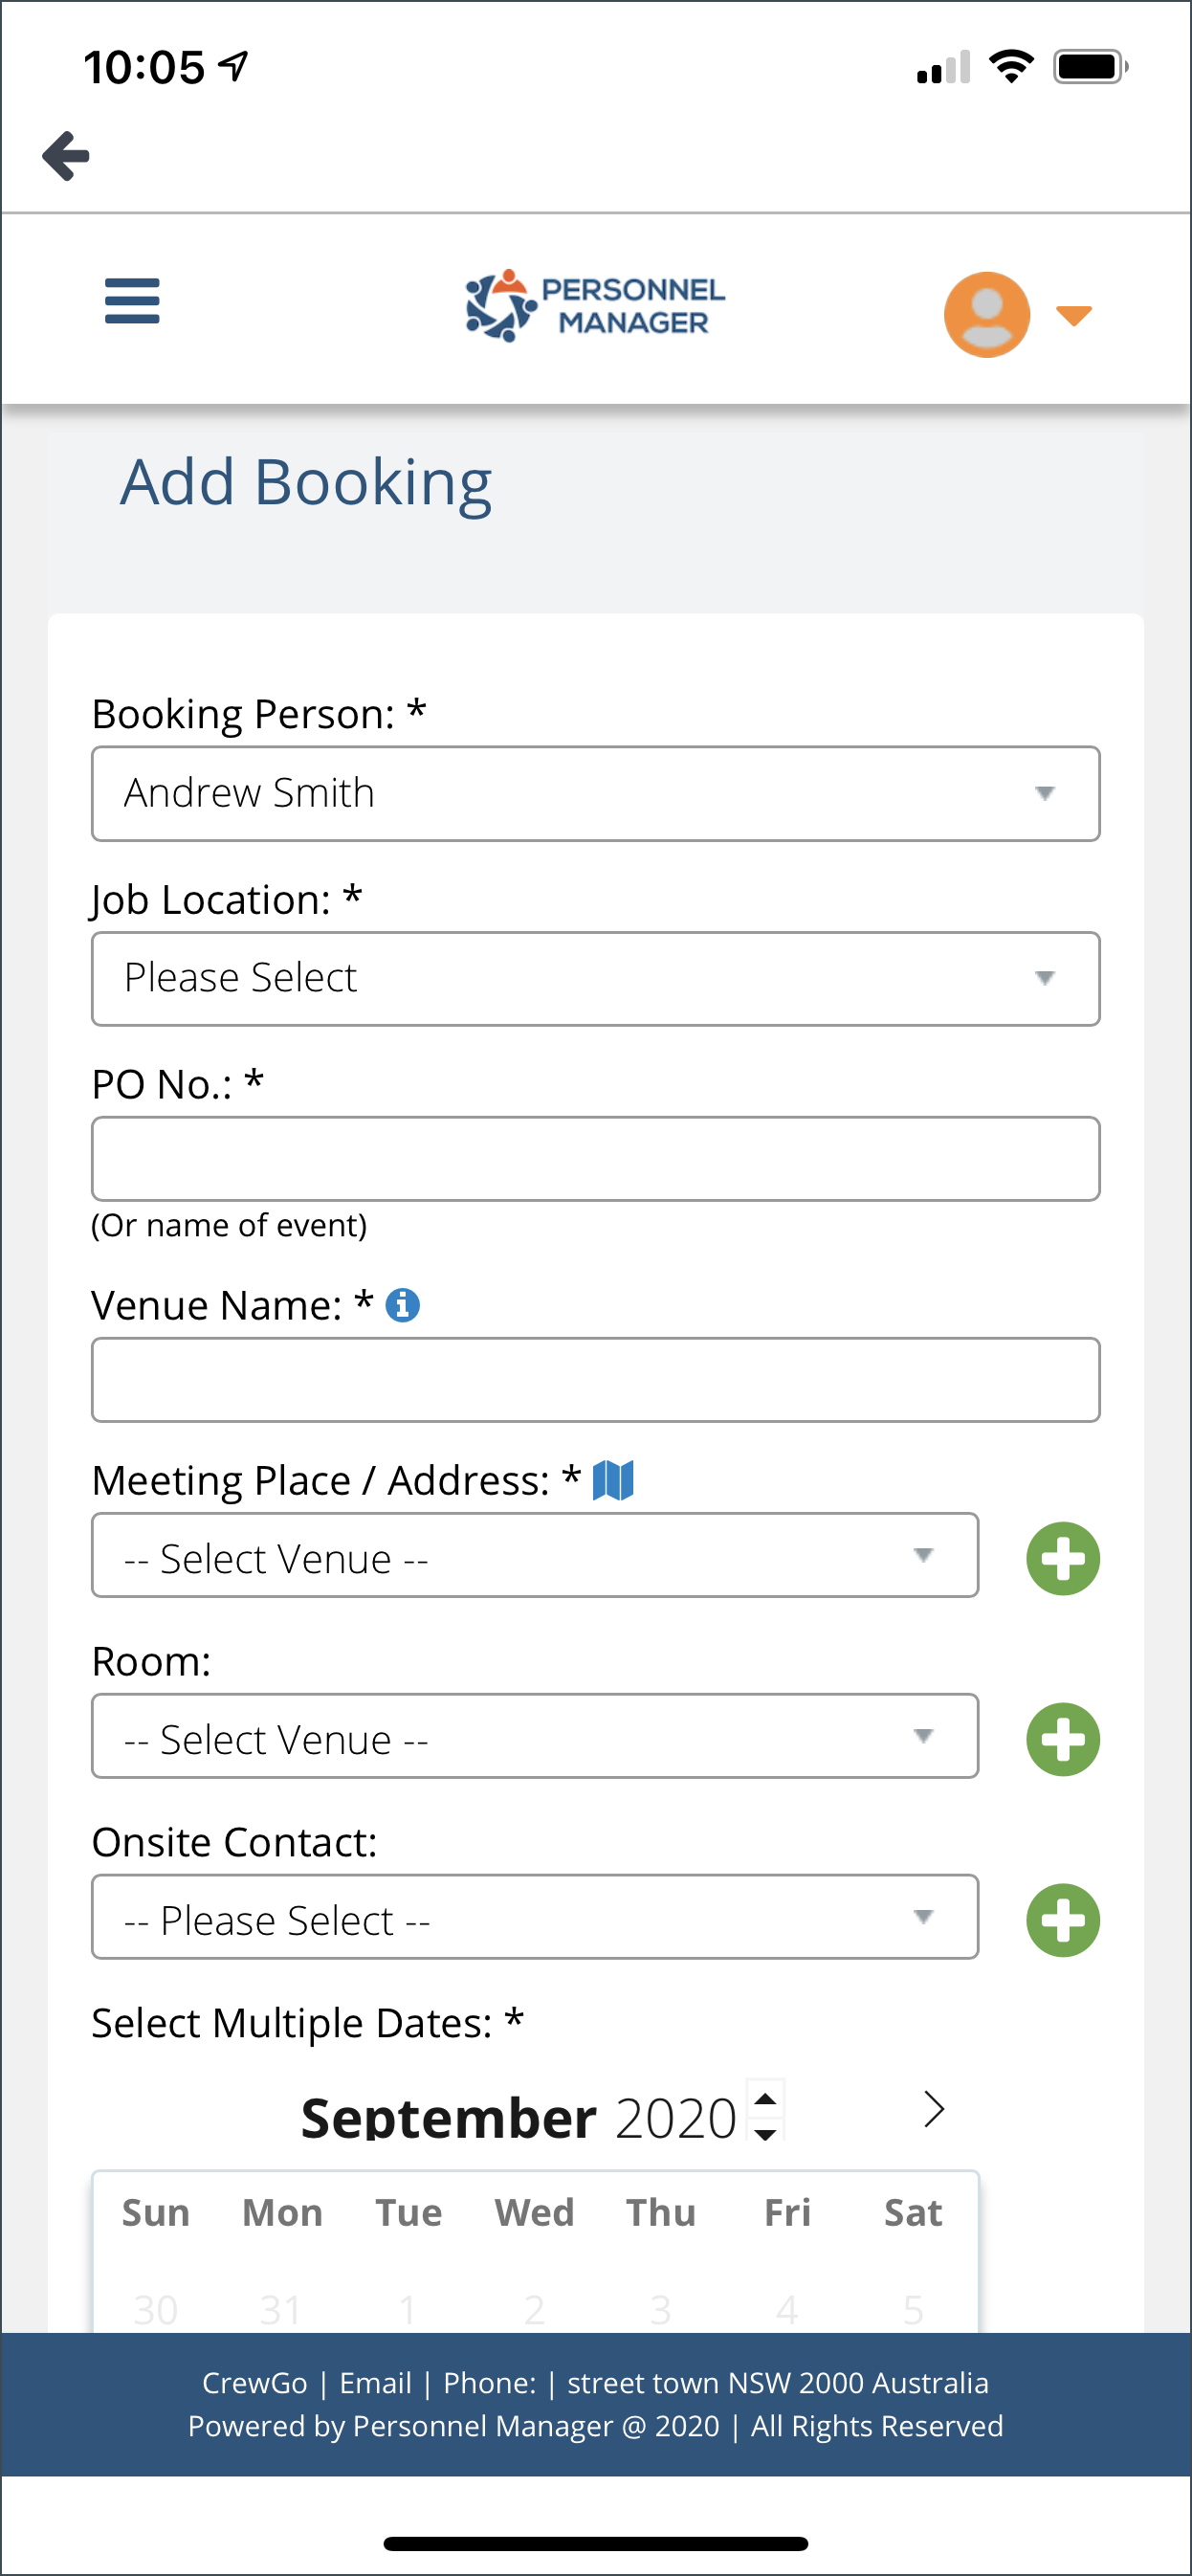
Venue Name: Enter the first three letters of the venue name. Suggestions will appear and tap the venue name based on the suggestions.
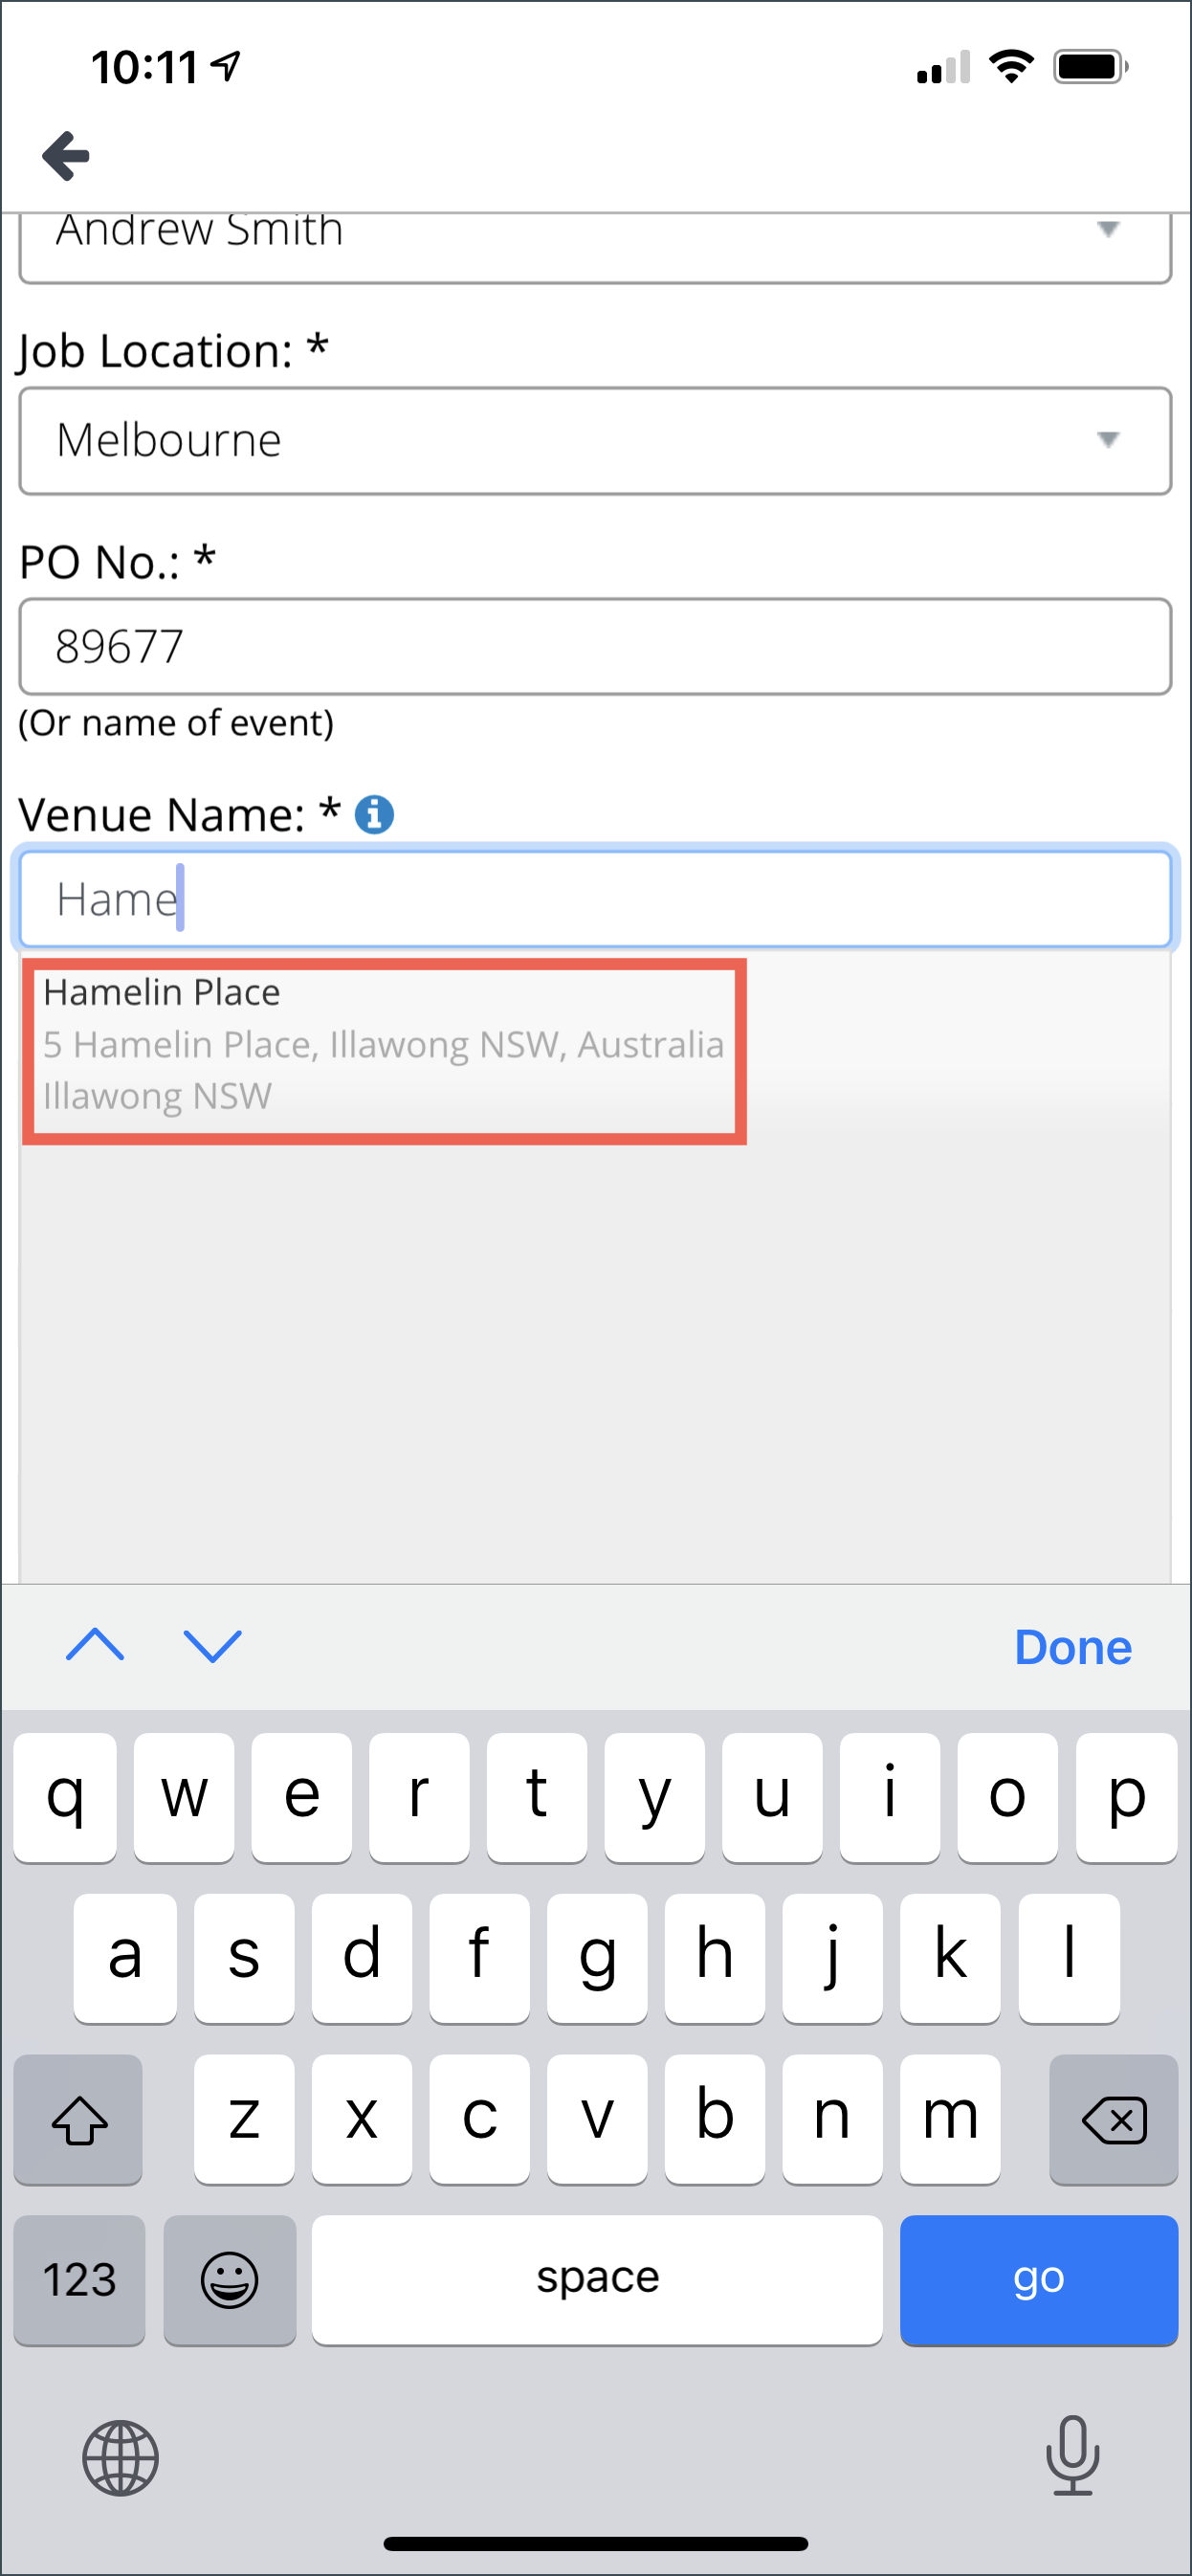
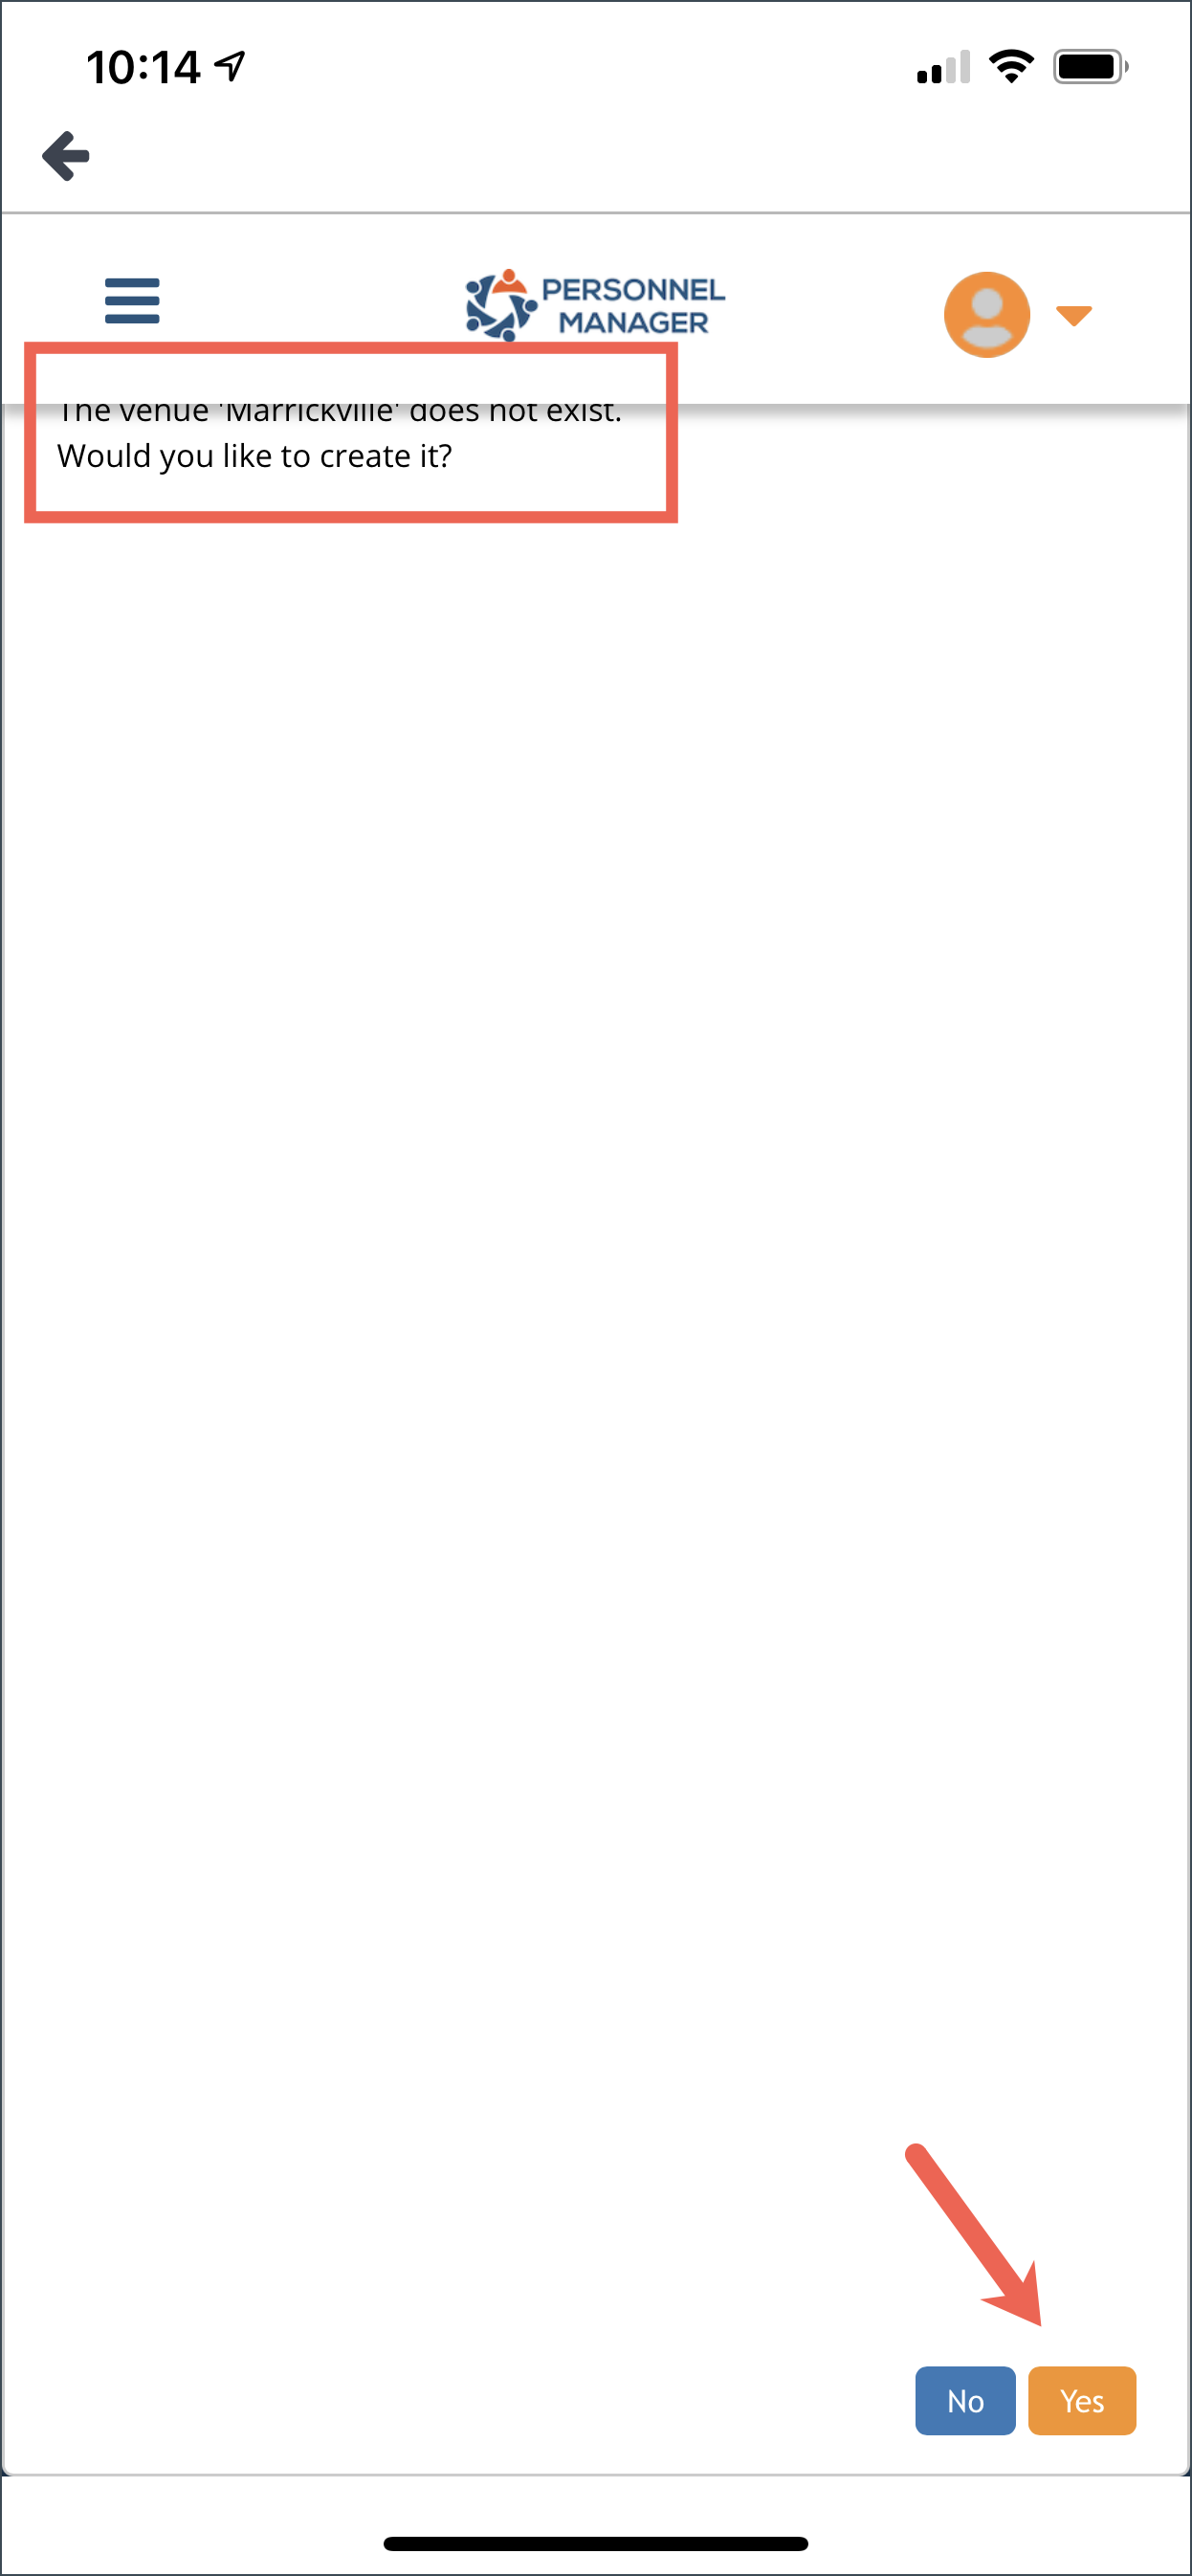
NOTE: If the Venue you entered on the field is non-existent, the app will ask you if you want to add that venue. Please follow the instruction on how to Add Venue below.
Meeting Place & Room: Select the meeting place and room from the dropdown menu. If you want to add another meeting place and rooms, click the + icon and follow instructions under Adding Venue.
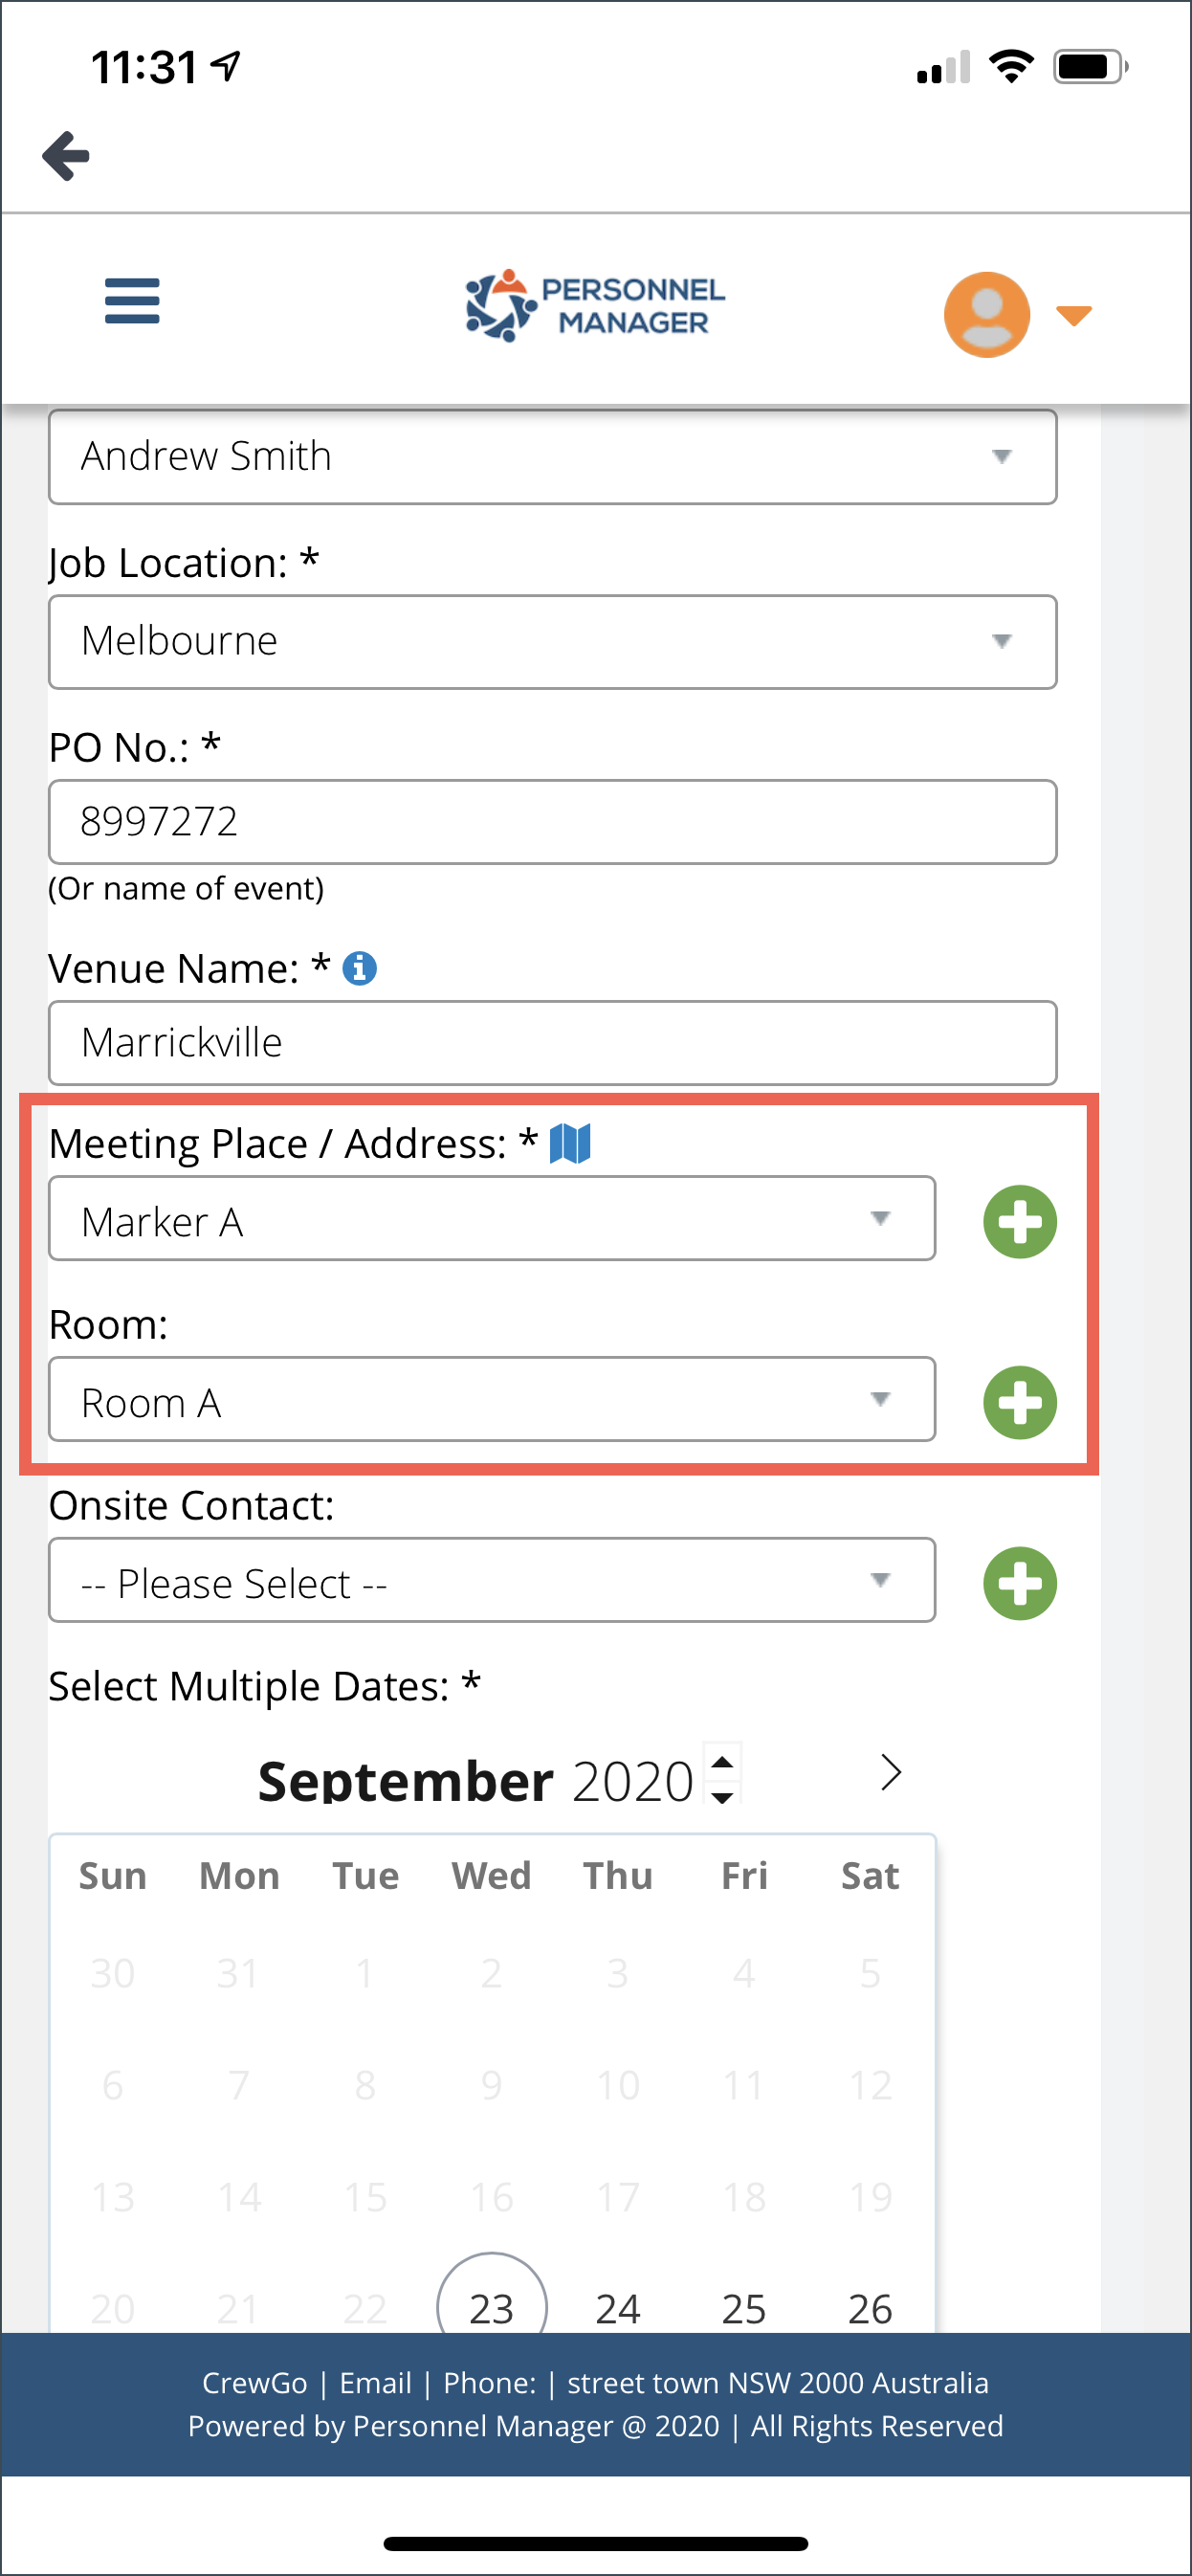
Onsite Contact: Select onsite contact from the dropdown menu. Click the plus icon if you want to add another onsite contact and follow instructions on Adding Onsite Contact.
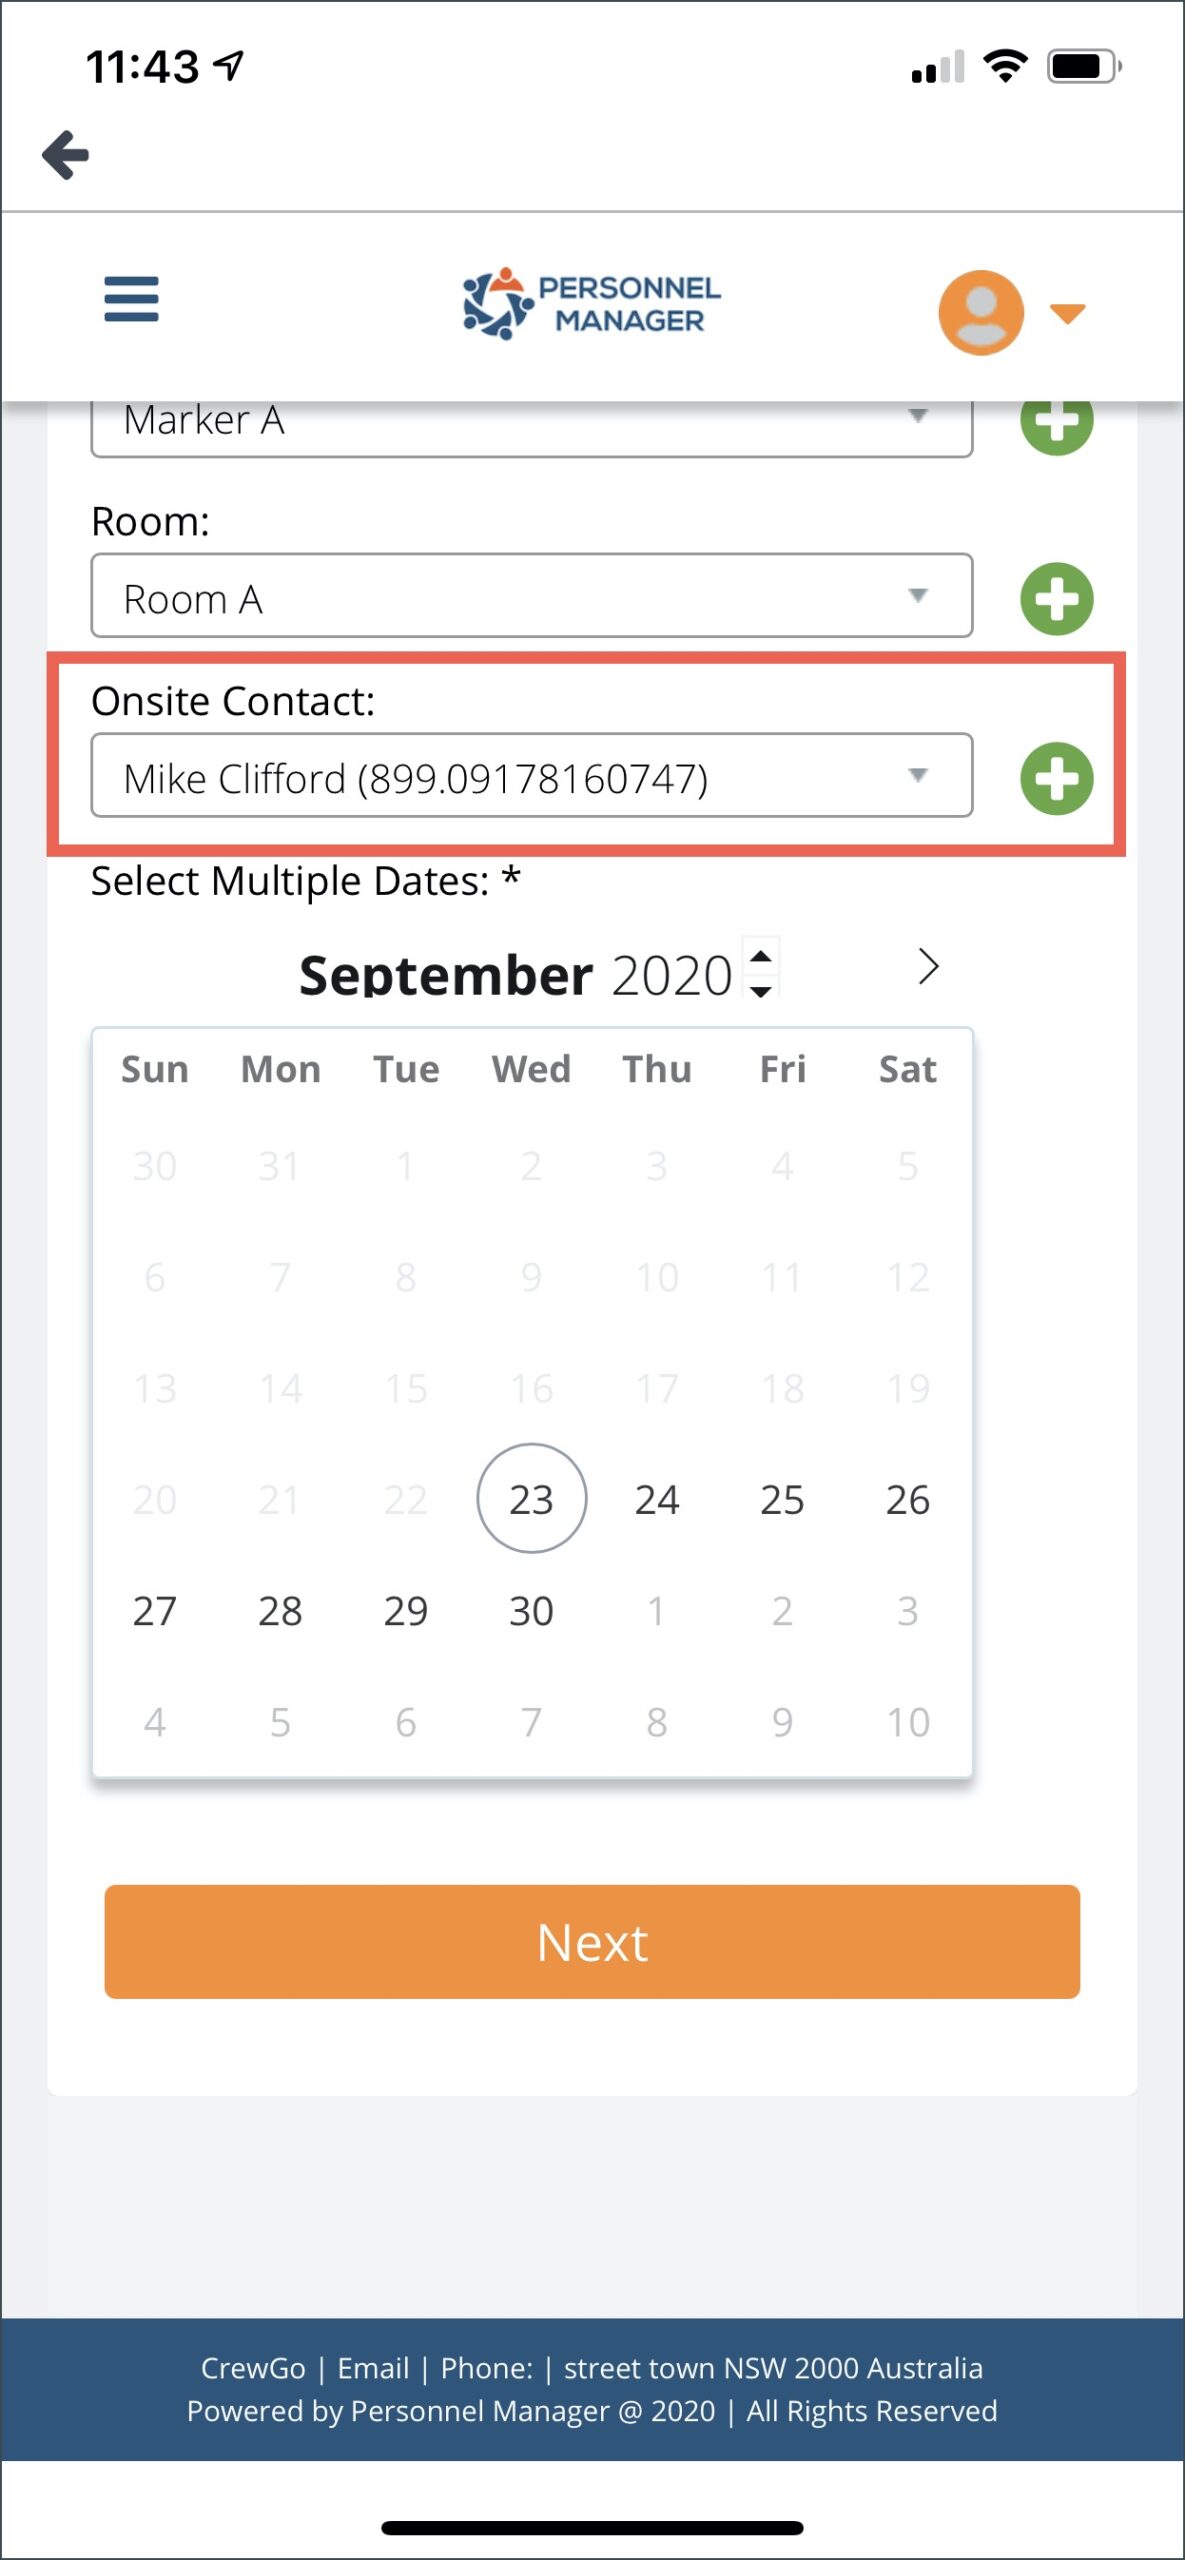
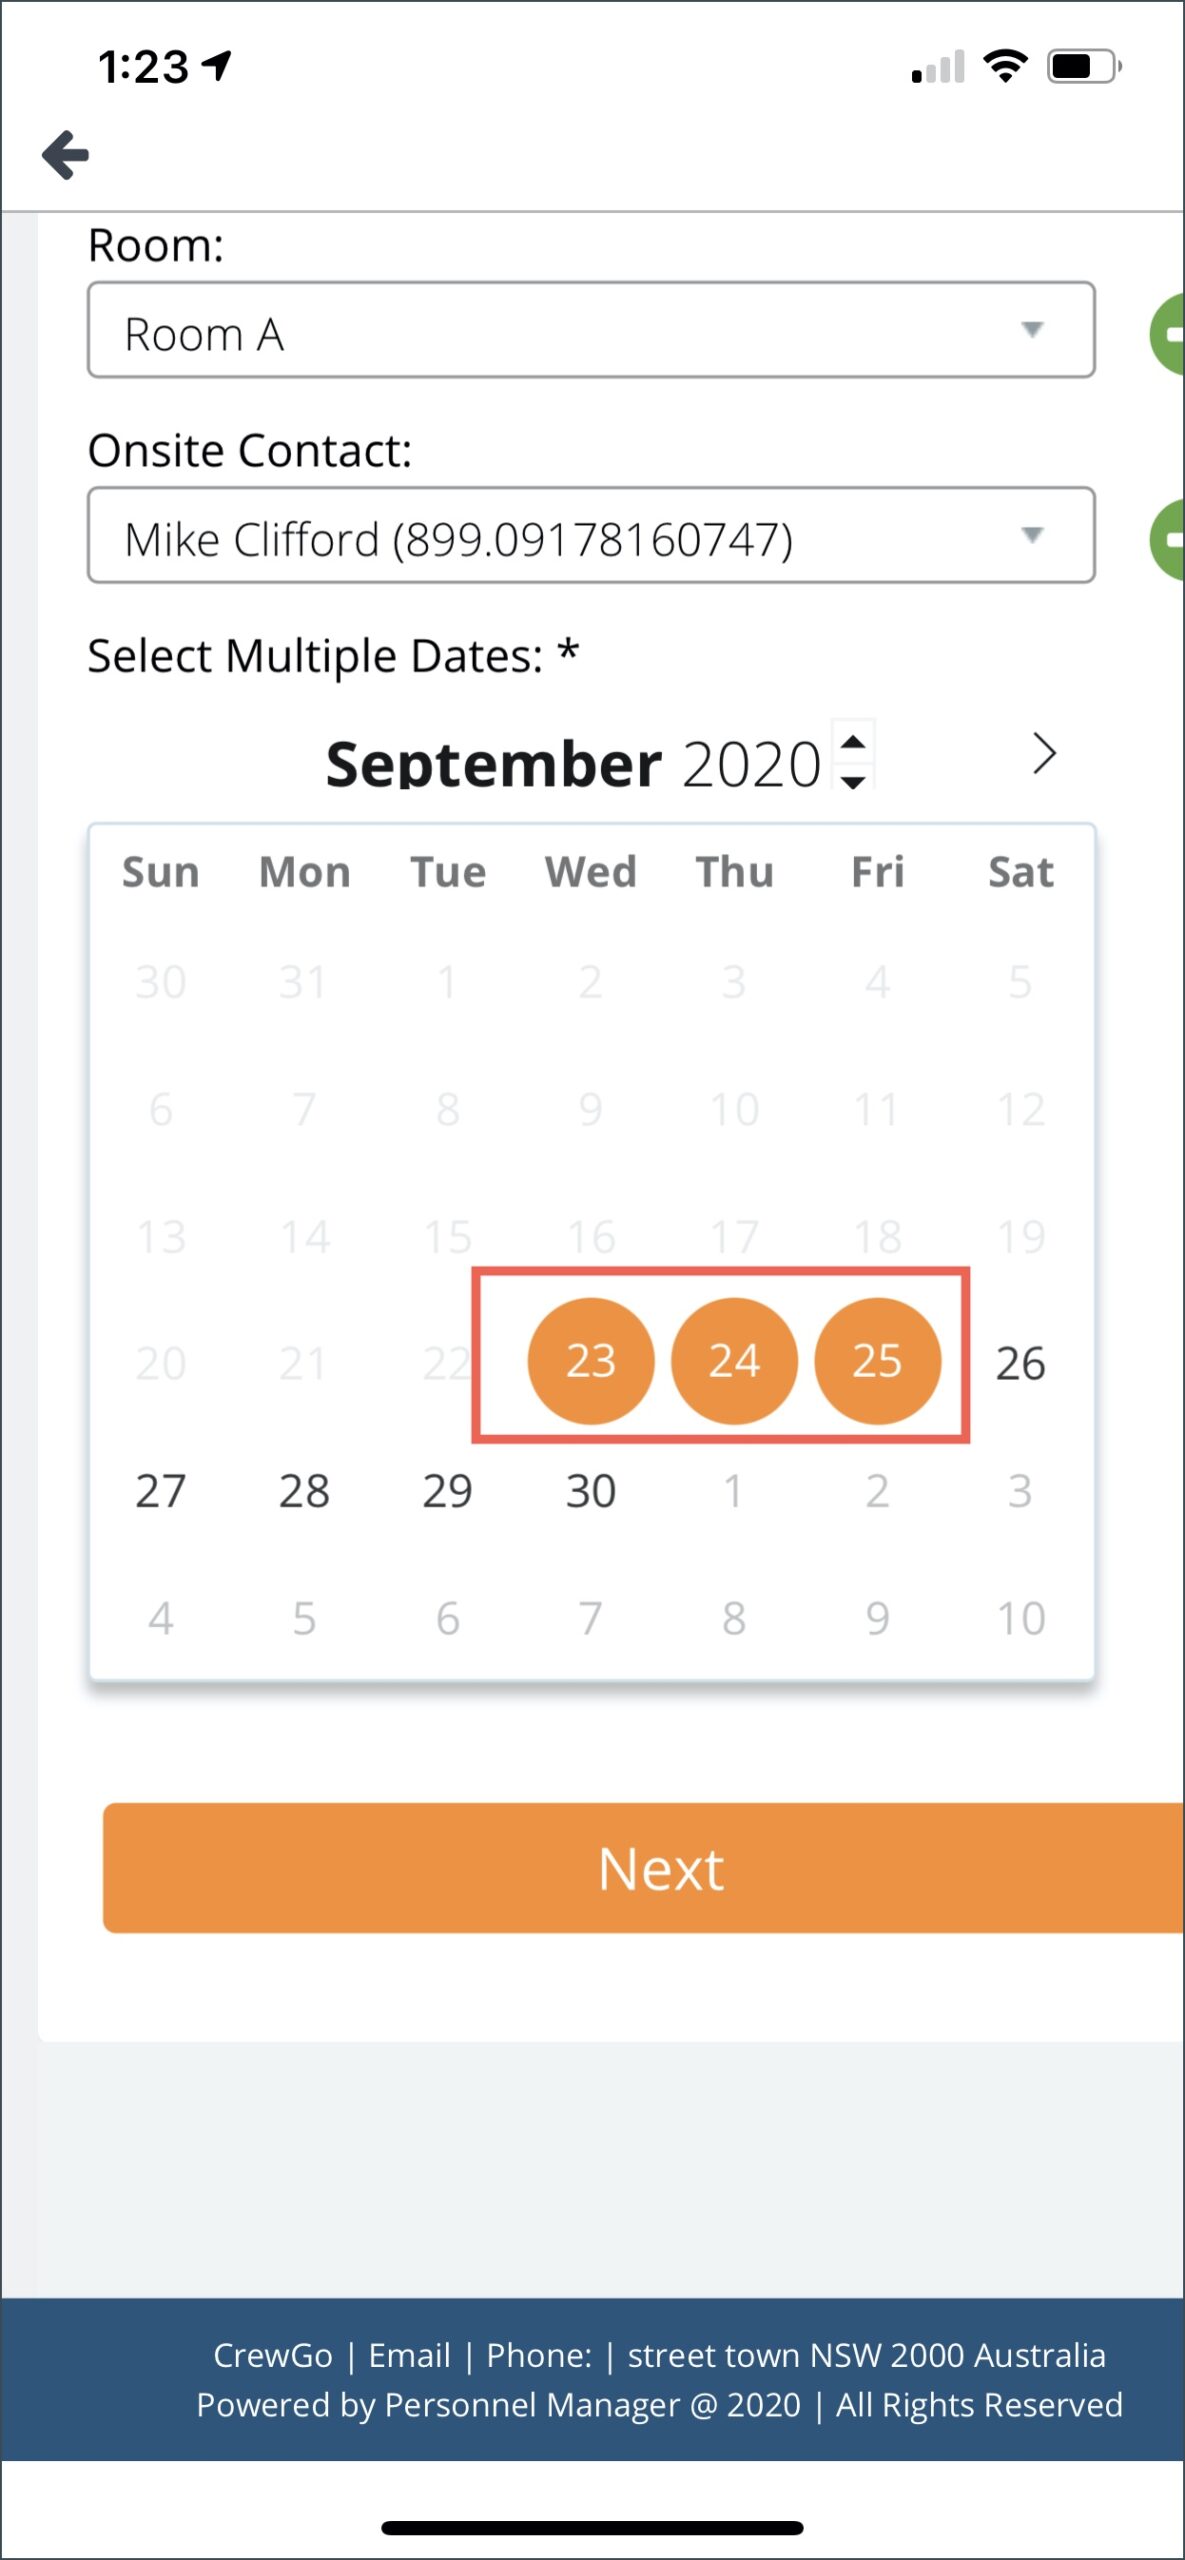
Next, select the date of the job. Tap on each of the dates where you want your job to be scheduled. Click Next.
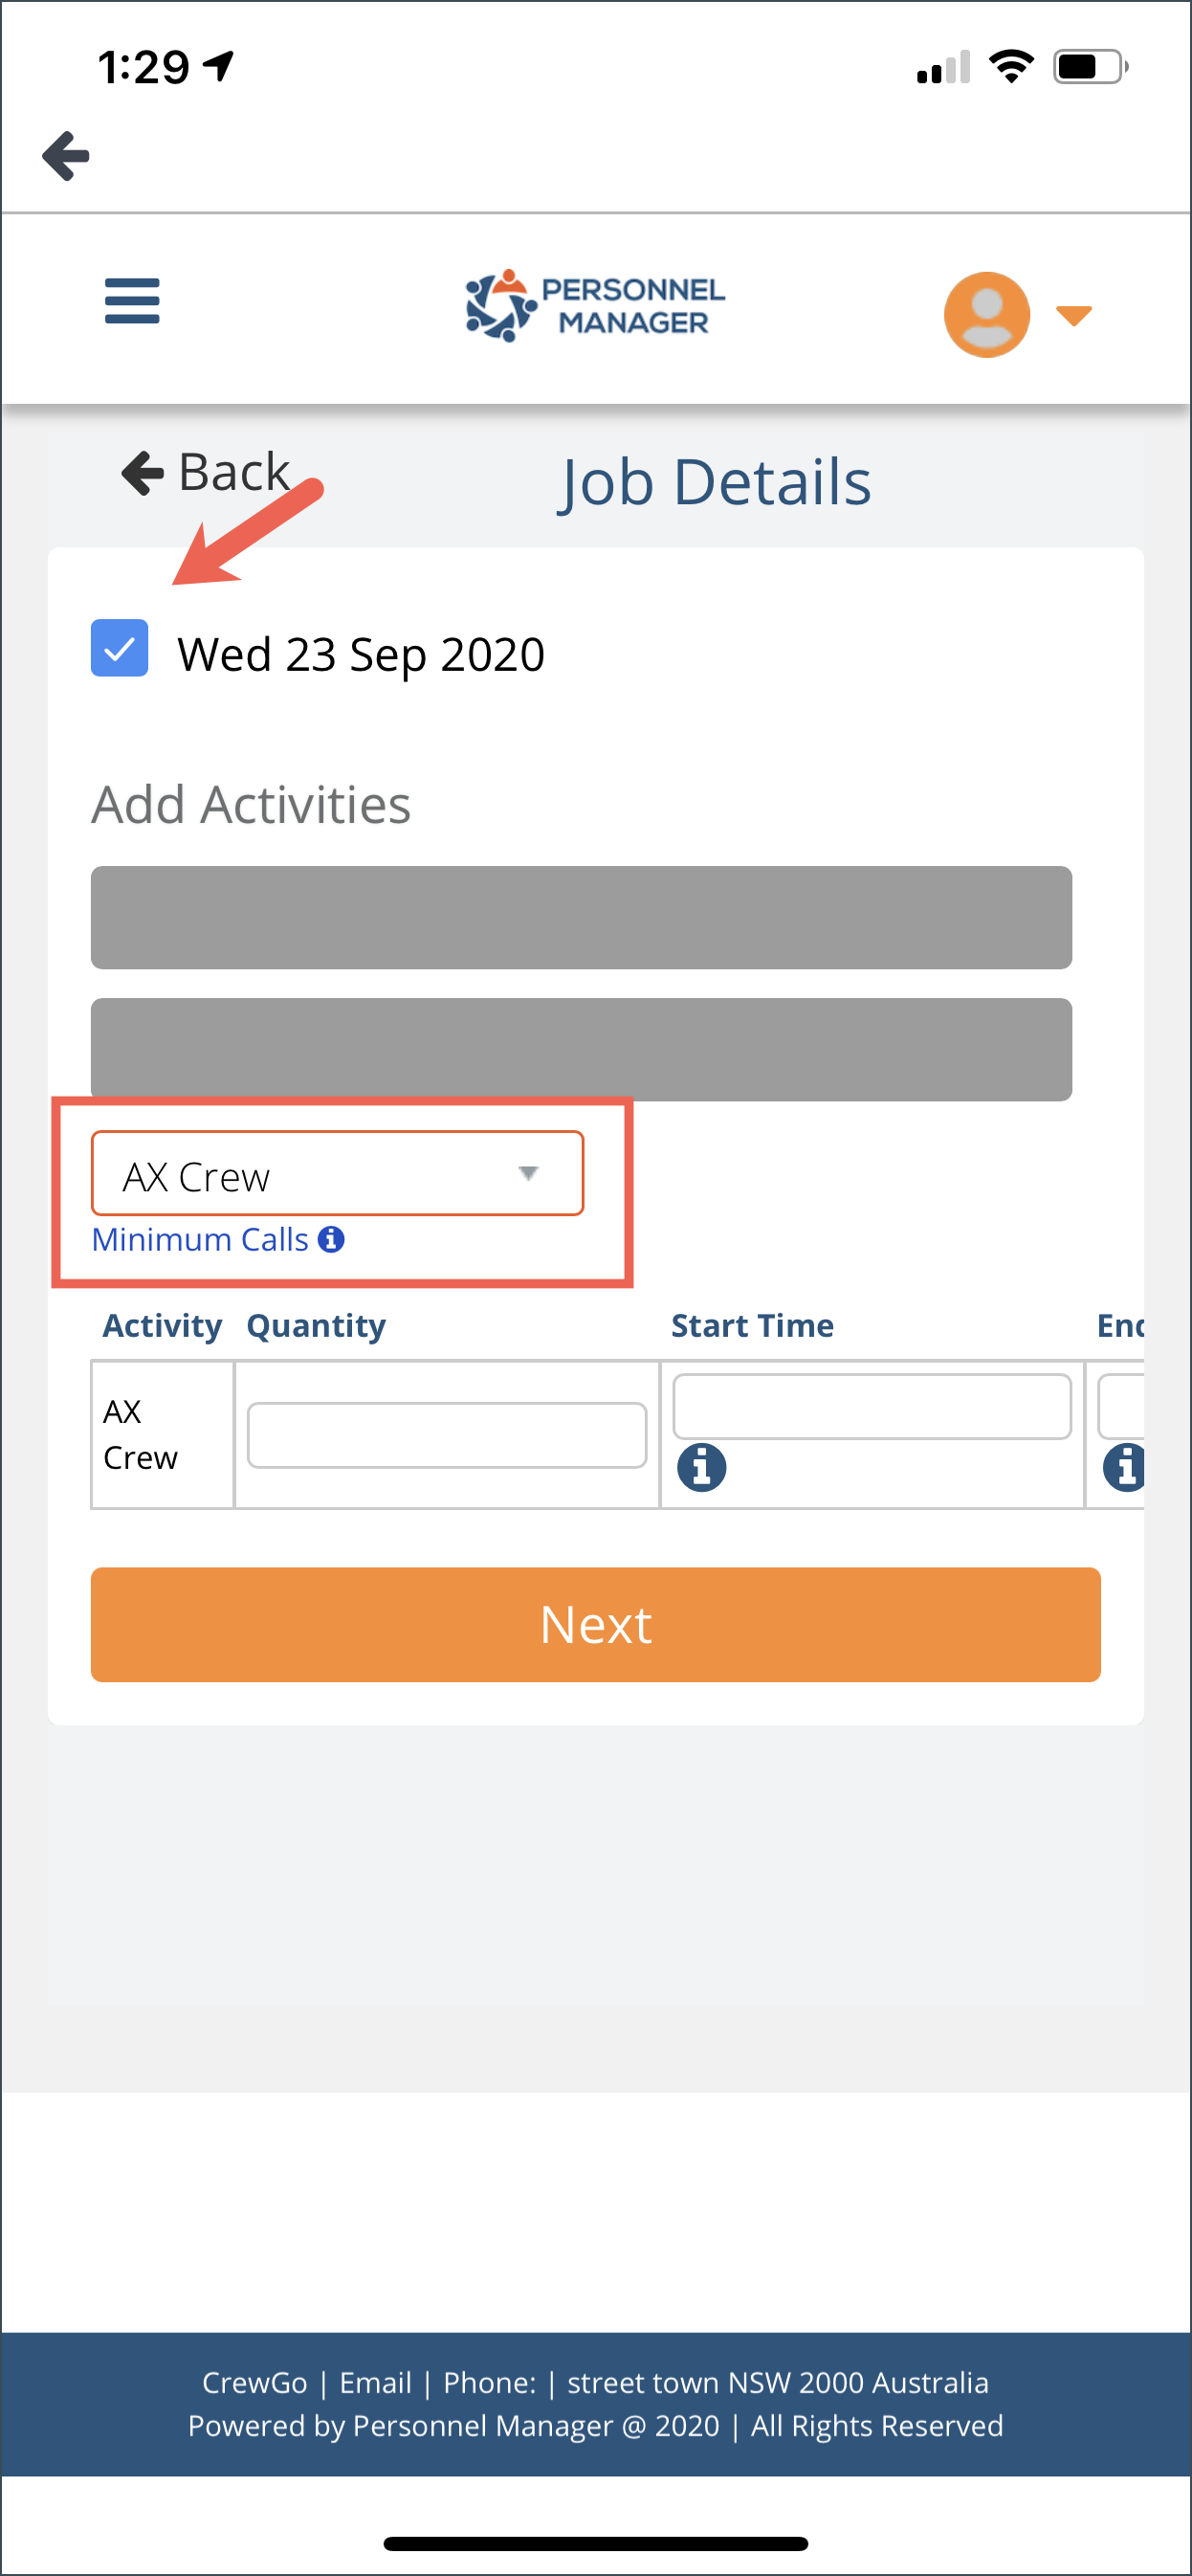
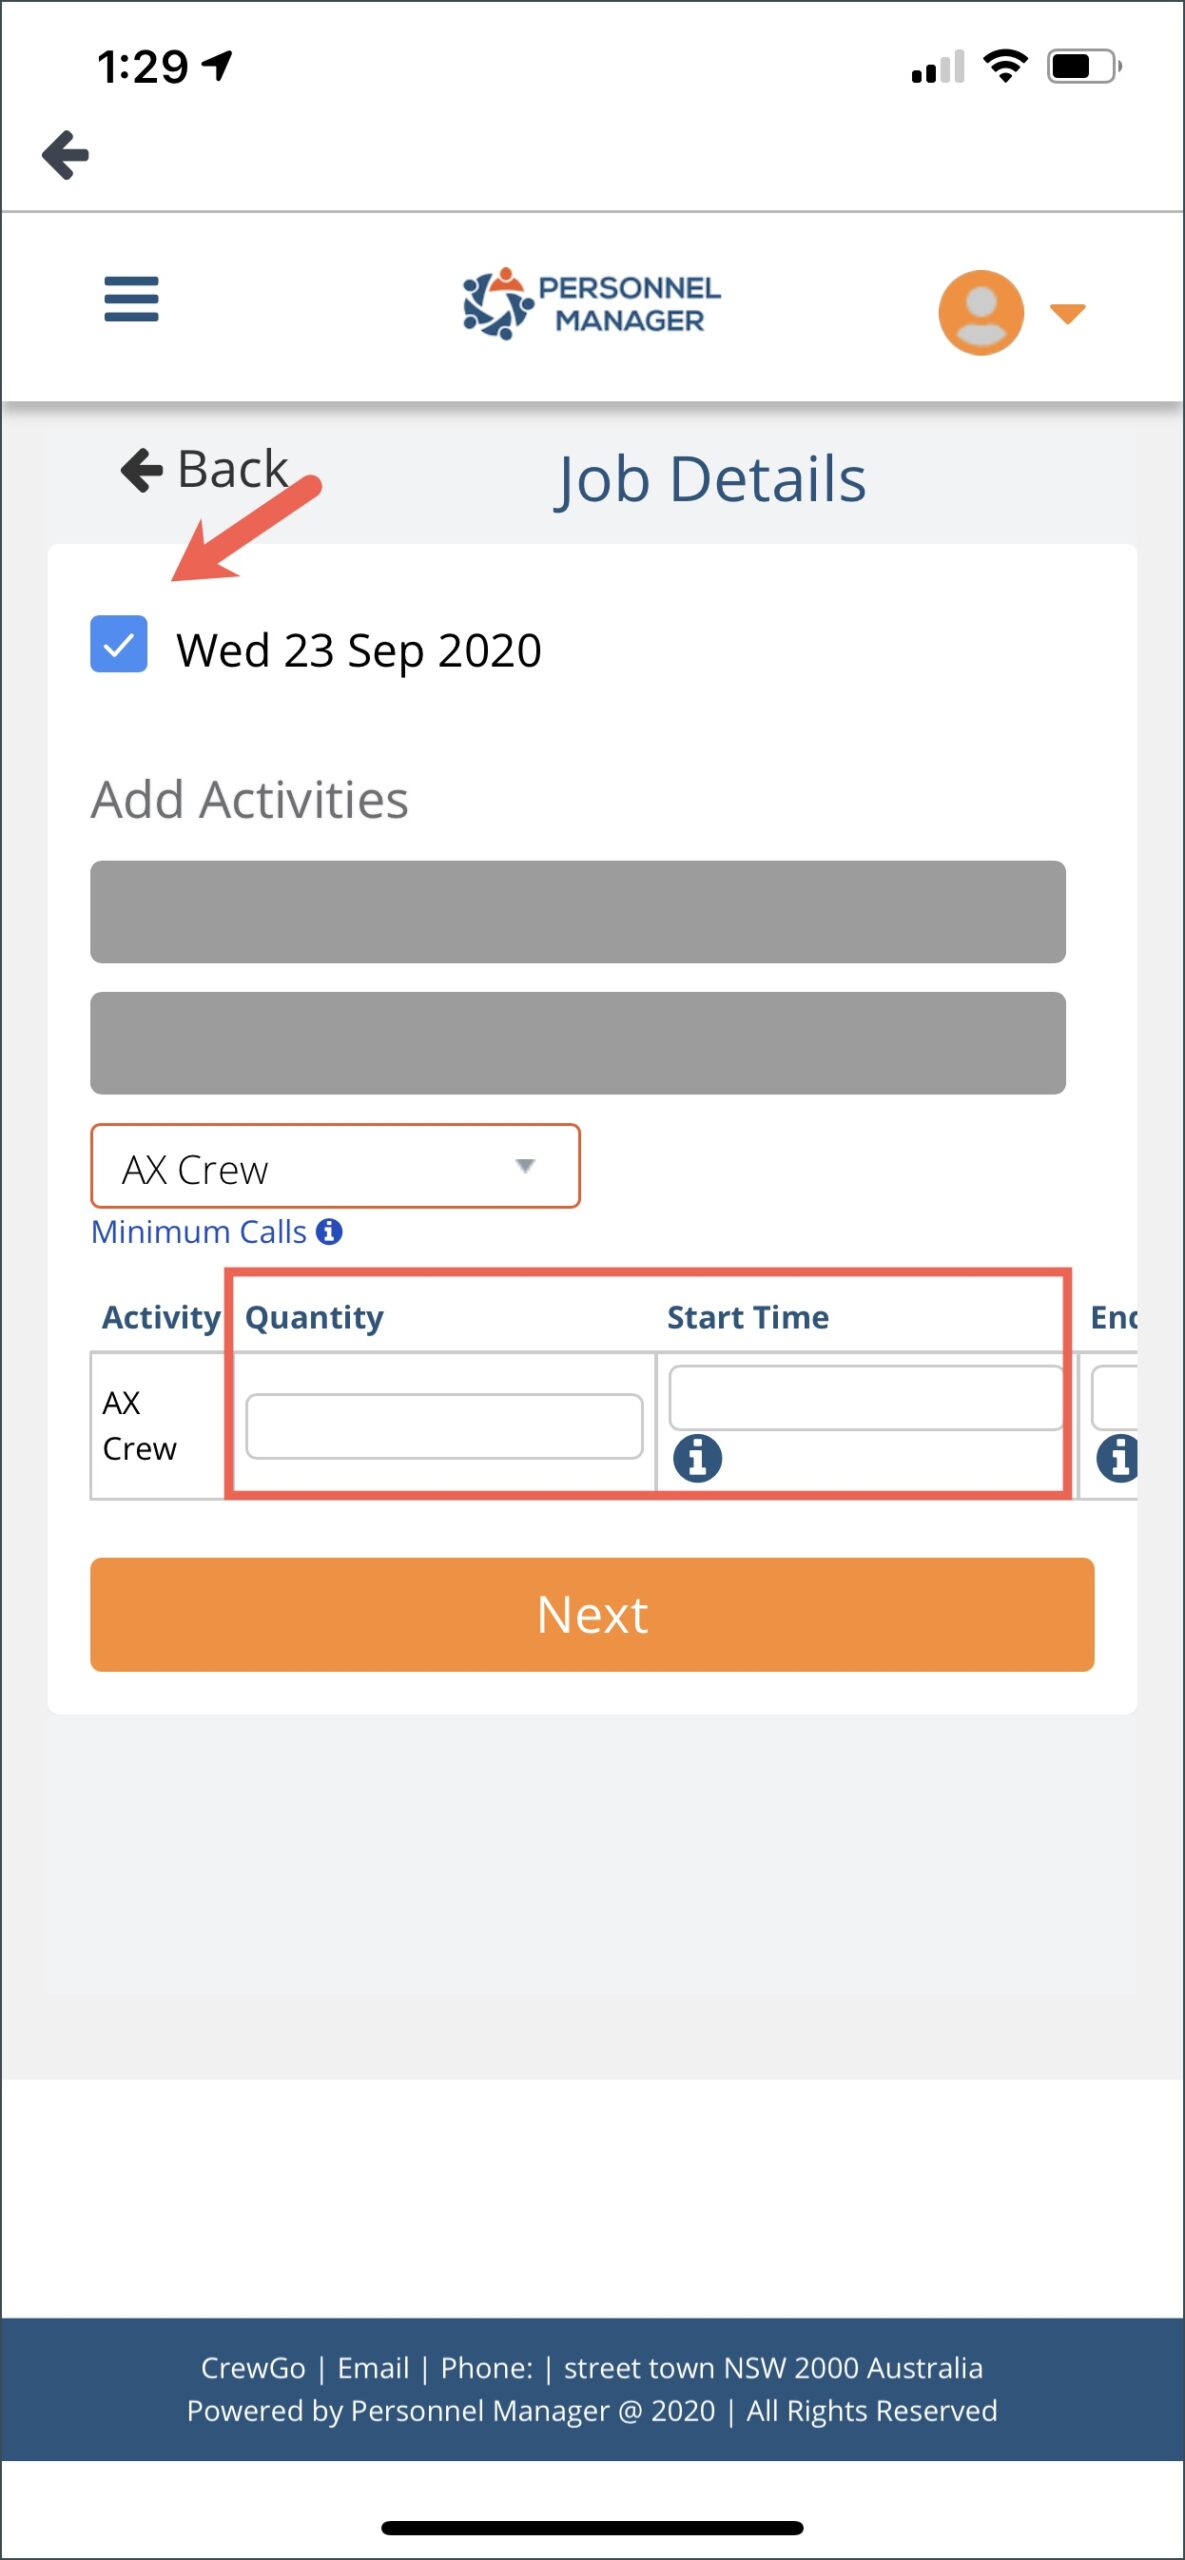
STEP 2
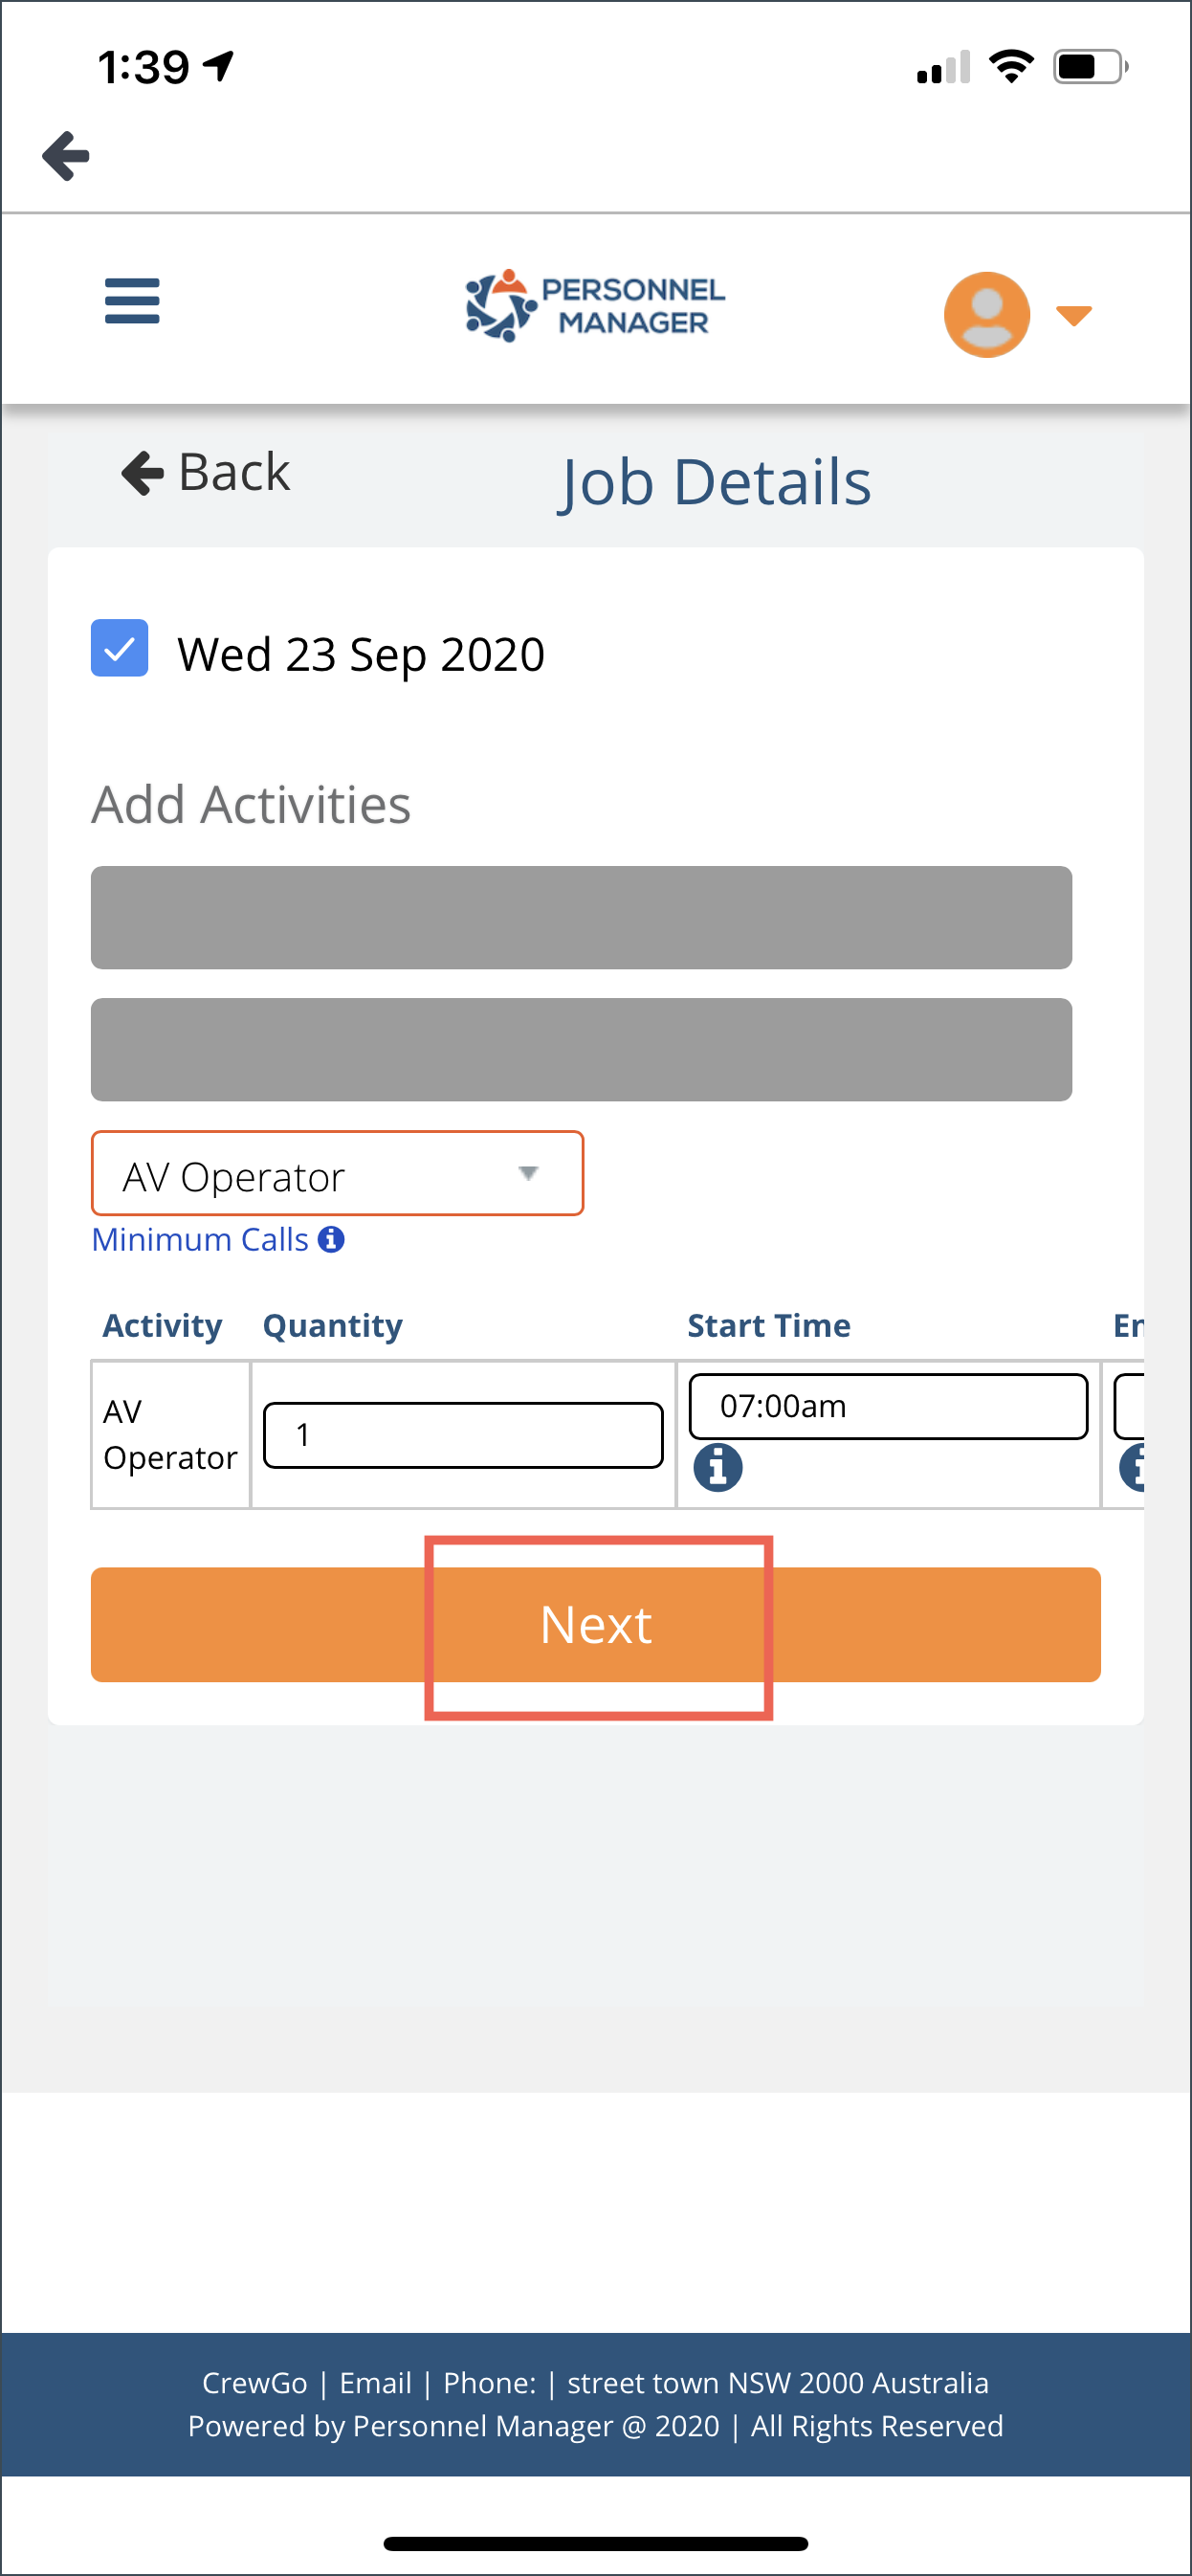
Check the box of the date. Select Activity from the dropdown menu.
You can also tap the “i” icon to display the minimum hours for the selected activity.
Once activity has been selected, a row of fields will appear.
Enter the following on the provided fields:
- Quantity of AX Crew needed
- Start Time – when you tap on this field, a dropdown menu will appear for the selection of time.
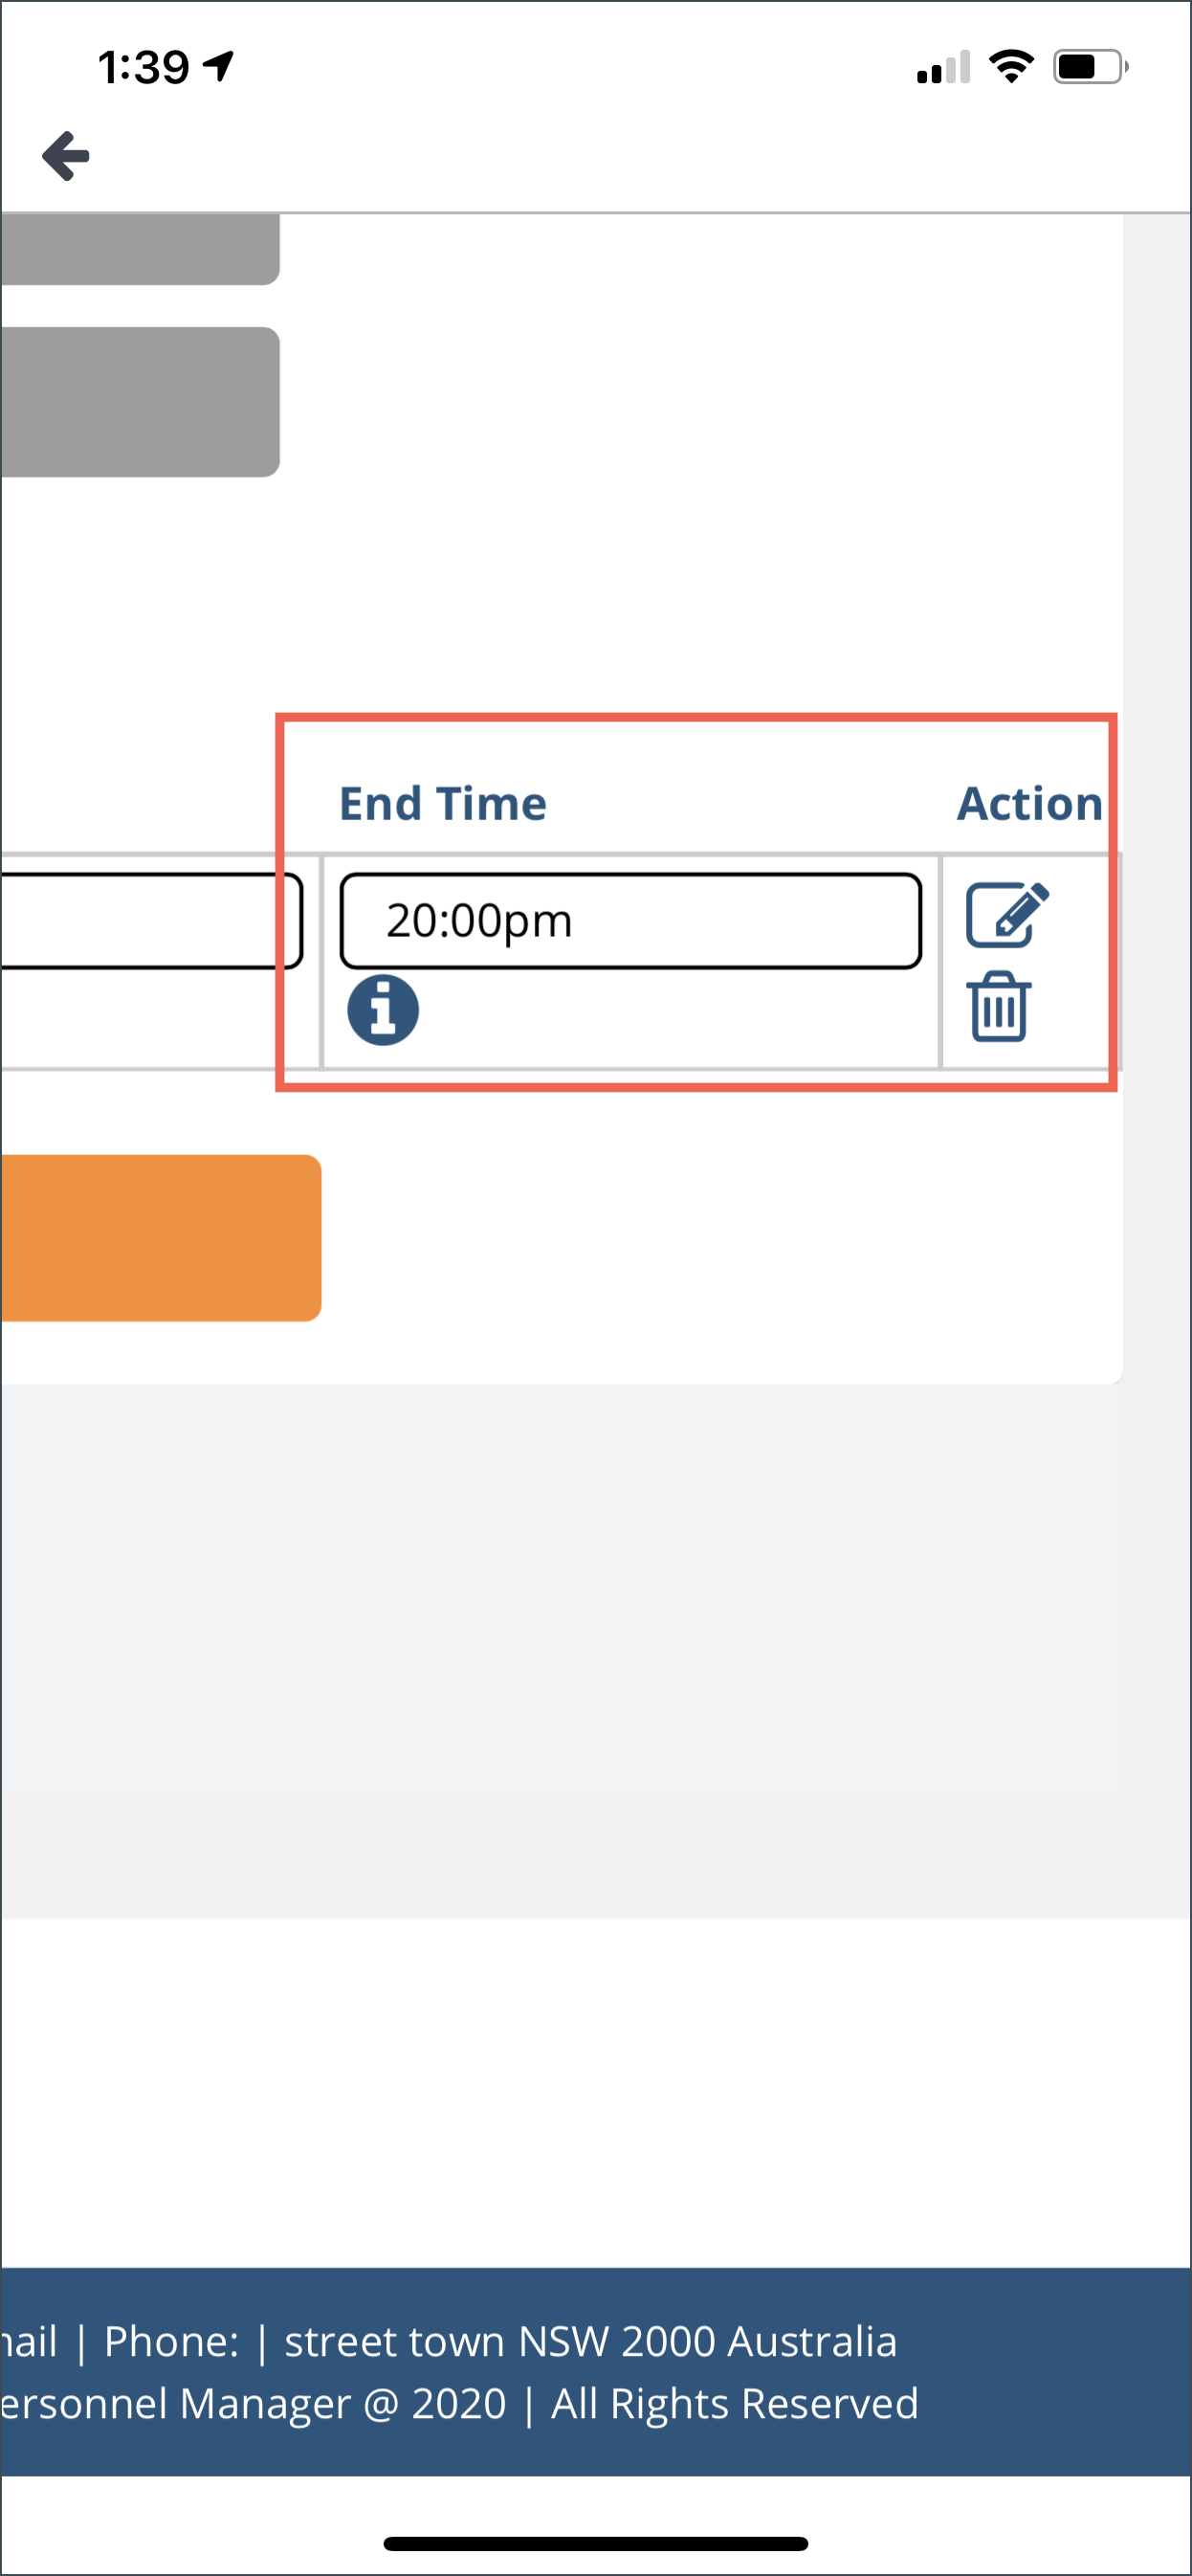
- End Time – when you tap on this field, a dropdown menu will appear for the selection of time.
- Edit icon – you can edit the data you have entered
- Trash icon – it will delete the row of data
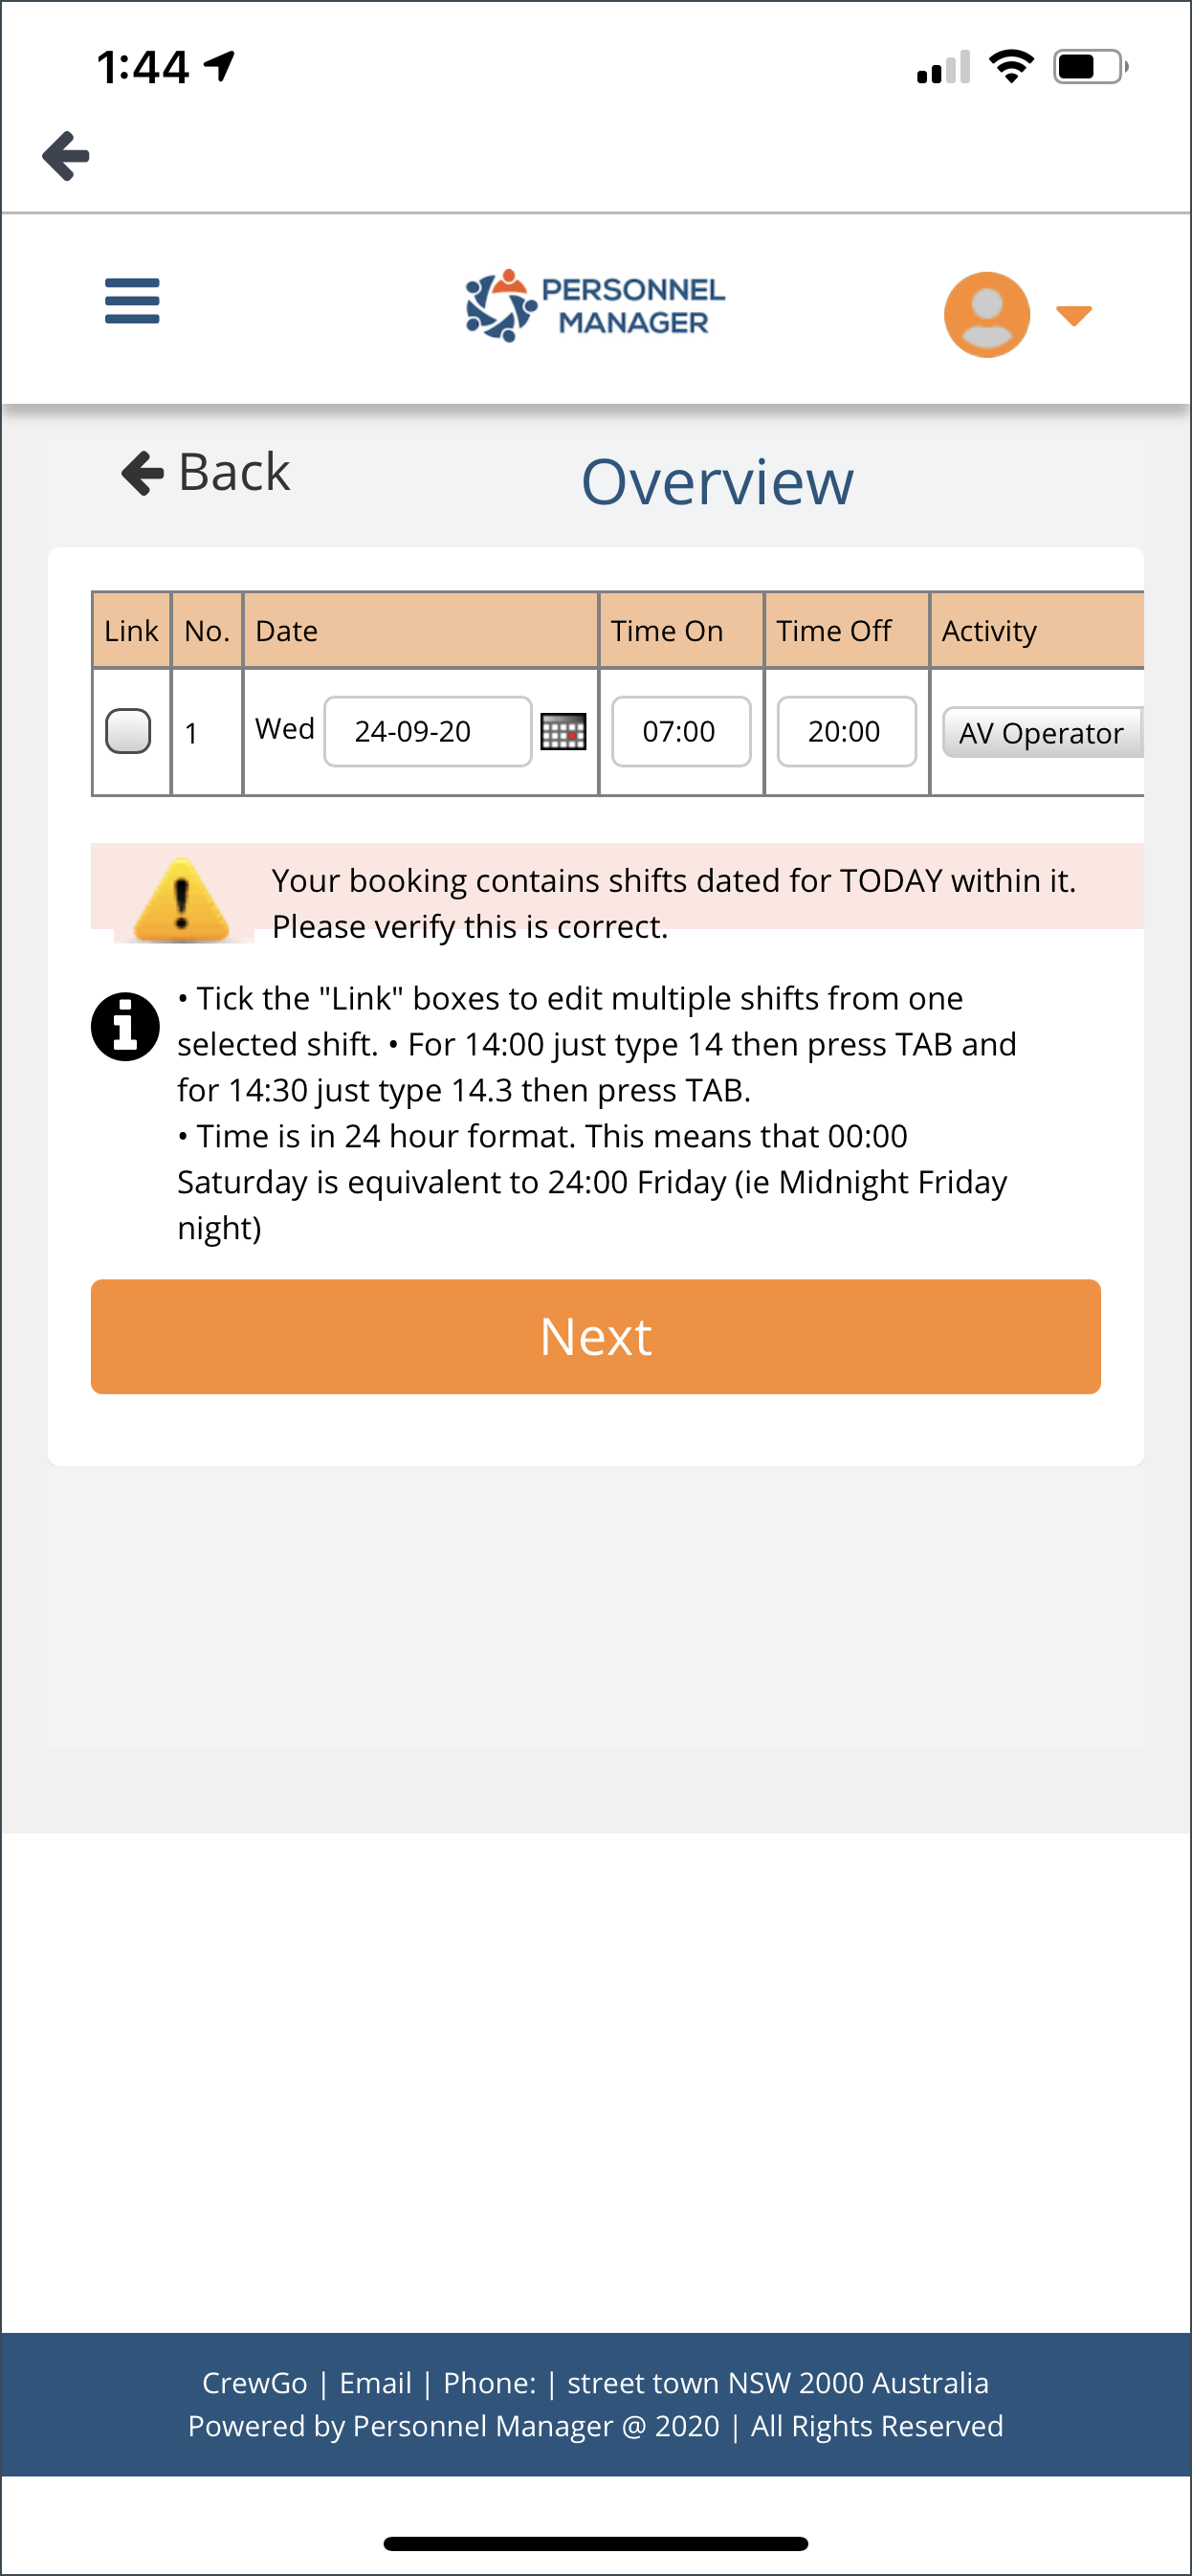
STEP 3
You will be redirected to the Overview page where you can review the job you have entered.
From here you can edit the date by tapping on the calendar icon. Time On and Time Off can also be edited.
If you want to change ACtvity, tap on the button and a selection activities will appear.
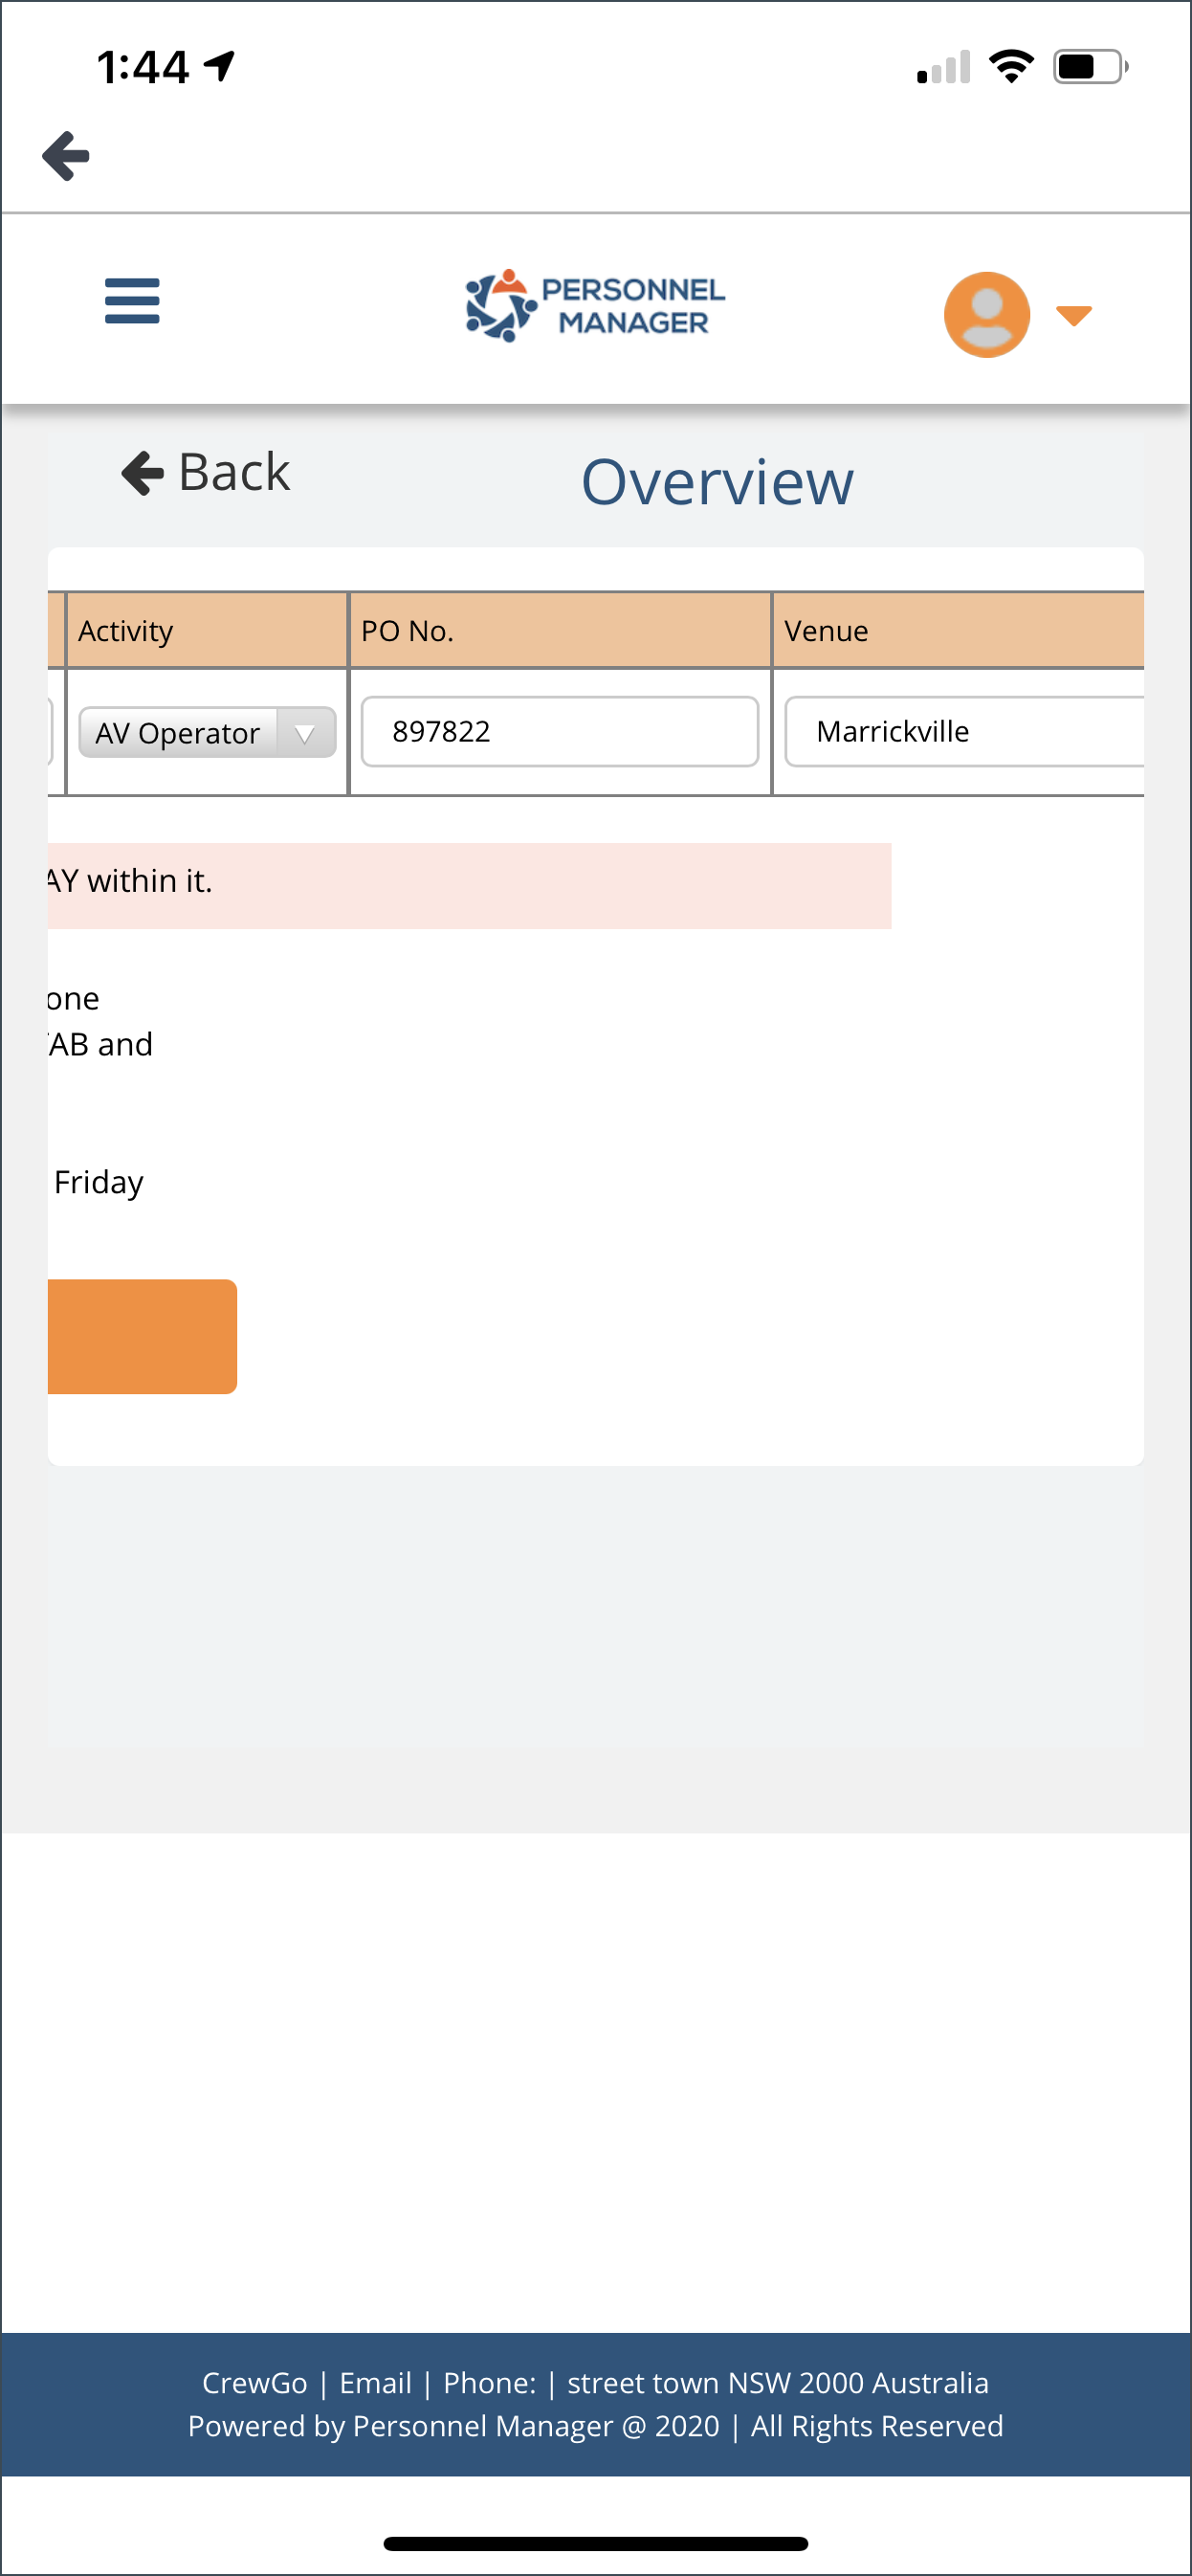
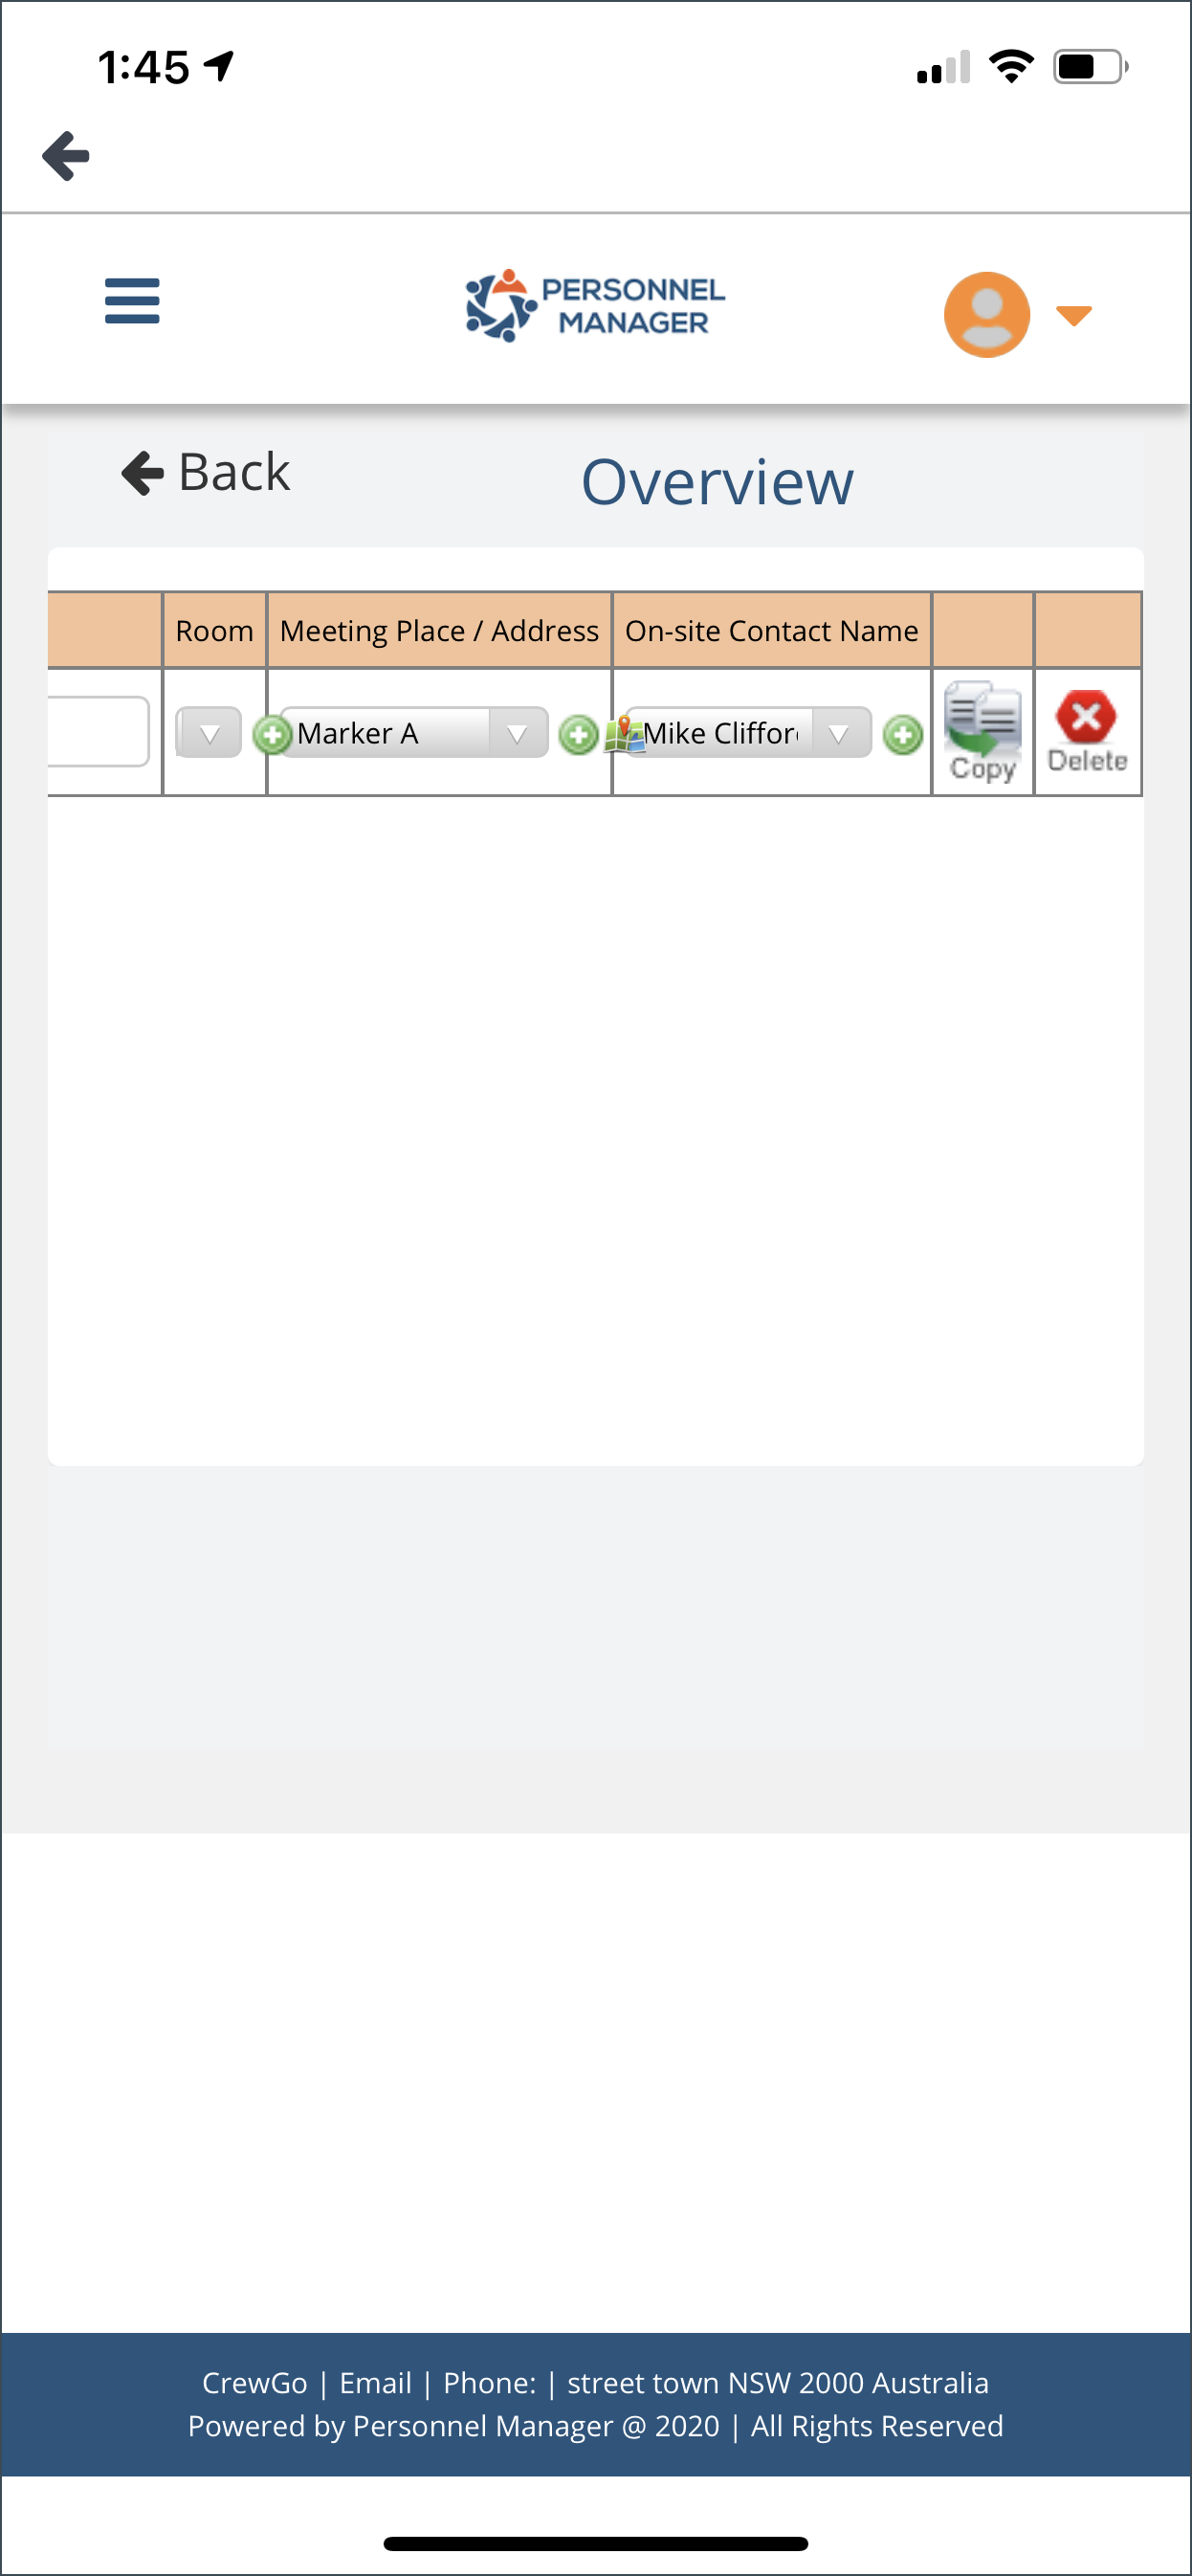
The same with Room, Meeting Place, and On Site Contact.
You can also copy the shifts you have entered or delete it completely.
Click Next once you are done editing the job.
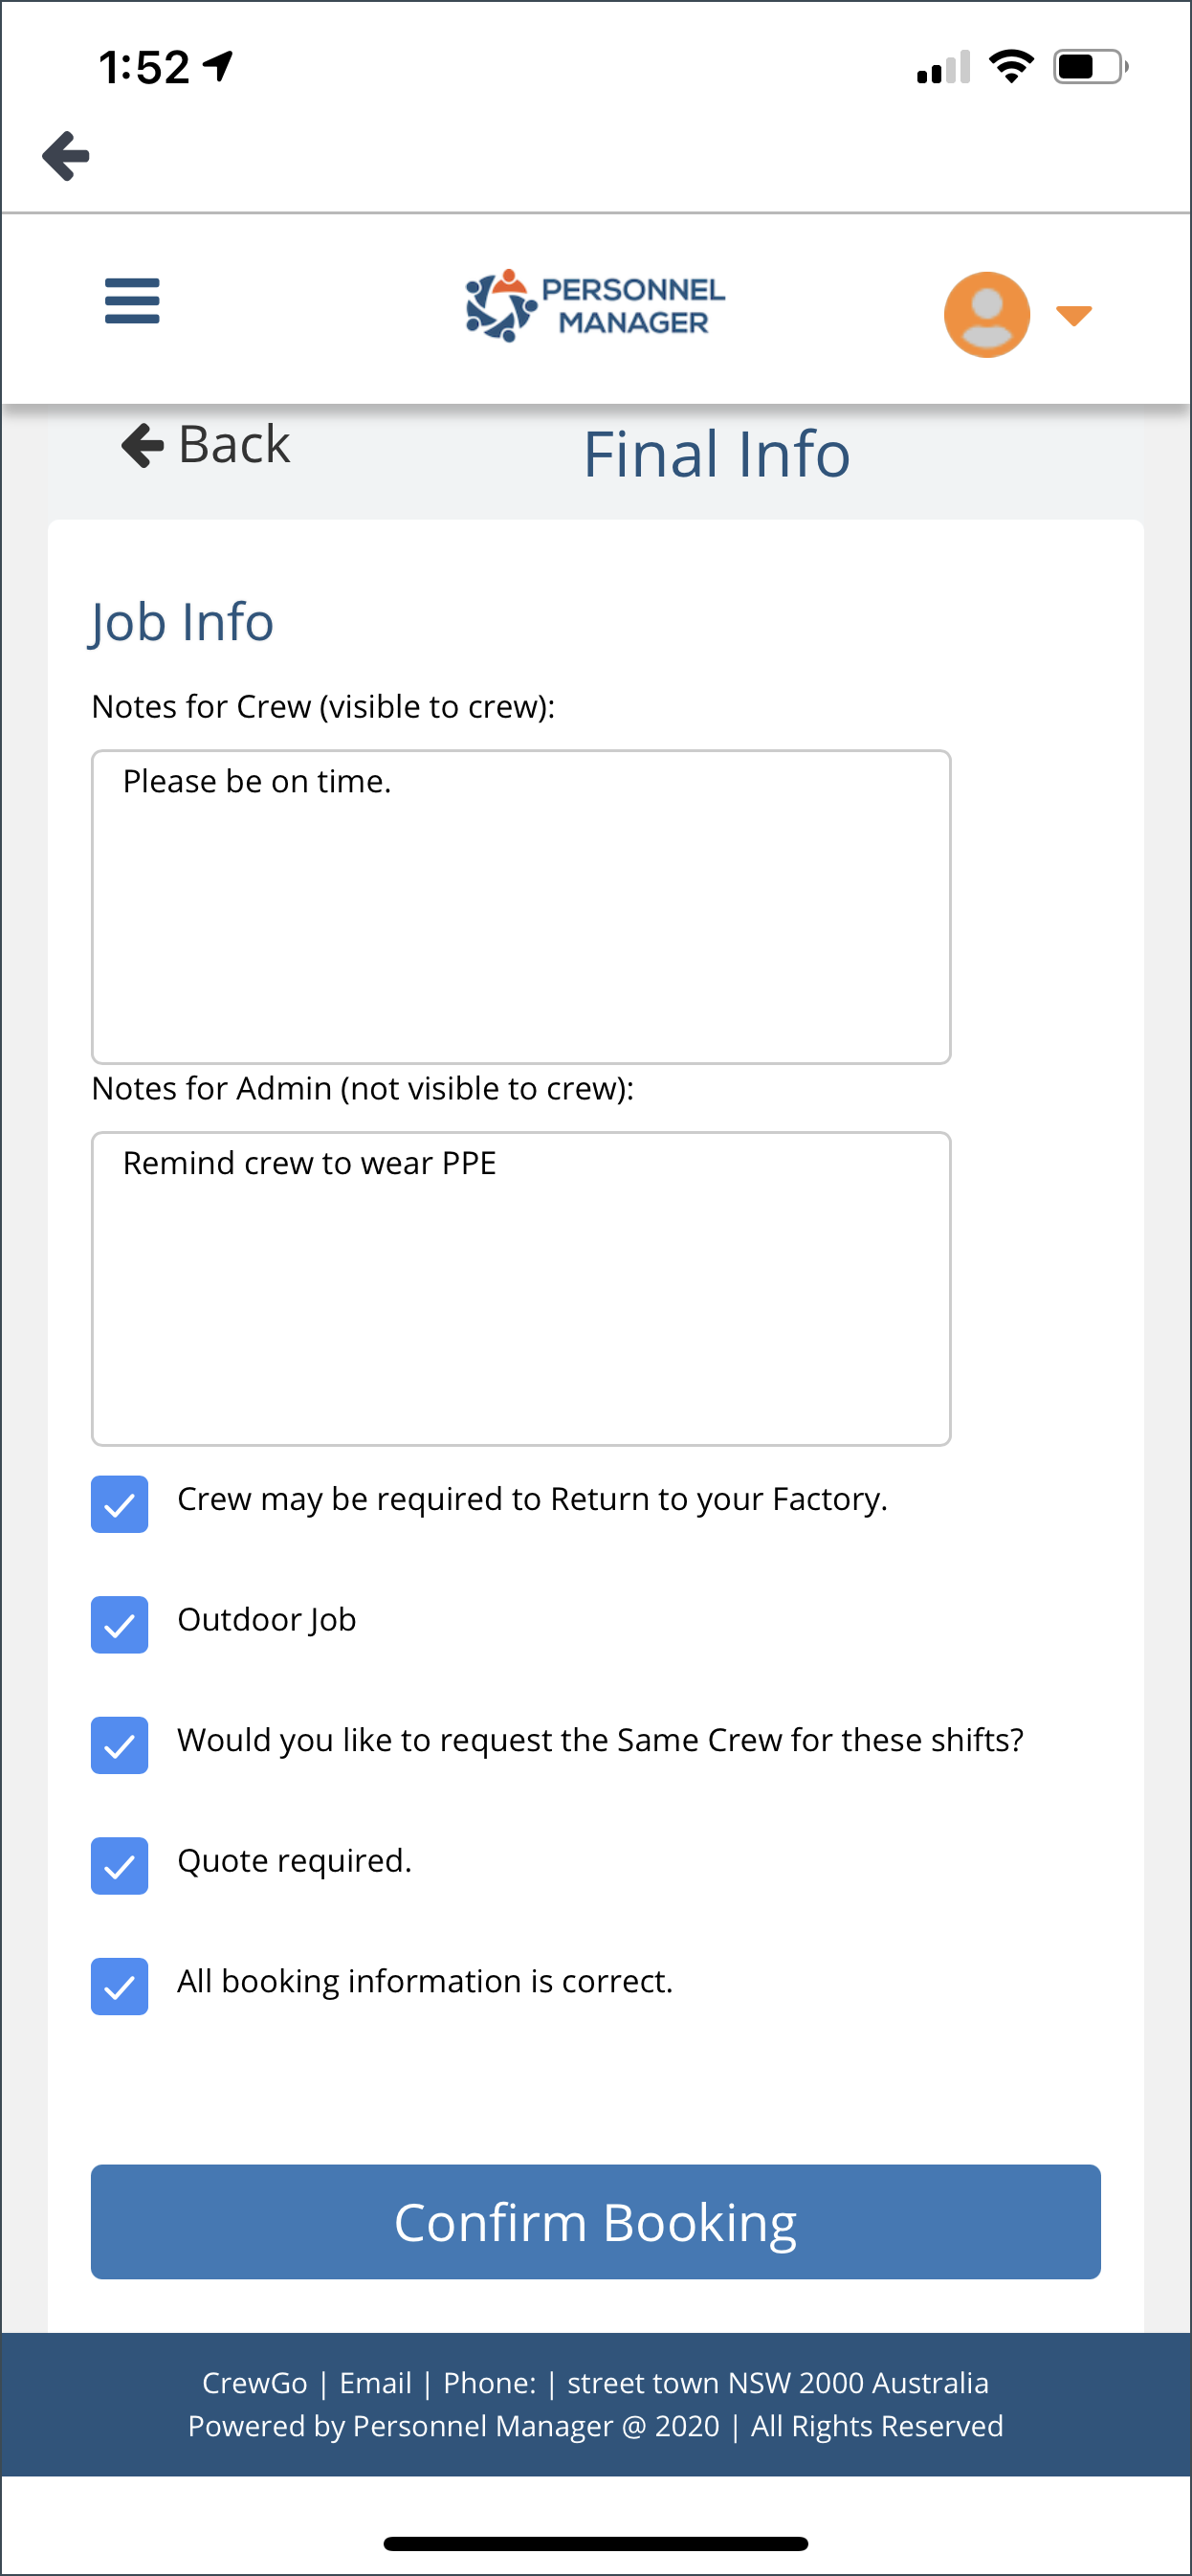
STEP 4
Enter notes for the crew and admin on the provided fields.
Tick the boxes of the conditions, then click Confirm Booking.
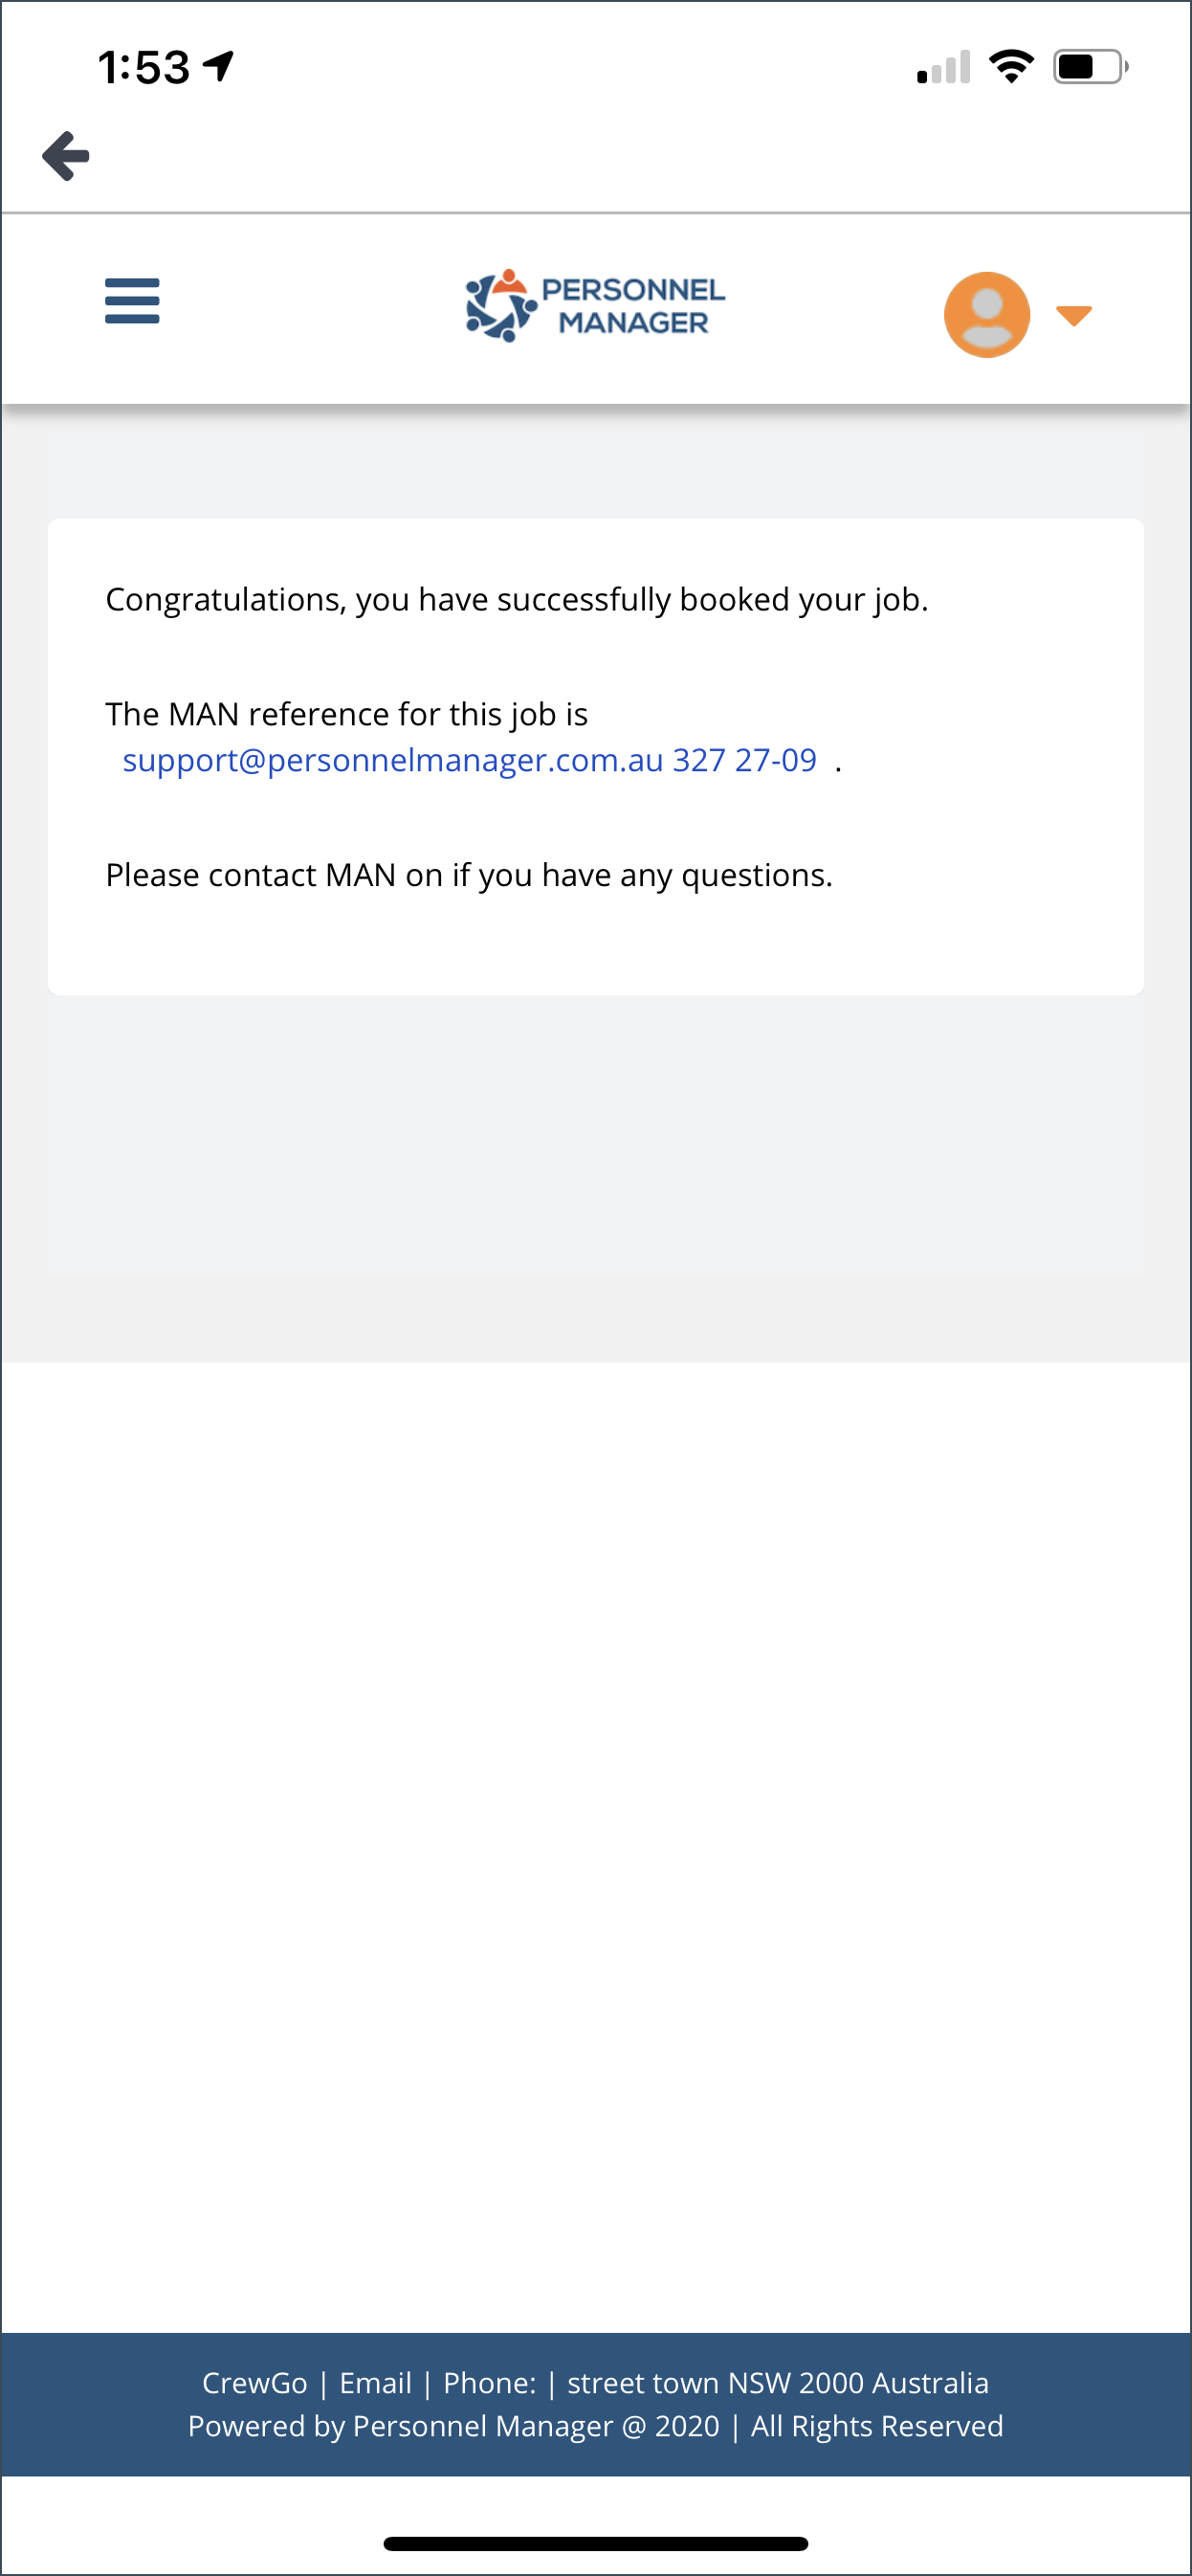
The job you created will now appear on the Job List page of the PM Crew App.

Adding Venue
If the Venue you entered on the field is non-existent, the app will ask you if you want to add that venue. Click Yes to proceed.
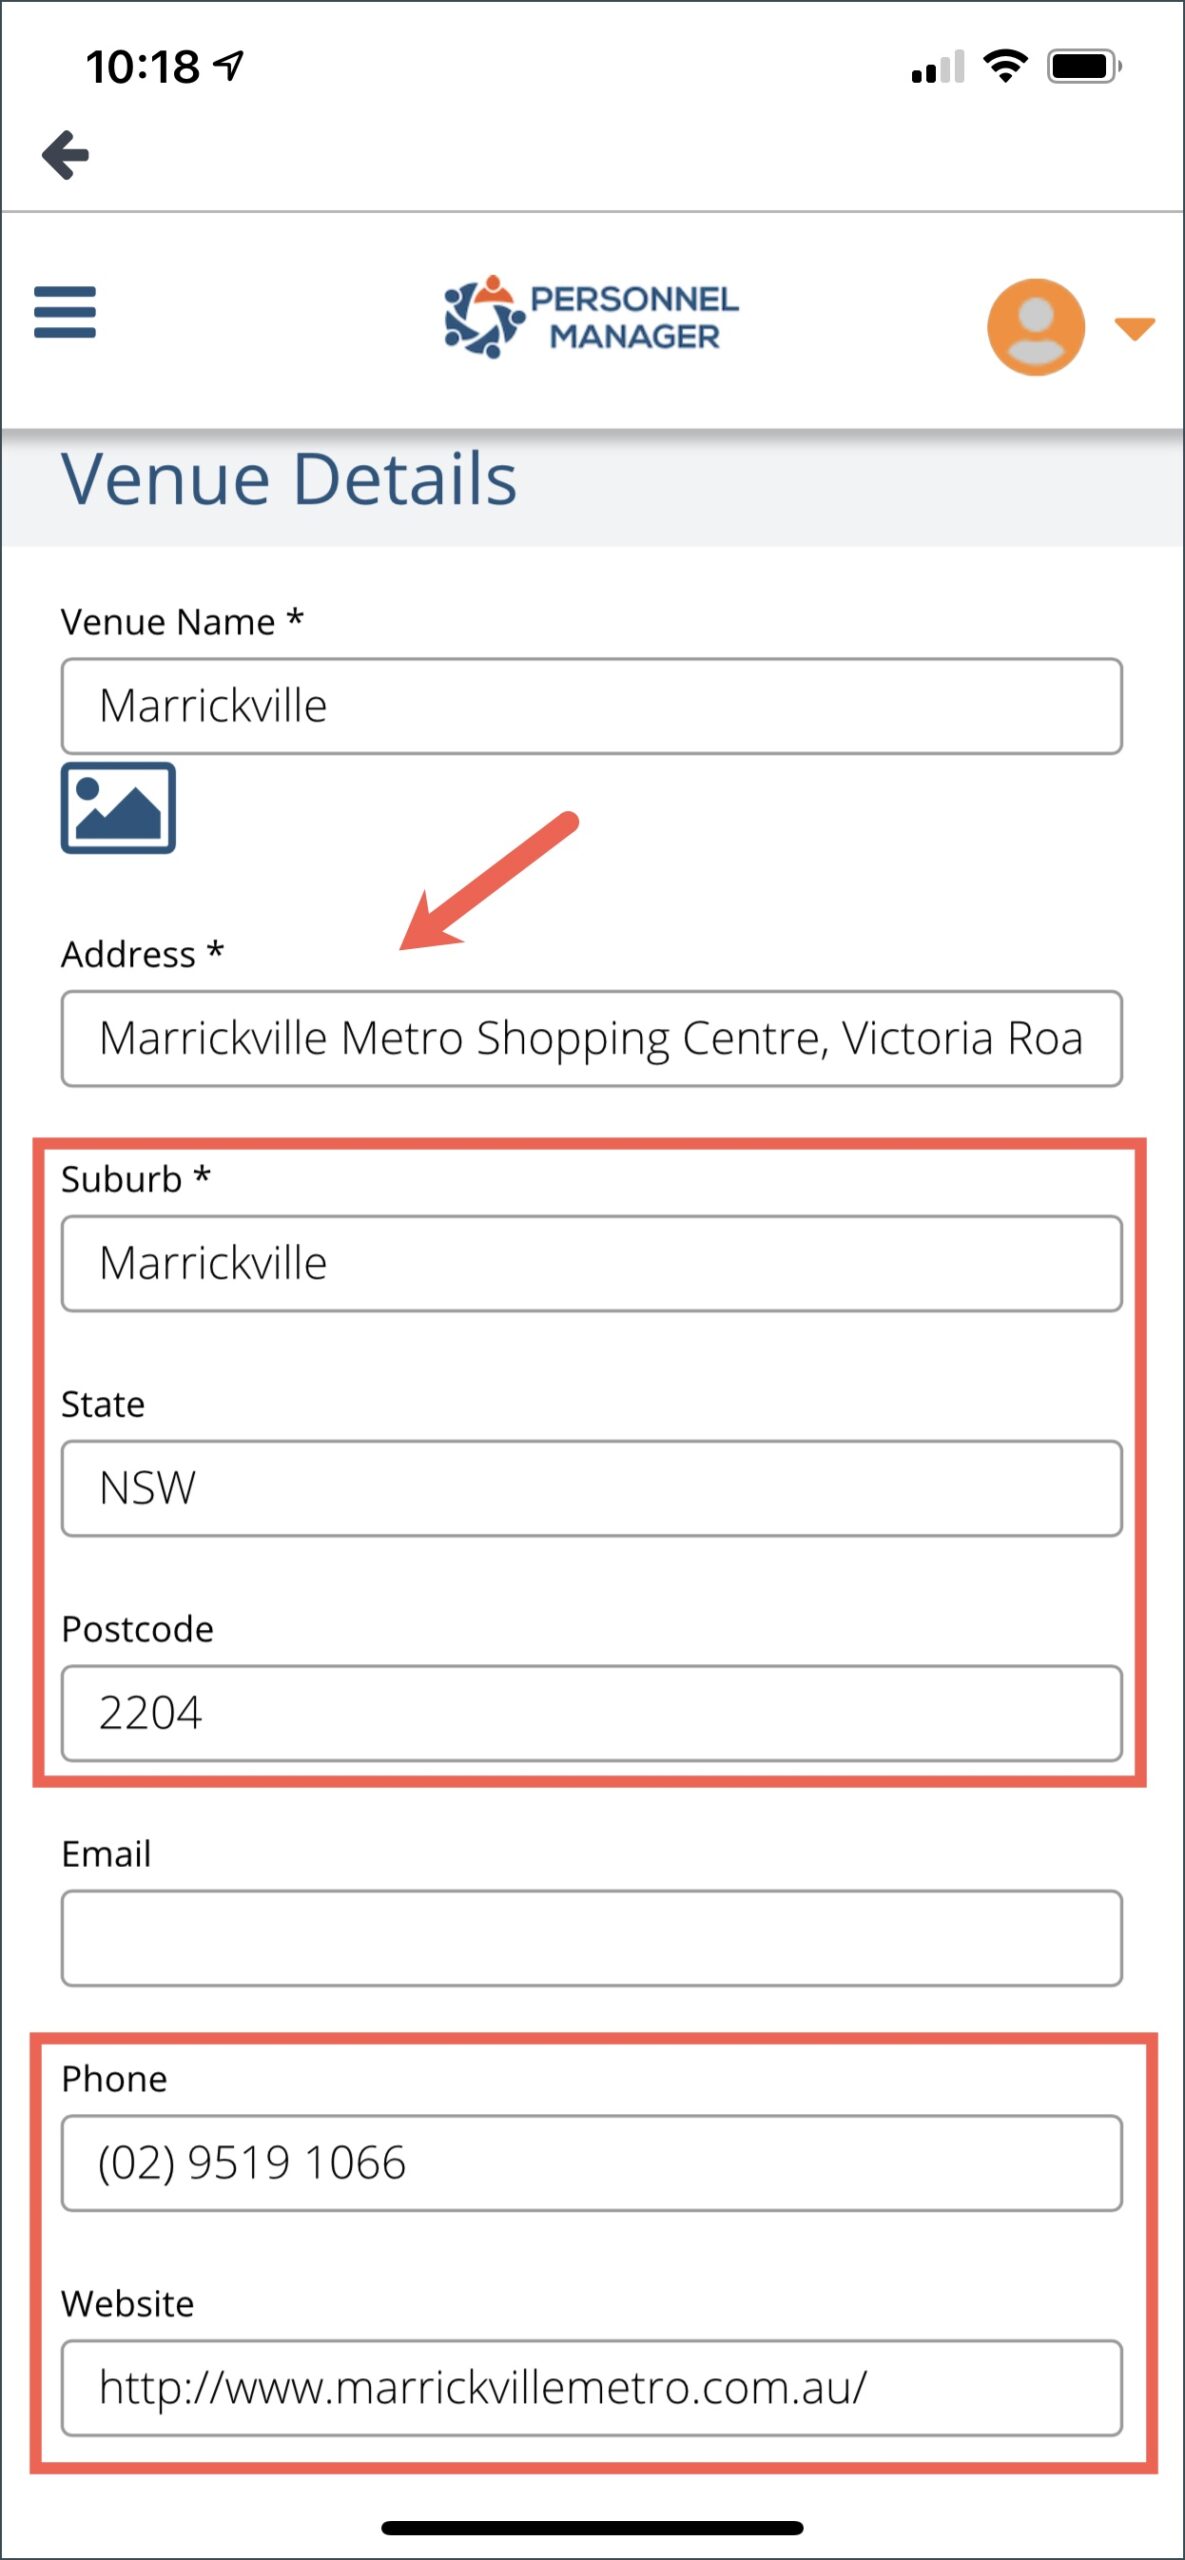
The Venue Details page will open where you can enter details of the new venue location. Enter the address on the field provided and Google Maps will suggest locations.
From the suggestions, tap the location.
Once done, all available information will be filled out automatically.
In the below screenshot, email is not populated automatically. You can manually enter the email address.
Mandatory fields are denoted by an asterisk.
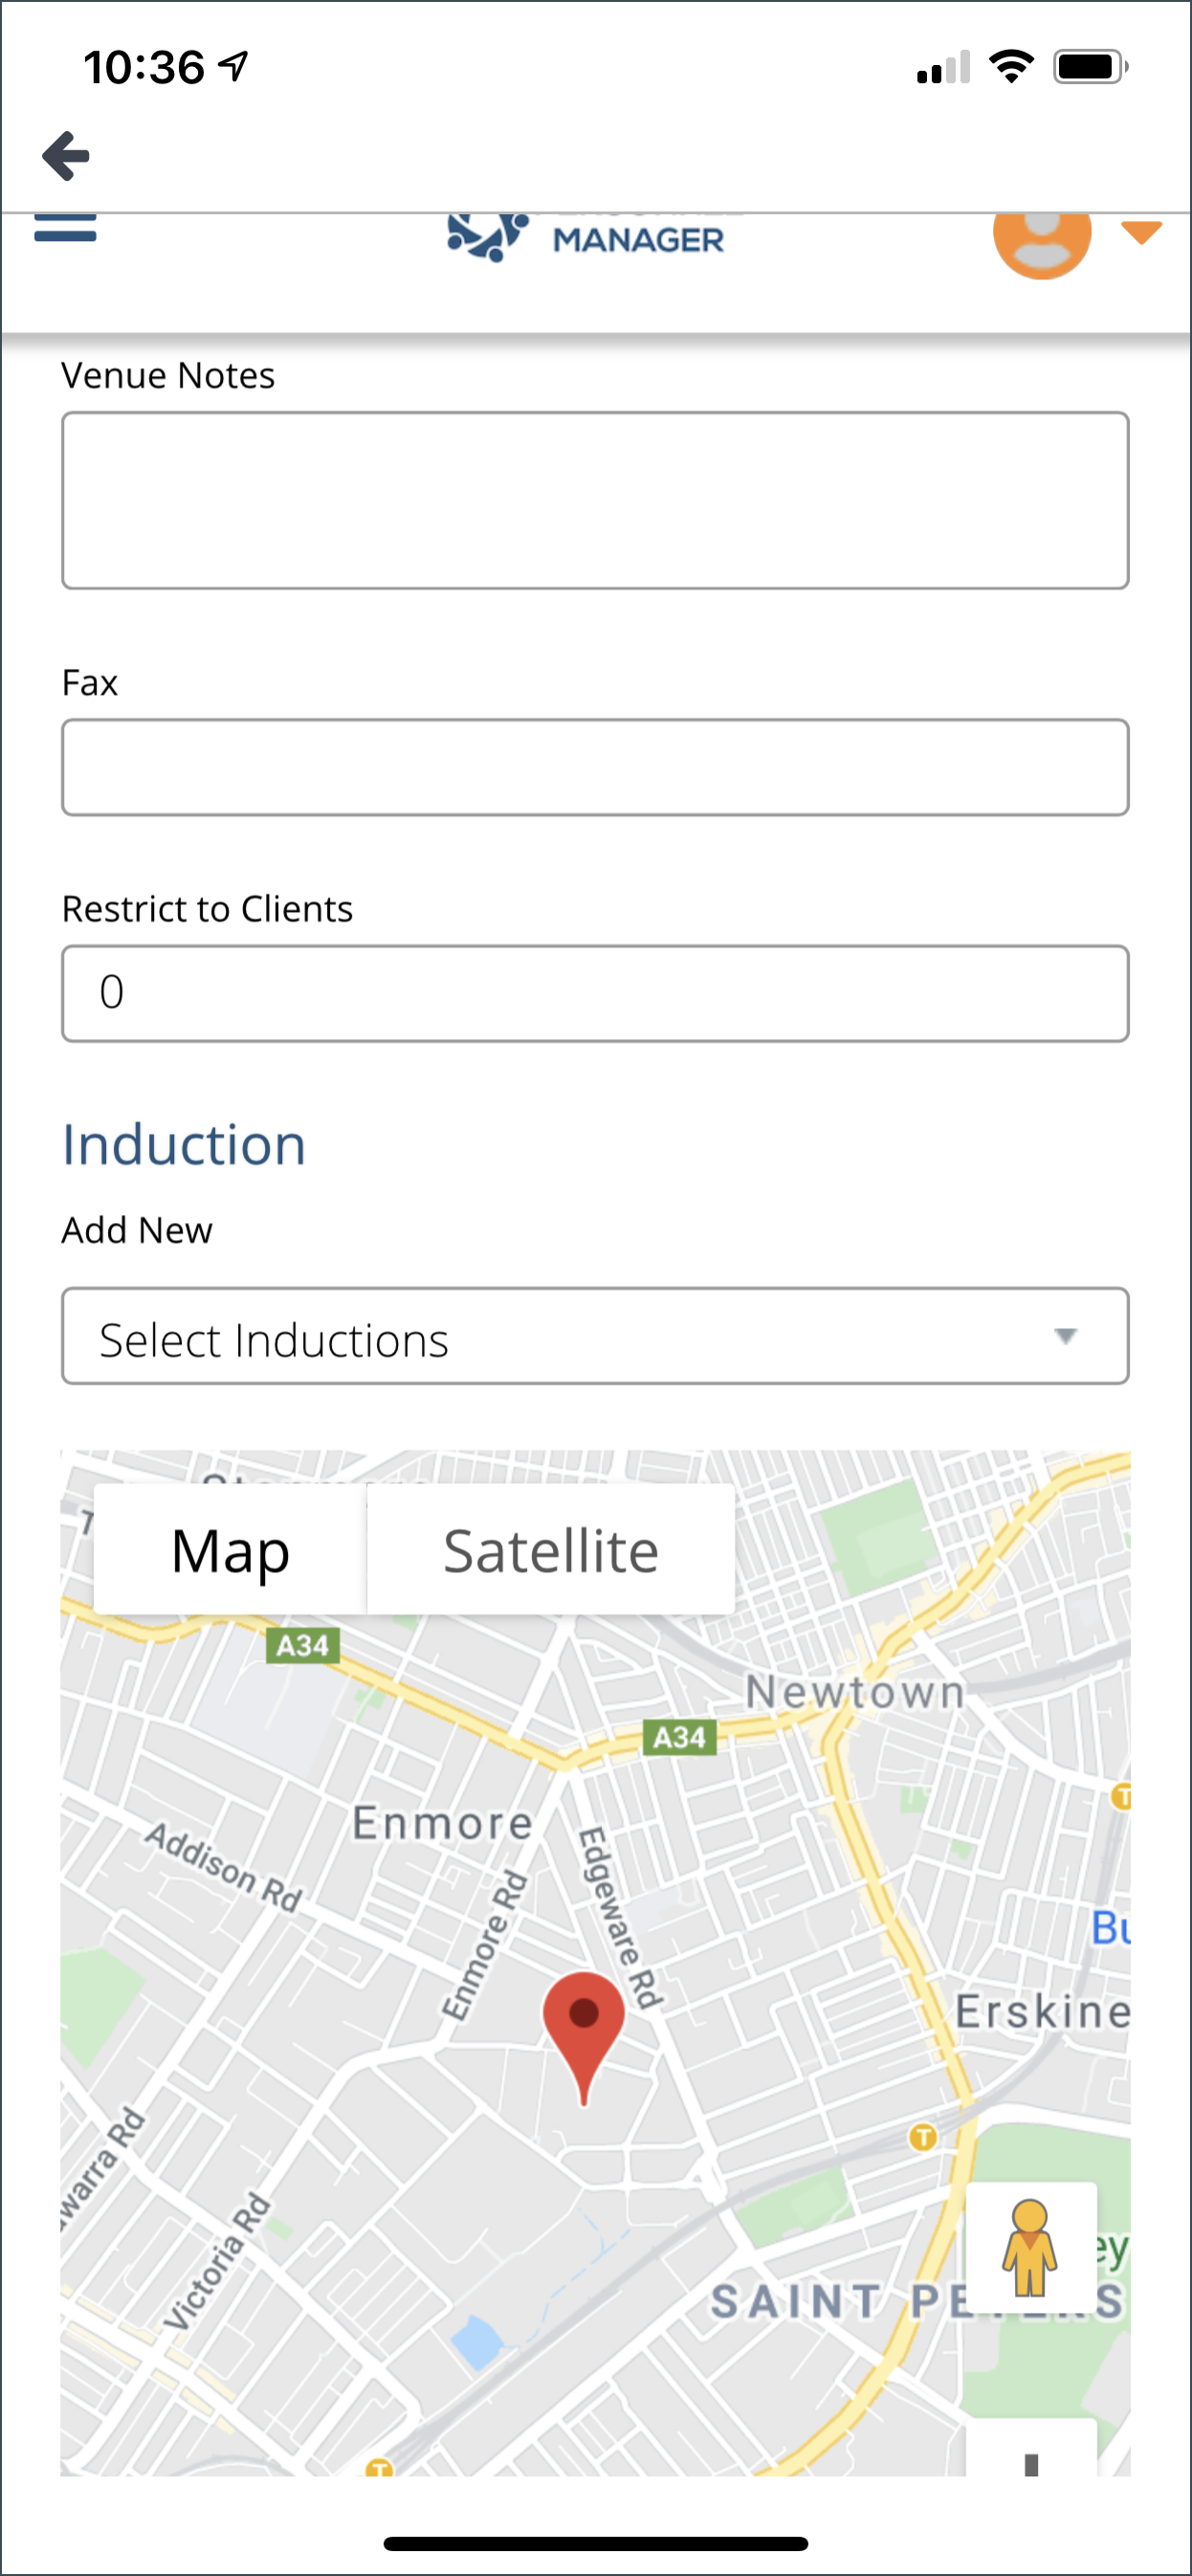
Continue adding the details of the Venue.
Venue Notes: You can important reminders or notes about the Venue.
Fax: Enter the fax number of the venue here.
Restrict to Clients: Set 0 or 1 if you do not want your clients to use this location.
Induction: Select from the available induction that is applicable to this venue.
ADDING MEETING PLACE
Meeting Place: To add a meeting place, enter the name of the meeting place on the field provided. Click the pin icon. Then a pin will appear on the map. You drag this pin anywhere on the map.
To add another meeting place, click the plus icon.
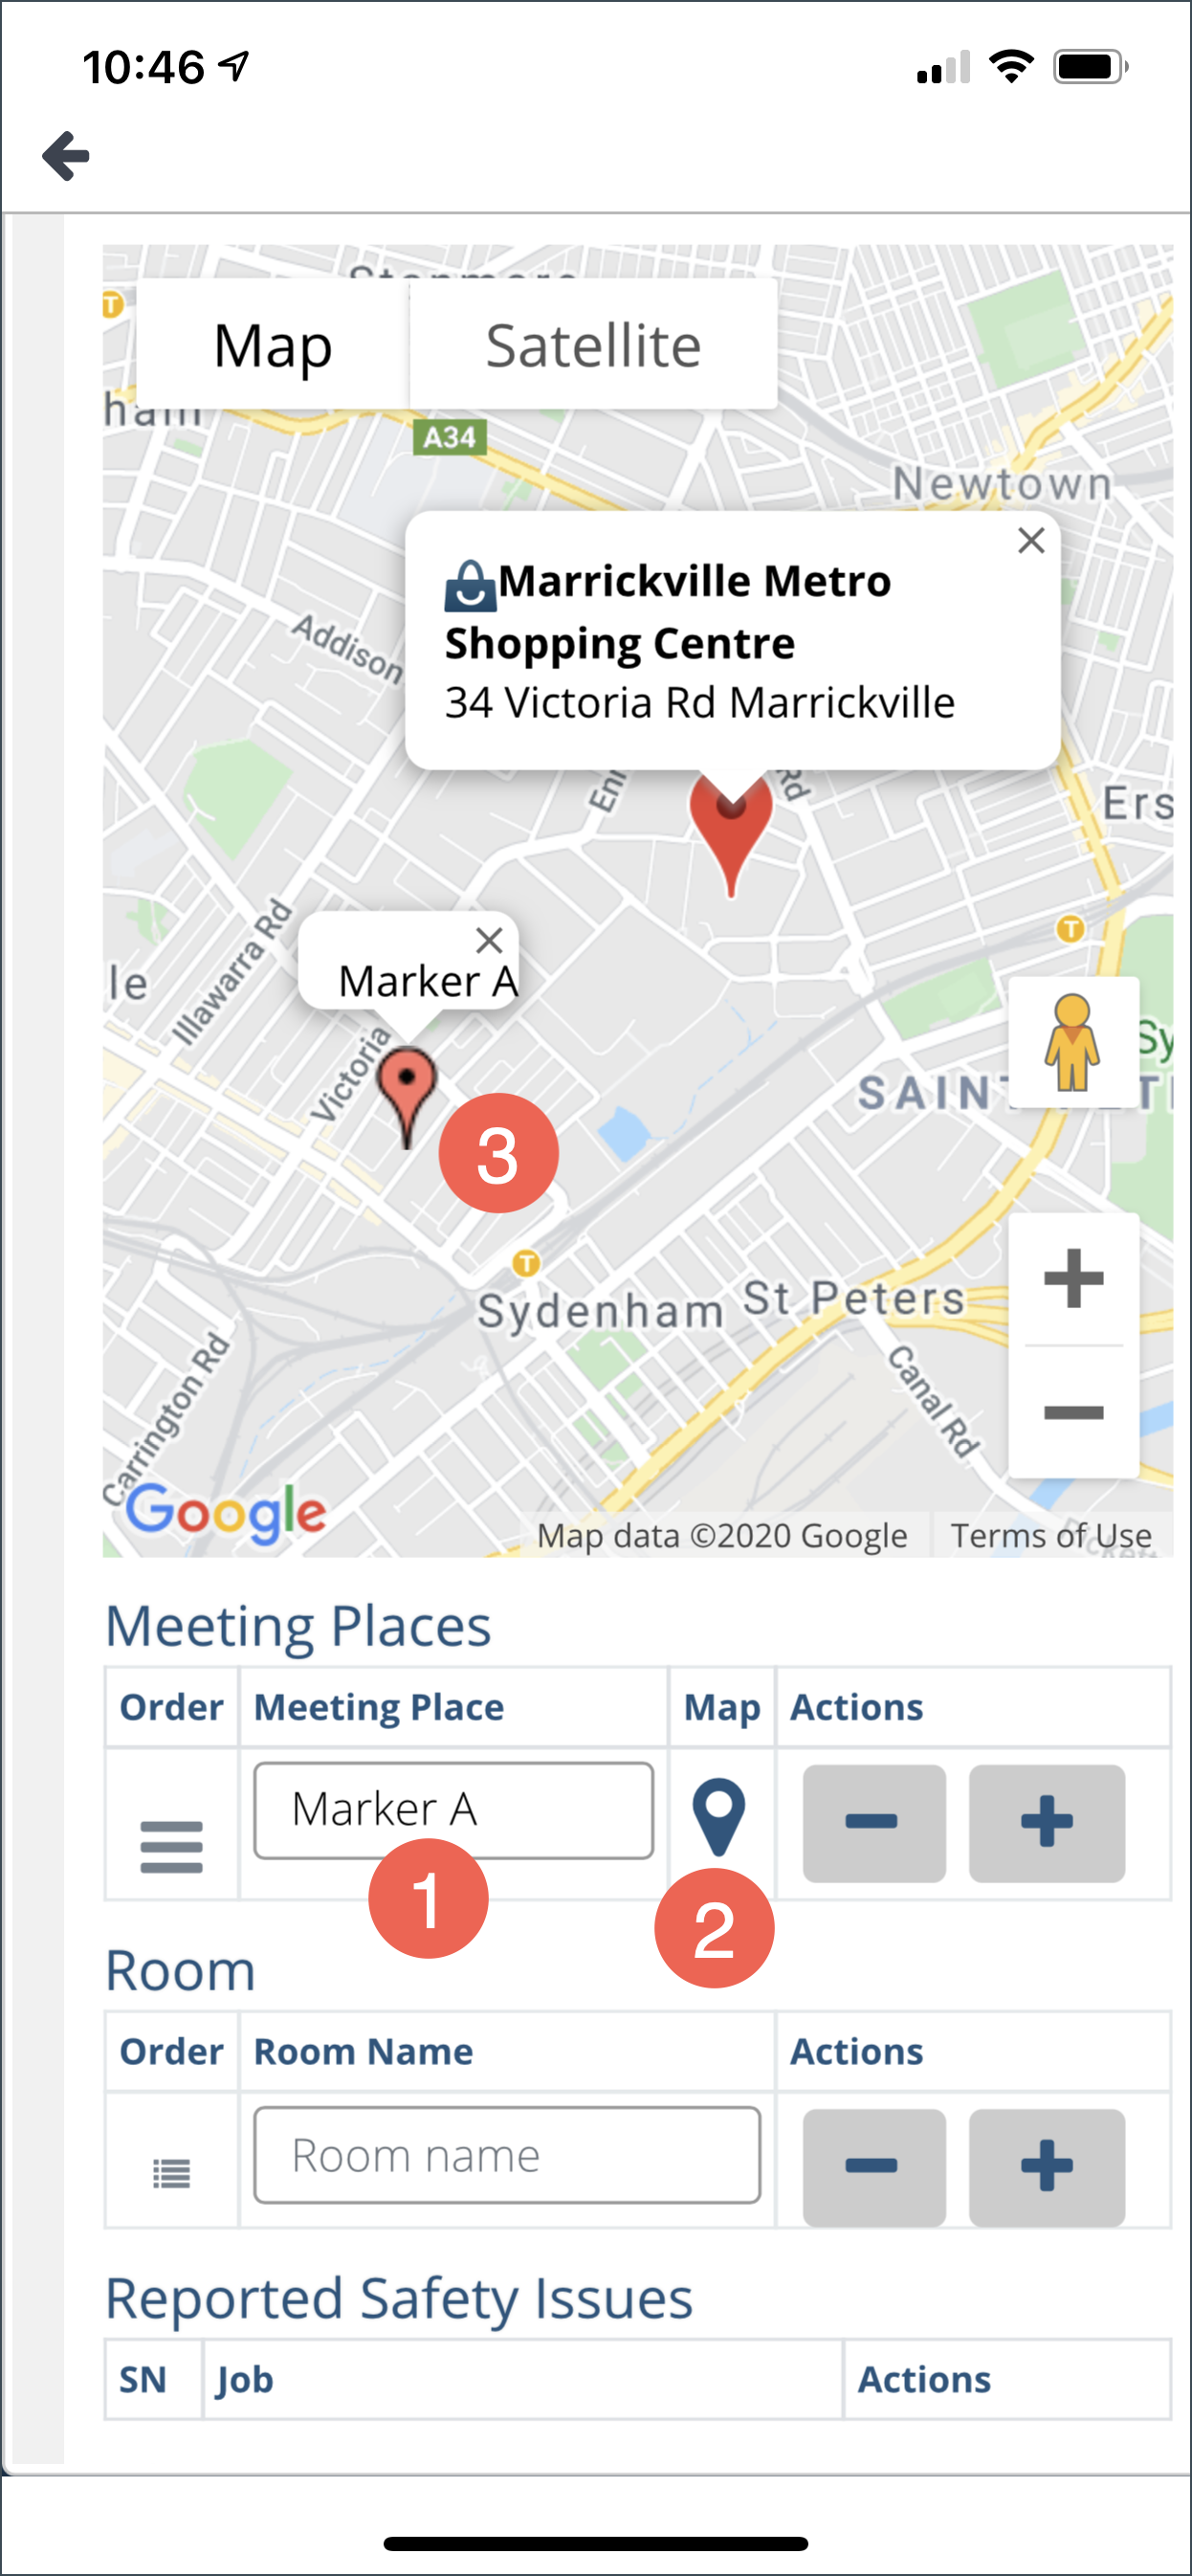
ADDING ROOM
Room: Enter the name of the room on the field provided. If you want to add more rooms, click the plus icon.
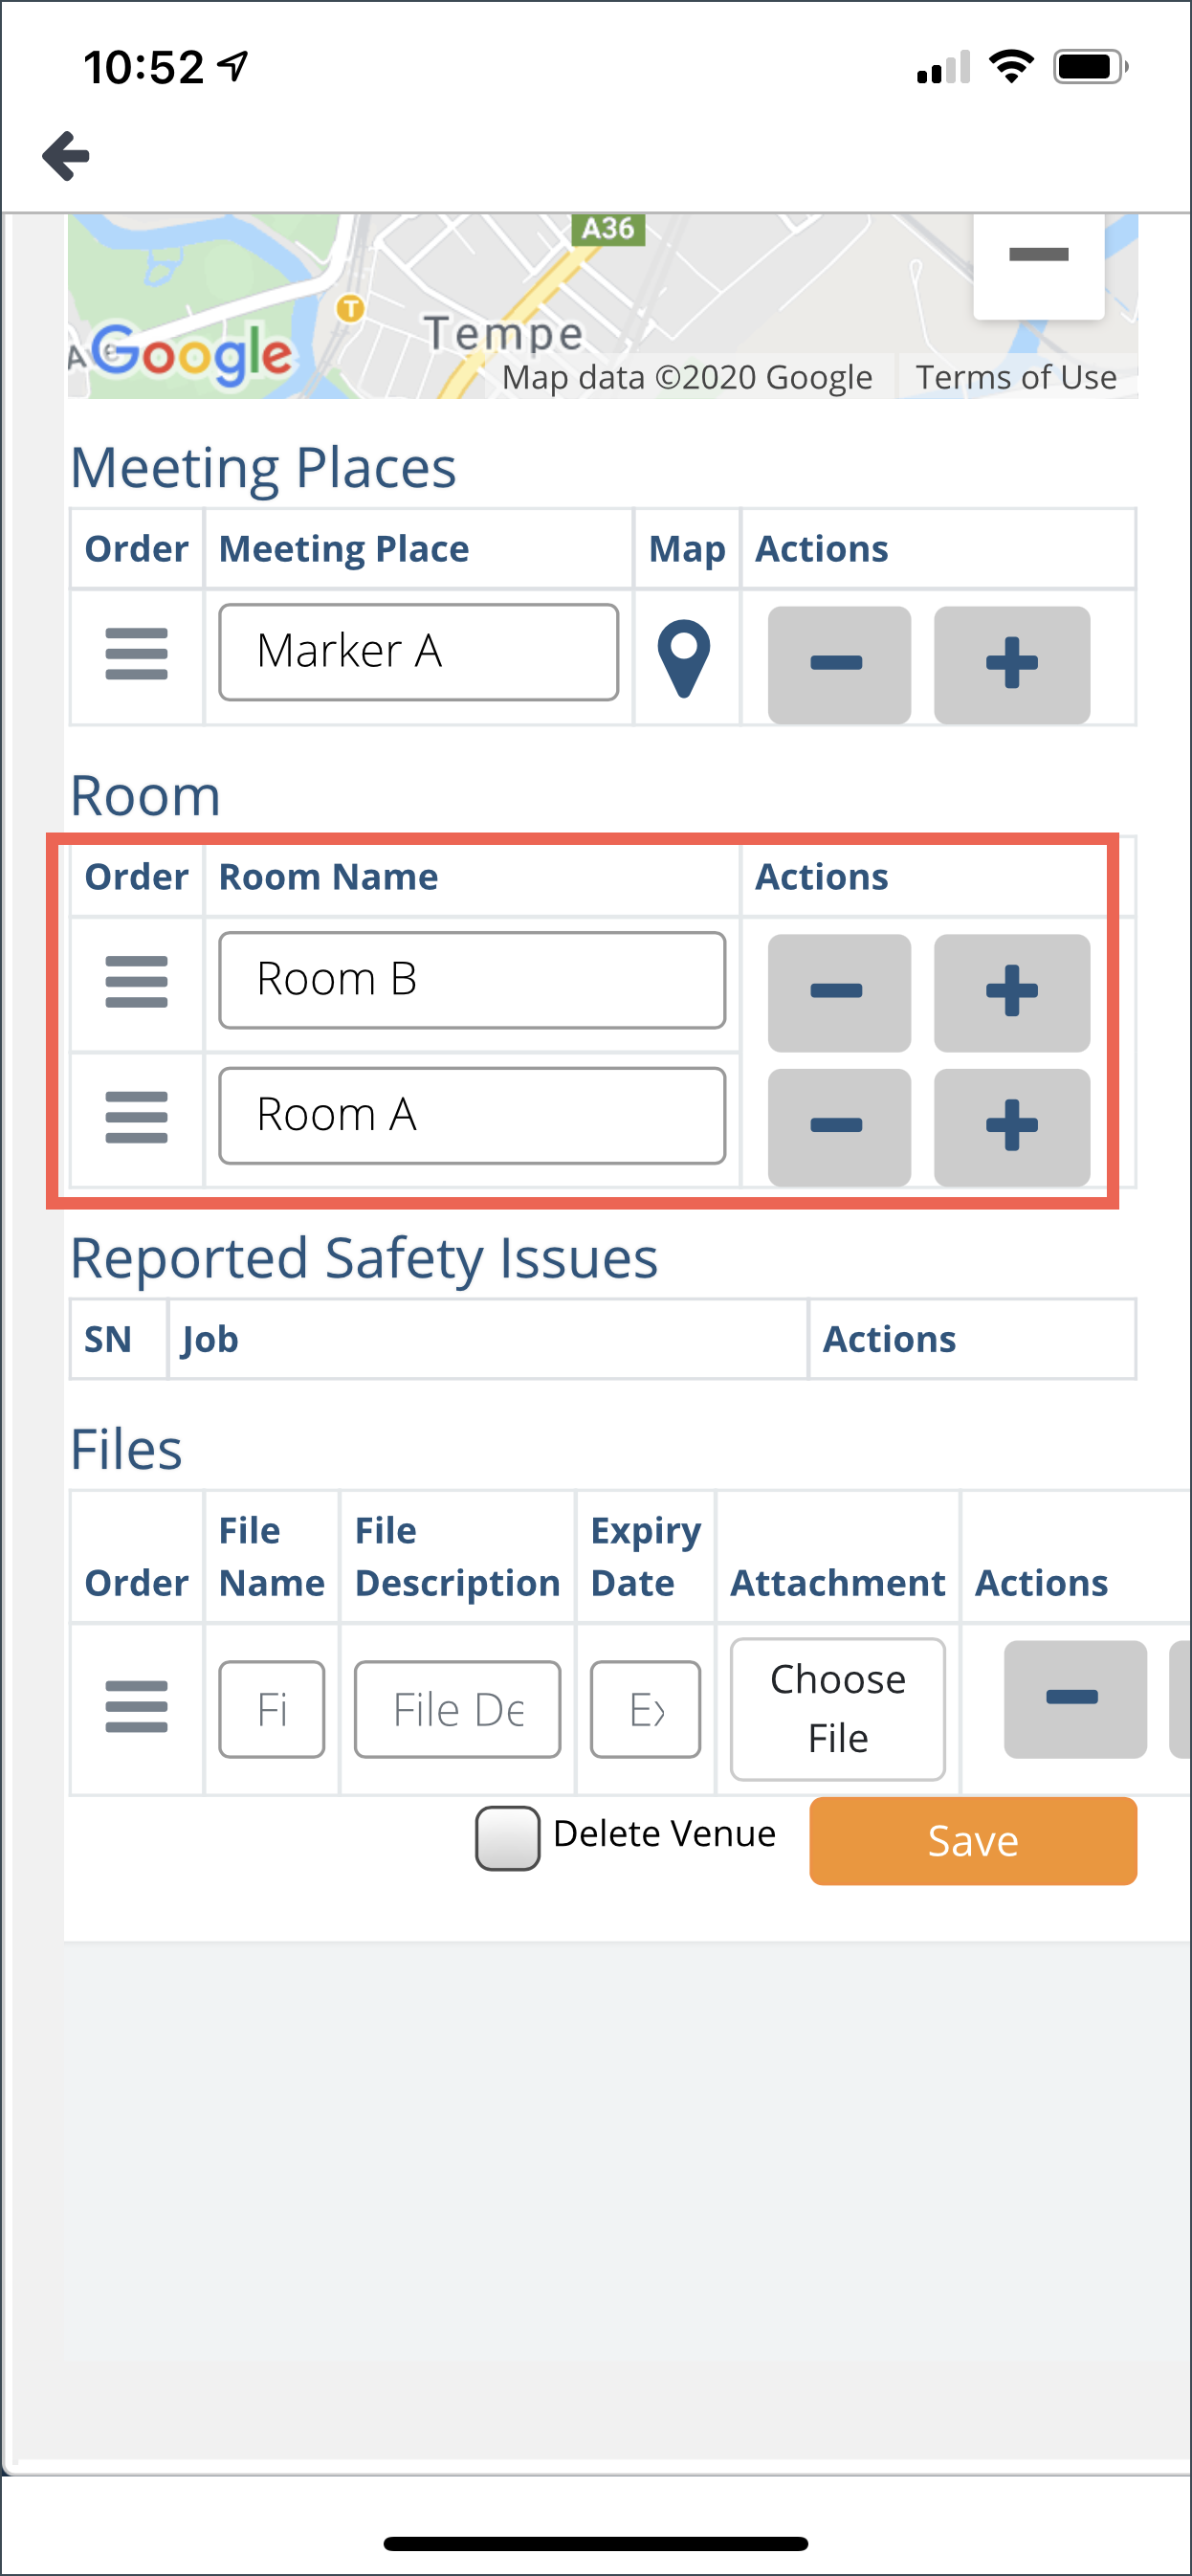
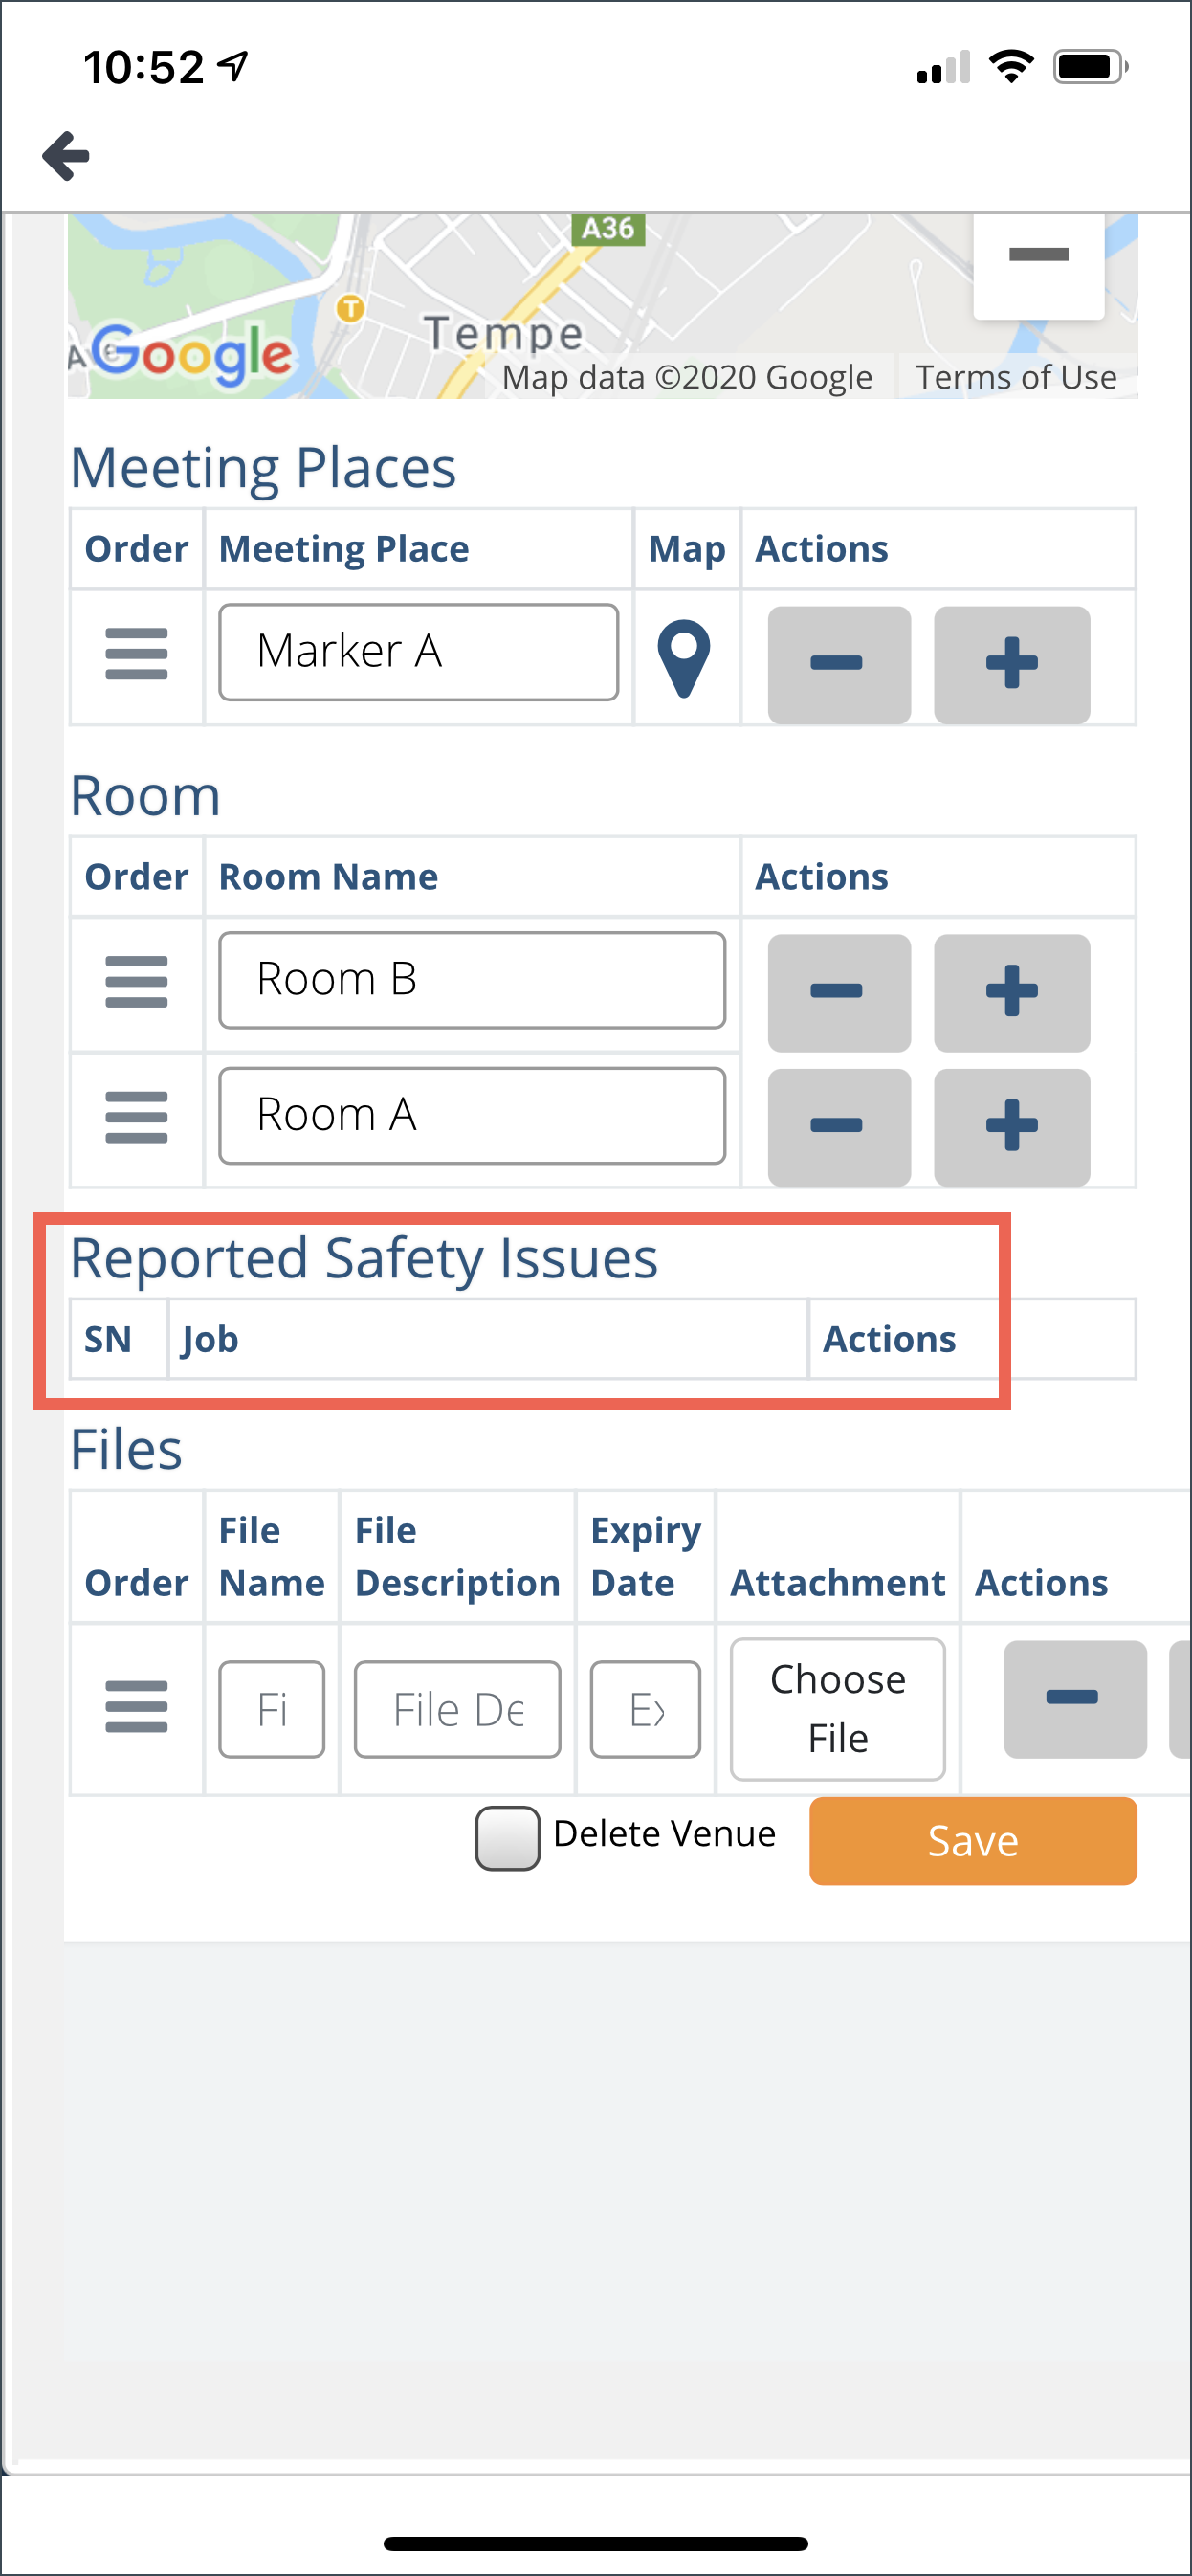
Reported Safety Issue: If there are issues about the job location, it will appear on this section.
ADDING FILES
Files: If you want to add the files with respect to the job location, you can do so here. Enter the file name, file description and expiry dates on the provided field.
Then click Choose File button to attach a file.
To add more files, click the plus icon.

Once you have completed the details of this Venue, click Save and you will be redirected back to the job booking page.
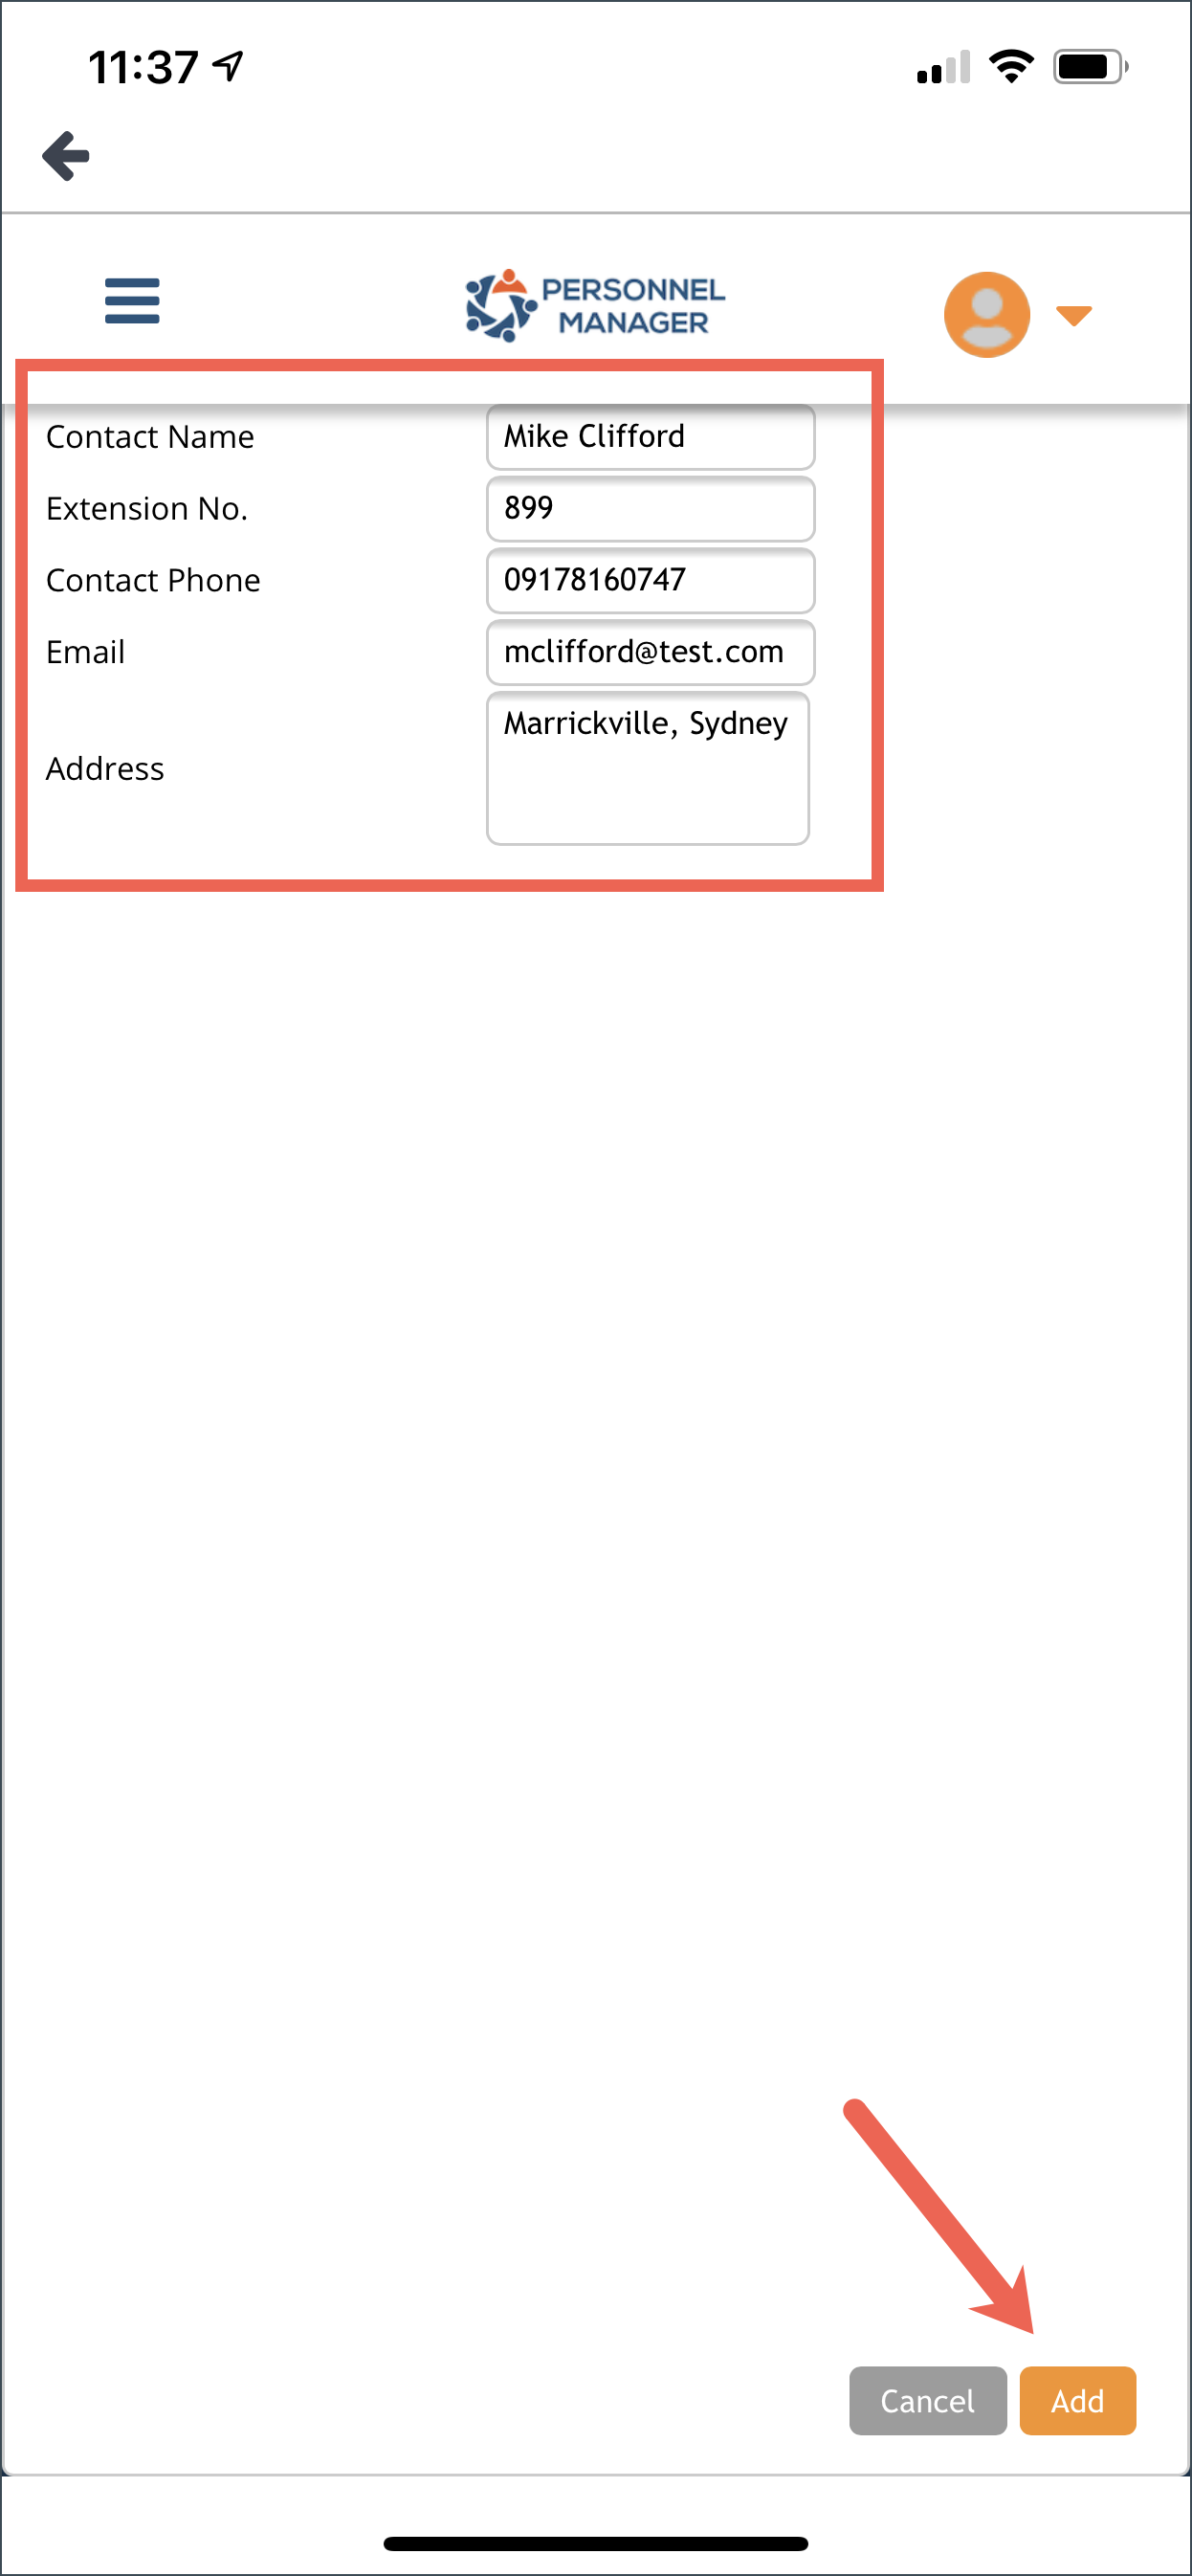
Adding On-Site Contact
Click the plus icon to add an on-site contact. Fill out the details and click Save.