Key: A / DM / M
PM automatically opens to the Home Page. The default home page displays the jobs page. However, you can change this to a calendar of events.
Jobs:
The jobs home page displays jobs in groups based on the week they are booked. In the columns, you can see the client, business, job sheets (When clicked it will take you to the job sheet), job no, description, access to the invoice, and access to the quote. When a new job is added it will display here, see guide 7.0 to add a new job.
Colour Code: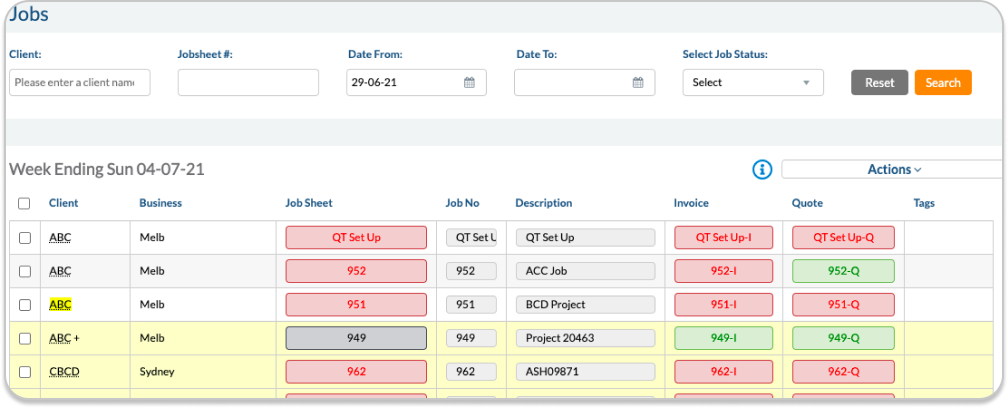
Red: Invoice or Quote have NOT been sent to the client. Red in the job sheet means no shifts have been confirmed.
Green: Invoice or Quote has been sent to clients. Green in the job sheet means some shifts are locked but there are still unlocked shifts in the job
Black: This means the Quote has been approved by the client. Black coloured job sheet number means all shifts have been locked.
The system assigns a Job Number to each Job Sheet automatically. Once a Job Sheet has been added, the Quote and the Invoice are automatically created. The corresponding Quote and Invoice share the same Job Number. A job with “+” next to it means it spans more than one pay week.
Colour codes for Job Sheets/Invoices/Quotes:
Blue shading: The job sheet is admin locked.
Yellow Shading: The shifts within the job sheet have been highlighted.
However, if the Client Name is yellow shading the job is booked via the client portal.
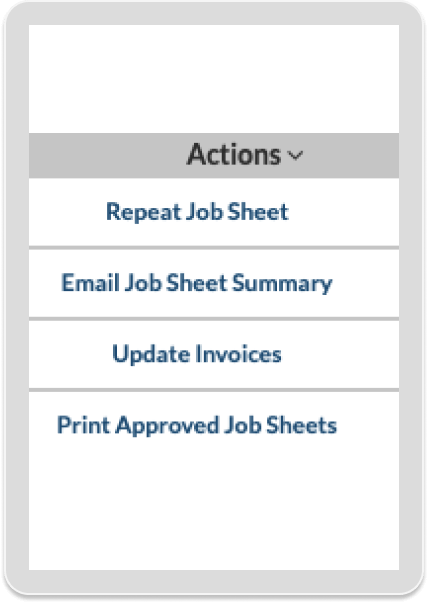
There are four actions that can be performed on this page. Tick box the shift and click the action dropbox to see the different actions.
Calendar
The Calendar is a useful tool in PM to overview jobs by the week, month, 3 days or 1 day. You can also access the calendar through the Jobs menu. Bookings change colour based on who locked the shift.
Crew Locked – Blue
Client Locked – Dark Red
Other lock including Admin Lock – Orange
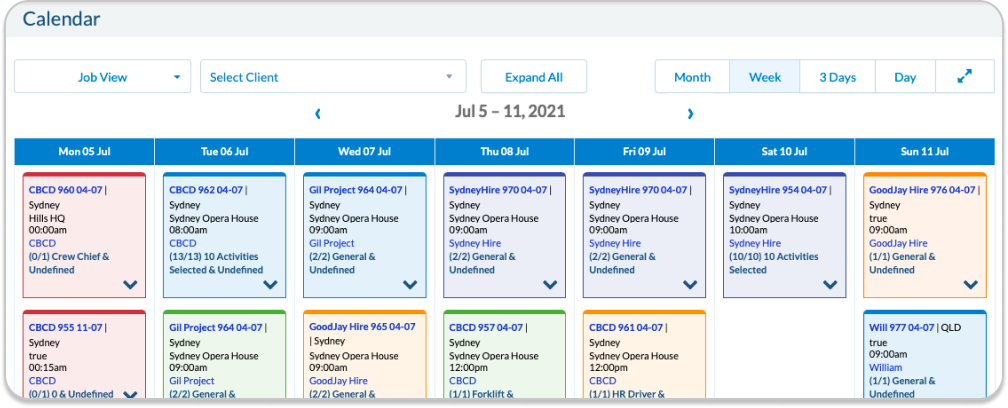
Use the arrow to expand the job to view more information.

Scheduler: If there are no confirmed staff for your shift, use the Scheduler function to send job offers to the available crew.
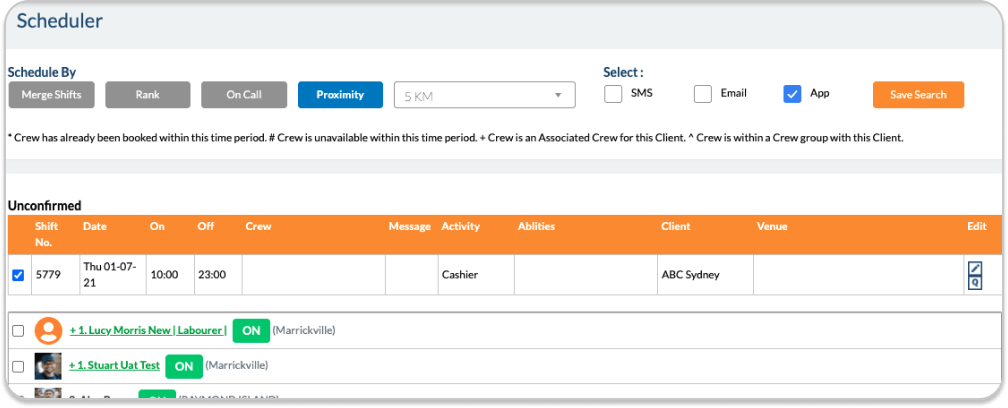
Merge Shifts – You can combine shifts into one using the Merge Shifts button. Tick box the shift to offering and crew members will only receive one message.
Rank: Offer shift by the rank of crew
On-Call: View crew who are on call
Proximity: The distance crew is away from the job
Footer:
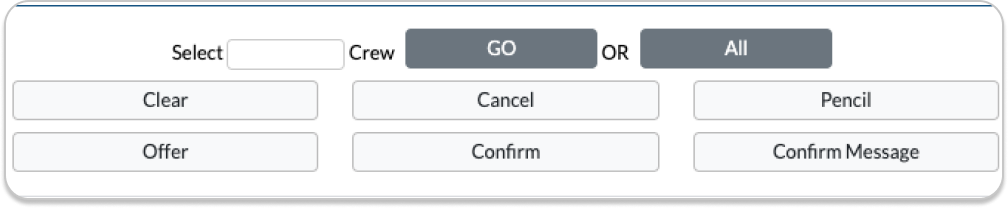
Tick box the shift you would like to action, then click the action in the footer.
Clear: This will clear any actions that have been performed on the shift
Cancel: This will cancel the shift
Pencil: Pencil crew you wish to book, this will NOT send them a message
Offer: Offer the shift to the selected crew
Confirm: If you know the crew has already confirmed the shift this will not send a message to them but will confirm that they will be doing the shift
Confirm Message: This will send a confirmation message to the crew who is booked for the shift
Quick Edit: Show limited editing options for the shift.
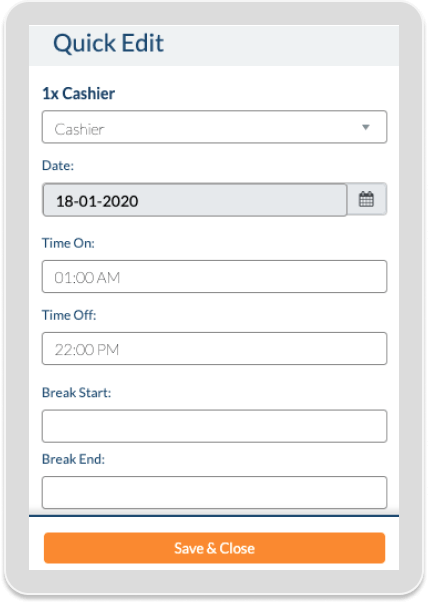
Edit: Will take you to a new page to edit the shift
Click on options to expand more buttons:
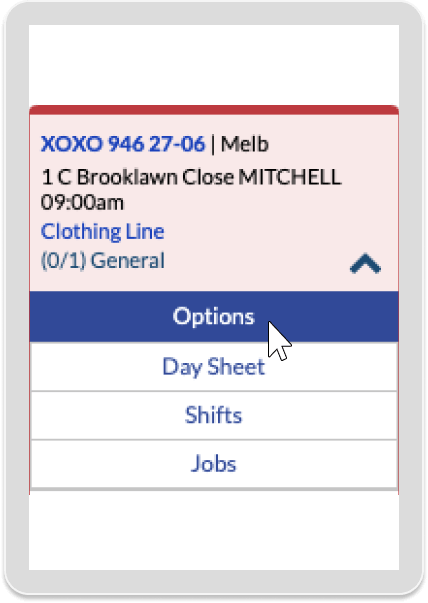
Shifts: Tick box crew and press shift to edit their shift
Jobs: Redirect you to the job sheet page
Day sheet:
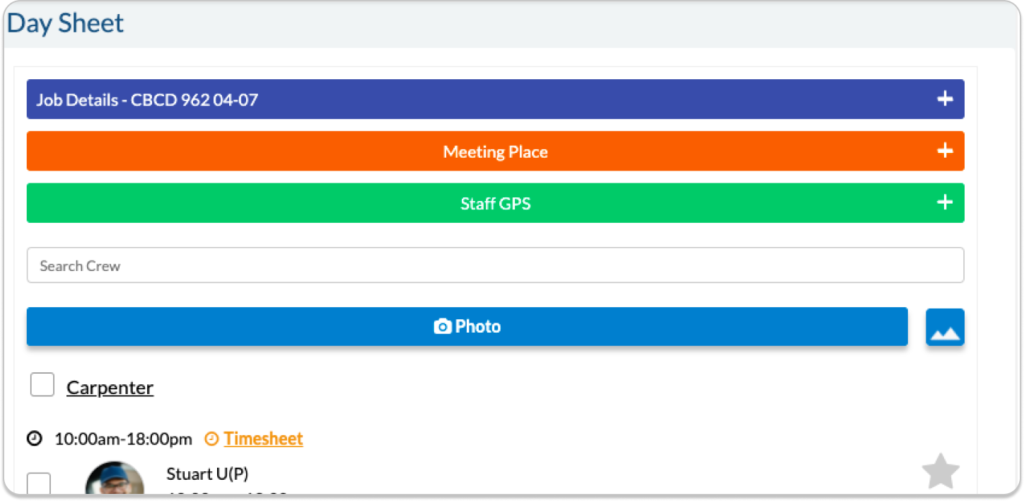
 The Day Sheet allows you to enter times directly into the system and to report the performance of the crew (applicable for Team Leaders, Client and Duty Managers). This is how the Day Sheet will look like for Admin, Duty Managers, Team Leader and Supervisors. The Day Sheet for the crew will only have the Job Details and their crew time which they can update.
Job Details: job number, date, venue, meeting place and the activities of the job
Supervisor Details: If there is a supervisor assigned to the job, it will be displayed here. This is not available in the Day Sheet of the crew.
Induction Button: Depending on your login credentials, the Induction can be for Client Induction, Team Leader Induction or General Activity. The Induction Button is not available in the Day Sheet of the crew. Further, the Induction function is for Team Leaders and Supervisors only.
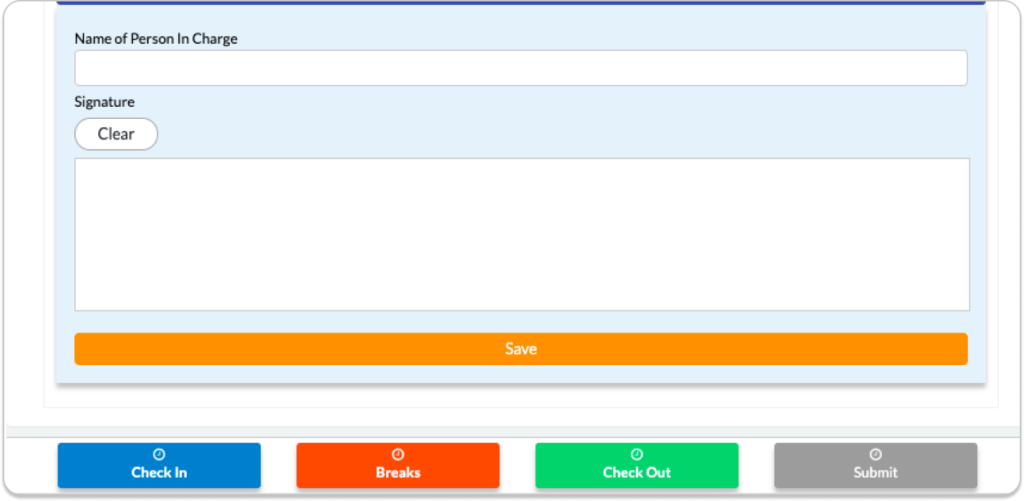
Toolbox Talk: Click on the Toolbox Talk, select the job from the dropdown list.
Policies and Procedures: It will list all available policies and procedures for the job.
Signature: affix your signature and submit it.
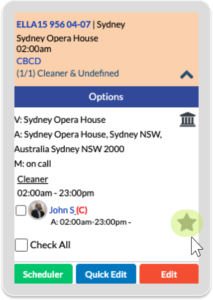
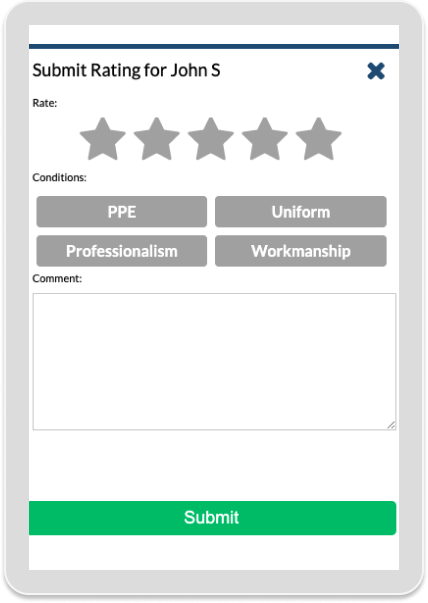
Crew Rating
Once the job is completed you can expand to see all the crews that were on the job, click on the star icon to provide feedback and a rating.
Events
Display a list of current events by date and day.
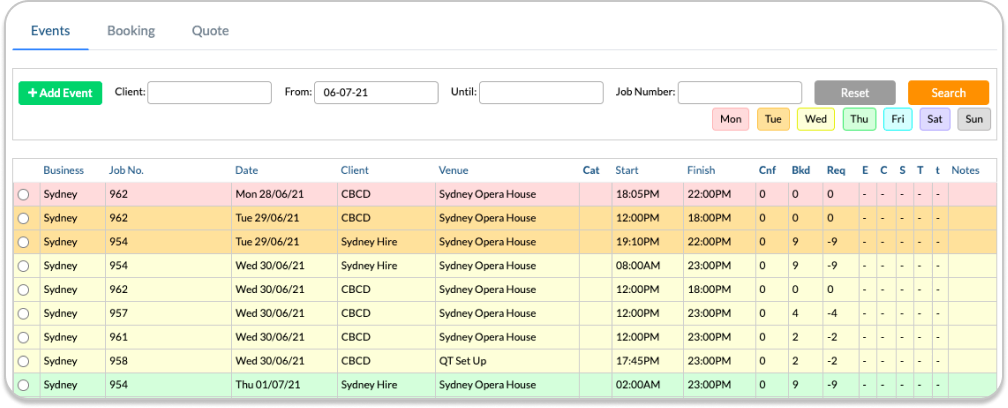
Working under the Events tab is a different way of entering jobs, paying staff and charging customers, it’s slightly different than creating job sheets on Jobs Page and using the Client Auto Booking Online Form. Creating jobs on this page also gives you quick access to 2 additional components which are called “Equipment” and “Consumables”, which can be added or edited later using the quote tab. Using the Events Page would be most efficient if each event is entered by your office staff (as opposed to Clients making bookings online every day) and your invoices include a combination of an hourly rate for staff, consumable items and equipment hire.
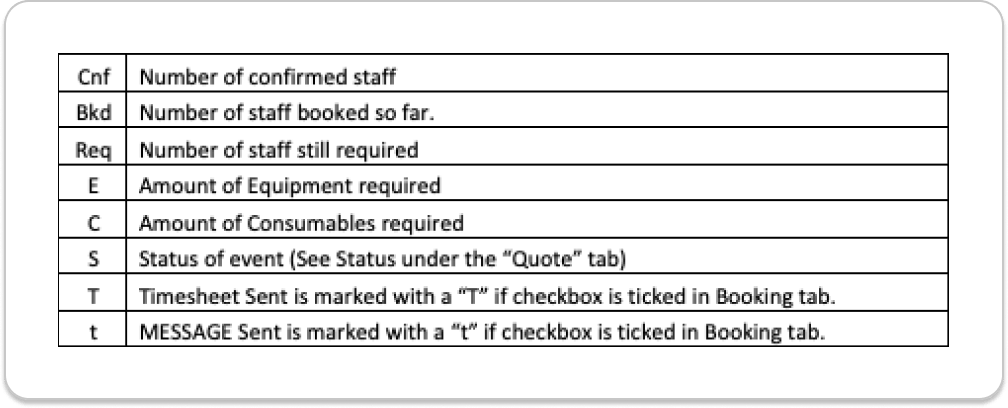
The events are colour coded by day and the columns are category by key: See Event Category below.
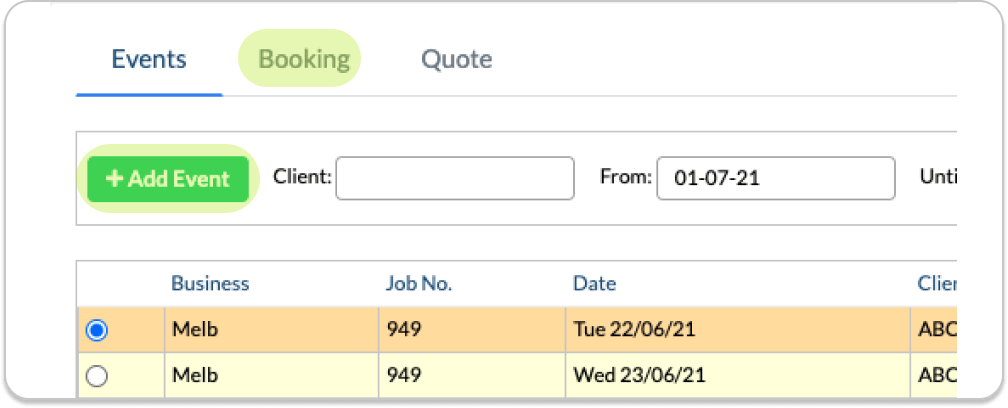
Creating New Event:
Click “New Event” or “Booking” which will open a small window.
Fill out the fields and click create.
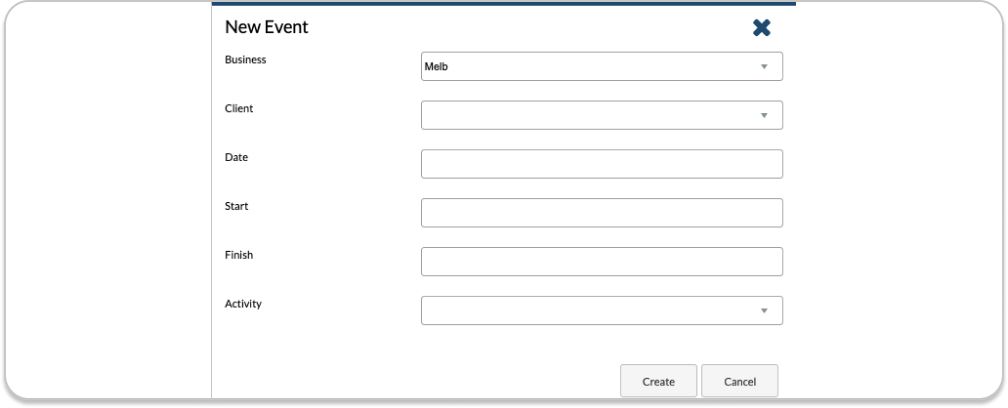
This will create a new booking / Event. This will then take you to the quoting page.
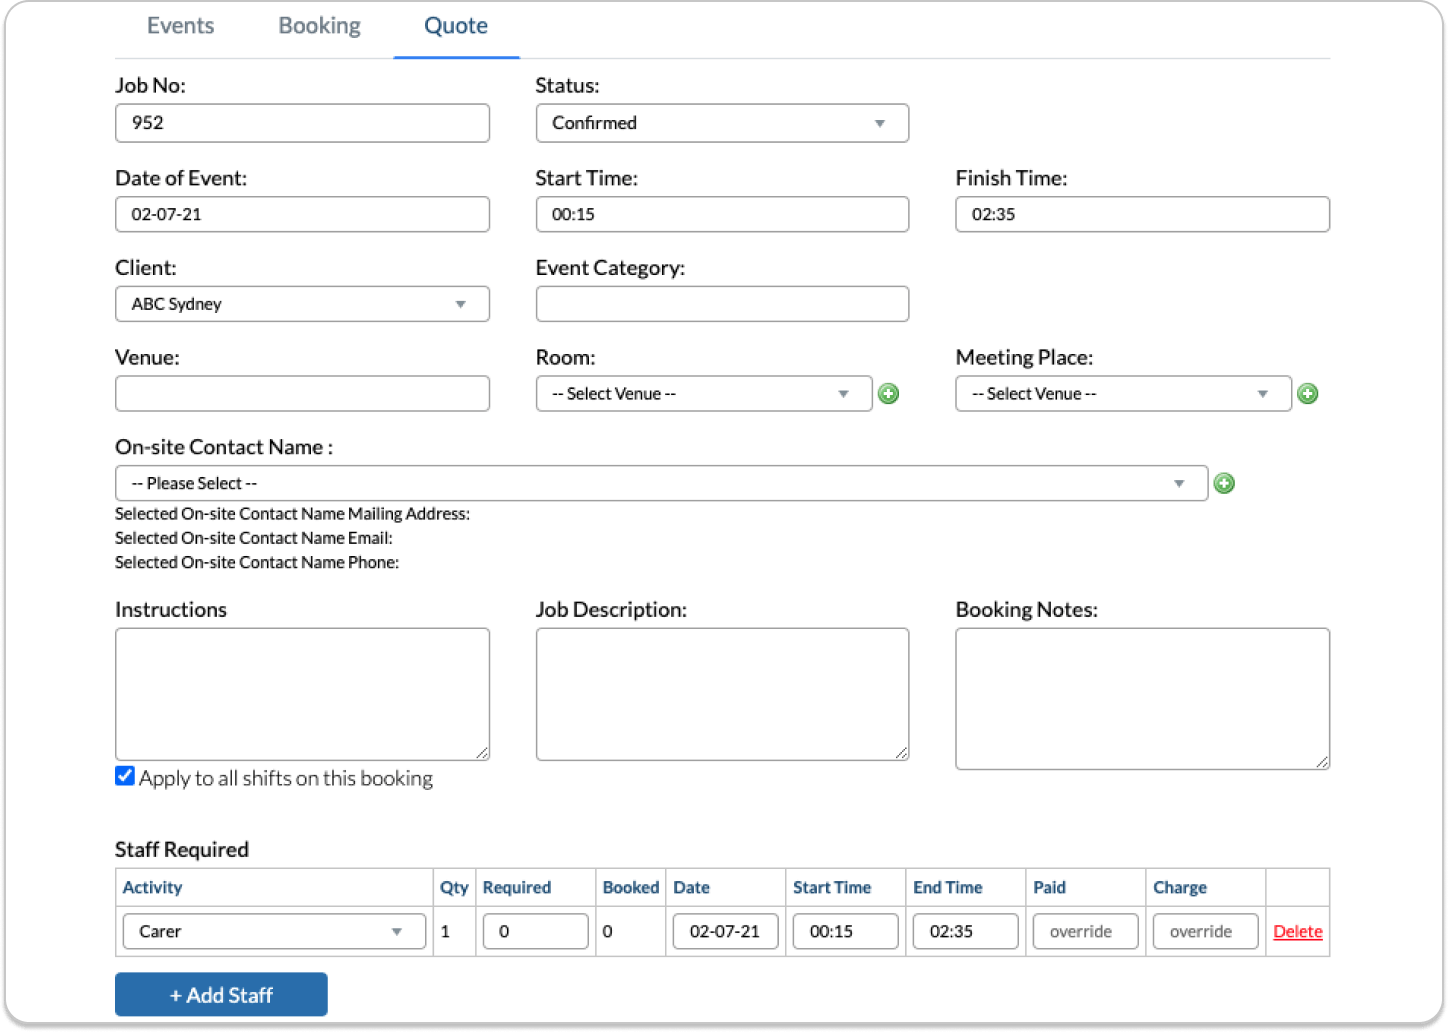
‘Job No’ is automatically assigned by PM this can be edited with numbers or text.
Booking Notes: Any notes related to this event can be entered here.
Staff Required: All staff requirements can be viewed and edited on this part of the page. More staff can be added by clicking “Add Staff”.
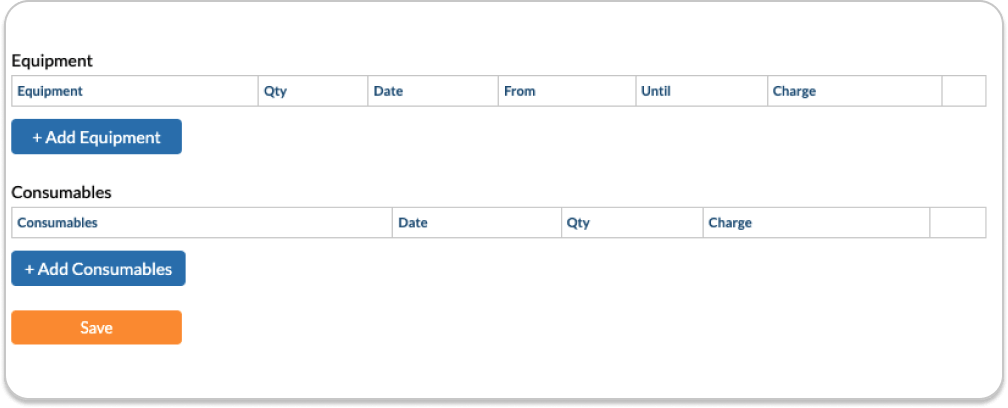
Equipment: click “Add Equipment” then enter the quantity, which will multiply the amount that’s entered under “Charge”.
Consumables: Add a description of the charge, date (optional), quantity and the charge, which will be multiplied by the quantity.
Make sure to click “Save Information” after making any changes.
Invoices can be connected to MYOB please contact support@personnelmanager.com.au for more information. Cost applies.
To edit, double click the event to open.
To perform an advance search, use the client bar, date or job number this narrows down the jobs displayed. Click reset to return to view all.
Booking
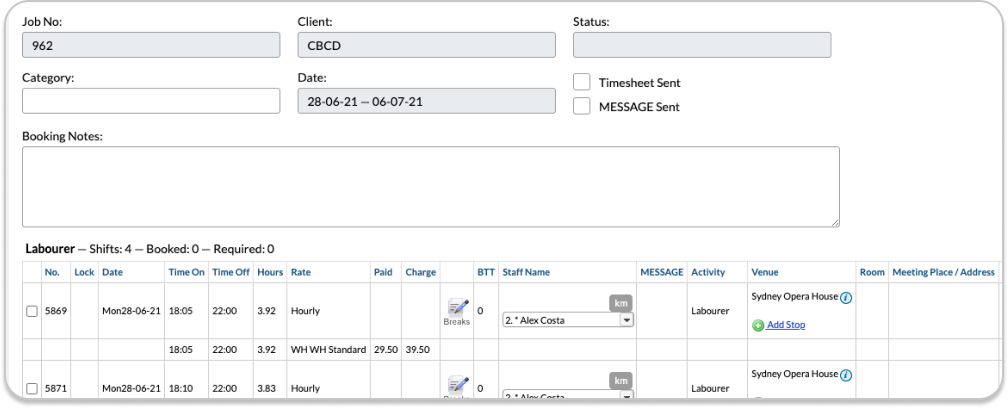
When the event has been created double click the event to be taken to the booking page. Here, you can allocate staff, select a venue, write notes for staff and update their rates.
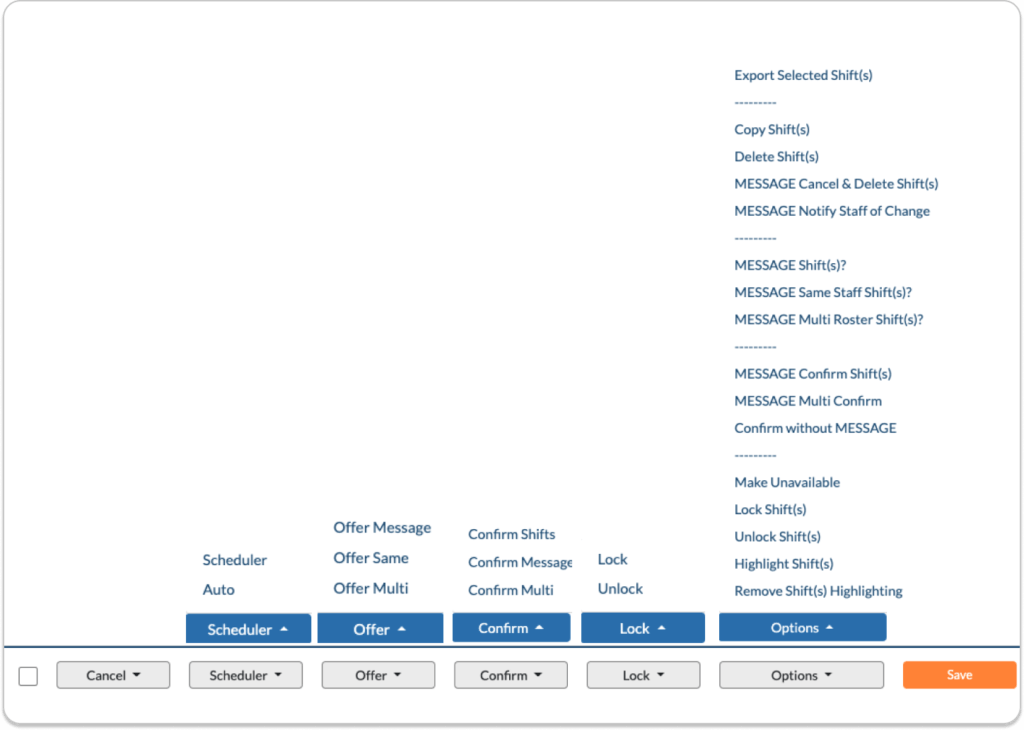
Footer
Tick box one or more shifts. Use the footer options to perform the following actions
Offer Message: A message will be sent to the crew about the shift.
Offer Same: If you have more than one shift with different details and you put those shifts in one offer, that is Offer Same
Offer Multi: Multiple shifts will be sent to the same crew
Confirm Shift: If you know the crew has already confirmed the shift this will not send a message to them but will confirm that they will be doing the shift
Confirm Message: This will send a confirmation message to the crew who is booked for the shift
Confirm Multi: Confirm multiple shifts the same crew can do
Lock: When a shift is locked, no one is able to make changes to the shifts details
Unlock: Unlock a shift so the shift can be edited
Export selected Shift (s): The selected shifts will export into an excel sheet
Copy Shift (s): The selected shifts will be copied
Deleted Shift (s): The selected shifts will be deleted
Message Cancel & Delete Shift (s): Delete/ cancel shift and a message will be sent to the crew member to notify them
Message Notify Staff of Change: The change in the selected shift will be sent to the crew
Make Unavailable: The shift won’t be available
Admin Lock Shift (s): This is different from the normal lock as only the admin can unlock the shift
Highlight Shift(s): Highlight the shift, this reminds you to make changes to it
Remove Shift(s) Highlighting: This removes the highlight from the