3.25 Venues
Venue is where a job will take place. Users can create a new Venue for their jobs that will be stored in a database. The new Venue can now be used to future job bookings.
3.25.1 Adding New Venue
Follow these steps to create a new Venue.
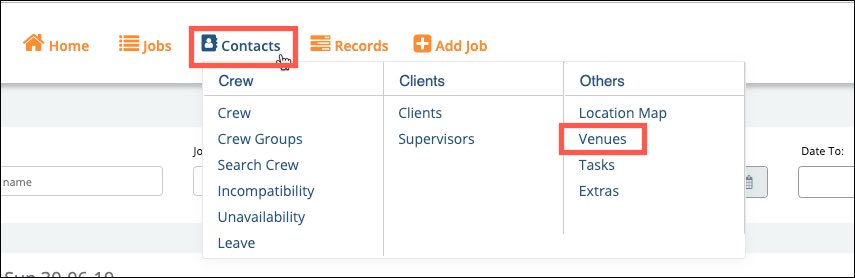
1. Click Contacts in the CNB and click Venues under the Others group.
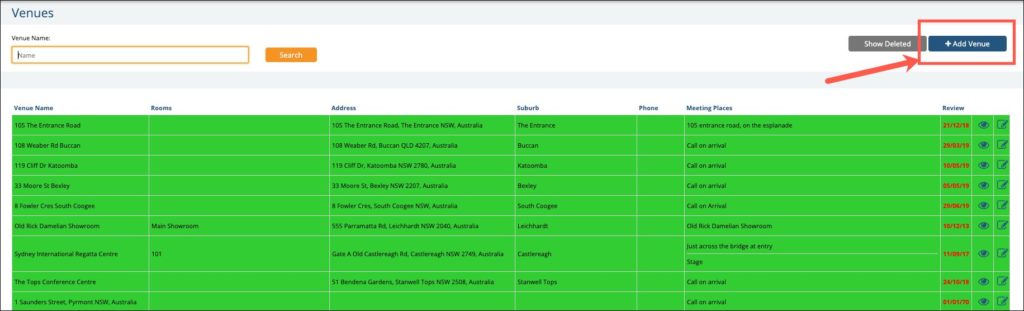
2. You will be redirected to the list of Venues. Click Add Venue.
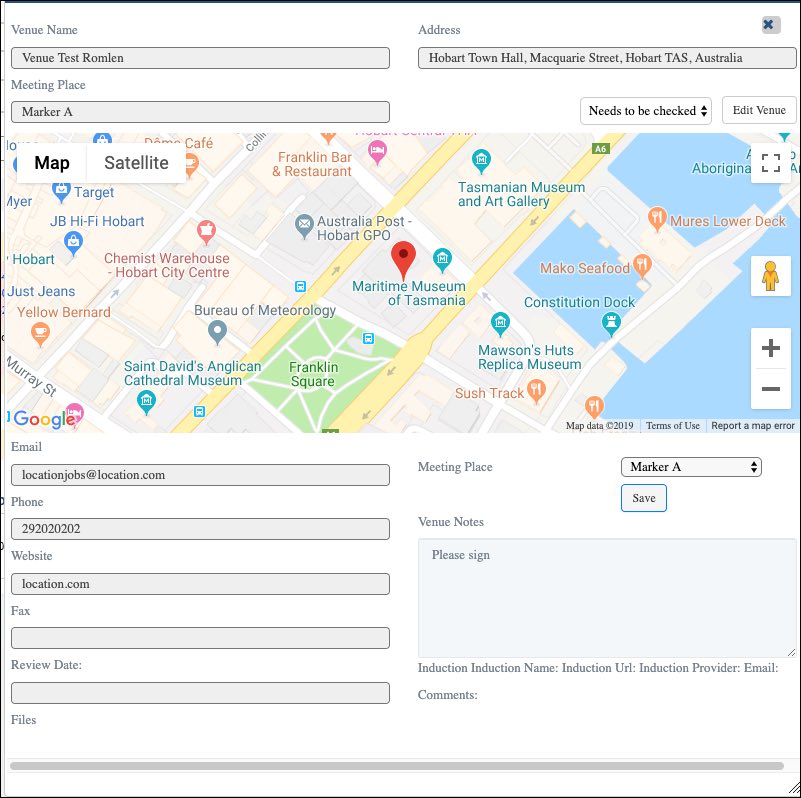
3. In the Venue Details page, you can now enter the information for your venue.
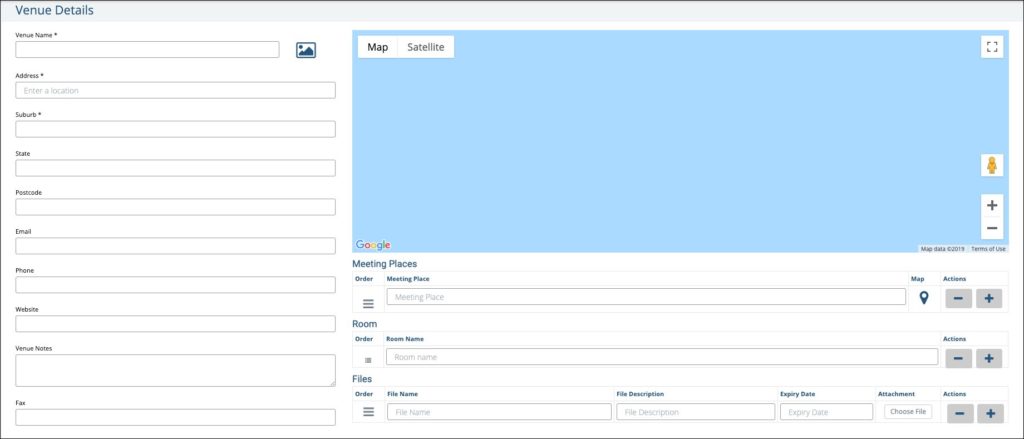
Note: All fields with asterisk are mandatory fields.
Venue Name: This is the reference name for your venue. You can enter any text on this field.
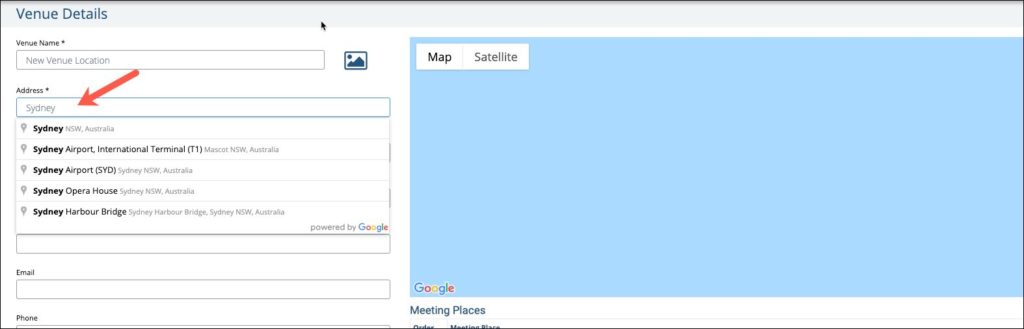
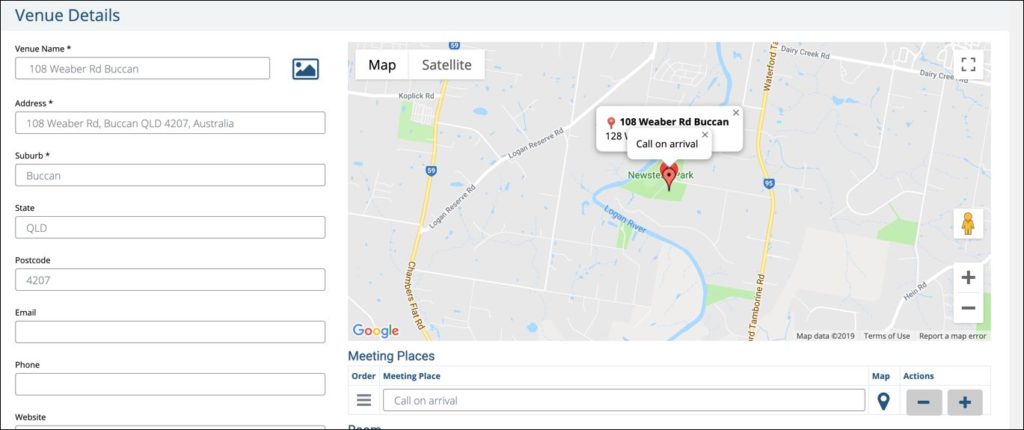
Address: Type the first three letters of the address on this field and Google Maps will suggest the location. Once the address has been found, click on the address and it will appear on the field and the map itself.
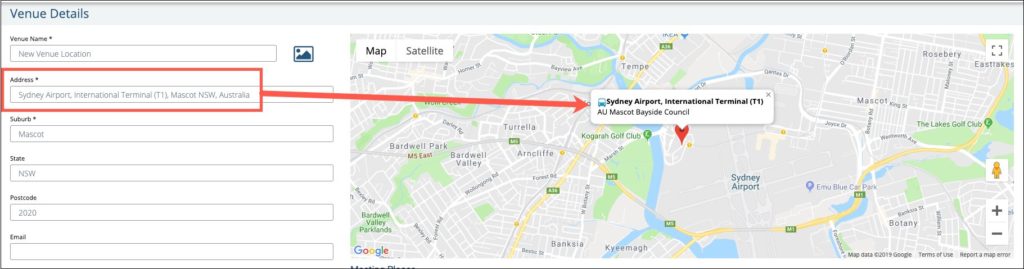
The following fields are also filled out automatically once location has been selected form the Address field.
Suburb
State
Postcode
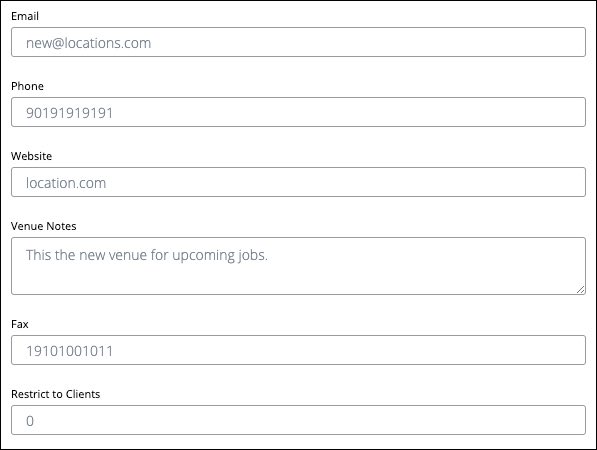
Enter the information for the following fields:
Phone
Website
Venue Notes
Fax
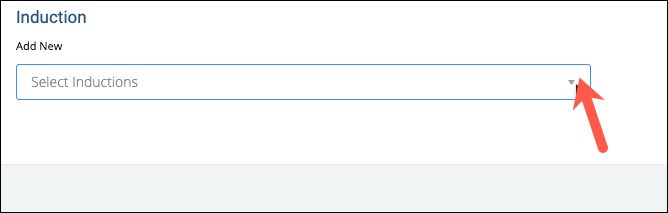
Select Inductions from the dropdown menu.
The details of the selected Induction will appear below the field

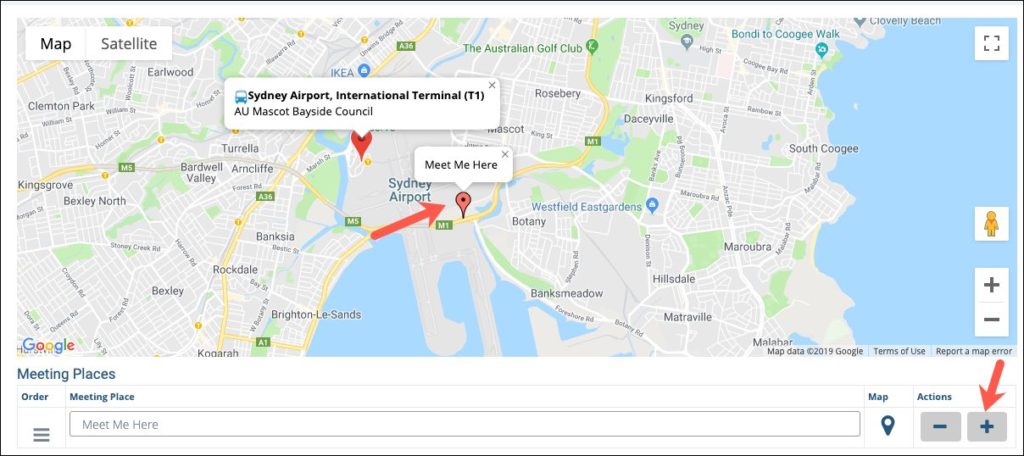
4. Add the name of the Meeting Place in the field, then click the pin icon.
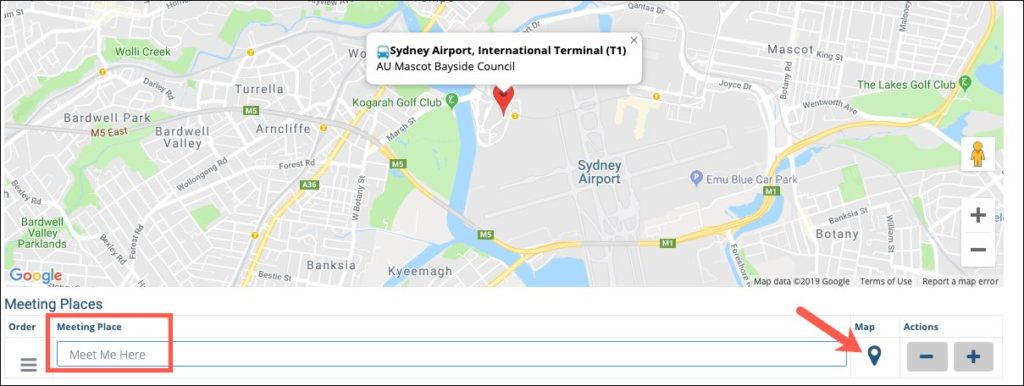
The pin of the Meeting Place will appear on the map. If you need to add more meeting place, click the plus icon.
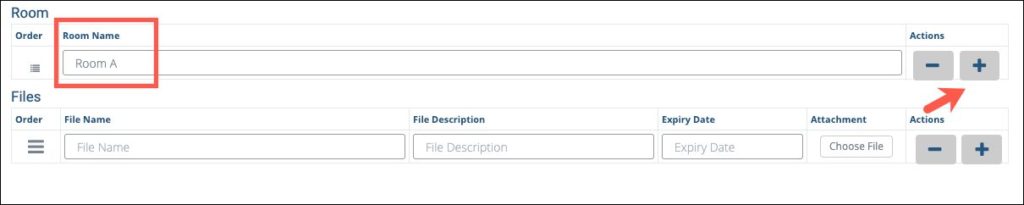
5. Add the name of the Room in the field, if applicable. If you need add more rooms, simply click the plus icon.
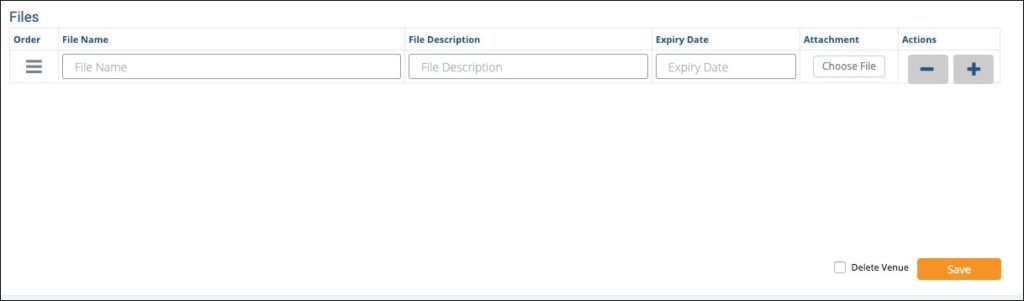
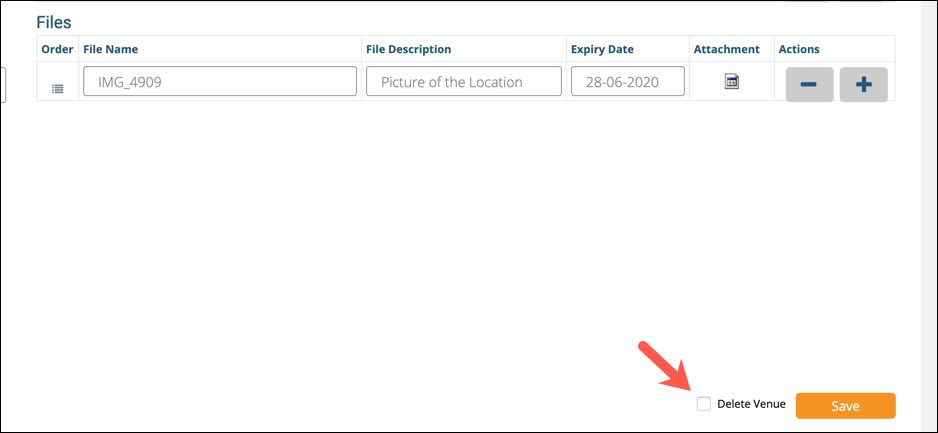
6. If there are files associated to the Venue, you can add it in this section. Enter the File Name, File Description and Expiry Date.
7. Click Save once you are done entering the details of the Venue.
8. The new Venue will be added on the list.
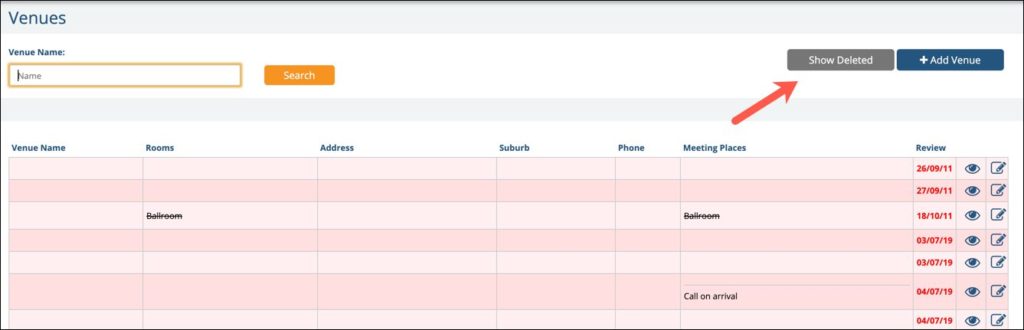
3.25.2 View Details of the Venue
To view the details of the Venue, just click the eye icon of the Venue that you want to view.
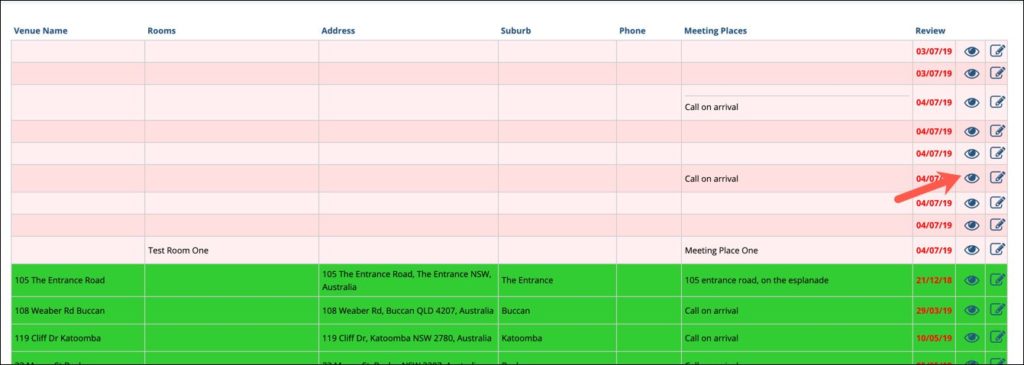
You will then be redirected to the Venue Details page.
3.25.3 Edit Details of the Venue
Similar with viewing the details of the Venue, you can edit the information of a Venue by clicking the pencil icon.
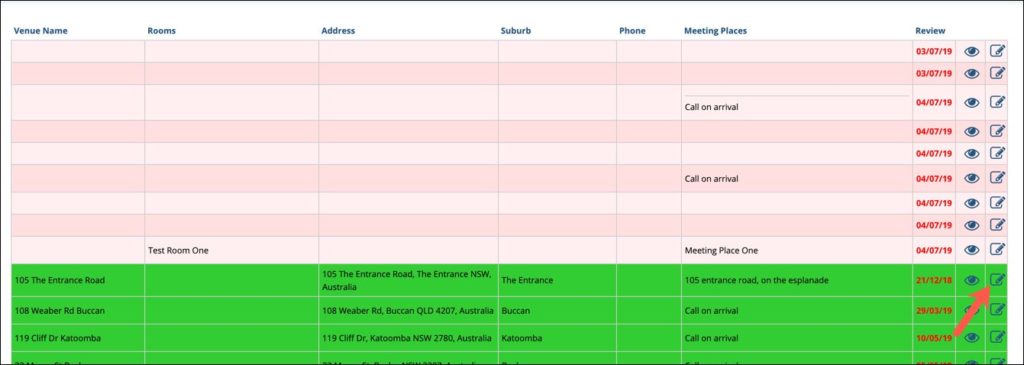
Then follow the steps outlined in 3.25.1 Adding New Venue to edit the details of the Venue.
3.25.4 Delete Venue
To delete a Venue, just tick the box of Delete Venue in the Venue Details page, the click Save.
3.25.5 Show Deleted Venue
In the list of Venues, click Show Deleted to display the list of deleted venues.
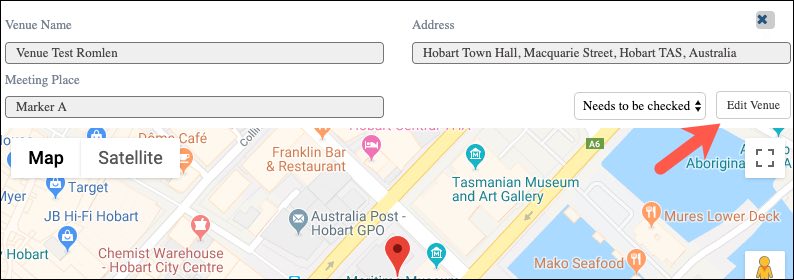
3.25.6 Venues Pop-up in Shifts Page
You can also access the Venues in the Shifts page by following these steps:
1. Navigate to the Shifts page of PM and click the Venue icon.

2. The Venue pop-up will appear.
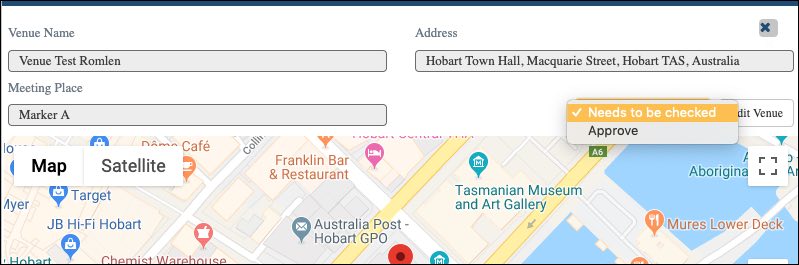
3. From this pop-up you can select if the Job Venue is approved or not.
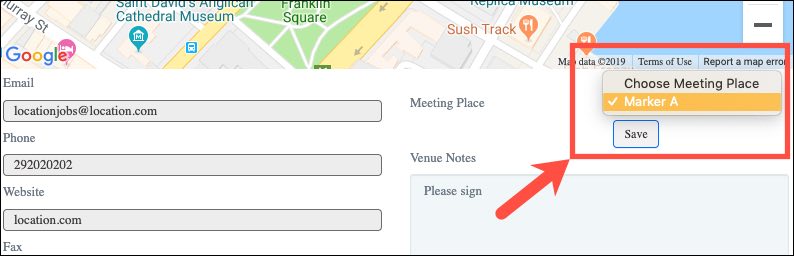
4. You can also update the Meeting Place for the shift.
5. If you want to edit the other details of the Venue, click Edit Venue and follow the steps outlined in 3.25.1 Adding New Venue