4.6 Settings
AUB > Global Settings A
Global Settings is found on the top right of the page named Settings
Global Settings is the Page where the entire configuration for your particular version of the database is held. In this way it is possible for many different users of the system to customise it to meet their unique needs.
Settings separated into tabs (General and Settings):

Sectioned by setting type and ordered alphabetically with jump to section links:


4.6.1 Administrator User Login Details
Admin user name and password can be edited here.
4.6.2 Duty Manager Login Details
Duty Manager User name and password can be edited here.
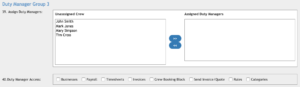
Admin has the ability to assign Duty Manager login access as 2 different groups in Global Settings, customize access is available for both Duty Manager Group 1 and Duty Manager Group 2, Please note that Duty Manager Group 1 has the access to Admin Lock/Unlock Shifts, Edit Clients – Client Notes – Associated Booking Persons – Associated Onsite Contacts -Edit Custom Clients Charge Rates.
Settings>Duty Manager select crew/s from Unassigned Crew section and move across to Assigned Duty Manager section, once crew/s is moved tick any access in Duty Manager Access to customize their Login access.
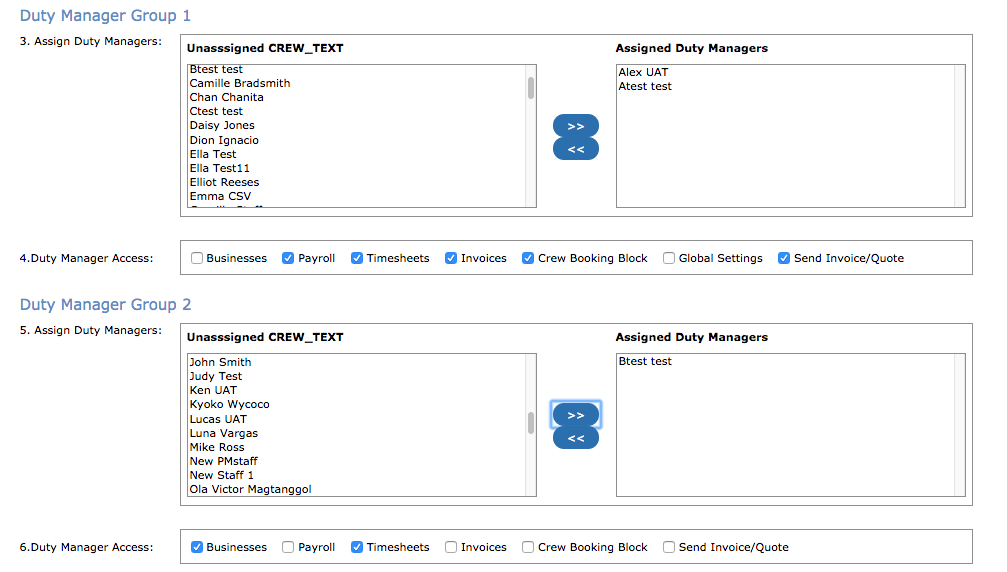
When Invoice is ticked for Duty Manager Group 1 means the Duty Manager Group 1 login has the access to Email Invoices/Quotes.
Tip: The particular crew/manager login will only access to the selected function from the Duty Manager Access list.
Once the crew is selected to have Duty Manager access their login details is the same as their Crew login. When Crew need to login as Duty manager, select “Duty Manager” user type on the Login page. When Crew need to access as a Crew member, crew need to logout and login again as ‘Crew’ user type.
When Admin made changes to the duty manager access, it displays in Shift History:

N 4.6.2.1 Duty Manager Group 1 Updated
AUB > Global Settings
Extra criteria added to make Duty Manager Group 1 more like the administrator user.
Note there are some functions such as Admin Locking Rank, changing Administrator username and password that are only available to Administrator user.

N 4.6.2.2 Duty Manager Group 3 Added
AUB > Global Settings
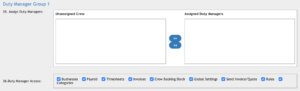
N 4.6.2.3 Ability to Hide Rules (Rates) and Categories from Duty Managers:
![]()
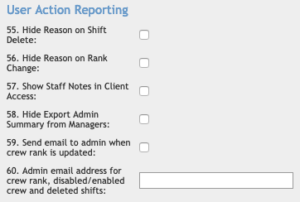
Admin Username and Password hidden from Duty Managers with Settings access
Hide Export Admin Summary from Managers
4.6.3 Company Details
Company details that will appear on the PM software, invoices, quotes and various places within the PM.
4.6.4 Accounts Details (for Invoices)
Payment Terms:X amount of days can be set for invoices which will appear as “Payment Terms: 7 days from date of invoice.”
Payment Grace Period: “X” Number of days after sent date before the interest is charged.
Percentage Interest: Interest rate can be set here (per annum).
Management Tax: There are 2 options for adding a Management Tax (or any extra charge) to Tax Invoices as either a percentage % or a flat amount. Tick the Checkbox to activate the Management Tax. Even if you do not select a Management tax amount in Global Settings, you can add the Management Tax (called whatever you like) on tax Invoices on an individual basis. When you open a Tax Invoice (Ops Home > [any Invoice number]) at the bottom right of the Invoice, just click the Apply Management Tax Checkbox (it will be whatever name you enter in Global Settings Page) and enter the amount % or flat rate to add to the Invoice.
For Example: If you wish to add a Credit Card Surcharge to your Tax Invoices, you could change the Management Tax Name to Credit Card Surcharge in Global Settings. Even if the Checkbox in Global Settings for management tax is not selected, when you open the Tax Invoice you can tick the Checkbox at the bottom right, enter the amount of the surcharge and Send Invoice.
Management Tax Name: Name of Management Tax can be assigned here, i.e: Credit Card Surcharge
Management Tax Amount: Enter the amount you wish to charge extra on all Tax Invoices. If you add a % after the amount, the amount charged will be a percentage. If you do not include the % then the amount charged will be a flat rate. Include a negative sign “-” before the amount and it will deduct this amount from the invoice.
Accounts Email Address: Email address for Accounts department
▪Bank Name: (Bank details)
▪Business Account Name: (Bank details)
▪Business Account Number: (Bank details)
▪BSB: (Bank details)
▪Bank Country Code: (Bank details)
Invoice Code: If desired a significant code can be given to appear in every single invoice.
For example: if your company name is “Lorem Ipsum Pty Ltd”, the code could be set as LIP, then all invoices would appear as LIP-12345, LIP-99999…
From Address: “From Email Address” for quotes and invoices.
Reply Address: “Reply Email Address” for quotes and invoices.
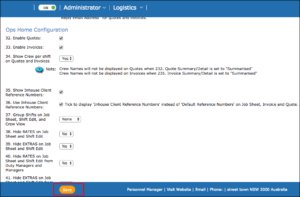
4.6.5 Ops Home Configuration
Enable Quotes: With this tick box, in “Ops Home” page quotes can be viewed or taken out.
Enable Invoices: With this tick box, in “Ops Home” page invoices can be viewed or taken out.
Show Crew names per shift on Invoice: Shows crew names on invoices sent to clients.
Show Inhouse Client Reference Numbers: Shows client numbers assigned by PM within PM.
Use Inhouse Client Reference Numbers: Tick to display ‘Inhouse Client Reference Numbers’ instead of ‘Default Reference Numbers’ on Job Sheets, Invoices and Quotes. Default Reference Numbers meaning Short names for clients (entered in Client Profile page) followed by automatically assigned job sheet/invoice number for each job sheet created. When unticked any number or name can be given to Job Sheets “manually”.
Group Shifts on Job Sheet, Shift Edit, and Crew View: Groups shifts on job sheet page view by date, activity, shift edit or none.
Hide RATES on Job Sheet and Shift Edit: Hides or shows all rates on job sheet or Shift edit pages. Rates can be hidden if this information is unnecessary to view each time in order to gain wider view to all shifts on the current page. (See “Rate / Paid / Charge” in Job Sheet Page for more info)
Hide EXTRAS on Job Sheet and Shift Edit: Hides or shows all Extras on job sheet or Shift edit pages. Extras can be hidden if this information is unnecessary to view each time in order to gain wider view to all shifts on the current page. (See “Add Extra” in Job Sheet Page for more info)
Enable RATE overrides on Job Sheet, Shift Edit, and Timesheets: Allows rates to be changed manually in job sheets/Shift Edit Page in order to override rates automatically assigned by Activity.
Show RATE NAME in Crew Timesheet area instead of PAID NAME: On crew page “Timesheets” page rates would be shown as “rate name” instead of “paid name”.
For example 2 hours of “Sun” rate instead of “2hrs Sun (0.5x A rate)”
Job sheet “Onsite Contact” Heading: Heading that appears on job sheets or crew pages which can be edited here i.e.: Client, crew chief…
Job sheet “Onsite Contact Number” Heading: Heading that appears on job sheets or crew pages which can be edited here i.e.: Client number, crew chief number…
Display Onsite Contact WITHOUT number: All onsite contacts can be viewed without phone numbers if desired.
Sort Job sheets on Homepage by: In “Ops Home” page job sheets can be sorted by wether client name or by earliest shifts’ start time.
Hide Pay and Charge columns on Job sheet from ADMIN: Pay and Charge details in job sheets can be hidden from user “ADMIN”.
Hide Pay and Charge columns on Job sheet from DUTY MANAGER: Pay and Charge details in job sheets can be hidden from user “DUTY MANAGER”.
Hide Pay and Charge columns on job sheet from MANAGER: Pay and Charge details in job sheets can be hidden from user “MANAGER”.
Logo: This is the area to upload company logo which appears on every page in PM.
4.6.6 Software Configuration
Group Shift Search Admin Summary by Client: Excel Export Admin Summary in Shifts Page > Select an Action in the drop down list regrouped by this option.
Enable Tasks: When enabled, a dropdown menu appears on each shift labelled “tasks”, which can be edited in “Tasks” page. Very useful and convenient feature for assigning different tasks for each shift. (See “Tasks Page” for more information)
In Crew login area, Tasks are: “Hidden” or “Visible”; some of the tasks may be for office staff or operators only; this option makes all tasks to be hidden to crew.
Enable Change of Business: Personnel Manager may be set to organise many different businesses (see Businesses). This option allows users to easily move shifts from one business to another, without having to create a similar one from scratch under a different business.
Default Business:
▪Active Business: When this option is selected, PM creates the new shifts under the currently selected business.
▪Job sheet Business: When this option is selected, PM creates the new shifts under the job sheet business that’s assigned already.
Crew Available across ALL Businesses: Tick to enable Crew to be available across all businesses.If not ticked, then the Crew will need to be assigned to businesses individually on crew their page.
Default Category: Every crew member should be assigned to a pay category (this is done in Crew Profile Page). Based on this selection in Global Settings page, PM will assign all crew to this default category, unless the crew member is assigned to one manually.
Crew can enter finish time and Lock shifts function: When enabled, all crew can lock off their shifts online by logging in to their crew page. This feature is recommended to be on, especially when working with large number of crew members, which would save a lot of office work.
Show [x] days of past shifts in the Crew login area: PM can be set up to allow the crew members to see their completed shifts in crew login page up to a certain amount of days in the past.
Crew can lock off shifts with a Start Time falling: “Before the current time”, “6-48 hrs in advance of current time” and “Any time” are the options for this feature, which allows crew to lock off their shifts “Any time”; “Before the current time”, which means shift start time must have passed to be able to lock, or 6-48 hours in advance of shift start time.
Crew can change start time function: For most businesses it is highly important and almost vital for a crew member to be present at work at a pre-scheduled start time. Nevertheless, allowing the crew members to lock their own times can be very helpful for relieving the office work load. But if not checked, some crew members may turn up late to work and still lock their shift at the scheduled time.
Using this feature in global settings, crew can still be allowed to lock off their times themselves but without being allowed to amend the start times of their shifts.
Individual Crew that can change shift times: Changing shift times can also be granted to certain crew in this area where all crew appears and be conveniently selected.
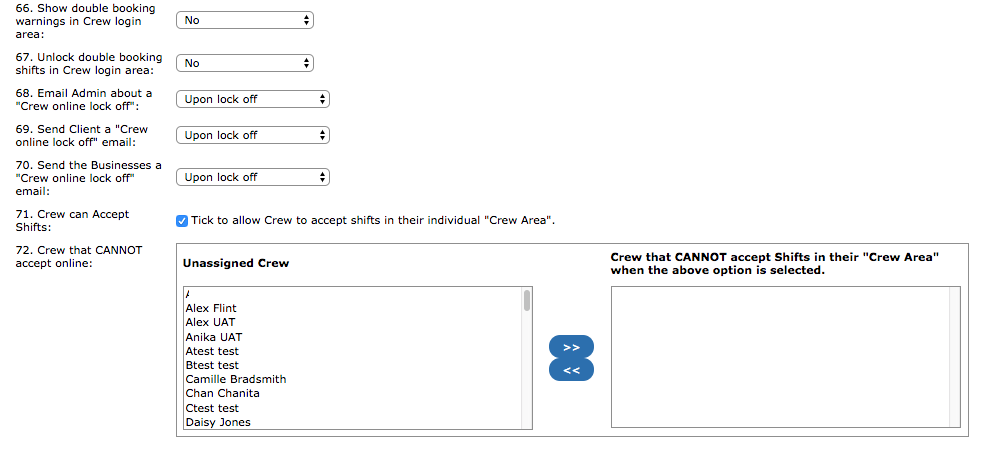
Show double booking warnings in Crew login area: Sometimes crew may be booked on two clashing shifts by choice and not by mistake. If it’s preferred that the crew is not to be bothered with a warning, this option can be turned off otherwise crew will see a double booking warning in crew login area.
Unlock double booking shifts in Crew login area: This option will give crew the freedom to unlock double bookings in crew login page.
Email Admin about a “Crew online lock off”: For convenience and faster payroll processing crew can be allowed to lock off their own times in crew login page as mentioned in “Crew can enter finish time and Lock shifts function”. This feature here can adjust PM to send an email to admin every time a shift is being locked off by crew. Choose;
Never: if you do not wish to receive any emails about online lock offs.
Upon Lock off: if you wish to receive an email as soon as any shift is locked off online by any crew.
Upon Start Time Change: if you wish to receive email ONLY when a start time is changed during lock off.
Upon Any Time Change: if you wish to receive email only when a time change is made before locking off.
Send Client a “Crew online lock off” email: Crew can be allowed to lock off their own times in crew login page as mentioned in “Crew can enter finish time and Lock shifts function”. PM can be set to send emails to admin as well as the clients, whom the crew has worked for. Choose:
Never: if you do NOT wish your clients to receive any emails about online lock offs.
Upon Lock off: if you wish your client to receive an email as soon as any shift is locked off online by the crew, who has worked for this client.
Upon Start Time Change: if you wish your client to receive email ONLY when a start time is changed during lock off.
Upon Any Time Change: if you wish your client to receive email only when a time change is made before locking off.
Send the Businesses a “Crew online lock off” email: If businesses need to be notified about crew online lock offs or not, choose:
Never: if you do NOT wish the corresponding business to receive any emails about online lock offs.
Upon Lock off: if you wish the corresponding business to receive an email as soon as any shift is locked off online by any crew.
Upon Start Time Change: if you wish the corresponding business to receive email ONLY when a start time is changed during lock off.
Upon Any Time Change: if you wish the corresponding business to receive email only when a time change is made before locking off.
Crew can Accept Shifts: Tick to allow Crew to accept shifts in their individual “Crew Area”
Crew that CANNOT accept online: All crew can be allowed to accept shifts online, which are already offered to them via SMS (see “Crew can Accept Shifts” for more information). Any crew member who is chosen not to be allowed to use this option can easily be selected from the crew list.
“Allow Crew to see other Crew” and “Crew that can see ALL Crew on the same jobs”: Some or all crew can be allowed to see their crew mates of upcoming or past jobs in their crew page area. When “Allow Crew to see other crew” is ticked, crew that are allowed to see details of all other Shifts on the same job sheet in their “Crew Area” can be selected individually from the list.
Allow Crew privacy: This option would allow Crew to hide their details from other Crew in “Crew Area”, should “Allow Crew to see other crew” is ticked.
Allow Crew unavailability: Not all crew can be available to work at all times, these unavailabilities can easily be entered by the crew into the system using their crew page so that these crew would not be sent to any shifts that’s clashing with their unavailability. Allowing crew to put in this information can be turned on or off using this option.
Allow Shift Email: “Email Shifts” allows you to contact staff with information about their Shifts by Email. If Allow Shift Email is selected in the Global Settings Page, then crew members will have the ability to select whether they wish to be offered shifts by SMS or email or both.
Please note that if Shifts are offered by Email, a link is provided in the body of the email for the Crew Member to log in to their Crew Support Page and Accept/Decline the offered Shift/s. In Global Settings, under SMS Configuration, the Email templates are editable so that all Email messages may be customised. The variable Fields are included as a tip below. You can copy and paste these Fields in the correct order to change the content of an Email (or SMS). Remember to save any changes by scrolling to the bottom of the Global Settings Page and pressing the Save Configuration button. You can restore the default settings of any Email or SMS at any time by pressing Back to Default under the relevant message.
Crew that have privacy: If any crew chooses not to share his/her details with other crew, which appears on the crew page under upcoming jobs, he/she can make a request to be put on this list.
Show Crew unavailability on graph: All shifts can be viewed in different formats such as list, calendar and graph. If you wish not to be bothered with crew unavailabilities, while looking at graph view, they can be turned off with this tick option.
Unavailable Graph Colour (Hexadecimal) and Leave Graph Colour (Hexadecimal): Colours of the Leave and unavailable blocks can be adjusted in this section.
Group graph by: Graphic view can also grouped by “Businesses” (set under PM) or “Crew Groups”.
Crew that can view ALL SHIFTS in graph: Some crew (usually high ranking crew) can be granted privileges to view all shifts, if their names are put in in this list.
Crew that can view ALL shifts with their name (not just the ‘C’ and ‘S’ shifts): In their Crew Support Page, Staff can normally see only confirmed shifts. With this option selected, Staff can see Shifts assigned (saved in the shift manually) to them even if not yet confirmed.
Crew can Update Personal Details: Tick to allow Crew to update their personal details in their individual “Crew Area”.
Crew can Upload Files: Tick to allow Crew to upload files in their individual “Crew Area”.
Crew can View Pay Details: Tick to allow Crew to view their pay details in their individual “Crew Area”.
Upload Notification Email Address: PM is set to notify admin users with an automated email, whenever crew make any change or upload files. Put your email address in this line, to which you would like PM to send notification emails.
Clients can view Crew Details: Tick to allow Clients to view Crew Names and Mobile Numbers.
Clients can view shifts: Tick to allow Clients to view shifts in their “Client Pages”
Clients that are allowed to enter time off in Shifts: These selected clients can manually enter the finish times of the crew, who has worked for them.
Clients can request a quote: When bookings are put in by clients using online booking form, they are able to request a quote for the booking that has been put in. Enable this feature to make the “Request a quote?” option available in all online booking forms.
Hide Crew first names from Clients: All clients who are granted an online profile can make bookings, view their existing bookings and see crew names and status. This option will hide or show crew names to whom they are booked for.
Clients can enter a PO number: This feature will give the clients another option in the online booking form to enter their own desired PO numbers, which would also appear in their invoices, in order to process invoices without hassles.
PO number text: This is an editable text for “PO number” line which appears in the online booking form. Depending on the type of industry, this line can be edited to say, for example “PO number”, “Name of event” or “Purchase Order”…
Automatically insert a [x] minute break every [x] hours for Shifts exceeding [x] hours in length. Extend time off to allow for breaks: This useful feature allows PM to enter breaks automatically for which parameters can be set here in global settings.
If admin break is not set, add a zero admin break and override the incoming Crew SMS breaks: If any job does not have any breaks while being created by users and is not meant to have any breaks regardless of what crew texts in, this feature can be ticked and enabled. If crew’s break times are acceptable, then leave this box unticked.
Crew Shift Buffer Warning: [X] (Minutes). This will show a warning on the Shifts Page if an individual Crew member’s shifts do not have more than the set number of minutes between them. Set to zero to disable.
SMS Shift Time Buffer: [X] (Minutes) The actual shift start time minus the set amount of minutes. For example if this time is set to 15 minutes, Crew will be told to turn up at 08:45 for a 09:00am shift.
Crew Car Pool Shift Overlap: [X] (Minutes) Allowing Crew to see other Crew starting or finishing within the allocated time frame. So that crew are able to arrange a lift with other crew who may be driving to the same location.
Crew Bonus Rate: [X] (Dollars). Set to zero (0) to disable. Must enter a bonus amount to activate feature. The rate can then be edited in Categories>Edit Rates. Crew Bonus Rate can be hidden or shown in Job Sheets/ Edit page. Crew Bonuses are added in Categories>Edit Rates>Bonus
Long Shifts: [X] (Hours) Over this amount of hours is considered a Long Shift. Set to zero (0) to disable.
Long Shift Break: [X] (Hours). A warning will be shown if the above number of hours is NOT given between an individual’s Long Shift and the next Shift.
Enable Webboard: Tick this feature to enable the “Webboard” to be displayed in Client Login. When this feature is selected a new page will appear in the Client Login titled View Webboard. This will show a version of the Shifts Page that is not able to be edited, listing all the shifts across all businesses. If the shift number (or client job no) on the left is clicked; only the shifts associated with that particular job sheet will be displayed. Businesses tend to use this feature when they use their Project Managers as Clients, rather than their actual clients, as it does display all the shifts for all Clients. (See “Client Login Page” for more info)
Codes: (SMS or Email texts for codes 1-4): Names for Codes 1-4 can be assigned here which will appear in SMS messages, which are sent to crew depending on job requirements. And the email text codes which can be edited such as “This is an outdoor job” rather than just an “O”.
Show Start Time on Calendar: Shows start times on Calendar View, which can be browsed through from the Shifts page.
Show End Time on Calendar: Shows end times on Calendar View, which can be browsed through from the Shifts page.
Show Crew Name on Calendar: Shows crew names on Calendar View, which can be browsed through from the Shifts page.
Show Crew Mobile on Calendar: Shows crew mobiles on Calendar View, which can be browsed through from the Shifts page.
Show Crew Shift Number on Calendar: Shows shift numbers on Calendar View, which can be browsed through from the Shifts page.
Show Unavailability Alerts: Unavailability alerts are shown on the shifts page when any crew is booked on a shift which is clashing with his/her unavailability.
View Calendar by Client/Site: Calendar view can be sorted and grouped by Client.
Show Job Description on Calendar: A description text can be entered on each job sheet on either Ops Home page or Job Sheet page, this feature will show that “description” on Calendar View.
Show Warning if Crew Member has completed more than [X] [hrs/shifts] in [X] [time]: If a warning needs to be triggered when any crew works more than certain amount of hours per period it can be entered here. For example “Show Warning if crew member has completed more than 40 hours in 1 week”.
Fields that are visible on spreadsheets: PM can export any shifts on shifts page to Excel (See Export to Excel). It is possible to configure exactly which fields from the shifts you would like to export into the Excel spreadsheet by using the table in the Global Settings Page. The unused fields stay in the left section of the table and the fields you wish to export go in the right section of the table. Click on the up and down arrows to arrange the order of the fields to be exported. Simply double click on the items in the table in the box on the left under Unused Fields to put them in the box on the right under Fields that are visible in Spreadsheets. Click on the up and down arrows to rearrange the order of the spreadsheet. The Fields from the top to bottom of this table will appear from the left to right of the spreadsheet.
Auto-Booking email cancellation warning: An example for the text box to appear in the online booking forms is: “BOOKING CONFIRMED. To cancel please email “ops@yourcompany.com” immediately.”
Client Booking Form Text: This is an editable body of text which appears in the bottom of any booking confirmation, that’s sent to clients when a booking is made using the online form.
Crew message title: This is an editable greeting title, which appears on first page of the Crew profile
Crew message: A body of message can be entered here, which will always appear on the first page of each Crew’s profile page.
After Hours Start Hour: Reminder SMS messages can be set to be sent to crew after hours before x amount of time of the start times. This setting would be the beginning of afterhours mark.
After Hours End Hour: Reminder SMS messages can be set to be sent to crew after hours before x amount of time of the start times. This setting would be the end of afterhours mark.
Alternate text for ‘Crew’: The word Crew can be replaced with any other preferred word all across the PM using this line.
Alternate text for ‘Client’: The word Client can be replaced with any other preferred word all across the PM using this line.
Alternate text for ‘Shift’: The word Shift can be replaced with any other preferred word all across the PM using this line.
Graph Colour Grouping: As explained in “View shifts as Graph”, all shifts can be viewed by working crew in certain period of time in a graphic view. This feature allows the users to see the shifts coloured by activities or job sheets.
Calendar View Number of Weeks: This feature allows you to switch the Calendar View to display the current week or the current week and the following week, In effect you can view the Calendar as one week or two weeks depending upon your selection in Global Settings.
Allow Shift Map Checking: For those businesses who send their crew to different locations/addresses for work, may like to use the map options on PM. This feature allows the Duty Managers to drop a pin on a building, street or location to set it as a meeting point (which can be saved or edited under “venues” link on top of every page). And when crew log in to their profile page to view their upcoming jobs, they can see a satellite picture of the meeting point of each job. For crew to see the maps, first it needs to be approved by PM user. Click “yes” to turn on map checking here, so they appear on Crew App, Calendar and Crew profile page (See “Venues / Allow Shift Map Checking” for more info).
Allow Shift and Job Sheet Note Checking: When job sheets are created, there may be some notes to be entered in, which are vital for the job. If these notes must be checked (by clicking a check box), then select “yes” option, that way unchecked notes will appear in red, and checked notes will appear in green. If “no” is selected, then there would be no colour indication in the background of the “notes” icon.
Show Scheduled times in excel export: When selected, this option will allow the excel export feature to show all exported shifts’ scheduled times.
Admin will confirm Crew Unavailability: Unavailability of crew can be overseen and approved or disapproved utilizing this feature. If “No” is selected, then crew’s unavailability requests get approved immediately by PM. If “Yes” is selected, all unavailability requests should be approved by office staff/operators before they can be put in place.
Order by rank in “Job SMS” area: All crew are saved in the system with a ranking number. Considering this fact, PM users can keep the crew in a ranking order in “job sending page”, or only in alphabetical order starting with their first name.
Order by rank in “Message” area: All crew are saved in the system with a ranking number. Considering this fact, PM users can keep the crew in a ranking order in “send SMS page”, or only in alphabetical order starting with their first name.
Obey Crew Groups functionality: Splits into Crew Groups rather than Businesses in “View Shifts as Graph” view and drop down crew lists on Edit Page. If clicked “yes” then only names of crew which are associated with each client on “Crew Groups” will appear on Job Sheet / Edit Page when sending out “shift offer” messages. Option “no” will show all crew but still highlight the crew names (in blue) that are associated with corresponding client on Job Sheet / Edit Page. (For more info see “Crew Groups”)
Remove Crew – Client Association violations from Crew name lists: Option “yes” removes staff completely from crew lists who are made Incompatible with certain clients. Option “No” shows the names still but flags them as unavailable (For more information see “Incompatible Client – Crew”).
Show Job Number in top right Job Sheet corner: Shows job number in top right corner of job sheet page.
Order Payroll by: All crew in payroll page can be organised by their first name first or last name first.
Display and Export Payroll according to: Either exports according to Shift Date or Payroll Approval in Timesheets.
4.6.7 Client additional information fields
AUB > Global Settings > Client Additional Information Fields A
CNB > Client > Edit Record (Pencil Icon) A / DM / M
Some clients may have specific requirements that are outside of your company’s standard operating procedures, if that’s the case and you would like PM to warn you about each time this client makes a booking, you can use this feature on Global Settings page as seen below. This feature enables you to customize the Client Details Page by adding Fields of your own choosing in the Global Settings Page.
Fields can be added as a Text Box, a Text Area Box, Check Box or Drop Down Box. When entering Drop Down Boxes, separate the options with a ( | ). Warnings can also be selected here to display on the Shifts Page.
Once these fields are created, they will appear on each client’s profile page, which can be switched on or off by ticking boxes. Drop down menus can also be created to show more in-depth information about client’s requirements.
Example: You could create a new Field called Dress Blacks to set a warning (reminder) on the Shifts Page that all Crew Members booked to work for this Client must wear Dress Blacks.

4.6.8 Crew additional information fields
AUB > Global Settings > Crew Additional Information Fields A
CNB > Crew > View Record (Eyeball Icon) > Edit Crew Details (Pencil Icon) A / DM / M
This feature enables you to customize the Crew Members Details Page by adding Fields of your own choosing in the Global Settings Page.

Fields can be added as a Text Box, a Text Area Box, Check Box or Drop Down Box. When entering Drop Down Boxes, separate the options with a “|”. Warnings can be selected here to display on the Shifts Page.
For example if your crew needs to be issued a company uniform and a hand drill, you can create these fields on the Global Settings page; which would appear on each crew’s profile page as tick boxes or drop down menus. As crew receive their uniforms and tools, these boxes can be ticked to indicate that these tasks are complete. Moreover, for an efficient follow-up, any unticked requirement would appear as a warning on shifts page if the crew is booked on any upcoming jobs.
To add click on Add Field then fill in the Caption, Type, Default. Extra and tick Display on Reports.
Note: For Checkbox Type: Default can be put 0 or 1, Extra can be put in any description text; Mark as Required to show warning message when not complete; For Dropdown Type: please put the options separated by “|” in Extra field.
Once a new field is added, Crew Details Page – crew Additional Information selection becomes available. Please see Crew Details Page more details:


Tip: It is recommended to check the selection in Crew Detail Page to ensure the new field is added and in the right selection.
When ‘Show Warnings for required field is available to Edit/Add/Select/Delete’ Tick box is selected those fields are available in 3 exports:
▪Shifts Page>Select an Action>Export to Excel
▪Shifts Page>Select an Action>Export Summary (Admin)
▪Timesheets Page>Export All Records
Crew Details Page
When an ‘End Date’ is entered and it is before today’s date you will receive a notification at the top of the individuals Crew Page.
Shifts Page
When you book a crew member onto a shift and:
▪they have an additional field that is set as ‘Required’ in Global Settings
▪the ‘Required’ field on their Crew Page has an end date prior to the end date of the Shift you will receive a notification at the top of the Shift Page when the shift is saved.
For example, if the crew member Dean Lewis has the Additional Information values set as per the above Crew Details Page, his ‘Induction’ has expired and therefore you will be warned of this when the following shift is created.
4.6.9 Online Shift Acceptance Configuration
Rank Required: PM allows certain crew/employees to log in and confirm themselves on shifts that are available to them. This feature can be granted to only a group of crew based on their rankings. For example; if this option is set at 3, only crew with rankings of 1, 2 and 3 will have access to online shift acceptance feature.
Accept Interval: When jobs are sent to crew to accept, this number of minutes will let PM to check highest ranking member after first acceptance. (0 for “first in first served”) alternatively putting a “0” on this line will disable this feature and start confirming crew as they send acceptance messages.
Show Shifts when unavailable: On crew page crew are allowed to respond to shift offers and accept or deny them. This option allows crew to see offered shifts even if they set an unavailability within that period.
4.6.10 SMS Configuration
Send next day Shift Reminder SMS: All crew who are booked on shifts on each day receives a reminder text message the day before at 1600 EST, which can be turned on or off here. See “SMS Crew Reminder (16:00)” below.
Crew that receive SMS reminders: “Day before reminder SMS”s can be customised not to send to certain crew if needed.
Send After Hours Reminder SMS: Another kind of SMS reminder can be sent to all crew right before their shift start time between 22:00 and 09:00. This option toggles on/off After Hours reminder SMS.
Send After Hours SMS – Minutes: [x] minutes. Crew who are booked on shifts that are starting between 22:00 and 09:00 will receive a reminder SMS message this amount of minutes before the start time.
Crew that receive After Hours SMS: After Hours reminder SMS’s can be customised not to send to certain crew if needed.
Automatically Add Used SMS to Clients Invoices: This tick box, if checked, adds costs of SMS messages to be sent to crew in order to fill the shifts within that job sheet.
For example, if 10 SMS messages are sent to confirm 2 crew, cost of 10 SMS’s will automatically be added to the invoice belong to that job sheet.
Charge per SMS: Cost of each SMS to be added to invoices is set here if “Automatically Add Used SMS to Clients Invoices” box is ticked.
Email / SMS Message Configuration: All SMS messages sent to crew can also be sent as an email. In this section, all SMS and email messages that are sent to crew regarding jobs can be edited (offers, cancellations, time changes, reminders, etc…). You can restore the default settings of any Email or SMS at any time by pressing “Back to Default” under the relevant message.
SMS Request Message: A simple “can you do…” message sent to crew. For single shifts.
SMS Request Message (2 connected shifts): SMS sent to crew when 2 shifts are connected. i.e.: “Can you work on Saturday 12:00 – 15:00 and Sunday 08:00 – 12:00?…”
SMS Request Message (more than 2 connected shifts): SMS sent to crew when more than 2 shifts are connected.
SMS Notify Crew of Change Message: A new message sent to already confirmed crew informing that times/dates have been changed. i.e.: “You were booked on this, now it has been changed to this. Do you accept?”
SMS Cancellation Message: Notifies crew who are booked on a particular job that has now been cancelled.
SMS Confirm Message: Confirmation message sent to crew confirming them on shifts, with details of the job.
SMS Confirmation: Tick to NOT send SMS confirmation messages. When accepted by crew, shifts get confirmed but a “Confirmation message” will not be sent.
SMS Multi Confirm Message: SMS sent when crew accepts one message which contains multiple shifts.
SMS Decline Message: Informs crew who said “yes” to SMS request message but it has been filled by other crew already.
SMS Crew Reminder (16:00): The message that is sent to all crew at 16:00 the day before their start time.
SMS Onsite Contact Reminder (16:00): The message that is sent to all onsite contacts at 16:00 the day before their start time.
SMS Crew Reminder (After Hours): Afterhours reminder message can be edited here.
SMS Onsite Contact Reminder (After Hours): Afterhours reminder messages that are sent to onsite contacts can be edited here.
Email Request Message: A simple “can you do…” message sent to crew in email format. For single shifts.
Email Request Message (2 connected shifts): Email sent to crew when 2 shifts are connected i.e.: “Can you work on Saturday 12:00 – 15:00 and Sunday 08:00 – 12:00?”
Email Request Message (more than 2 connected shifts): Email sent to crew when more than 2 shifts are connected.
Email Notify Crew of Change Message: A new message sent to already confirmed crew informing that times/dates have been changed. “You were booked on this, now it has been changed to this. Do you accept?”
Email Cancellation Message: Notifies crew who is booked on a particular job that it has now been cancelled.
Email Confirm Message: Confirmation message sent to crew confirming them on shifts, with details of the job.
Email Decline Message: Informs crew who said “yes” to SMS/Email request message but it has been filled by other crew already.
Email Crew Reminder (16:00): The message that is sent to all crew at 16:00 the day before their start time.
Email Onsite Contact Reminder (16:00): The message that is sent to all onsite contacts at 16:00 the day before their start time.
Email Crew Reminder (After Hours): After hours reminder email message can be edited here.
Email Onsite Contact Reminder (After Hours): After hours reminder messages that are sent to onsite contacts can be edited here.
4.6.11 SMS Incoming Configuration
Incoming SMS to Web Number: Mobile number that’s dedicated to use with PM when sending and receiving SMS messages. It is possible to have an Incoming SMS number assigned to your version of the Personnel Manager Labour Management Software (extra cost/optional). Messages can be sent directly to the system for the purposes of accepting/declining shifts; entering hours worked ‘locking off shifts’ or just sending an SMS message to the admin department.
Incoming SMS IP Address: IP address that’s dedicated to receive incoming SMS’s.
Incoming SMS Lock Off: tick box that allows crew to lock off their shifts with an SMS. (See “Lock Shifts” under “Shift Page” or “Job Sheet Page” and “Select an Action Drop Down List” for more info)
Incoming SMS Lock Off Within: [X] Lock Off Incoming SMS. Within this many minutes of the end of the shift before labelling them as “Late”.
SMS Cut-Off Time: [X] minutes. The shift will be marked ‘T’ (timeout) after this amount of time. Any acceptance messages that come after that will not be processed.
4.4.12 Footer Configuration
Footer Email Address: Email address that appears in footers of PM web pages.
Footer Website Address: Web site address that appears in footers of PM web pages.
4.6.13 Terms and Conditions:
Client Terms, Crew Terms, Manager Terms, Admin Terms and Duty Manager can be edited here.
These are the terms that corresponding user must tick the box to accept them each time before logging into PM.
4.6.14 Client Booking Settings (Online Client Login Page)
Primary and Secondary Booking Skill: Default activities that appear on the Client Online Booking page.
Clients to have Booking Edit/Delete permissions: Some (or all) clients can be assigned to edit their bookings. This option will allow the selected clients to see full crew list and copy/repeat shifts send SMS’s to crew. This option can be used if PM is set as an internal rostering system and “clients” are set up as supervisors / managers within the company rather than actual clients.
Clients to be able to view Payroll: Some (or all) clients can be assigned to view Payroll details. This option can be used if PM is set as an internal rostering system and “clients” are set up as supervisors / managers within the company rather than actual clients.
4.6.15 Minimum Call Hours
Personnel Manager also allows you to set a default minimum call hour on Global Settings page for any activity unless the activity’s minimum call is specified otherwise under “activities”. (To set minimum call hours for each activity please refer to “Activities”)
Furthermore minimum call hours can be adjusted based on which day of the week the call is on.
For example minimum call hour can be set to 4 hours on the weekends, and 3 hours on weekdays.
4.6.16 Email Message
All email messages which are created through Personnel Manager for various purposes can be edited and saved as a draft in global settings page.
i.e.: Invoice Message, Statement Message, Email footer, PDF Invoice text.
4.6.17 Time Sheet Configuration
Other information on the time sheets can be edited on Global Settings page, including the column widths. (See “Timesheet” under “AUB” for more info).
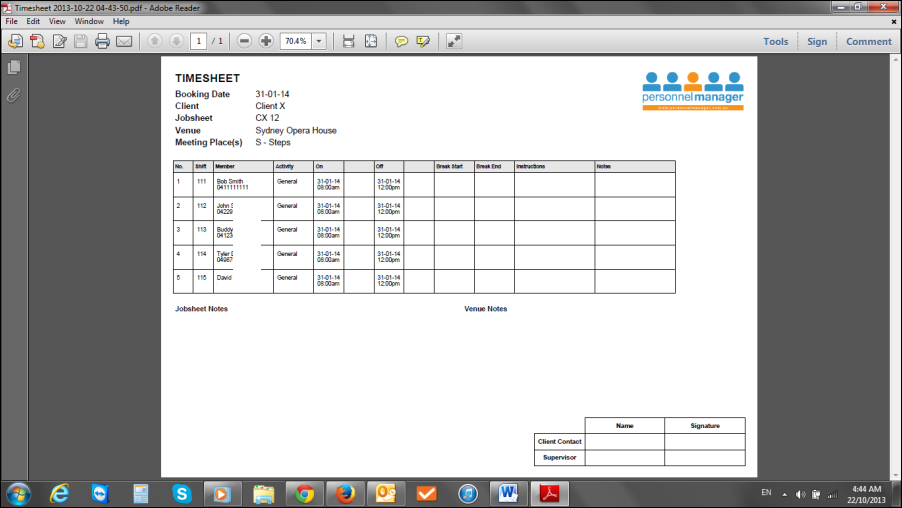
Output timesheet in this format: Output of the time sheet page can be set as “portrait” or “landscape” for desired view options.
Show “Onsite Contact” in header area: Onsite contact name can be set to appear on time sheets.
Show “Onsite Contact” number in header area: Onsite contact number can be set to appear on time sheets.
Group timesheet by: Crew on time sheets can be grouped by either “time” or “activity” for easier view.
Timesheet header area Warning and Timesheet header area Warning line 2: A default message which will go on top of each time sheet as the header can be entered in this line.
Timesheet footer: A default message which will go on the footer of each time sheet can be entered on this line.
4.6.18 Pay Period Configuration
Pay Period: In this feature pay period can be adjusted weekly, fortnightly or monthly which will affect ops home and payroll pages.
4.6.19 Day Rate, Holidays, and Overtime Configuration
Default Holiday Skill for working out Crew pay: Crew rates on Public Holidays can easily be adjusted with this feature by selecting a default skill for it.
Enable the Day Rates: Day rates can be enabled or disabled with this selection. If disabled all rates will appear as flat rate.
Does Paid Leave count towards overtime calculations: Paid Leave can be calculated towards overtime or not, depending on this setting given overtime calculations have been set up in the Rates Page.
Example:
▪Company A allows Paid Leave to be calculated towards overtime calculations and has overtime of ‘time and a half’ set after 40 hours in a Pay Week in the Rates Page. If a Staff Member is accorded 50 hours Paid Leave per week, then Staff will receive the first 40 at normal rate and 10 hours at time and a half.
▪Company B does not allow Paid Leave to be calculated towards overtime calculations and has overtime of ‘time and a half’ set after 40 hours in a Pay Week in the Rates Page. If a Staff Member is accorded 50 hours Paid Leave per week, they will receive all 50 hours at normal rate.
Each Day of Paid Leave counts this amount towards the overtime calculation: Day Rates of Paid Leave can count towards overtime calculation or not depending on this setting given overtime calculations have been set up in the Rates Page.
Example:
▪Company A allows Each Day of Paid Leave to count towards the overtime calculation and has overtime of ‘time and a half’ set after 5 Days in a Pay Week in the Rates Page. If a Staff Member is accorded 6 Days Paid Leave per week, they will receive the 5 Days at ‘normal rate’ and the 6th Day at ‘time and a half’.
▪Company B does not allow Each Day of Paid Leave to count towards the overtime calculation and has overtime of ‘time and a half’ set after 5 Days in a Pay Week in the Rates Page. If a Staff Member is accorded 6 Days Paid Leave per week, they will receive all 6 Days at ‘normal rate’.
Remove breaks from overtime calculations: If selected, desired breaks can be removed from overtime calculations.
Show Overtime hours count in Time Sheet: If Selected, Payroll Timesheets will display the amount of overtime hours as well as hours worked in the system.
Overtime hours are referred to as: What overtime hours are called in job sheets, invoices and quotes.
Zero Crew breaks on Day Rates: This feature will remove automatically added breaks from Day Rates. Breaks will still appear in Shifts with hourly rates.
4.6.20 Other Configuration
In Global Setting, Other configuration is available to use for Clients
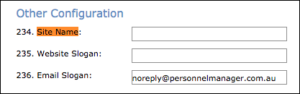
Site Name: Name of the company to which current PM version is dedicated.
Website Slogan: A brief catchy slogan for your company.
Email Slogan: The slogan that goes out on every email.
Important Note: In Global Setting Page “Site Name” punctuation is NOT to be use, as this will case error for crews to receive emails.
FAQs: Why I am not receiving emails after Locked-off shift? Even when I setup different emails for Crew Online Lock Off email alerts.
Please check the flowing:
▪Send the Businesses a “Crew online lock off” email is selected the correct option.
▪“Crew that CANNOT accept online” the Crew Name is not in section “Crew that CANNOT accept Shifts in their “Crew Area””
▪“Site Name” punctuation is not used.
Make sure to Save Configuration before exit.
4.6.21 Custom Quote Template Settings
NOTE: Ensure “Set Customized Template as Default Option” is ticked for any of the below settings to be applied. If not ticked, PM will generate quotes using default settings.
Quote Template offer the ability to create your own quote template that includes a custom logo, default text before and after the quote section, custom footer, whether the quote prints in summary or detail form and whether the quote prints in Landscape or Portrait format. It is also possible to define whether all quotes use the standard or customised template by default.
The following configuration items are available via the ‘Global Settings’ page under the ‘Quote Template Settings’ Heading.
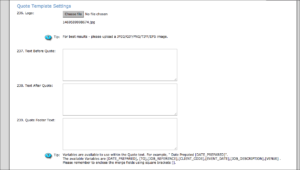
Logo: A logo that will appear on all quotes.
Click on the “Choose File” to select file from computer to upload template.
TIP: JPEG/GIF/PNG/TIFF/EPS formats are the recommended template format to upload.

▪Text Before Quote:
Any text that will appear before the quotation. “Text Before Quote” text box allows you to define the text you wish to display before the quote section.
▪Text After Quote:
Any text that will appear after the quotation. “Text after Quote” text box allows you to define the text you wish to display after the quote section.
▪Quote Footer Text:
Any desired Quote footer text can be entered here.
For example: ‘Date Prepared’
[DATE_PREPARED]”.The available Variables are [DATE_PREPARED], [TO], [JOB_REFERENCE], [CLIENT_CODE], [EVENT_DATE], [JOB_DESCRIPTION], [VENUE]
TIP:Variables are available to use within the Quote text. For example, ” Date Prepated [DATE_PREPARED]”.
The available Variables are [DATE_PREPARED], [TO],[JOB_REFERENCE],[CLIENT_CODE],[EVENT_DATE],[JOB_DESCRIPTION],[VENUE] . Please remember to enclose the merge fields using square brackets [].
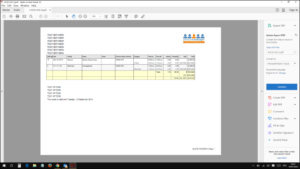
▪Quote Summary / Detail:
The information within the body of the quote can be displayed in summary or detail.
Summary will consolidate identical lines ie: where all information (except staff name) is the same on two or more lines, this information can be combined onto a single line.
This is drop-down box, To select click on the drop-down selection of “Summarised” and “Detailed”. When “Summarised” is selected shifts with multiple crew are shown in one line as seen in the screen shot above. If “Detailed” is selected all individual shifts are shown in the quote as one line. So if a quote has 10x general staff doing the same job quote would have 10 lines, (1 for each staff booked).
Note: The Crew name column will not be displayed on ‘Summarised’ Quotes even when ‘32. Show Crew names per shift on Quotes and Invoices’ is set to ‘Yes’
▪Set Customised Template as Default Option:
When ticked all preferences above (Quote Template Settings) becomes default settings for all Quotes. There is a tick-box to tick and confirm the ‘Set Customized Template as Default Option’ and all quotes will use the Customized Template.
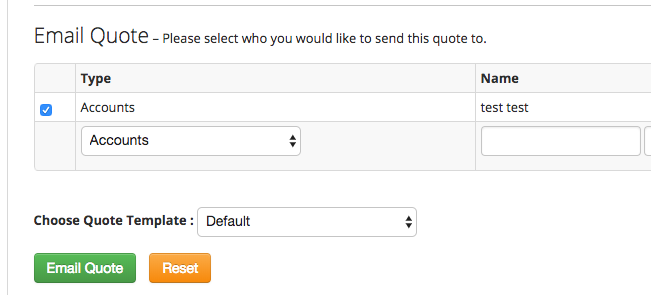
Once Customised Template is set in Global Settings, there is a drop-down box ‘Choose Quote Template’ on the Quote Page that allows you to override the default template for individual quotes.
To override the default template for individual quotes, click on the selection ‘Choose Quote Template’ dropdown list to select either the Default (standard) Quote Template, or use your customized template then Email Quote.
Quote Page – Choose Quote Template Selection:
▪Quote Page Layout
When a quote is set as ‘Customized’, you can change the layout to print in either Landscape or Portrait. To set select ‘Landscape’ / ‘Portrait’ from the drop-down list
4.6.22 Save button on Settings Page
For easy access to the Save button on Settings Page you will now find the new yellow Save button on the left side of the Blue Footer Content, there is no need to scroll down to the end of the page to click Save.
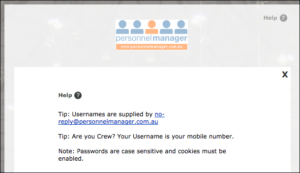
4.6.23 Default Help Text
In Settings page, there is a Help Text section created for the Help popup message on Login Page and Admin has the ability to customize the text within the text box.
The text is defaulted to below:
▪Tip: Usernames are supplied by [EMAIL]
▪Tip: Are you Crew? Your Username is your mobile number.
▪Note: Passwords are case sensitive and cookies must be enabled.

Please note that any text within the Help Text Box will be displayed when your crewmember click on the Help Icon on the login Page.
4.6.24 Expiry Reminder Emails
Admin has the ability to set up reminders emails before any Crew Additional Information Fields expires.
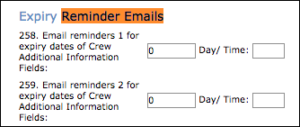
On the bottom of the Settings Page there are Email reminder 1 and 2 section for those who wish to set up the reminders, this reminder will be helpful for important documents like Visa, working with Children, RSA etc.
Client Warning
Client Additional Information Warning:
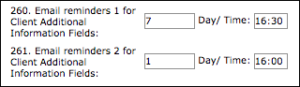
Expiry Reminder Emails section there are Email reminder 1 and 2 section for those who wish to set up the reminders emails for Client Additional Information warnings. If there is any warning added in Client Additional Information Fields, this reminder warning email to Admin will be helpful for important warnings.
Note: PM uses 24-hour clock system, 00:00 time format required in order to Save the settings.
N 4.6.25 Send email to admin when crew rank is updated & Send email to admin when a shift is deleted (Hide to Disable)
User has the ability to send email to Admin when crew rank is updated and shift is deleted by entering the email address of the Admin.
4.6.26 Exceed Hours Warning
Exceed Hours Warning/Blocks when crew exceeded Xhours per week or their total confirmed hours since crew started working with SHS.
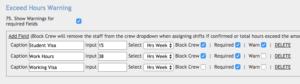

Step 1:
General Settings Exceed Hours Warning
Example Student Visa the work hour limit is 20hours per week, we have set it as 15hours limit to allow 5hours buffer in case some shift running over time etc.
Block: When this checkbox is ticked it will remove the crew on the crew list for that week as soon as the crew has reached the hour limit.
Warn: When this checkbox is ticked there will be warnings appear on the shifts page, jobsheet page, as well as email warnings as soon as crew exceeded the hour limit, as well as reminder email at 16:00 each date.
Apply to All: When is ticked means the setting wwill apply to all crew system wide, such as 2000hour total limit, it will apply to all crews in the system and if a crew member exceeded the 2000hour there is an Email warning.
![]()
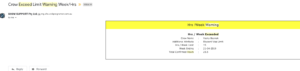
Step 2:
Crew Profile page, under the Crew Status you will find the Exceed Hours Warning section with the options that was set from the settings.
If crew is on student visa, please tick the Student Visa, give it a description such as their visa number and upload related document.

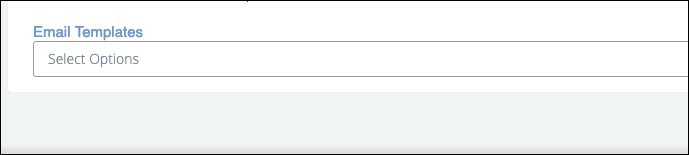
4.6.27 Email Templates
PM provides users with email templates that can be readily used. These templates are customisable to fit the needs and requirements of the user. Additionally, the email templates has variable fields that the user can use inside the content of the email.
Accessing the Email Templates Settings
1. Under the General Settings, click Email Templates.
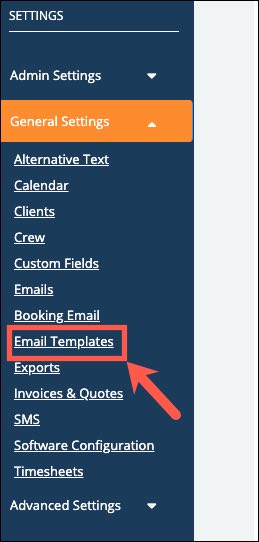
2. The window on the right side will point you the settings of Email Templates.
Create New Email Templates
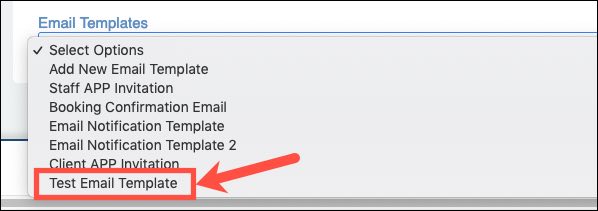
1. In the dropdown menu of Email Templates, select Add New Email Template.
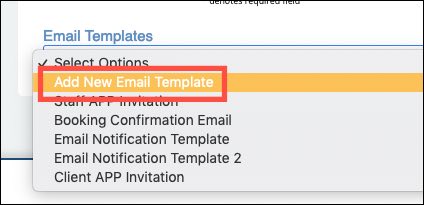
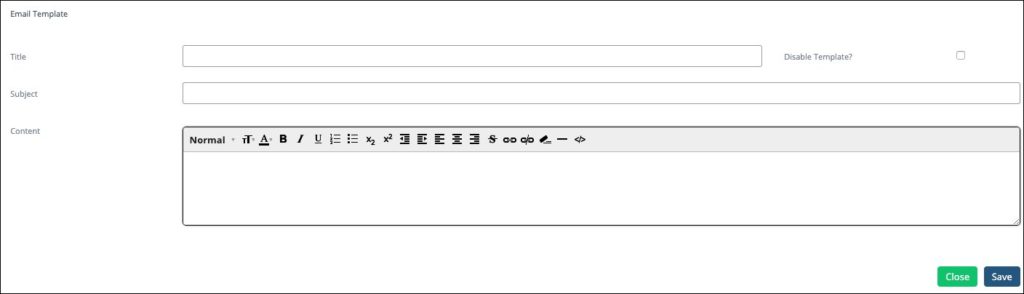
2. The Email Template window will appear where you enter the details of the template.
Title: Enter the title of the template
Subject: Enter the subject of the template. The subject will also be the same subject that will appear on the recipient’s email.
Content: Using the editor tools, you can now write the content of the email template here.
Disable Template: When the box is ticket, the template is deactivated.
3. Once you are finished entering information in the Email Template, click Save.
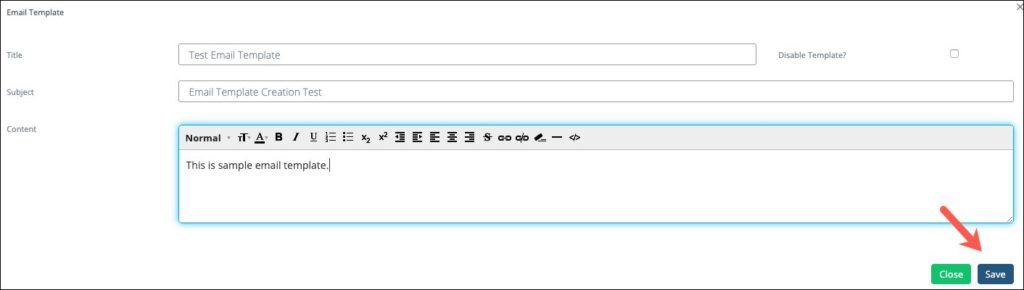
4. A success message will appear on the window.
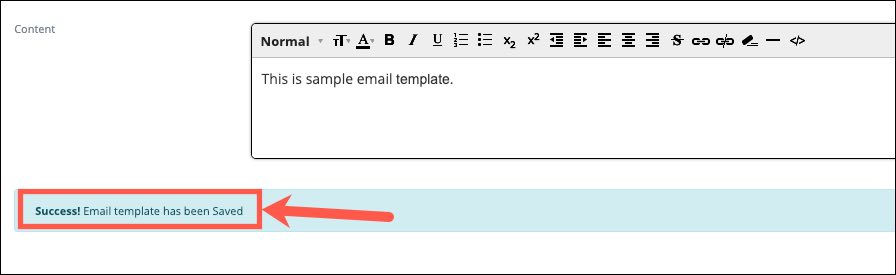
5. The Email Template will now appear on the list.
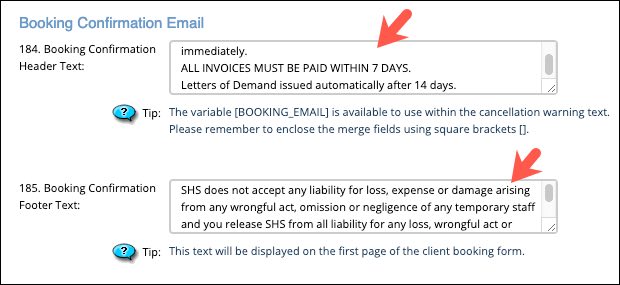
4.6.28 Booking Confirmation Email Templates
The Booking Confirmation Email is the email sent to clients once a job has been booked.
Edit Booking Confirmation Email Template
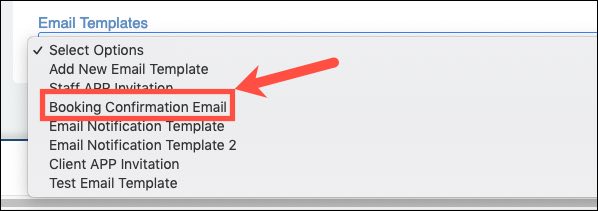
1. In the dropdown menu of Email Templates, select Booking Confirmation Email.
2. The template for Booking Confirmation Email will appear.
You can edit the following fields and contents.
Title: Enter the title of the template
Subject: Enter the subject of the template. The subject will also be the same subject that will appear on the recipient’s email.
Content: Using the editor tools, you can now write the content of the email template here.
Disable Template: When the box is ticket, the template is deactivated.

3. Click Save once finished.
Header and Footer of Booking Confirmation Email Template
You can also edit the header and footer by going to these settings. Simply enter your texts in the text field.