3.0 Add New Job / Create New Job
Creating Jobs
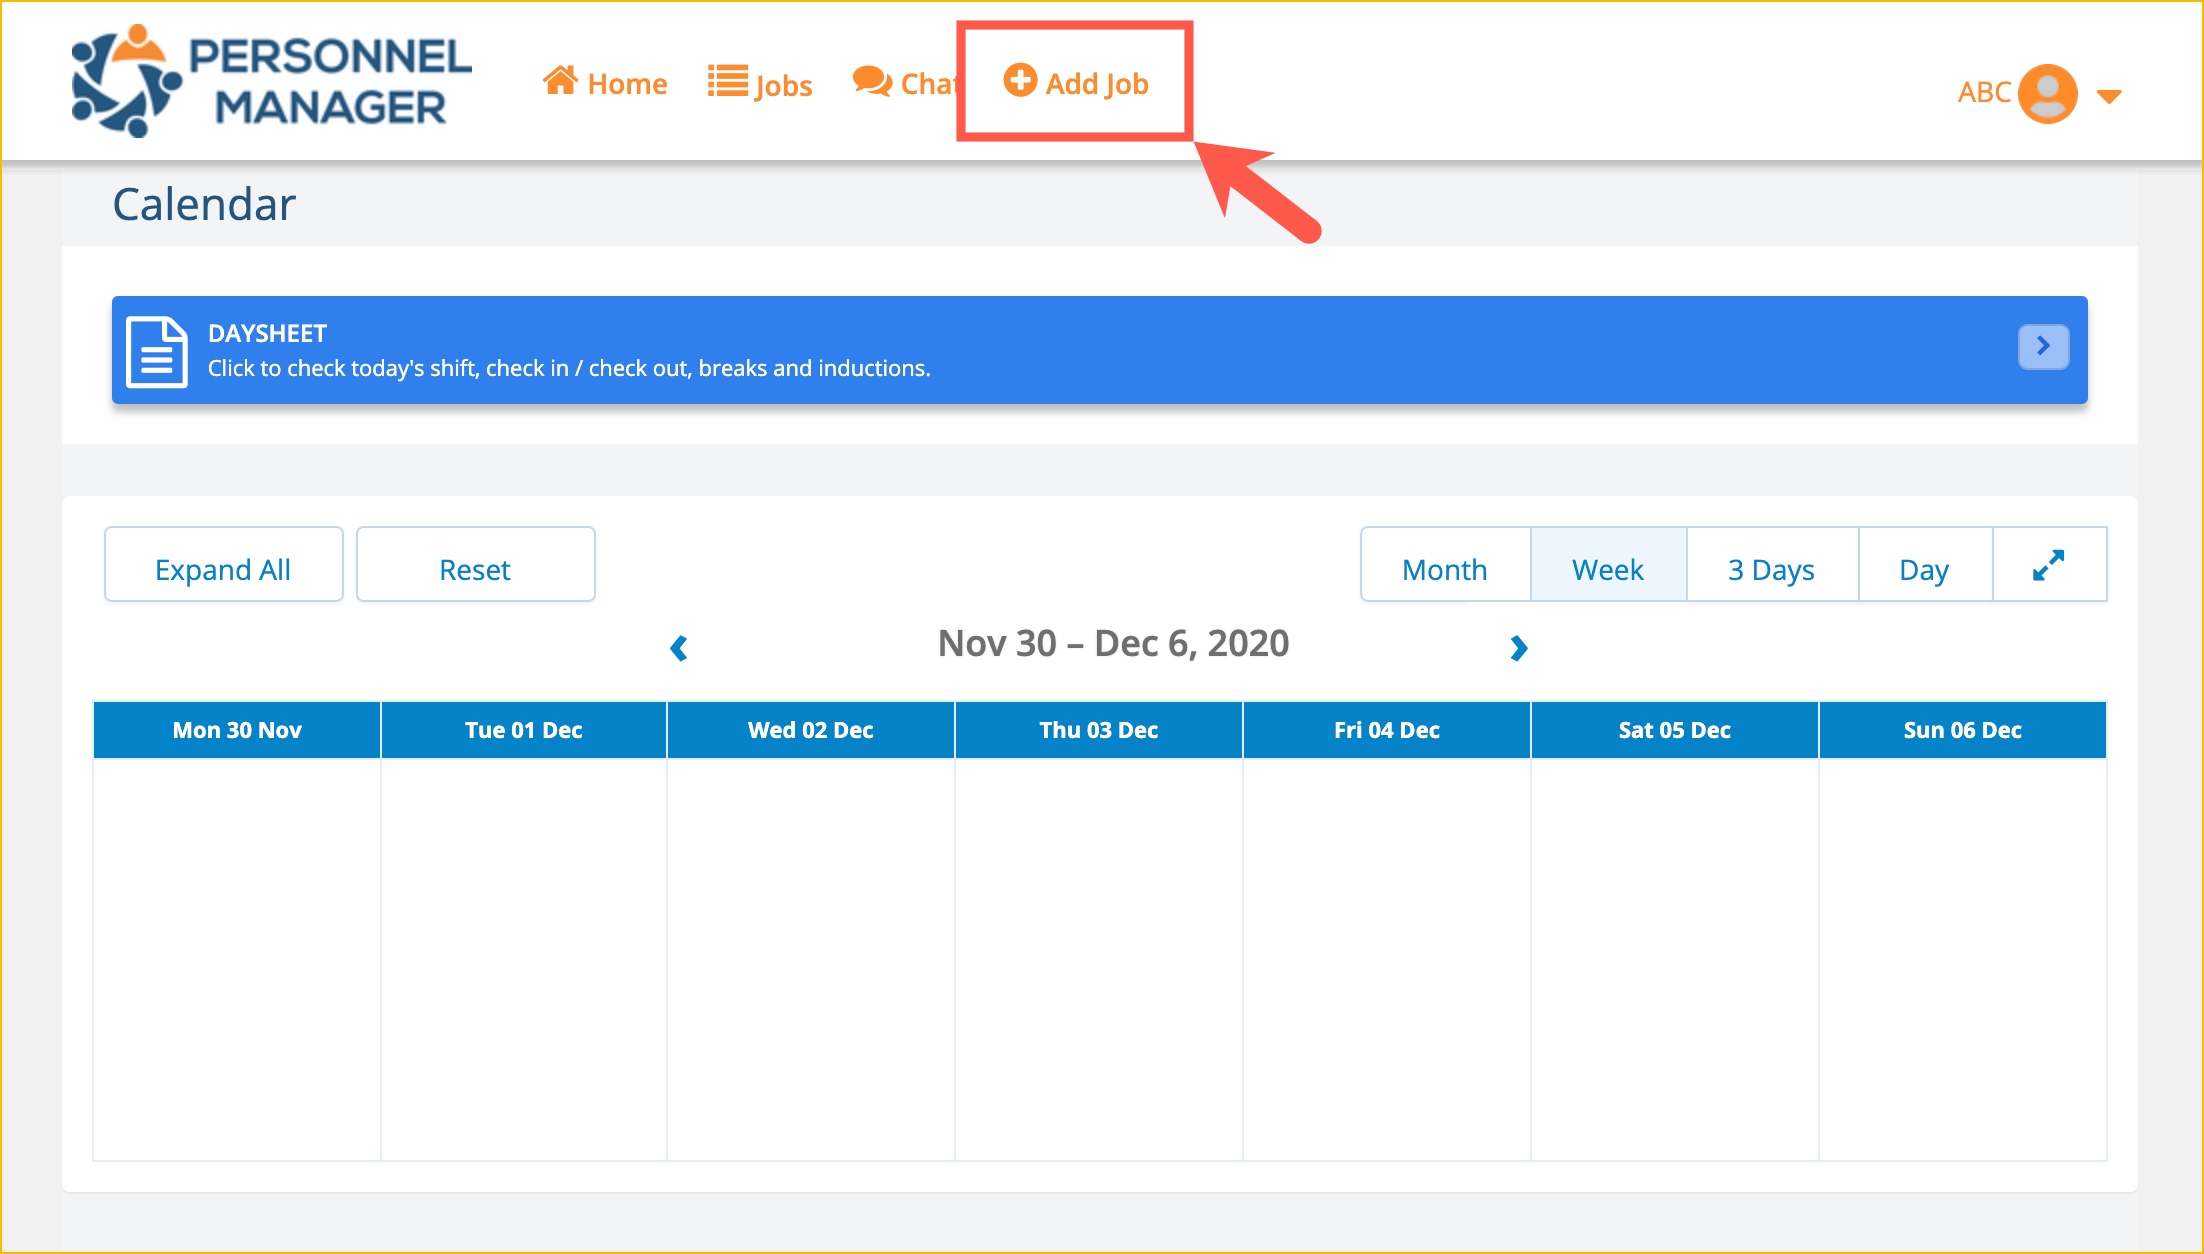
Click the Add Job button to start adding/creating new job on the system.
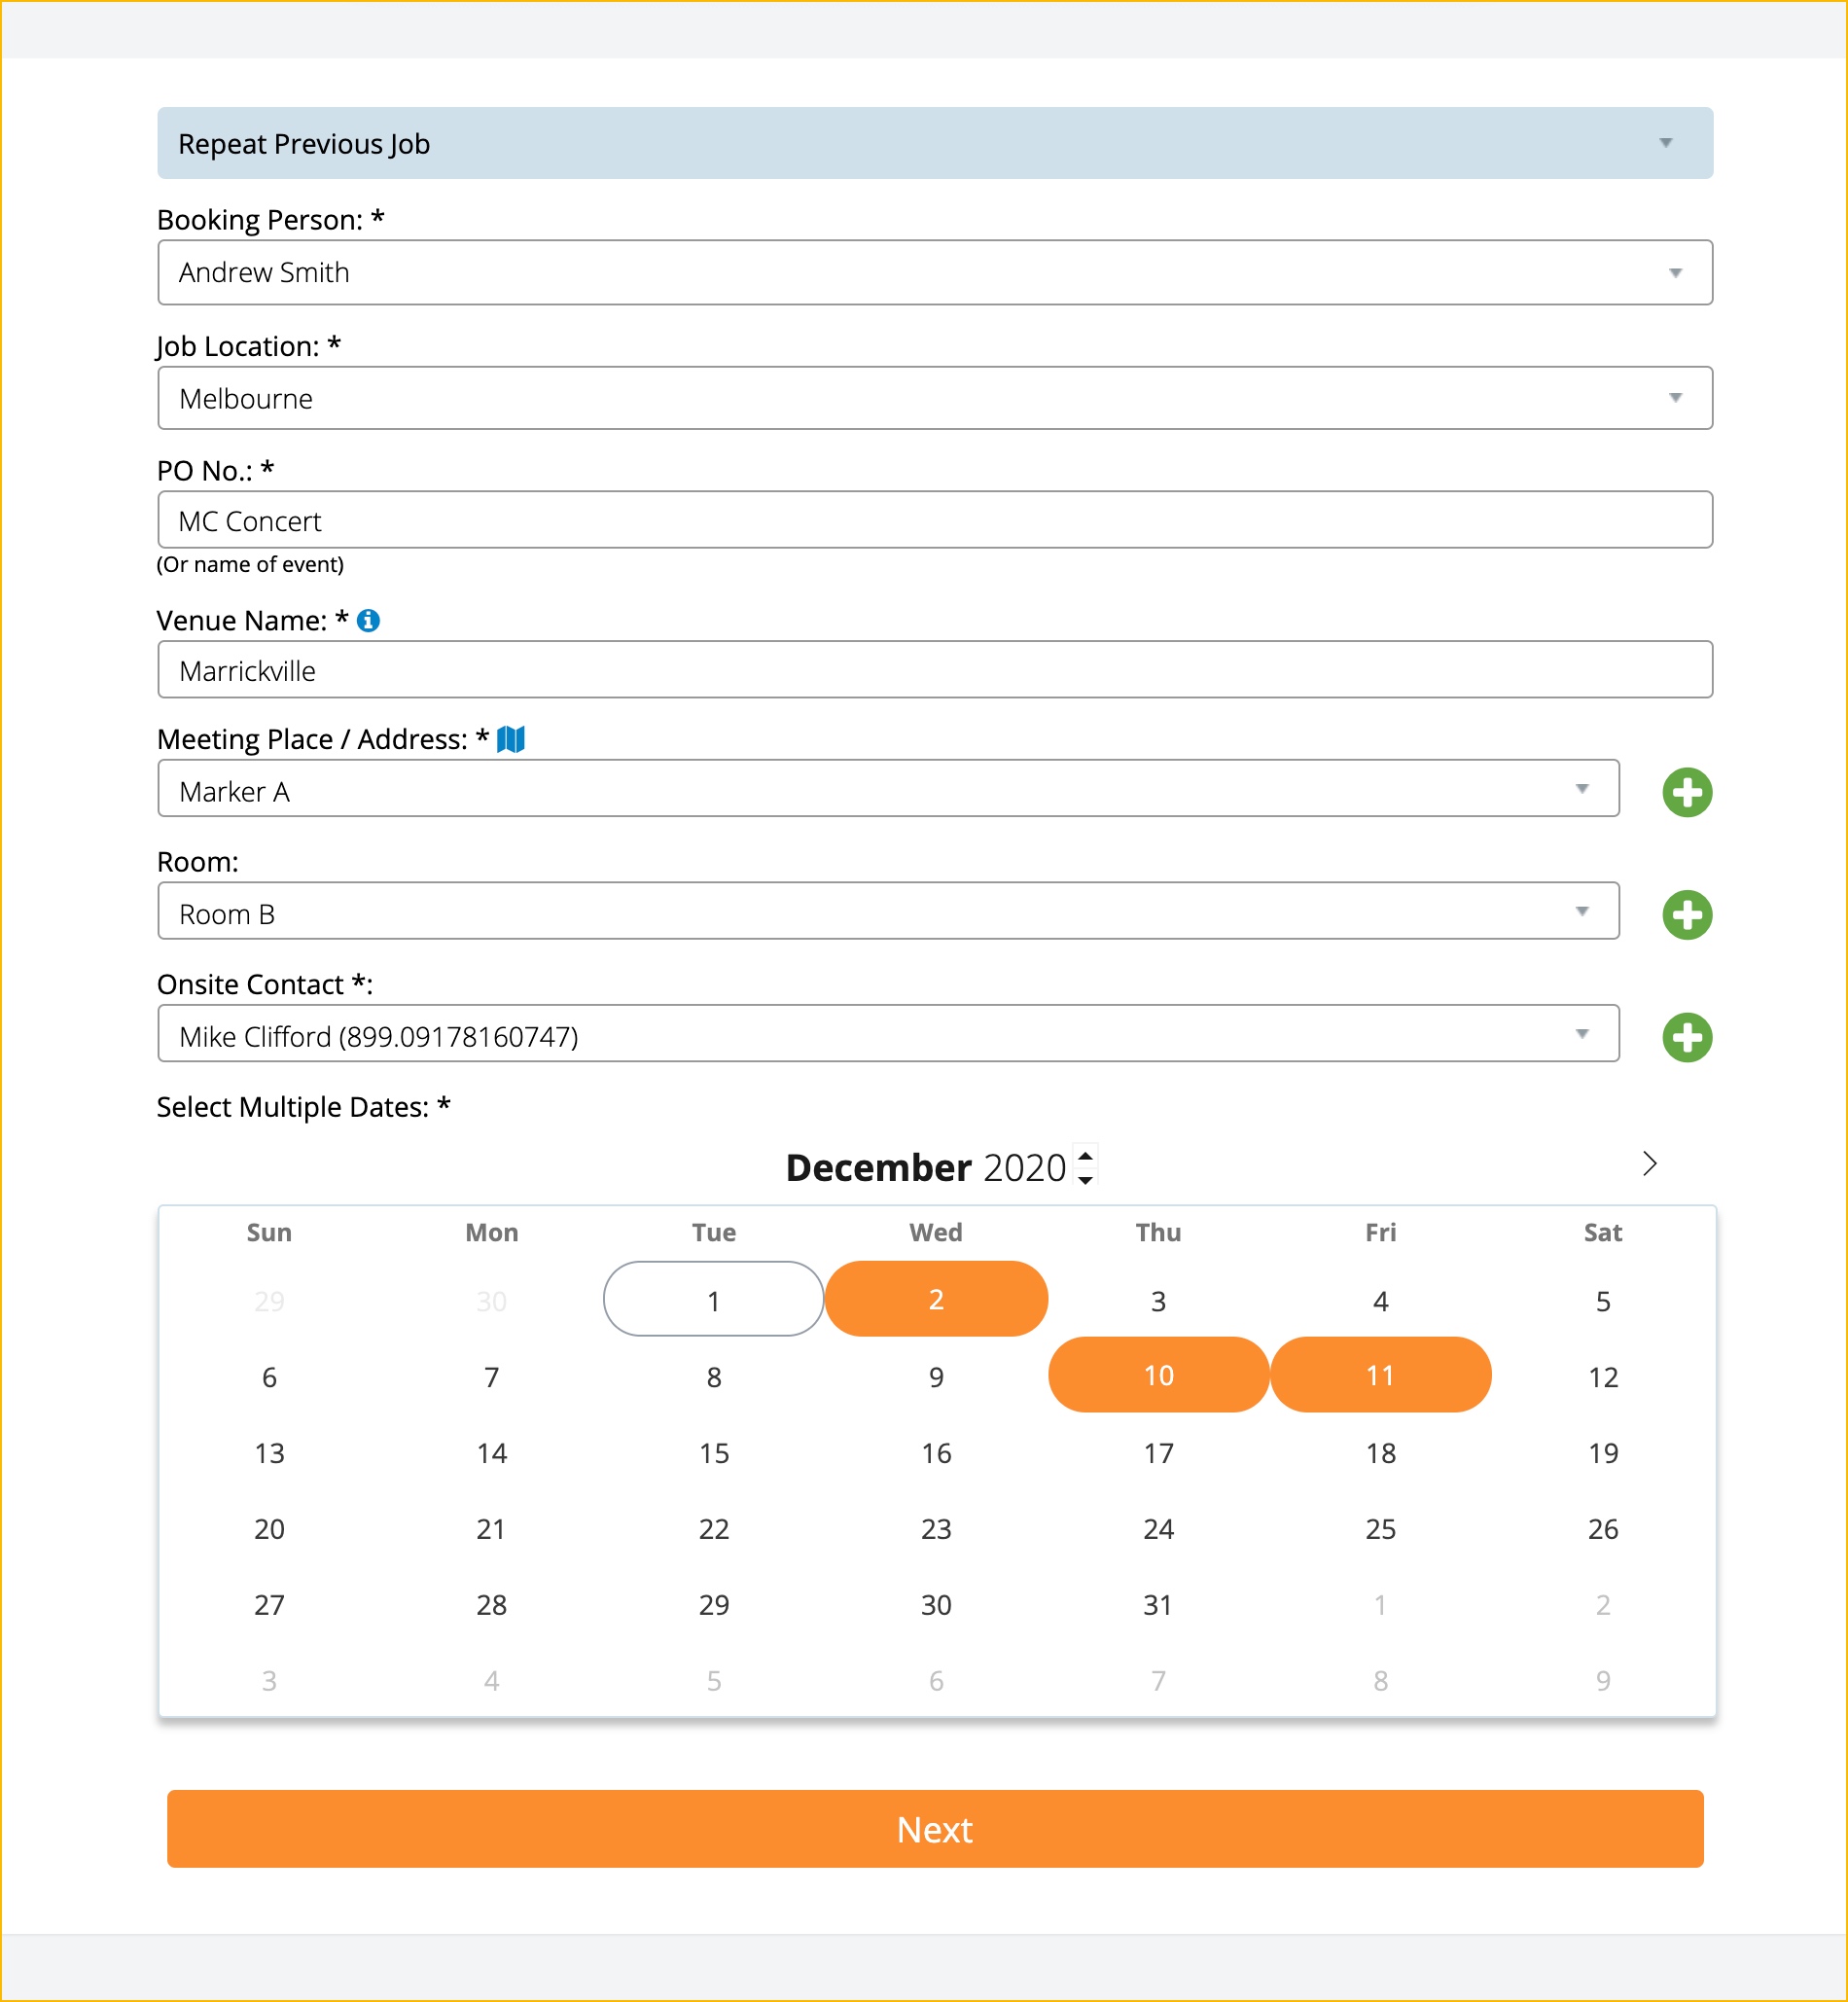
Fill out the information on the Booking Job page.
Booking Person: Select the booking person from the dropdown menu.
Job Location: Select the job location from the dropdown menu. The job location is typically the business.
PO No.: Enter the PO Number on this field. The PO Number can be any reference for the job that you are creating.
Venue Name: Enter the first three letters of the venue and the system will display venue suggestions. From the suggestions, select the correct venue for your job.
If the venue you are trying to use is not available, check this link on how to add a venue.
Meeting Place: Select the meeting place from the dropdown menu.
Room: Select the room from the dropdown menu.
On-site Contact: Select the on-site contact from the dropdown menu.
On the Calendar interface, select the dates for the job. You can select multiple dates.
Note: You can click on the plus sign to add a new meeting place, room and on-site contact.

Once all fields have been filled out, click Next.
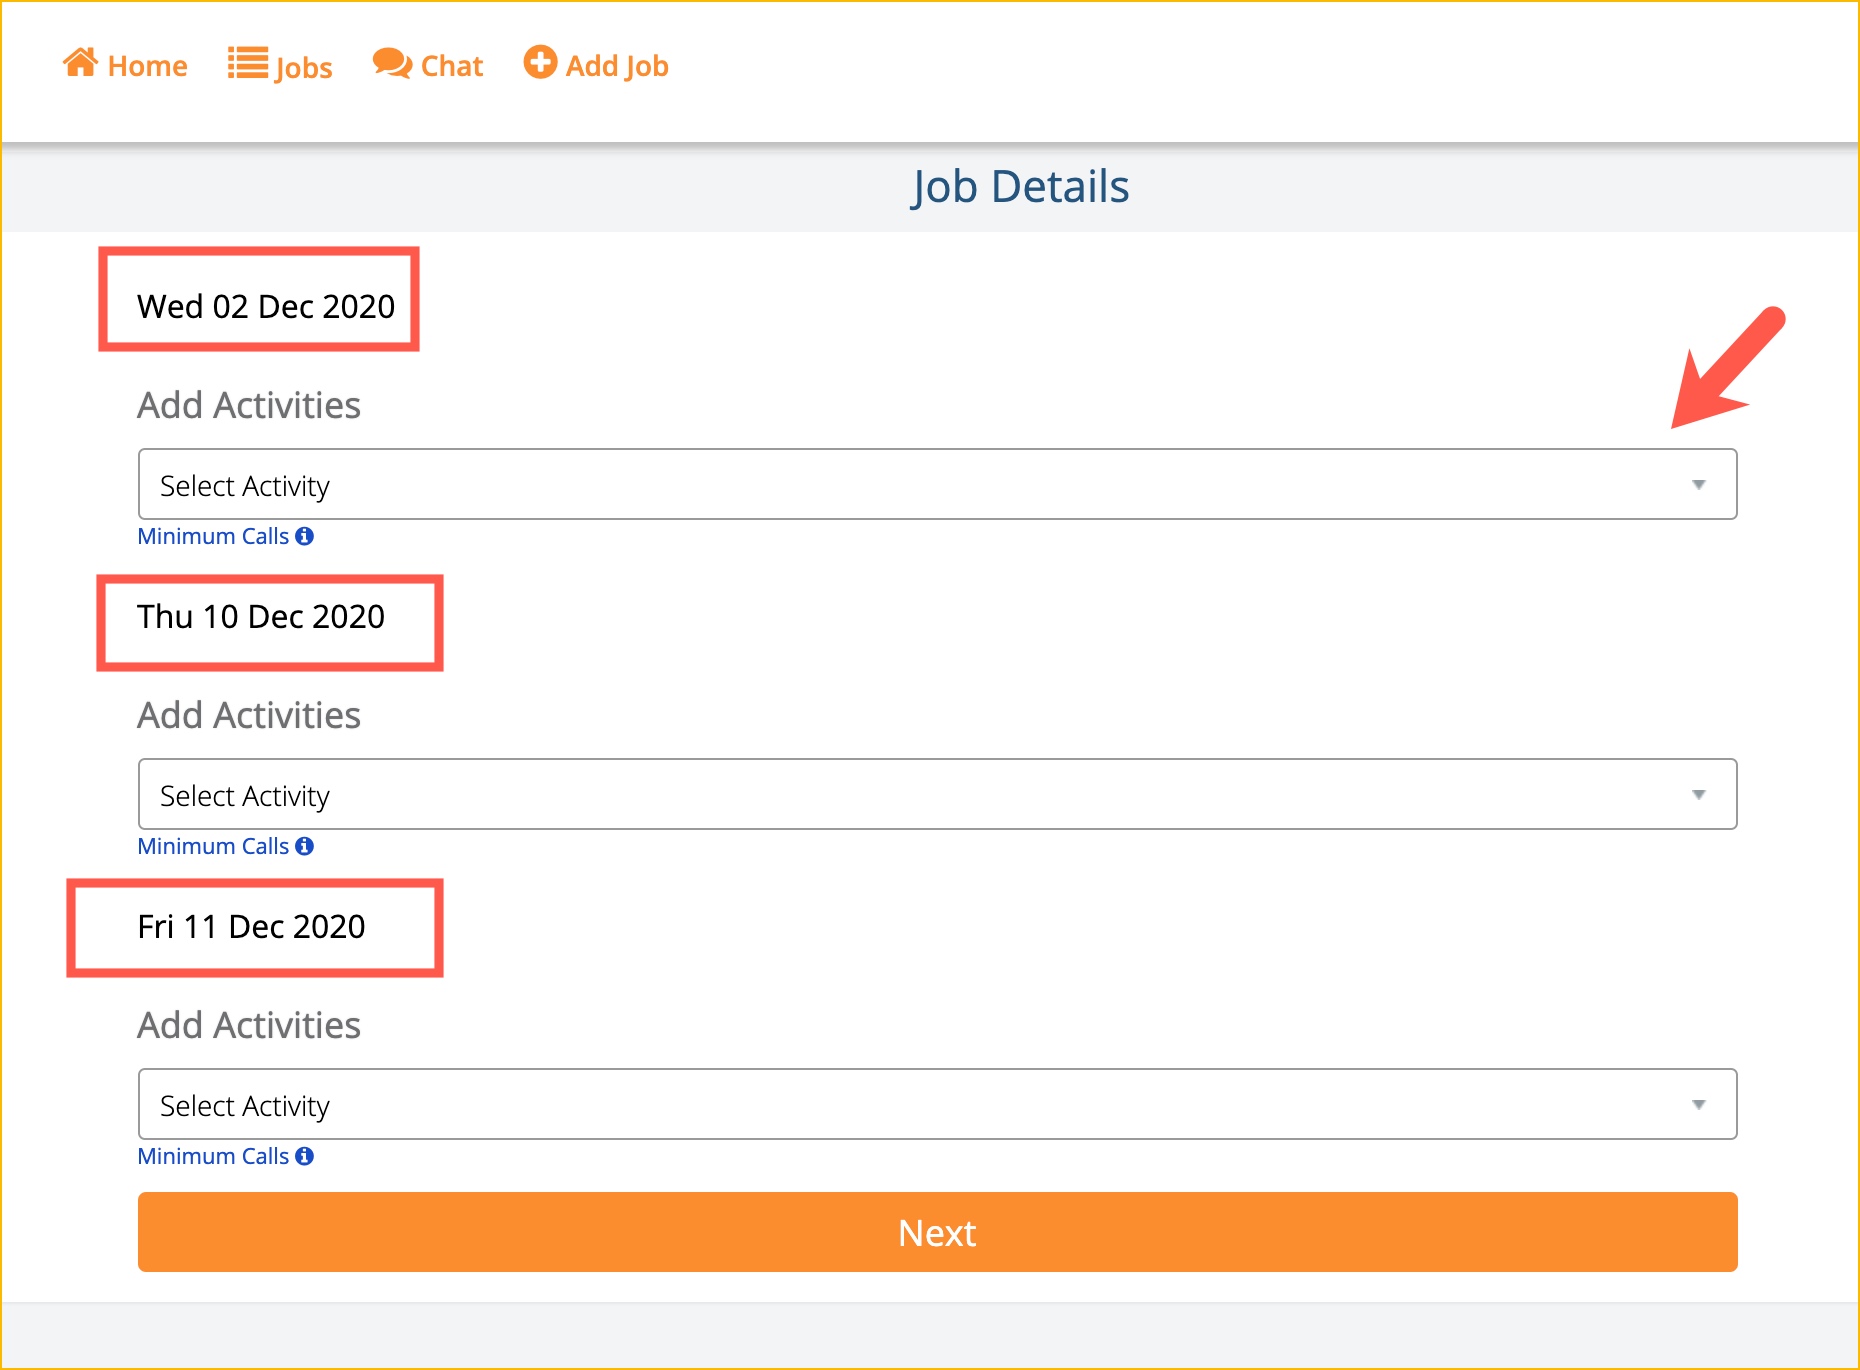
Select the Activity from the dropdown on each date that you have selected from the previous step.
Note: If the Activity is not included in the dropdown, request Admin to add it for you.
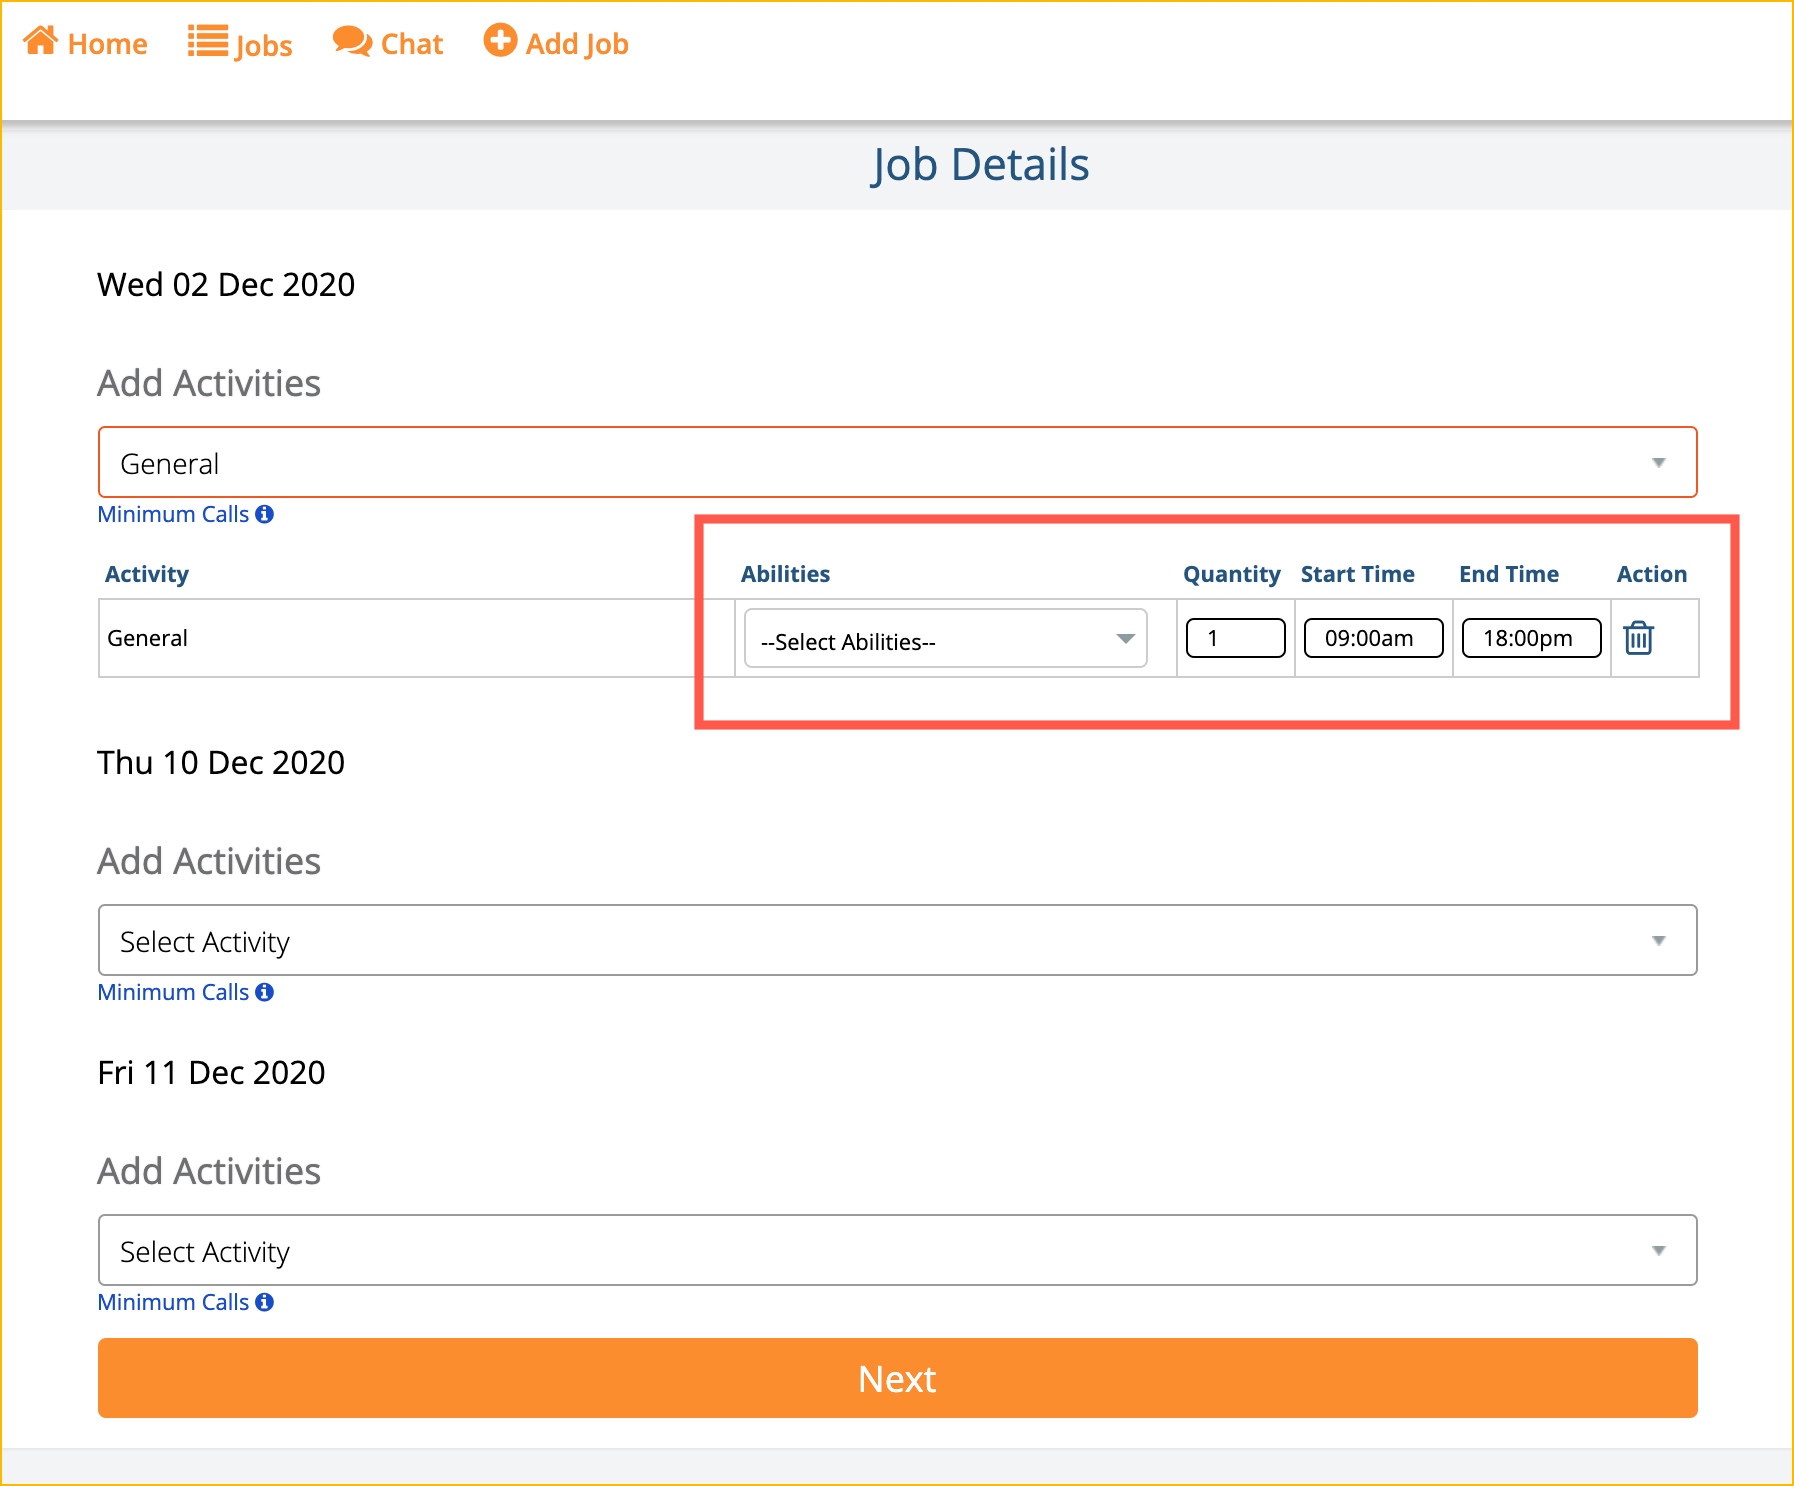
Enter the quantity, time in and time out for the Activity. You can also select an Ability for the Activity.
Click Next once finished.
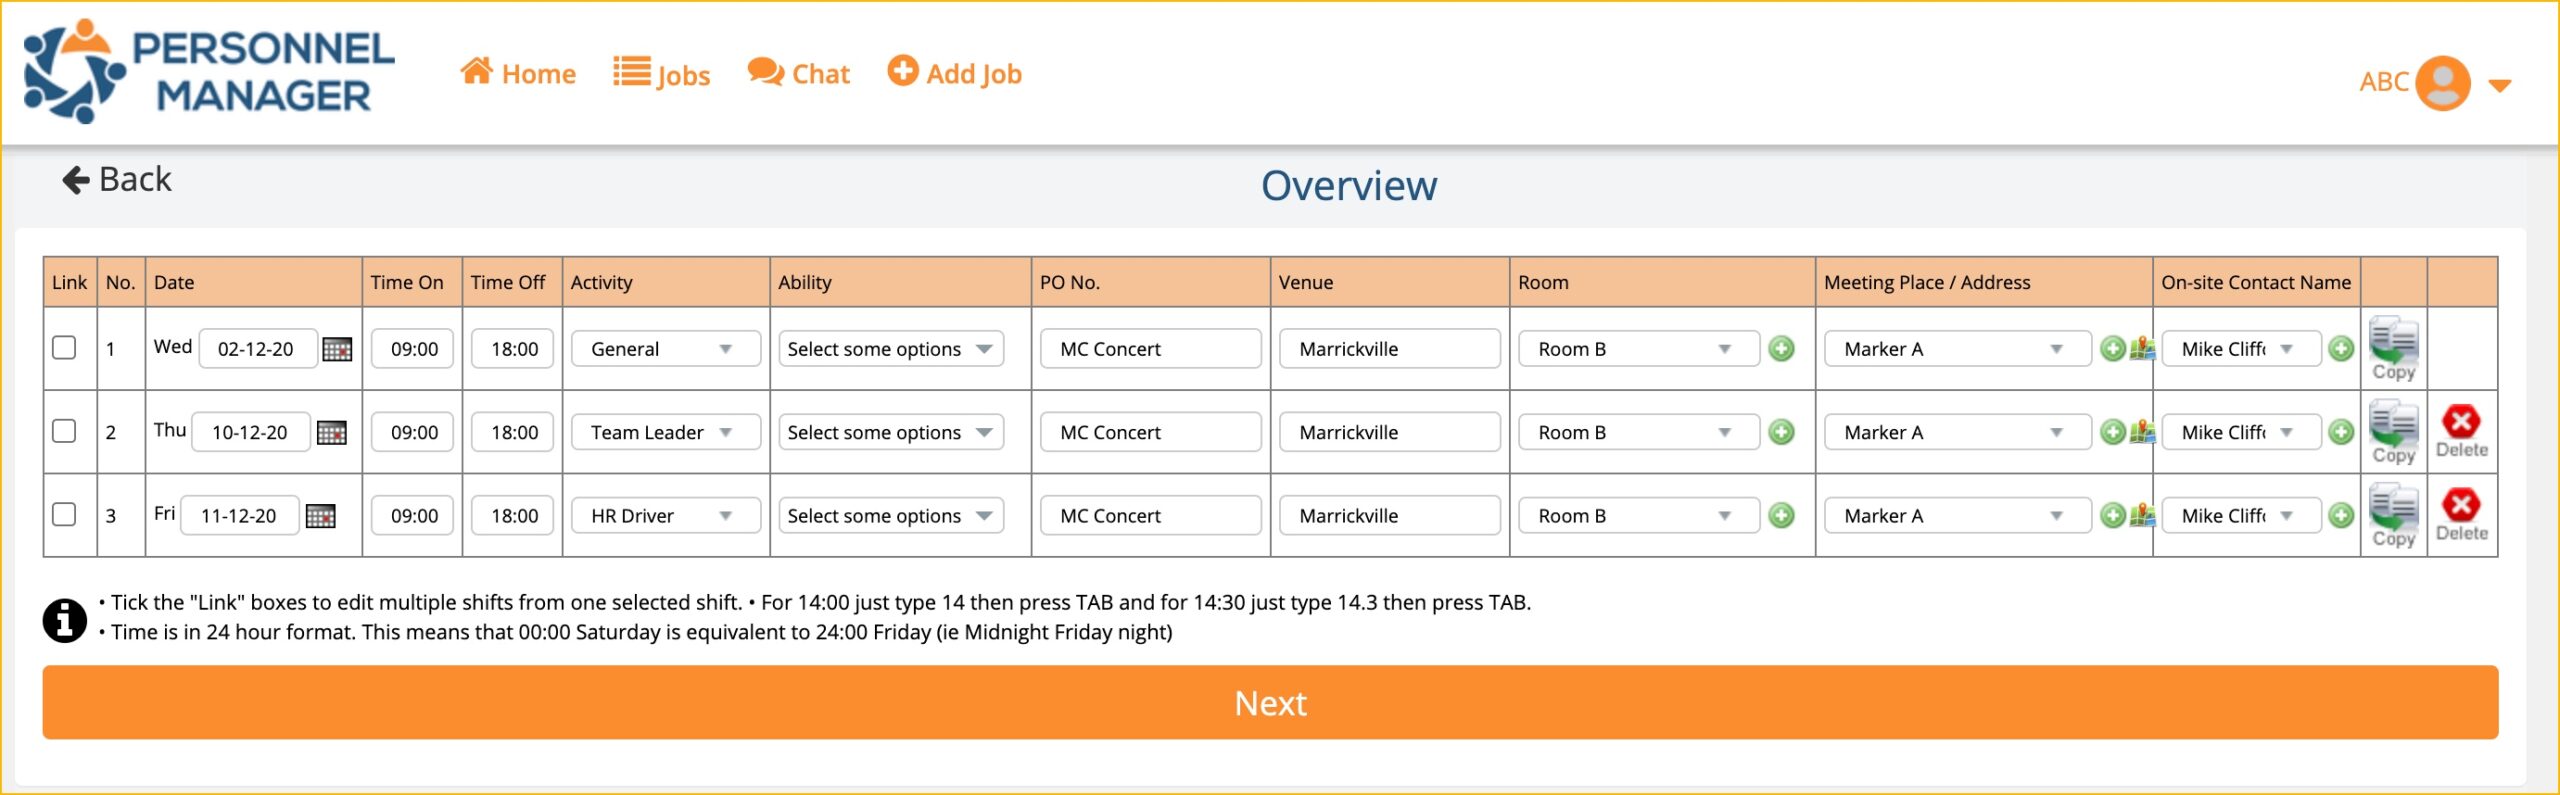
After you click Next, the overview of the shifts that you created will be displayed. You can still change, edit or update the following information on this page:
- Date
- Time On
- Time Off
- Activity
- Ability
- Venue
- Room
- Meeting Place / Address
- On Site Contact
You can also copy a shift by clicking the copy icon or you can delete by clicking the delete icon.
Once everything is in order, click Next.
You will be redirected to the Final Info of the Job Booking.
You can enter notes for both crew and Admin.
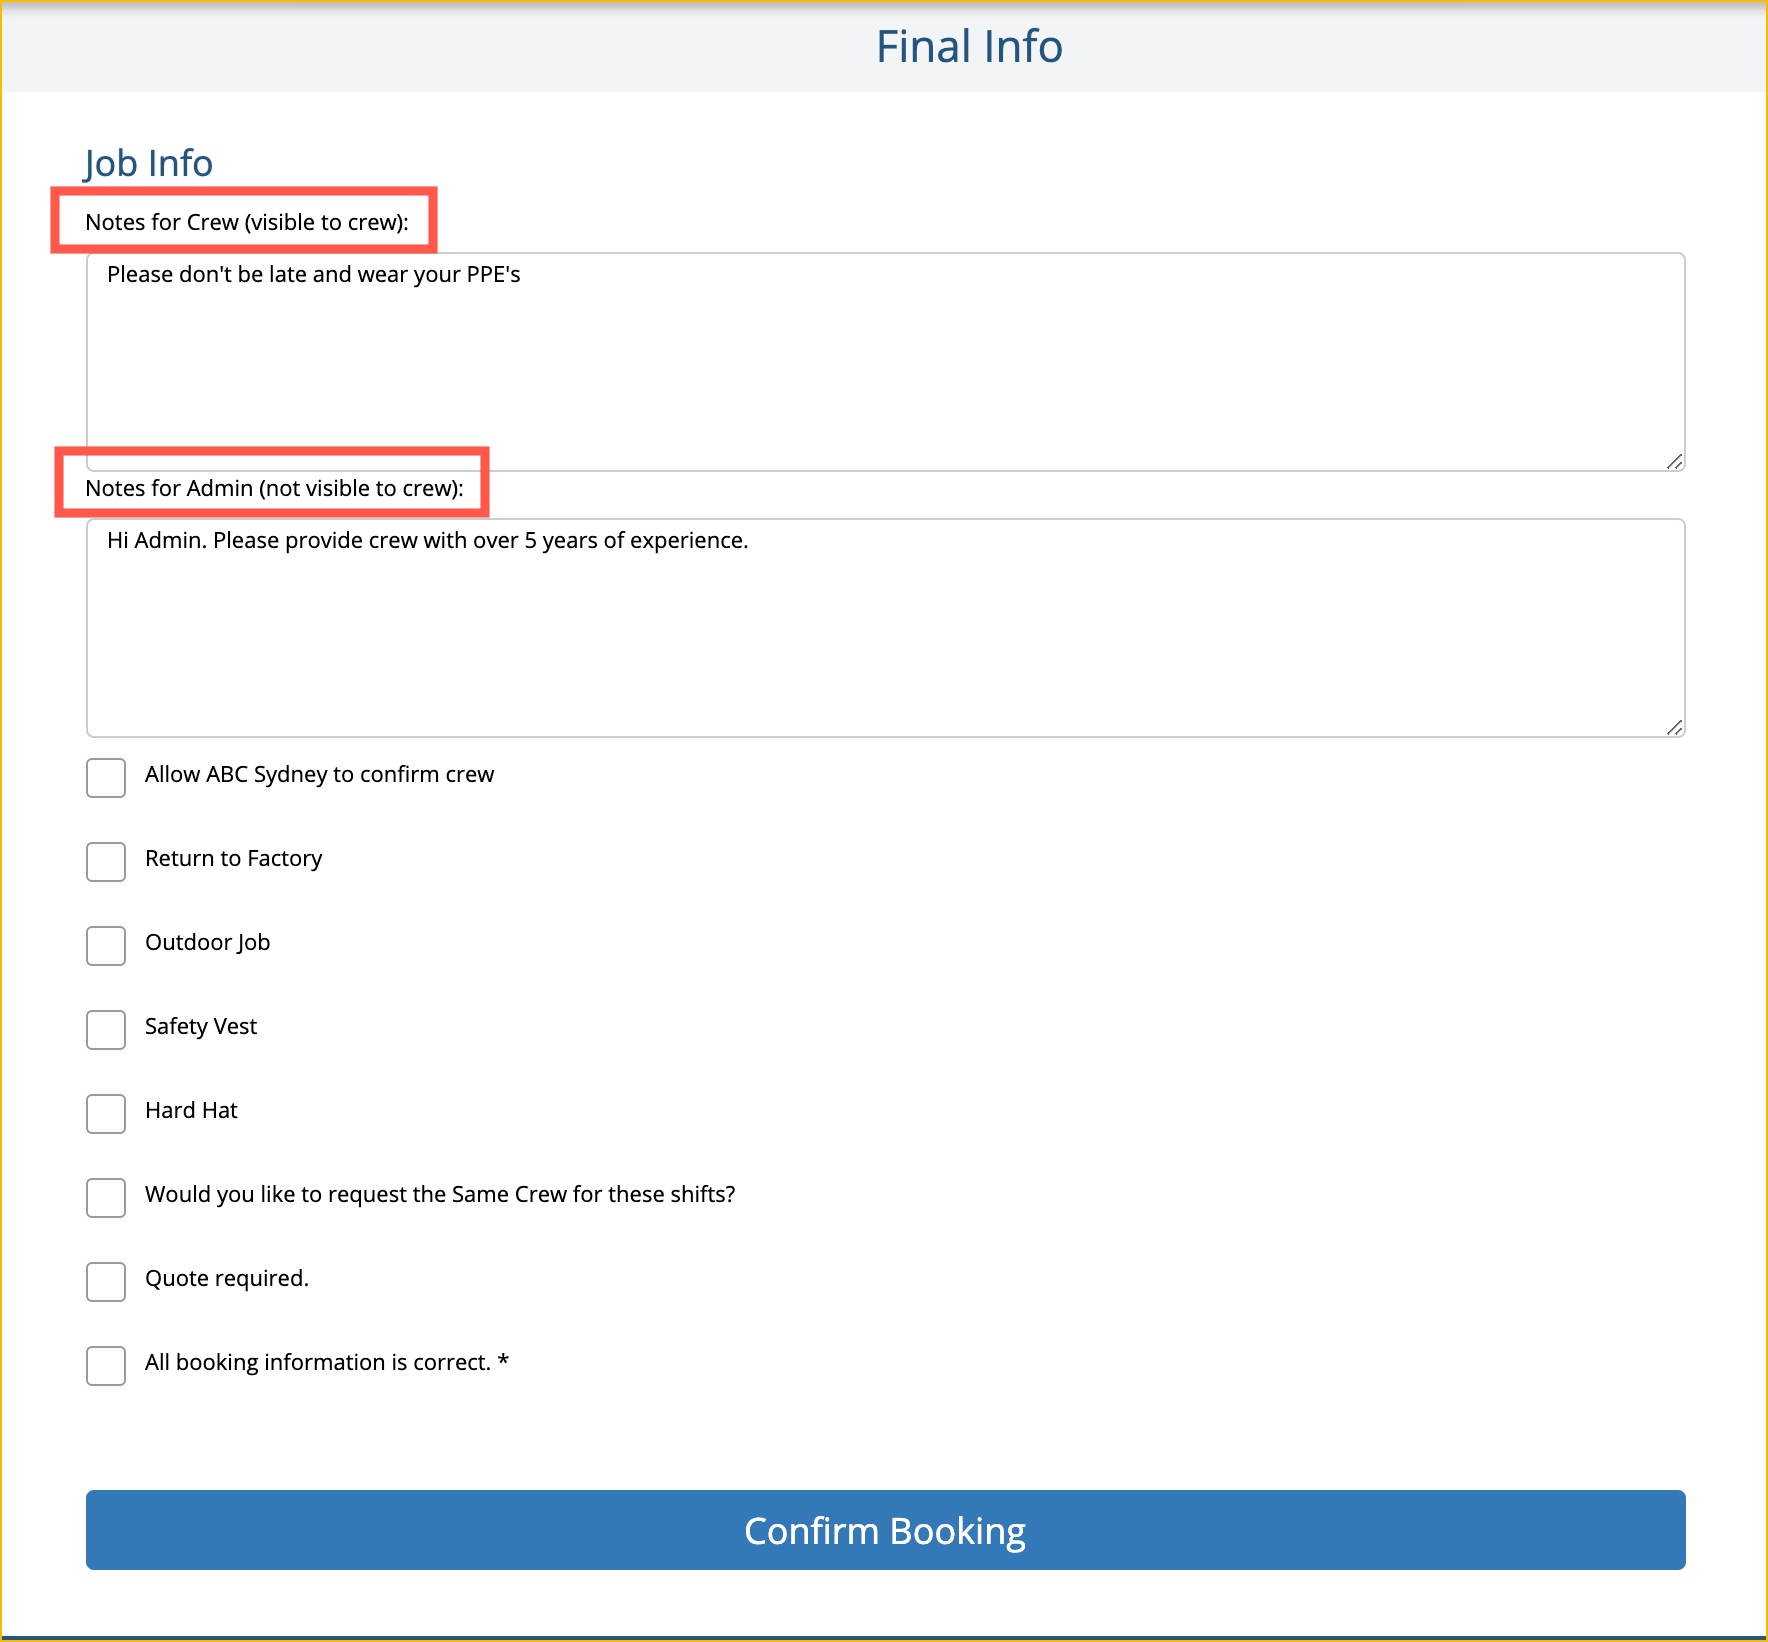
As for the checkboxes, you can tick the boxes depending on what you need.
Allow ABC Sydney to confirm crew: This checkbox is only visible for clients with Client Shift Confirmation function. If you do not see this box on your system and you want to have this function, you can request your Admin to activate this for you.
This function works in conjunction with the PM Client App. Basically, you will be able to select crew for the job you have created. You can confirm shifts with the selected crew using the PM Client App.
The following checkboxes can also be configured by Admin for you.
- Return to Factory
- Outdoor Job
- Hard Hat
- Would you like to request the Same Crew for these shifts
Quote Required: Tick this box if you want Admin to send a quote for the job that you created.
All booking information is correct: This is a mandatory box. Once all data have been verified to be correct, tick this box and click Confirm Booking.
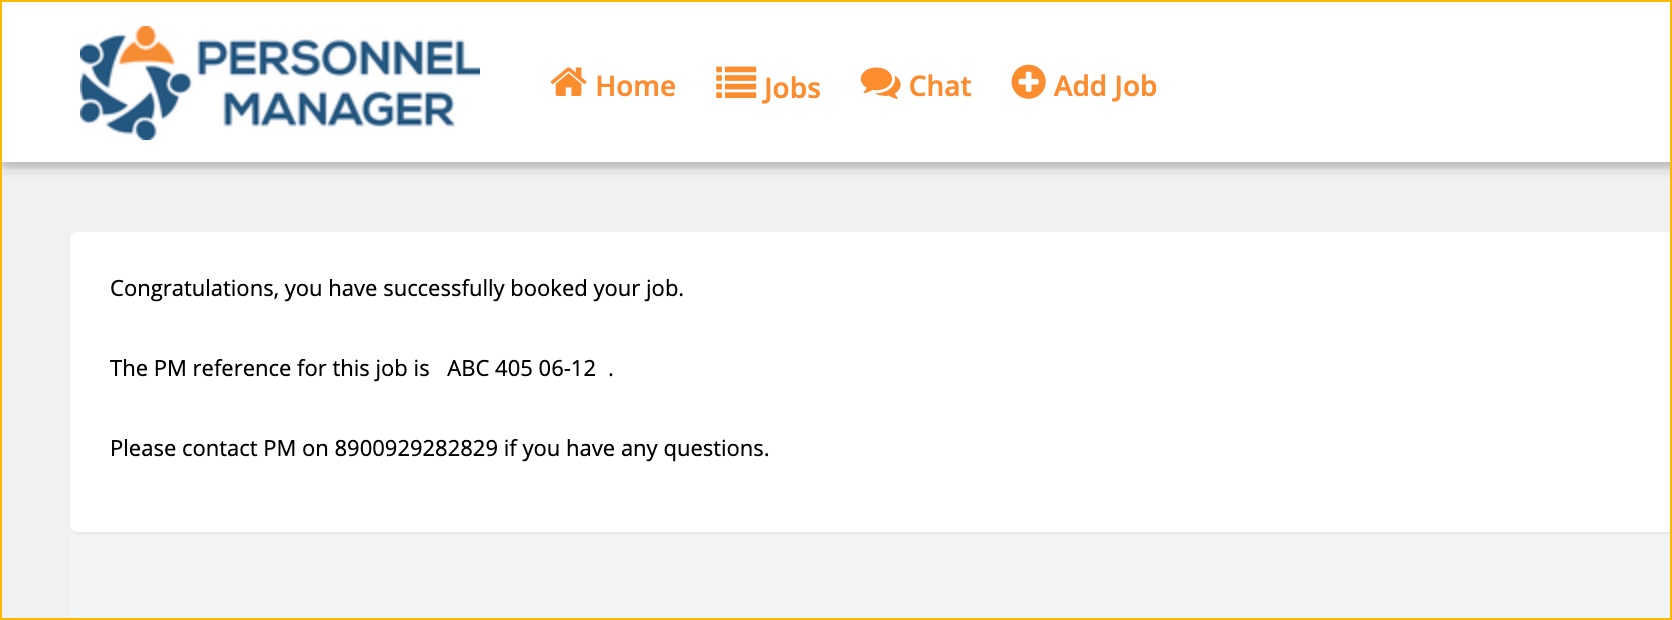
Once you have successfully booked a job, this message will be displayed.

