Key: A / DM / M

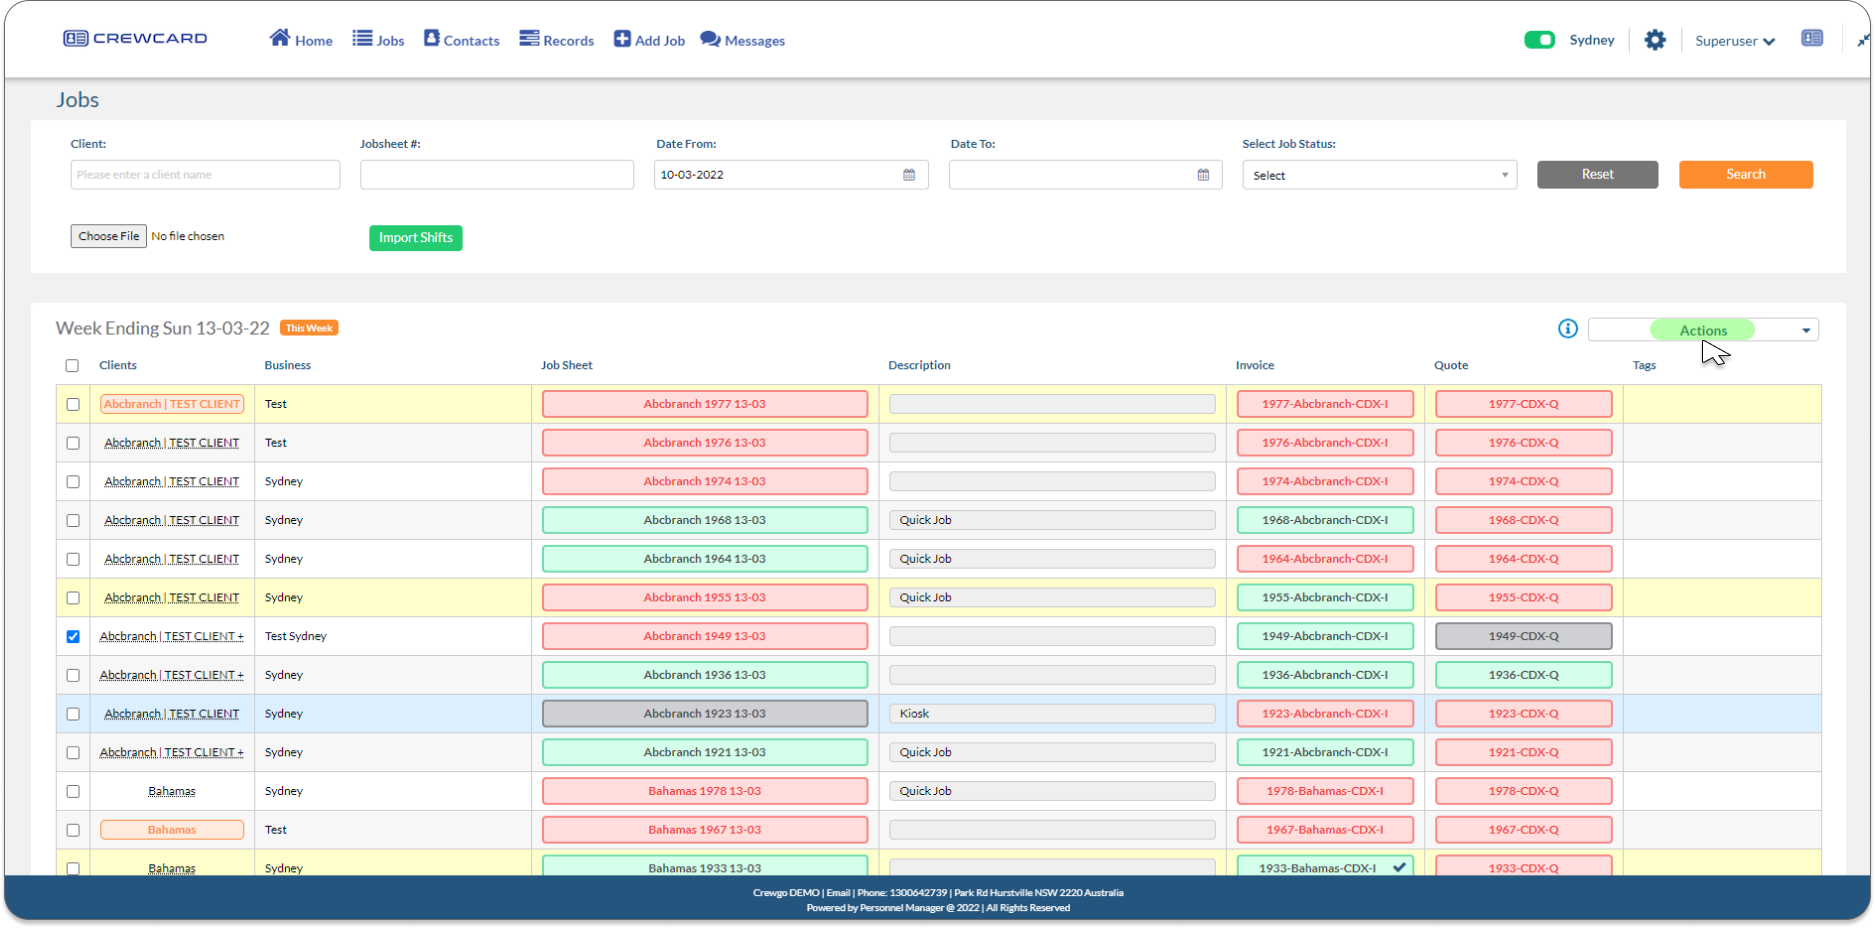
CrewCard automatically opens to the Home Page. The default home page displays the jobs page. However, you can change this to a Calendar view or Events view, this change is done through the Admin Settings please read 10.1.6 Ops Home Configuration guide for guidance.
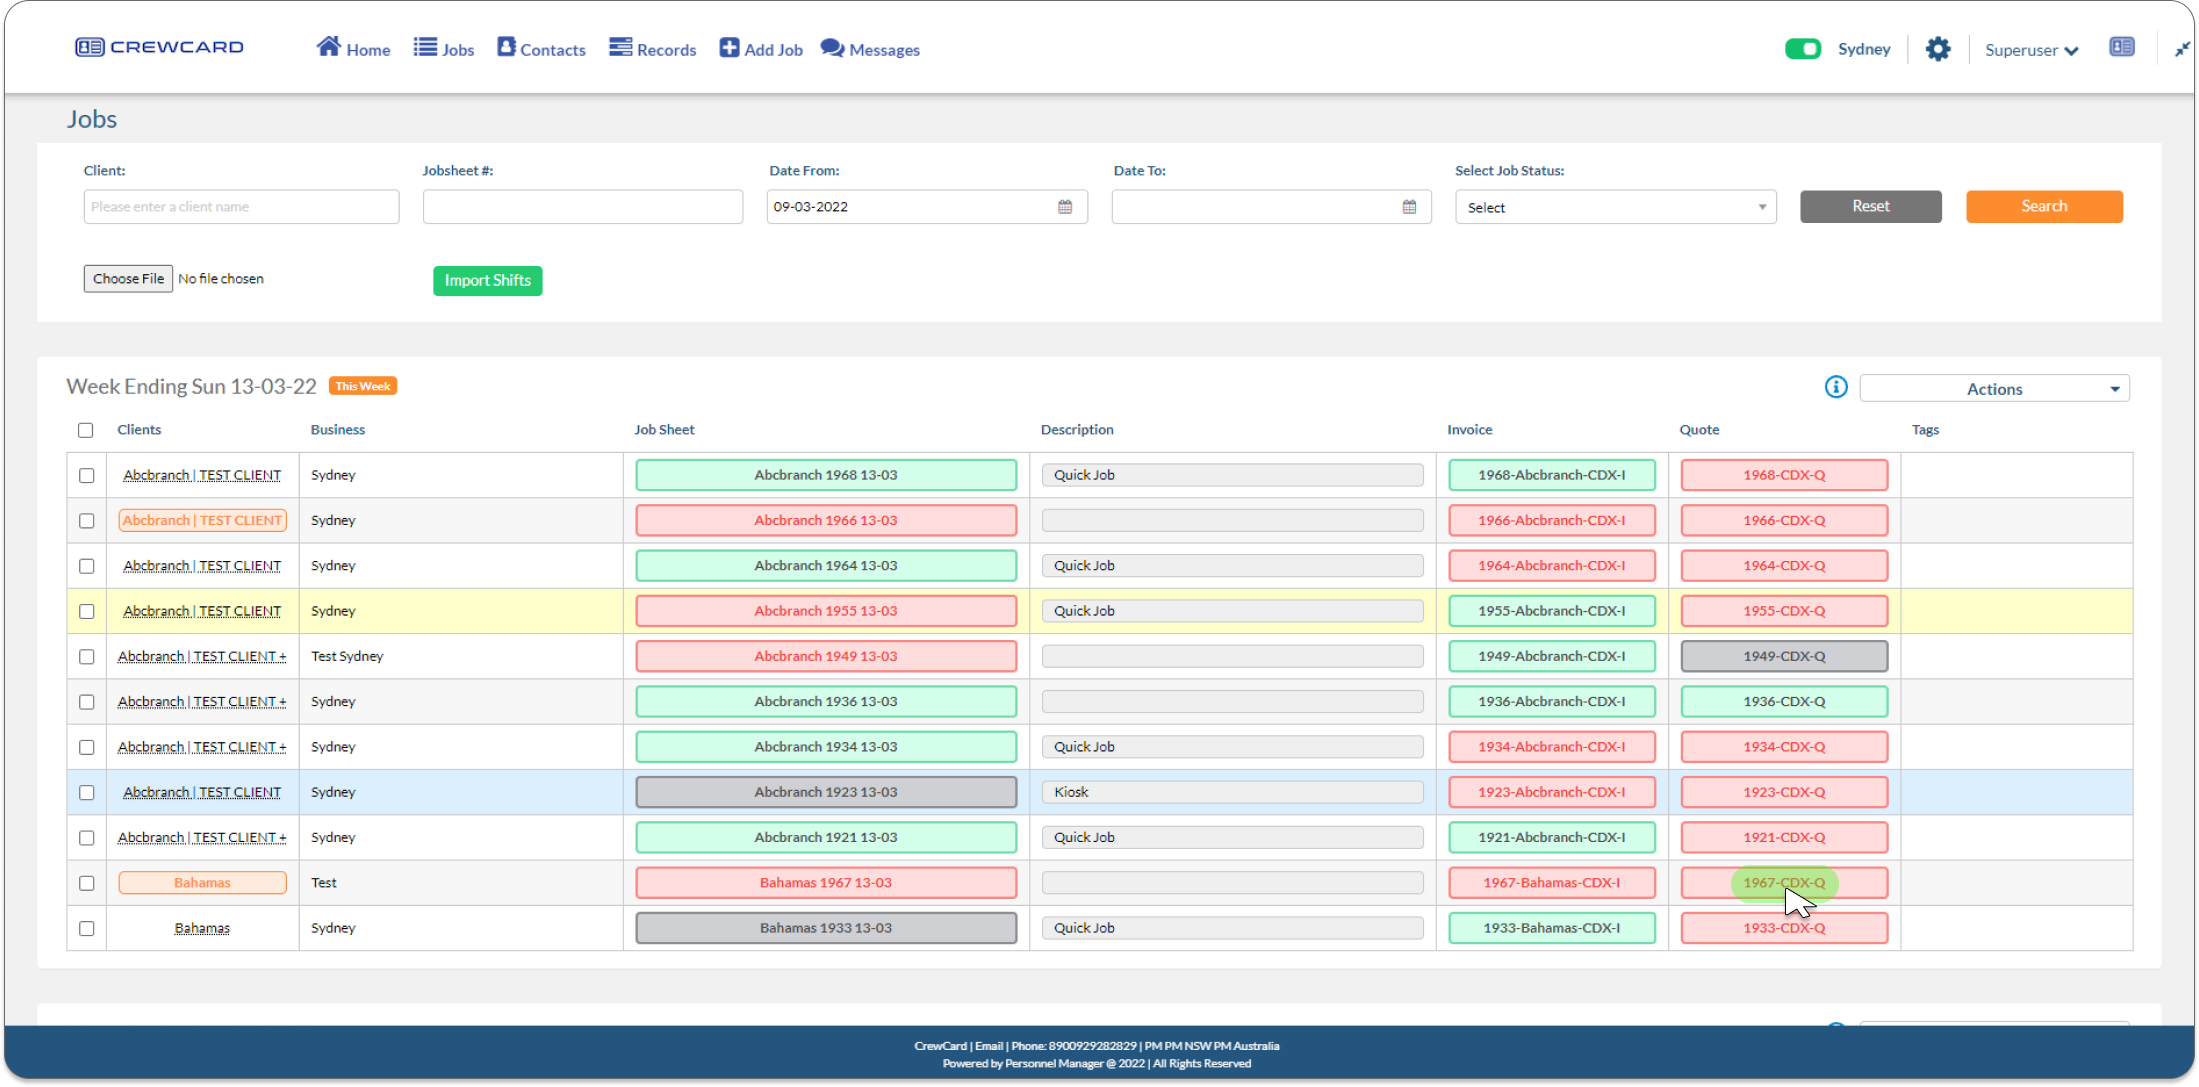
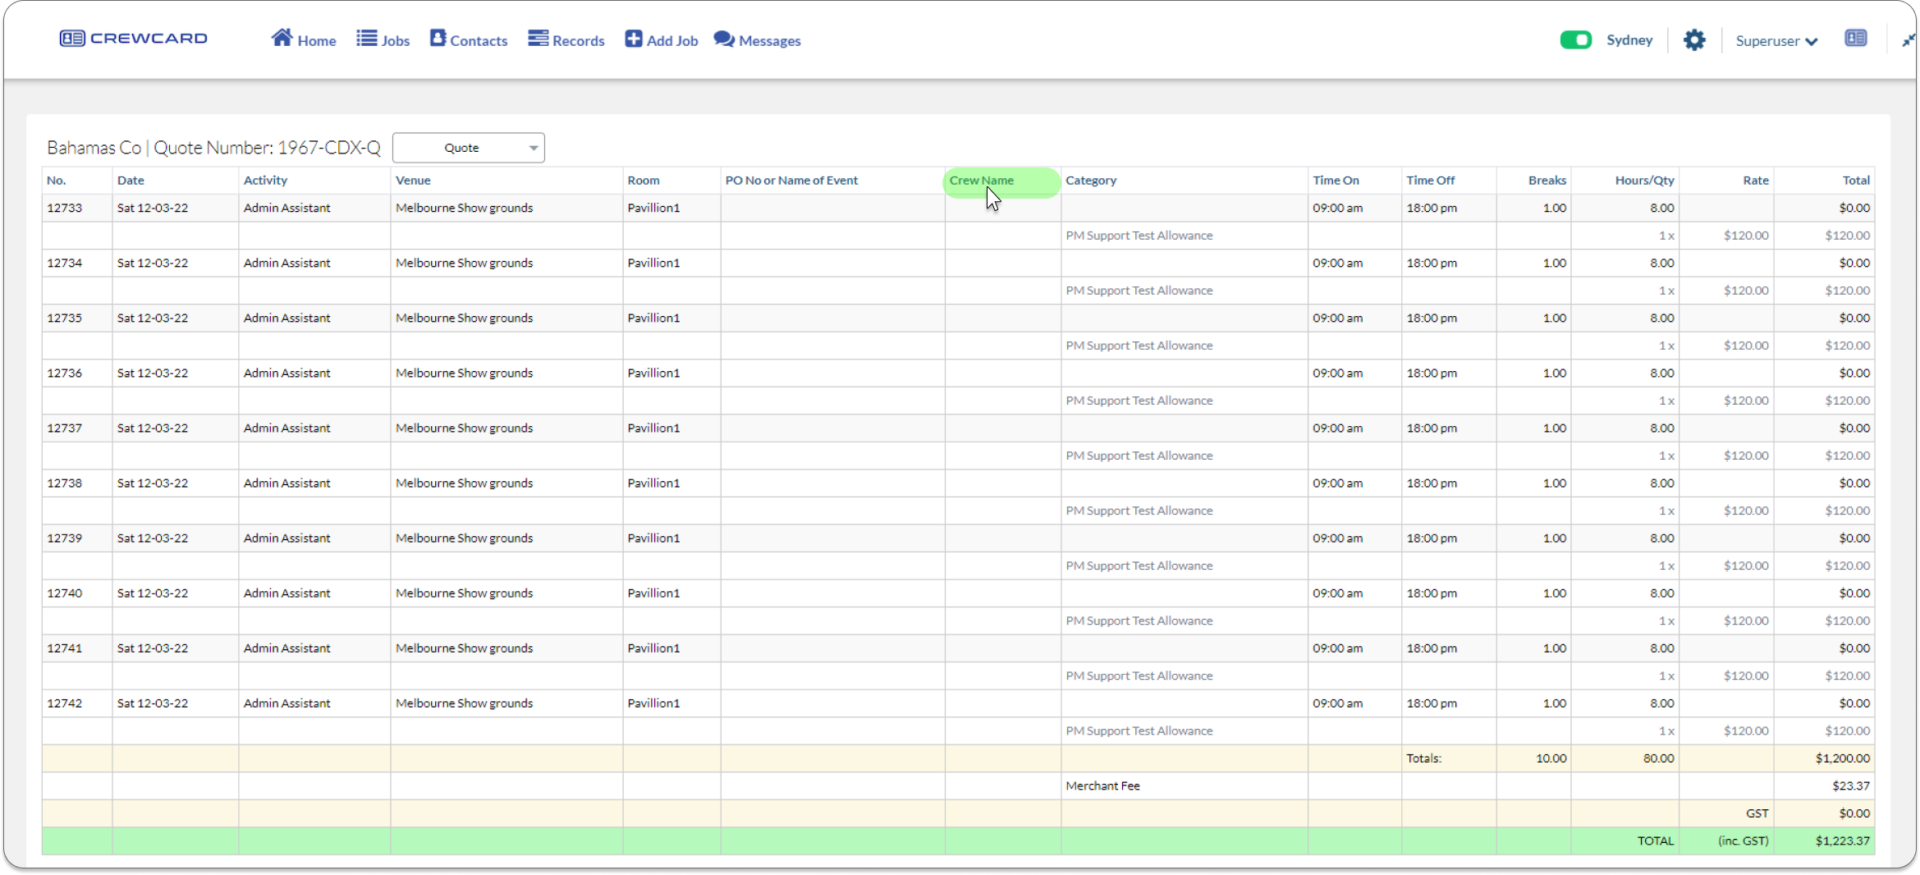
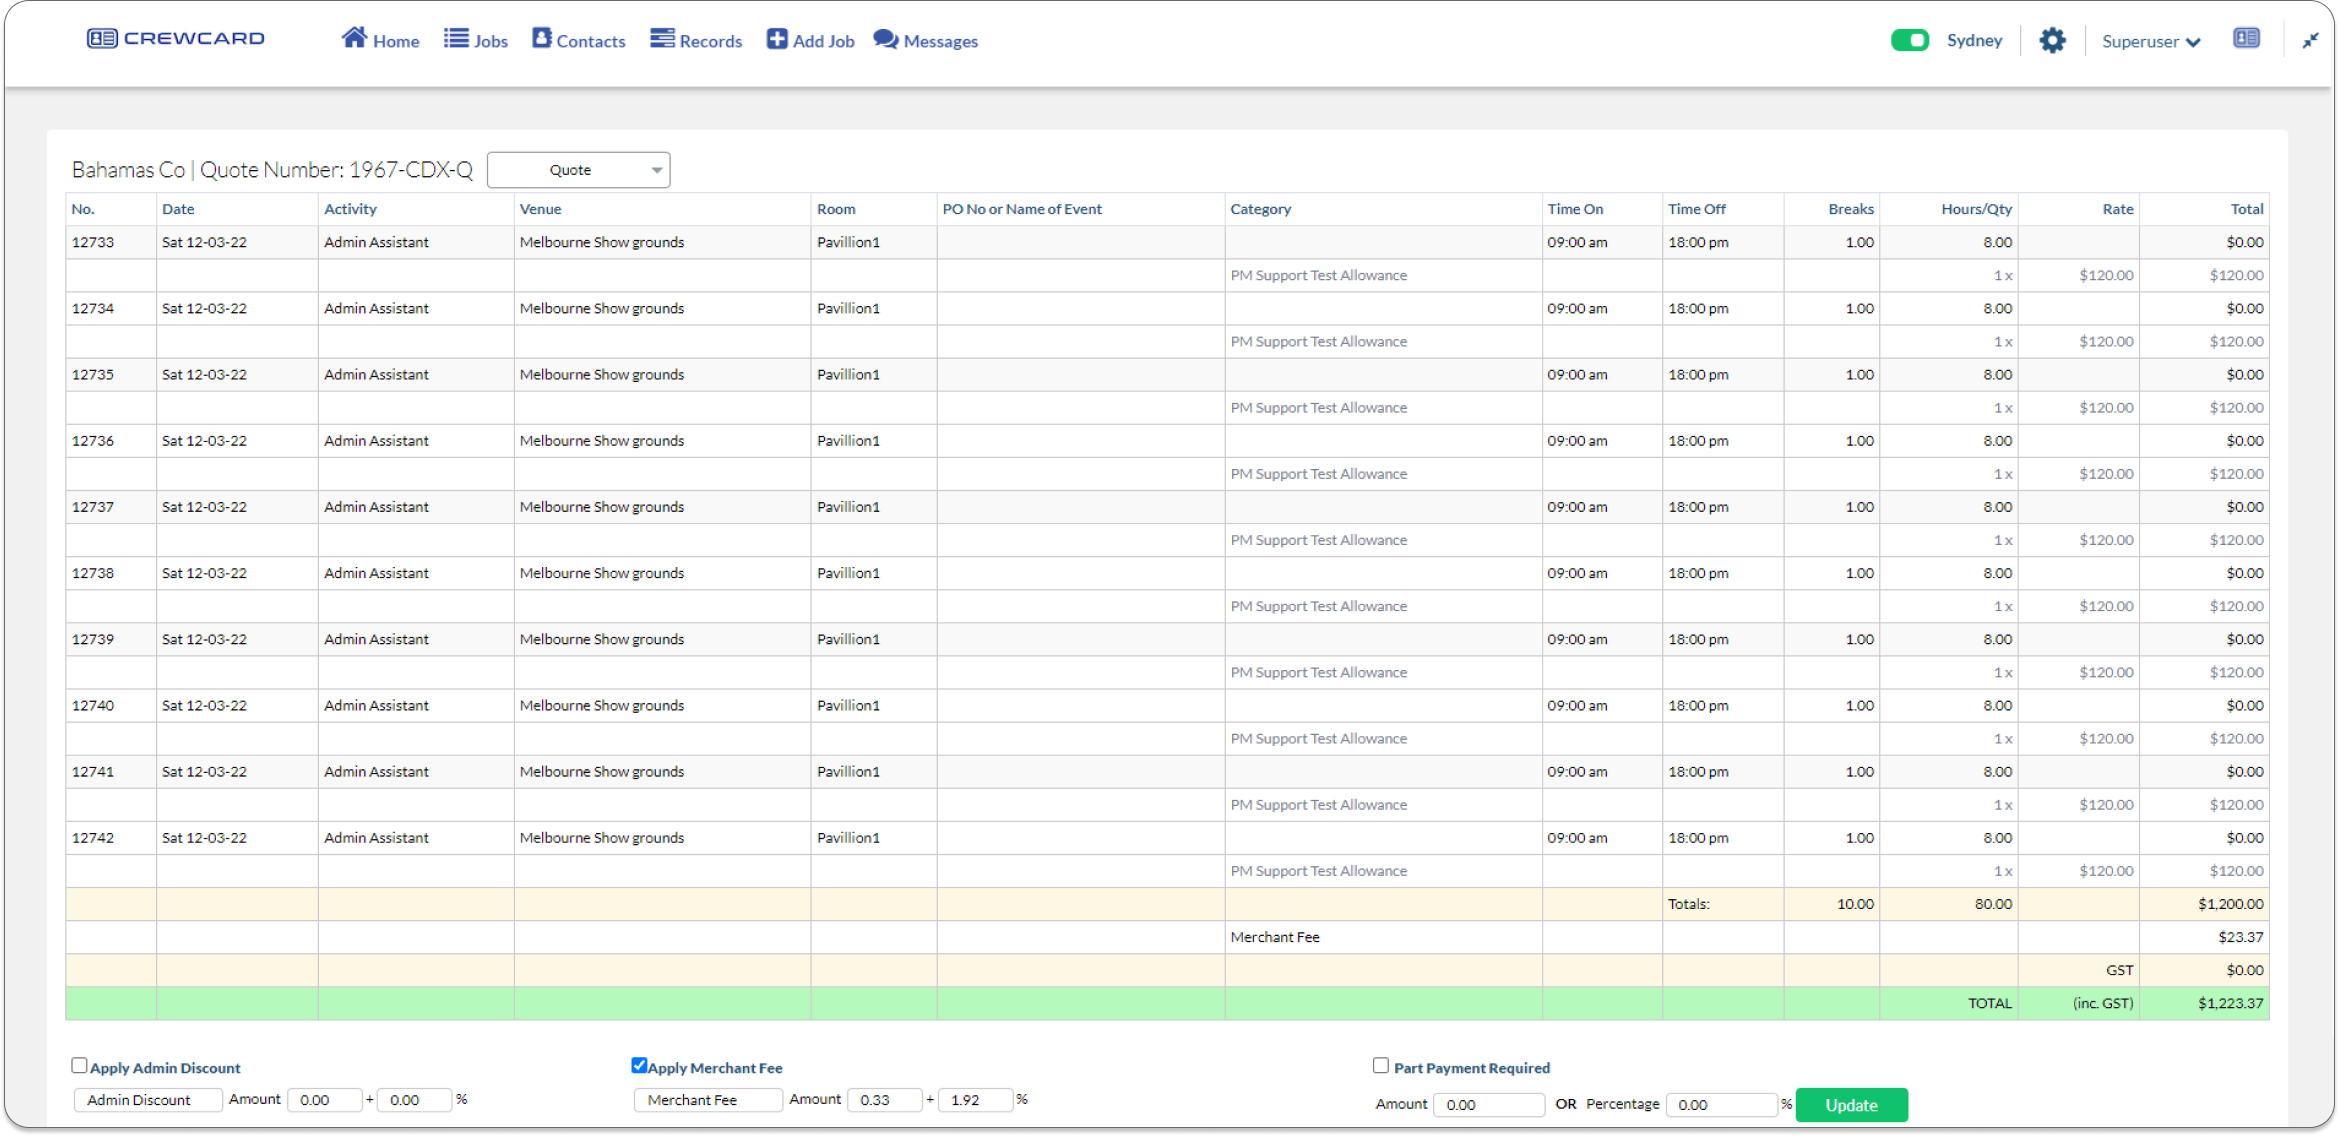
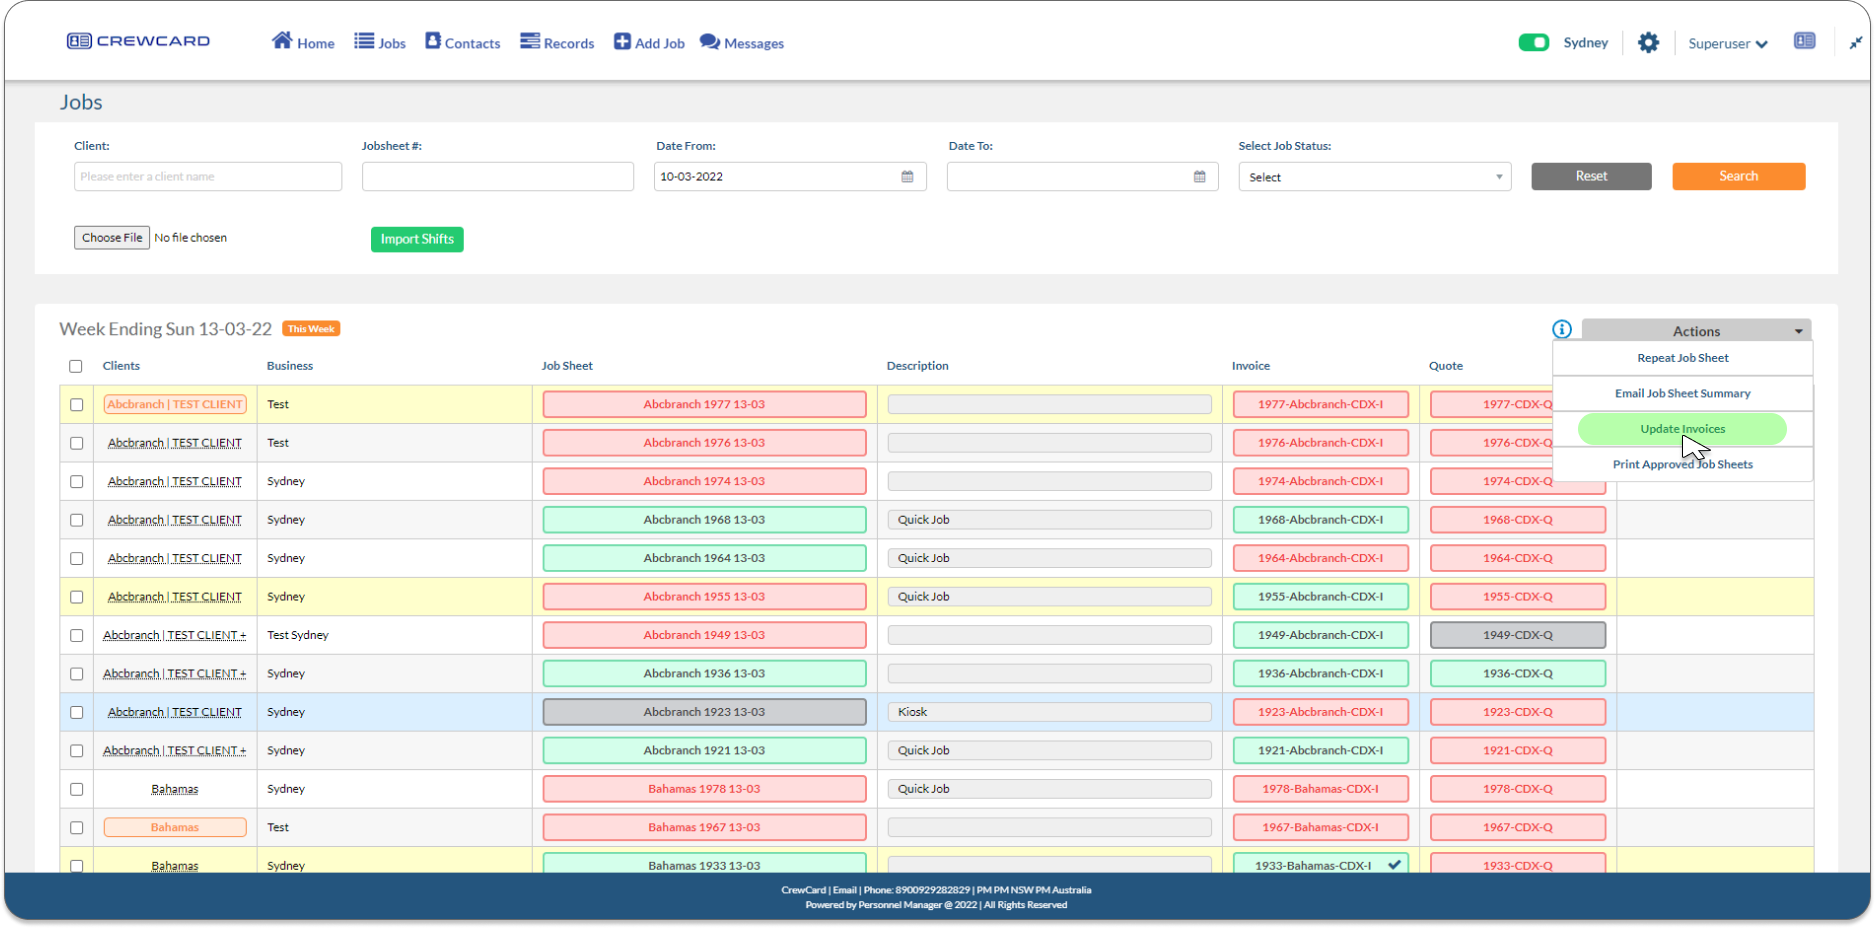
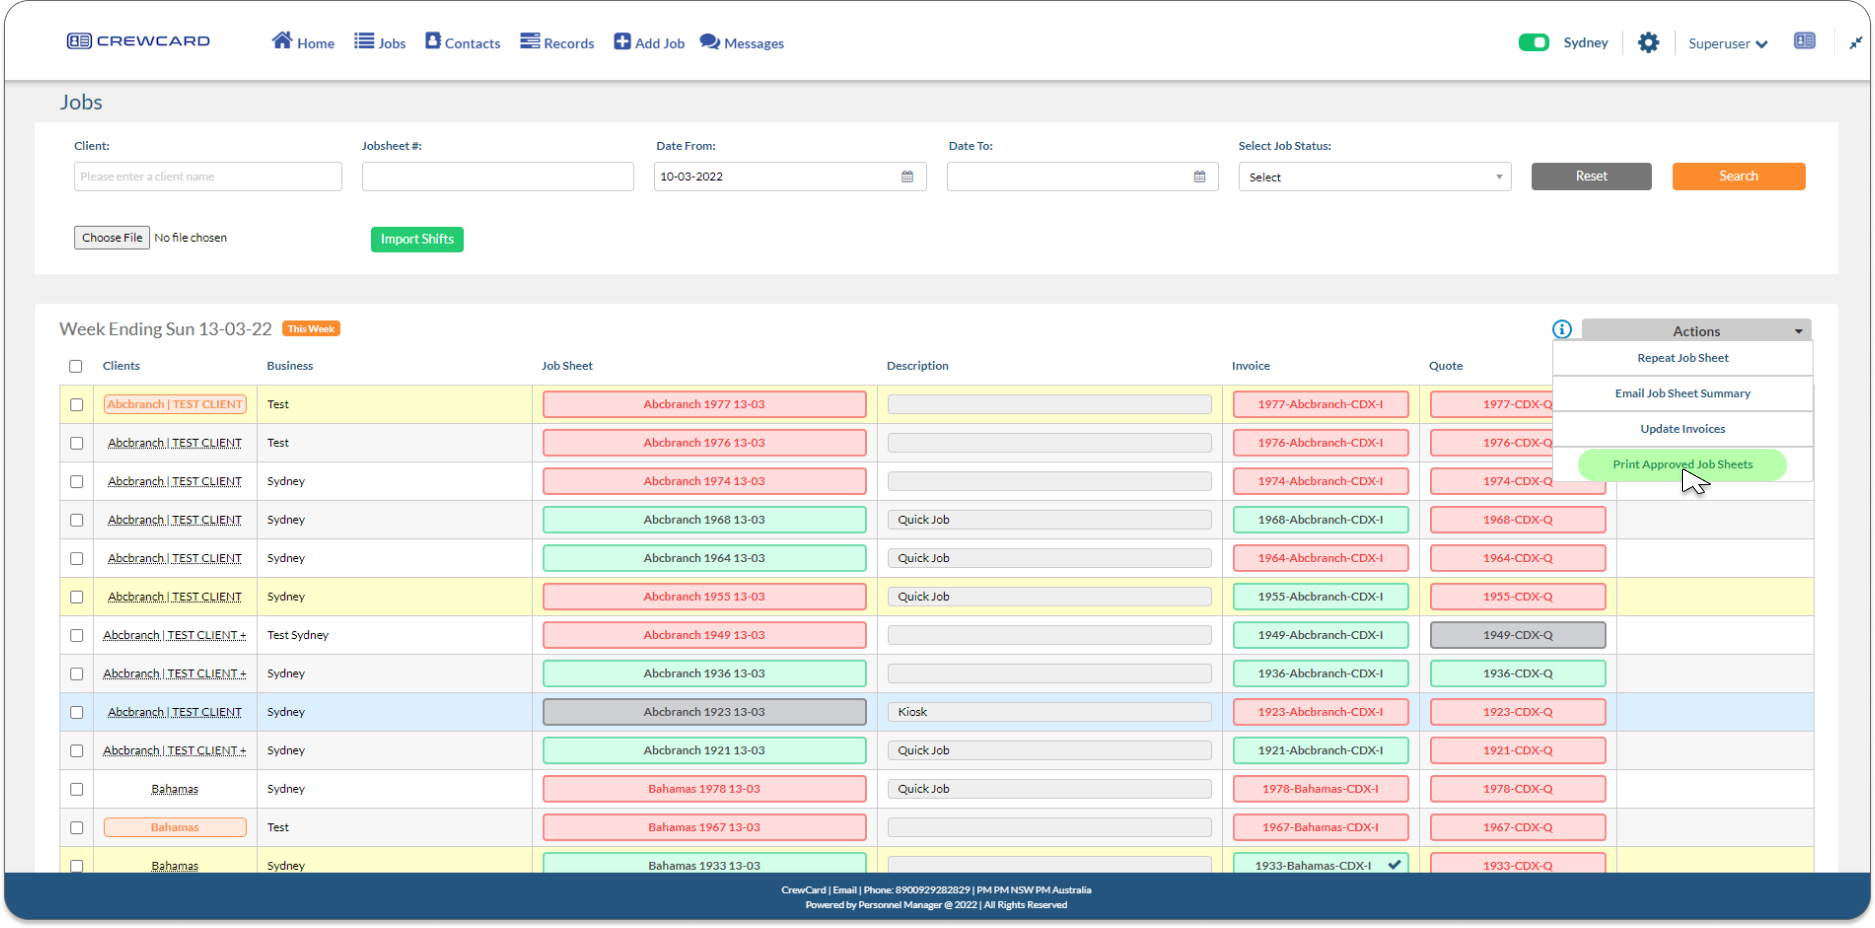
Jobs:

This page displays Job Sheets, Quotes and Invoices for jobs based on the week they are booked, new jobs in the system automatically show here. The default week is Monday to Sunday, if you would like to alter this please contact support@personnelmanager.com. 

Colour Codes for Invoices/ Quotes:

Colour Description
Red Invoice or Quote have NOT been sent to the Client.
Green Invoice or Quote has been sent to the Clients.
Grey This means the Quote has  been approved by the Client.
The system assigns a Job Number to each Job Sheet automatically. Once a Job Sheet has been added, the Quote and the Invoice are automatically created. The corresponding Quote and Invoice share the same Job Number. A job with “+” next to it means it spans more than one pay week.  Colour Codes for JobSheets:
Colour Description
Red No Shifts have been confirmed.
Blue Some or All Shifts confirmed.
Green Some shifts are locked but there are still unlocked shifts in the job.
Grey All shifts have been locked.
Blue Background Highlight The Job sheet is admin locked.
Yellow Background Highlight The shifts within the job sheet have been highlighted.
Client Name Orange Shading The job is booked via the client portal.


In the columns, you can see the following: Clients: The name of the client for whom the job is booked for Business: The job relates to the business within your system Job Sheet: Click the square you are wanting to open and it will take you to the related job sheet to view or edit, for more information please read guide 7.1 Jobs Sheets Job No: CrewCard automatically creates a 3 digit Job No. If you wish to be able to overdrive the Job No this can be done in the admin settings, please read guide 10.1.6 Ops Home Configuration. If turned on, click the field and start typing a new Job No. Description: Click the field and start typing the description of the job, this can be entered at the time the job is created or can be edited here Invoice: Click the square you are wanting to open and it will take you to view and update the invoice for the job, see guide 12.2.6 Updating Invoices for more information about this page Quote: Before sending a quote, please read 10.2.13 Quote Template Settings to set up a customised quote experience on CrewCard. Tag: All Tags created and selected in Job Sheets are displayed in this column. (See “Tags” under the 7.1 Job Sheet Page for more info). Click the square with the quote number you are wishing to open, this will open the quote. Please see the quote example below.

 
On the quote page you are presented with a view of all costs for a review before sending. Through settings, you can hide the crew/staff from the quote which will remove the crew/staff column from the quote. Go to Admin Settings>> #61 Show Crew  per shift on Quotes/ Invoices.
Please see guide 10.1.6 Ops Home Configuration for more help.
If the Admin Discount and Management Tax is not set to be automatically added to a quote and invoice, it can be applied at this point before sending the quote by ticking the box next to the one you wish to add, then enter a name to appear on the Quote (explanation/description), enter the amount to include the (%) sign and make sure to click “Update Quote”. Additionally Part Payment Required is allowing admin charging the client maximum 3 times by using this feature. It can be applied  by ticking the box next to Part Payment Required, Enter the part payment amount or enter the percentage and click Update button. TIP: Tick “Apply Management Tax” and add any amount without the (%) sign and update Quote to add any cost or make a deduction/discount. For example type “Tool Hire” and put 100 in the amount to charge $100 or enter an amount with “-“ negative sign to deduct any amount or give discounts. Please remember these amounts are excl. GST. After reviewing the quote, move down to the email quote section, all recipients who have been uploaded into the client’s profile will be displayed here. To find out how to do this, please see guide 9.2 Client Profile. Tick the box next to their name. If you wish to send the quote to a recipient who is not in the system, use the bottom line to add their information:
A “Type” of contact, Name, Position and email address can be filled before sending. If you wish to remove the entered information, click the Reset button which will reset the fields. Once new details are entered and the quote is sent, the contact will automatically be added to the contact’s list and the invoice loop. Any contact’s entry can be Viewed, Deleted or Edited in each client’s “Client Profile”. Time to send the quote, select to use CrewCard default quote template or use your own customised one that you have set up in settings. Then click Email Quote. Back on the job page on the right, there is a button that says action:
A drop-down menu will appear which contains a list of actions that can be performed on this page:
Tick the box next to the job/s you wish to perform an action on, then click the action from the list. Repeat Job: If you need to repeat the same job sheet, a pop-out window will appear on the page:
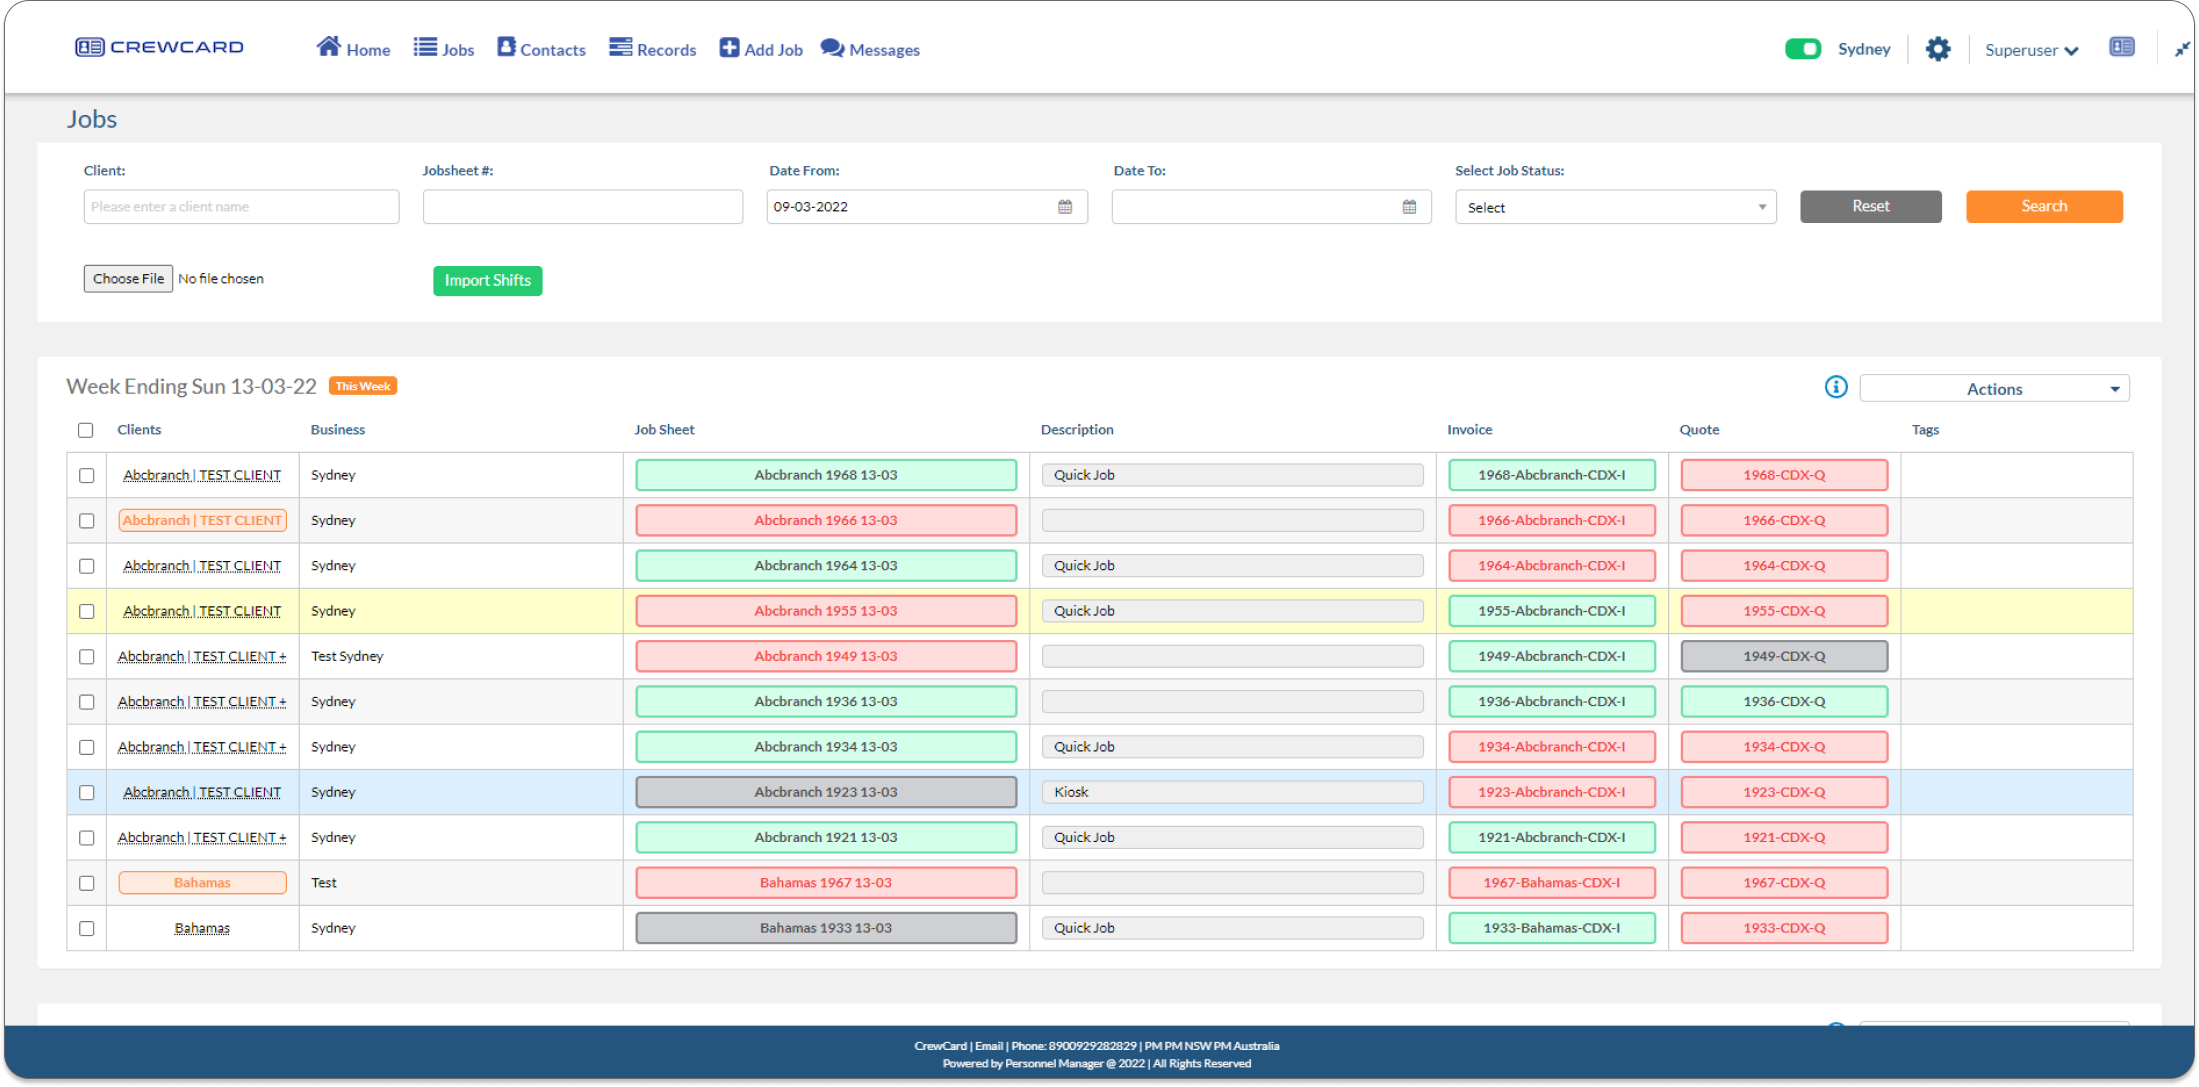
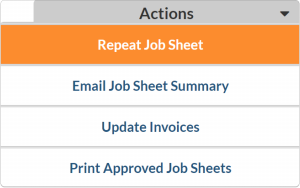
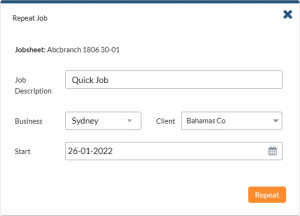
Fill out all fields and click Repeat, the job will be added throughout the system. Email Job Sheet Summary: This will be sent to the client, it is important to customise these through General Settings > Client, you can customise the layout of the email that is sent, which is located in guide 10.2.5 Client Email Job Sheet Summary. The following should be met for the client to be able to receive the email.

  1. Only ‘Locked’ shifts will be included in the summary email.
  2. Accounts Email in the Client Profile. Client Profile>> Accounts>> Contact Type “ Accounts” >> Email address who has the contact type “ accounts” will be able to receive the email.
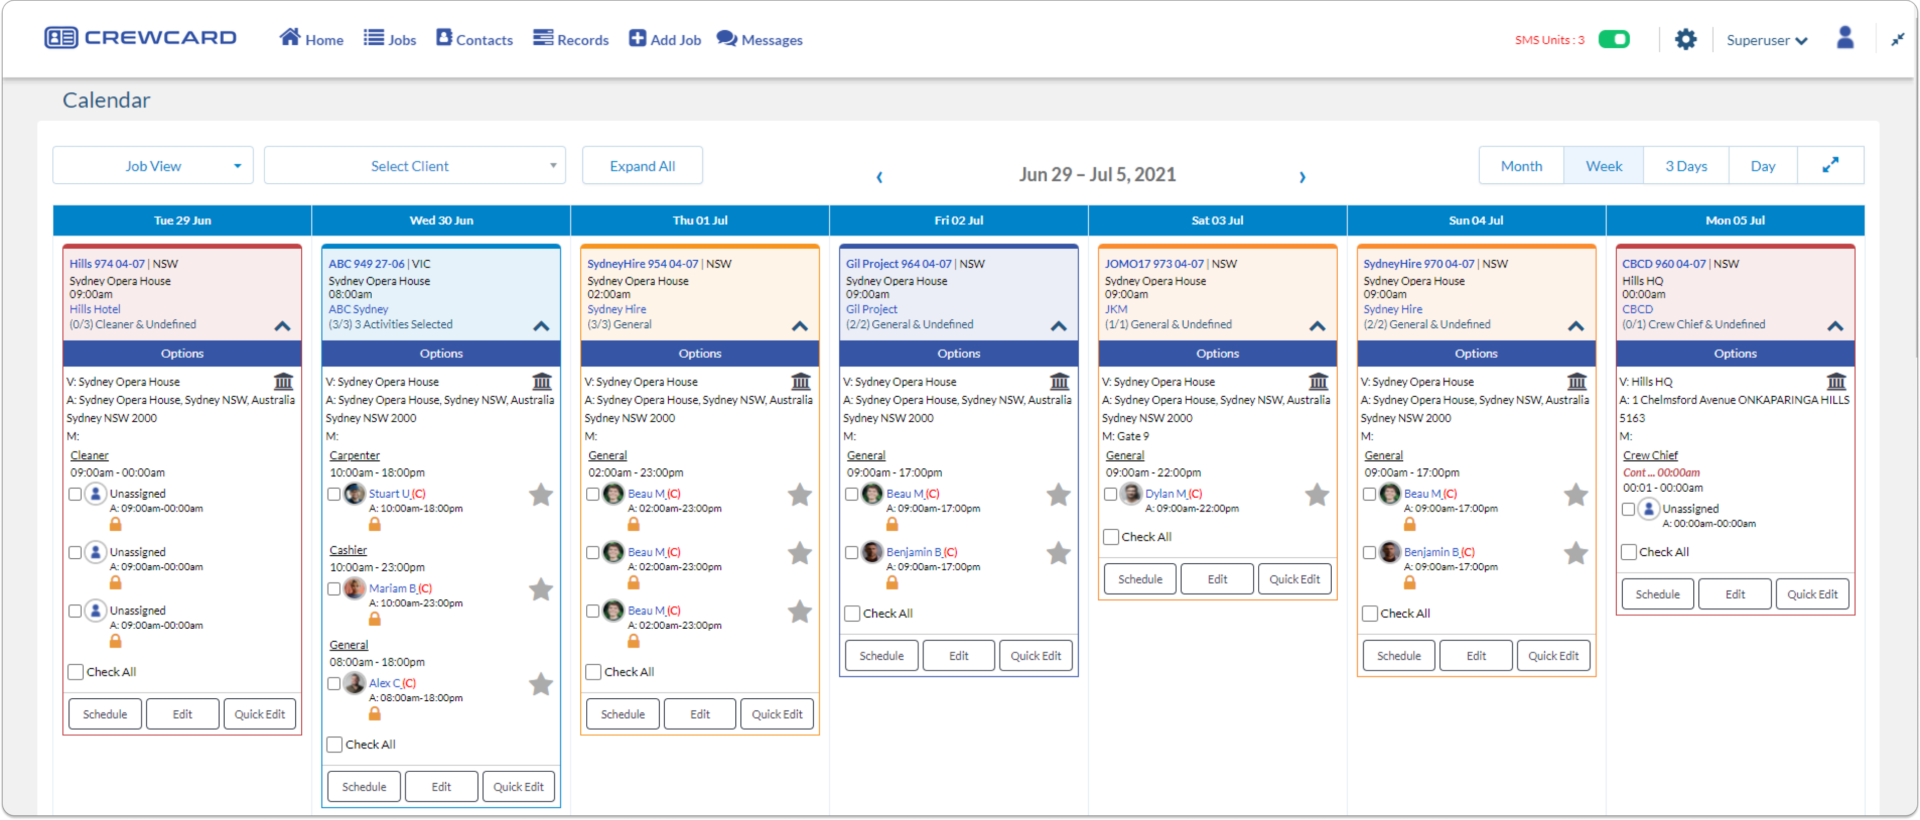
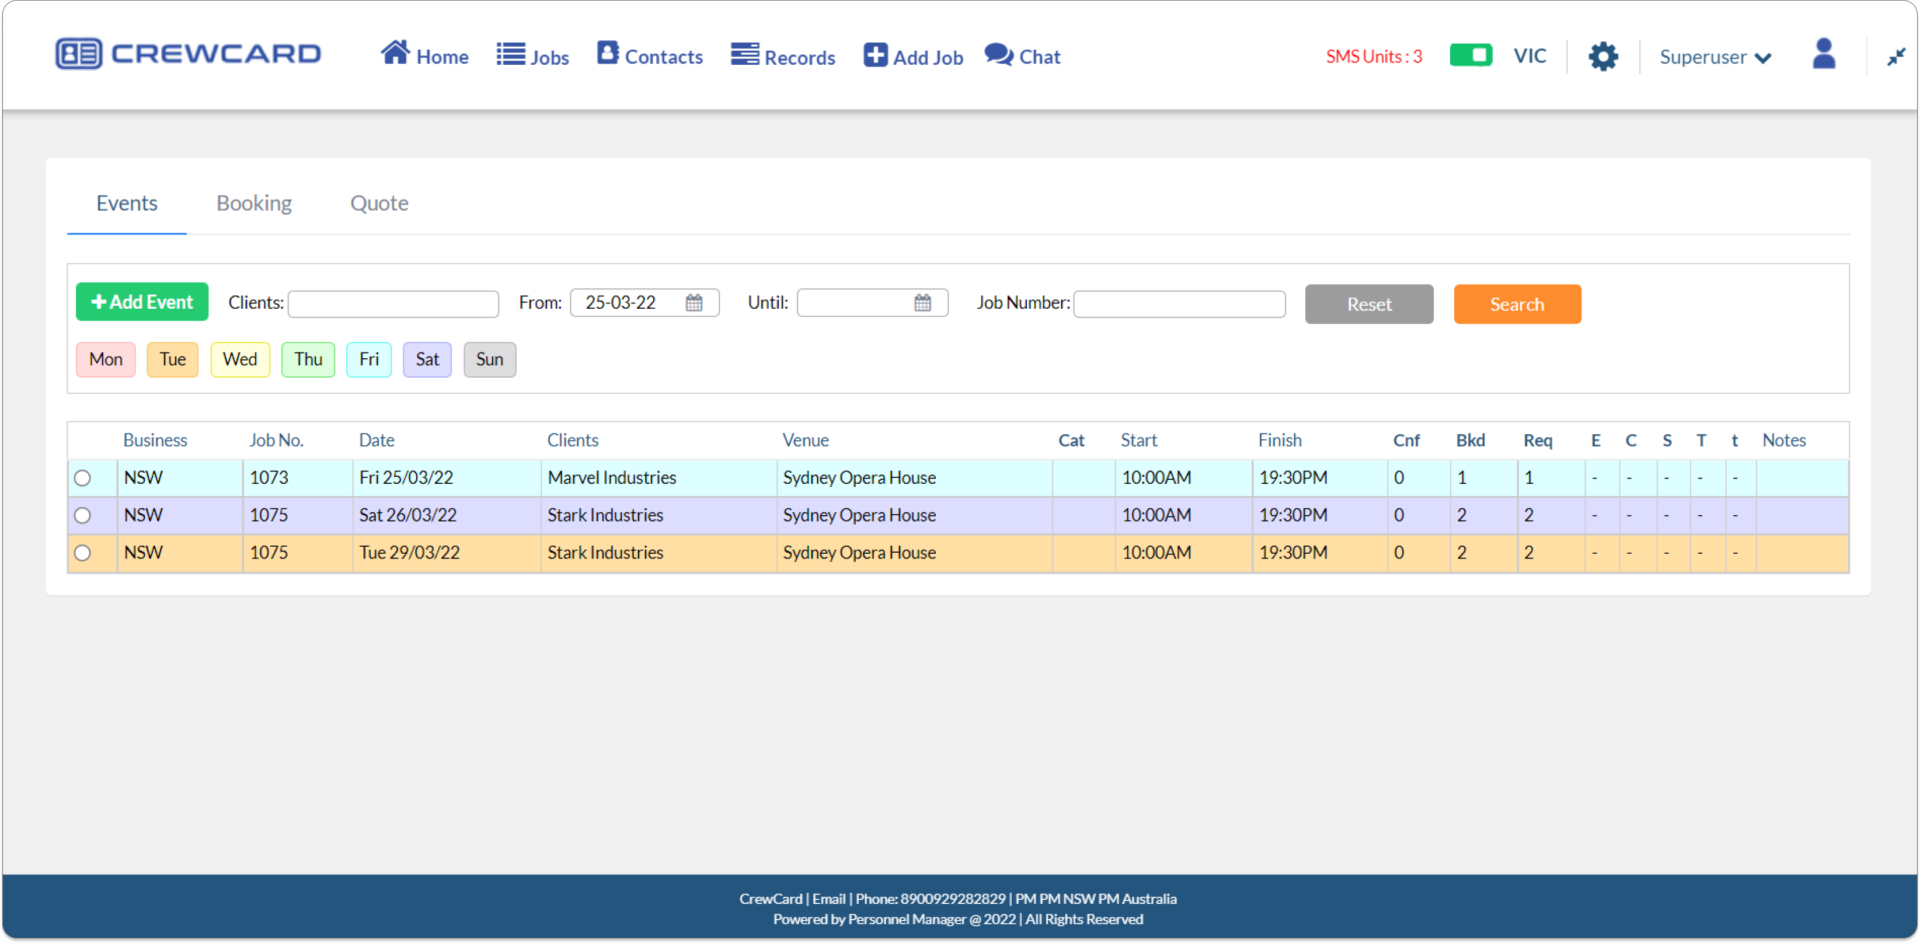
Update Invoices: If an invoice has been paid in full, partly paid or the amount has been changed, then the original invoice number will turn red, click the box for the job, click update invoice, and this will turn the box green.
Print Approved Job Sheet: CrewCard will create a Job Sheet that will open in another window. You can print the Job Sheet or download it into a PDF.
 Tags: All Tags created and selected in Job Sheets are displayed in this column. (See “Tags” under the 7.1 Job Sheet Page for more info).

Calendar:

The Calendar page is a useful tool in the CrewCard. All jobs are plotted in a calendar interface where you can view important details of a job in one glance. To learn about the Calendar, please see guide 4.4.

Events:

Working on the Events page is a different way of entering jobs, paying staff and charging clients. The layout of the page shows an overview of all jobs in colour coordination based by the day. Please view guide 4.7 to learn more.