3.38 Items
ADDING ITEMS
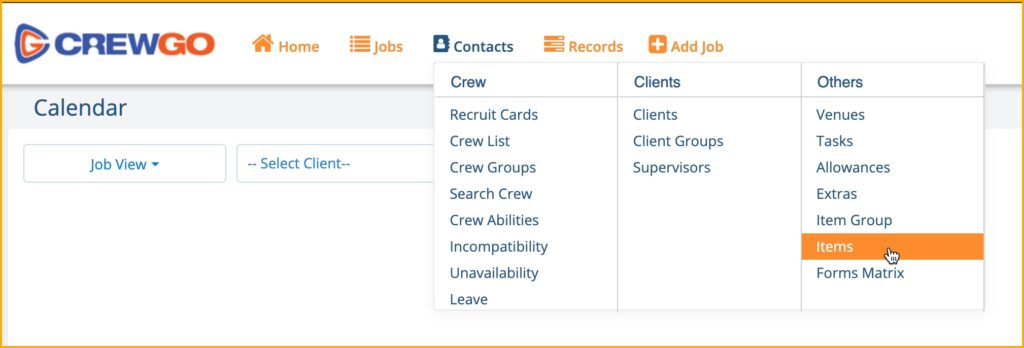
You can now add Items in your Job Sheet in PM/CrewGo. These items can be service charge, upfront payments or anything that is needed when booking a job. Under the Contacts menu, select Items to create new items.
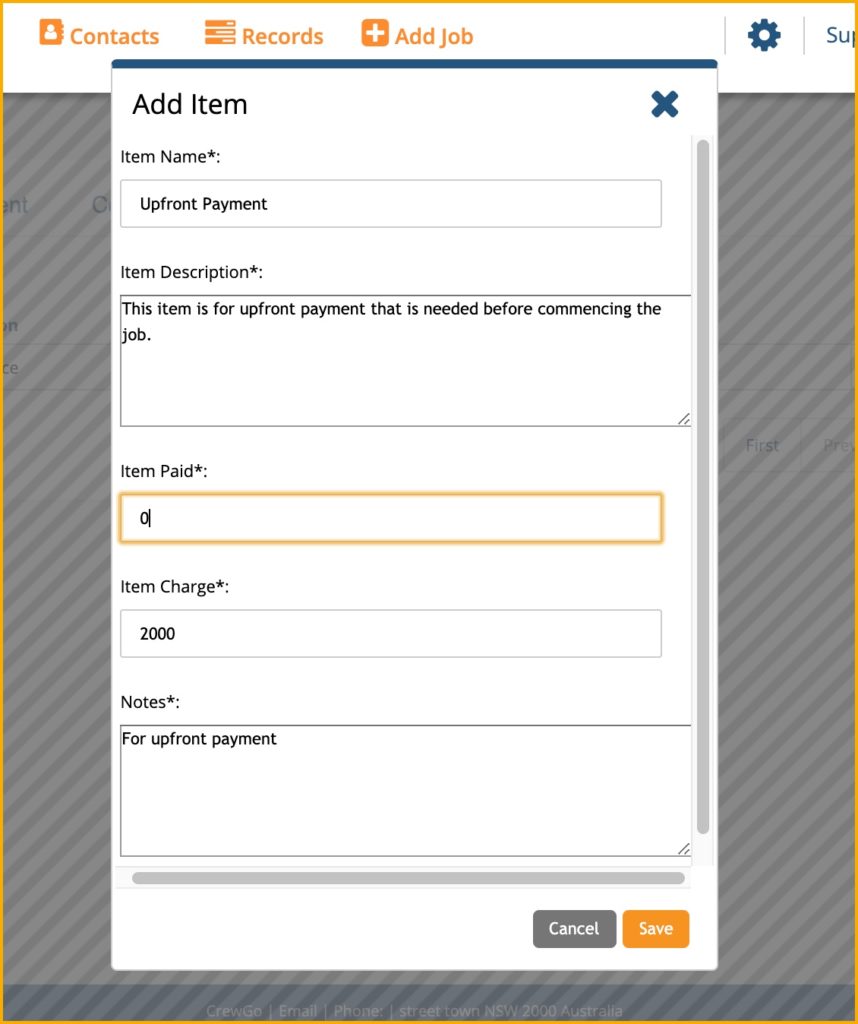
Click Add Item and enter the details of the item. Enter the Item Name, Item Description, Item Paid, Item Charge and Notes.
In the Item Paid, enter the amount that you paid for the item, if applicable. Then Item Charge, enter the amount that you will charge to the client.
Click Save once completed.
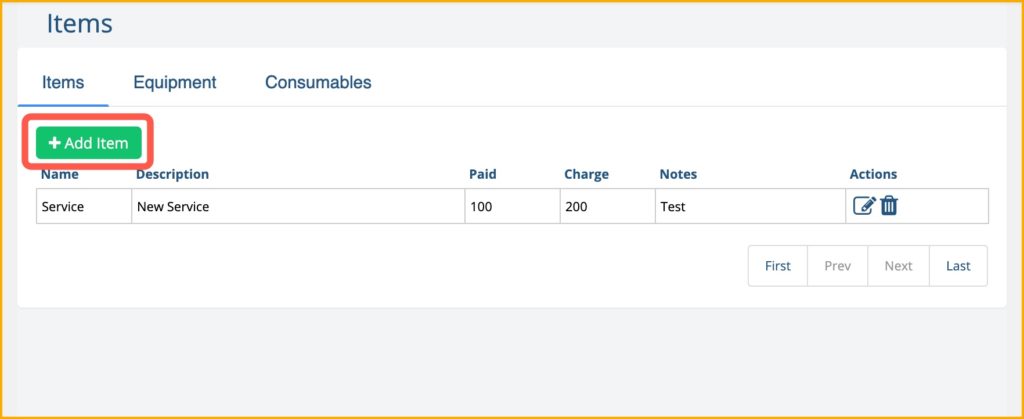
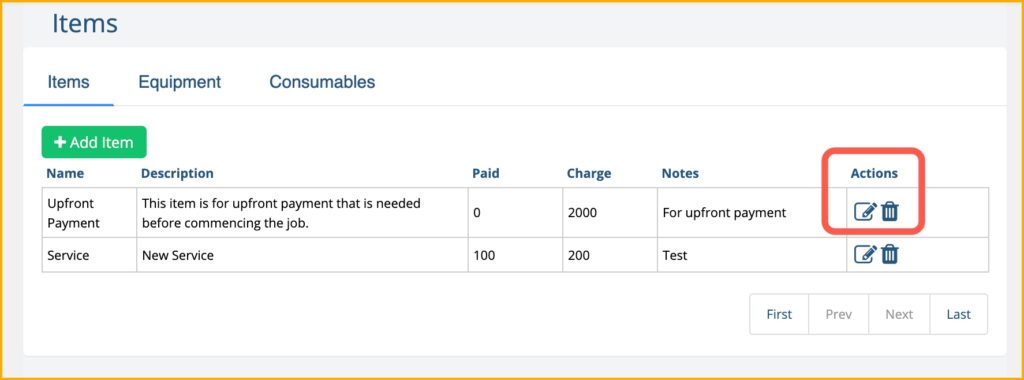
The Item will now be listed on the item list. You can delete and edit the items using the trash icon and pencil icon respectively.
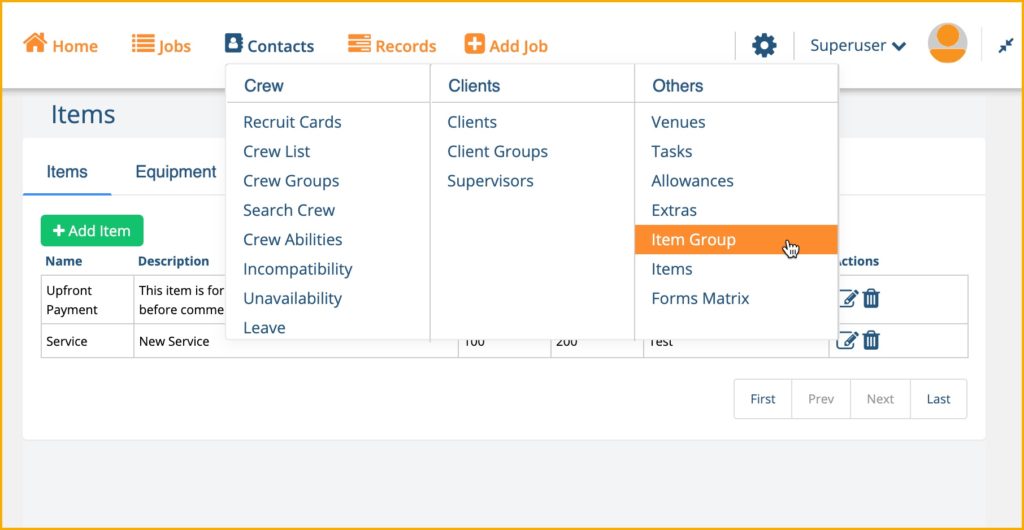
ADDING ITEM GROUPS
Before an item can be displayed to the Job Sheet, it needs to have an Item Group. Under the Contacts menu, click Item Group.
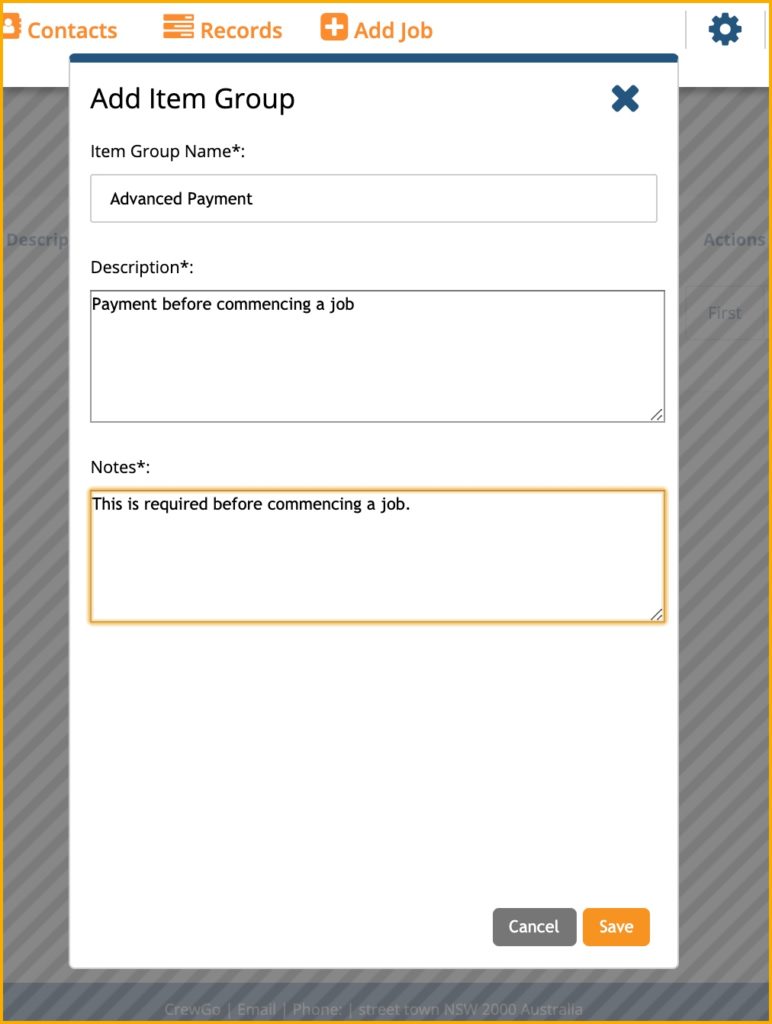
Click Item Group and enter the details of the Item Group. Enter the Item Group Name, Description and Notes, then click Save.
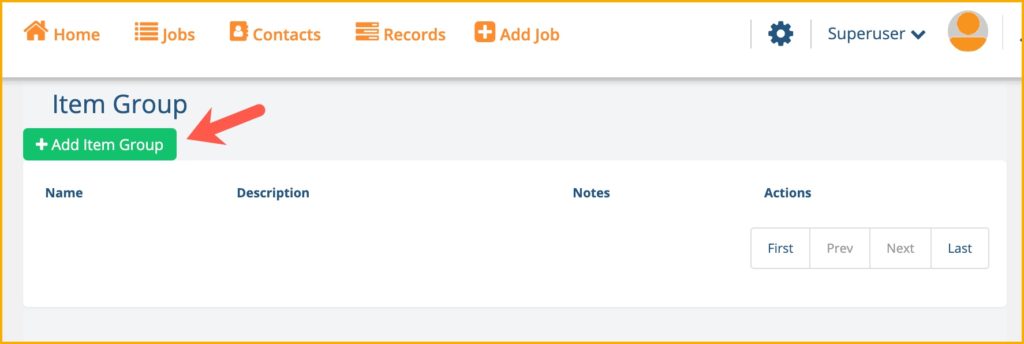
The new Item Group will now be added to the list. You can delete and edit the items using the trash icon and pencil icon respectively.
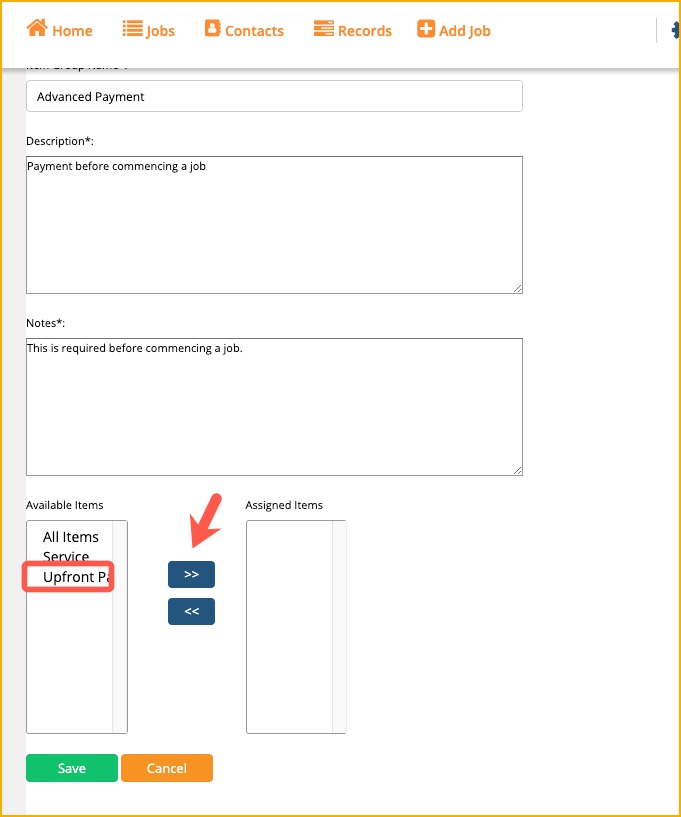
To add the item that we created, we need to edit the Item Group by clicking the pencil icon.
![]()
In the Available Items section, select the item and move it to Assigned Items then click Save.
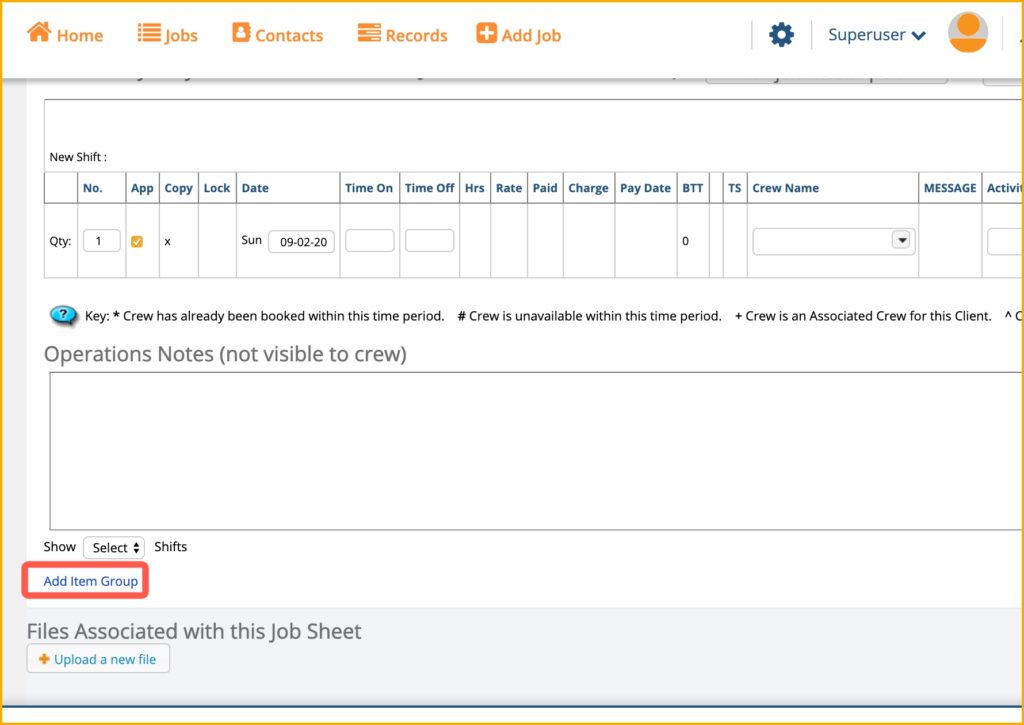
USING ITEM GROUP IN JOB SHEET
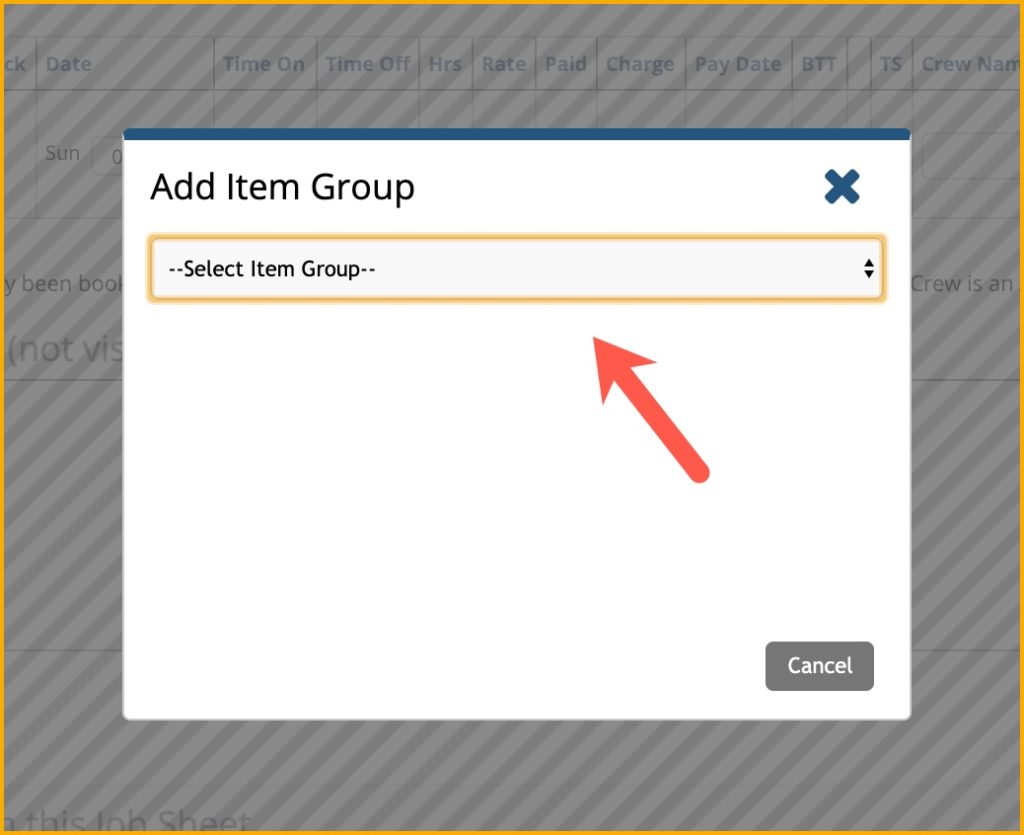
When you create a new Job Sheet, you can now add the Item Group by clicking Add Item Group.
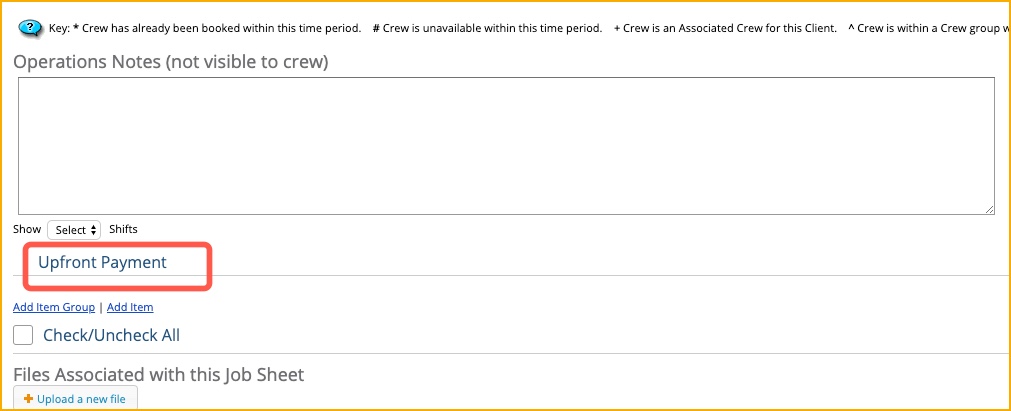
Select Item Group from the dropdown menu and the page will refresh and the Item Group will be added to the Job Sheet page.
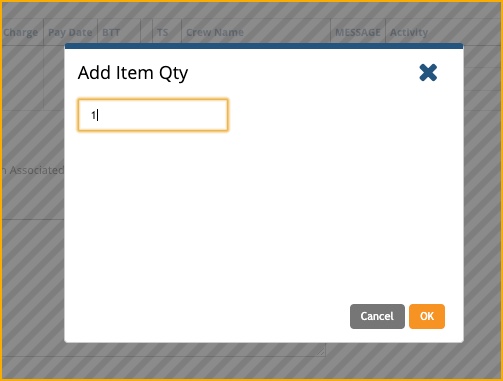
Now click the Item link and enter the quantity of item that you want to add.
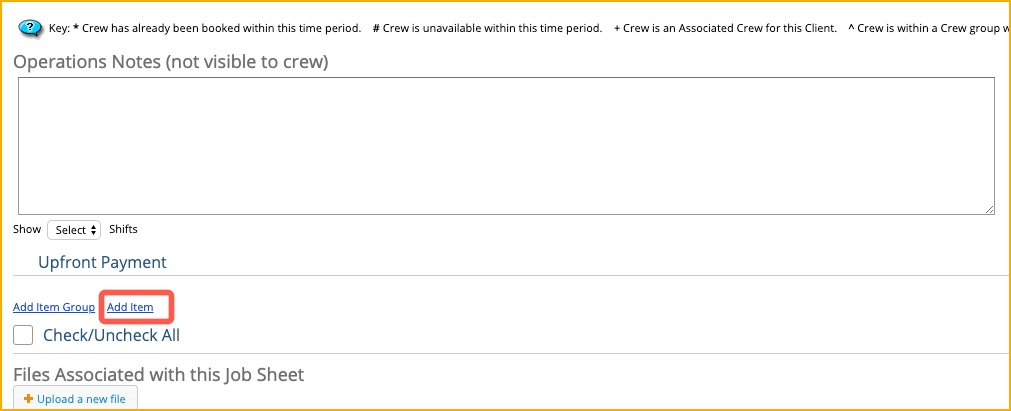
Select the item from the dropdown menu list.

Enter the Qty for the Item, the start date, start time, end date. end time. You can also select the Assigned Name from the dropdown menu, Venue and Meeting Place.

Now you can save the Job Sheet.

