3.4 Crew Page
CNB > Crew A / DM / M
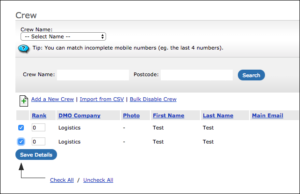
Click on the Crew Icon on the CNB to open Crew Page.
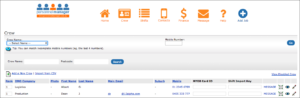
This is where all your crew records are kept. Existing crew can be searched by selecting their name from the drop down list where it says “Crew Name” or by entering their mobile numbers. All names are shown in alphabetical order starting from the first name.
TIP: You can click on “—Select a Name—”and start typing the first few letters of the crew, which will take you to that section of the names for a quick access. Or a search by name can also be performed by typing a key word (or letters) in the text box next to “Crew Name.
TIP: if you remember only a few numbers of a mobile number of crew, you can enter it in the “Mobile Number” field and click “Go”. It will bring up all the crew members that have the combination of the short number you entered.
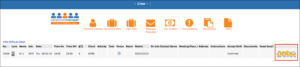
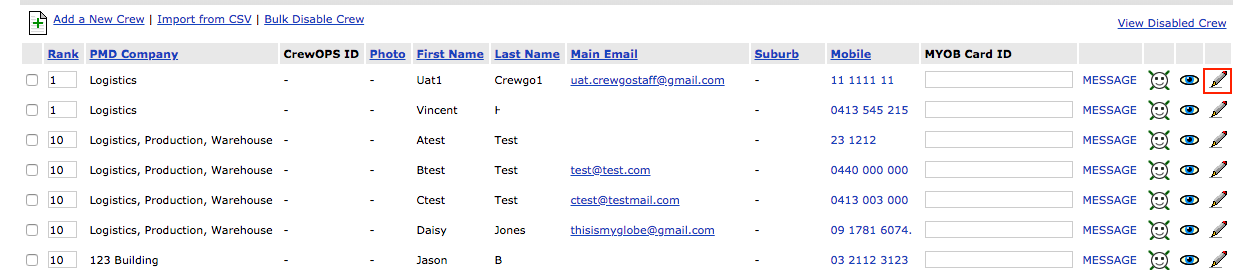
▪”Disable” Face Icon, Click to disable crew and disabled crew/s will display in the Disabled Crew list. (Click View Disabled Crew link to view list)
▪”EYE”: Crew profiles can be viewed or edited by clicking “eye” icon next to each crew.
▪”EDIT” Click on the ‘Edit’ Pencil Icon will open the Crew Details Page.
MESSAGE: clicking “MESSAGE” opens “Send an SMS” page with this particular crew selected ready to be sent, this is useful for quick messaging.
DISABLE BUTTON: Clicking Disable Crew Button will bring up the TextBox to enter a reason, enter any text and click Submit will disable the selected crew.
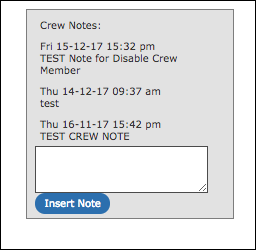
Any text that is entered in the textbox will appear on the Crew Profile Page. Disabled crew can be viewed using View Disabled Crew page.
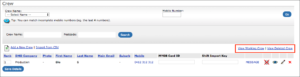
View Disabled Crew: This link opens a new window of crew list showing only disabled crew, where crew profiles can be view, edit or restore. To delete crew please see “Disable and Delete Crew” under View Deleted Crew Page.
3.4.1 Add a New Crew
Click this link to open up a new profile page and start filling the form with crew information. First and last name, mobile number and at least one skill must be selected in order add this crew to your crew list.
Rank: The Personnel Manager staff rostering system allows you to rank your staff, numerically for the purposes of prioritising them in order, or assigning numbers to particular ‘types’ of staff for your own internal reference. Simply open the Crew Page (Admin/Duty Manager/Manager Login) then put a number in the text box to the left of each Crew Member’s entry under the title Rank. Remember to scroll down to the bottom of the page and press “Add/Edit Crew”. It is possible to assign the same ranking to multiple staff for your own reference. For example, you could give everyone that has a car a ranking of 20. The database will display all Crew Lists in the Shift Edit Page and the various SMS pages in order of the assigned ranking. In this way you can offer staff work in order of ranking. The MultiSMS system will use the ranking when prioritising which staff to confirm for shifts. If rankings are not saved (which means 0), the MultiSMS sequence will display staff in alphabetical order.
Business Association: Determines which “Business” this staff works under. All shifts are entered under one “Business” and crew names DO NOT appear if they are not saved under that “Business”. Please note that any crew can be saved under multiple businesses.
Primary Business: If a crew needs to be entered under multiple Businesses, this field determines the primary business. This is used with rates “Public Holiday (full timers)” calculations.
Client Association: If a crew member only works for certain clients, they can be added to the right side of the table, otherwise If left blank then the crew member will be available across all clients.
Personal Details: All personal details name, address, DOB… can be entered here. Also a profile picture can be added by clicking “Choose File” select it from the computer and scrolling to the bottom of the page and clicking “Add/Edit Crew”
Shift Messages: All outgoing SMS messages to this crew can also be sent in email format providing an email address has been entered in the Personal Details section. Or SMS option can be turned off by unticking the box for it.
Additional Information: Any additional information that needs to be followed up or tracked can be created in Global Settings which will appear in this field on each crew profiles. For example once “Uniform” tick box is created in the Global Settings it can be ticked each time a crew member is given a uniform. For customising “Crew Additional Information” go to:
▪AUB > Global Settings > Crew Additional Information Fields A
Personal Notes: Any notes regarding Crew can be entered here.
Personal Files: Any personal files (.jpg, .pdf…) can be uploaded to crew pages and viewed here. (Copies of certificates, tickets, pictures…)
Double Booking Warnings: Ticking this box will NOT show “Double Booking Warnings” for this crew, if booked on two clashing shifts.
Assigned Member Categories: All crew must be assigned under at least one category which will determine the pay rate.
Crew Groups: Crew can be added or taken out of crew groups. Please see “Crew Groups” for more information.
Available Member Skills: These are the “activities” that are created under “Activities” tab. Crew members MUST be assigned activities in this field in order for their names to appear in the “Crew” list of the shift with corresponding activity.
Ticketed Member Skills: If the crew is assigned a ticketed skill (for more info see ticketed activity), ticket number and the expiry date can be entered here. PM shows warnings on top of the “Shifts” page if any crew is confirmed on an Activity, which requires a ticket and that this information is missing or ticket is expired.
Bank Details, Superannuation Details: Crew Bank and Super details can be entered here.
Emergency Details: Emergency contact details in case of any emergency.
3.4.2 Admin Lock Crew Rank
Admin Lock Crew Rank:
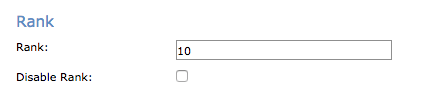
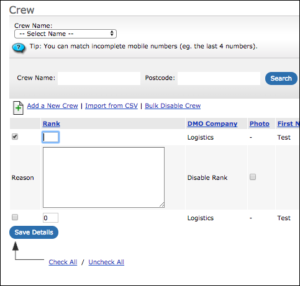
When crew rank change by Administrator under the new reason text box there is a checkbox call Disable Rank, when ticked it will Admin Locked the crew’s ranking. This checkbox only available in administrator login. The checkbox cannot be view under duty manager or manager login.
When the check box is selected duty manager and managers are unable to change crew ranking. In order for duty manager or manager to change crew ranking, admin will first to untick the text box and save.
When the check box is save only administrator is able to change.
3.4.3 Change Crew Rank
Change Rank – Add Reason and Send Emails to Admin
Set Email Notification to be send to admin when a Crew Ranking is changed and Saved, scroll down to the bottom of the Global Setting Page, tick the Check Box 247. ‘Send email to admin when crew rank is updated:’ and click ‘Save Configuration’
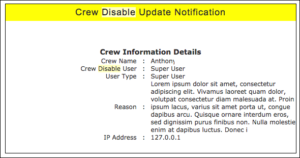
The Email Notification sent to admin with the following:
▪Crew Name whose ranking was changed
▪Previous Rank
▪Current Rank
▪Who changed the Ranking
▪Reason it was changed
▪IP address of the person who changed the ranking
▪User Type of the Person who changed the ranking.
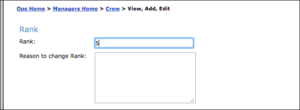
A pop up window is appeared to prompt the user to add a reason for the ranking change.
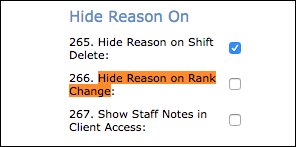
If you do not require reason to change crew rank within your organisation, Reason requirement can be hidden from settings. To hide reasons go to Settings Page scroll down to the bottom Hide Reason section tick “Hide Reason on Rank Change” and Save.
TIP: Crew Rank can also be change from Crew Page, Crew Page under Rank column and rank can change with Reason required to enter.
3.4.4 Display Crew in order of Hrs Worked
On the Crew Page (Admin Login) there is the feature “Display in order of Hrs Worked”. To use this feature it is important to have View All Company Details Details: OFF, it must be done for each business individually. When the box is ticked, a date from and date to calendar appear, making it possible to enter a date range and press GO in order to view your Crew in order of hours worked. A list will be displayed of only the Crew Members that have worked in that time period, the amount of hours each one has performed, from the most amount of hours through to the least.
This new list will show a new Ranking for each Crew Member corresponding to the amount of hours they have worked in the chosen time period. The Crew Member that has performed the most hours will have a new ‘ranking’ of 1 and the list will assign a 2 for the Crew Member that has performed the second most hours, and so on, numerically for the whole list. It will also display their old ‘ranking’ as well. The system will allow you to save the new rankings by pressing the Save Ranks button at the bottom of the page. Any Crew Members that did not work in the time period searched, and whose previous ranking conflicted with a new ranking, will now be ranked one rank lower than the lowest ranked member of the search.
For example: If you searched crew that have worked in the last fortnight, and your list displayed 20 Crew Members, in order of the hours they have worked, from highest to lowest, and you saved these rankings, you would have a ranking order of this ‘active crew’ list from 1 – 20. Any crew that had a ranking between 1 and 20 already, but did not work in the previous fortnight will now have a rank of 21.
N 3.4.5 Import from CSV
Instead of creating each crew profiles one by one they can be imported using CSV (Comma Separated Values) files. Click on “Import From CSV” and follow the instructions. To start from scratch;
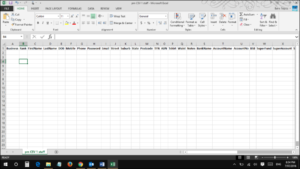
▪Create an Excel Spreadsheet and enter the fields in the header row as outlined in the instructions,
▪Fill out crew information as much as possible (Please note that “FirstName”, “LastName” and “Mobile” fields MUST be entered),
▪Please note that “Business” must be entered exactly as one of the Businesses that was created within the PM. (See “Businesses” for more info)
▪Once done save the spreadsheet as .csv,
▪On “Import From CSV” page scroll down to the bottom and click “Choose File”, select the .csv file that’s been created and click “Upload CSV”,
▪Choose which entries to import, then press “Import”.
▪Please note that any existing entry will be overwritten on each import.
The Staff Import CSV Template has been created for your convenience to use to upload lists of staff into PM. To access please click here: Staff Import CSV Template
Please Note: Import From CSV only recommend at system set up, once the system is set the import staff is not supported. Please DO NOT attempt to use this feature at any other time.
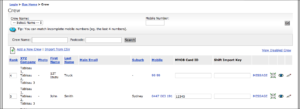
3.4.6 MYOB Card ID
MYOB Card enables integration with the Mind Your Own Business Payroll software. Crew will be identified in the MYOB by their MYOB Card ID. (See “MYOB Export” under “Payroll” for more info)
TIP: As the MYOB Card ID field is located next to Crew Mobile Number field, it is easy to copy part or all of the mobile number and use this as the MYOB Card ID.
3.4.7 Disable and Delete Crew
CNB > Crew Page>Disable Crew>Crew Page>View Disabled Crew>Delete Crew A / DM / M
Firstly you must disable the crew member in the crew page by pressing the little anti-smiley face on the right of the screen associated with that crew member to delete a crew record.
Once disabled, you have to click the link “View Disabled Crew” top right of the Crew Page, search for crew then delete by pressing the X. It’s impossible to resurrect mobile numbers as they are the unique identifier, so it is recommended not to delete crew unless absolutely necessary.
To re-enable disabled crew, go to “View Disabled Crew” and click the smiley face to the right of the screen associated with the crew member.
Disable Crew Reason:
Disable crew reason is now required when disabling any crew member.
When click on any Disable Icon there is a TextBox popup to enter a reason, enter any text and click Submit will disable the selected crew.
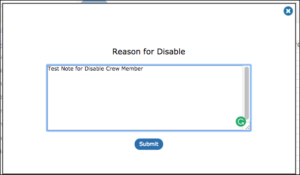
Any text that entered in the textbox will appear on the Crew Profile Page and an email Notification is send to Admin, Admin Email address can be set in Settings Page ‘Admin email address for crew rank, disabled/enabled crew and deleted shifts’
Same step applies to Bulk Disable Crew, reason is required and one same note will appear on Crew Profile but no notification will send to Admin.
Enable Crew Reason:
Enable crew reason is now required when enabling any disabled crew member.
When click on any Enable Icon there is a TextBox popup to enter reason, enter any text and click Submit will disable the selected crew and an email Notification is send to Admin.
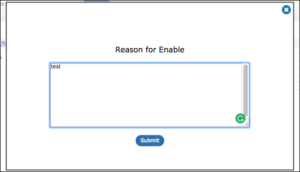
Any text entered as Enable reason will appear on Crew Profile Page.
Bulk Crew Disable function is available for disabling multiple crew members at once, there are tick box on the left side of Rank column, select one or more crews and click Bulk Crew Disable will open the Reason for Disable textbox, enter any text and click Submit to disable any selected crew member. The same note will appear on all selected crews’ Crew Profile, but no notification will send to Admin.
Tip: Any disable crew can be found on View Disabled Crew Page, any deleted crew can be found on View Deleted Crew Page.
N 3.4.8 Deleted Crew Page
Once View Disabled Crew Page opened there is option to open the Deleted Crew Page
The Deleted Crew Page contains deleted crew member details which enable Admin to access for edit/view. The purpose of the Deleted Crew Page is to the change deleted crew details for a crew to rehiring in the system, PM system is not allowing to add a Crew with the same mobile number even when a crew member been deleted.
To add a deleted crew as New Crew please go to Deleted Crew Page then change crew’s mobile number and Save. Once mobile number is changed Admin is able to add the person as new crew again.
N 3.4.9 Crew Status
In Crew View, Add, Edit Page, under Personal Details section crew status optional to from the drop-down list. If status is not within the drop-down list, click on the ‘Plus’ Icon to add new status.
“Show Warnings for required fields” is available to select/add/edit/delete in Global Settings.

To add a new filed, click on ‘Add Field’ to add new row to fill in with specific text, Type and list then mark as Required/Warning to show warning message when not complete.
Note: For Dropdown Type please put the options separated by “|” in List fields.
When this section “Display on Report” tick box is selected those fields are available in 3 Exports:
▪Shifts Page>Select an Action>Export to Excel
▪Shifts Page>Select an Action>Export Summary (Admin)
▪Timesheets Page>Export All Records
Once a new field is added, Crew Details Page – Crew Status selection becomes available.
Example: Pay Rate is added in Global Settings and Pay Rate become available in Crew Details Page:

N 3.4.10 Crew View
For quick access to crew details from Crew Page, Anticipated Icon button is available to click to open the Crew Detail Page.
N 3.4.11 Edit Crew Icon
For quick access to edit crew details from Crew Page, Anticipated Icon button is available to click to open Crew Detail Page.
Anticipated Icon button is next to the “Eye” Icon.
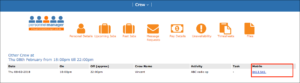
3.4.12 Tel Link in Crew Login
When crew member login via a mobile device, within their Upcoming Jobs click “Other Crew On This Job” will open other crews on the same job, other crew’s contact number is highlighted as telephone link that enable to click and call.