4.0 Add Venue / Room / Meeting Place / Onsite Contact
Add Venue
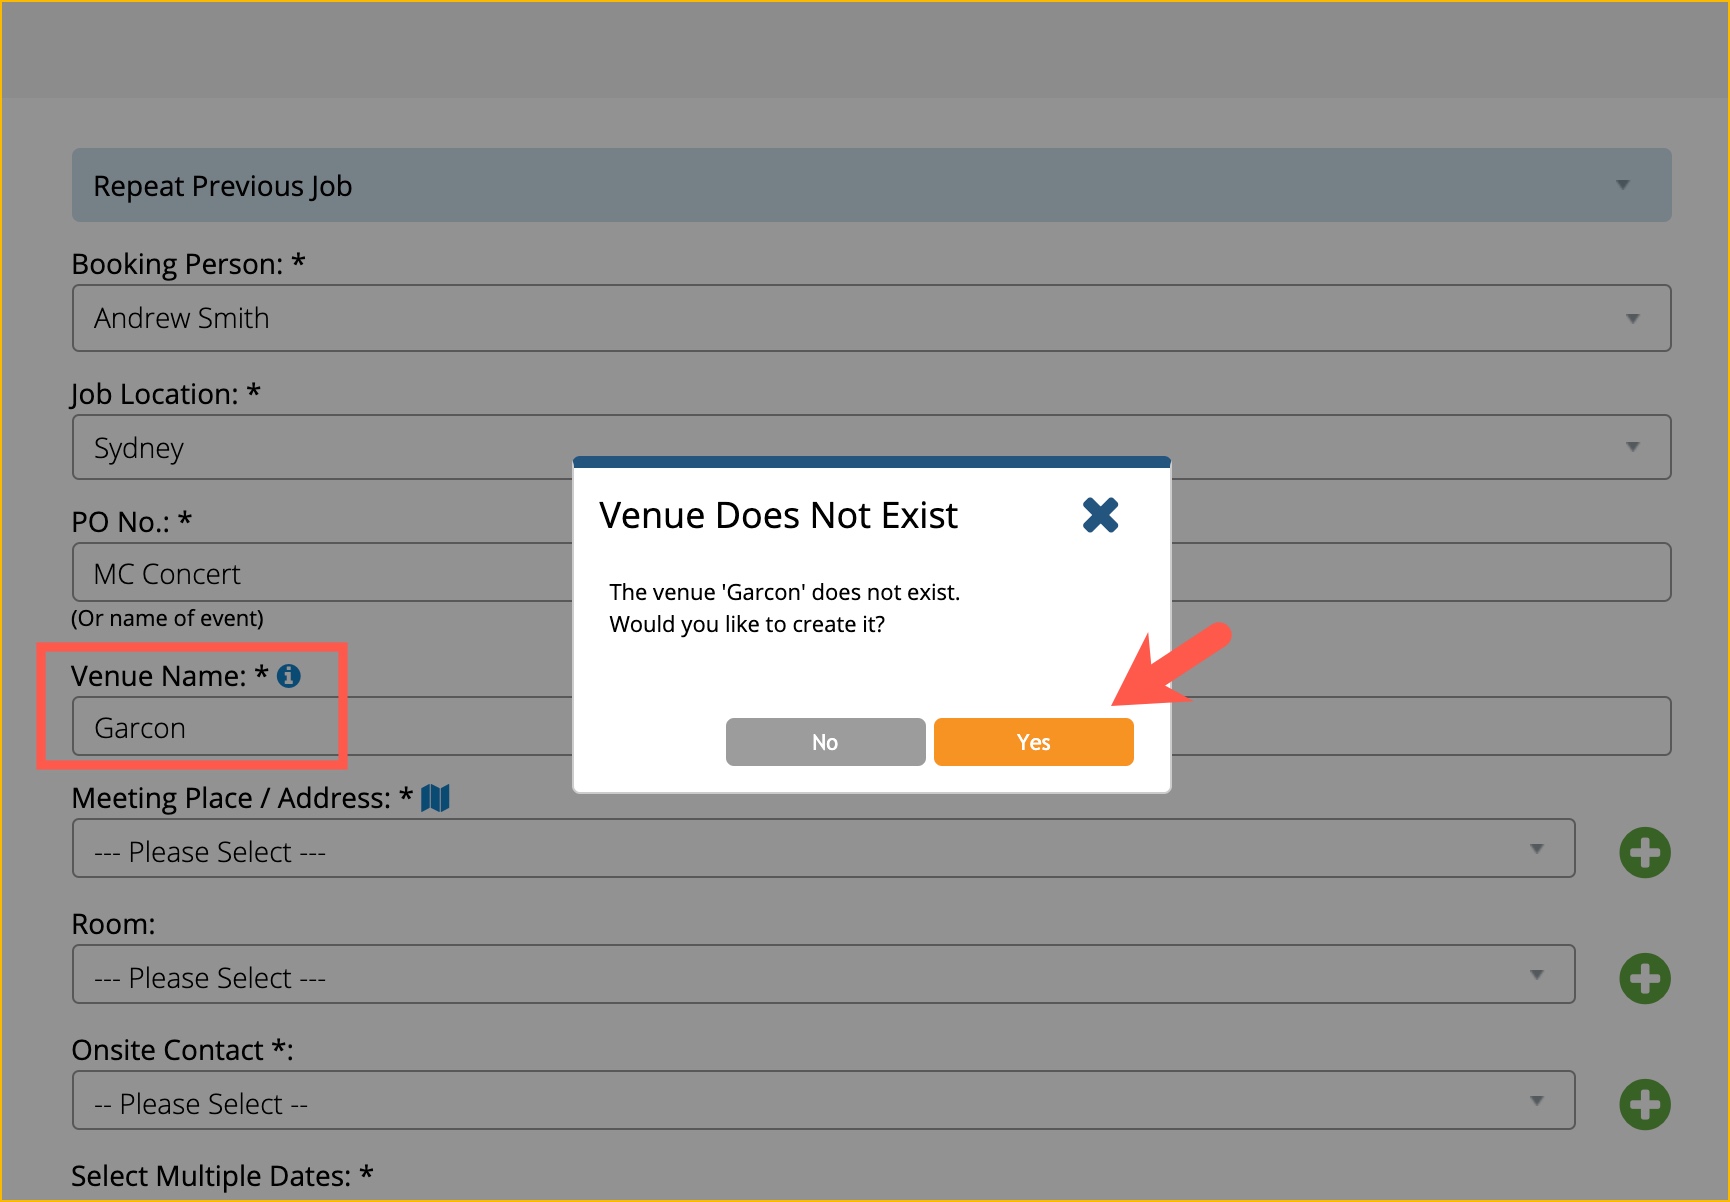
When booking or creating a job and you want to create a new venue, simply type on the Venue field and wait for the system to detect the venue.
The system will check the venue in the database if it is non-existent. If it is non-existent, the system will ask if you want to add a new venue.
Click Yes.
The Create Venue window will appear.
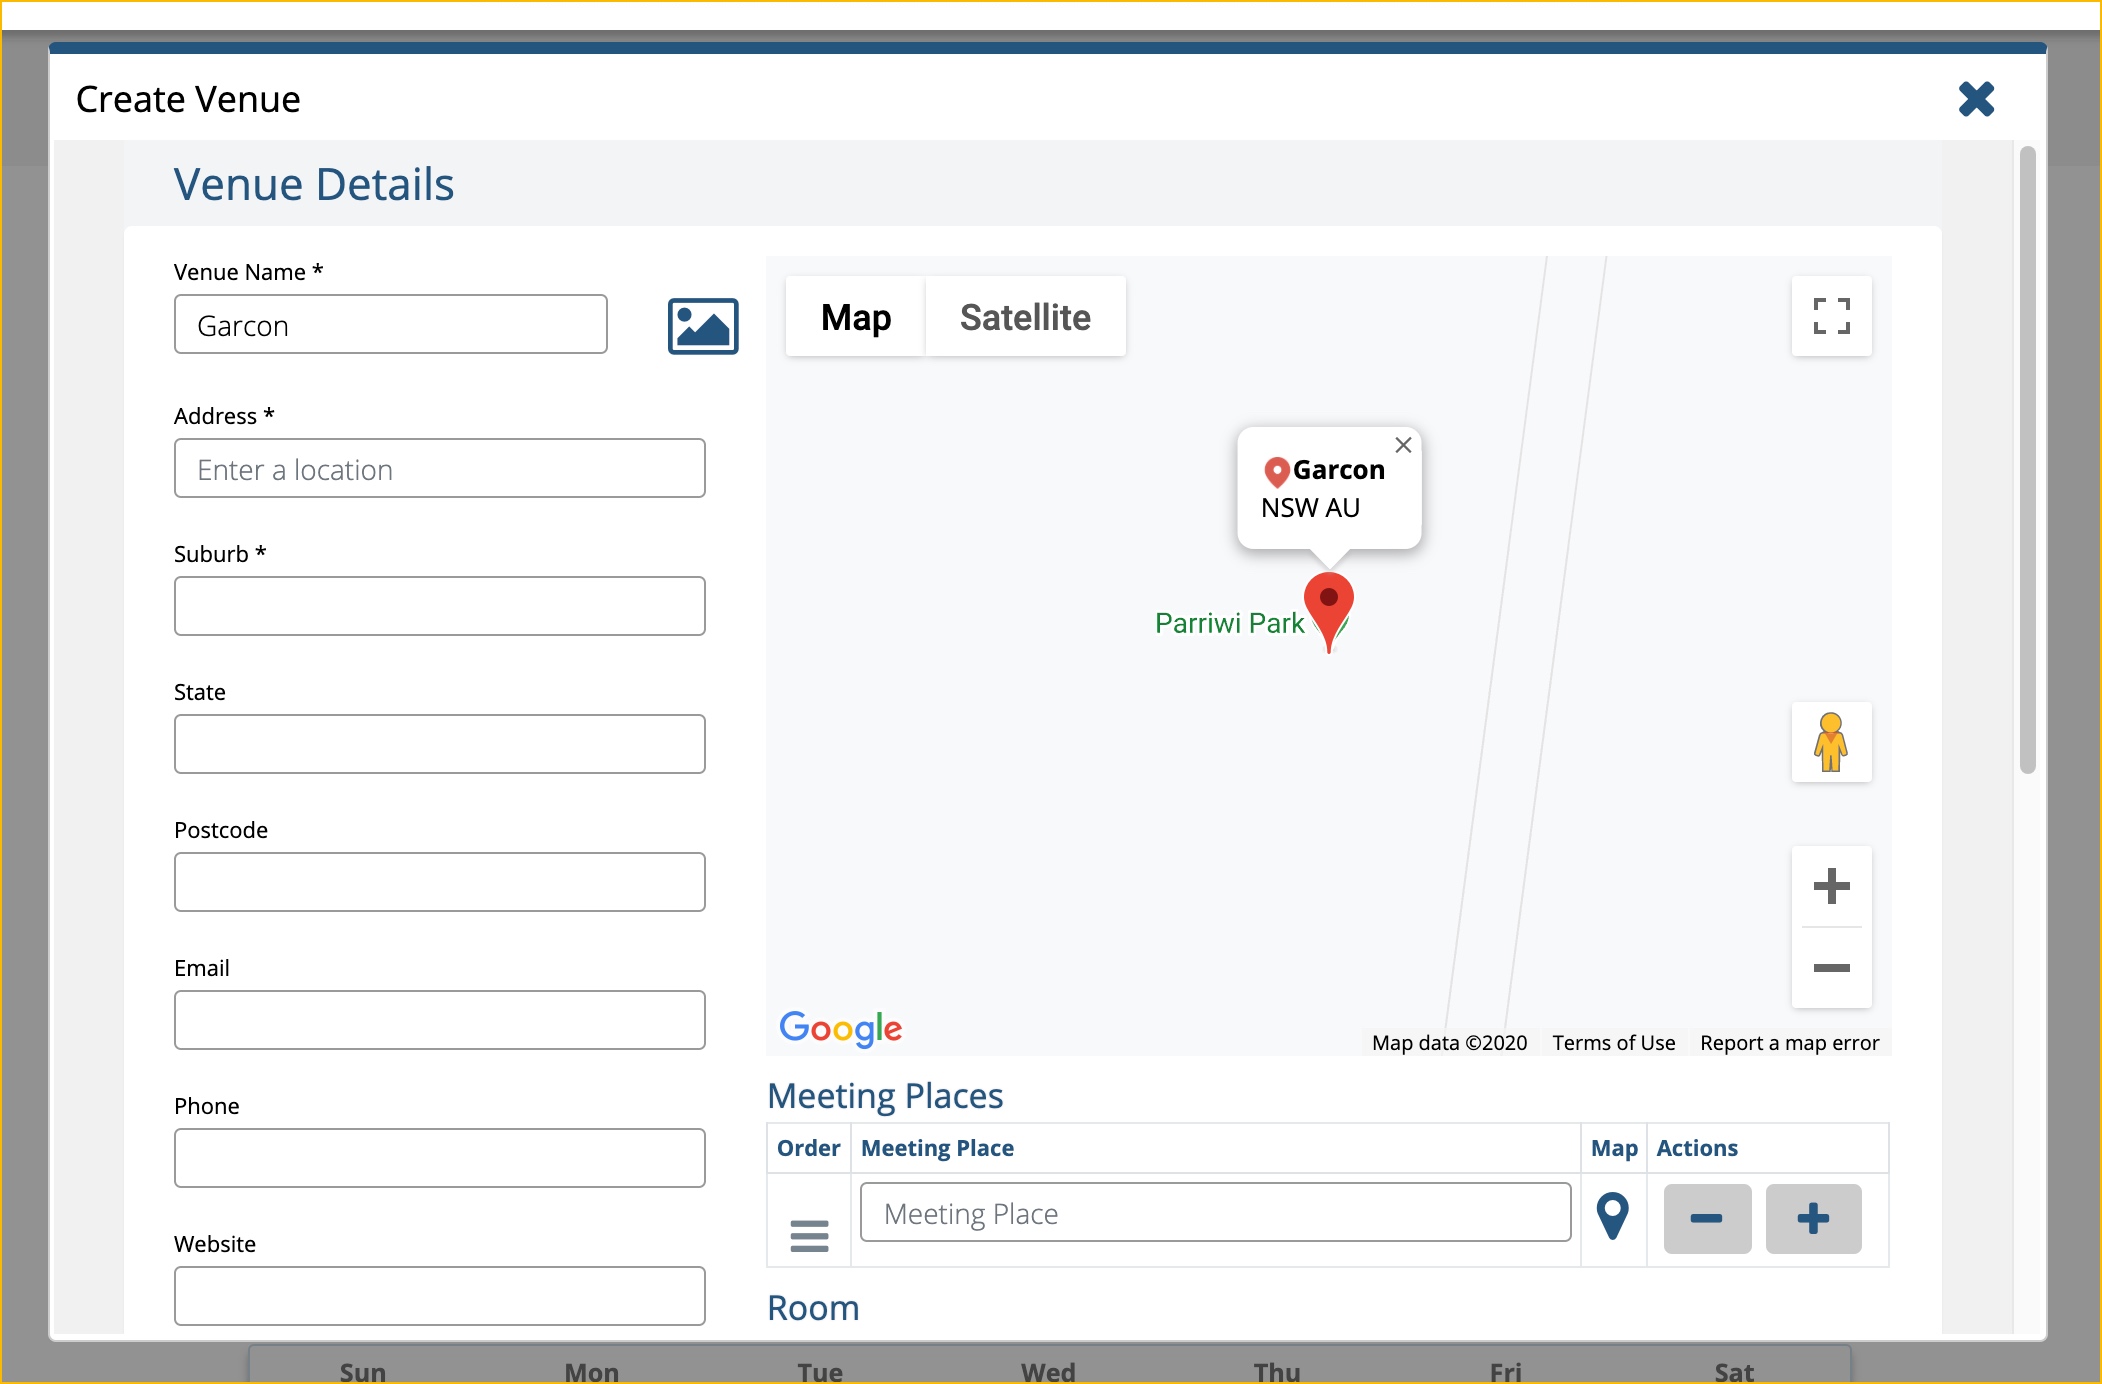
Type the address in the provided field and the system will suggest the location.

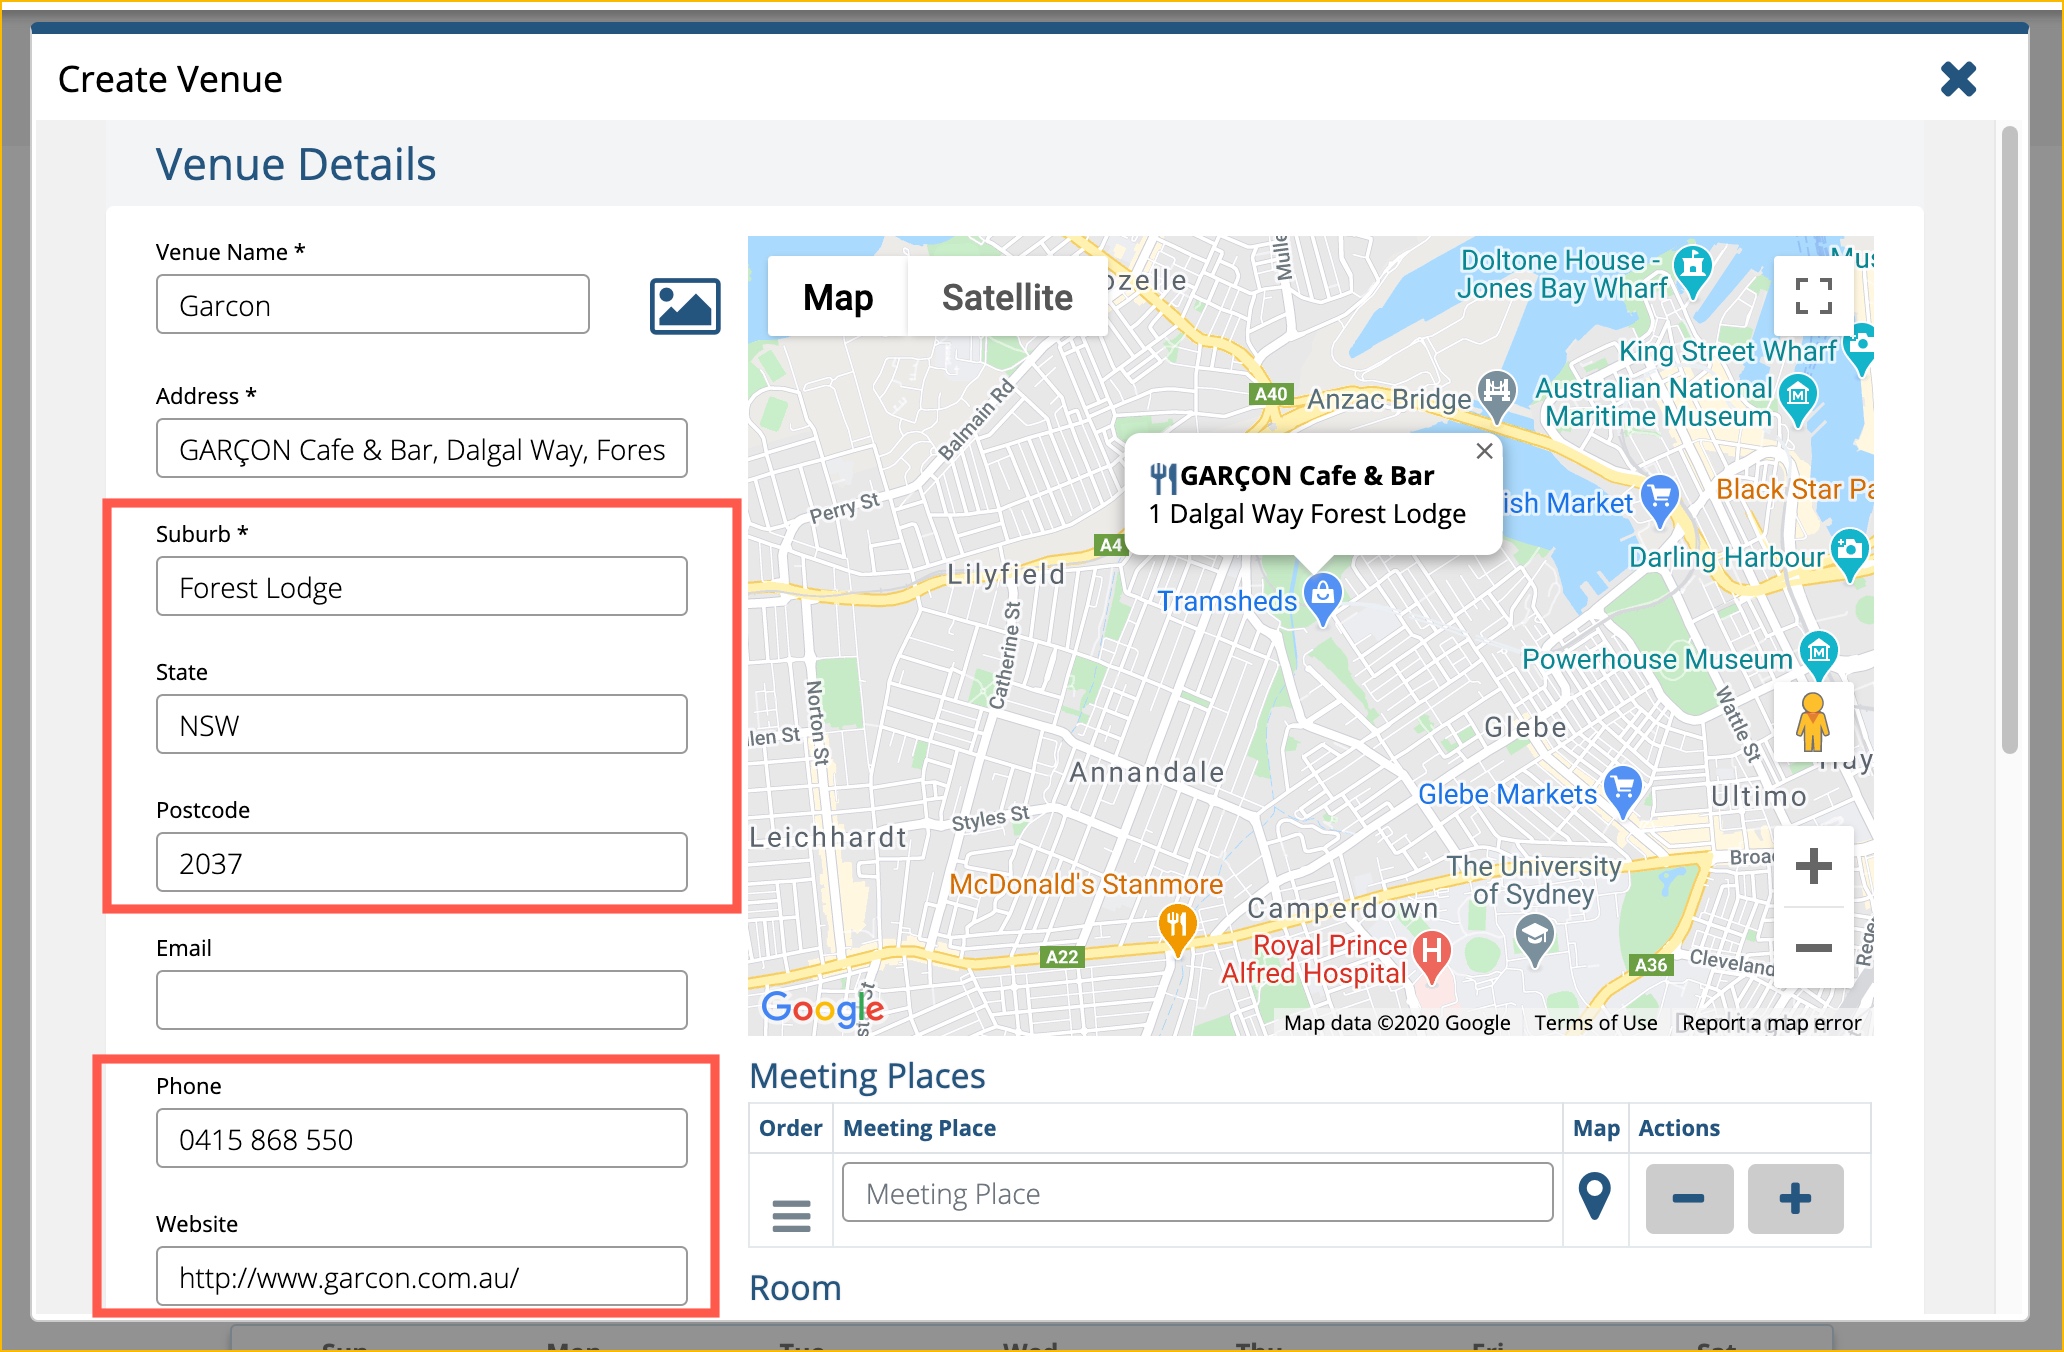
Once you selected an address from the suggestion, the information will populate on the given fields.
If there are no populated data, you can manually enter them. In the screenshot below, email address was not populated.
Enter Venue Notes, Fax Number and you can select an Induction for this venue in the dropdown menu.

MEETING PLACE
Add the name of the Meeting Place in the field, then click the pin icon.
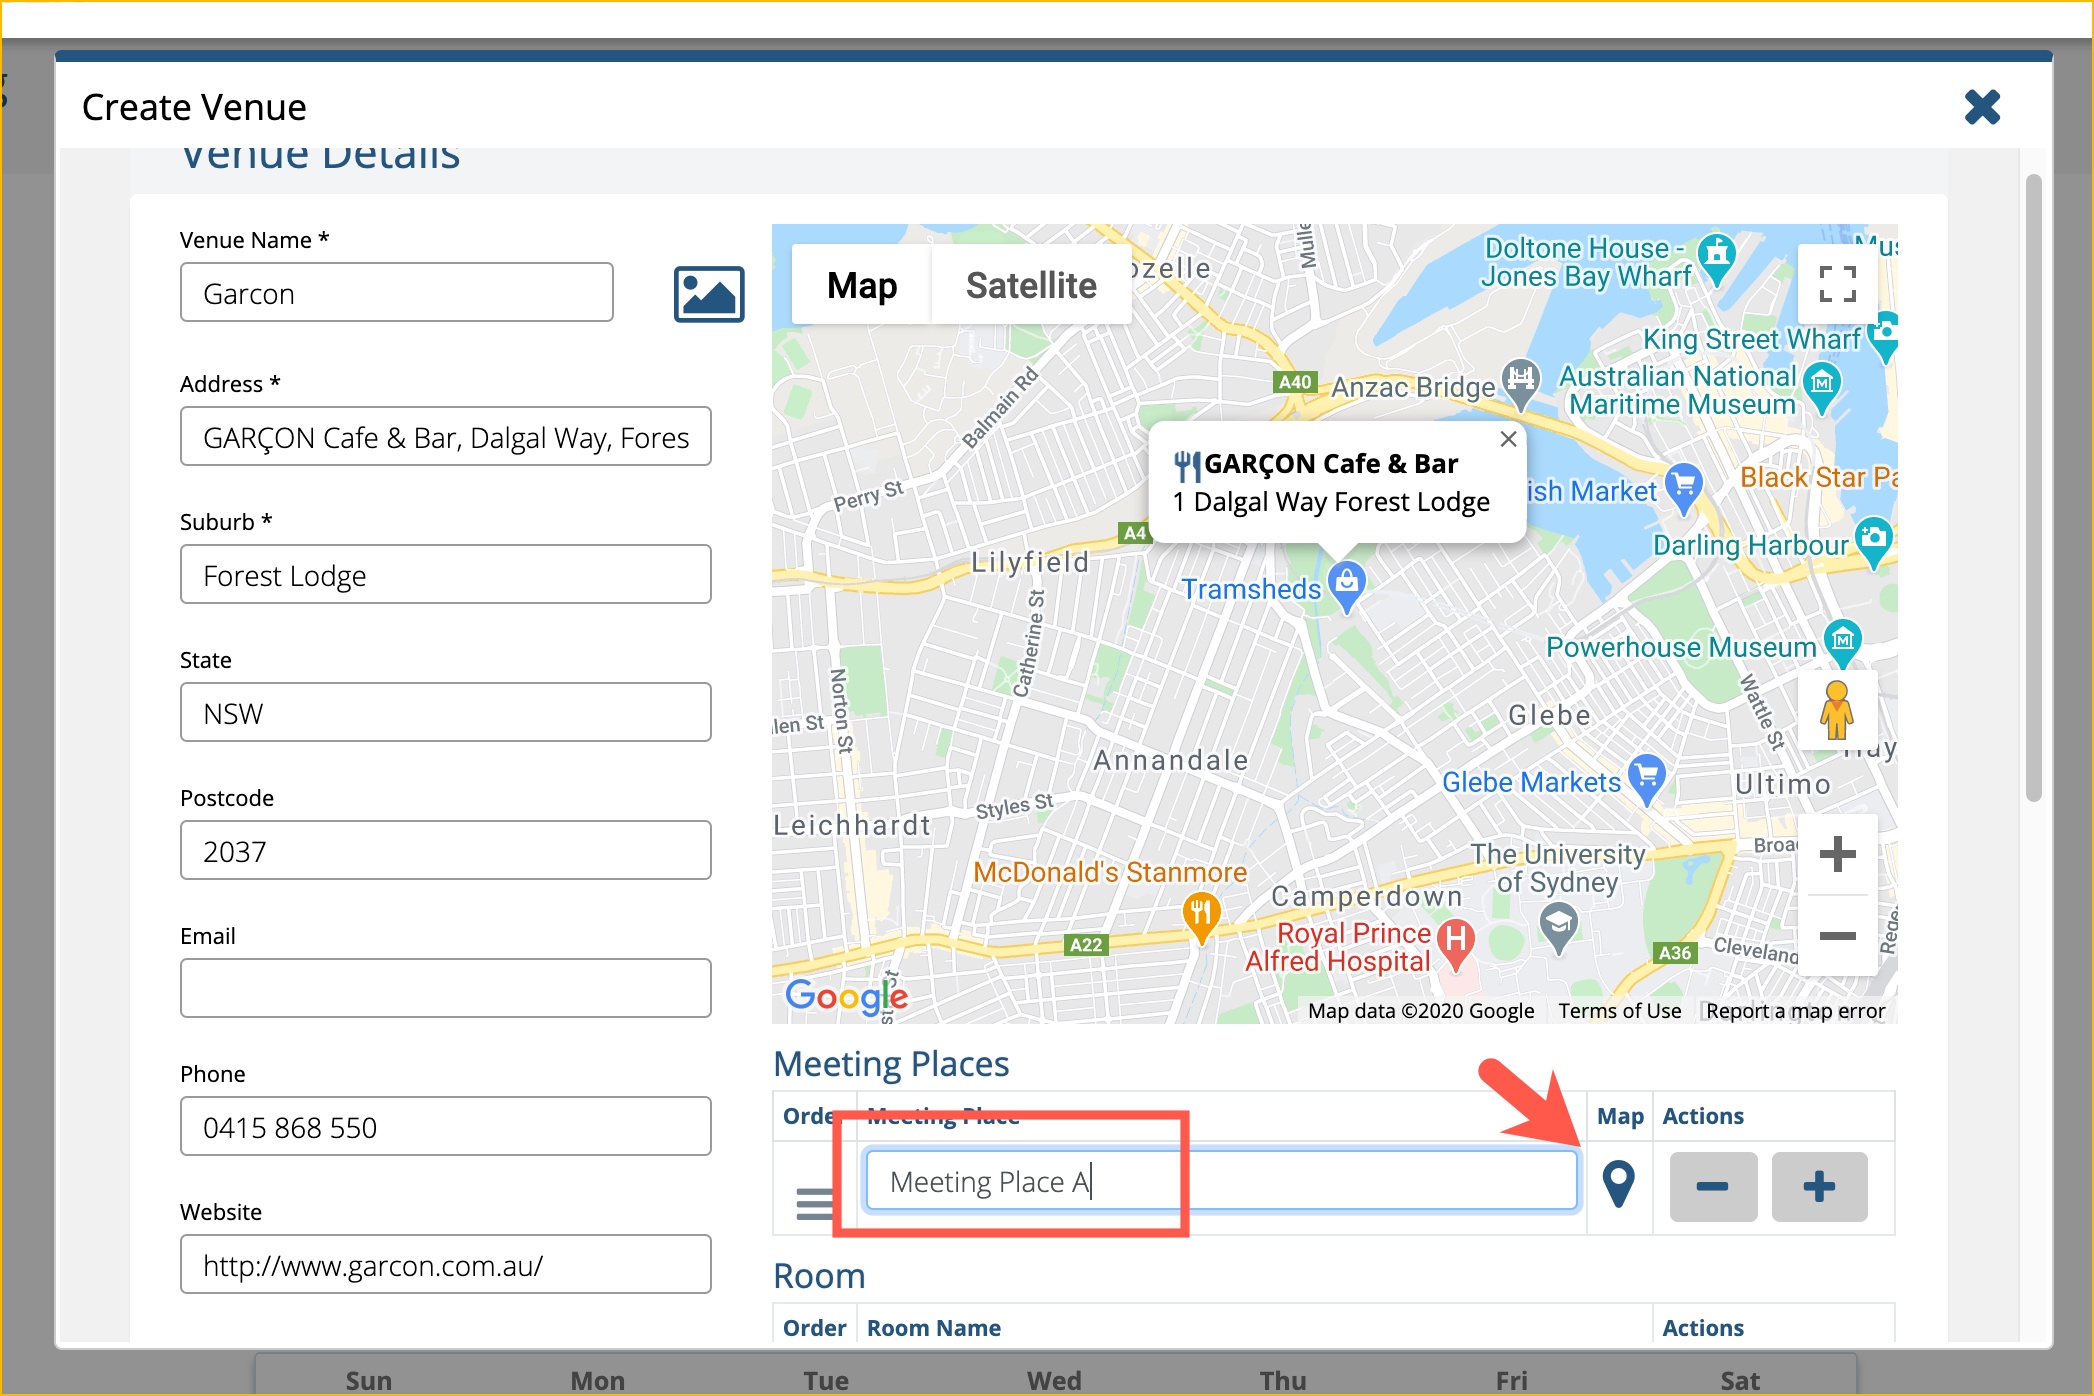
The pin of the Meeting Place will appear on the map. If you need to add more meeting place, click the plus icon.

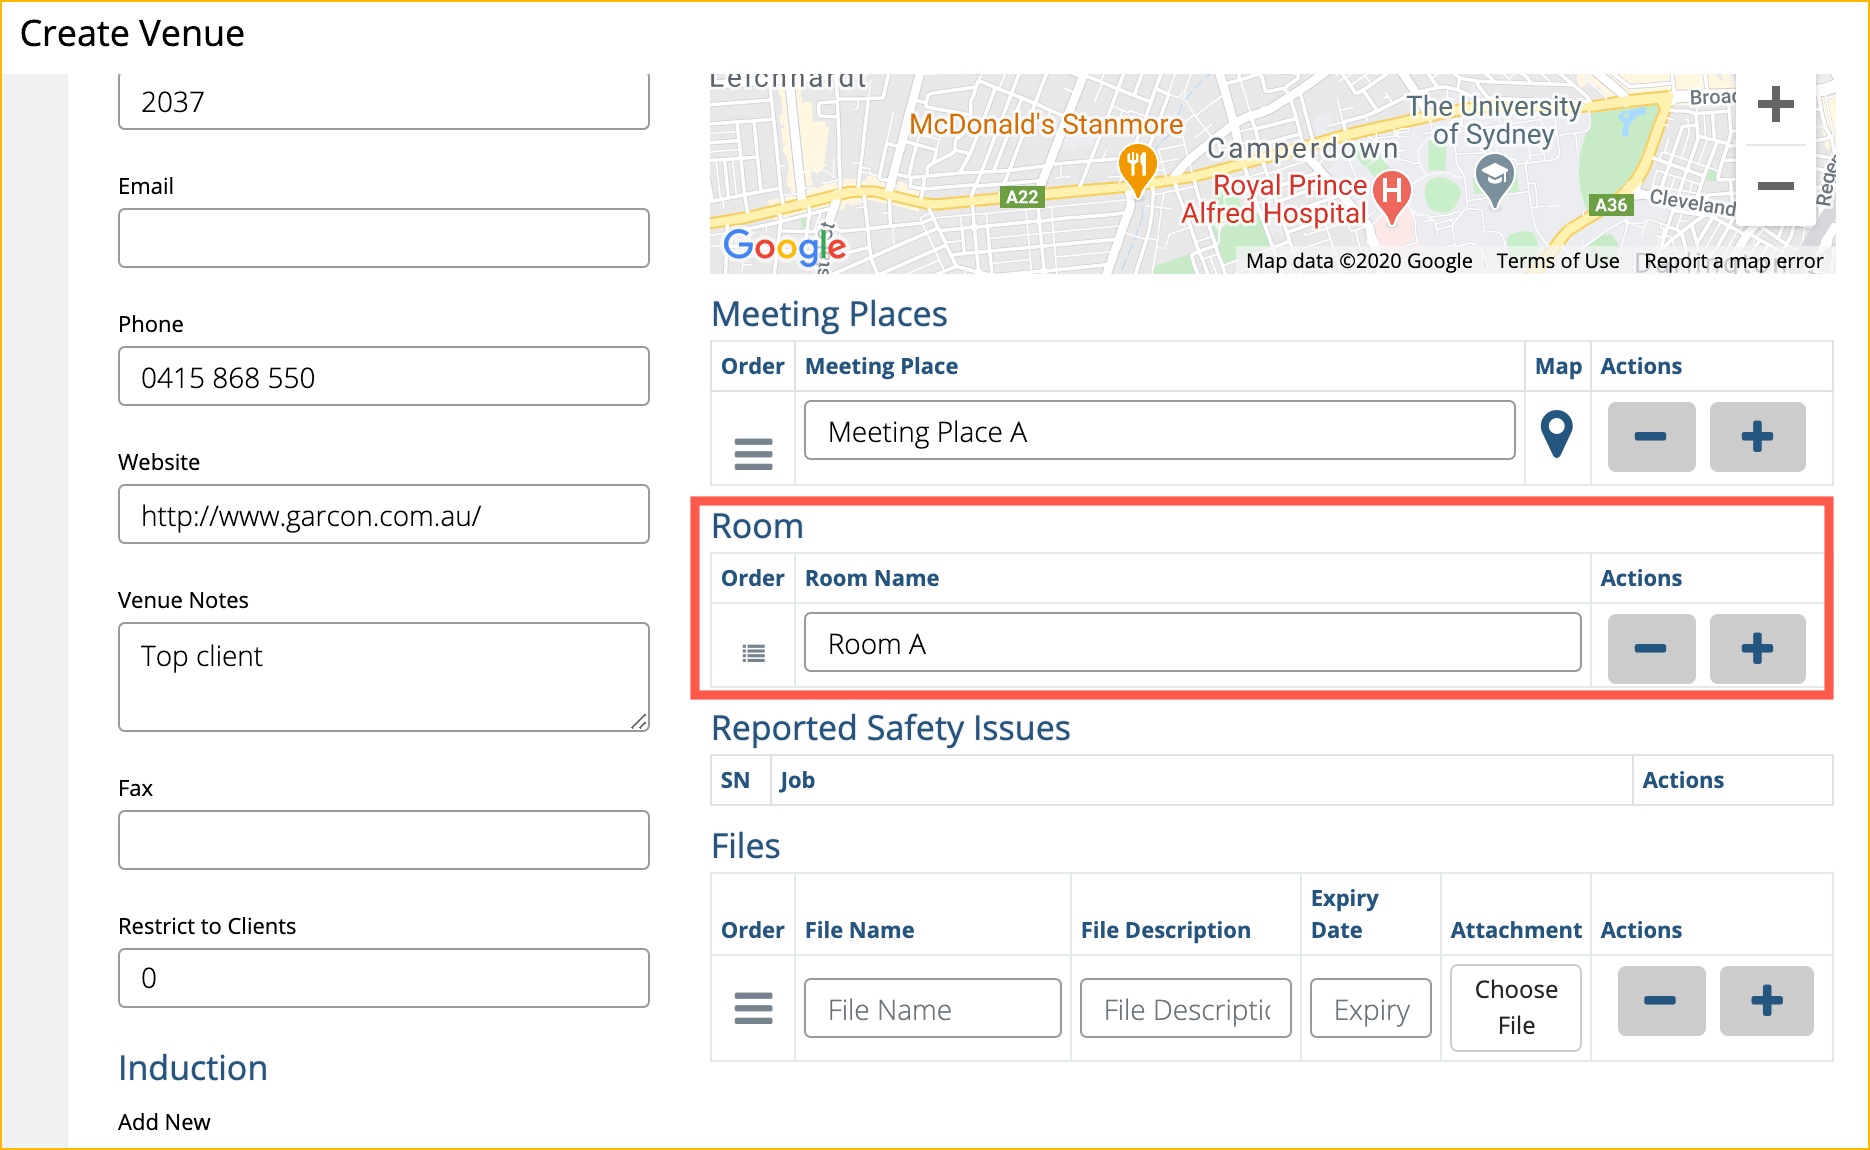
ROOM
Add the name of the Room in the field, if applicable. If you need add more rooms, simply click the plus icon.
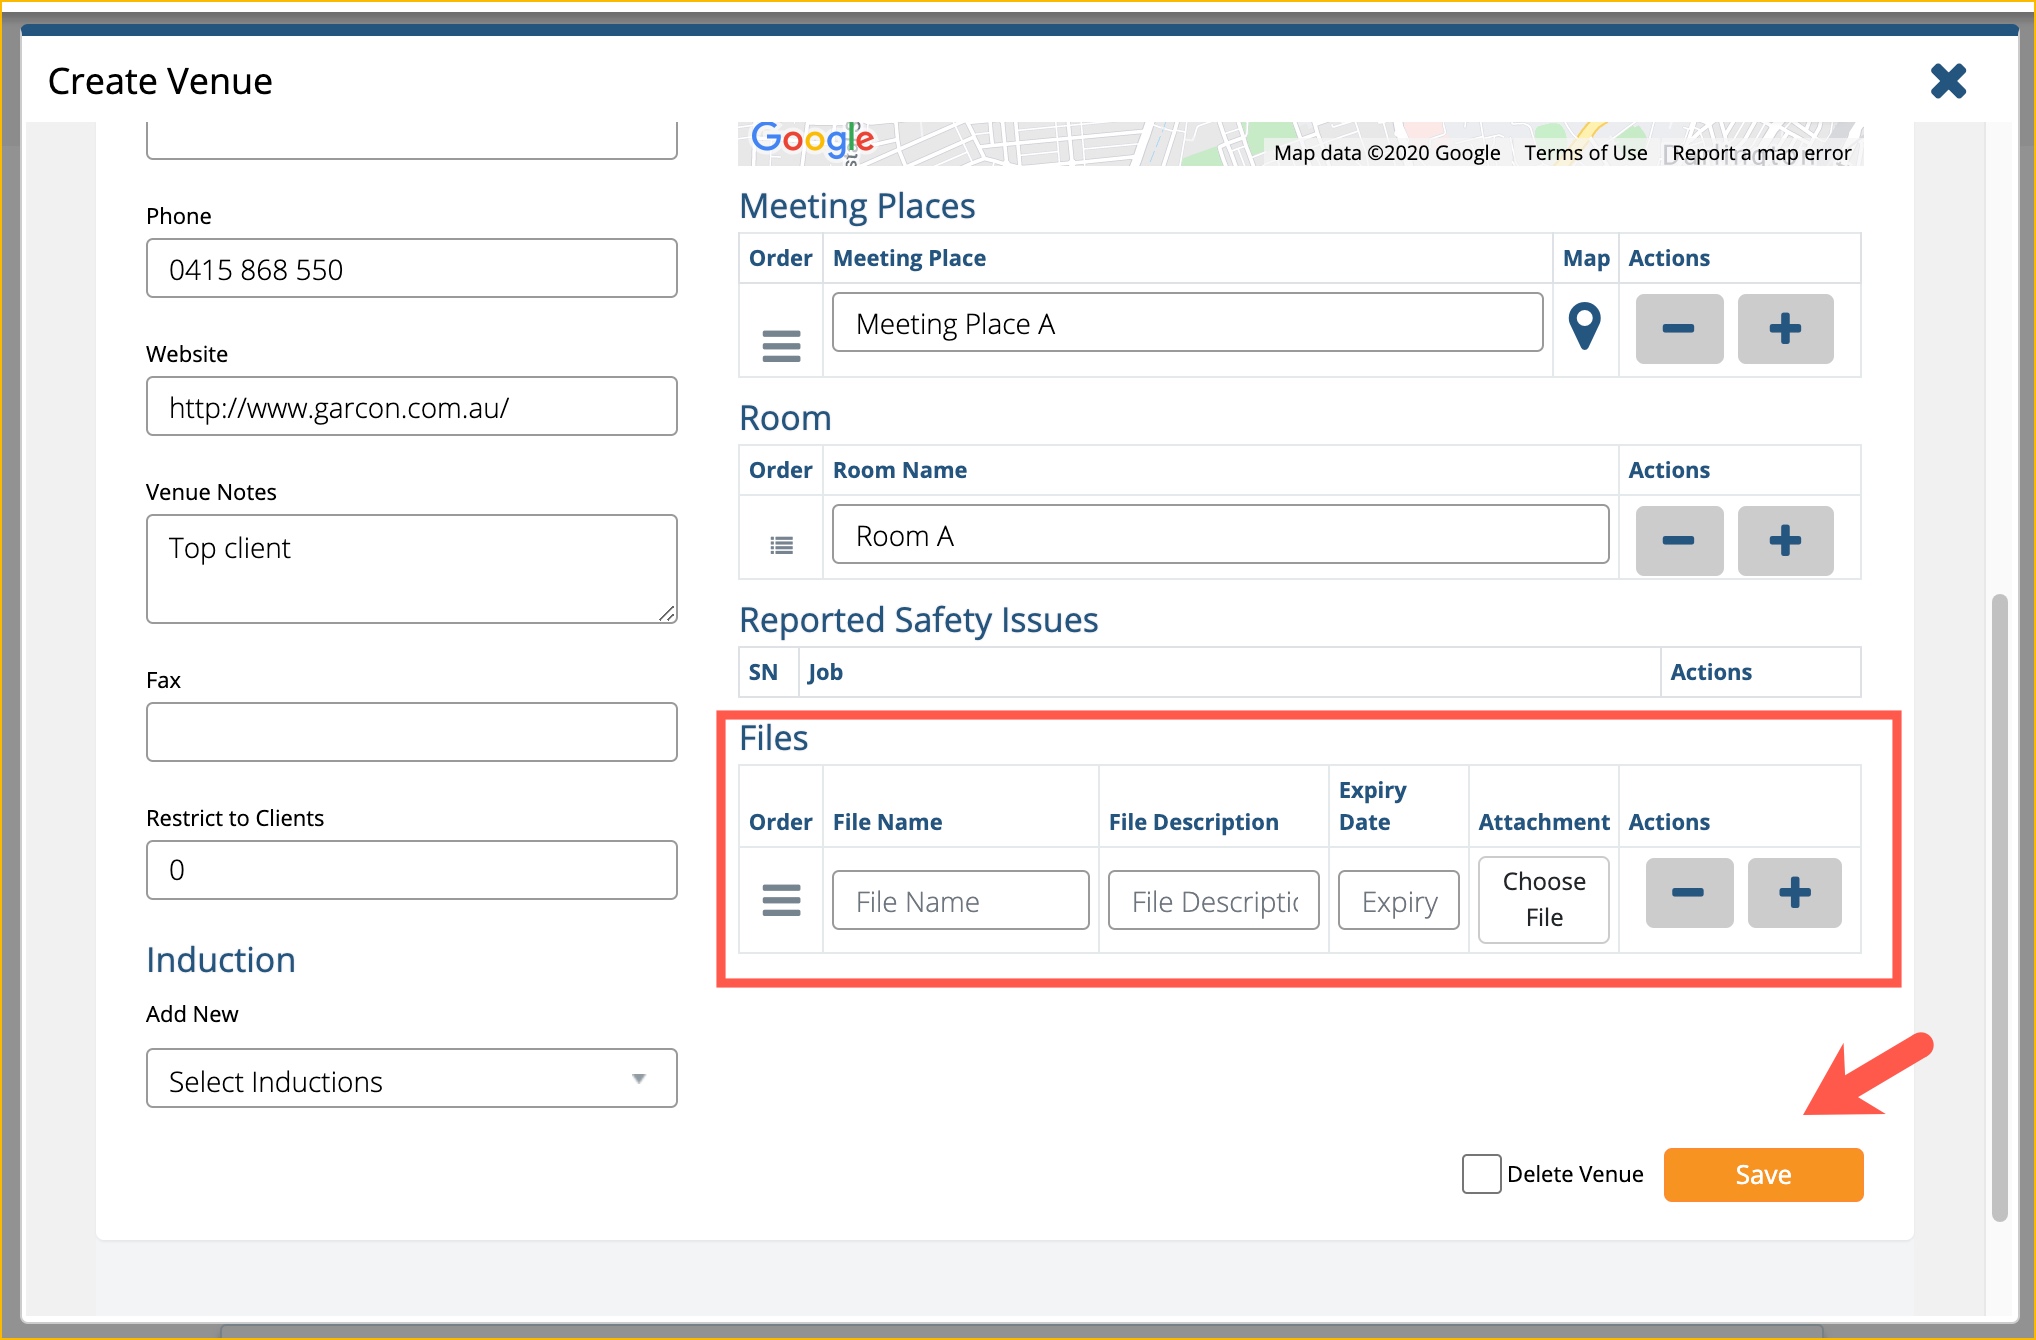
If there are files associated to the Venue, you can add it in this section. Enter the File Name, File Description and Expiry Date.
Click Save once you are done entering the details of the Venue.
After clicking Save, the page will refresh and you can now close the Create Venue window.

Add Meeting Place & Room
When you click on the plus sign to add Meeting Place and Room, the Create Venue window will appear. Follow the steps outlined above to add the Meeting Place and Room.
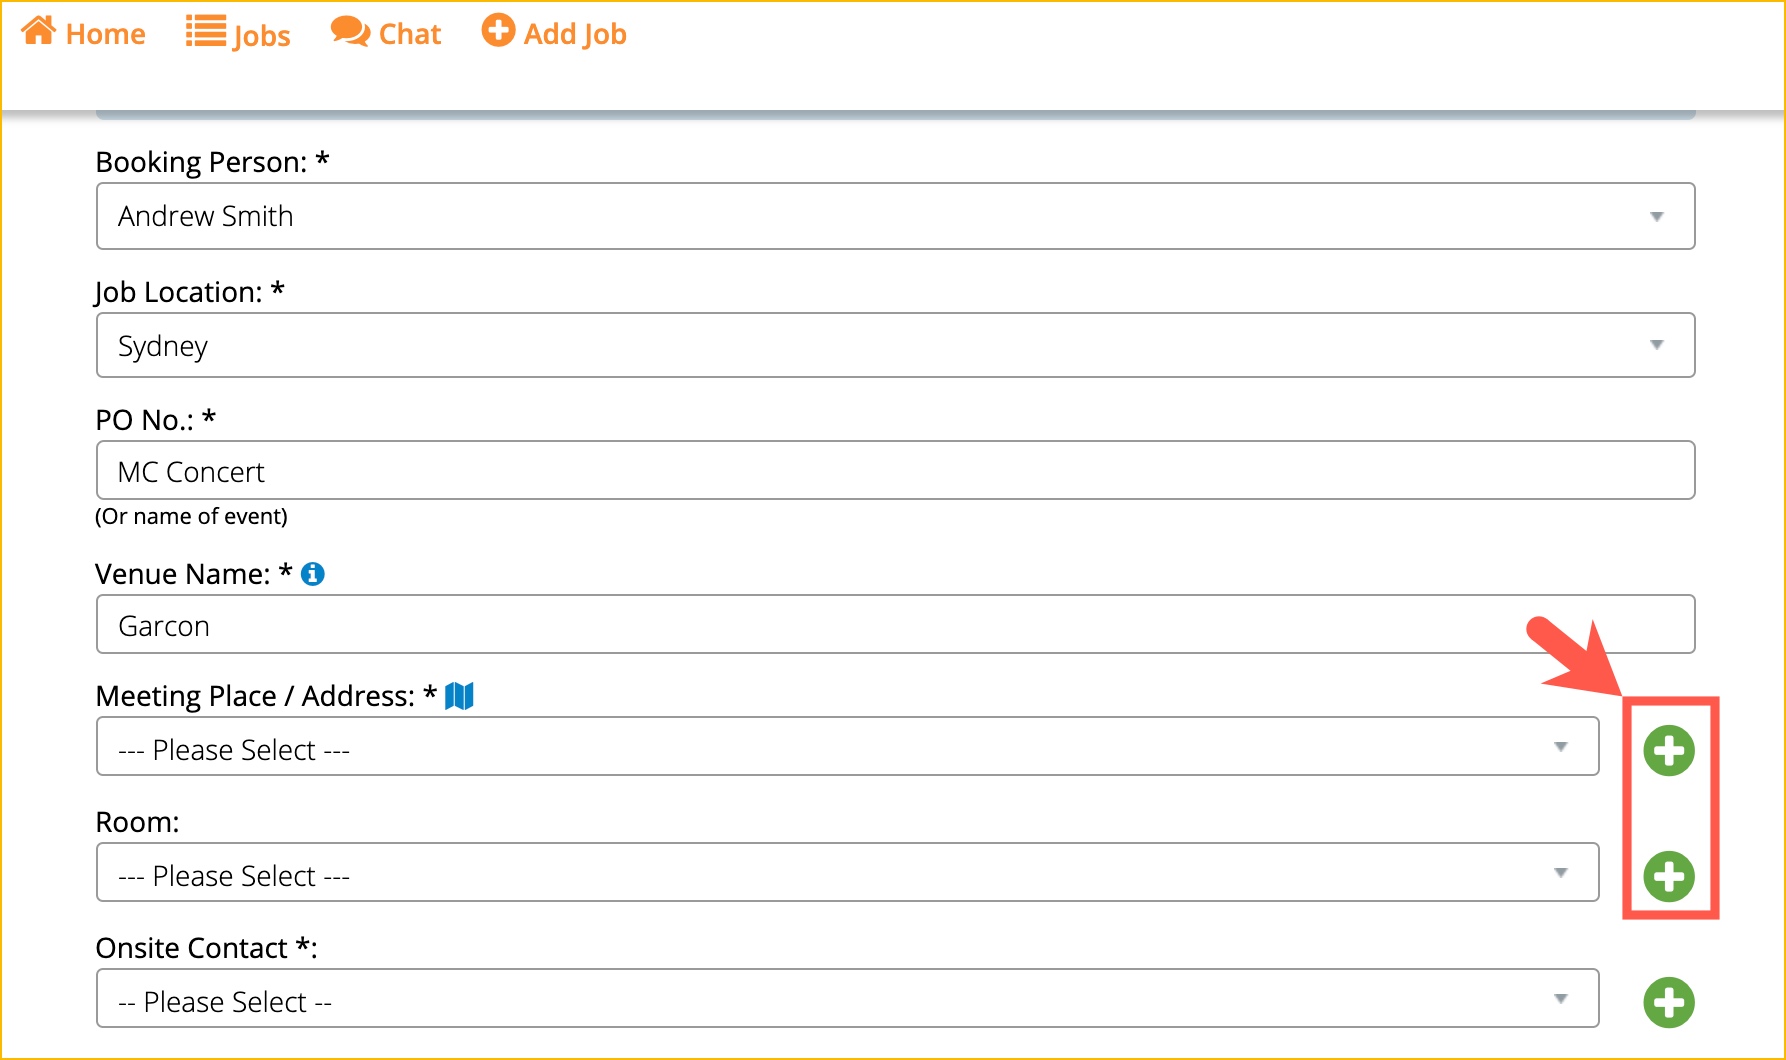
Add Onsite Contact
Click the plus icon next to the Onsite Contact.
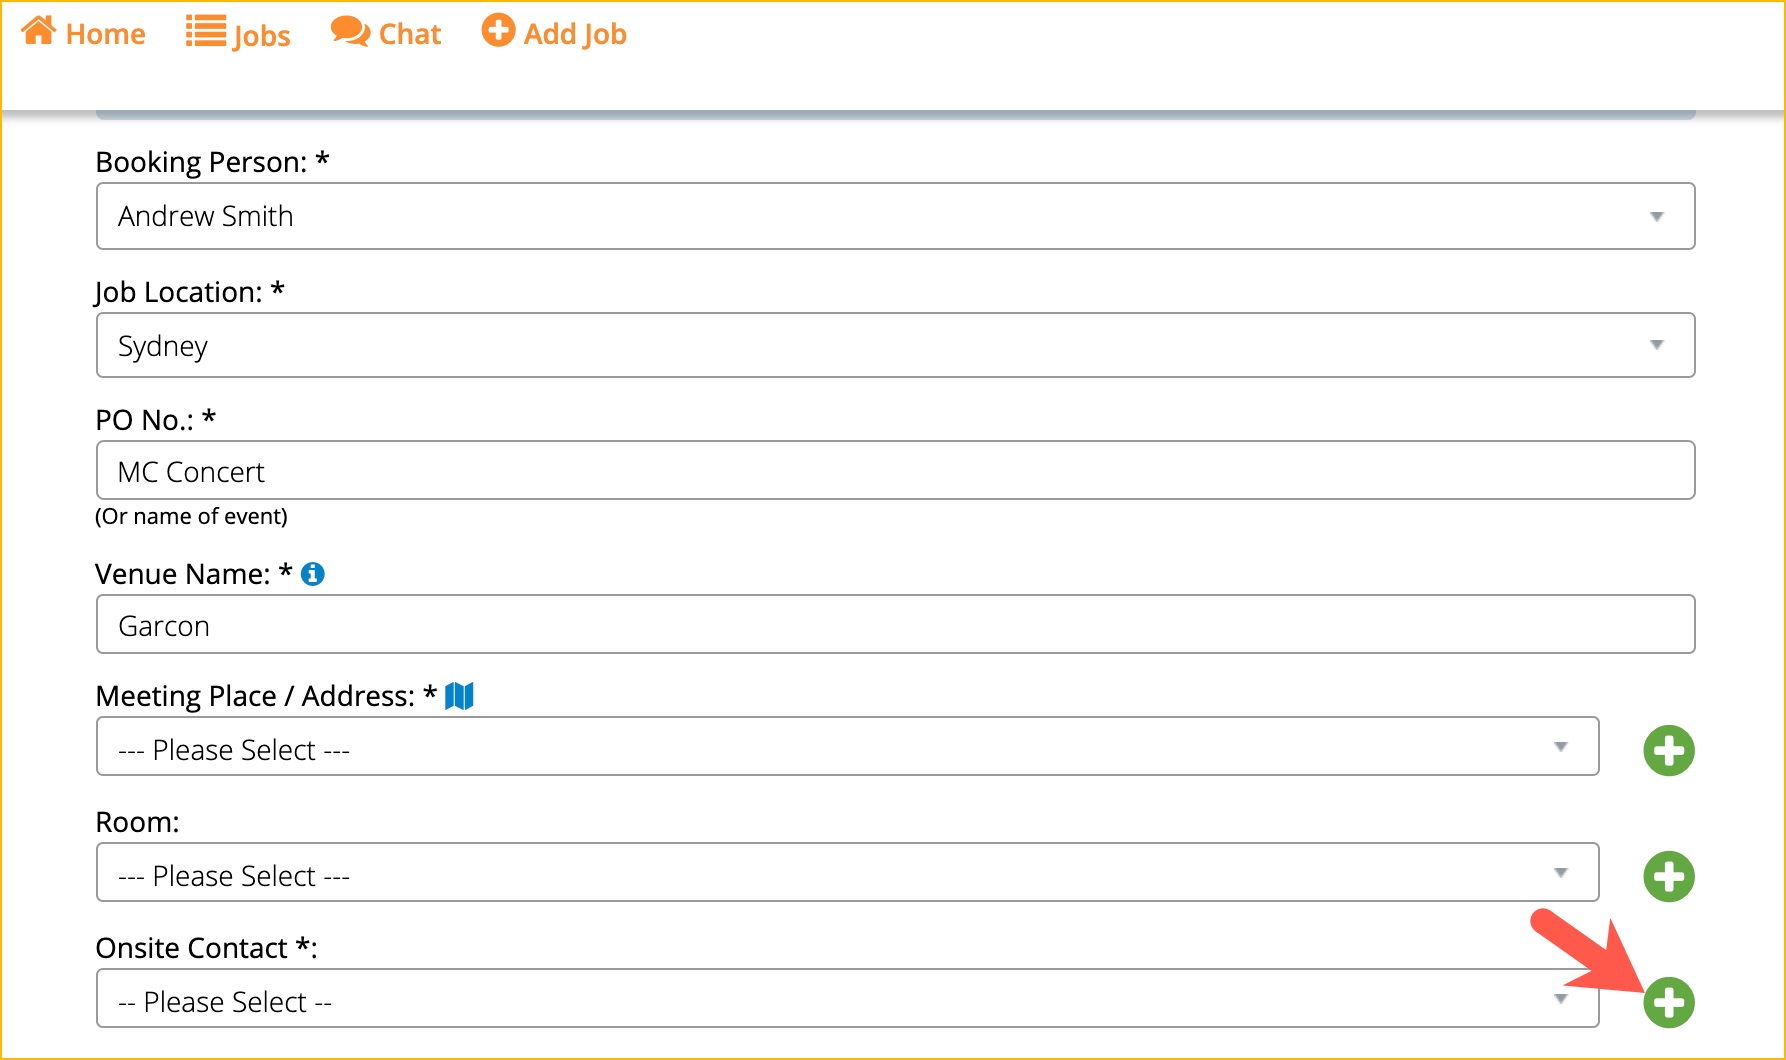
The Add Contact window will be displayed. Fill out the following details:
- Contact Name
- Extension No.
- Contact Phone
- Address
Click Add.


