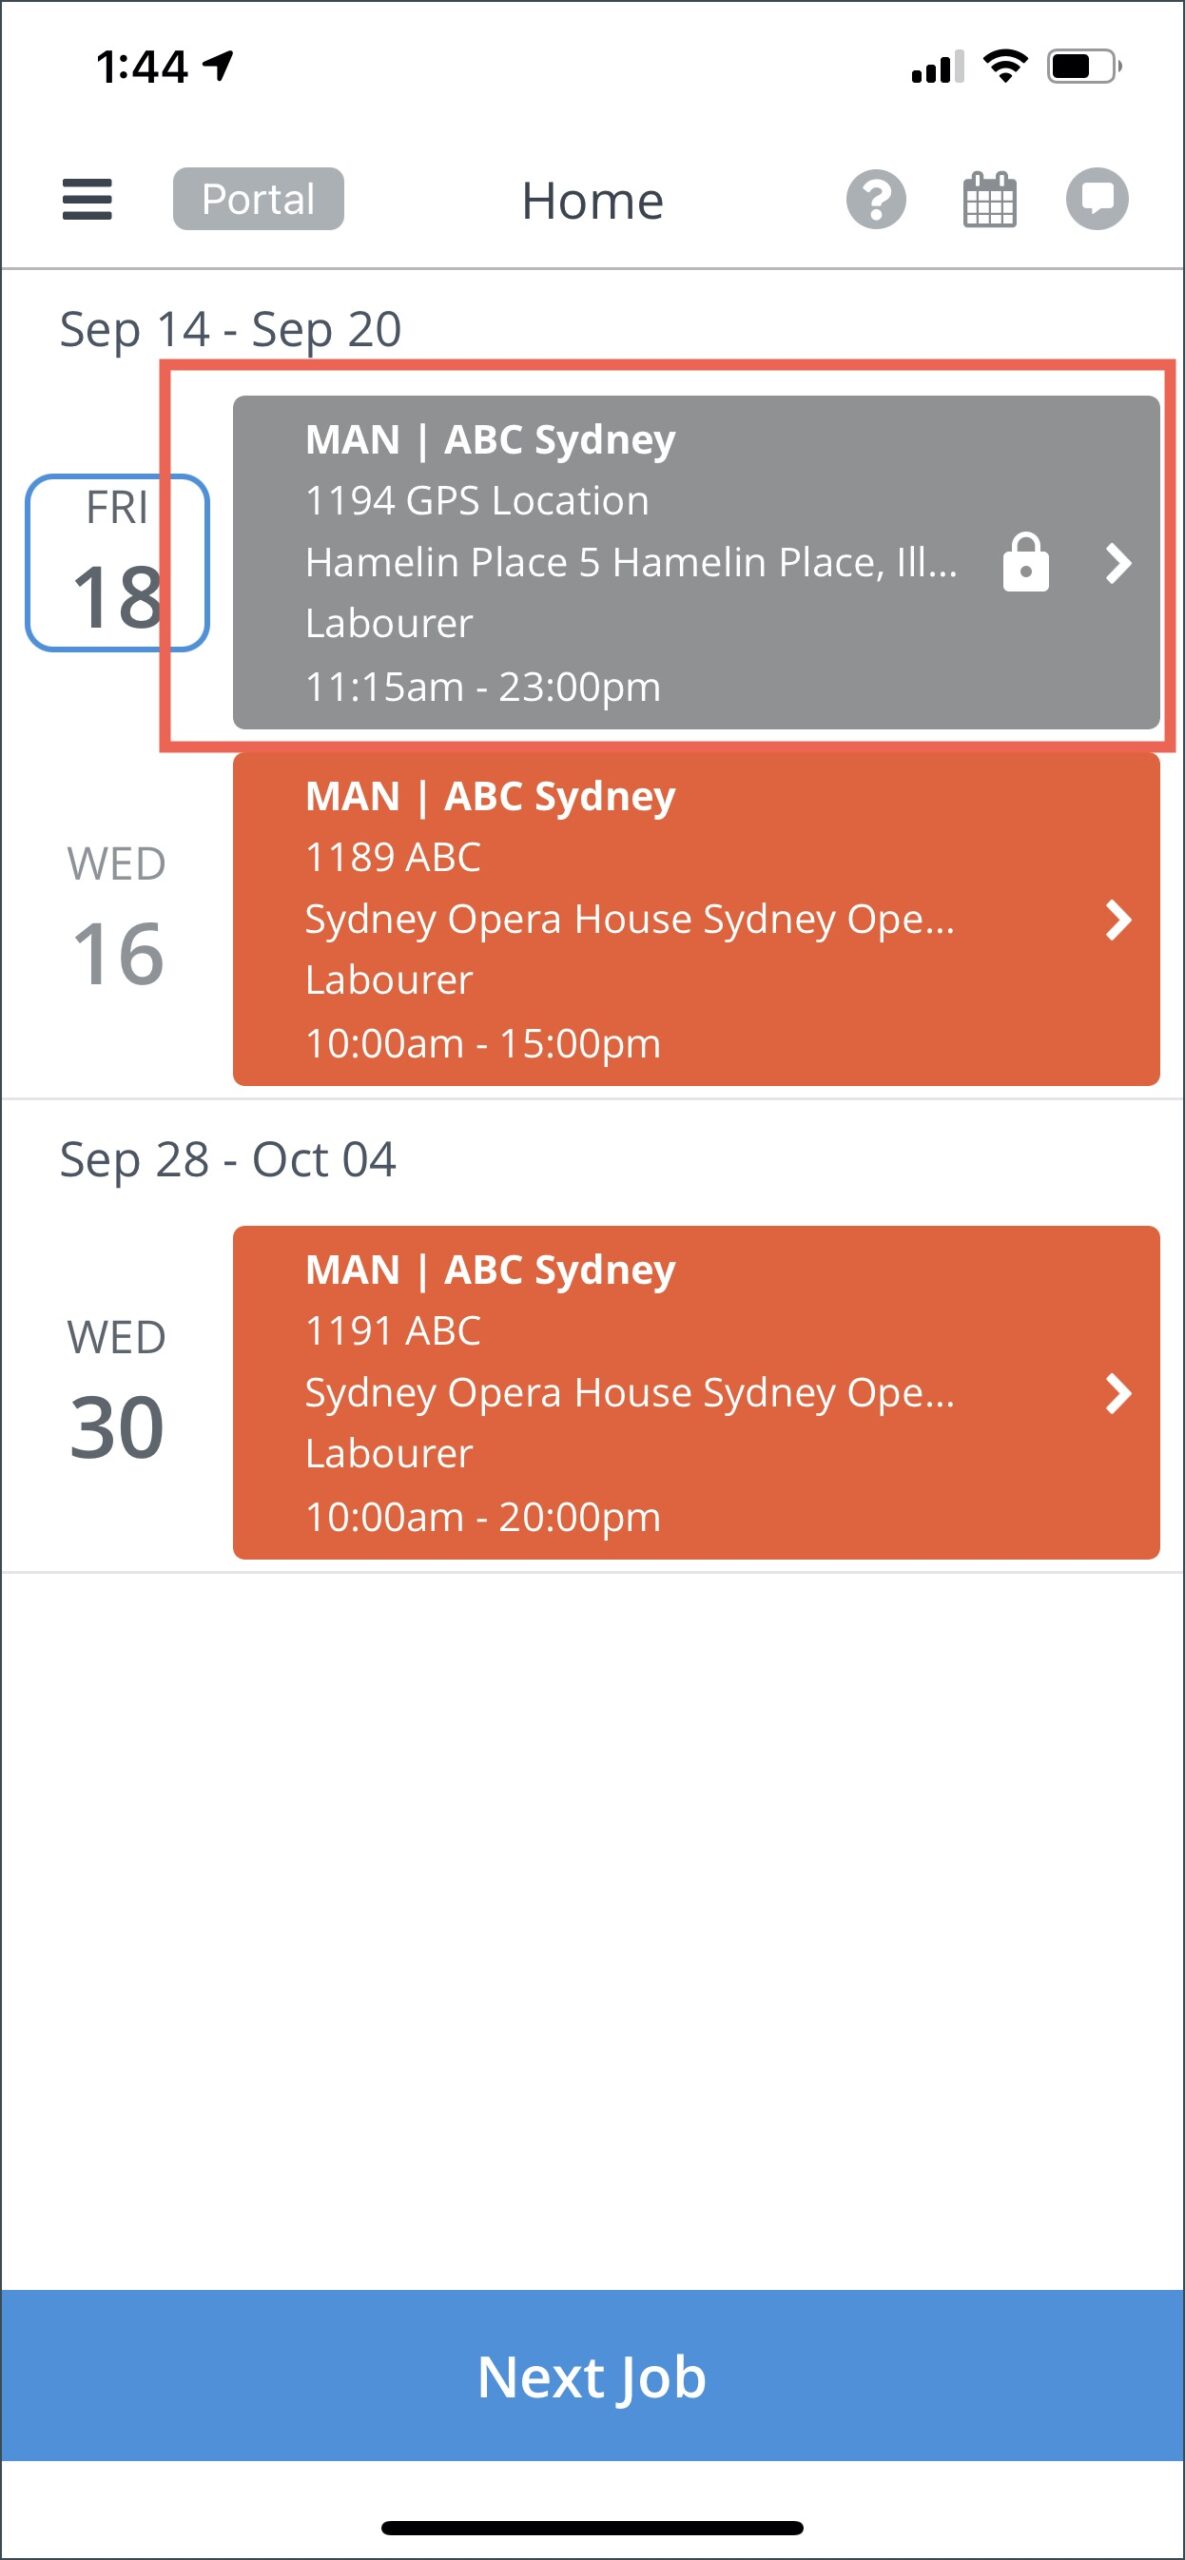
4.0 Job Options, Day Sheet and Safety Forms on the PM Crew App
The Job Details page of the PM Crew App has other functions which includes Day Sheet and Safety Forms.
Job Options
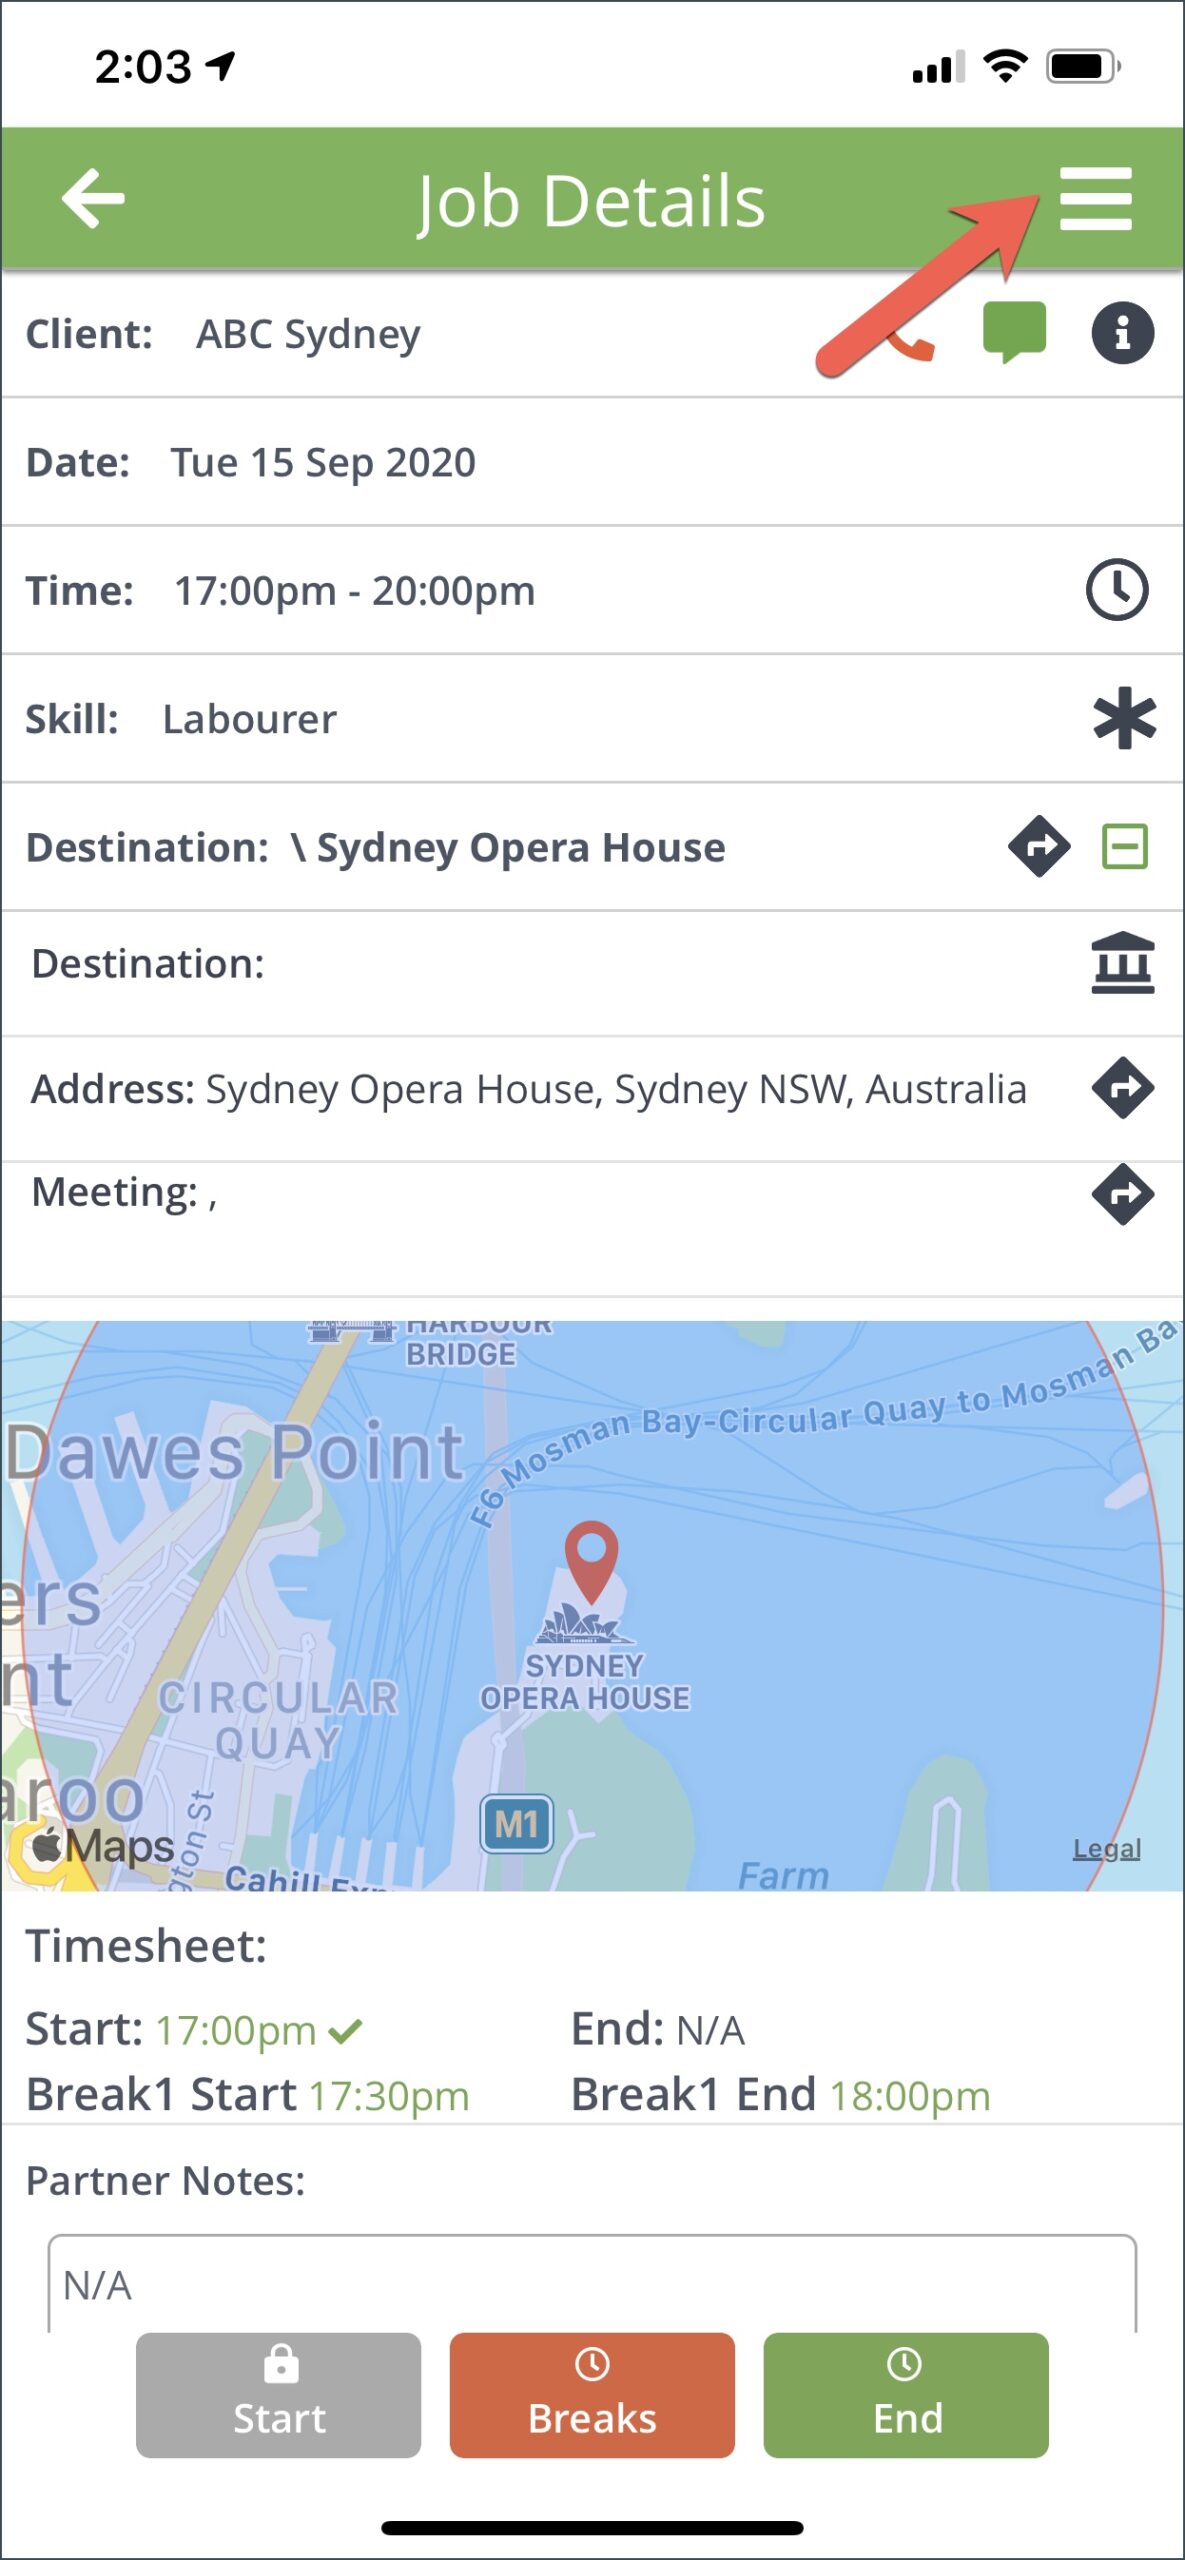
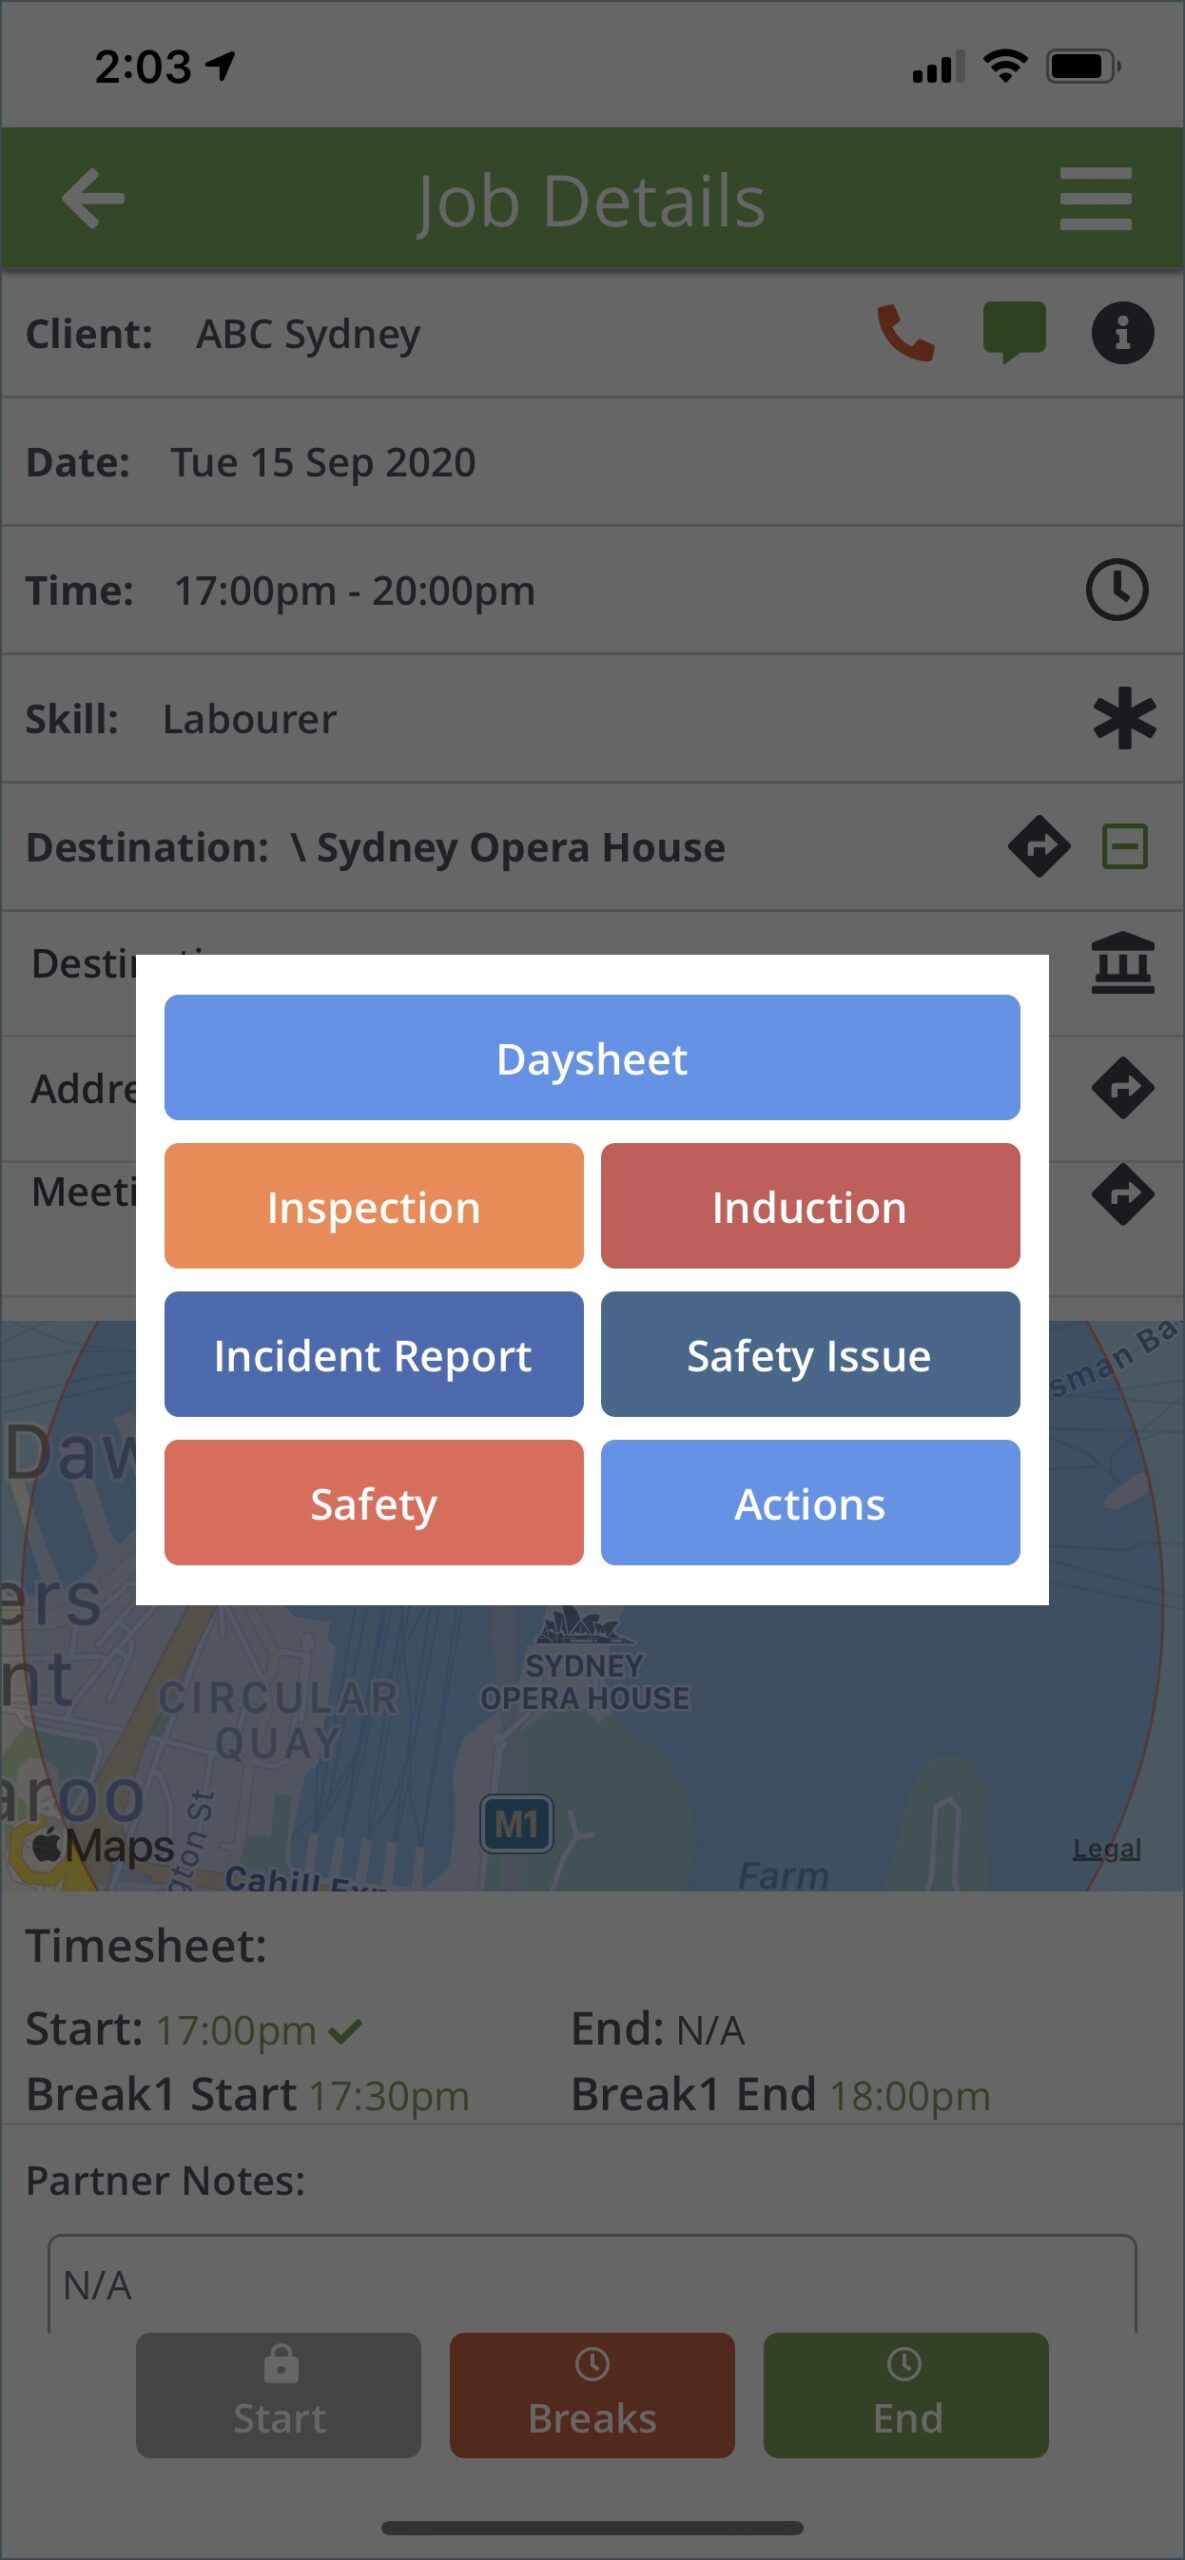
Tap the three horizontal lines on the upper right corner of the Job Details page of the PM Crew App. This will open a pop-up with options to access the Day Sheet and Safety Forms.
The Safety Forms on the Job Options include:
- Inspection
- Induction
- Incident Report
- Safety Issue
- Safety
- Actions
Safety Forms
INSPECTION
This is the Venue Inspection Form. When you tap on this option, it will open the Venue Inspection Form where you will be able to enter information about the venue.
Workplace inspections help prevent incidents, injuries and illnesses. Through a critical examination of the workplace, inspections help to identify and record hazards for corrective action.
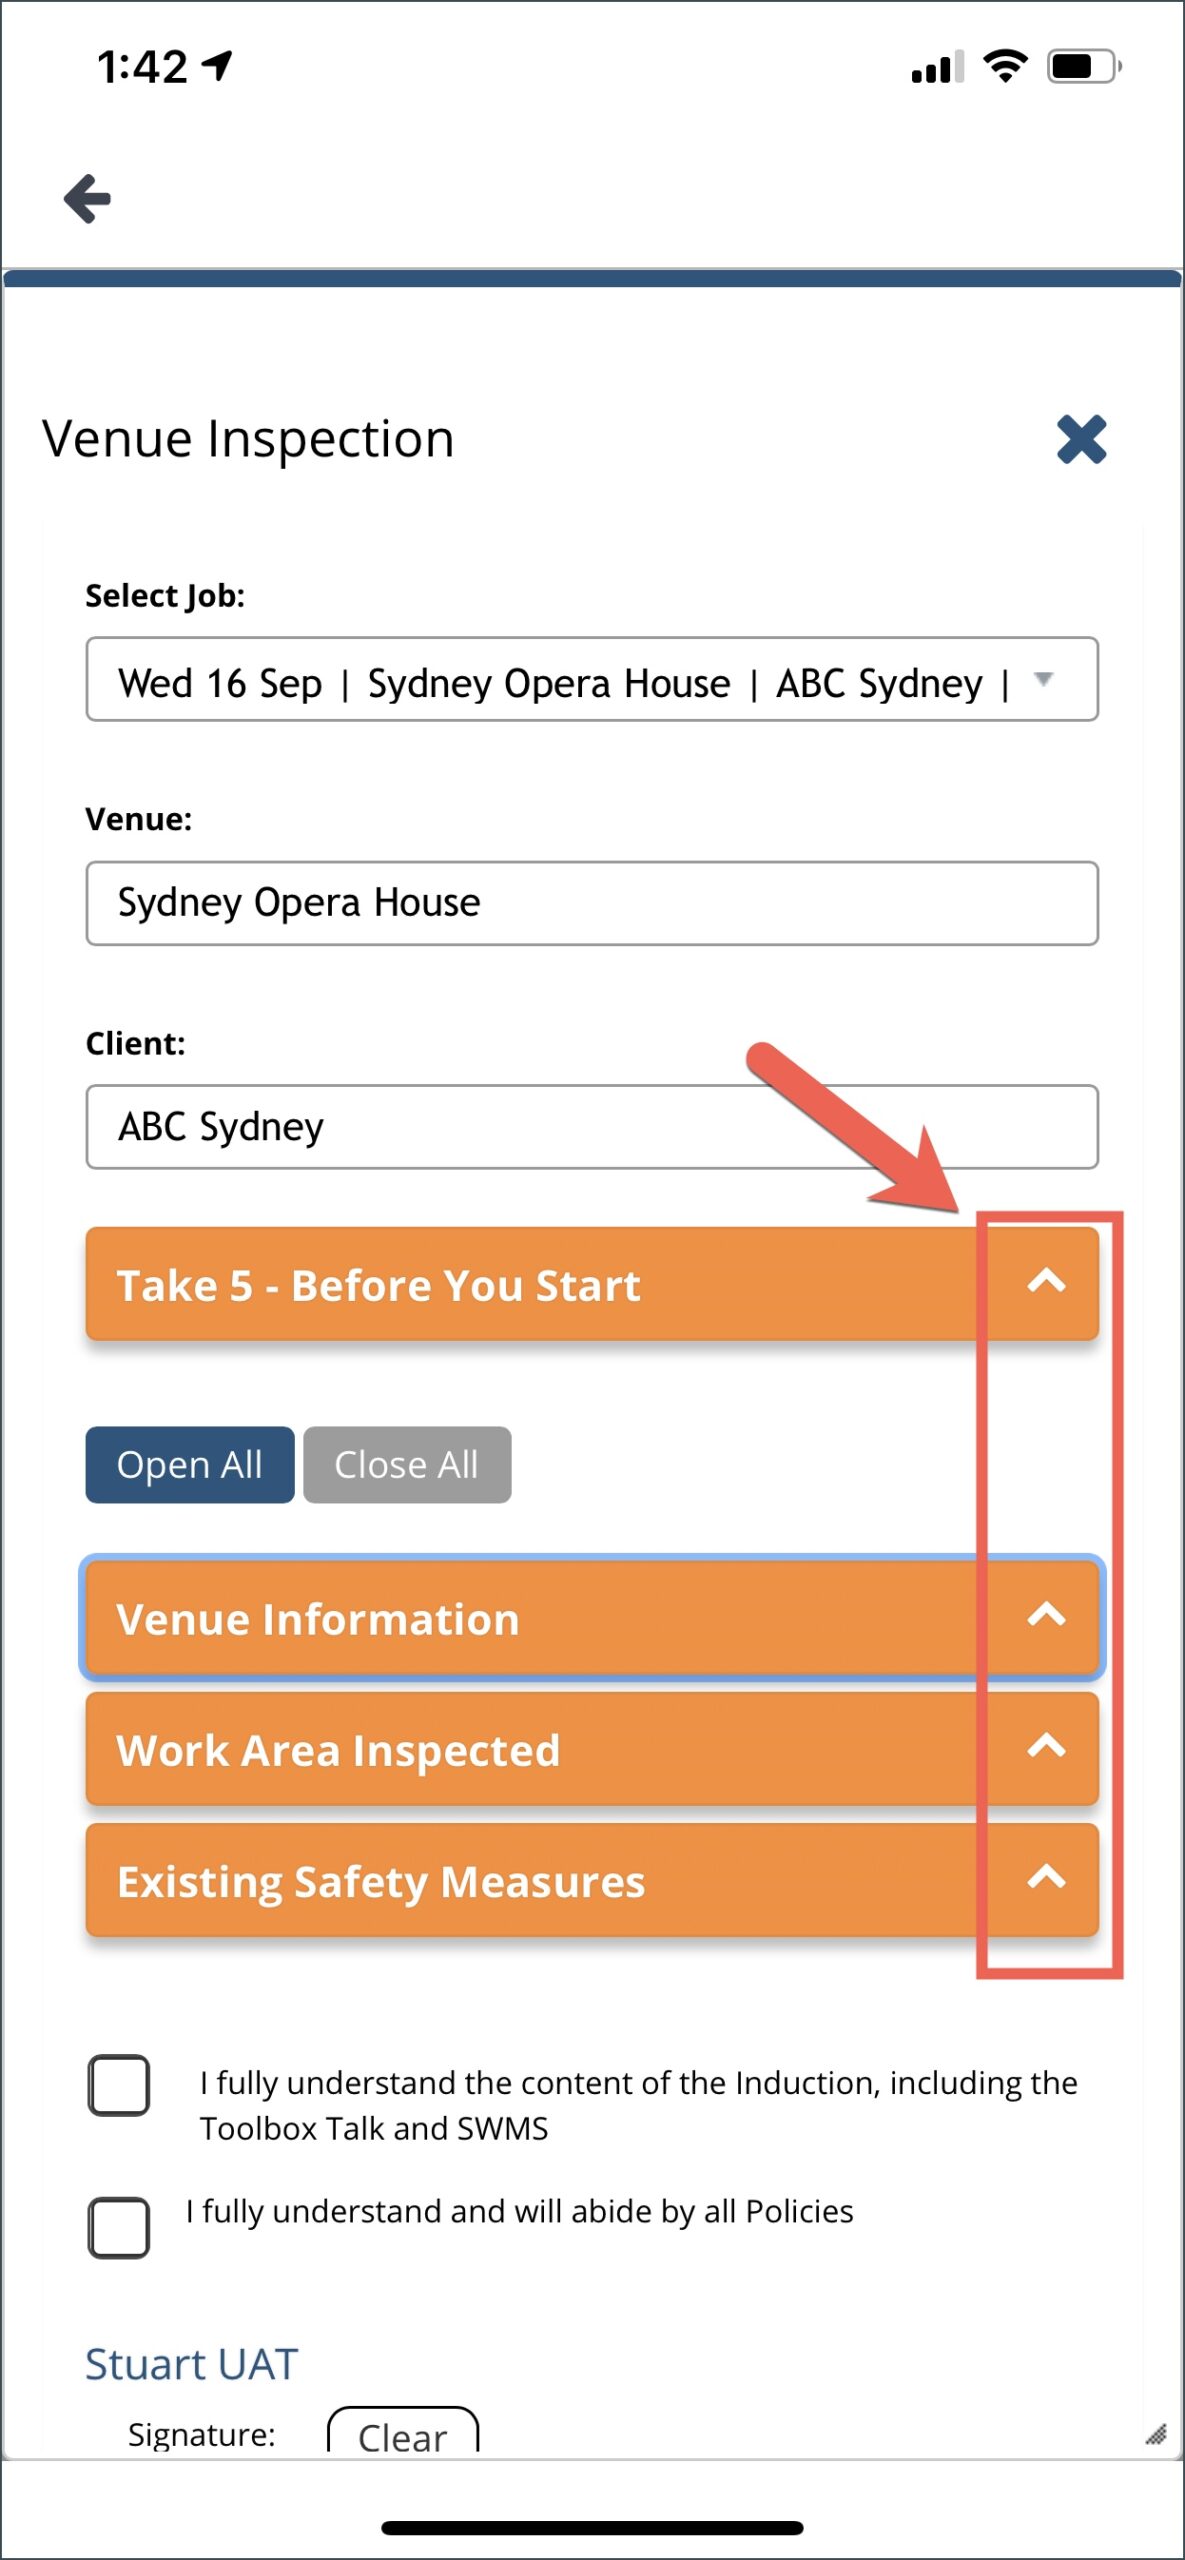
This is how the Venue Inspection Form looks like. Since a crew member can be assigned to different locations, he/she will be able to select the specific job from the dropdown menu where the Venue Inspection is being conducted. When the job is selected, the Venue and Client fields are automatically populated.
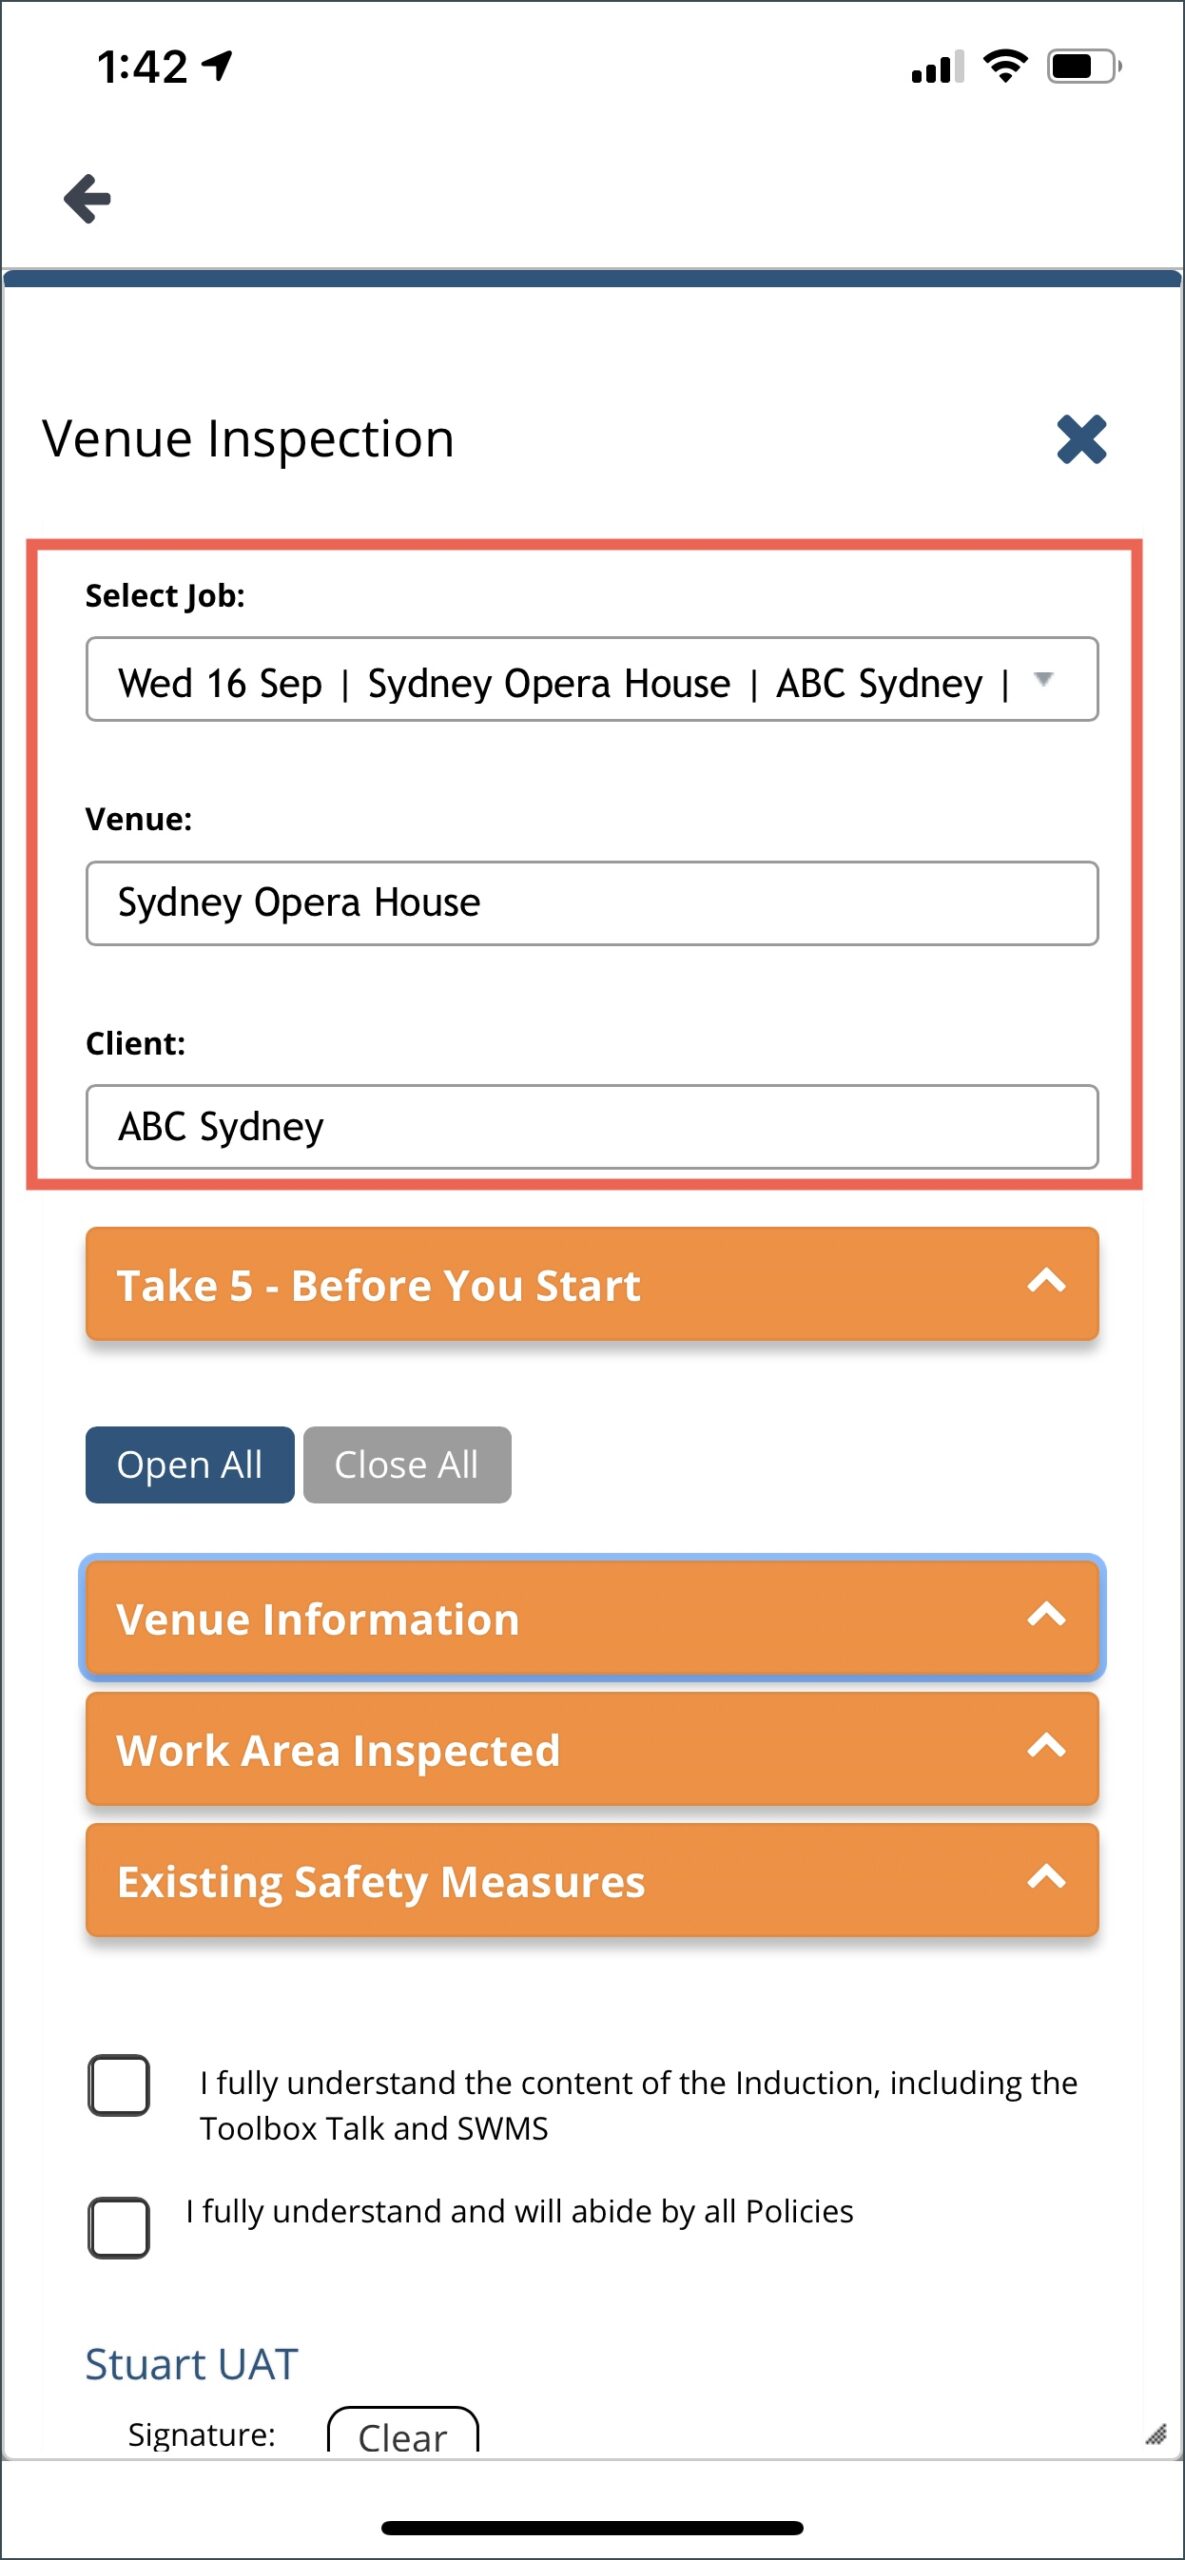
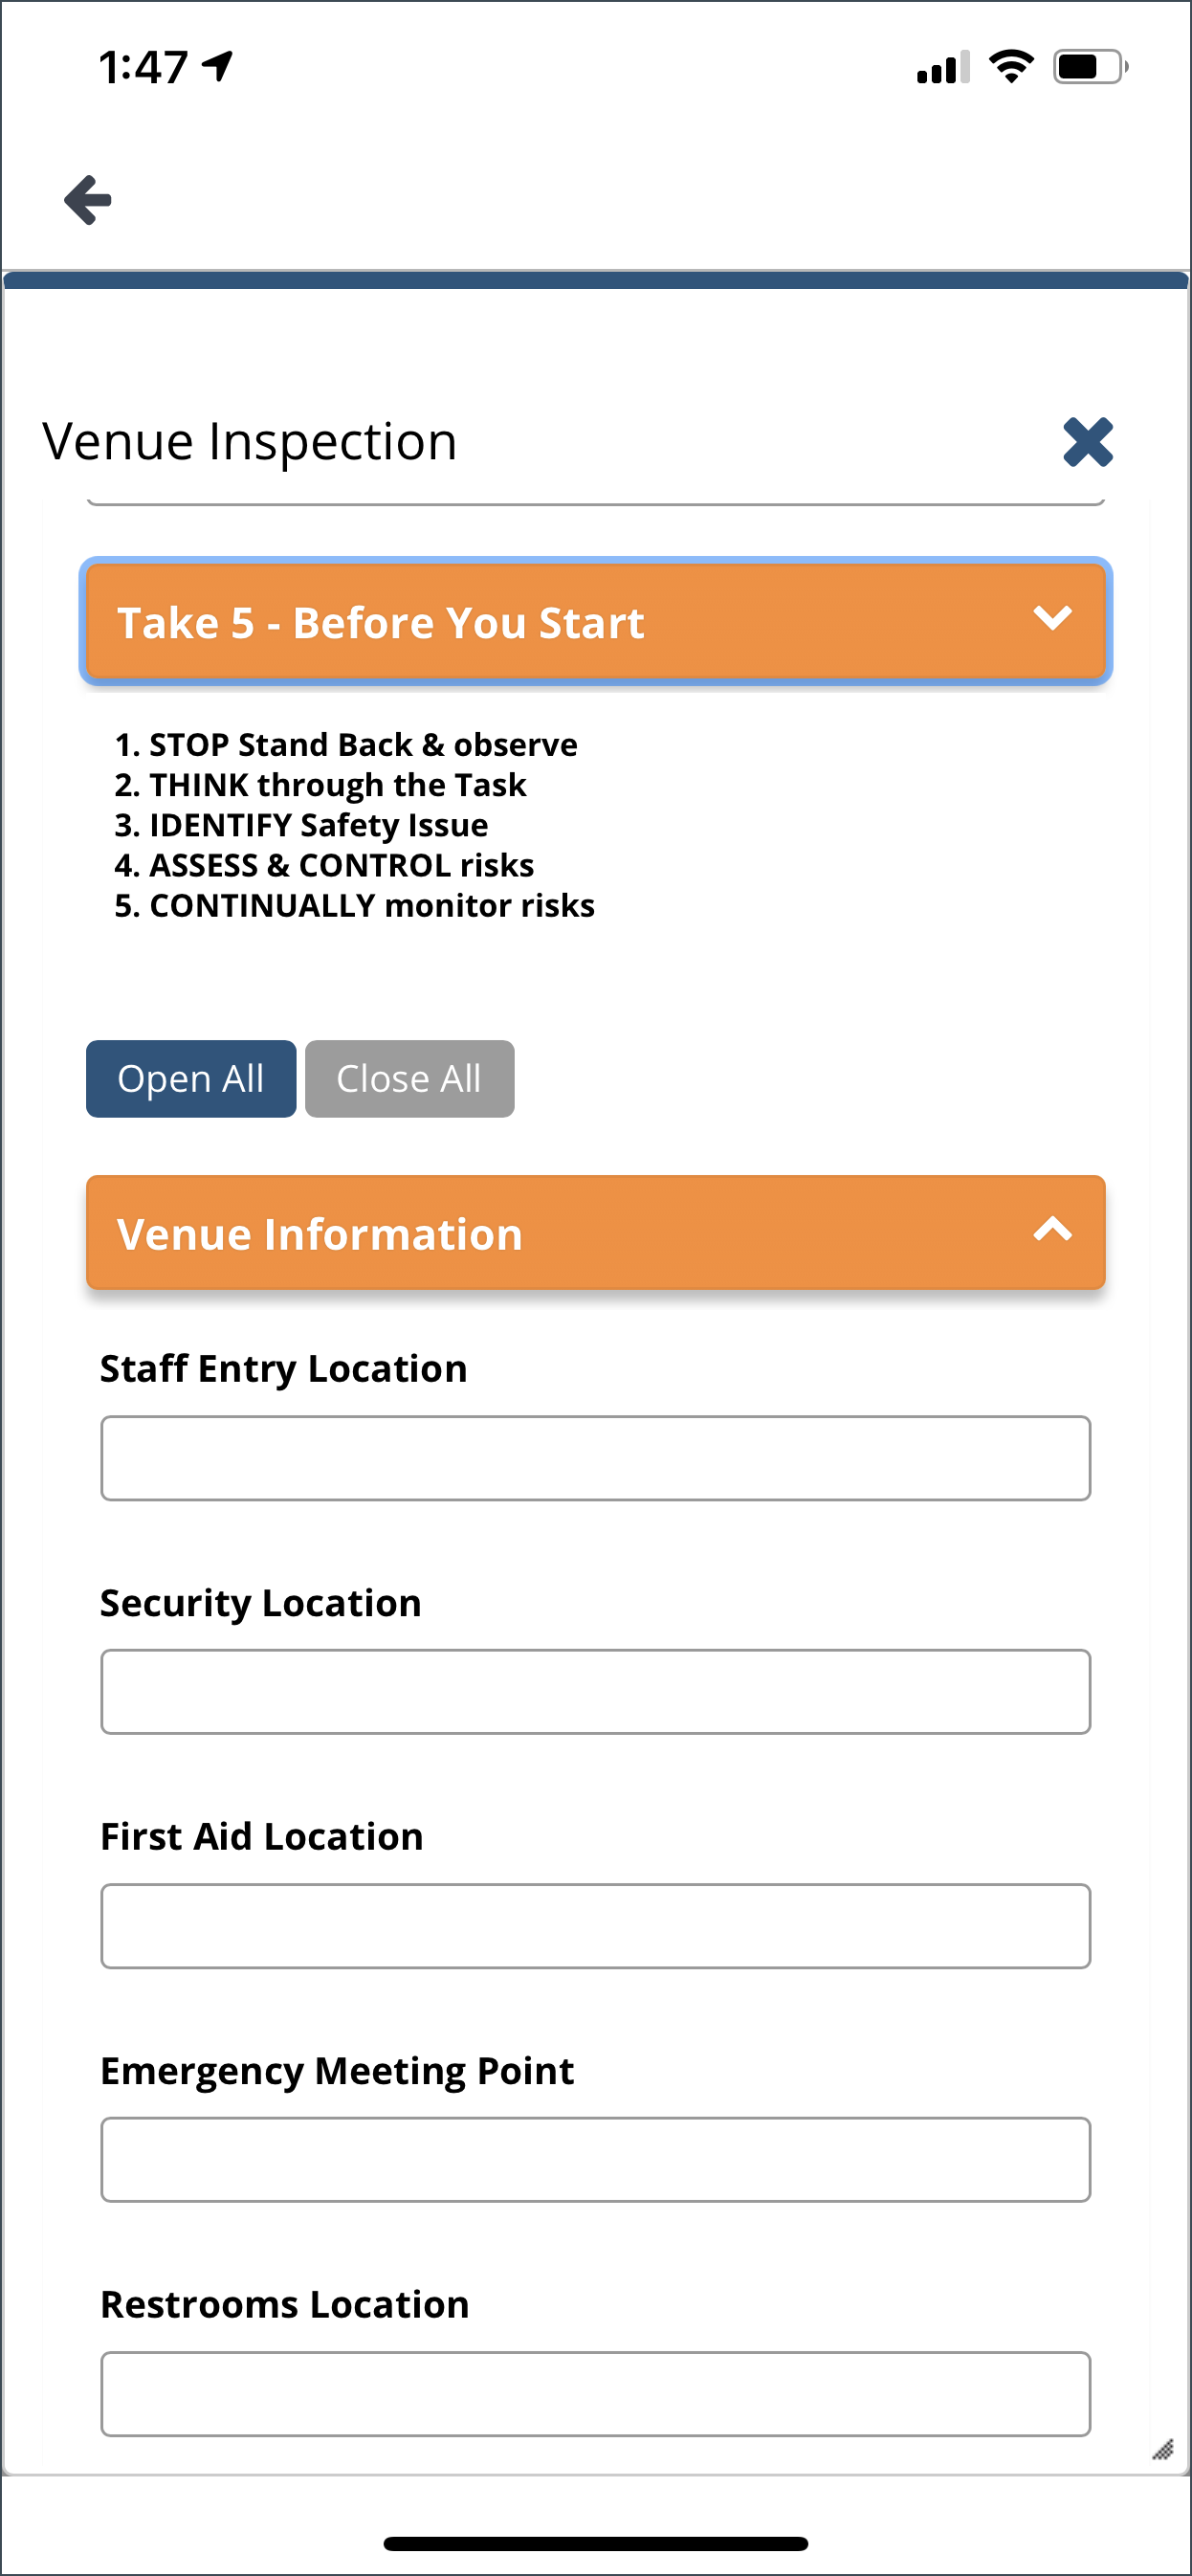
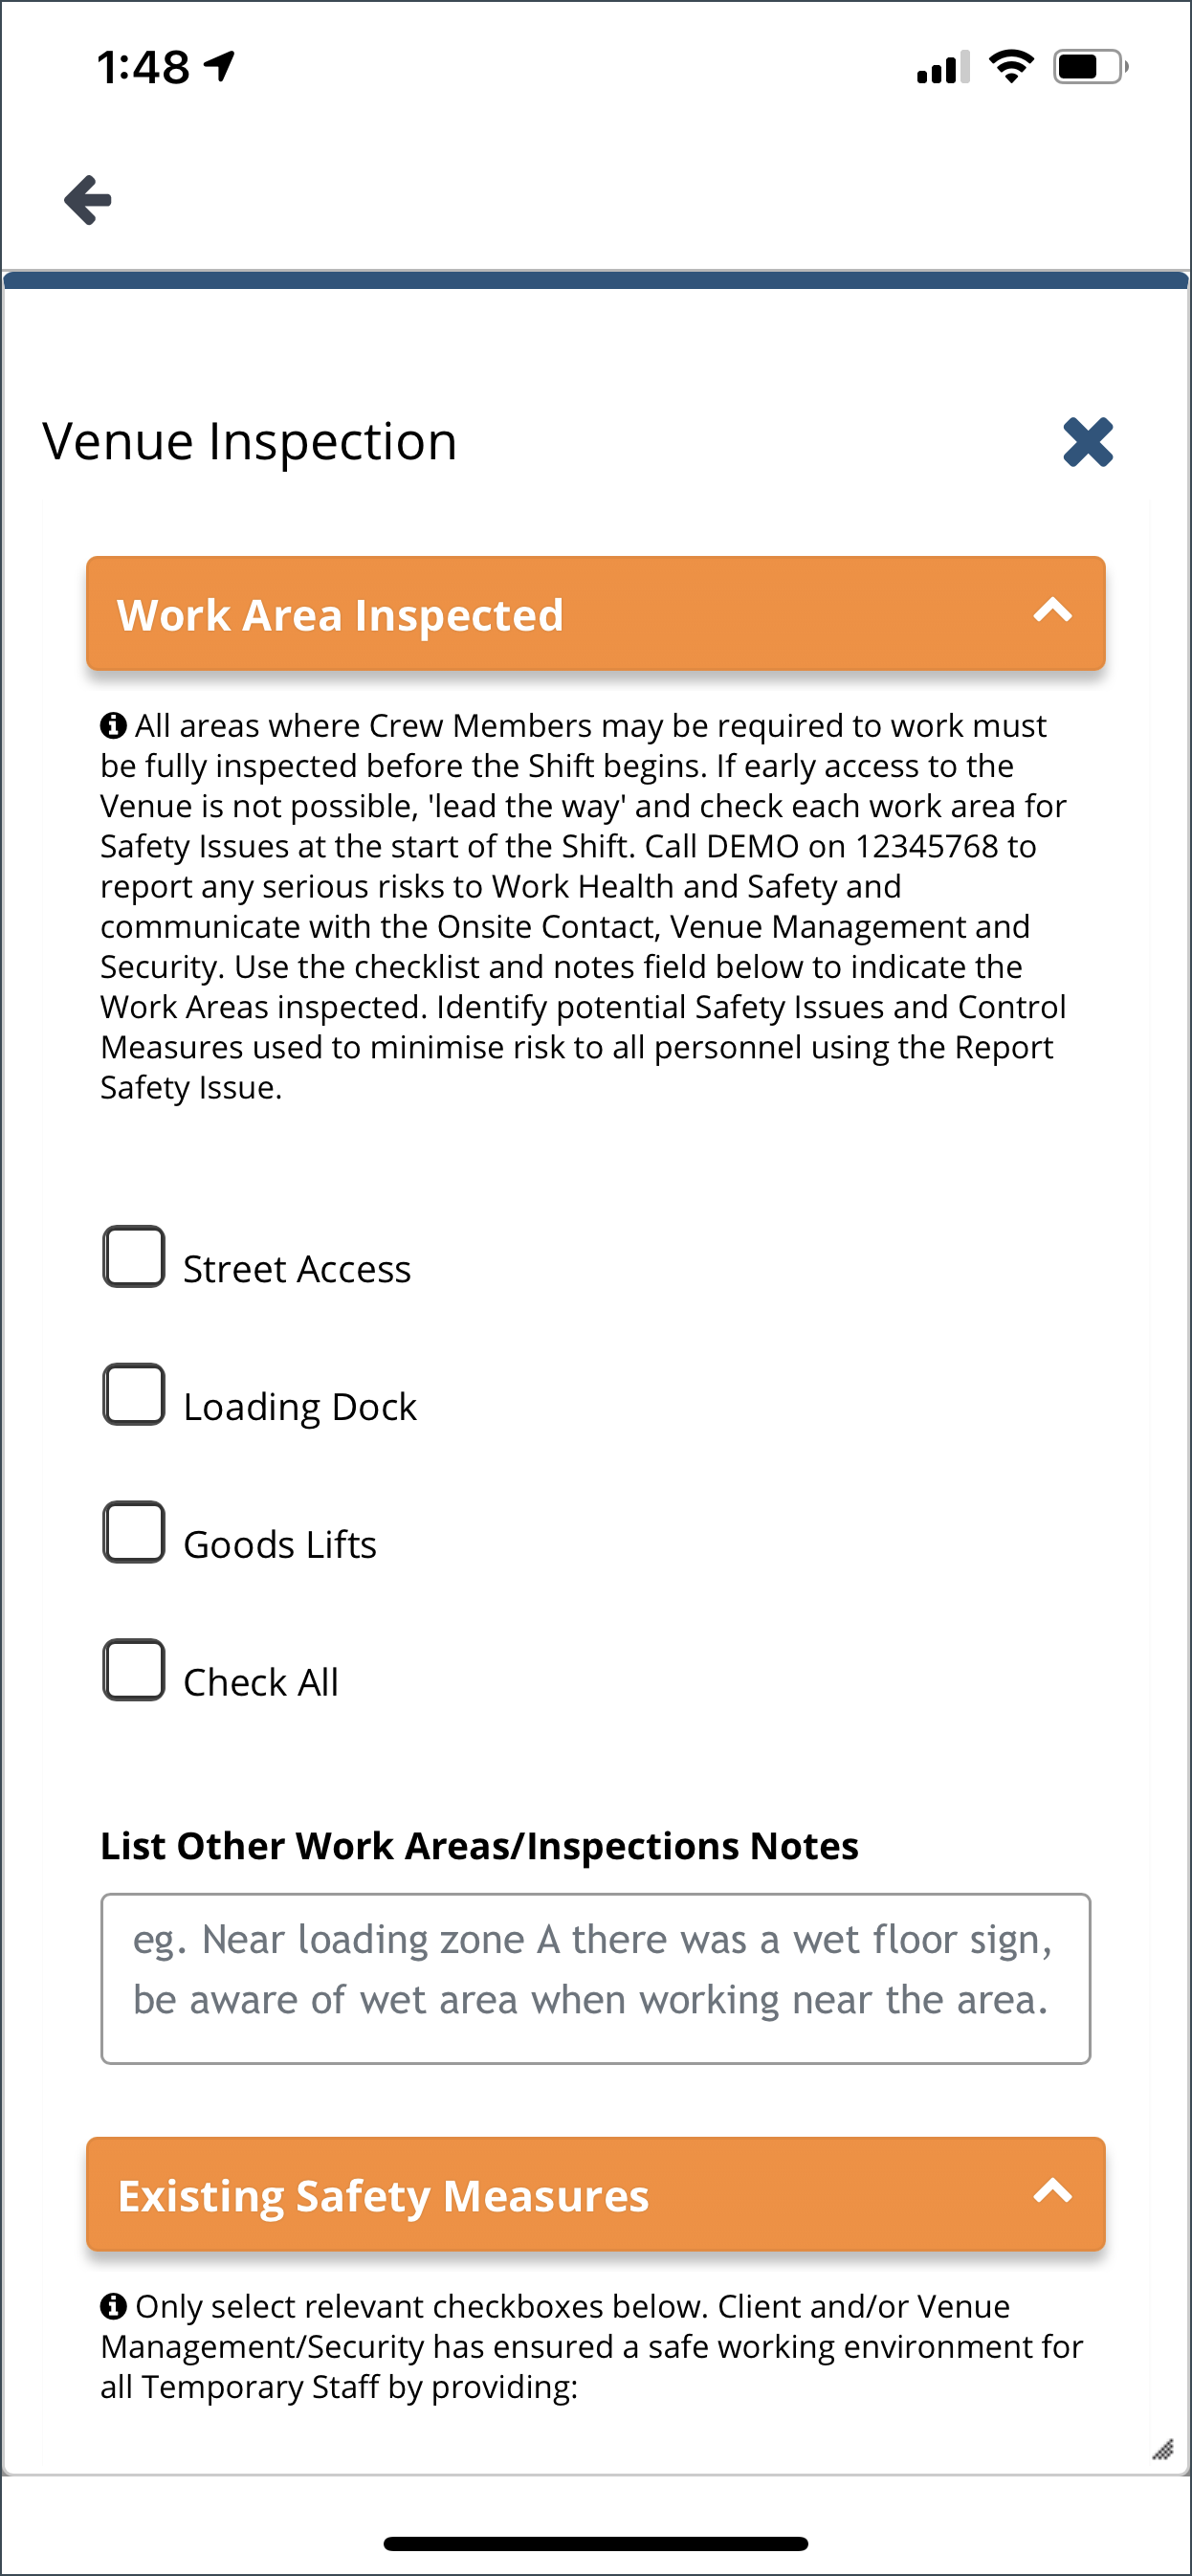
The content of the Venue Inspection Form may vary from one client to another. The contents of the form are set via the Admin Portal.
You can click on the arrow buttons to display the fields where you can enter data and information.
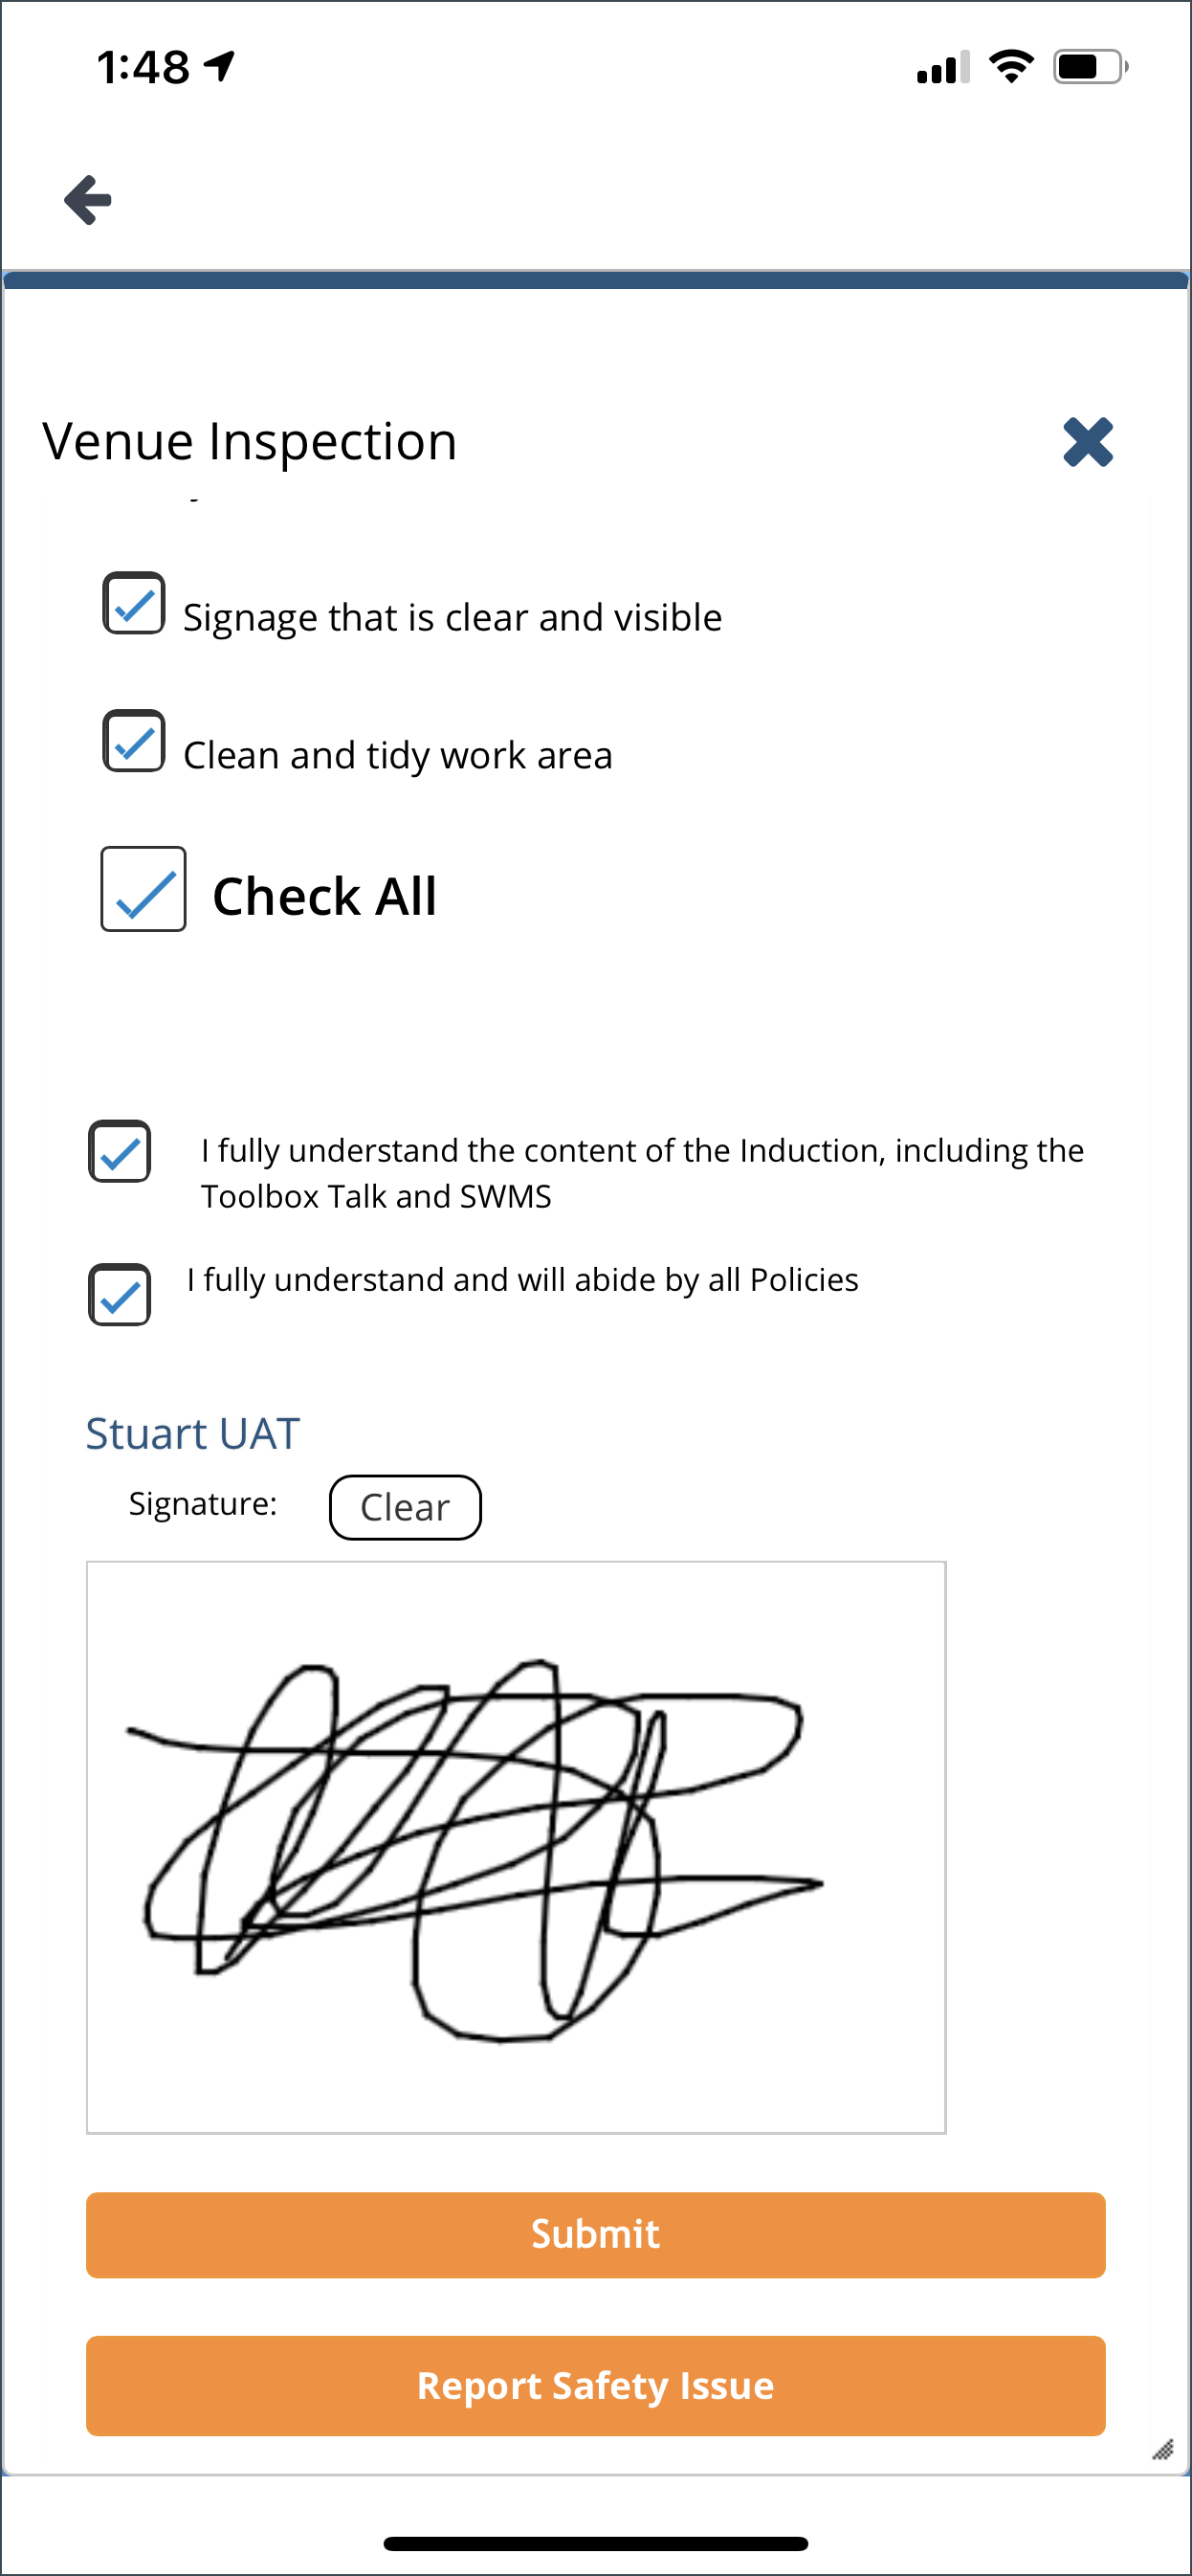
Once you have completed filling out the forms, affix your signature and click Submit.
After you have submitted it, the form will ask you if you want to submit a Report Safety Issue. Click Yes if you want to report a safety issue, otherwise click No.
INDUCTION
A safety induction is conducted to welcome new employees to the company and prepare them for their new role. It ensures workers are fully informed about the organization and are aware of their work and responsibilities. It serves as a starting point for an organization to introduce a culture of safety in the workplace.
This is the Safety Induction Form for Team Leader. For other crews, it will show as General Activity Induction.
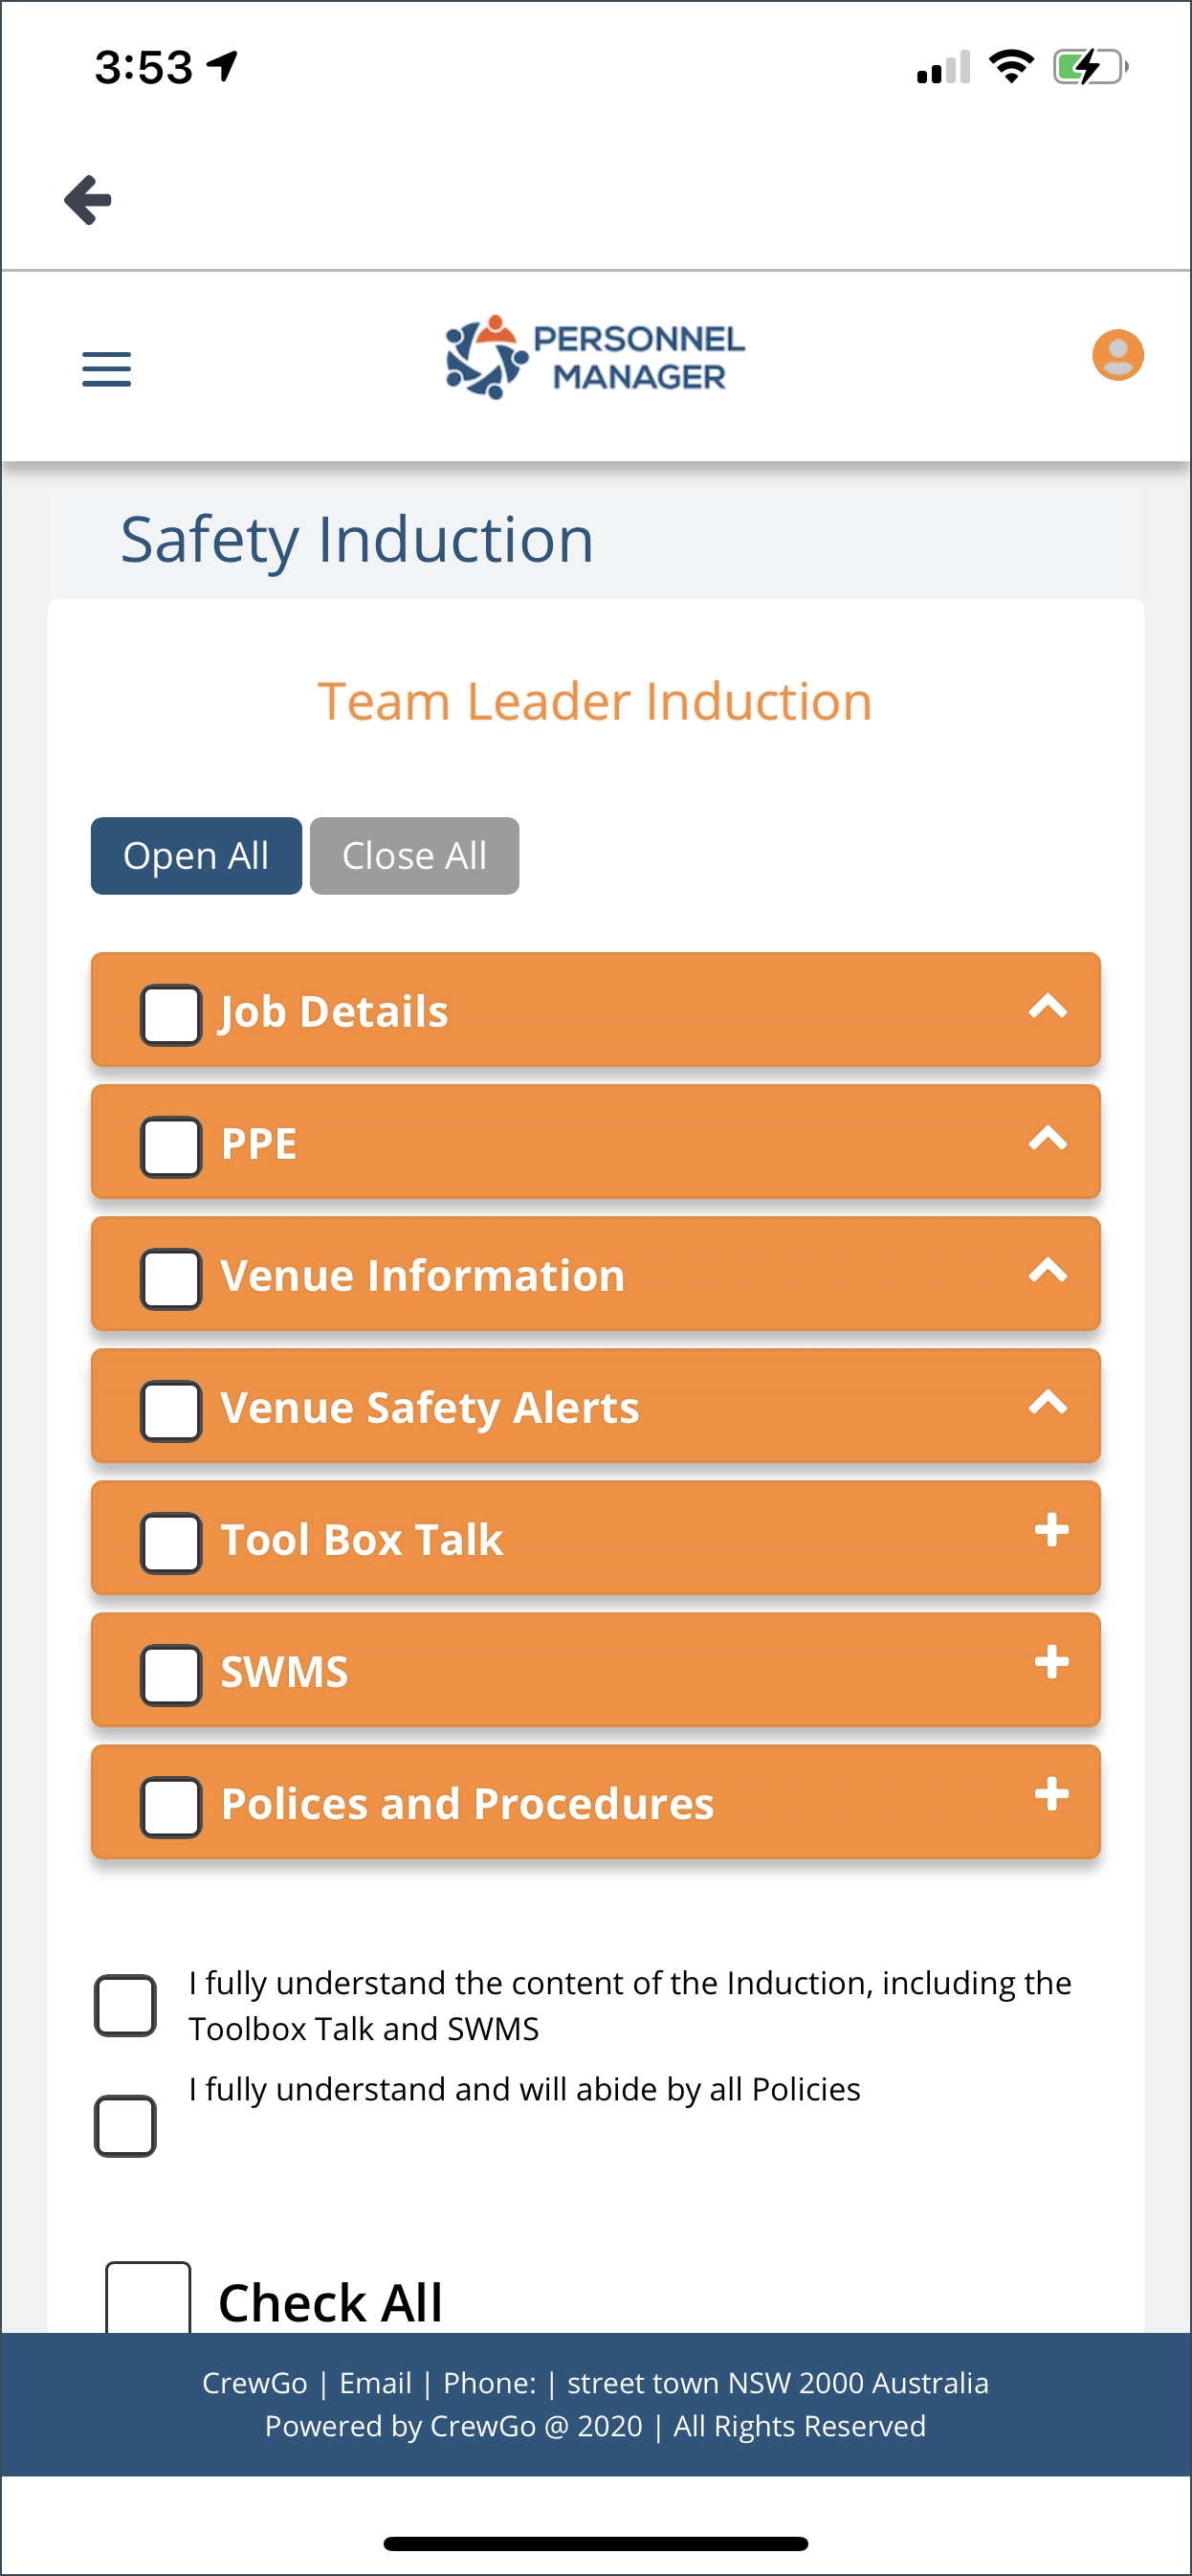
Note: The contents of the Safety Induction Form may vary depending on how it was configured from the Admin Portal.
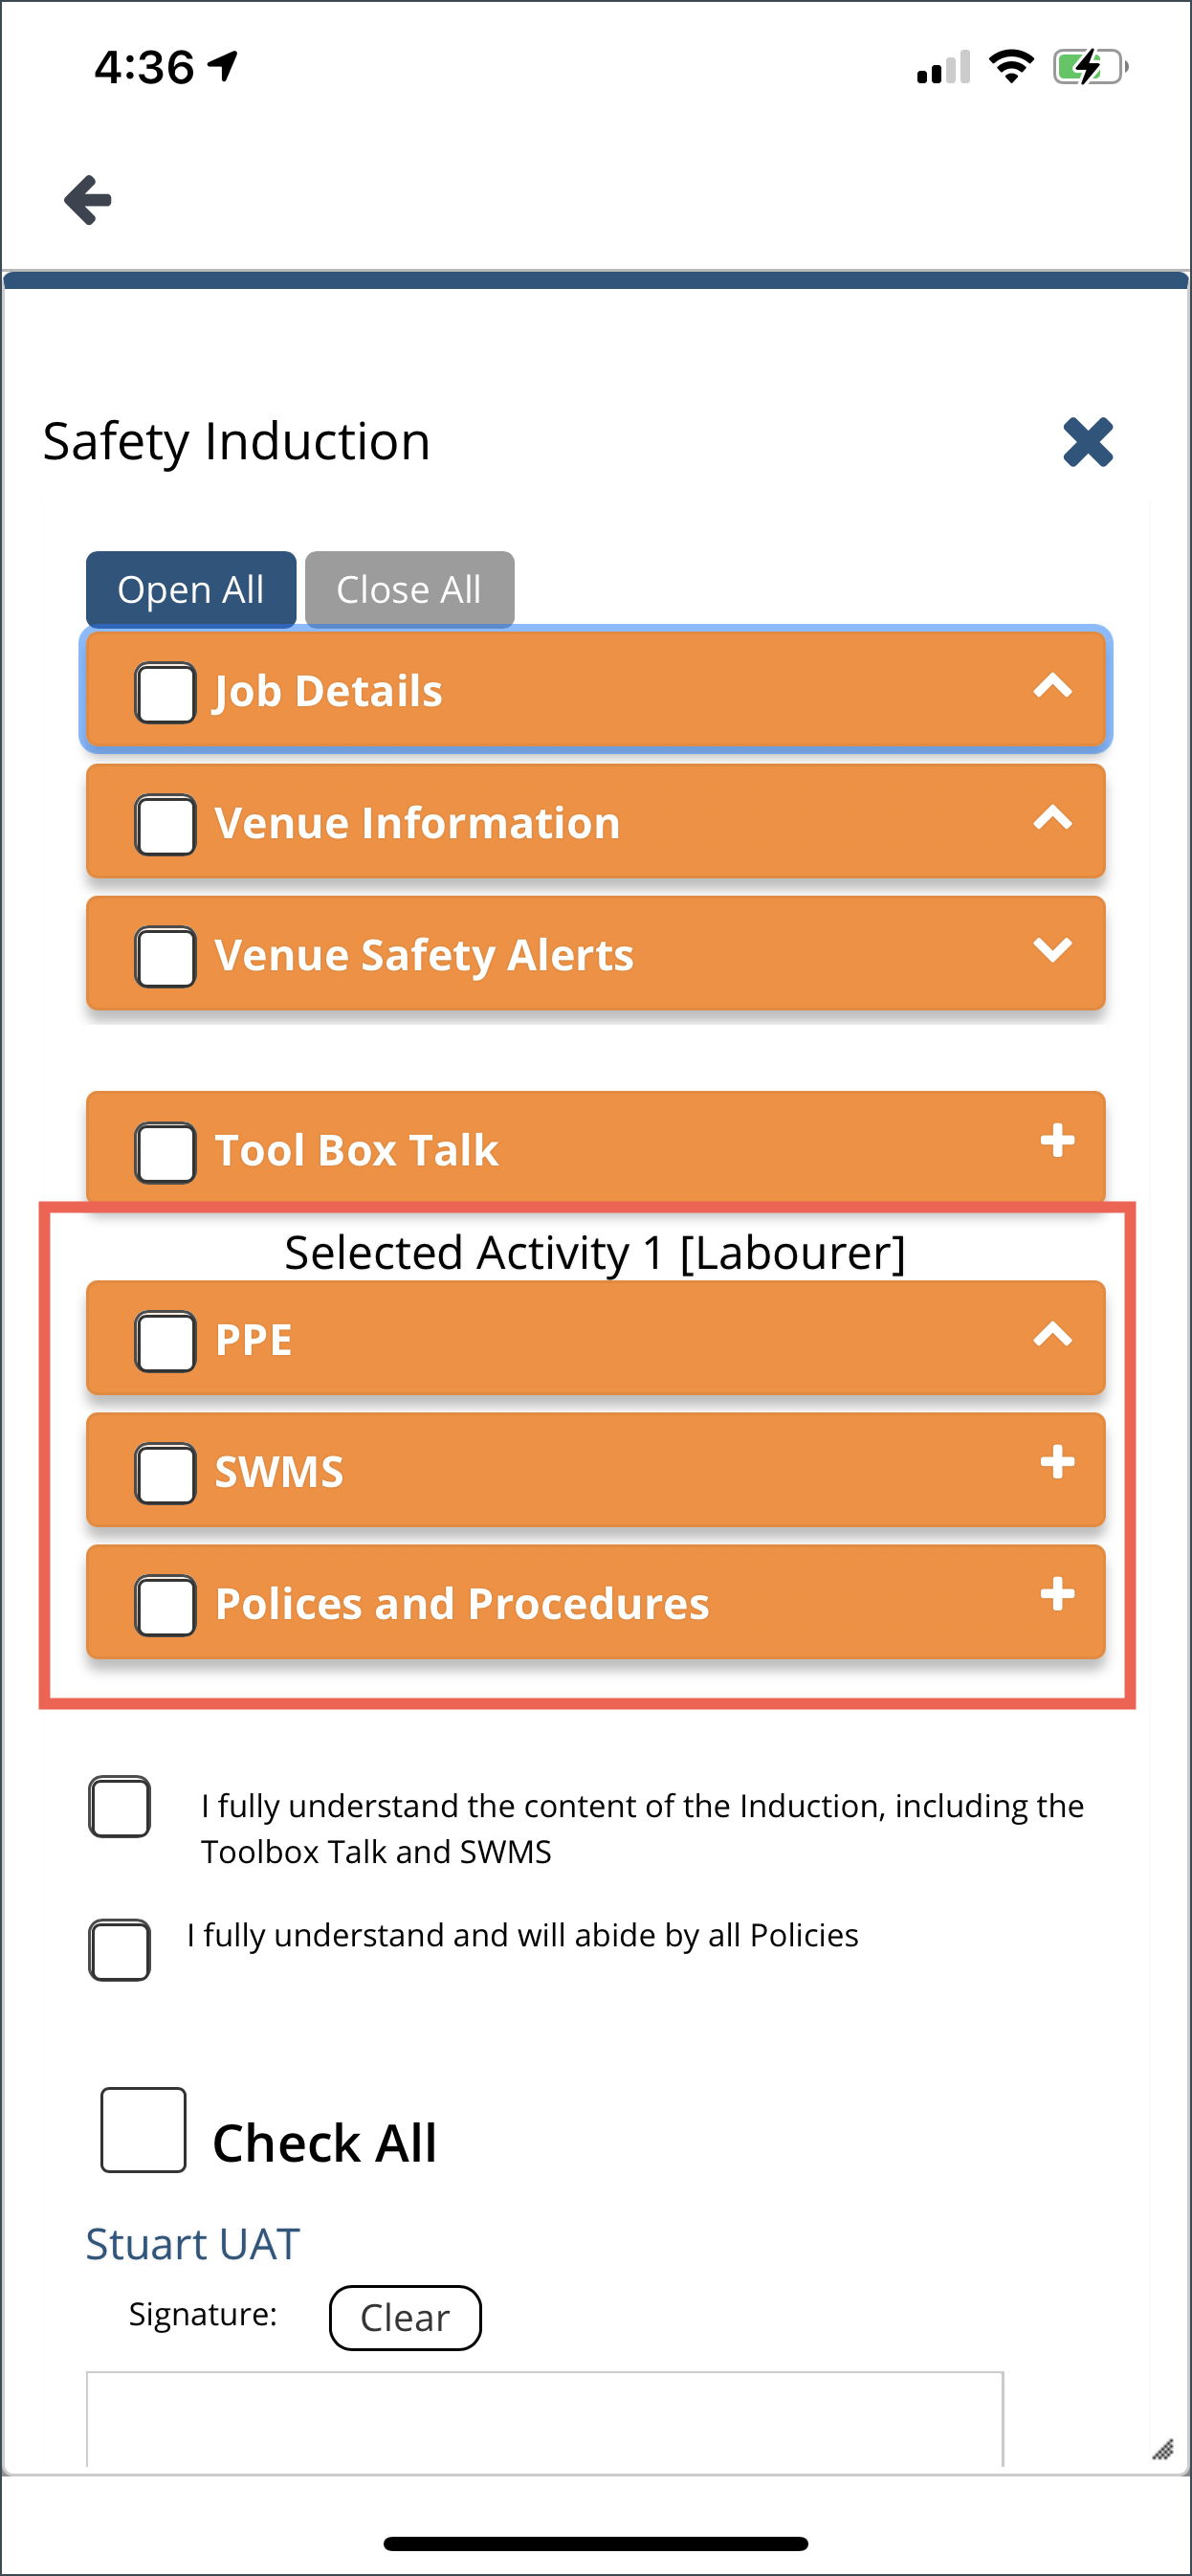
In the screenshot above, there are seven tabs under the Safety Induction. You can click the Open All button to display the content of these tabs or you can click the arrow icons.
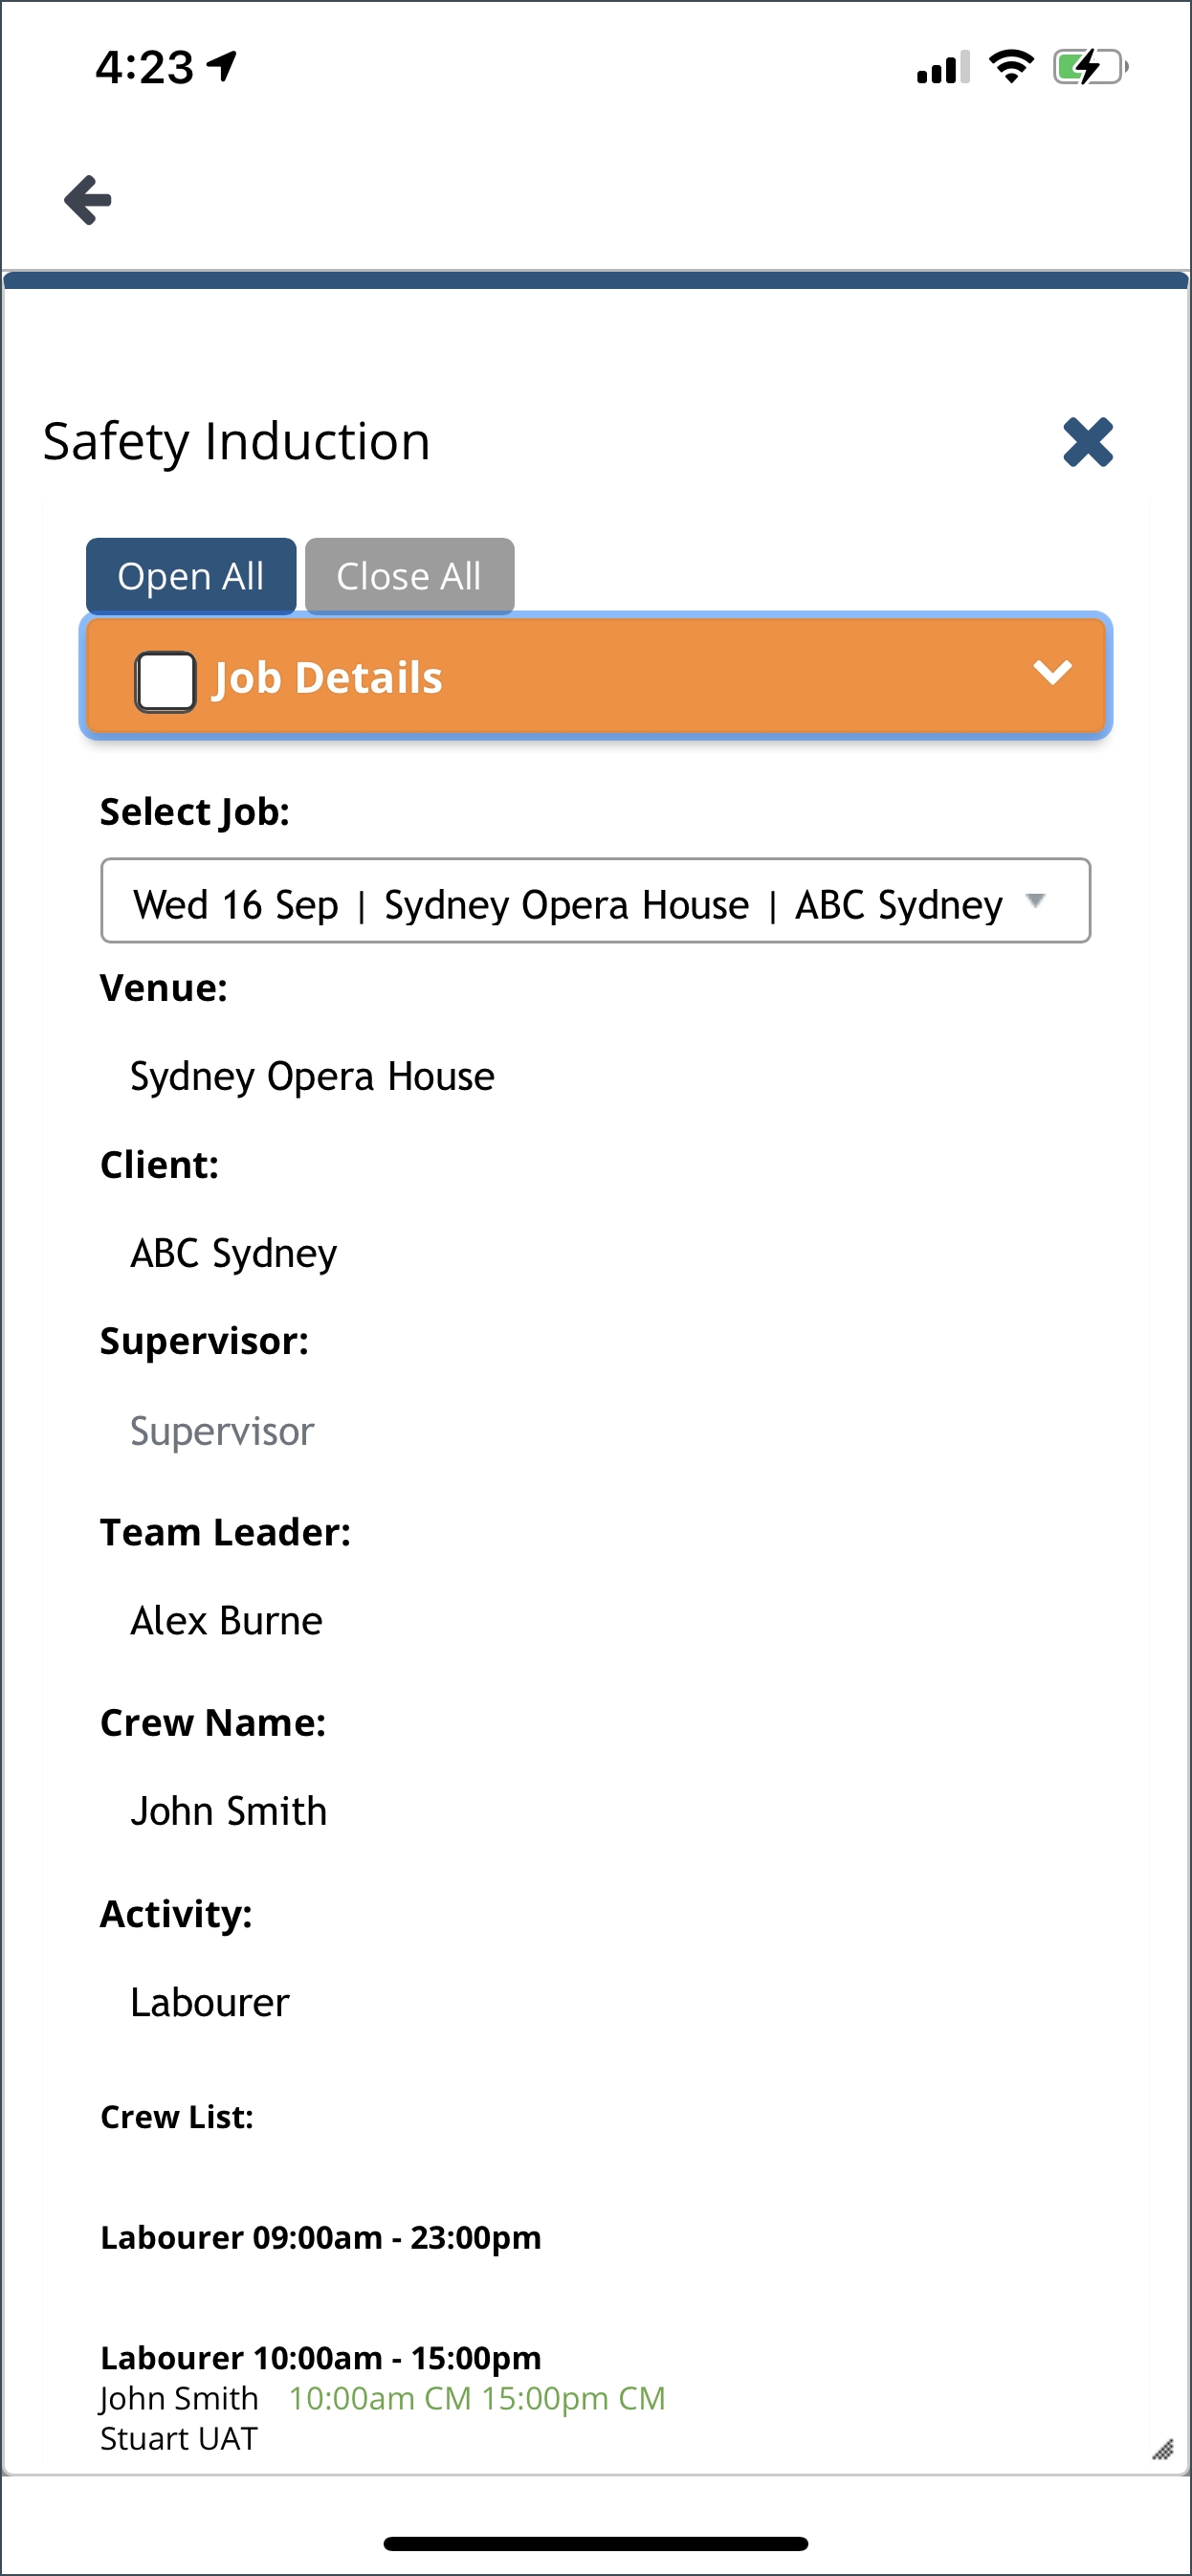
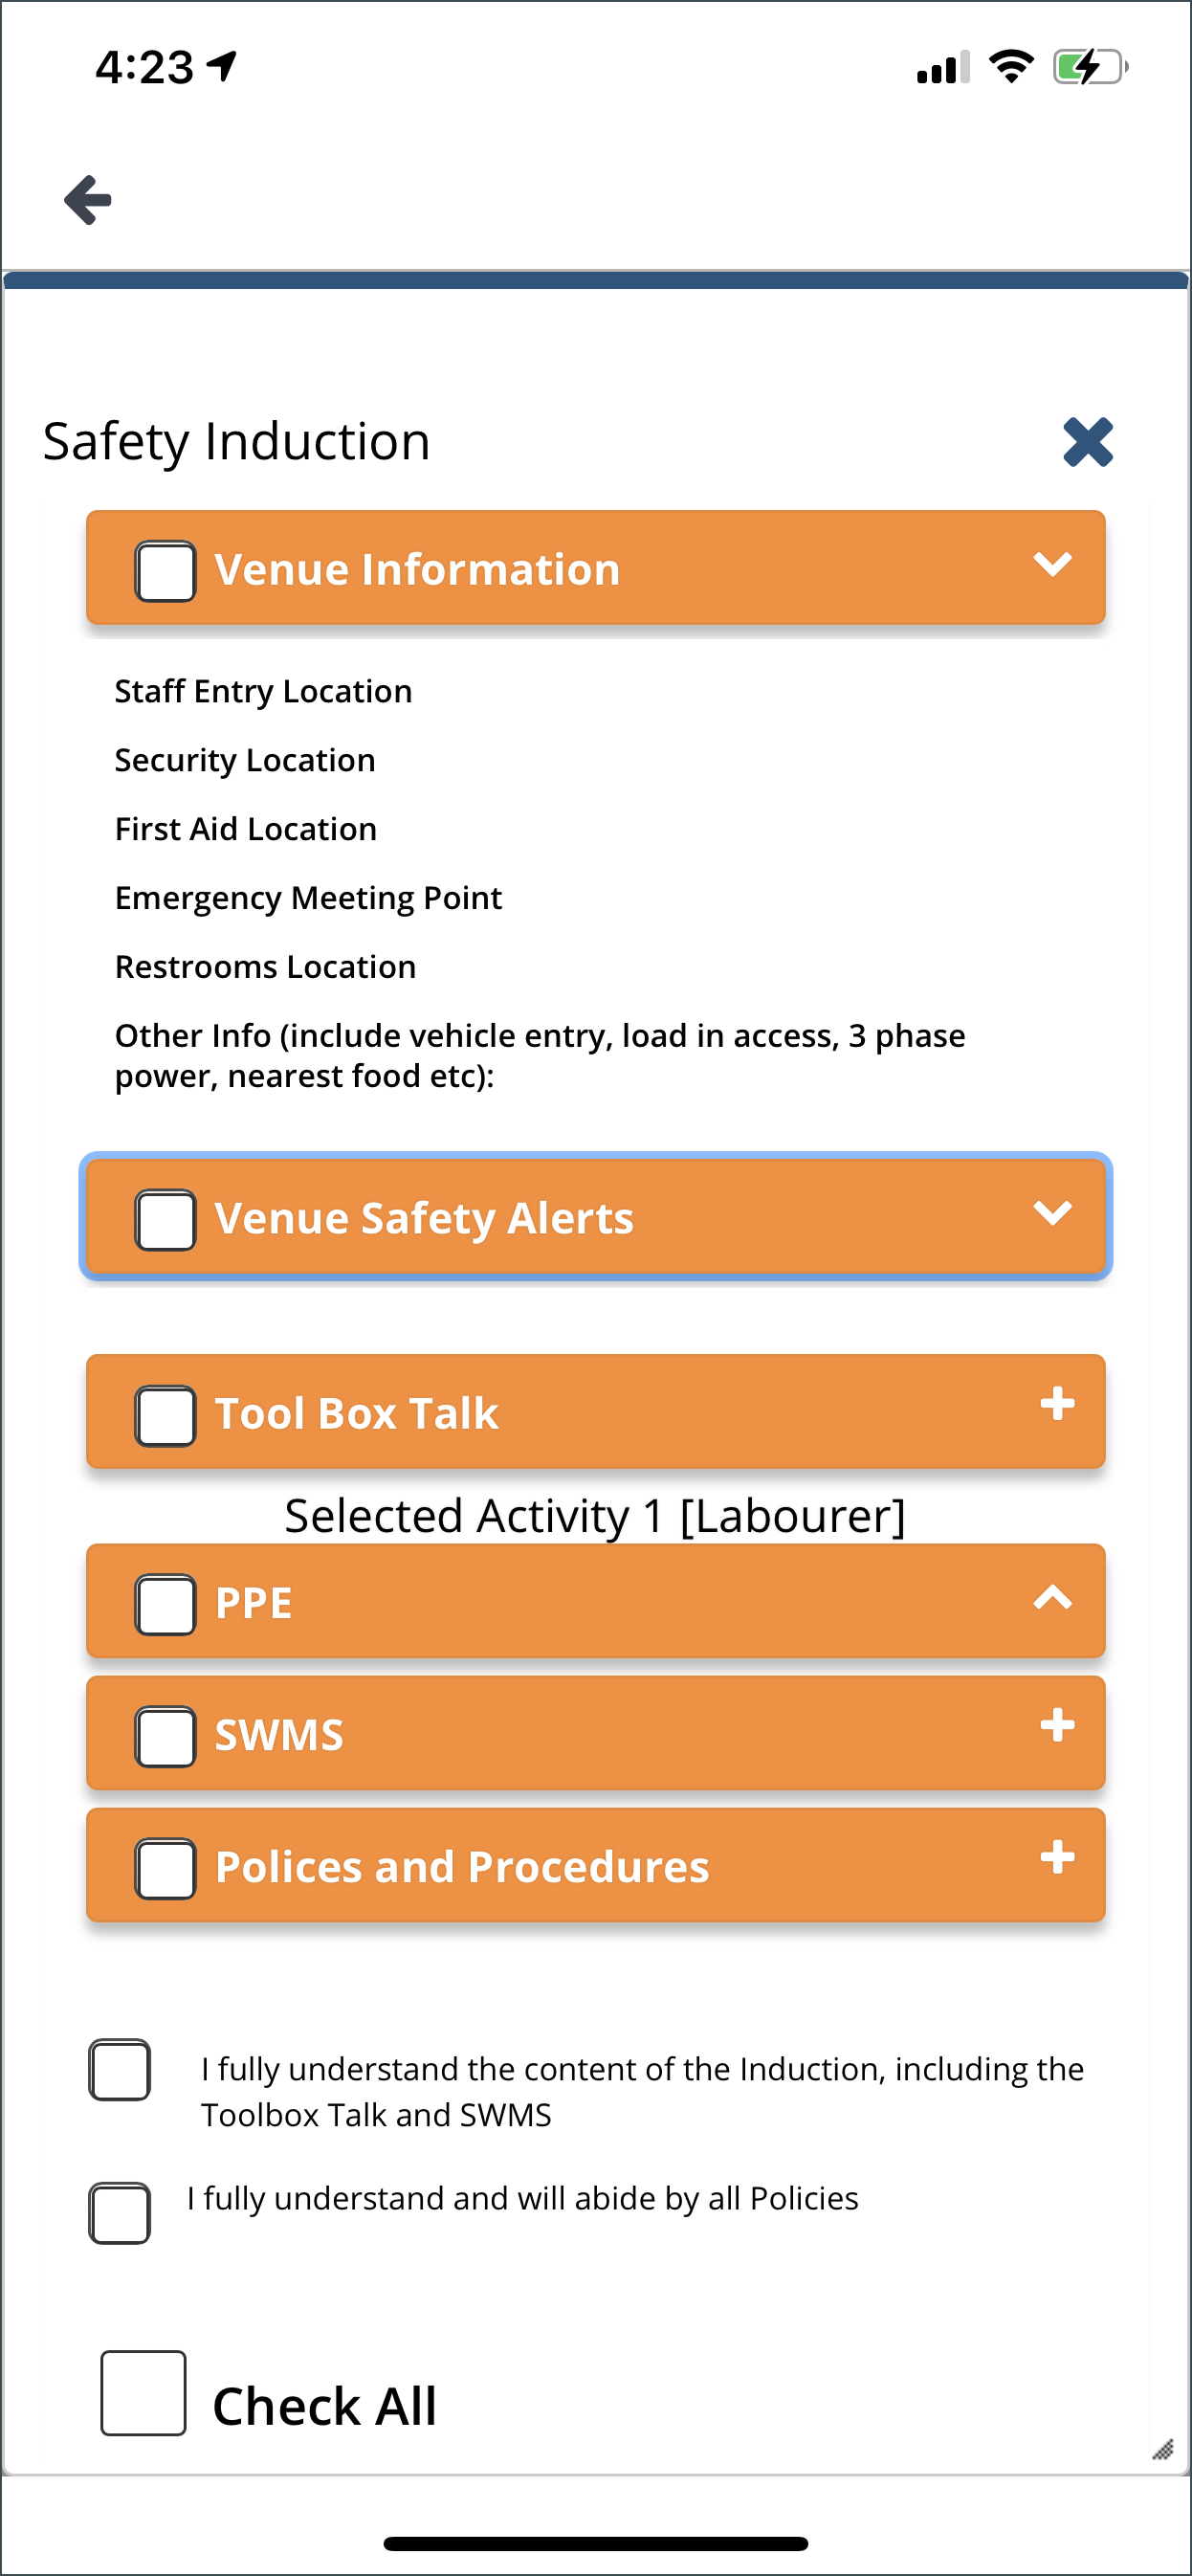
Select the job from the dropdown menu. This will populate other information automatically.
Venue Information: The data in this section is derived from the Venue Inspection
Venue Safety Alerts: If there are reported safety issues on this venue, it will show up here.
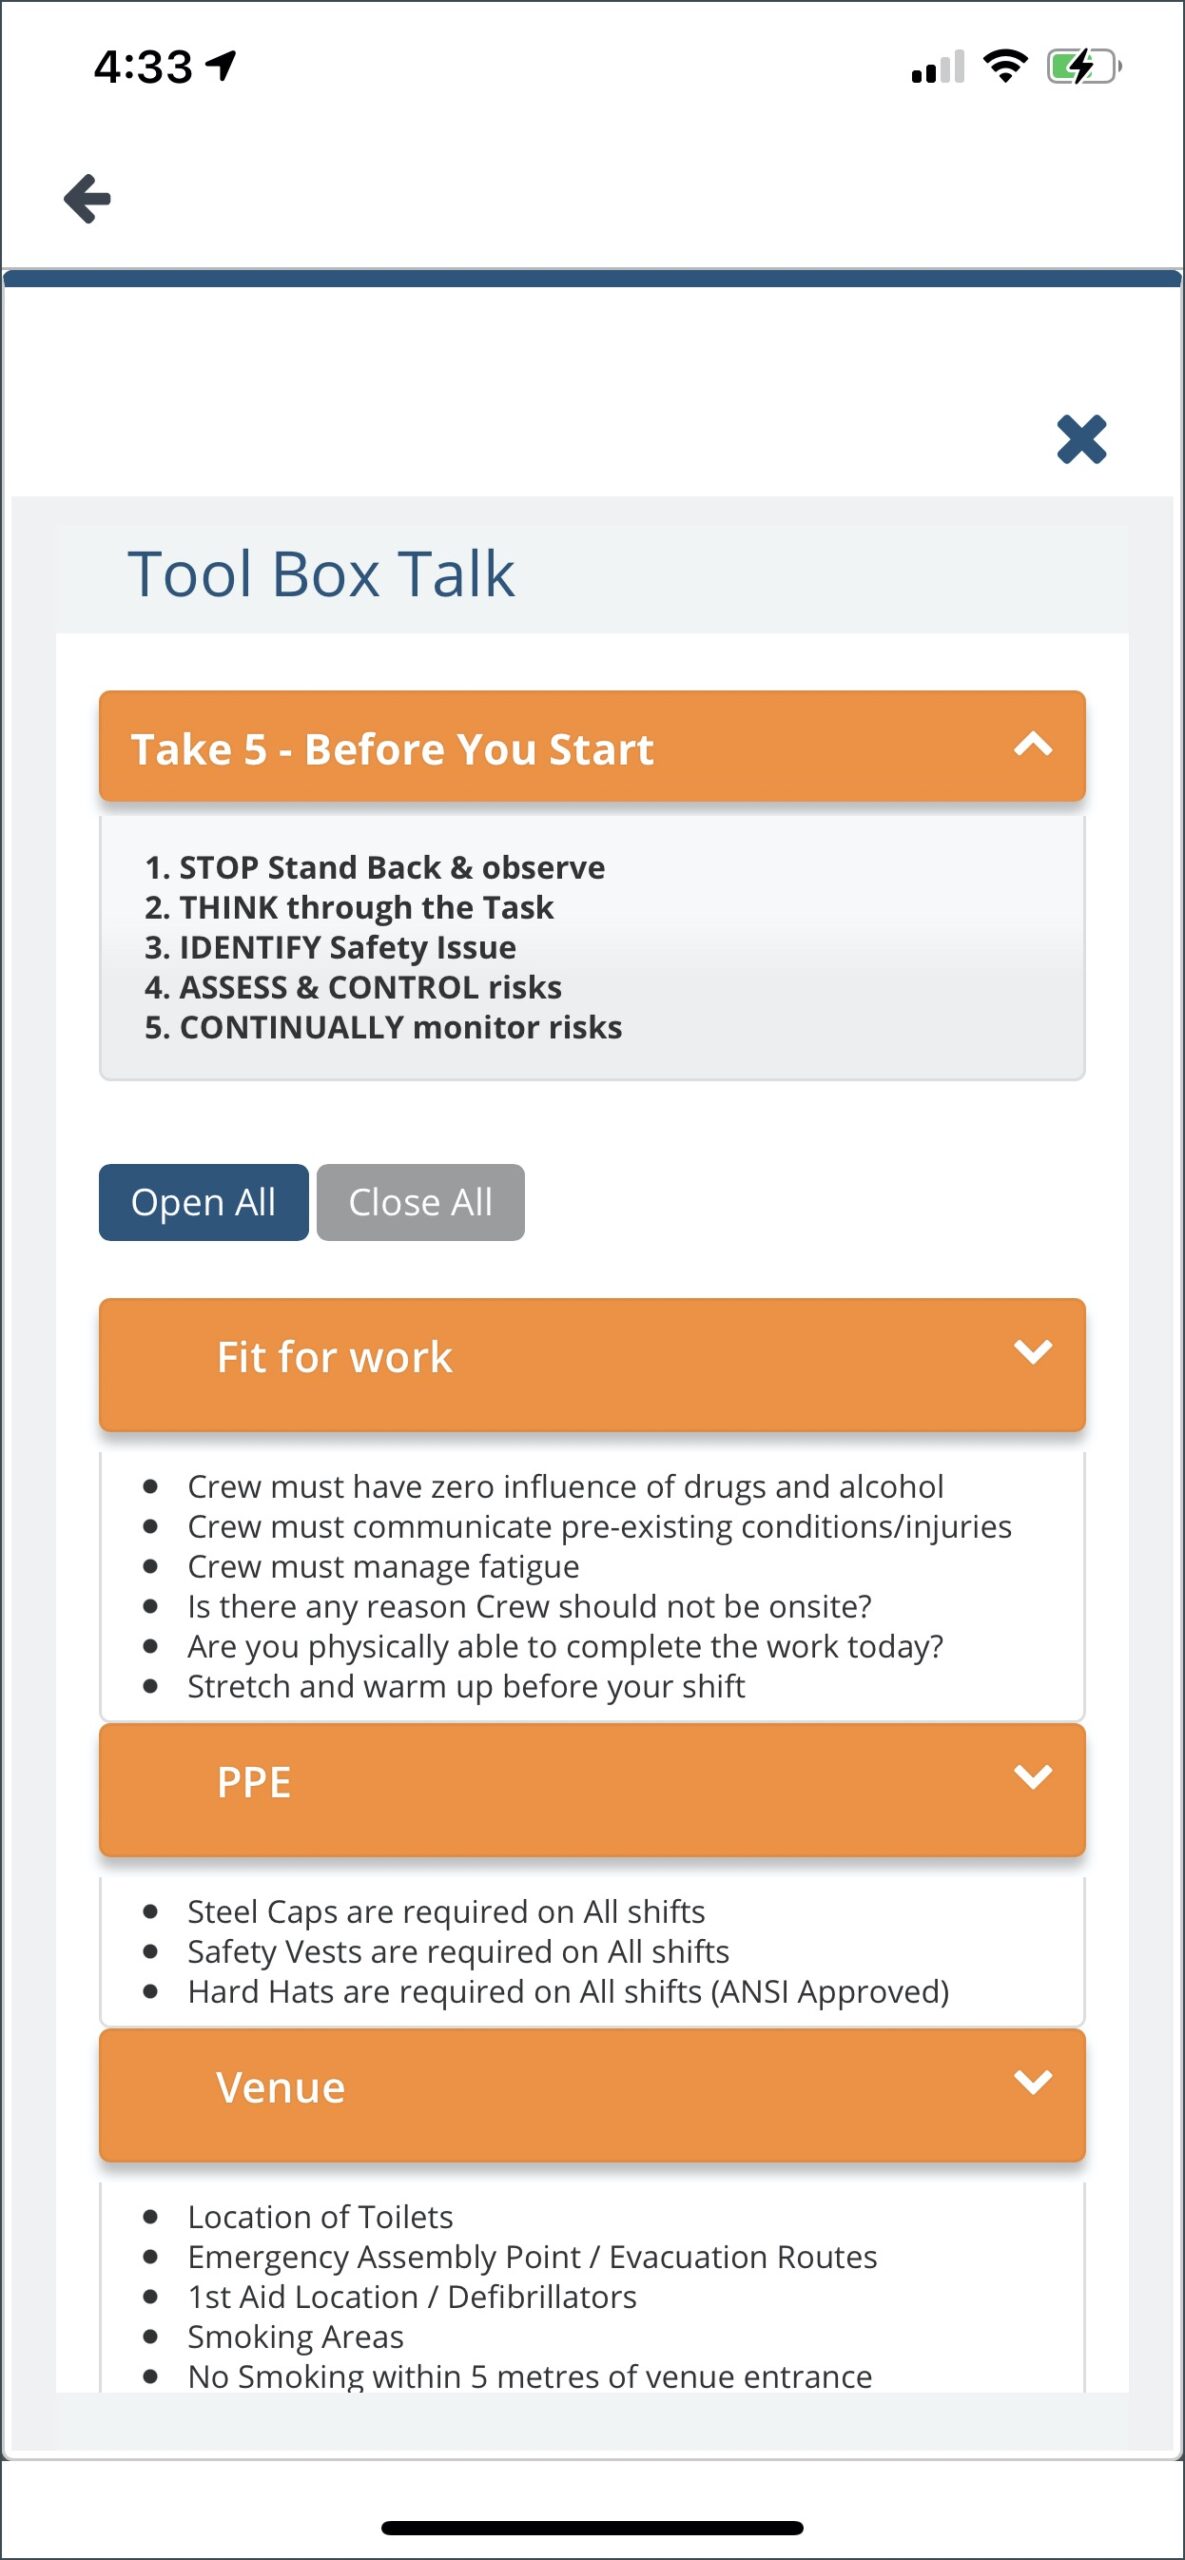
Tool Box Talk: Click on the plus icon to display the content for Tool Box discussion.
If a selected Activity is mapped to SWMS/PPE and Policies, it will appear on the Safety Induction. In below screenshot, selected Activity is Labourer. This activity is mapped to SWMS/PPE and Policies.
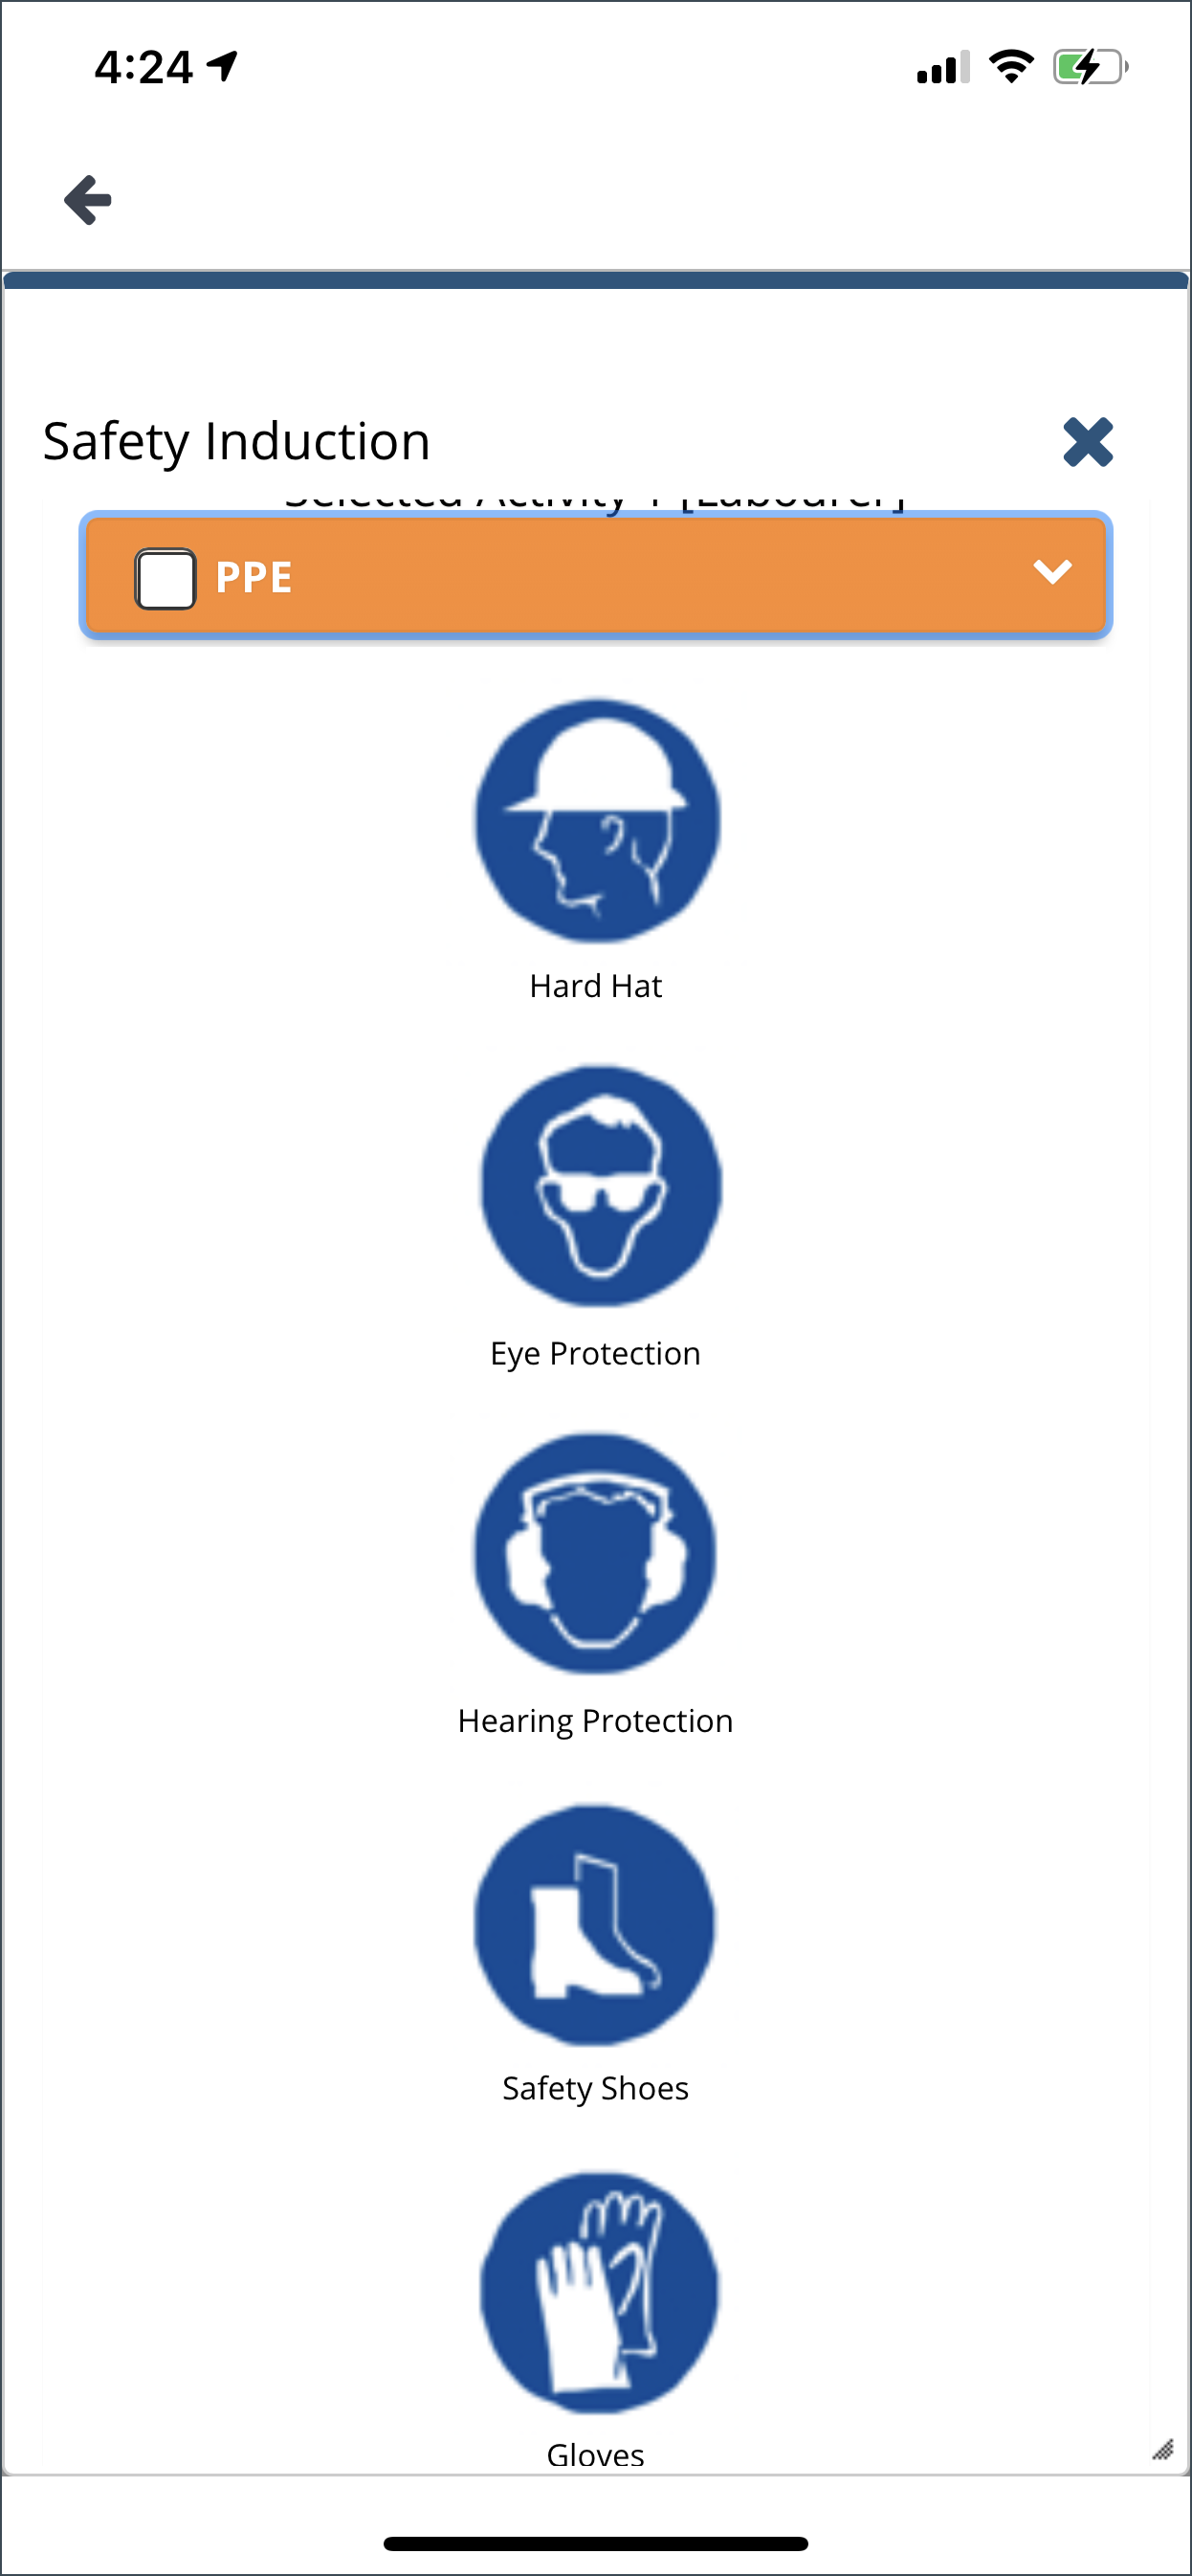
Click on PPE to display the required PPE for the job.
For tabs with plus icon, when this is clicked, it will open another form.
Team Leaders should discuss each sections (tabs) of the Safety Induction to the crew members. Once a section is completed, Team Leaders will need to put a check on the box.
SAFETY ISSUE
This is the Report Safety Issue Form. In filling out this safety form, you need to select the job from the dropdown menu. This will automatically populate the Venue and Client information.
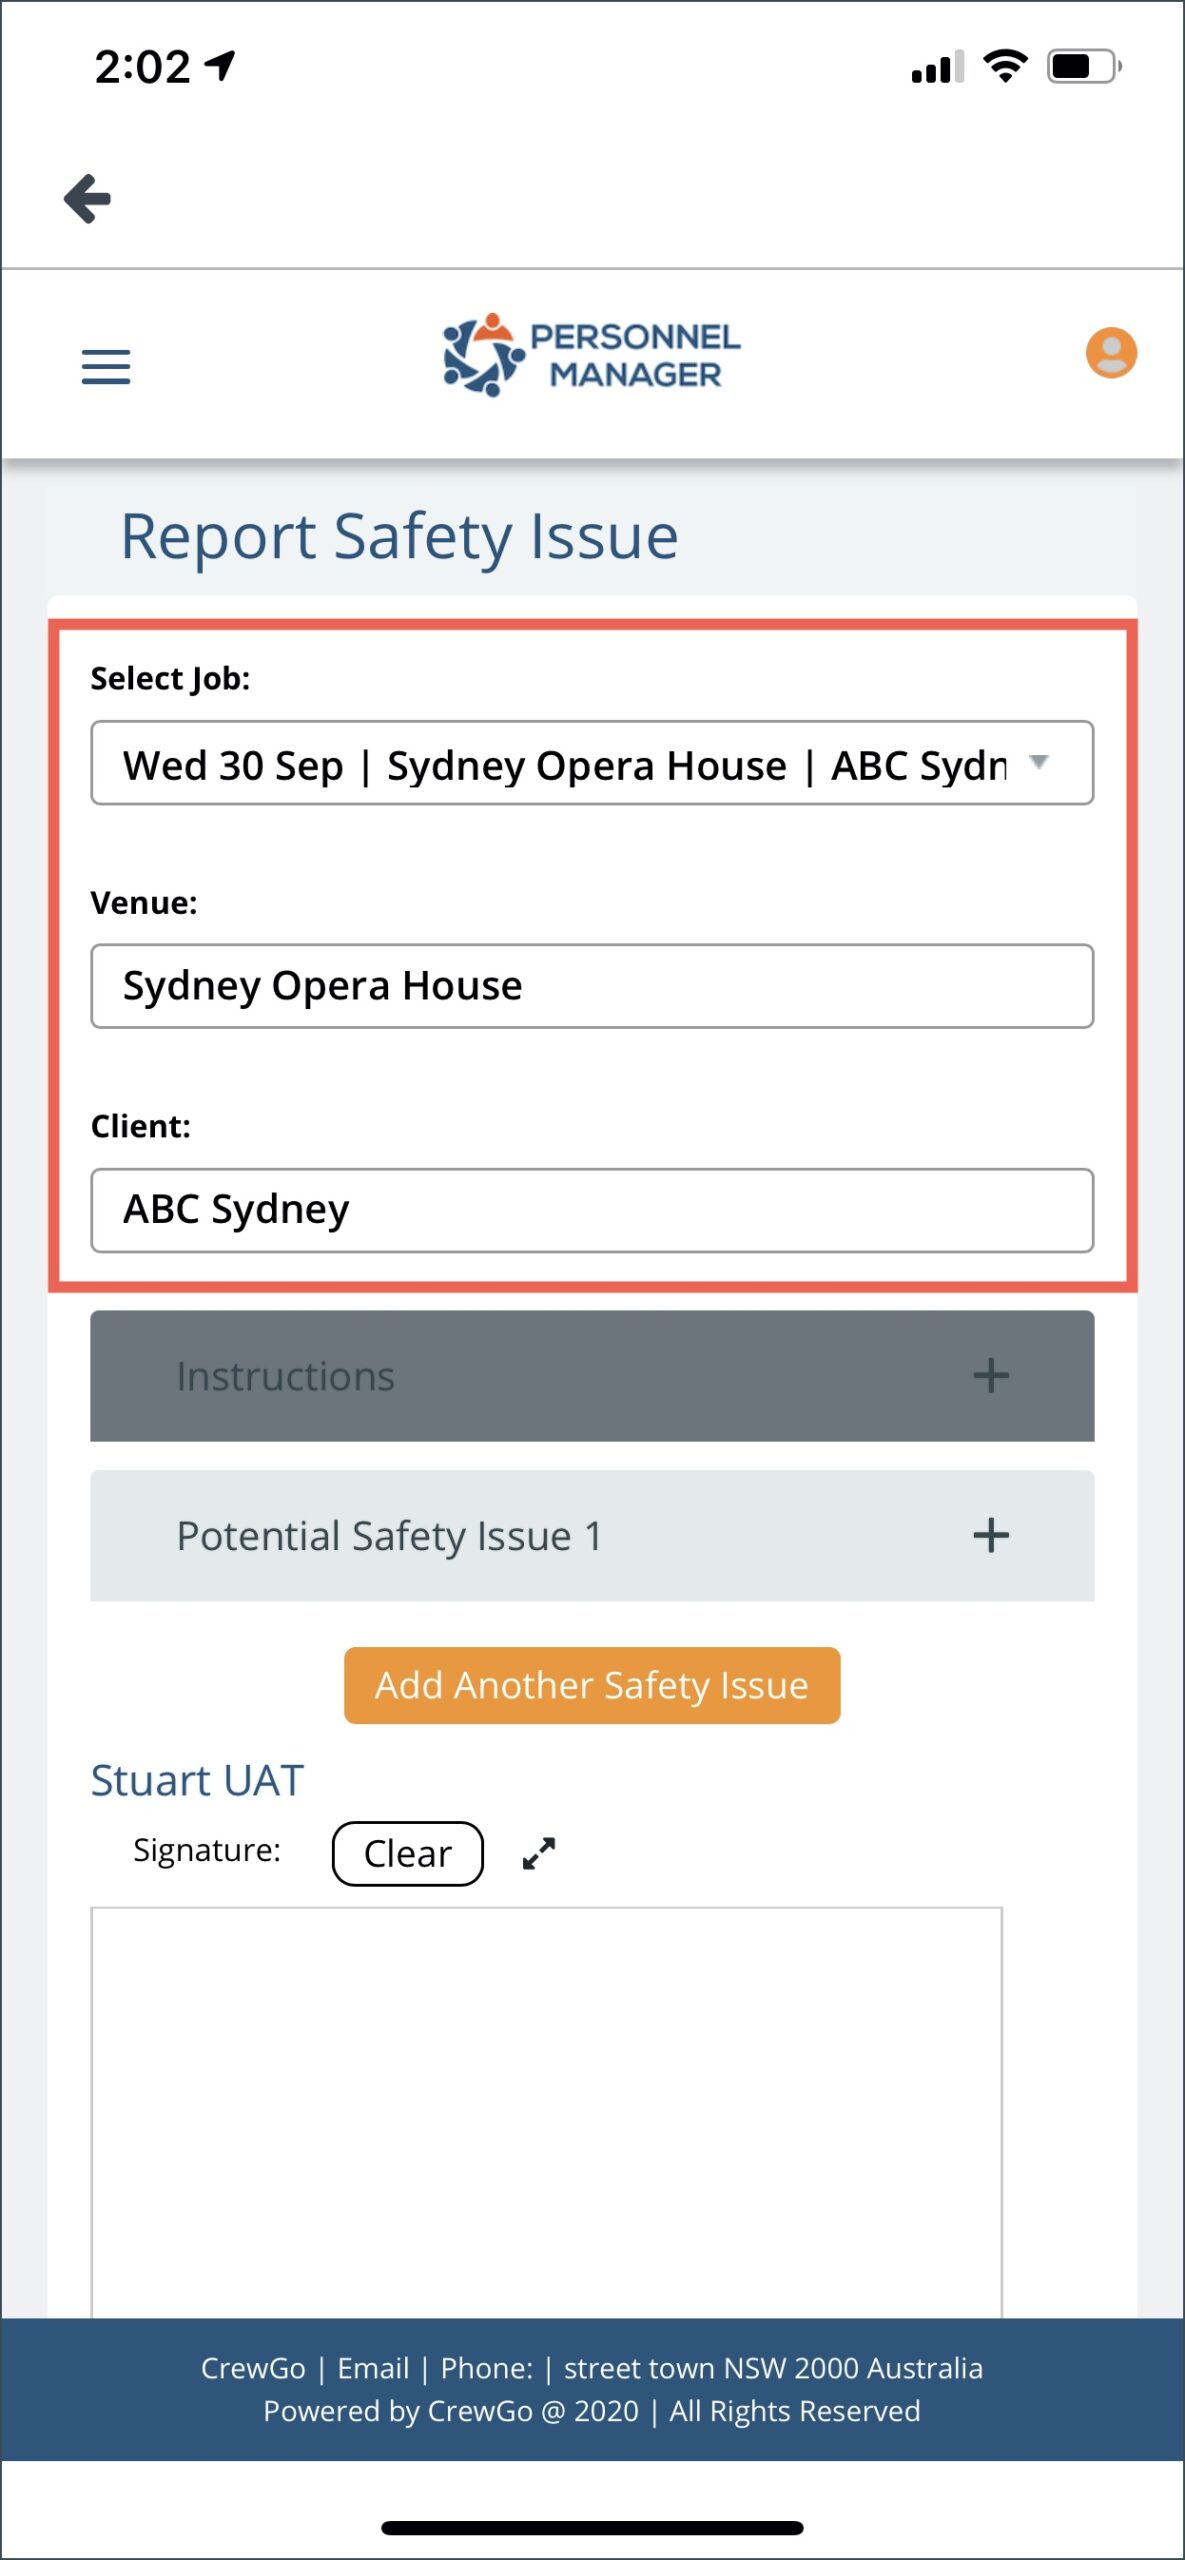
This Report Safety Issue Form will identify health and safety problems in the workplace and will assist with the implementation of solutions.
Note: The content of the Instruction tab will vary depending on how it is configured on the Admin Portal.
Click the plus icon of the Instruction tab to display its content. You will find instruction on this tab and on how to use the Risk Matrix.
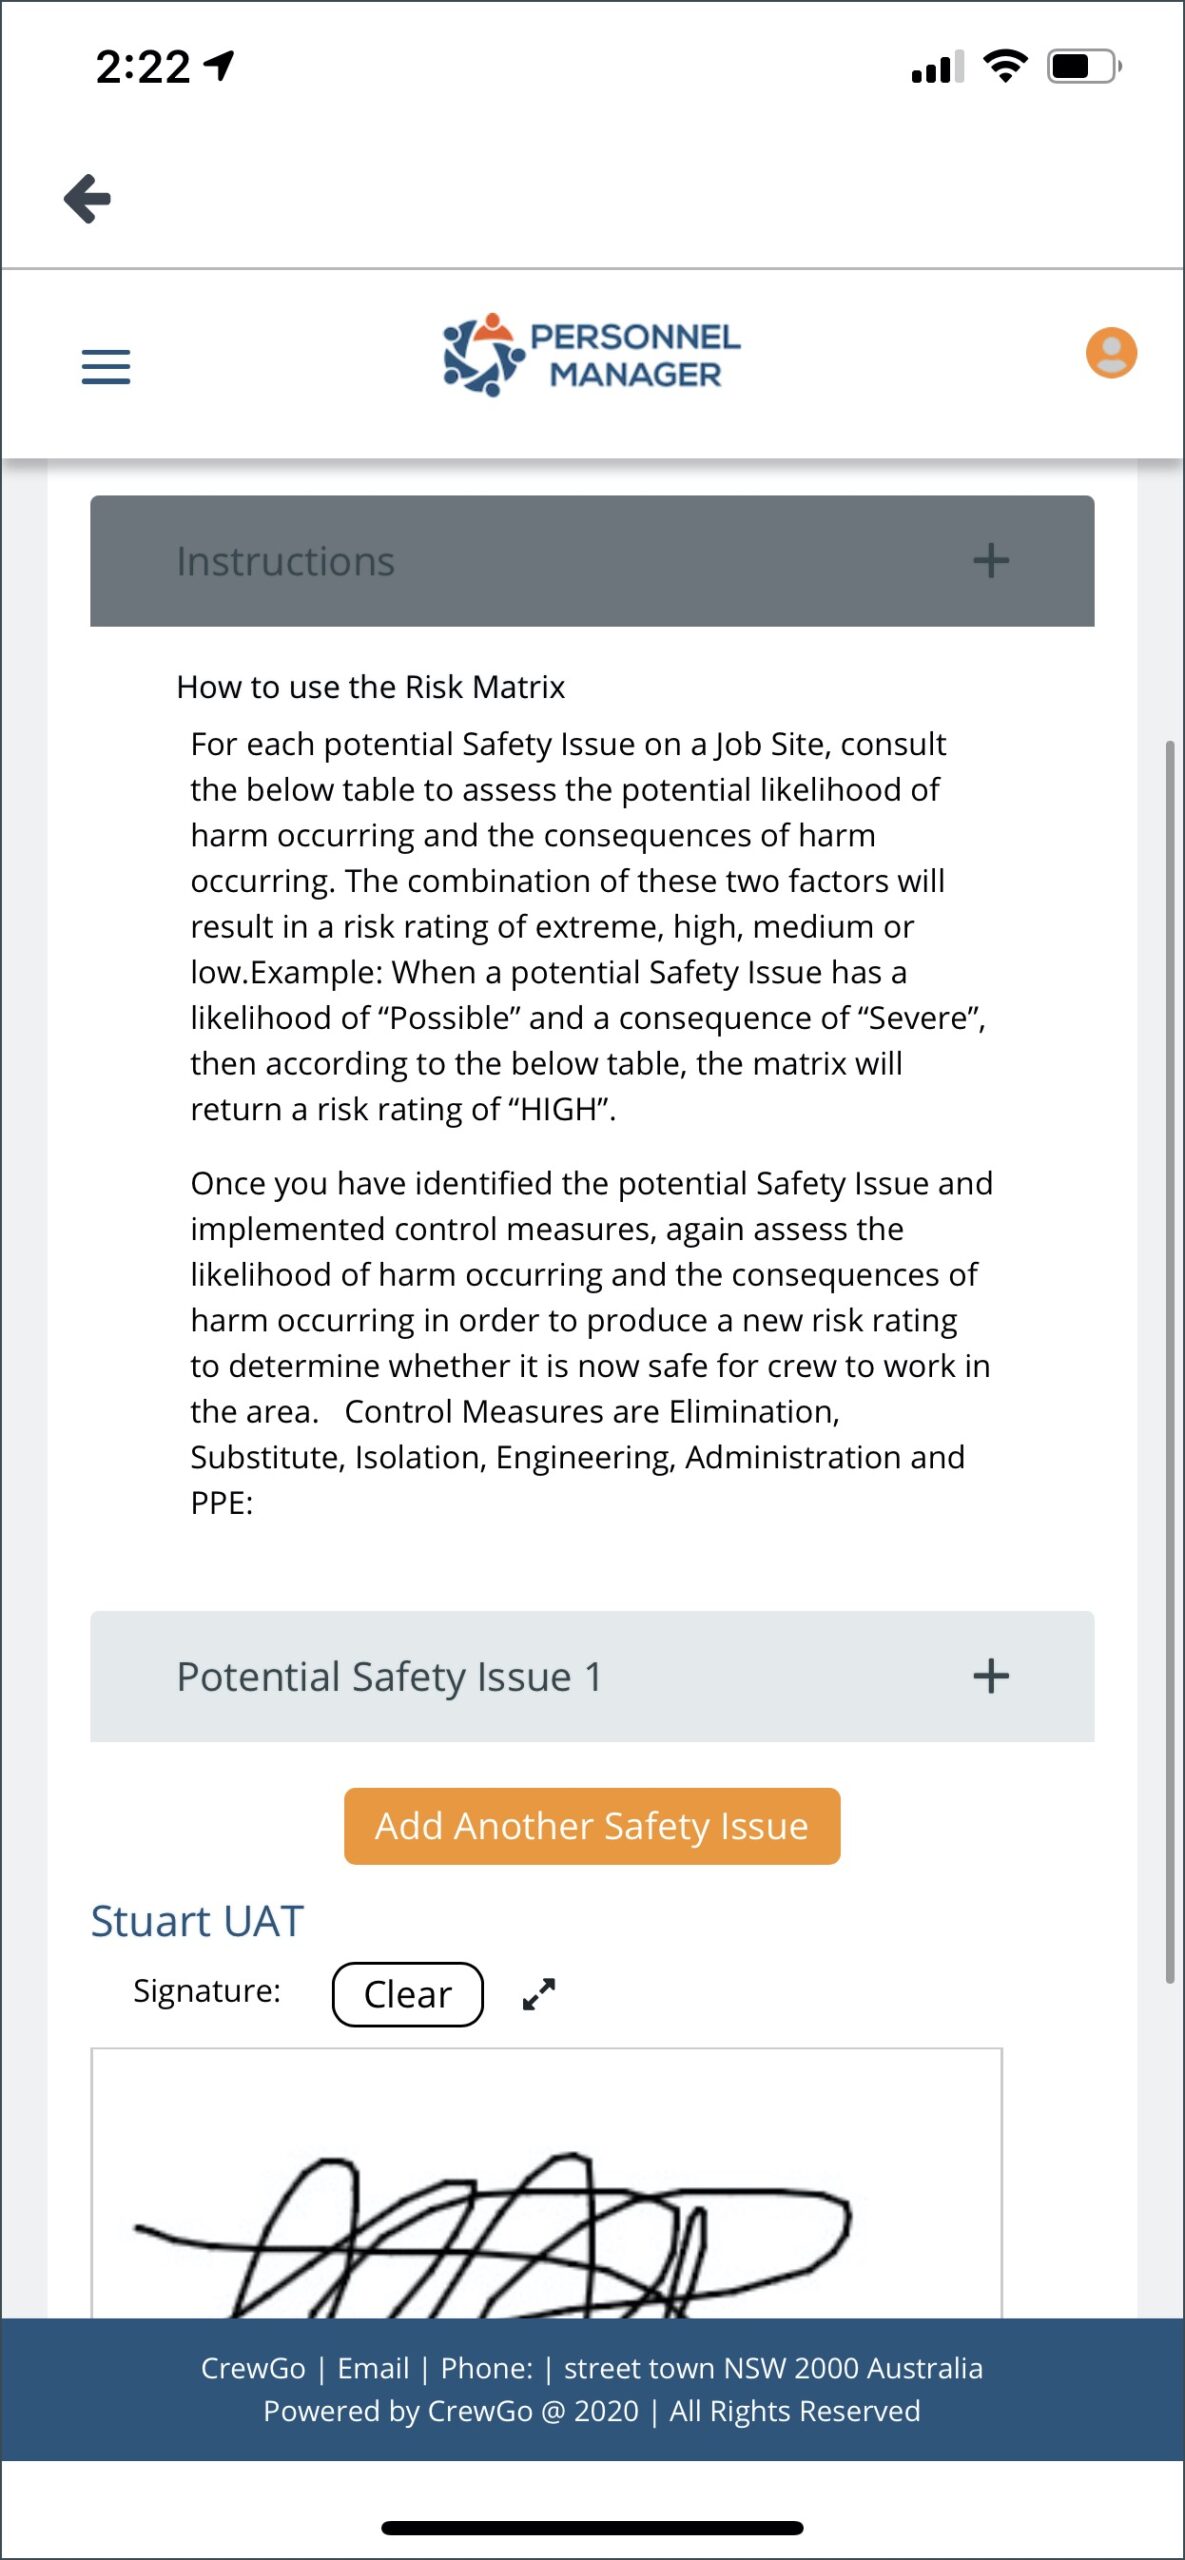
Now it’s time to fill out the Potential Issue by clicking the plus icon.
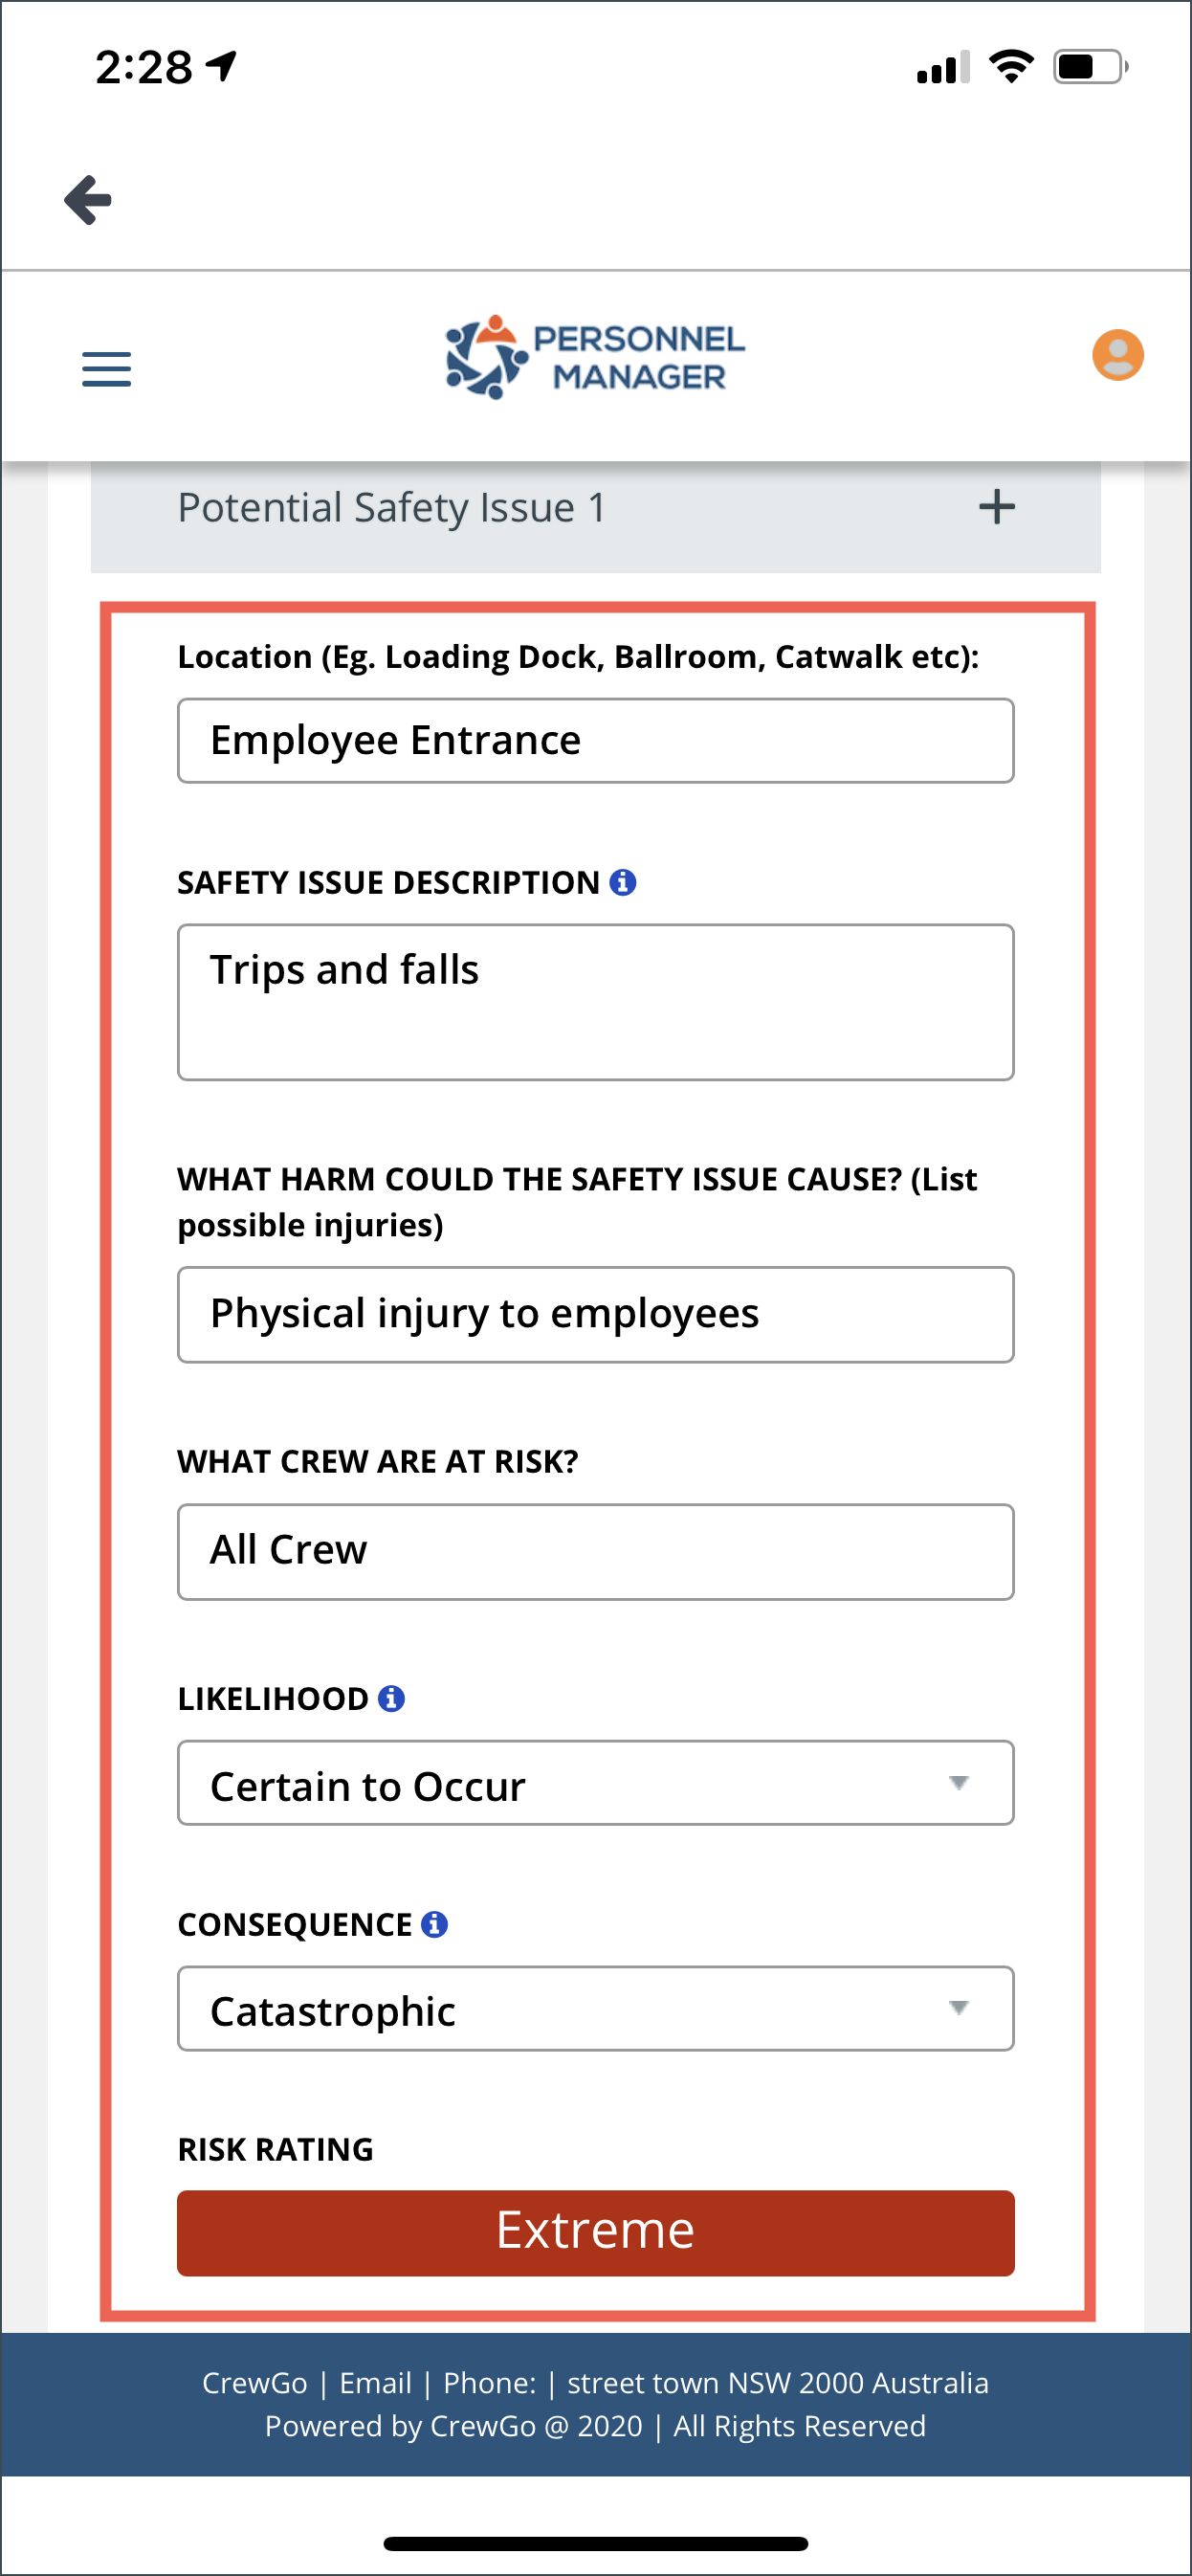
Location: Identify the location of the safety issue and enter on this field
Safety Issue Description: Describe the safety issue and provide more details as needed
What harm could be the safety issue cause: Identify what harm it can cause to employees, clients and other stakeholders
What crew at risk: Identify which crew are at risk
Likelihood: Select from the dropdown menu
- Certain to Occur
expected to occur in all circumstances (every time) - Very Likely
Will probably occur in most circumstances (1 in 5 times) - Possible
Might occur occassionally (1 in 50 times) - Unlikely
Could happen at some time (1 in 100 times) - Rare
May happen only exceptional circumstances
Consequence: Select from the dropdown menu
- Catastrophic
Many injuries fatalities and widespread medical attention required - Severe
Extensive injuries hospitalisation possible fatalities, long term disabilities - Major
Medical treatment required but no fatalities - Moderate
Minor injuries no fatalities first aid treatment required - Minor
No injuries or fatalities little or no personal support required
Risk Rating: Depending on your choice on the Likelihood and Consequence, the Risk Rating is calculated automatically.
- Extreme
- High
- Medium
- Low
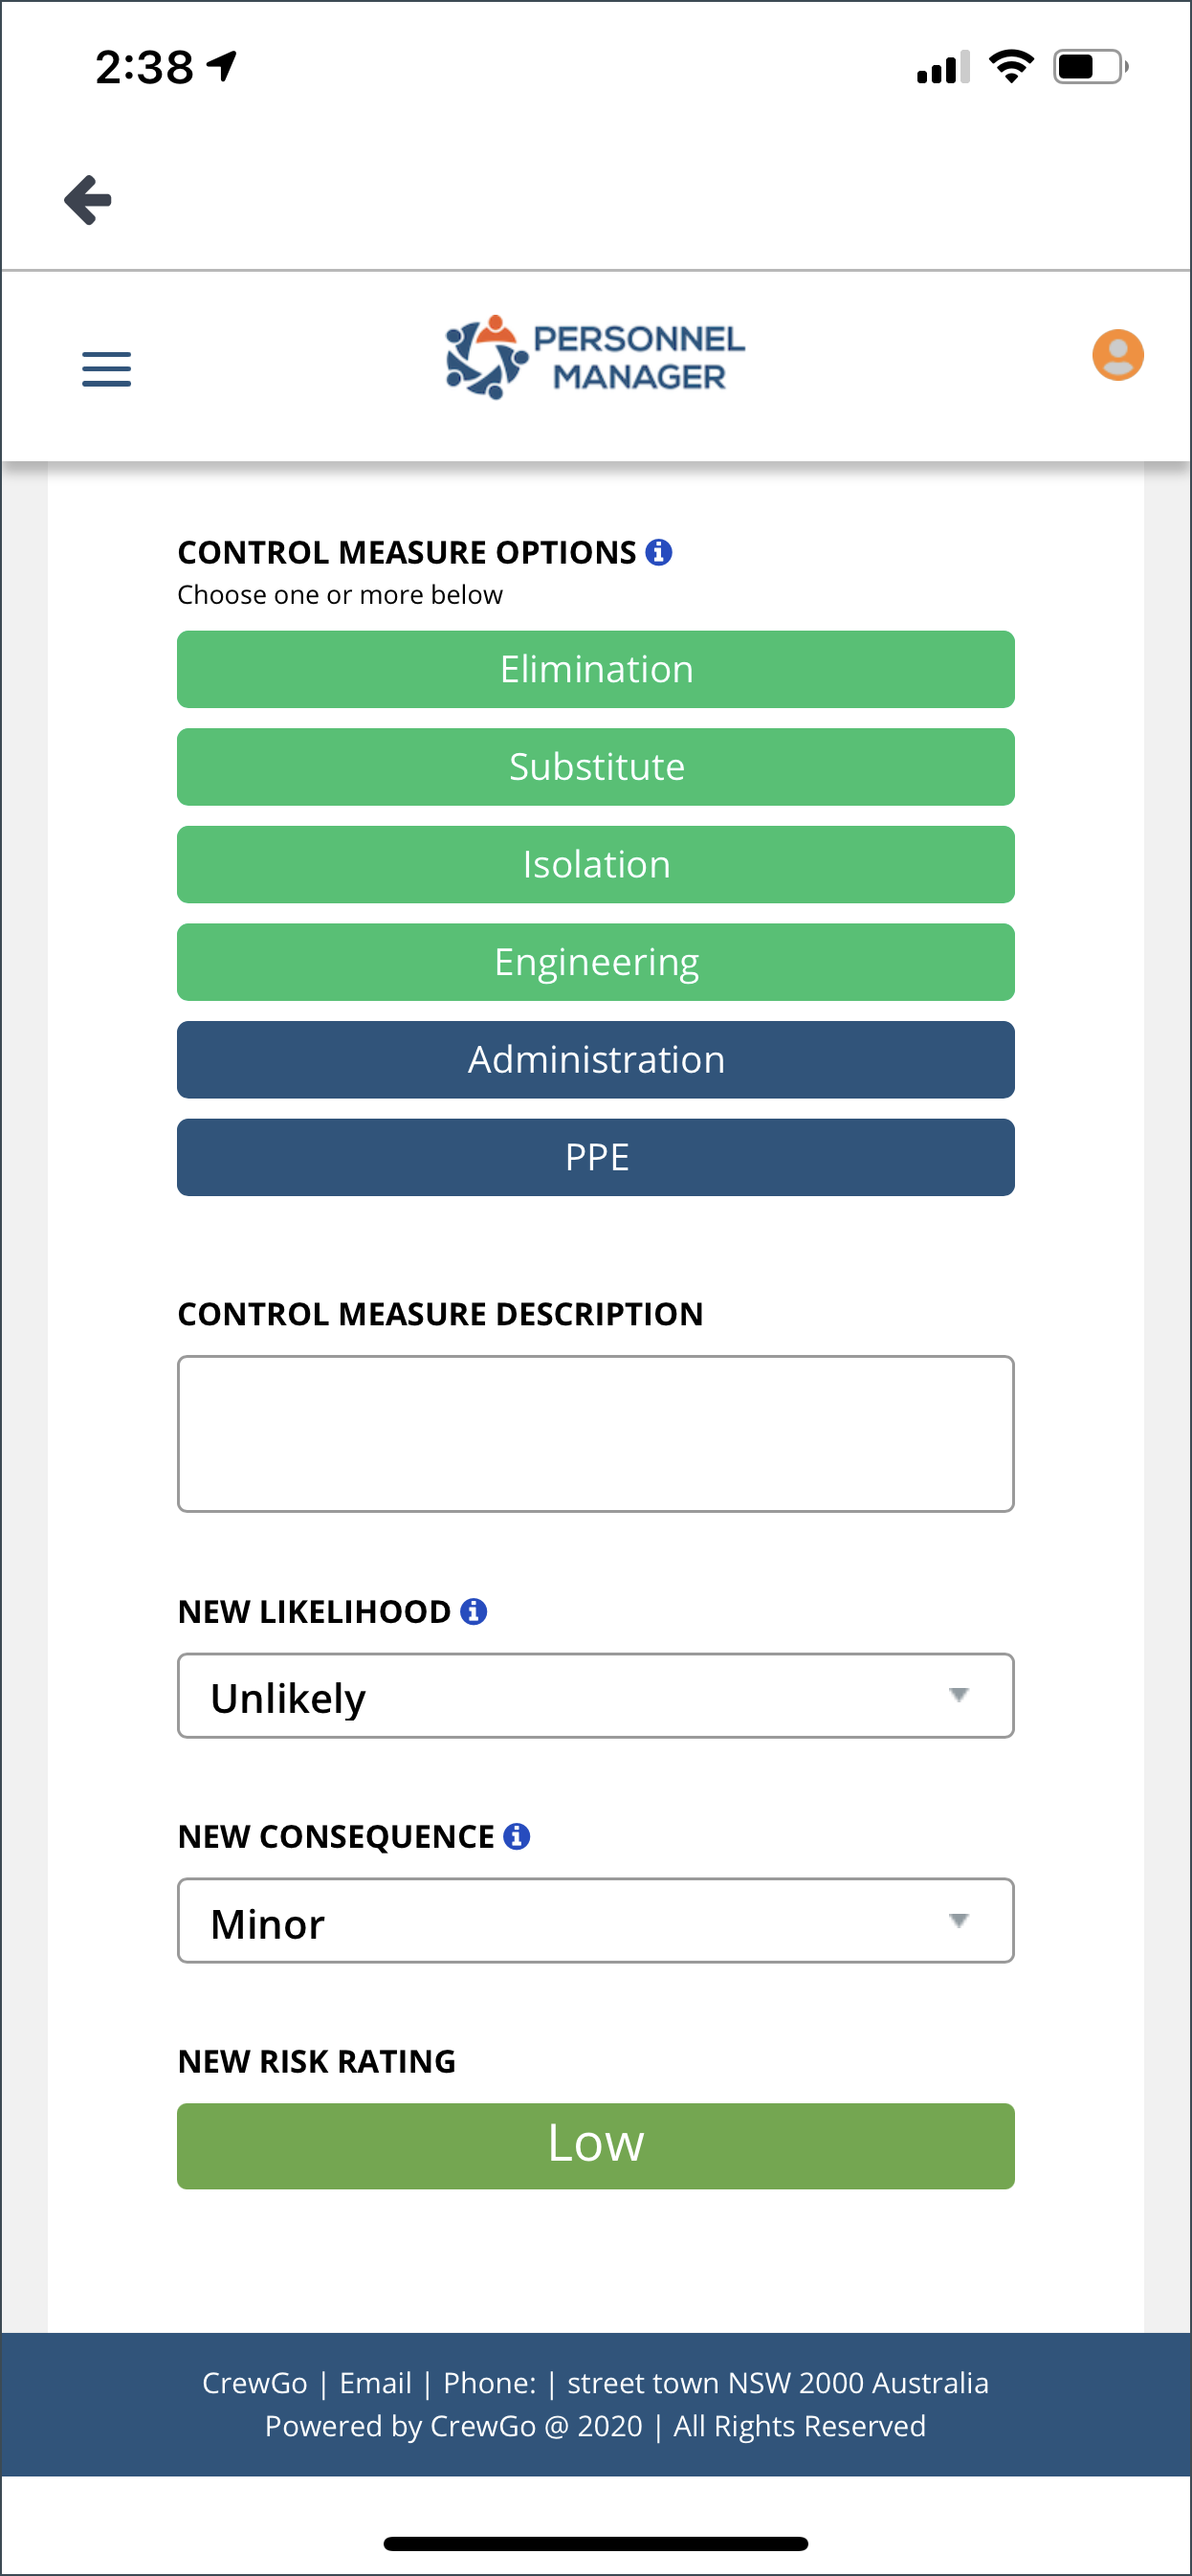
Now select the Control Measure that can be used to mitigate the Safety Issue.
- Elimination – Physically remove the hazard
- Substitution – Replace the hazard Eg, swap faulty equipment for safe equipment
- Isolation – separate the hazard from the people at risk by isolating it Eg. barricade the hazardous area
- Engineering – Isolate people from the hazard Eg. Cordon off the area where the hazard is found
- Administration – Change the way people work Eg. Use a forklift to lift a heavy load or use a ramp to a loading dock or move a truck closer to the load in
- PPE – Protect the worker with Personal Protective Equipment Eg. Steel cap safety shoes/boots, hard hats, Hi Vis safety vests, gloves
Based on the selected ControlMeasure, select the New Likelihood and New Consequence. This will calculate a new Risk Rating.
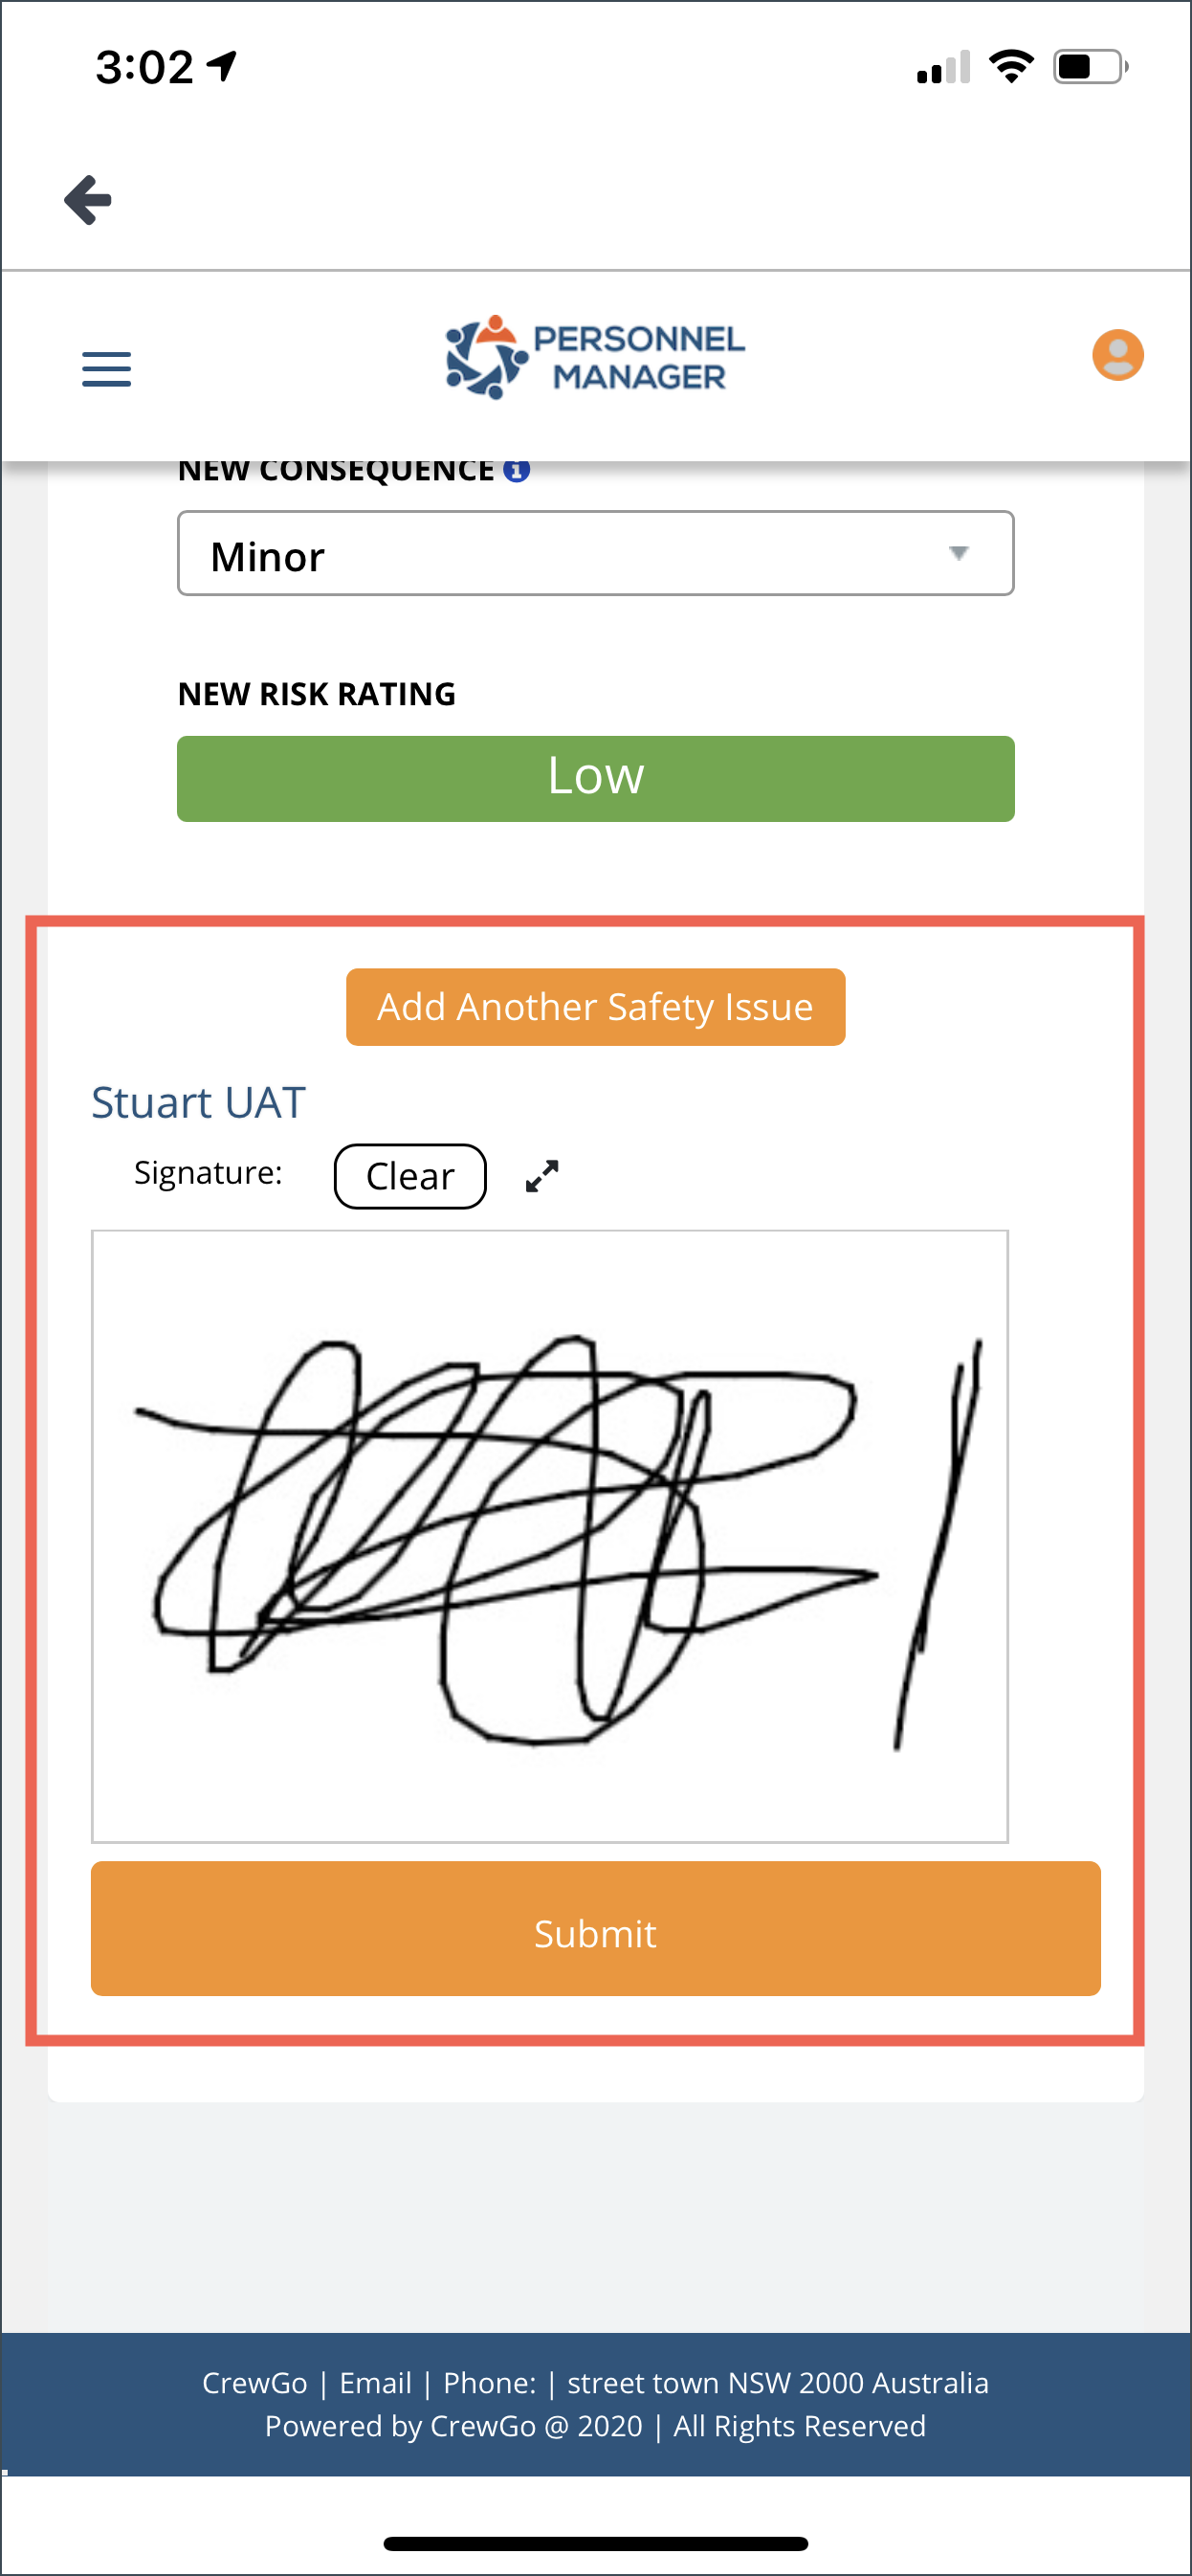
If there are multiple safety issues that you need to report, click Add Another Safety Issue. This will add new fields for Potential Issues and Control Measures.
Otherwise, affix your signature and click Submit.
INCIDENT REPORT
An incident report is a tool that documents any event that may or may not have caused injuries to a person or damage to a company asset. It is used to capture injuries and accidents, near misses, property and equipment damage, health and safety issues, security breaches and workplace misconduct.
An incident report can be used in the investigation and analysis of an event. It includes the root cause and corrective actions to eliminate the risks involved and prevent similar future occurrences. Incident reports can also be used as safety documents that indicate potential risks and uncontrolled hazards found in the workplace.
When you tap Incident Report from the Job Options, it will open a form that you can fill out with information.
Similar with the other forms, you need to select the job from the dropdown menu that is applicable to the incident. The Client and Venue will be automatically populated.
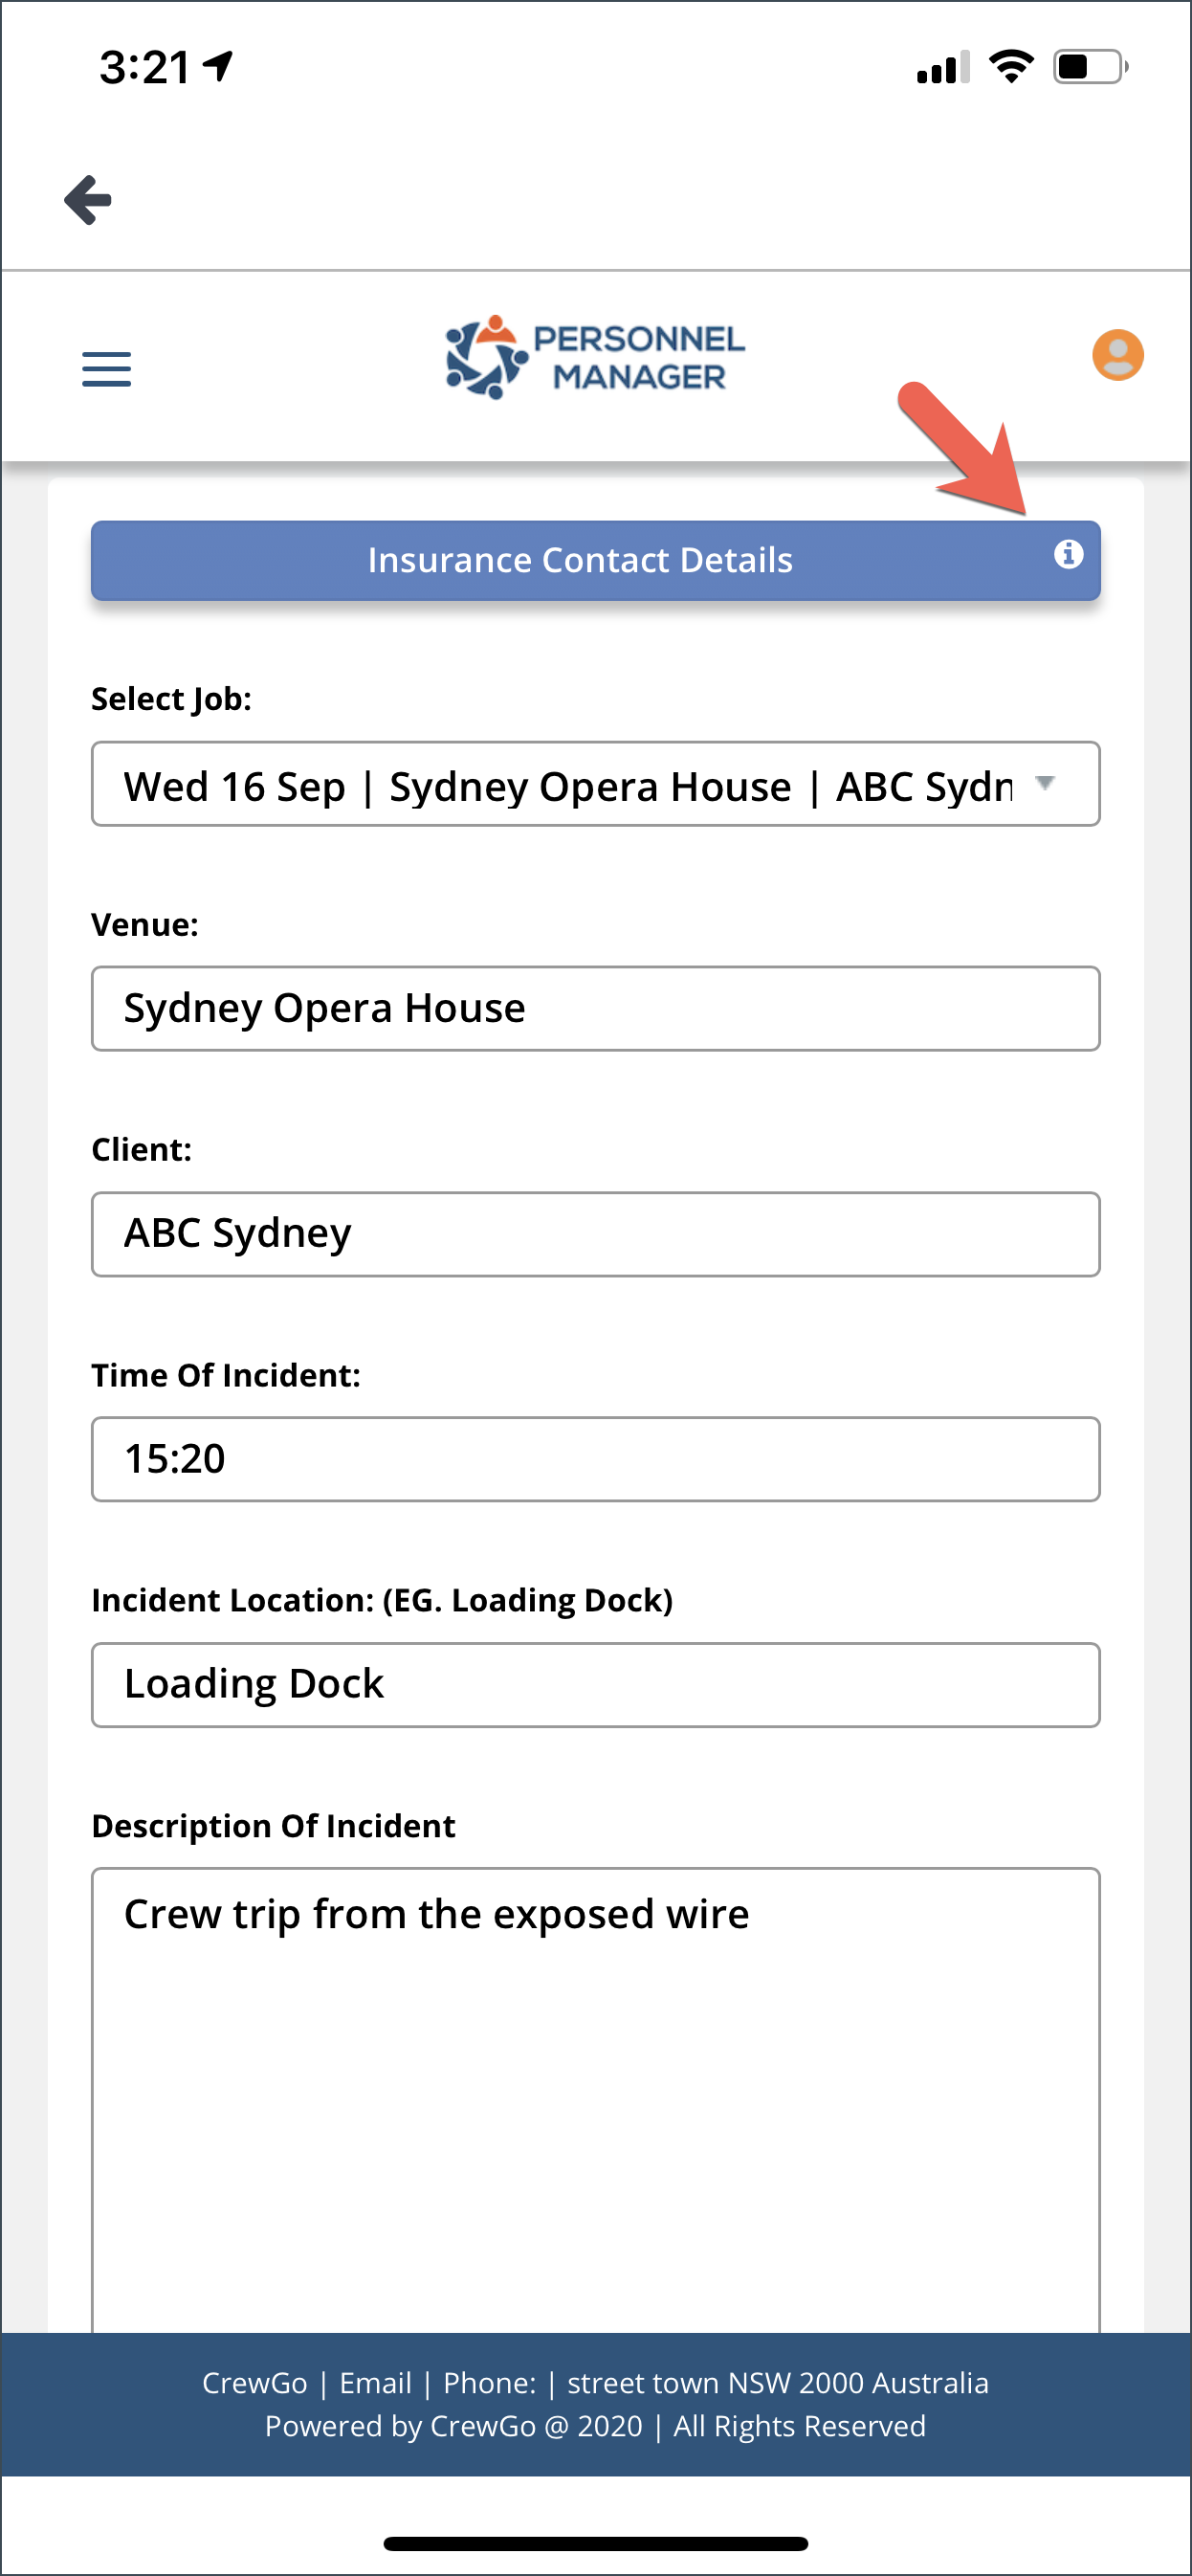
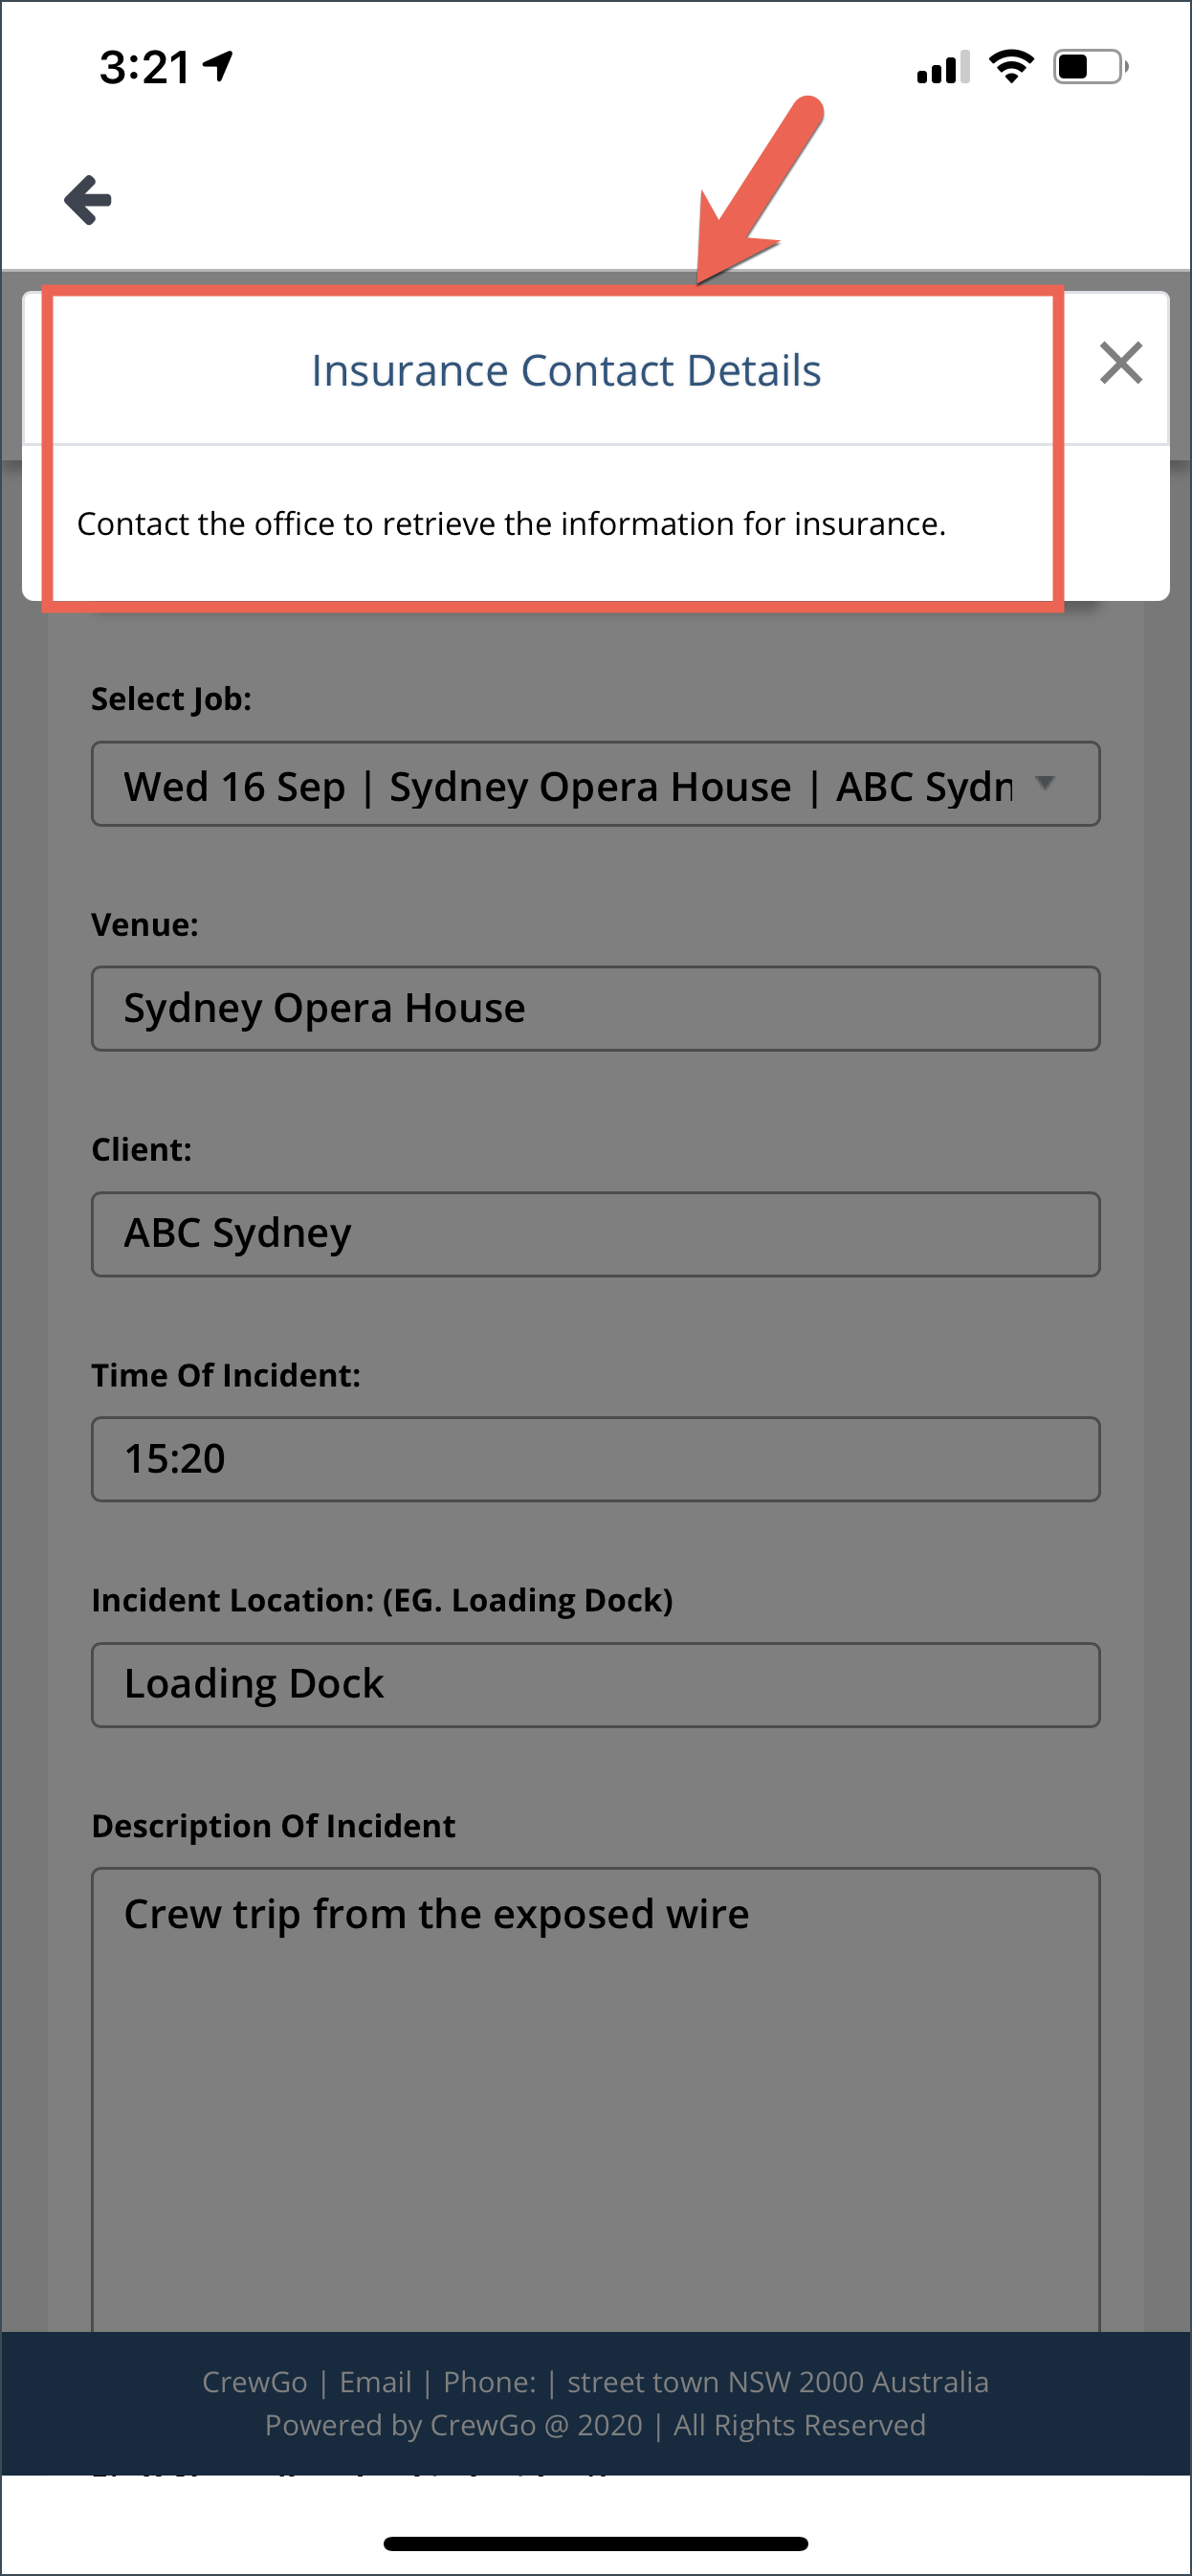
Click the “i” icon to view the details of the insurance company.
You can now start filling out the Incident Report Form:
- Time of Incident
- Incident Location
- Description of Incident
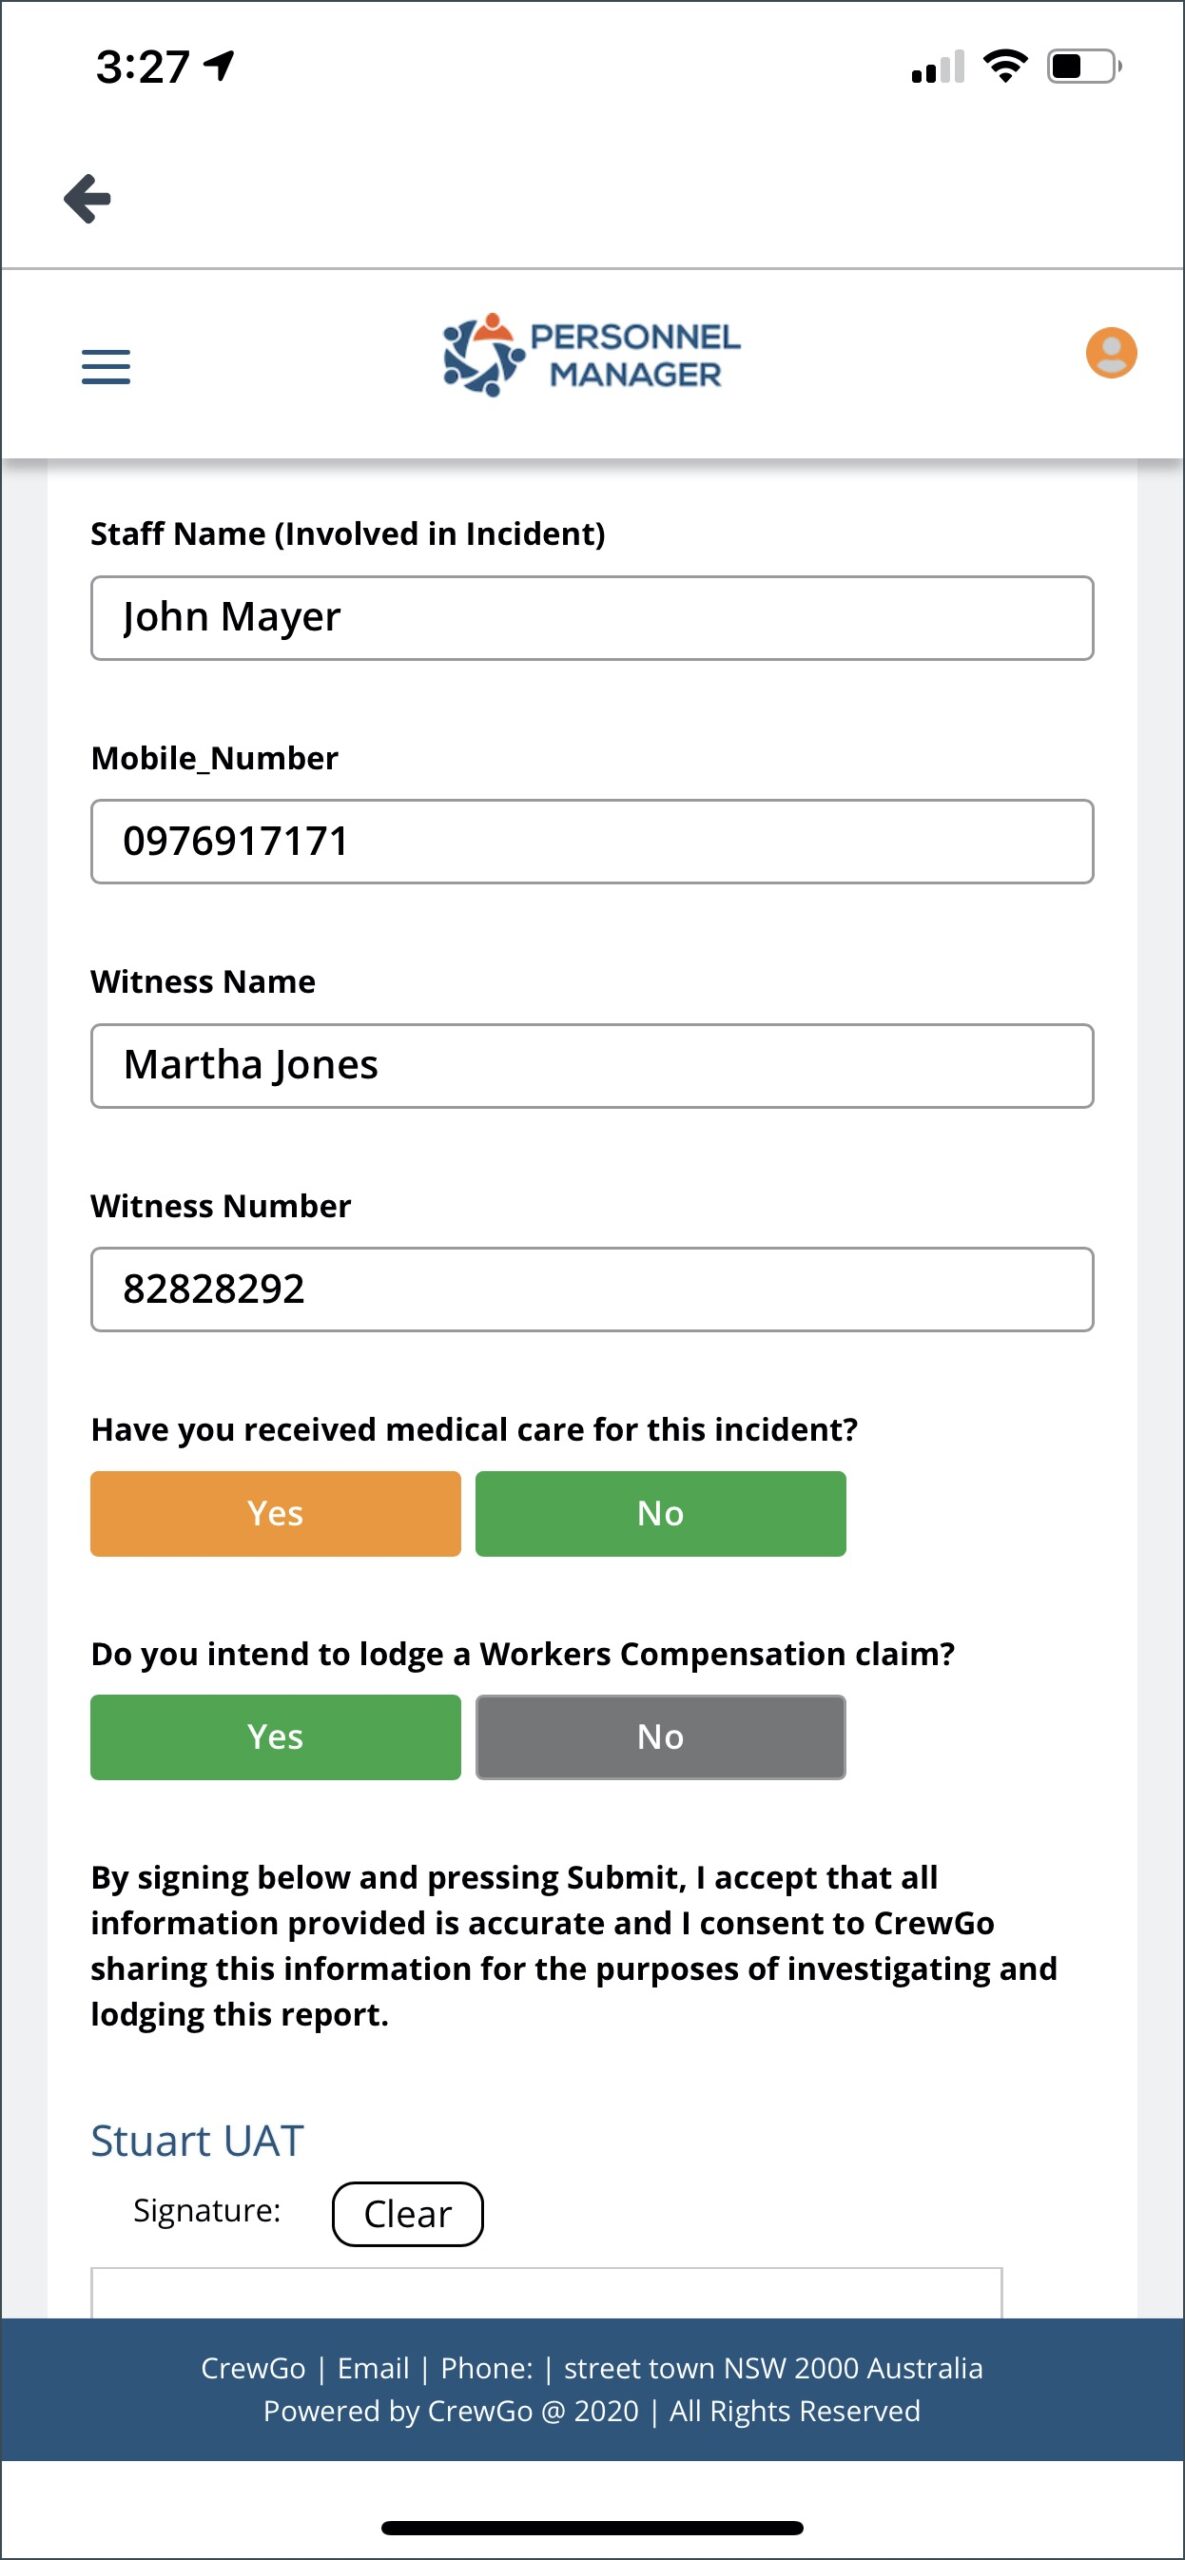
- Staff Name
- Mobile Number
- Witness Name
- Witness Mobile Number
For the question, “Have you ever received medical care for this incident?”, you can select Yes or No.
If you selected YES, then you need to fill out the following information:
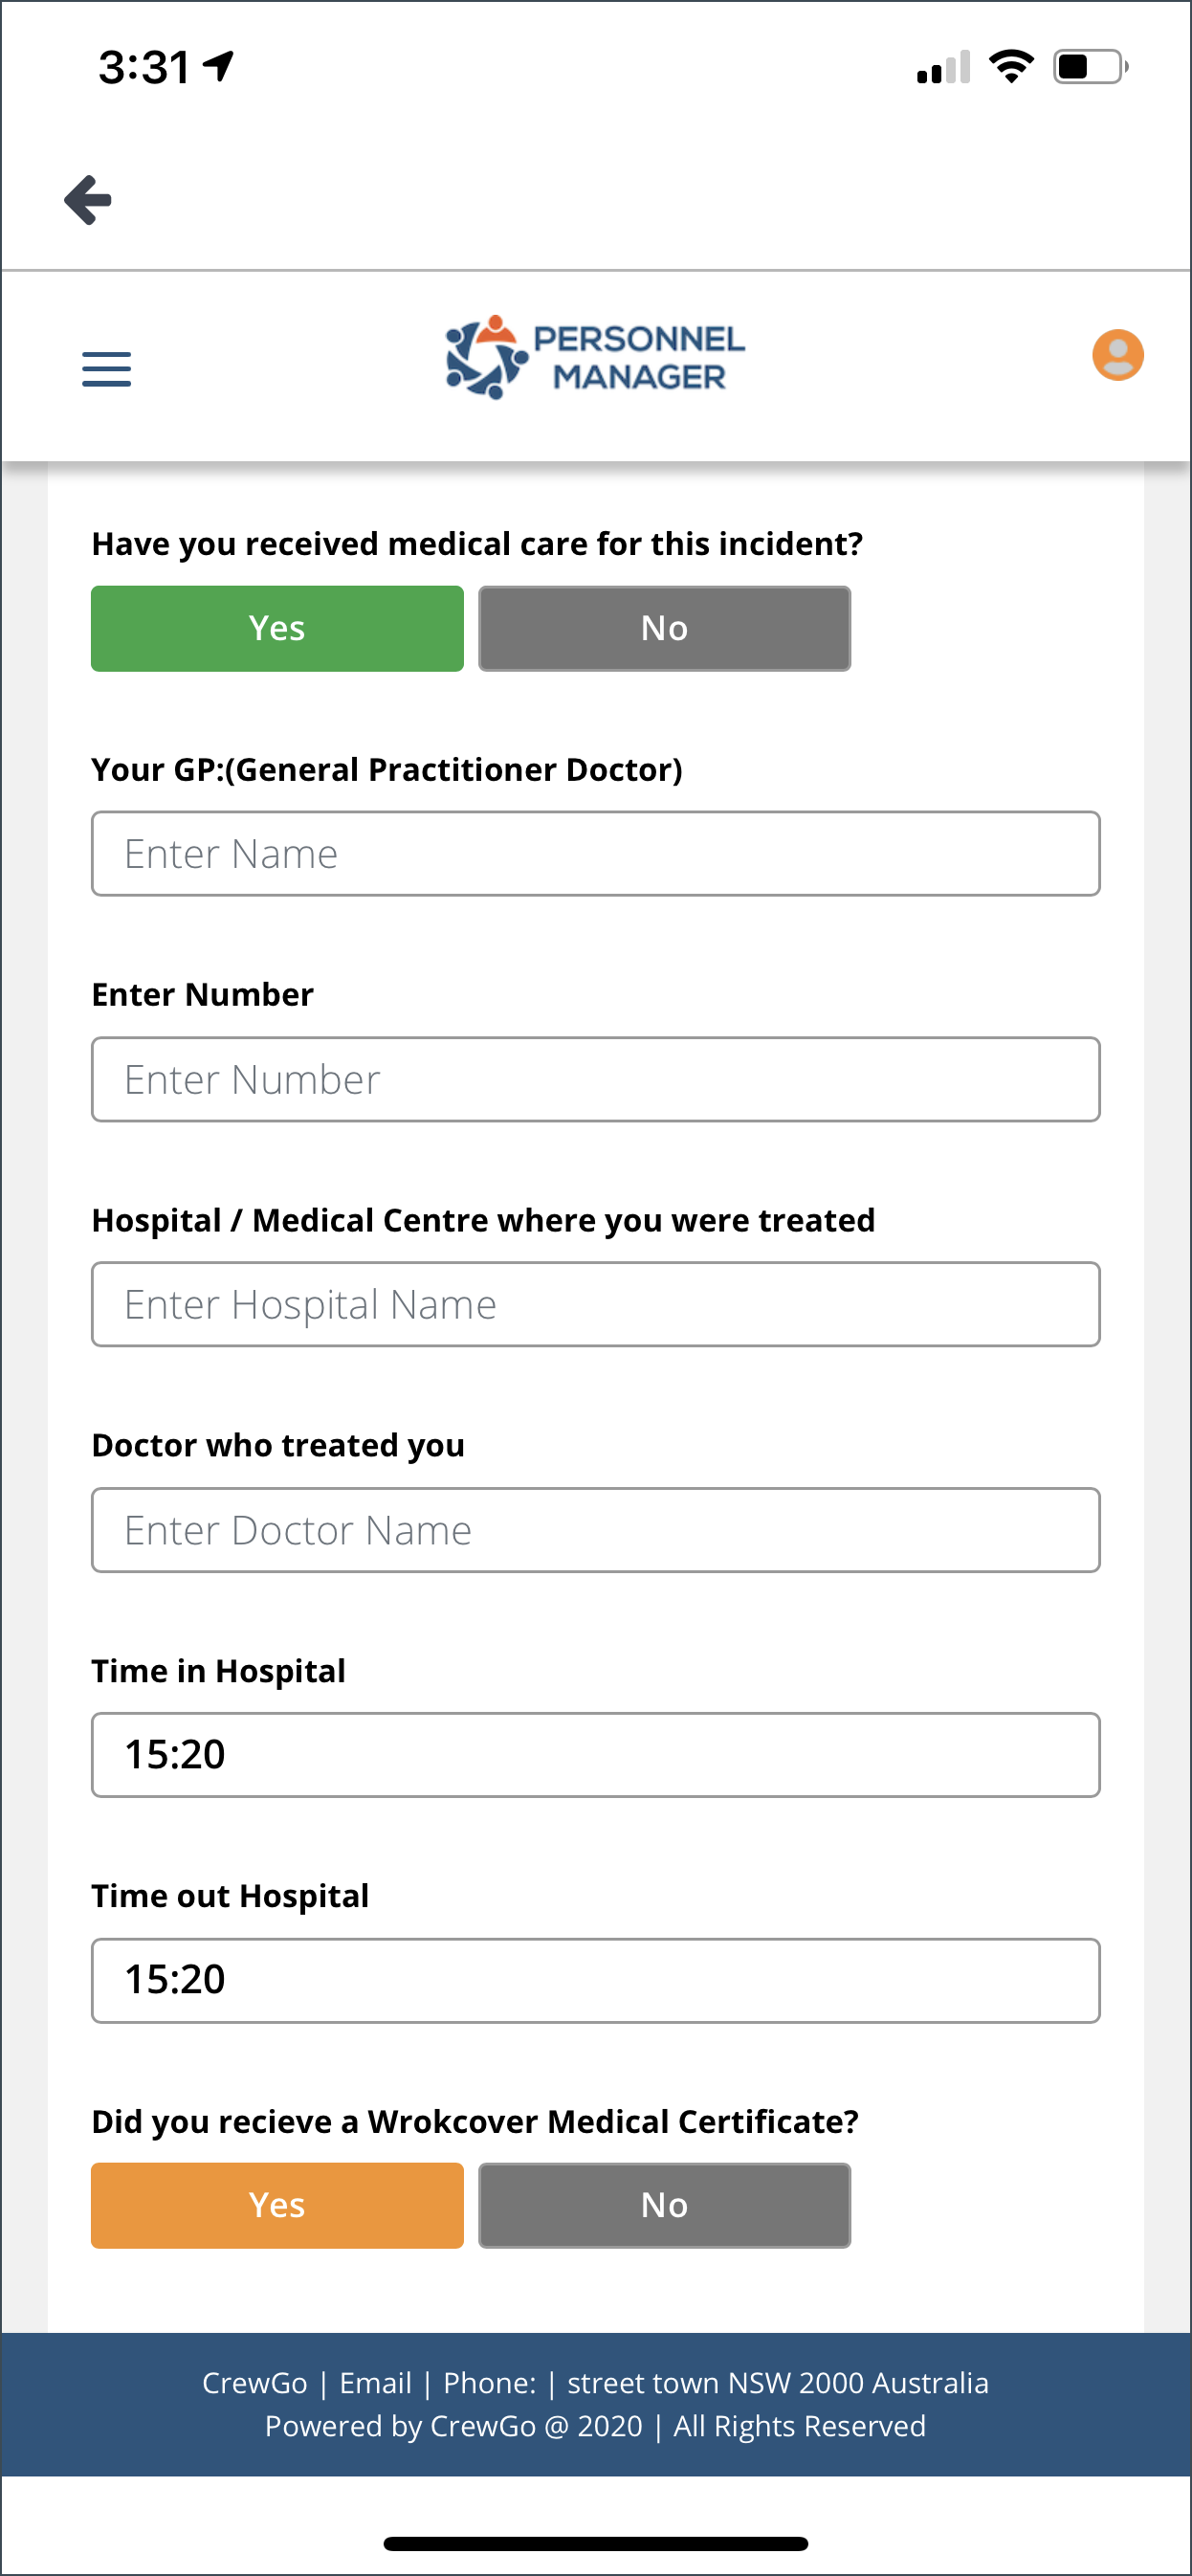
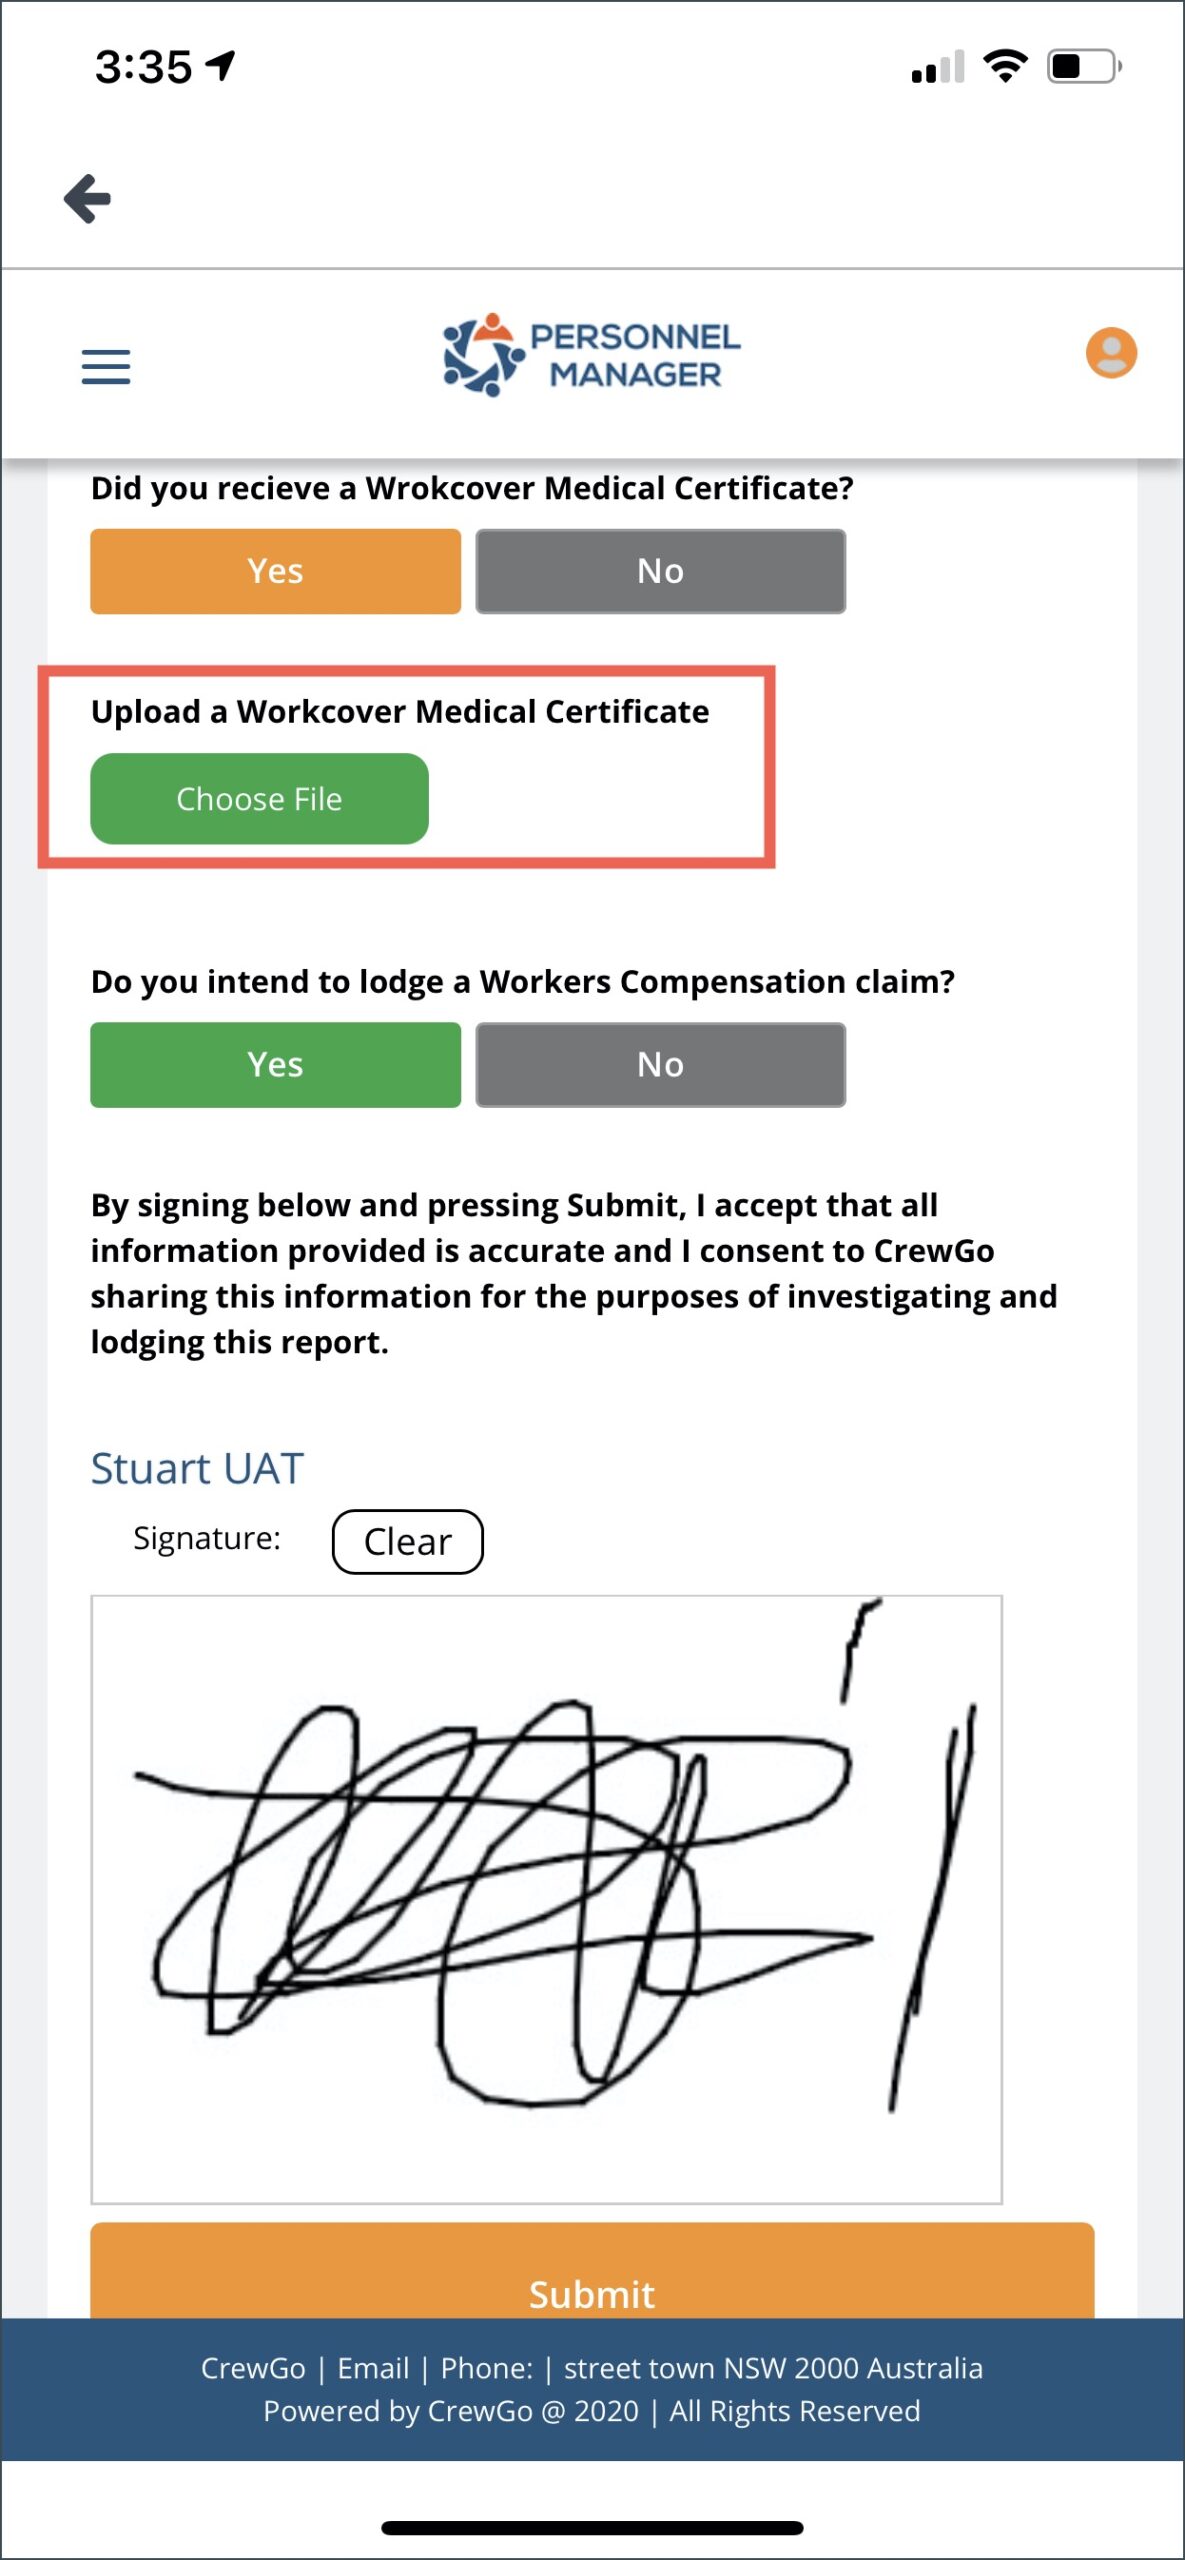
If you received a Medical Certificate, you need to upload it to the system.
Select Yes or No to answer if you have lodge a Workers Compensation claim.
Affix your signature and click Submit once completed.
SAFETY
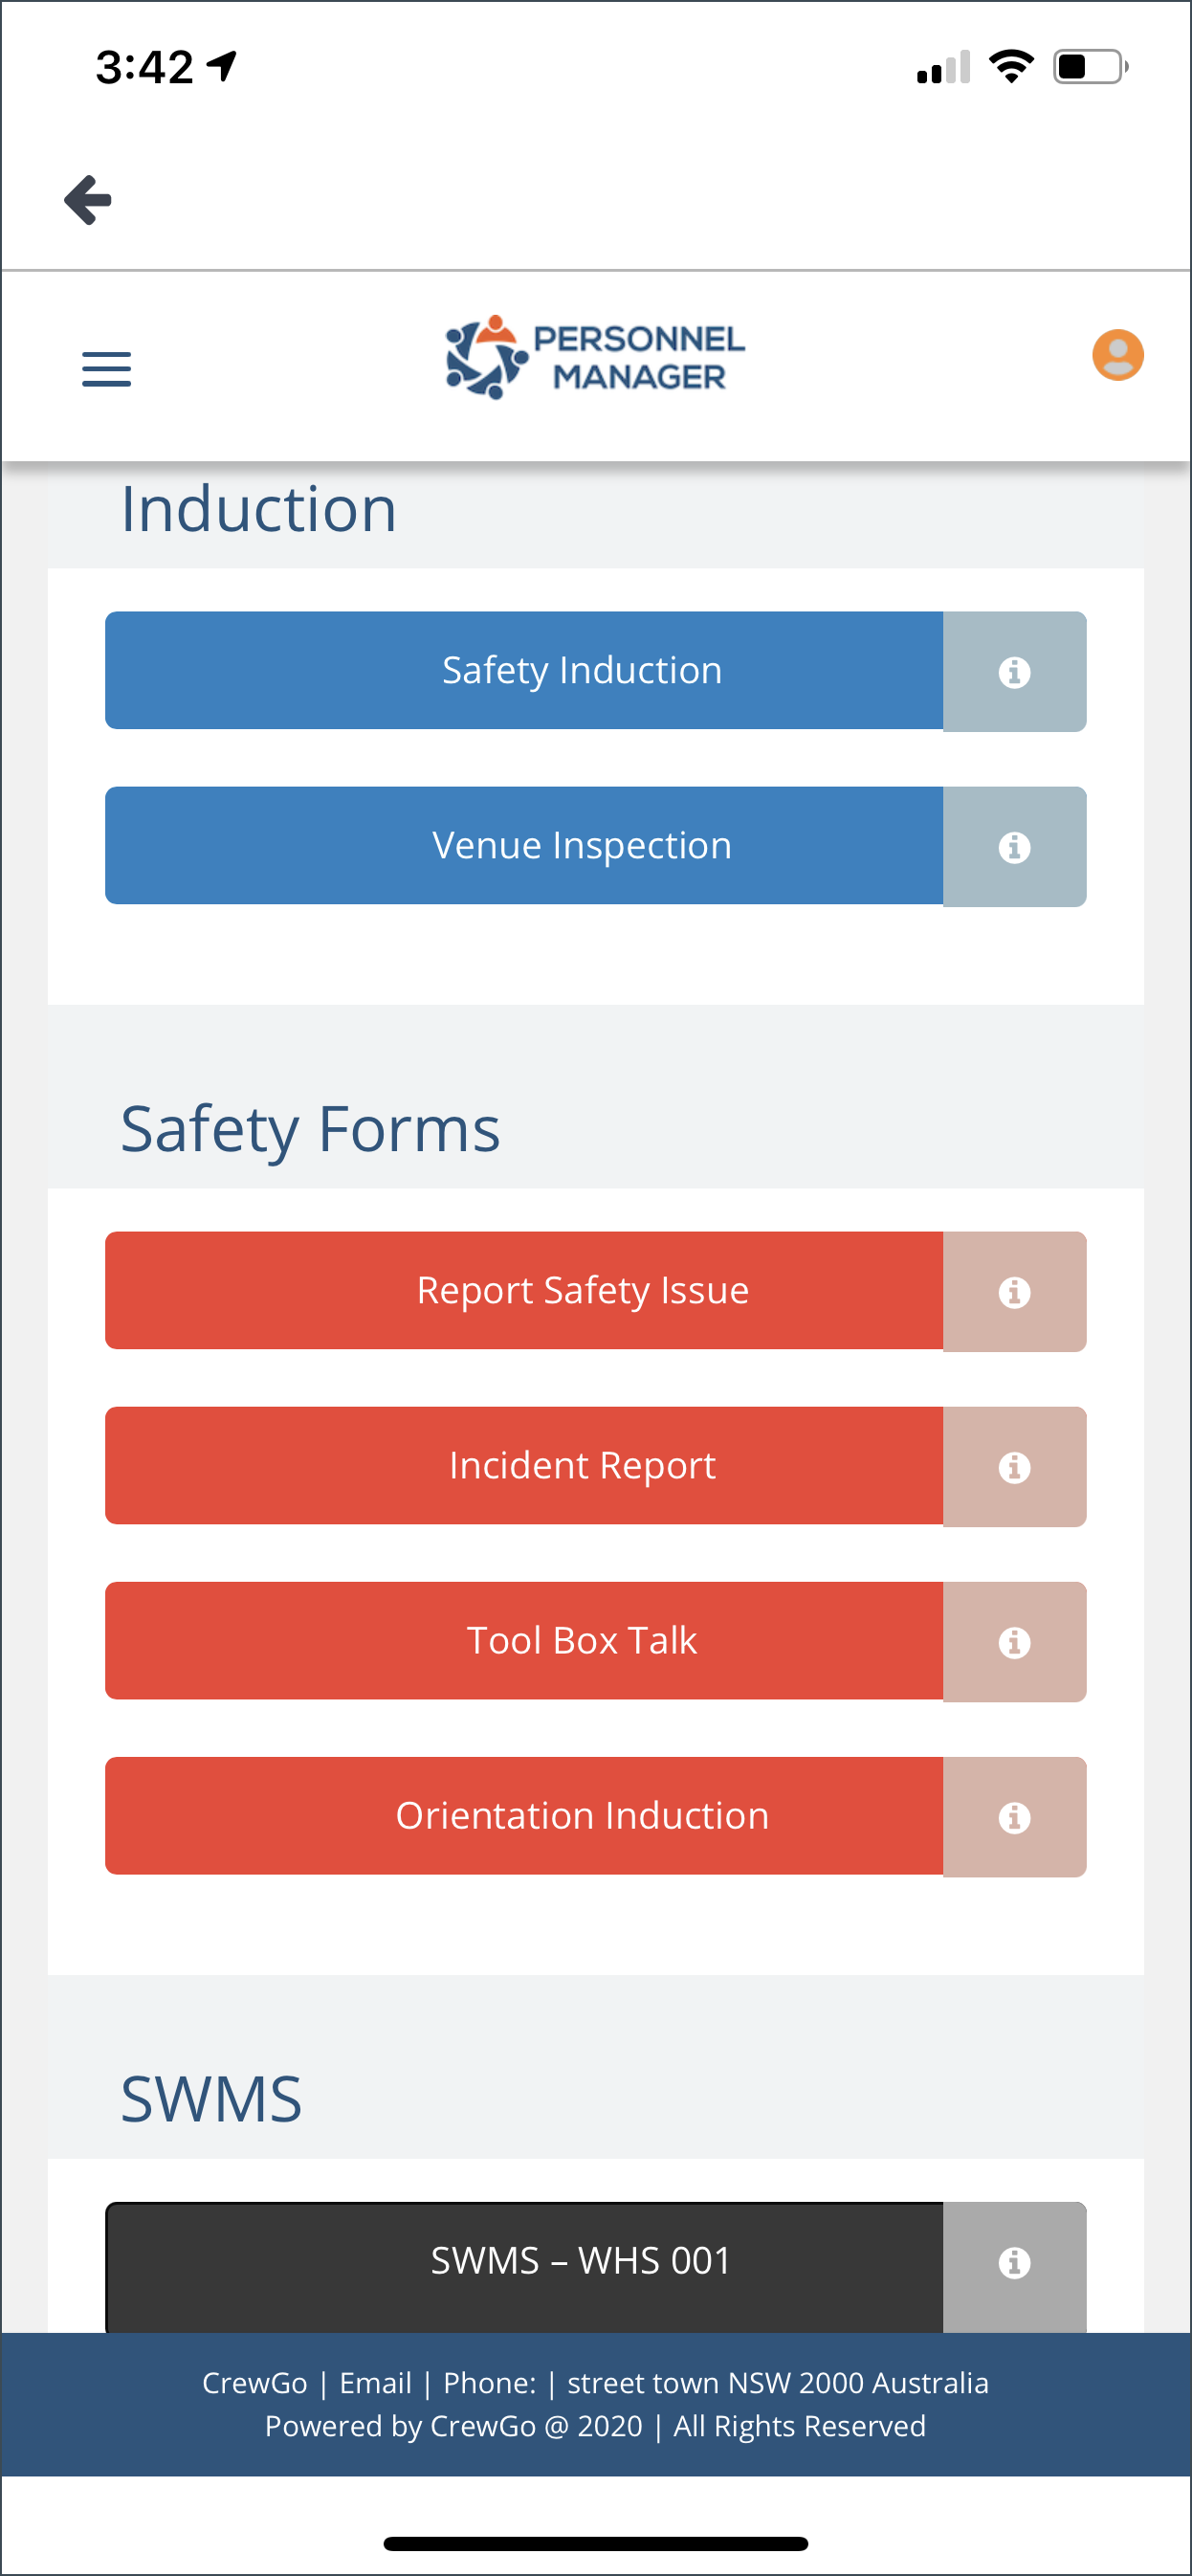
When you tap on this Job Option, it will redirect you to the Crew Portal where you can access all safety forms and resources.
Note: The contents of Safety may vary depending on the configuration from the Admin Portal.
ACTIONS
When you tap on this Job Option, it will redirect you to the Action page of the Crew Portal.
Actions are steps and instructions that you need to complete when you are confirmed to a shift. The Actions may vary depending on the activity you are assigned to.
Day Sheet
The Day Sheet allows you to enter times directly into the system and to report the performance of a crew (applicable for Team Leaders, Client and Duty Managers).
Day Sheet as Crew Member
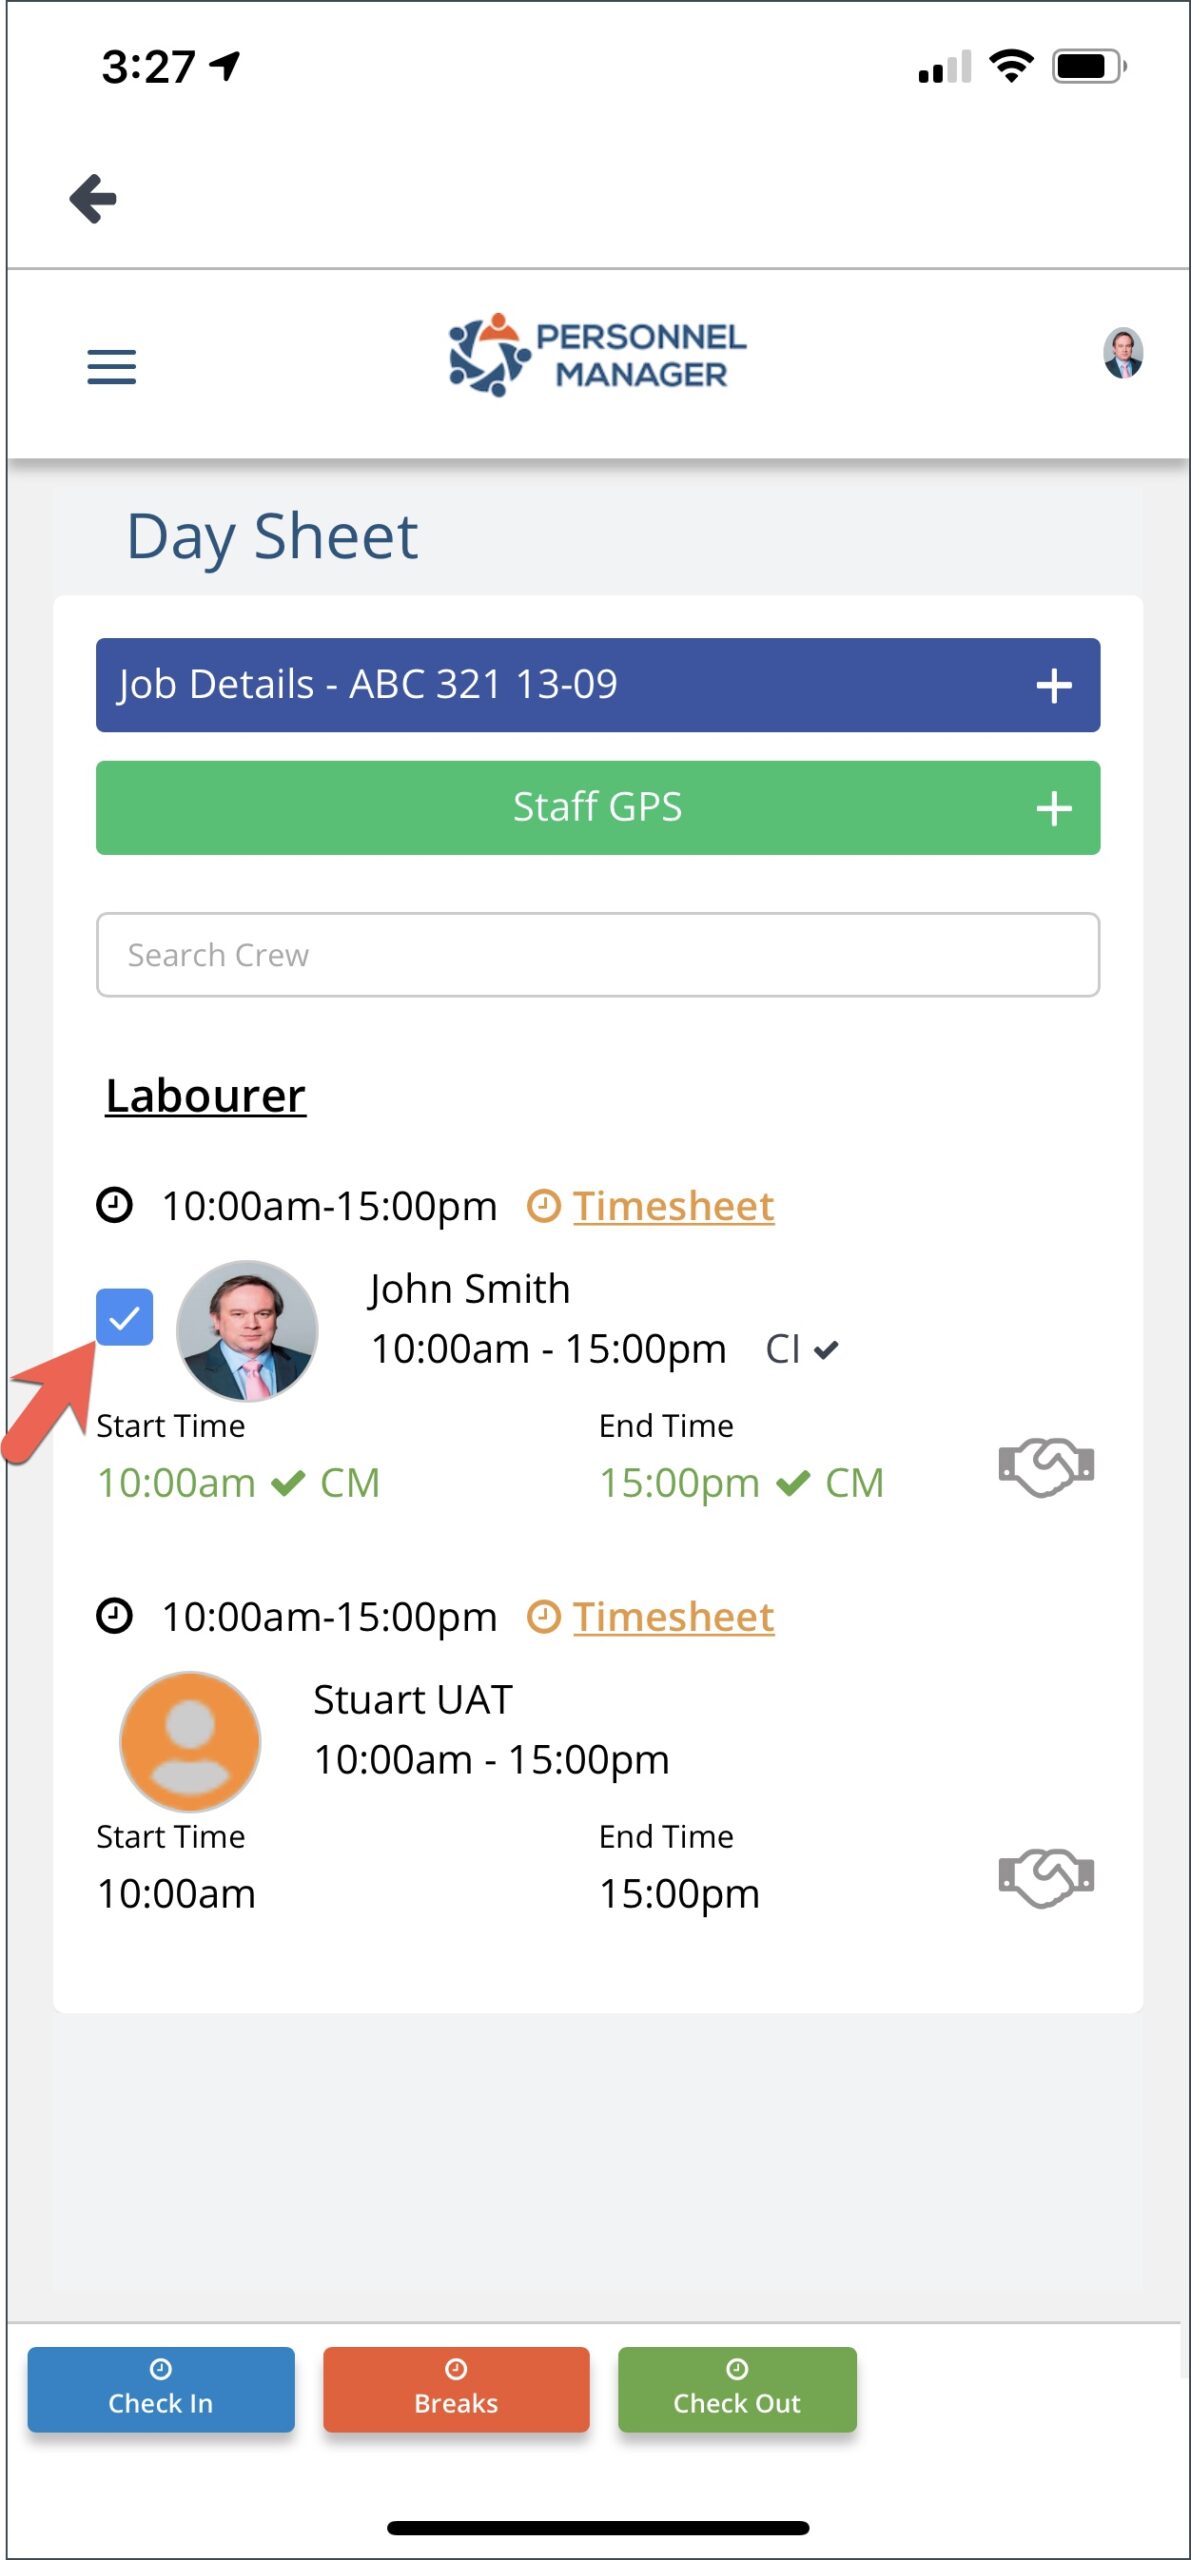
Click Day Sheet from the Job Options. On the Day Sheet page, you will be able to enter your Check In, Check Out and and Break Times.
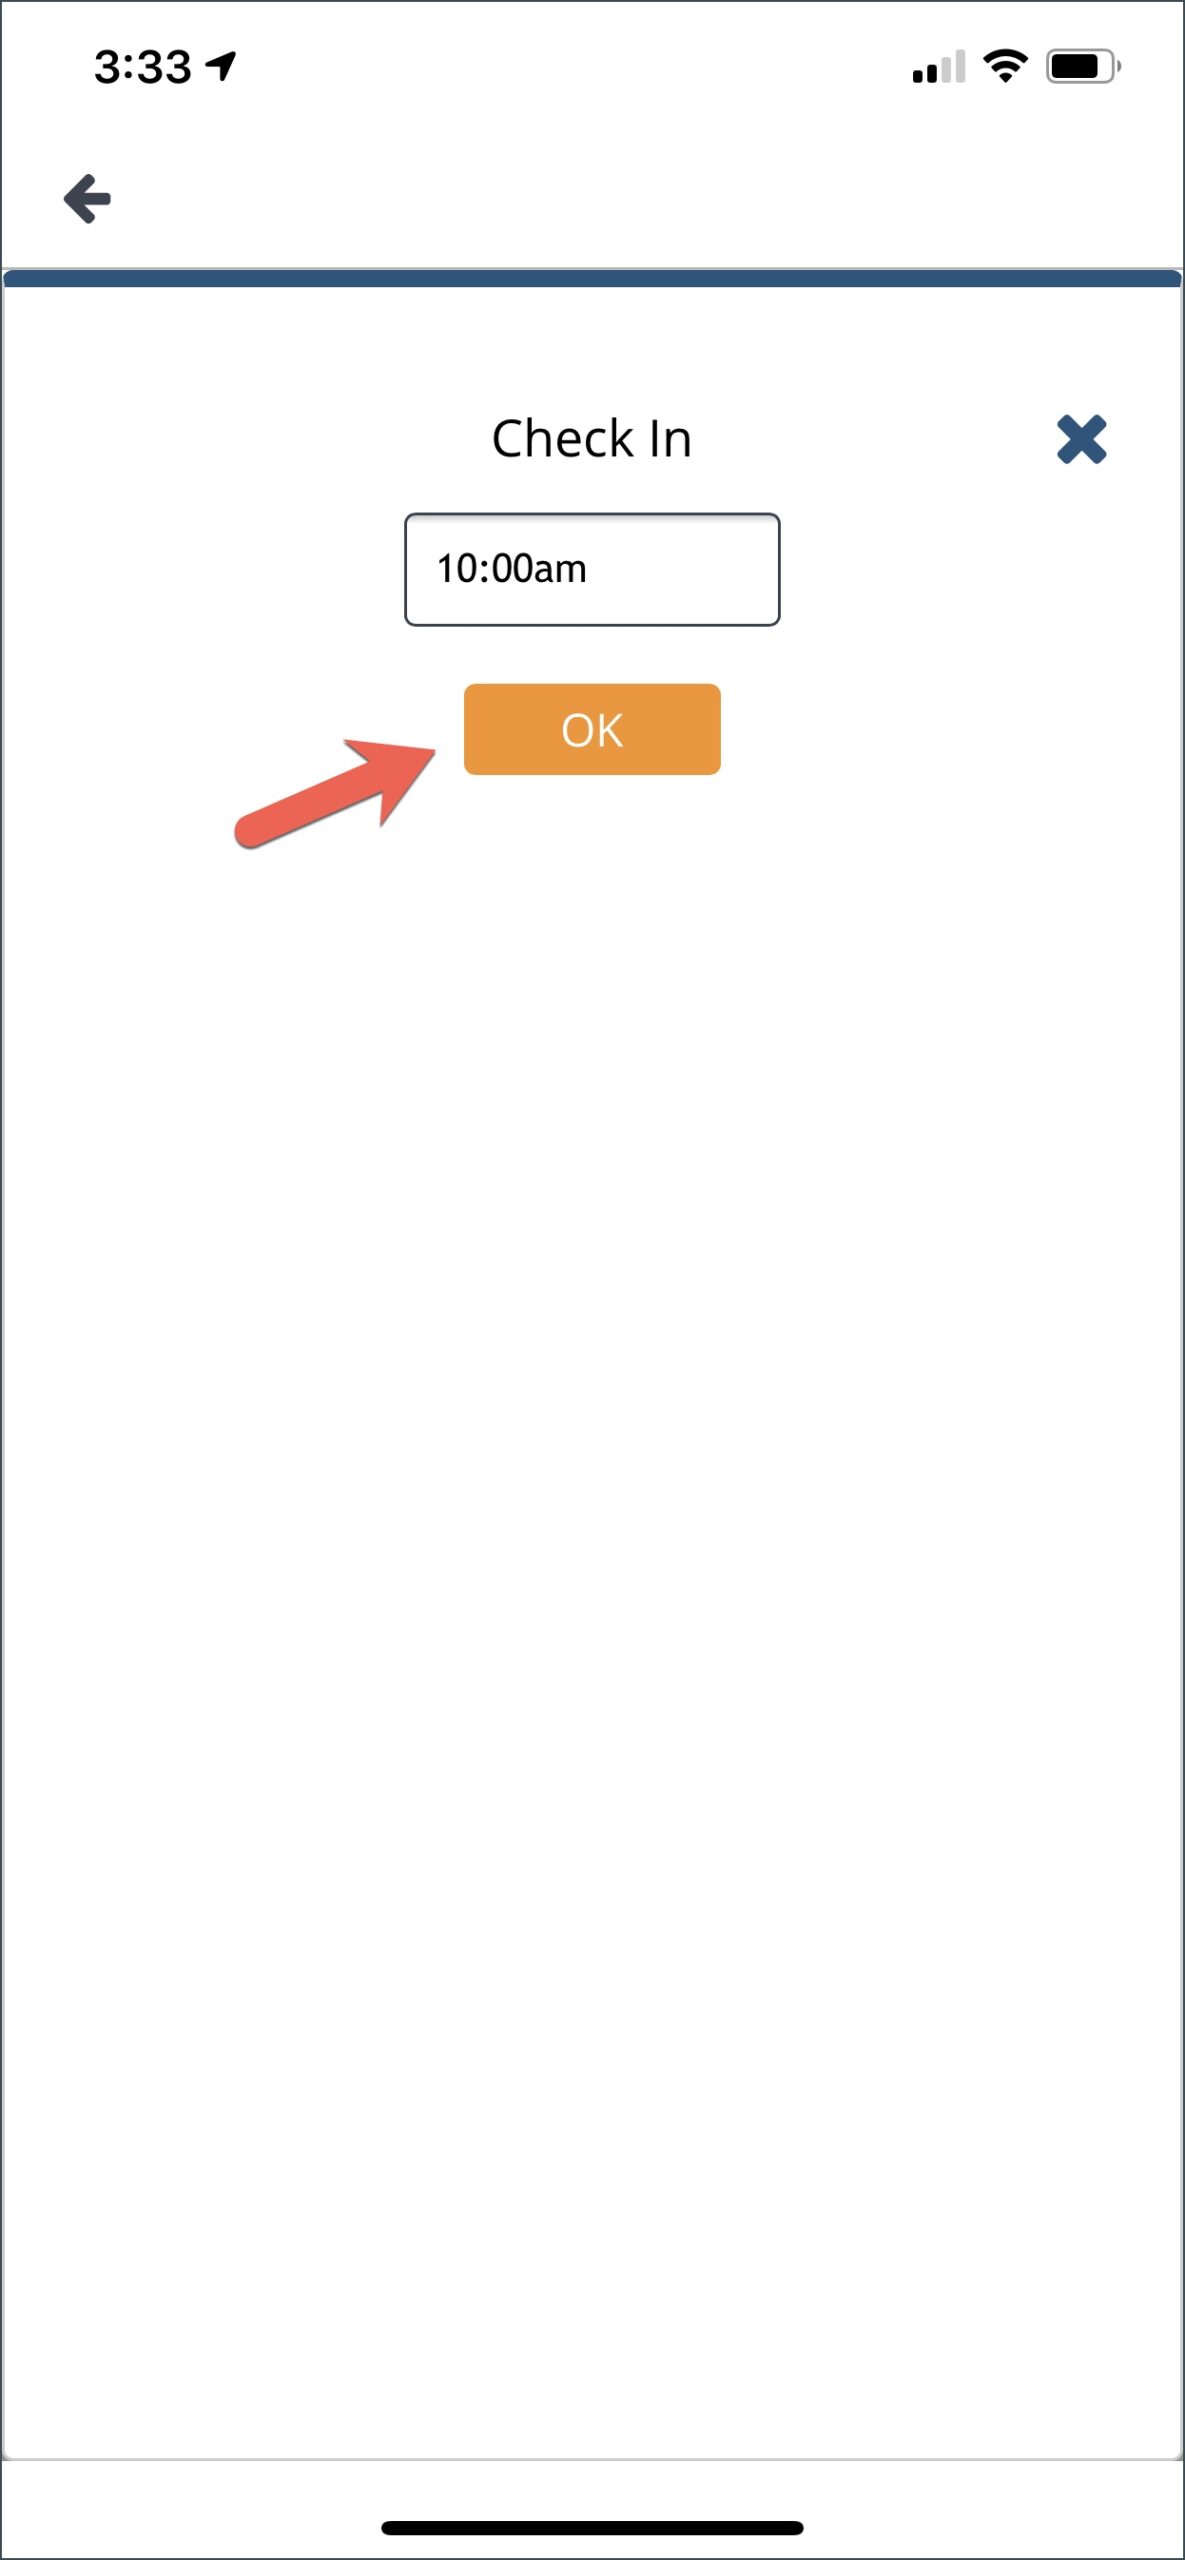
Put a check mark on the box next to your name, click Check-In and select your time from the dropdown menu and click OK.
The Day Sheet will refresh and will reflect your selected time for Check In. The time you selected will be reflected under Start Time with green font.
Do the same for Check Out and Break Time.
The time you entered for Check In, Break and Check Out is denoted with a two-letter code “CM” which means Crew Member in green font.
Note: You will be able to enter times for your own shift. There is no checkbox for other crew members so you won’t be able to enter time for them.
Before the start of work, your Team Leader may conduct Safety Induction as needed. Once the Safety Induction is complete, click on the handshake icon to signify that you fully understand the Induction, Tool Box, SWMS and other policies.
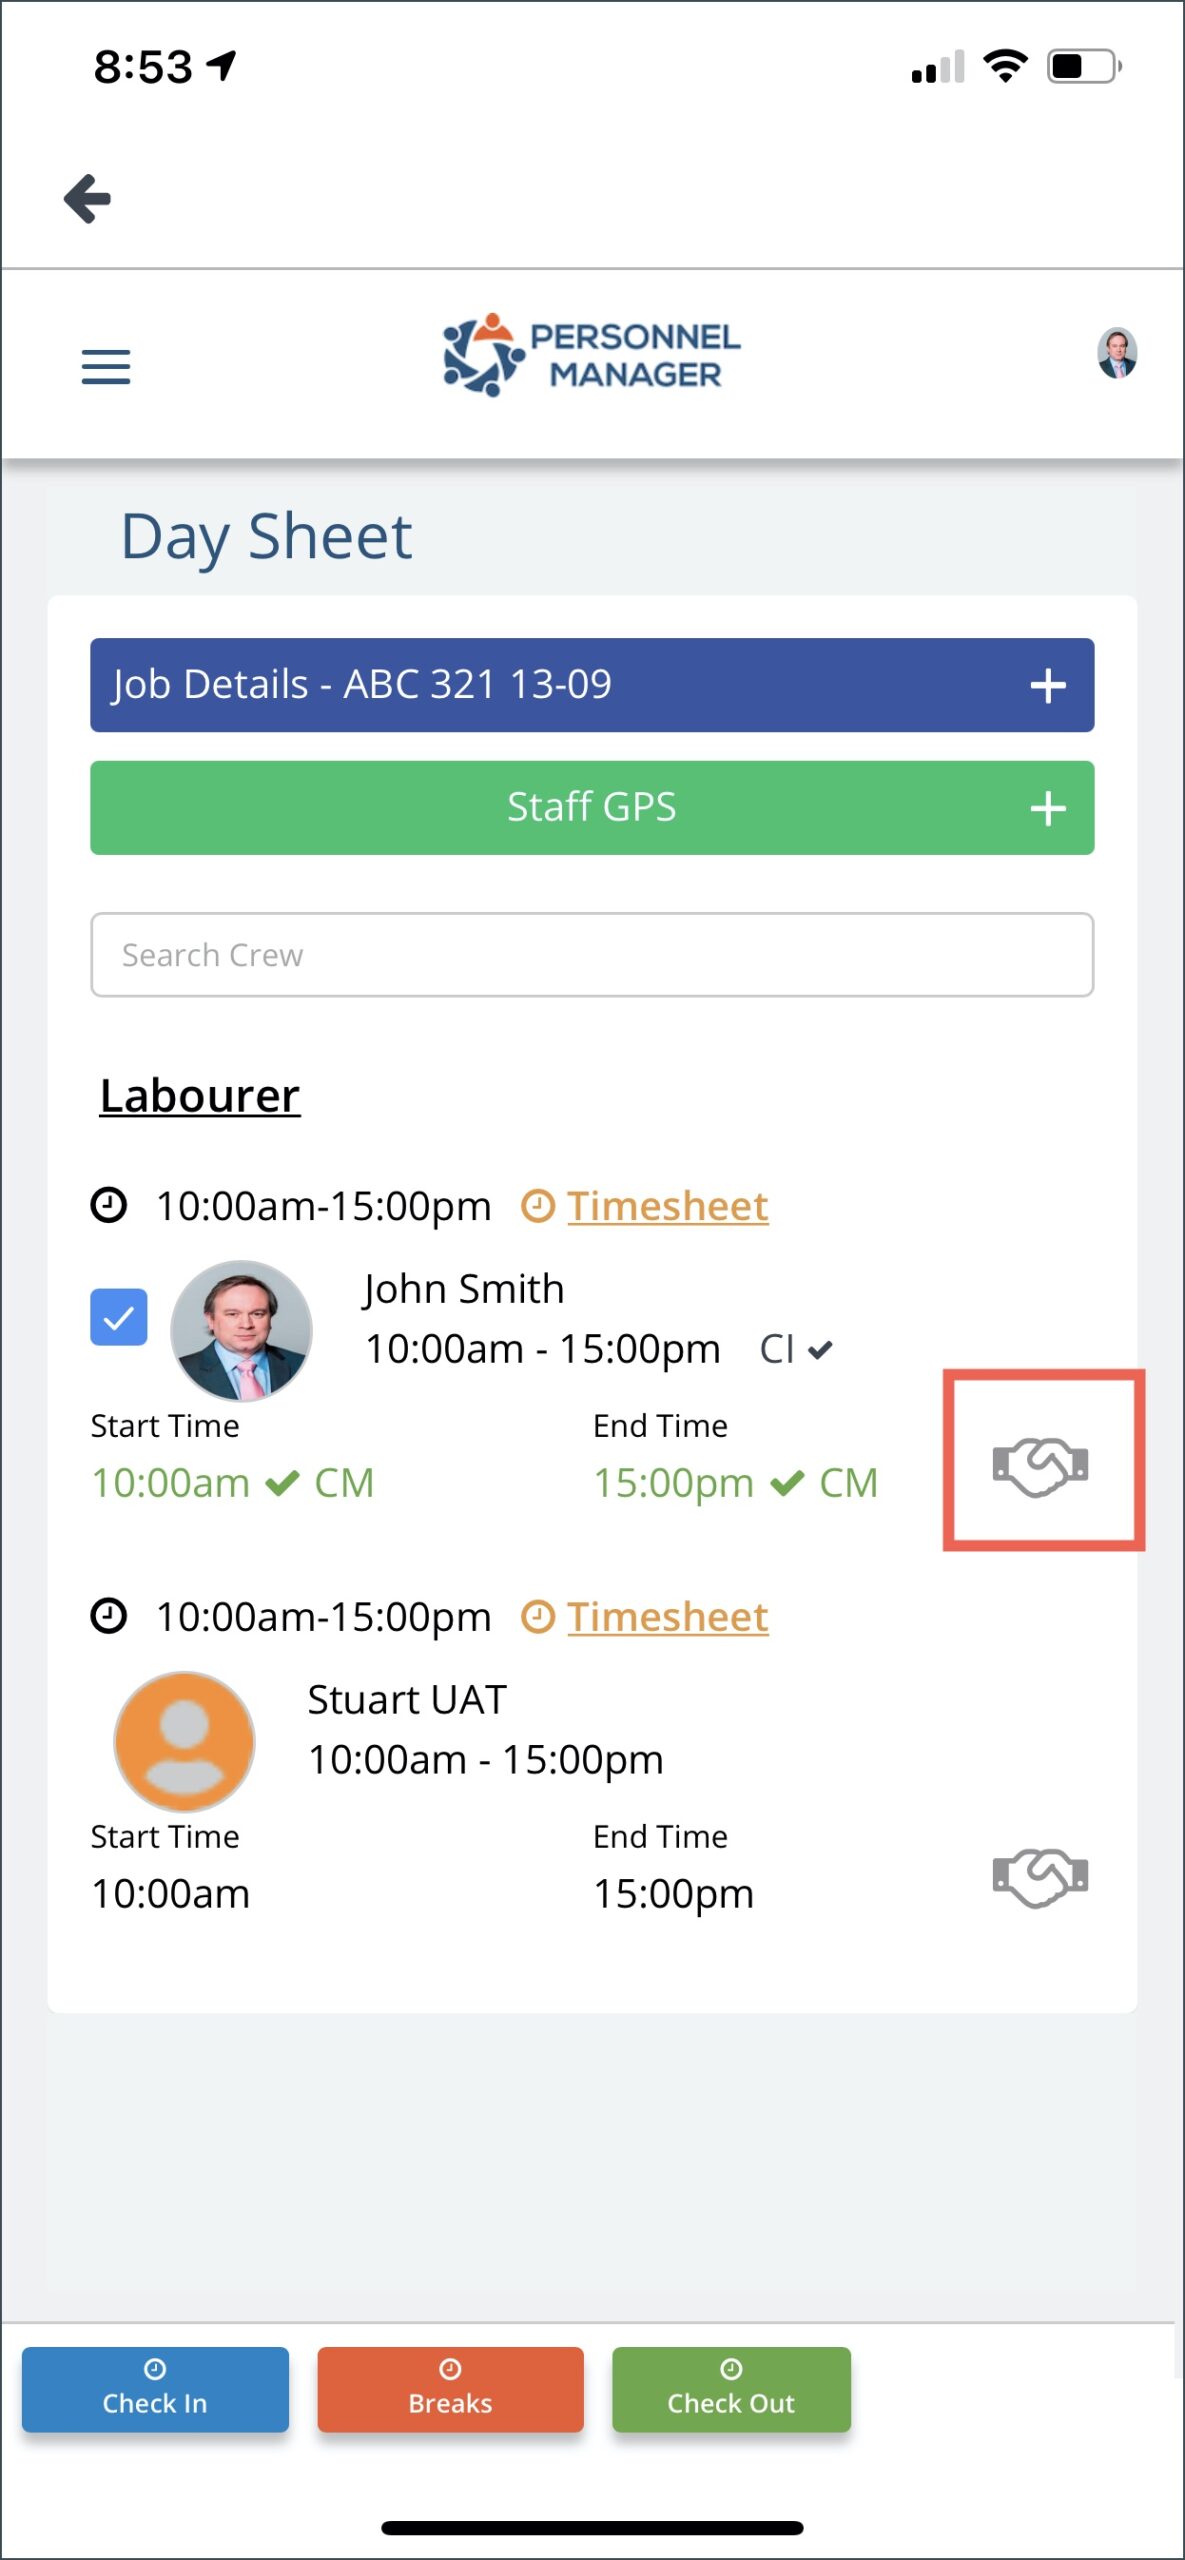
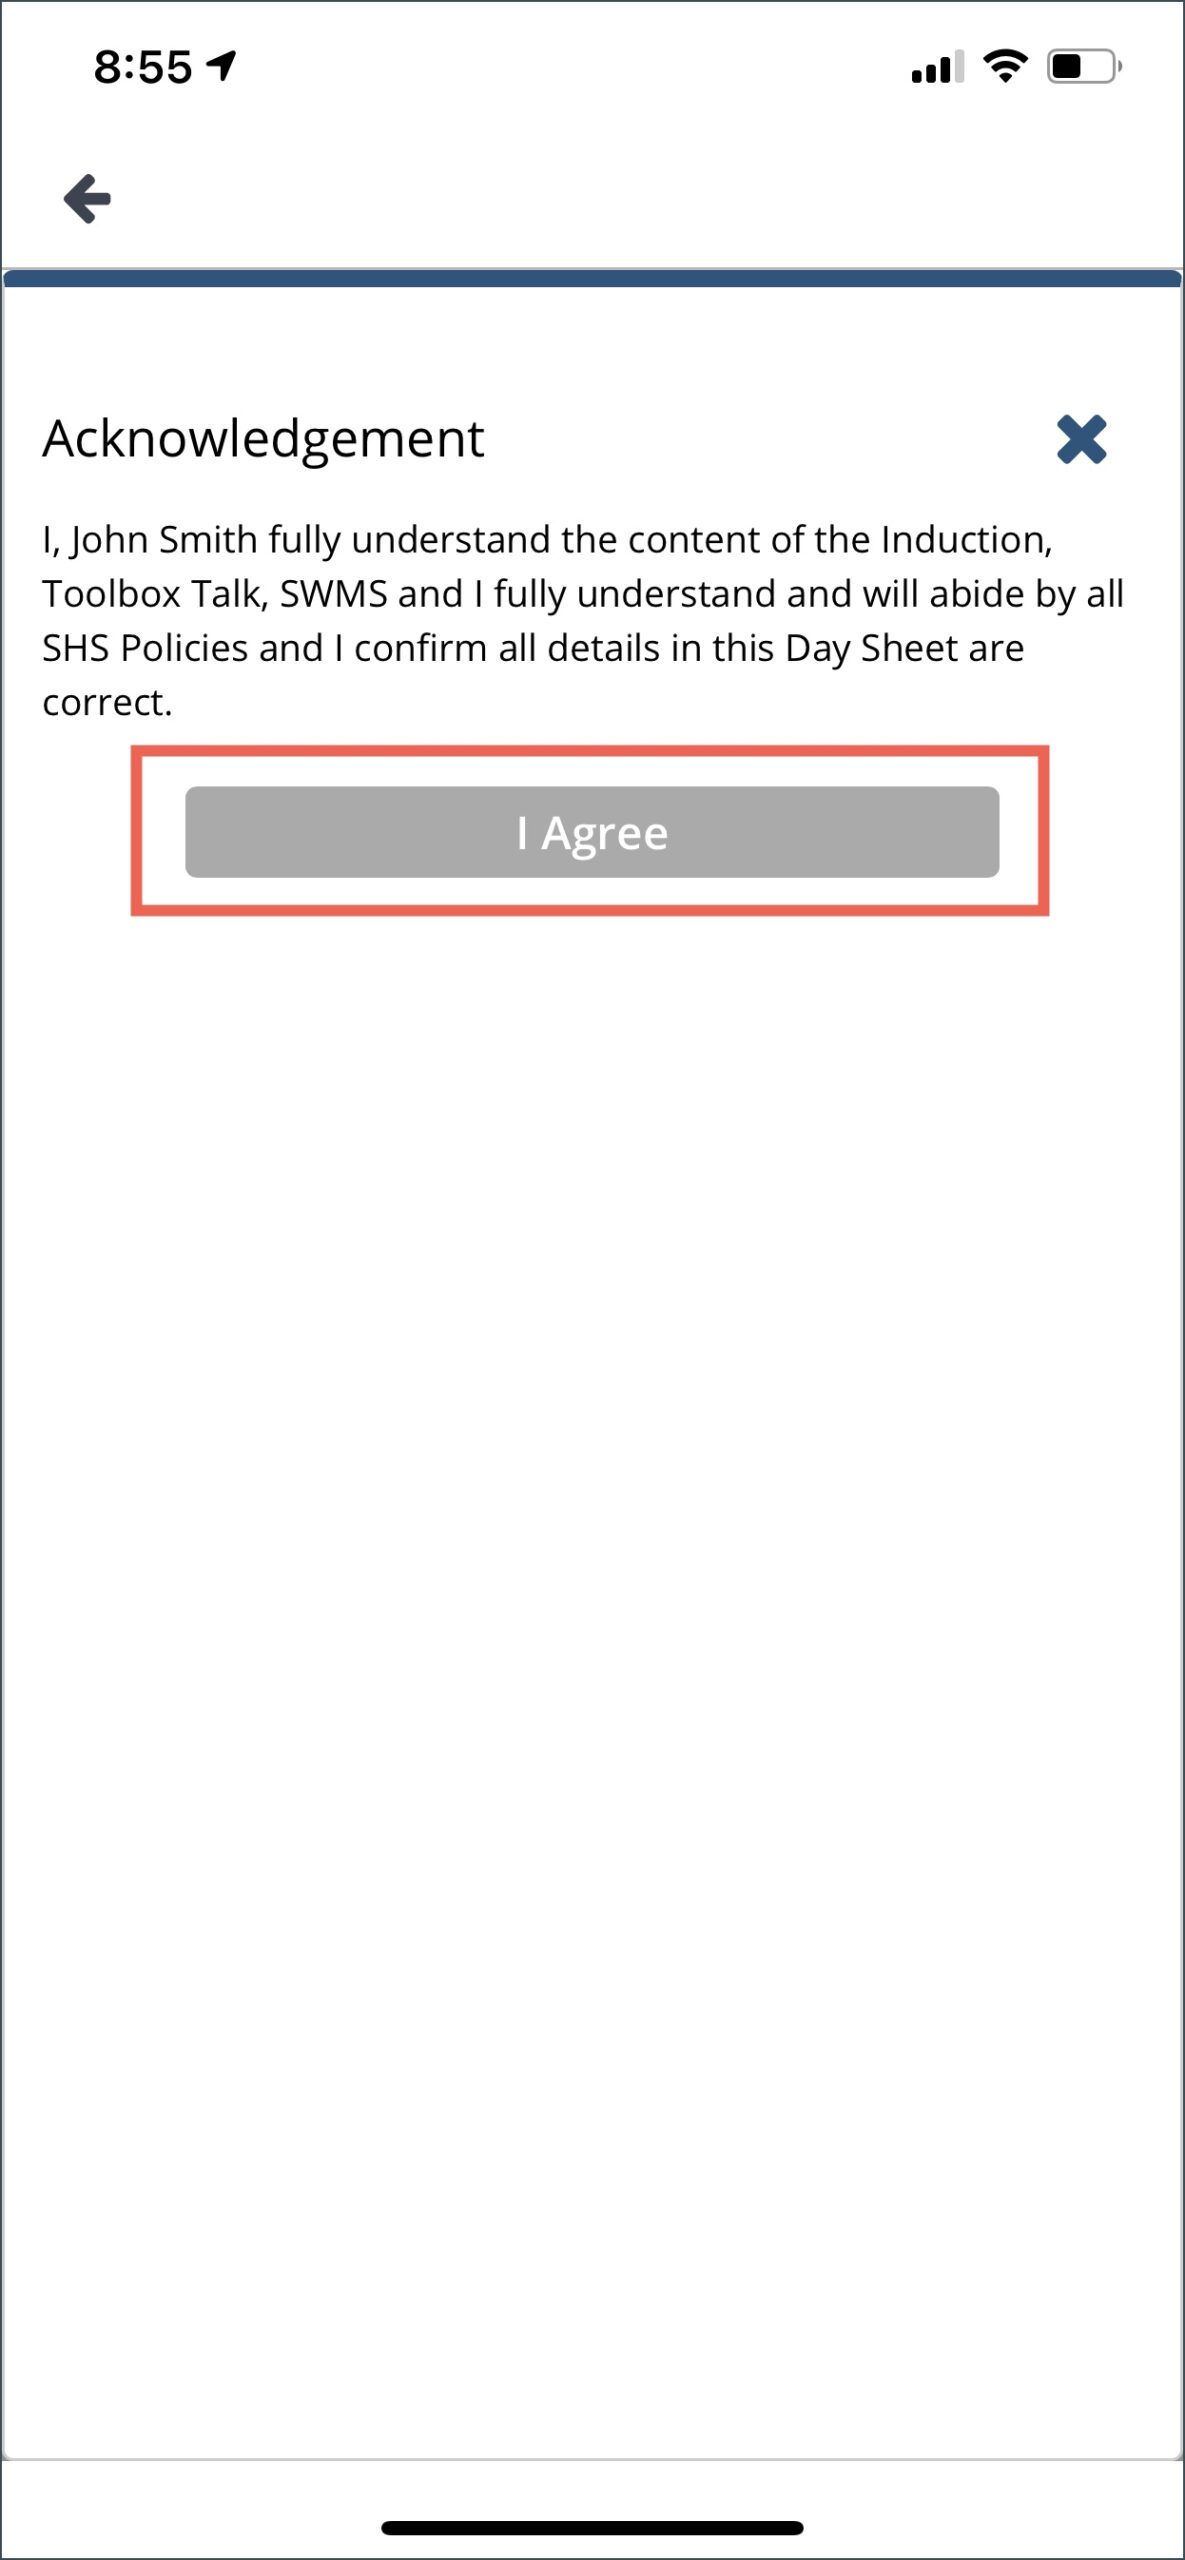
Once you clicked tap, the handshake icon colour will change to green.
![]()
Job Details
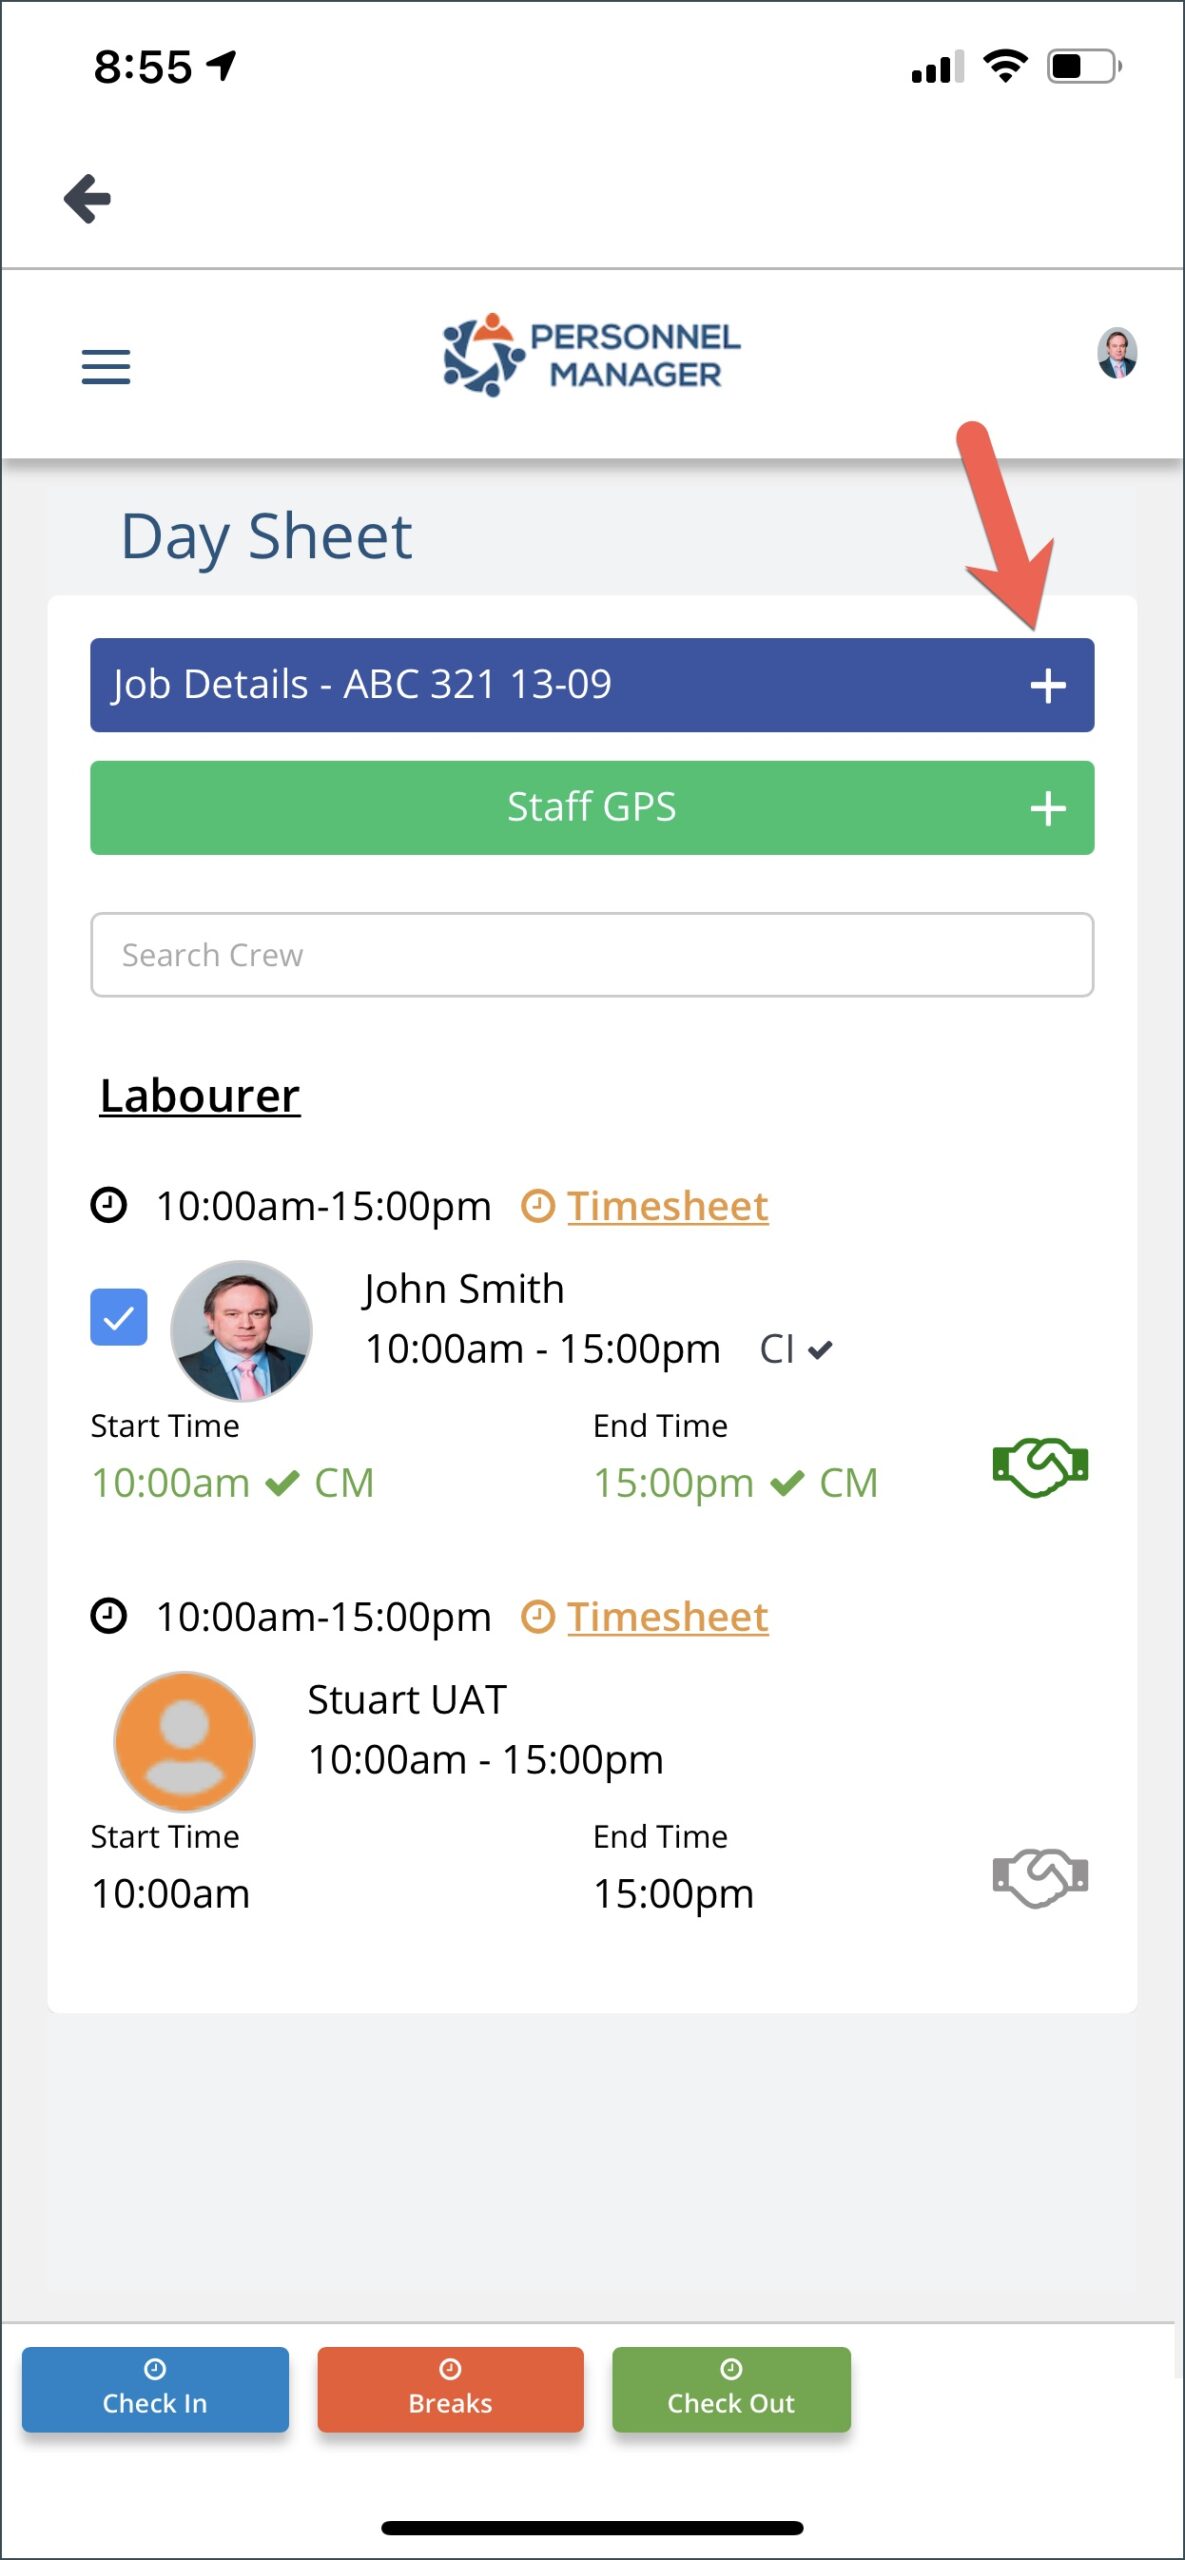
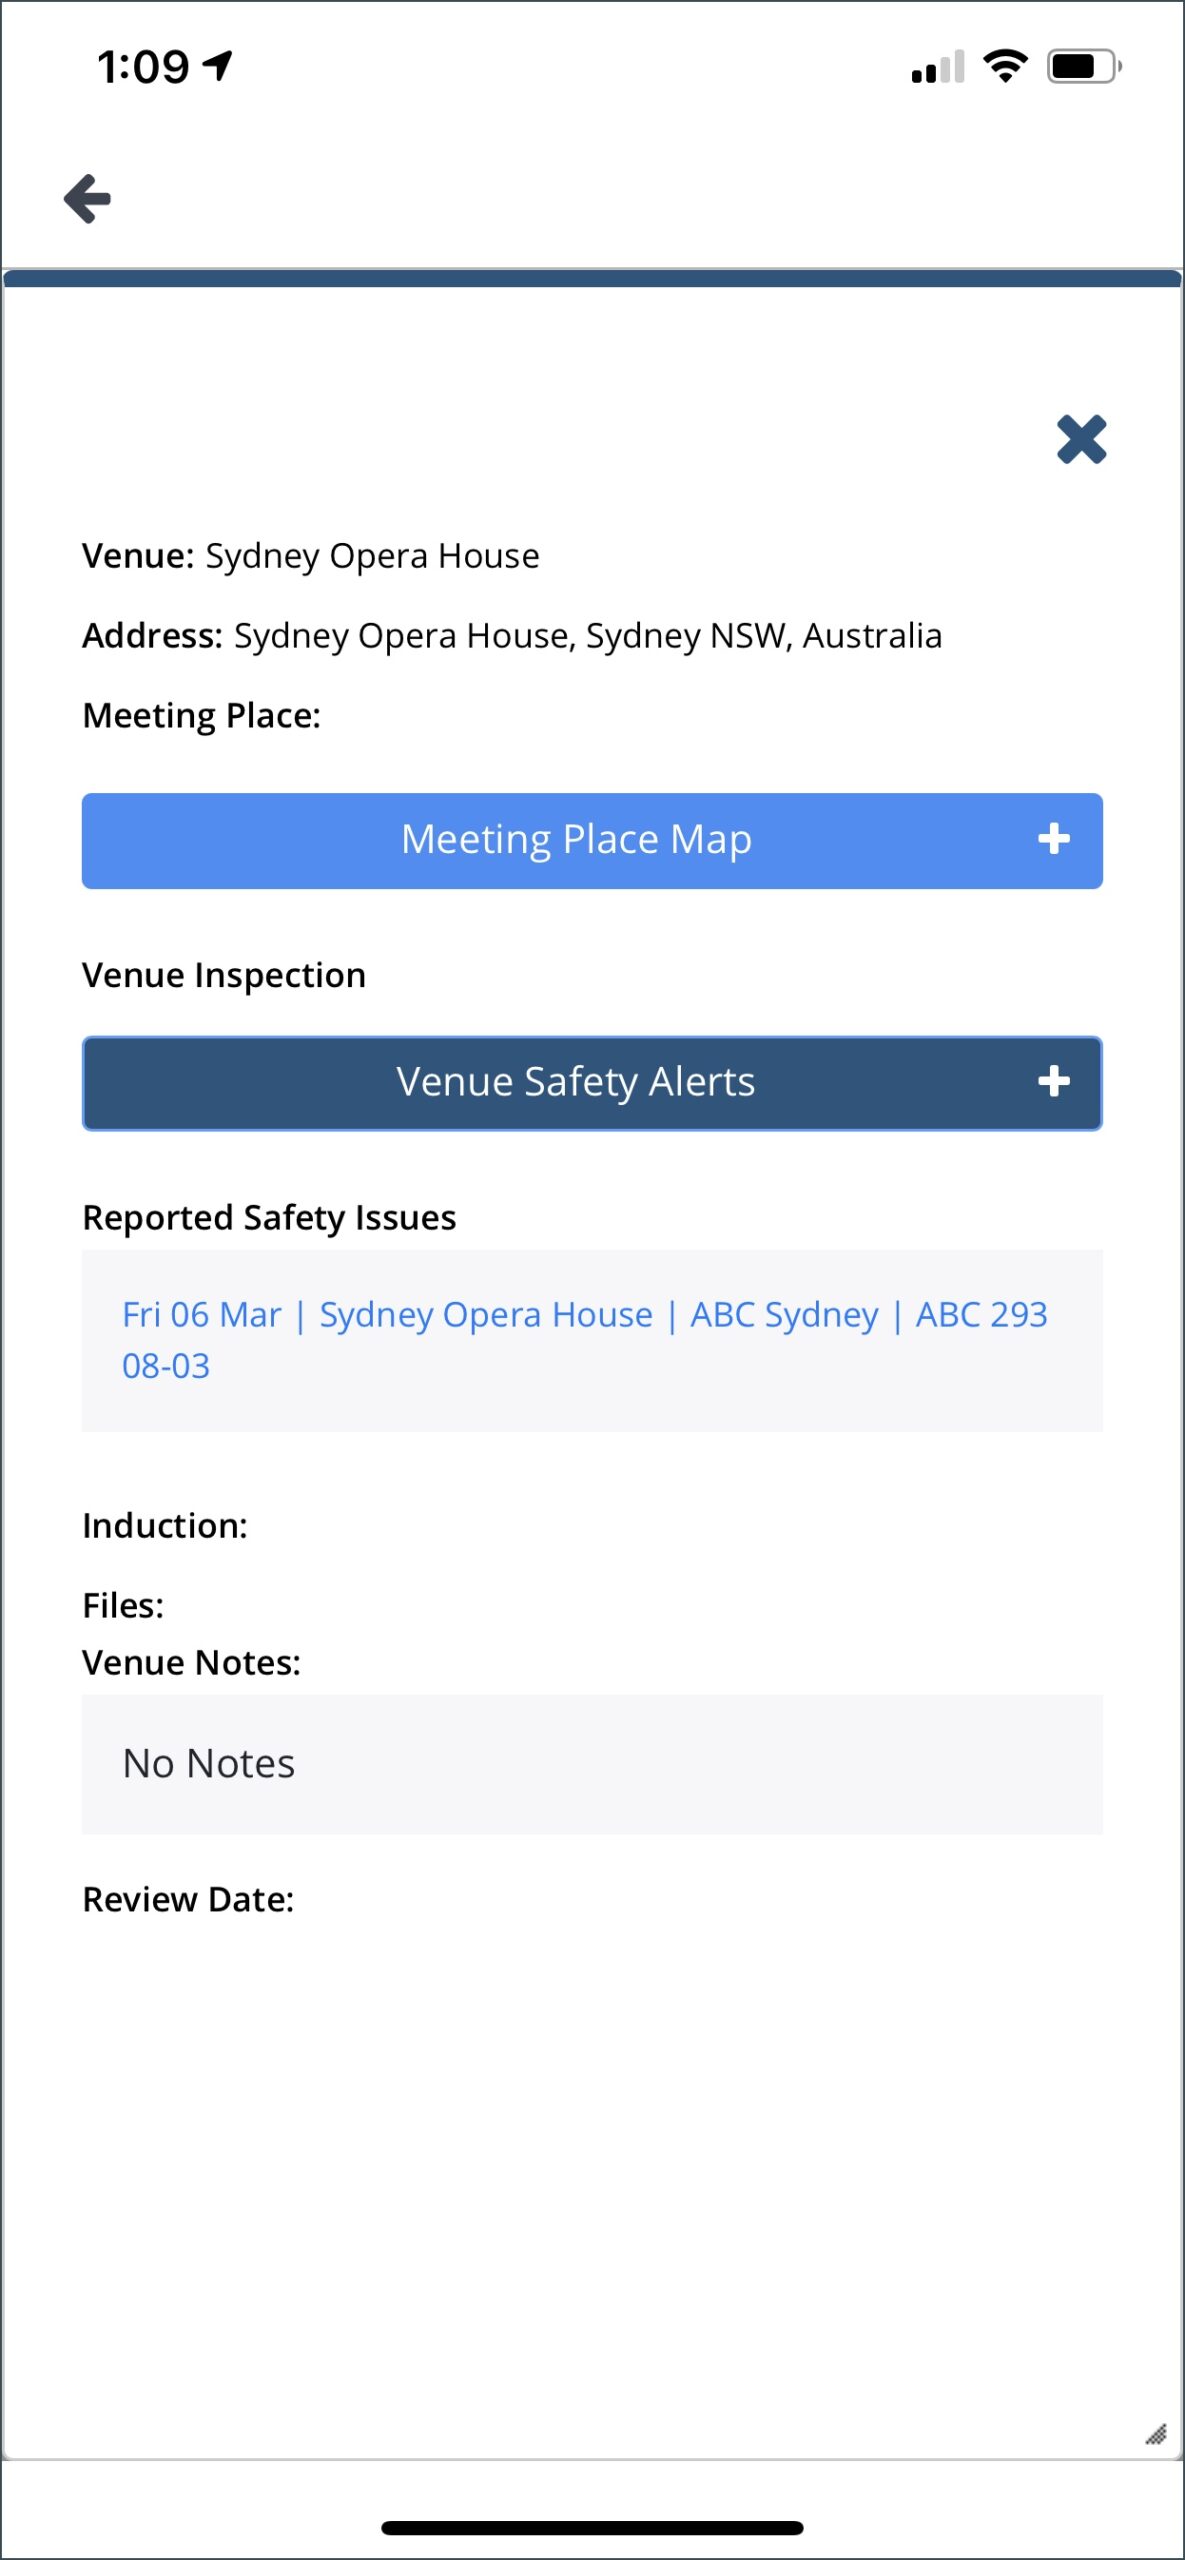
As a Crew Member, you can view the details of the job where you are confirmed. Clicked the plus icon to display the details of the job.
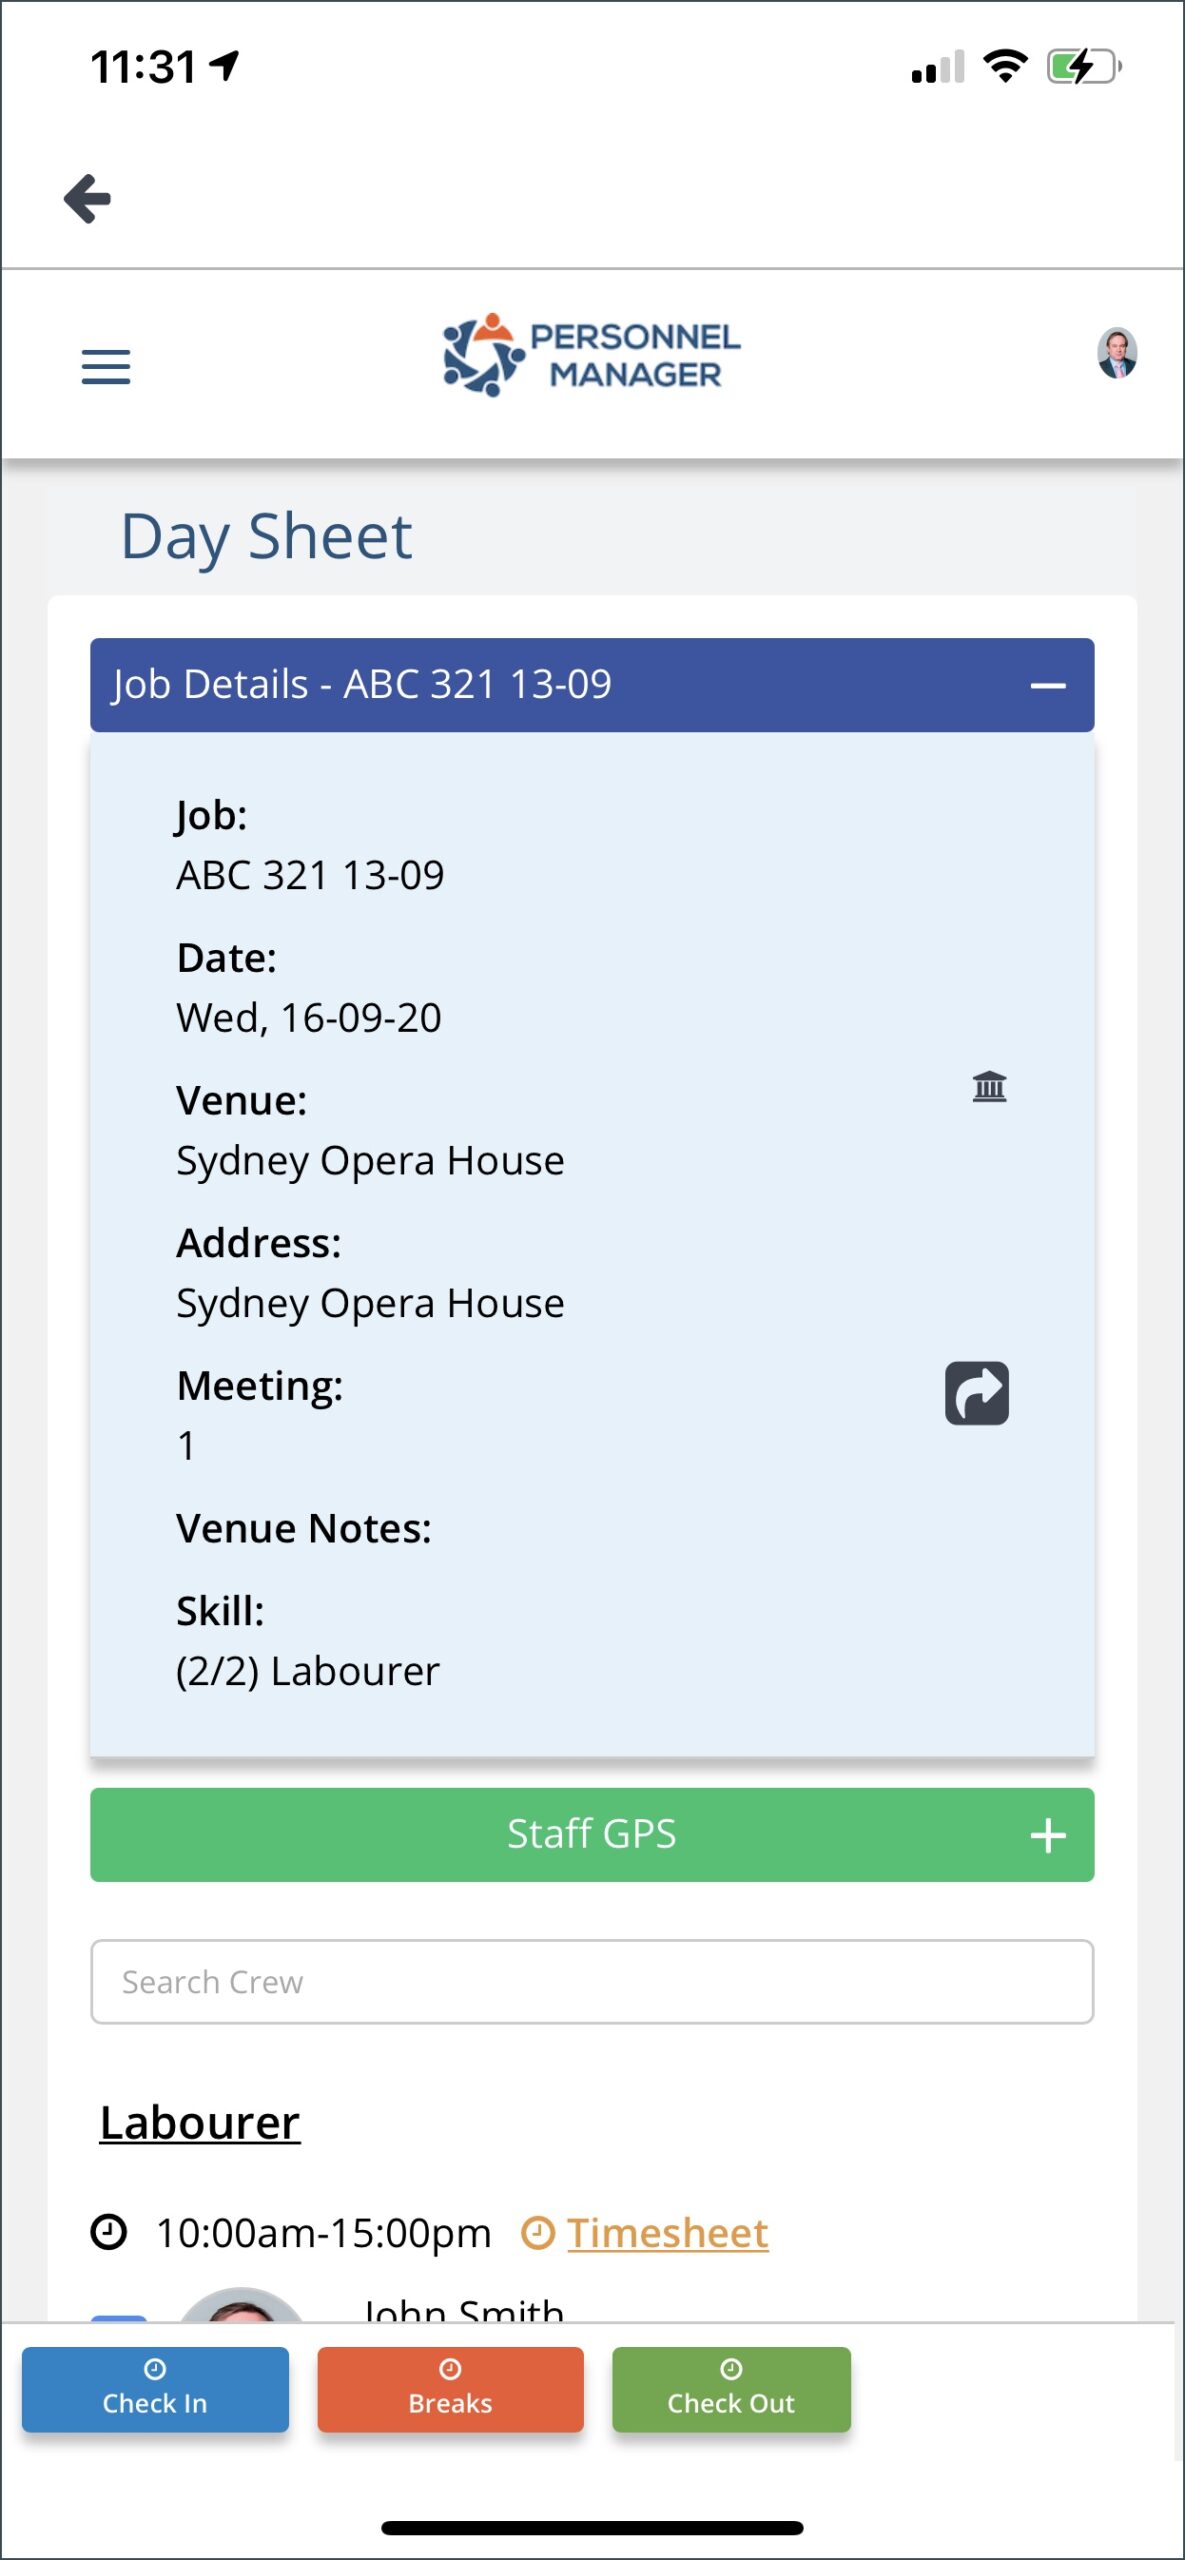
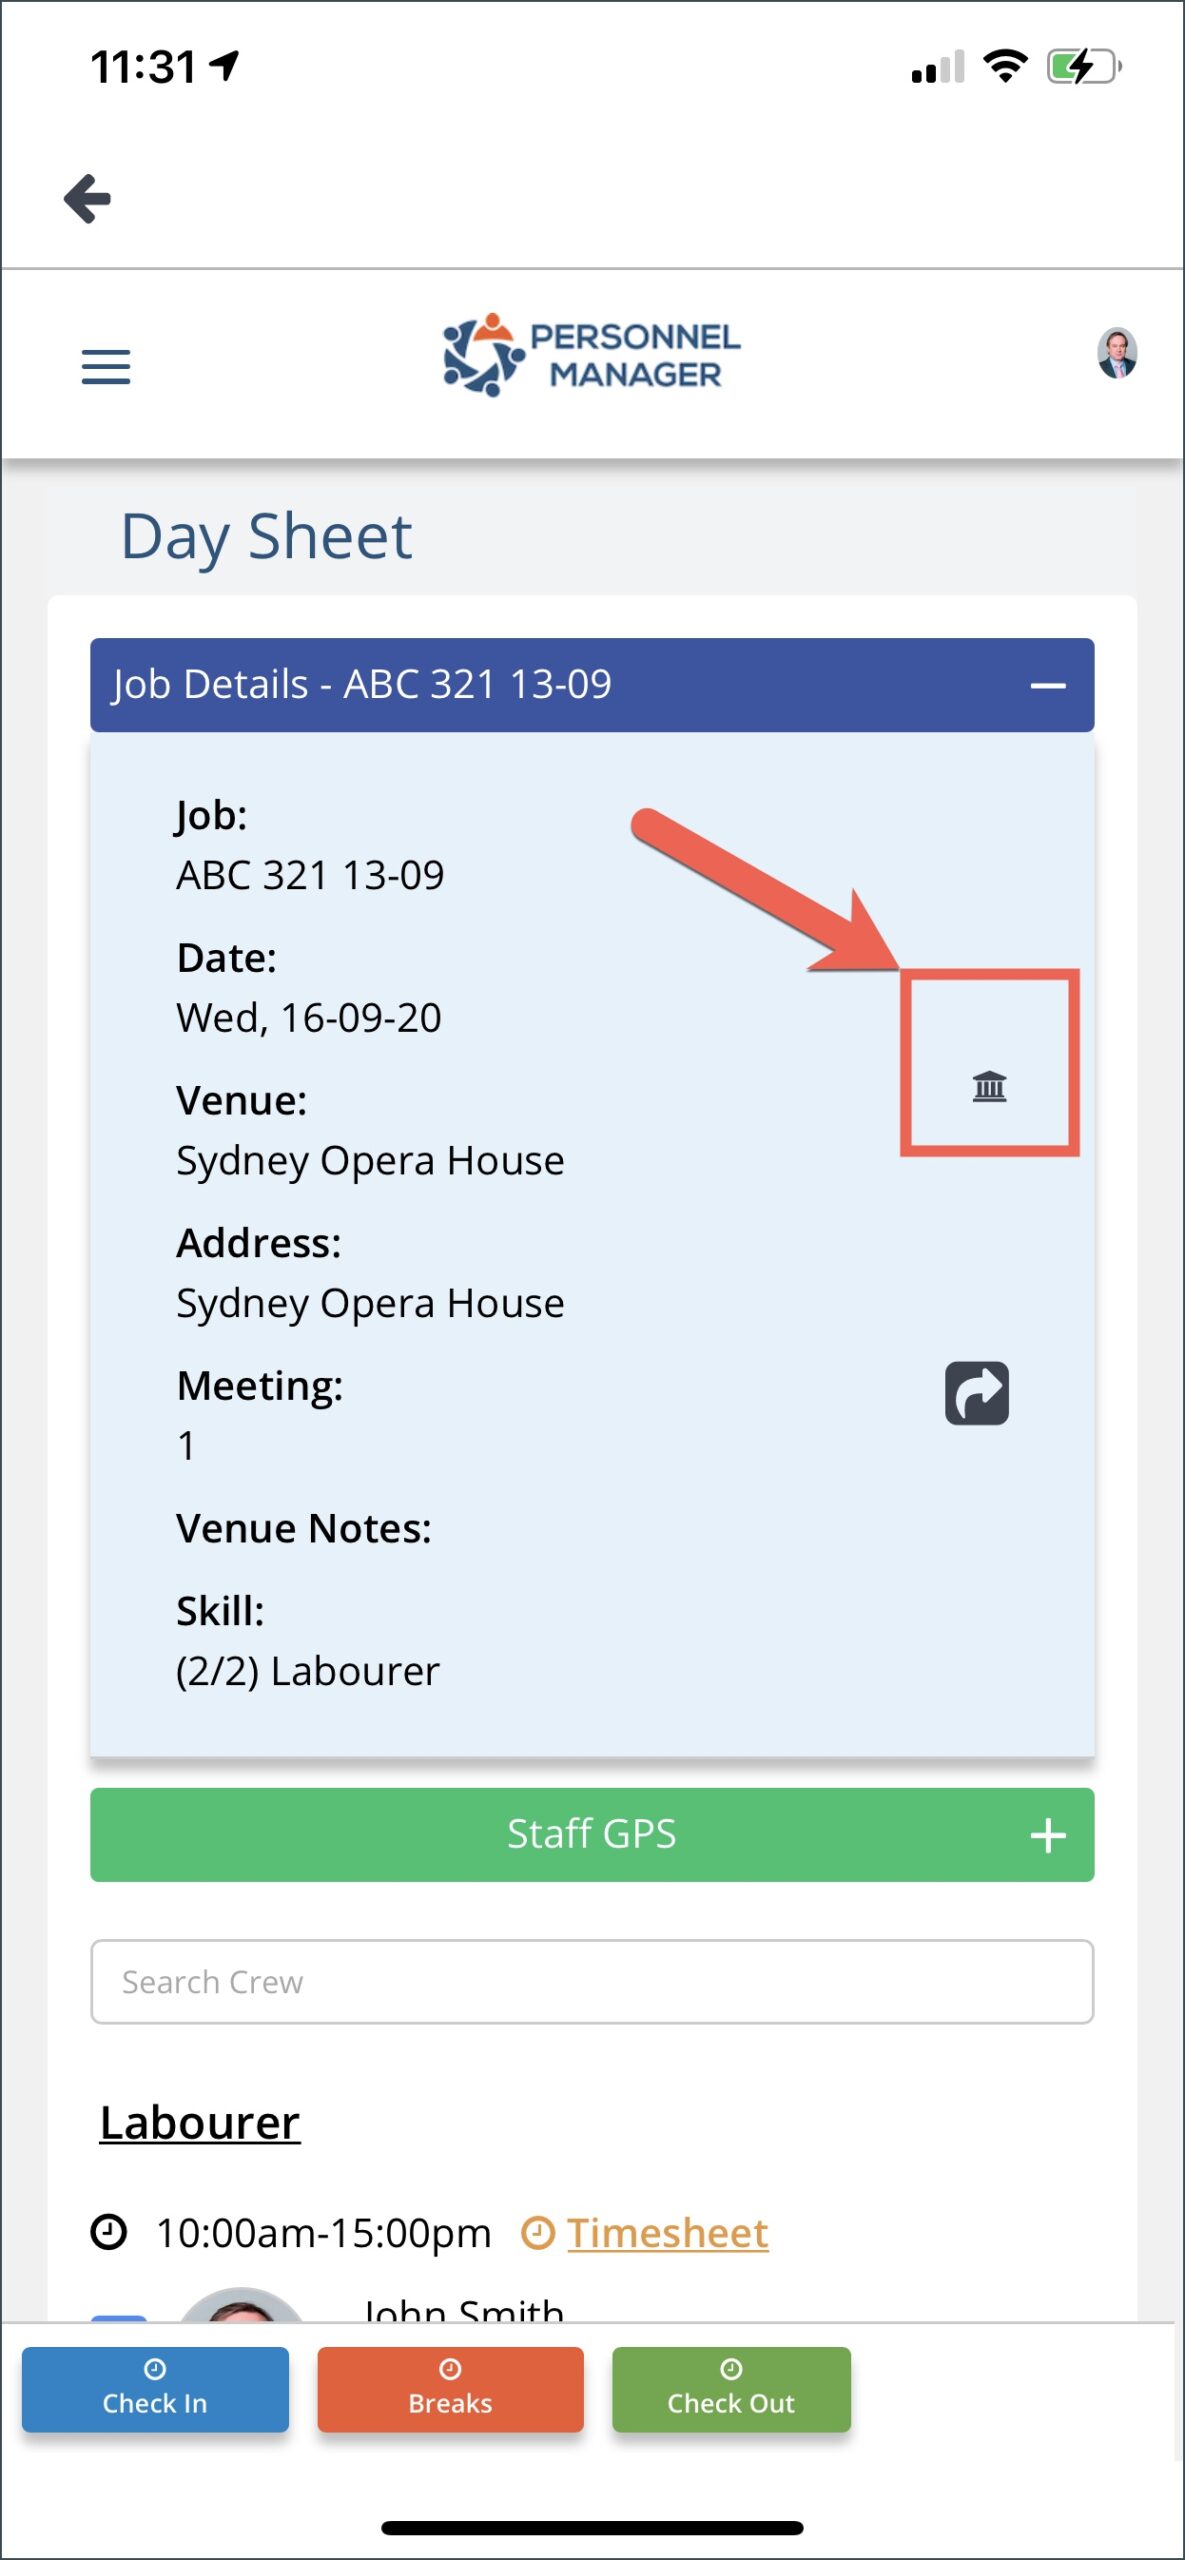
Click the building icon to display the Venue Information.
Tap on the plus icon of Meeting Place Map and it will display the location of the meeting place on the map. You can also view safety alerts for the venue and if there are reported issues on the venue. Simply tap on the plus icons or links to view these information/
Staff GPS
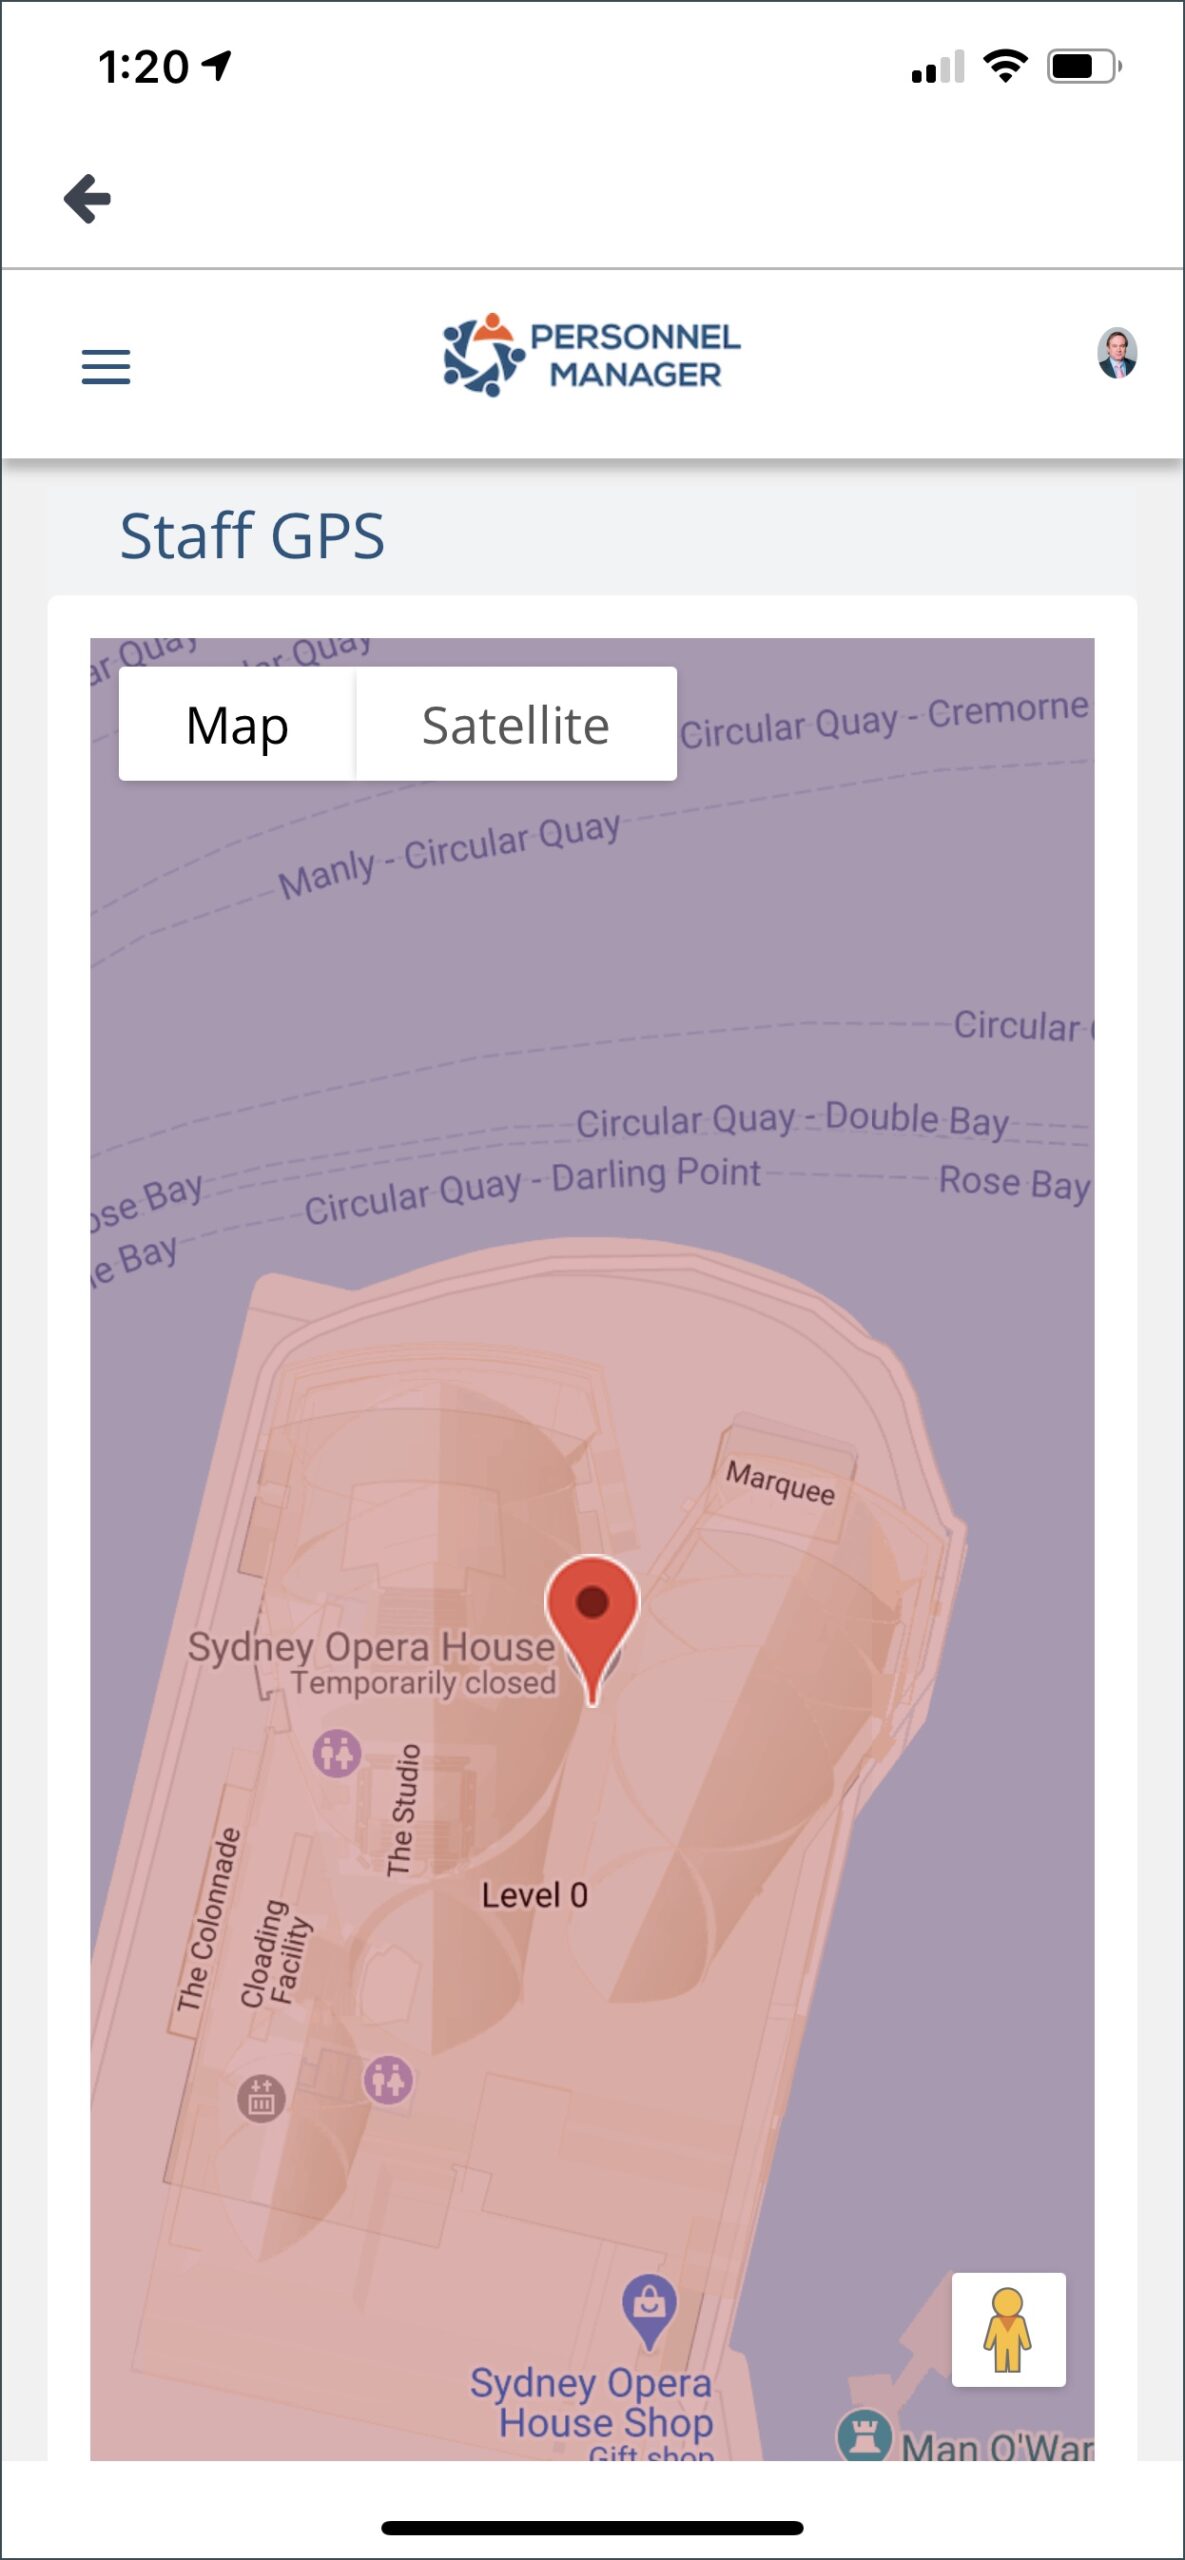
The staff GPS will display the job location on the map as shown in below screenshot:
Day Sheet as Team Leader
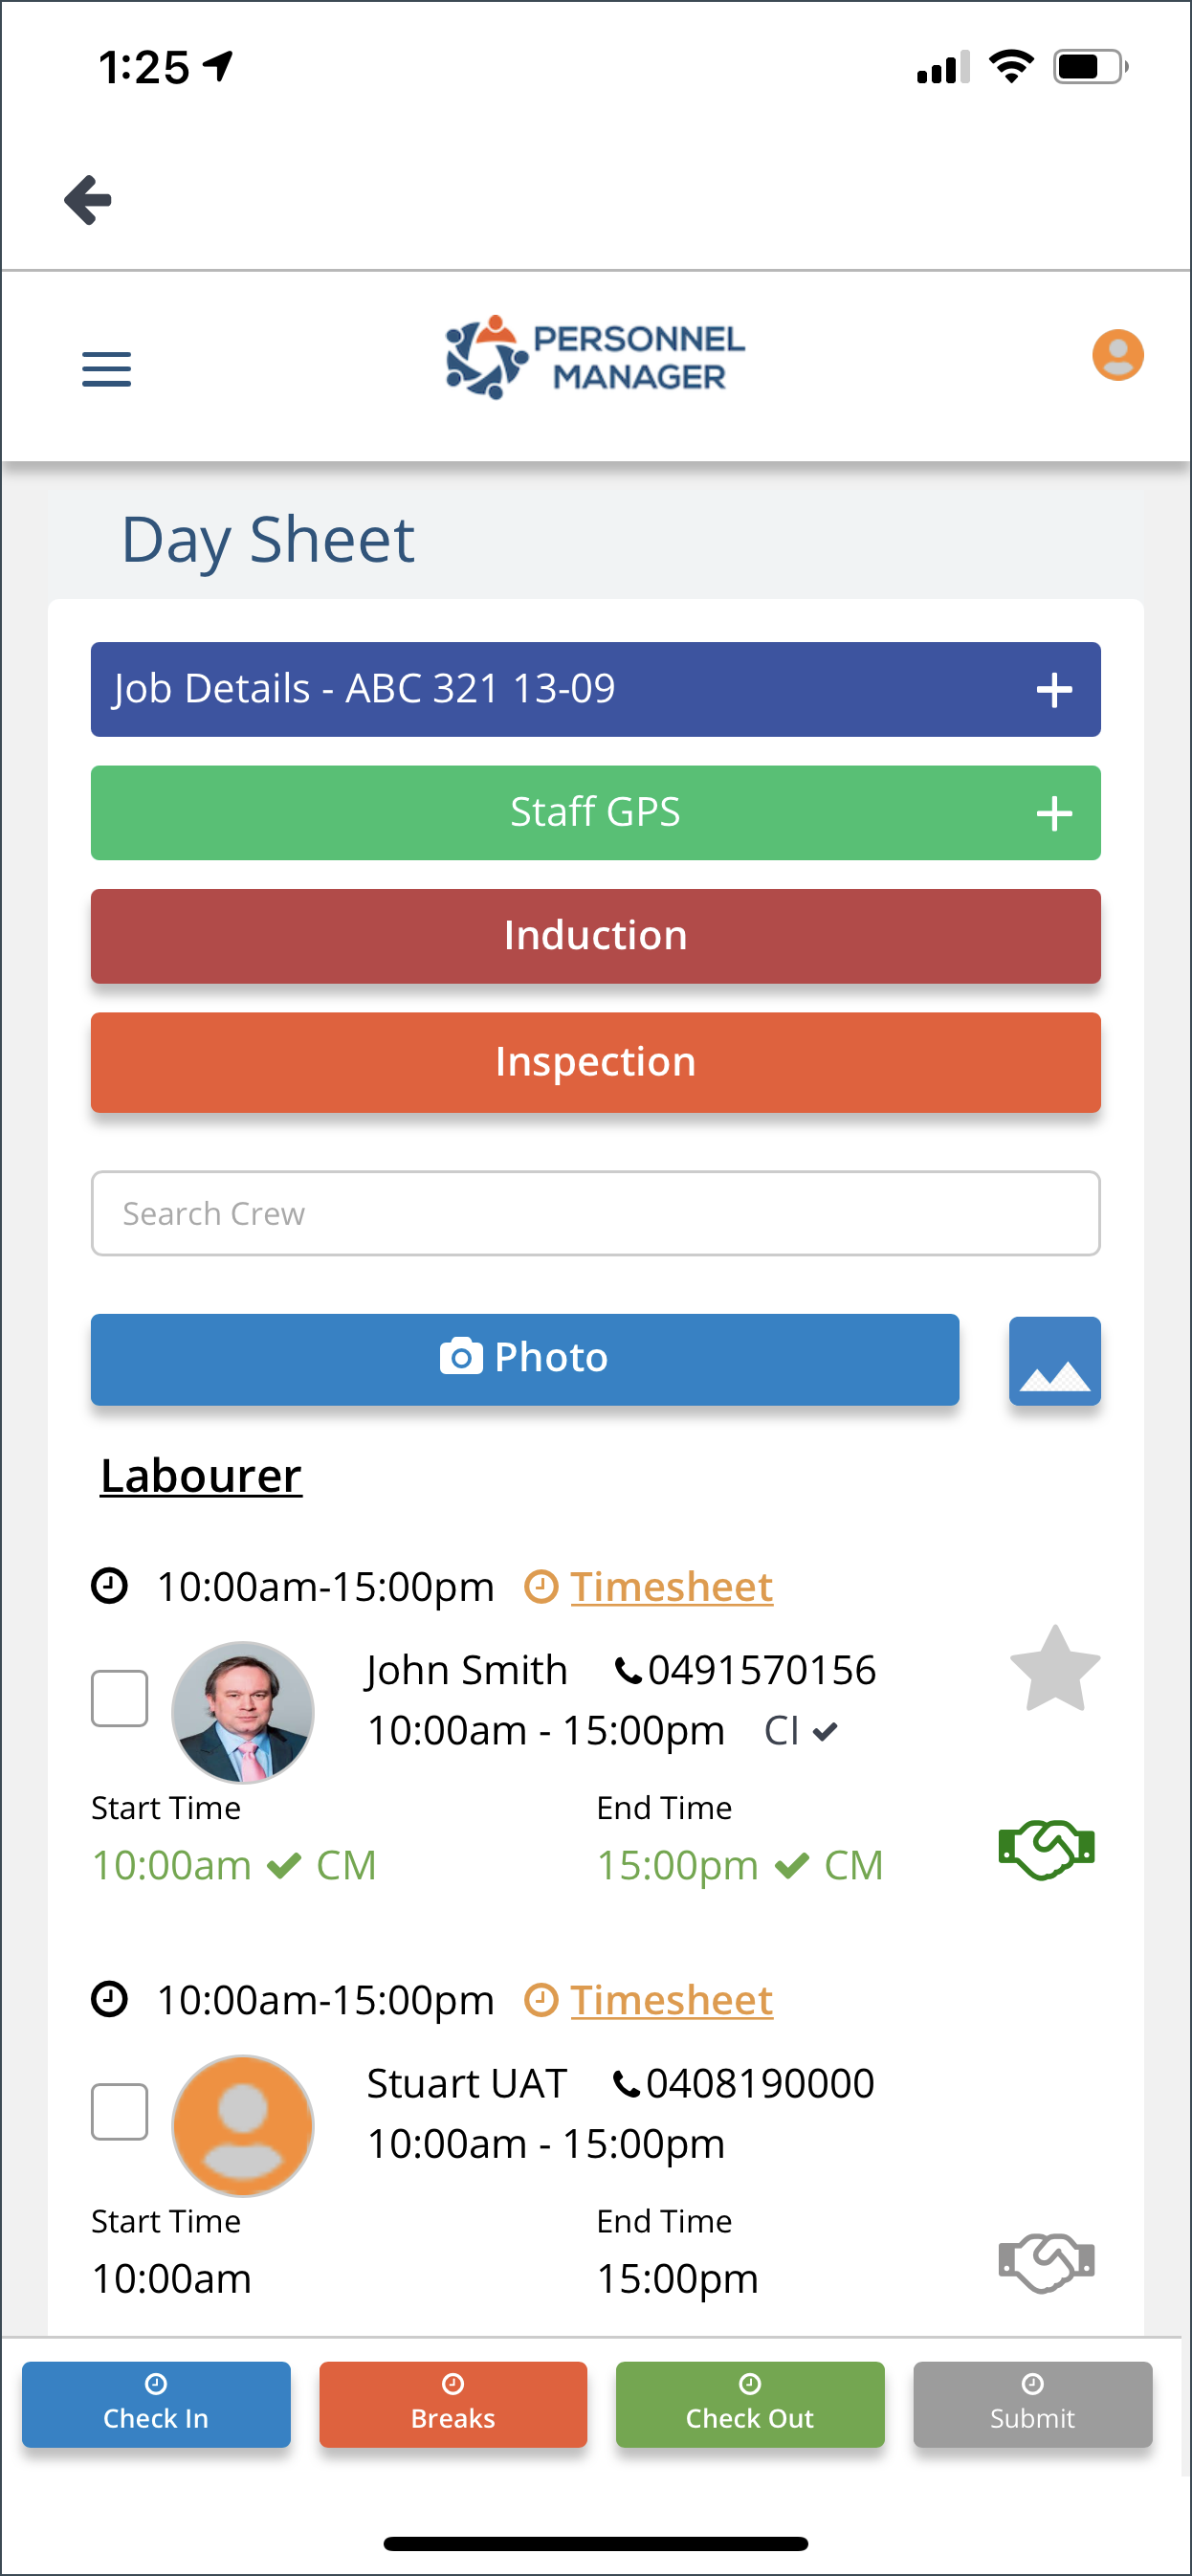
Day Sheet view for Team Leader is different from the Crew. It has added functionality like Safety Induction, Venue Inspection, Crew Rating and Timesheet Submission.
This is how the Day Sheet will look like if you are assigned as a Team Leader.
Job Details
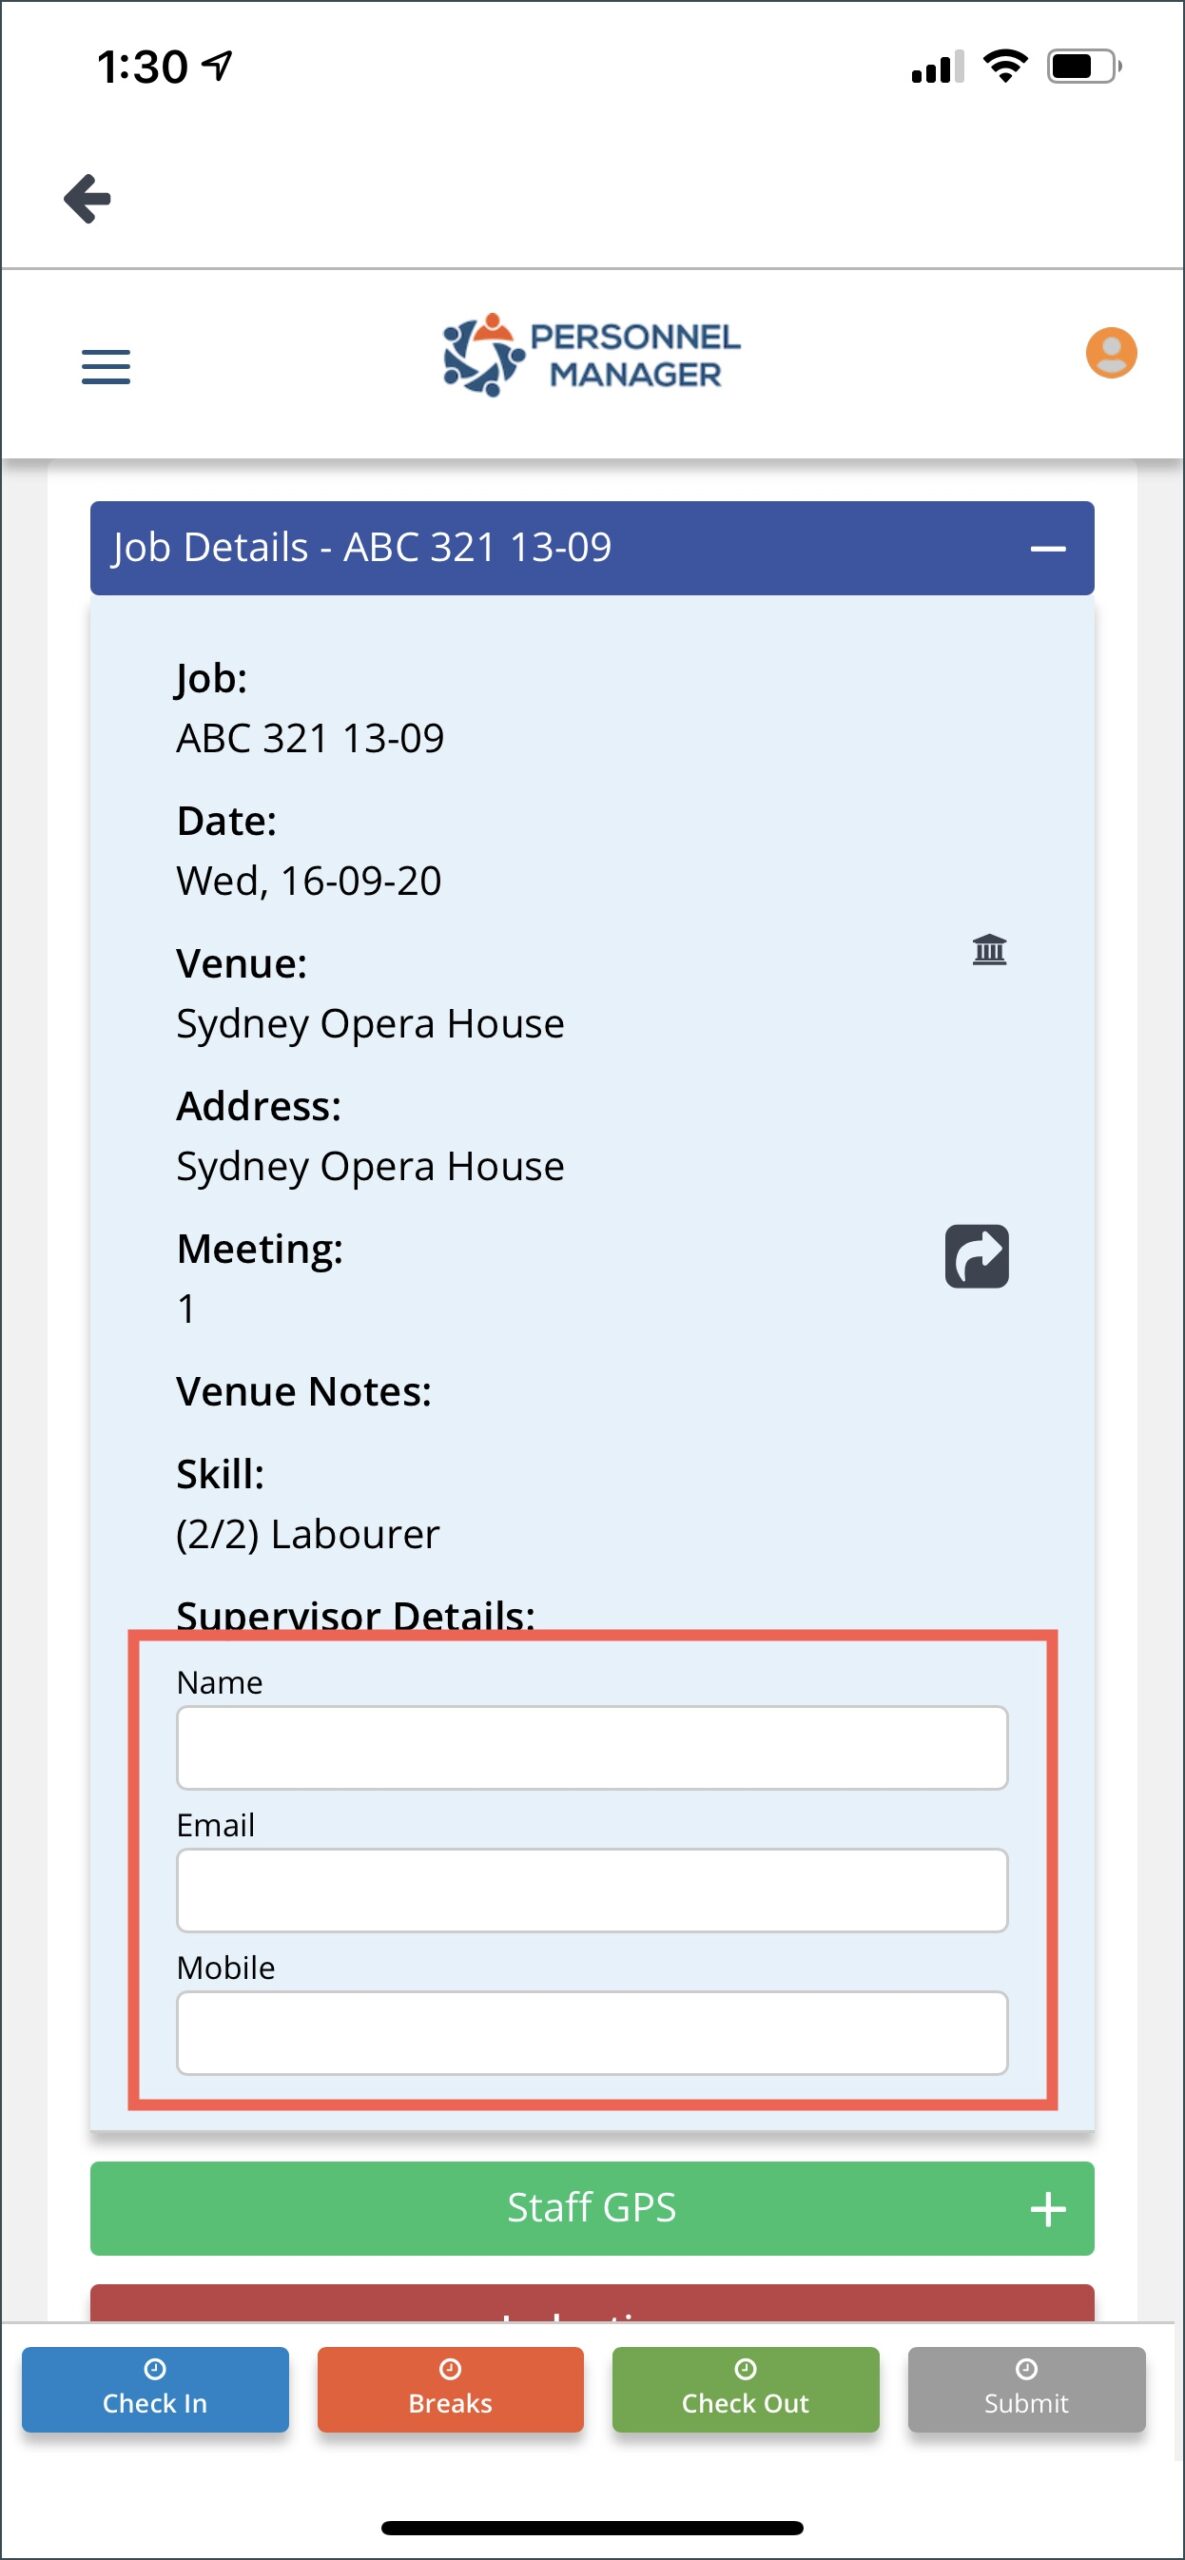
Similar with the crew member, you also have the Job Details section on the Day Sheet. The only difference is that you have the Supervisor section. As Team Leader, you will be able to enter the details of the Supervisor on this field if it’s available.
Staff GPS
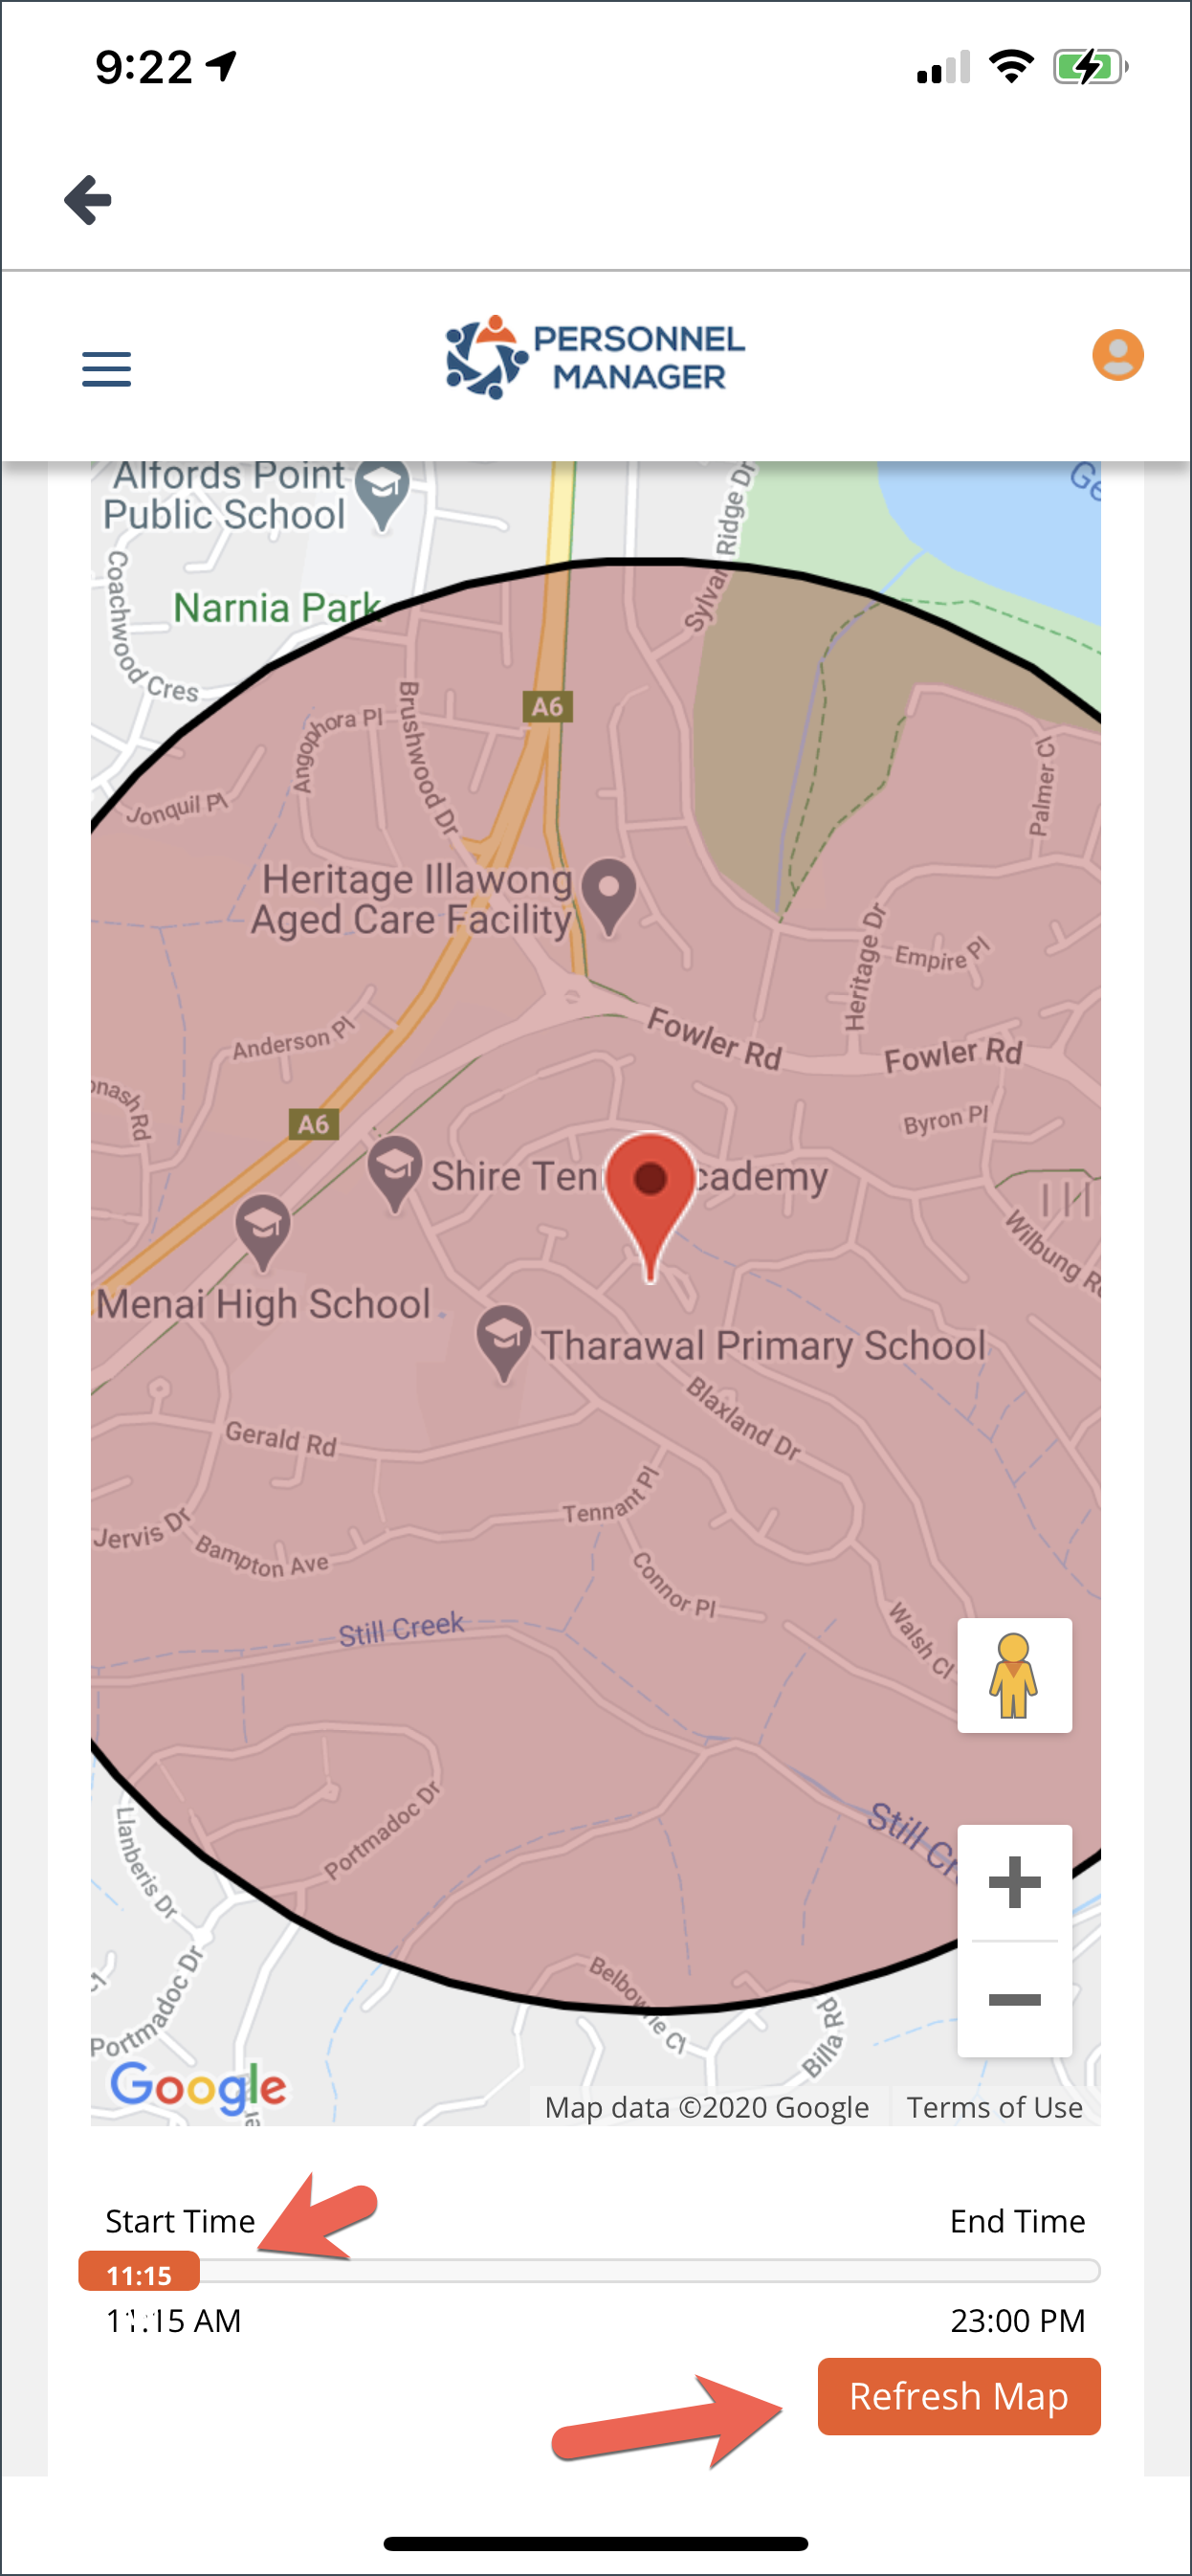
The staff GPS will display the job location on the map. It will also show the location of the crew on the map.
You can drag the slider to show the pin of the crew on each given time. You can also click Refresh Map to display the most current location of the crew.
Induction & Inspection
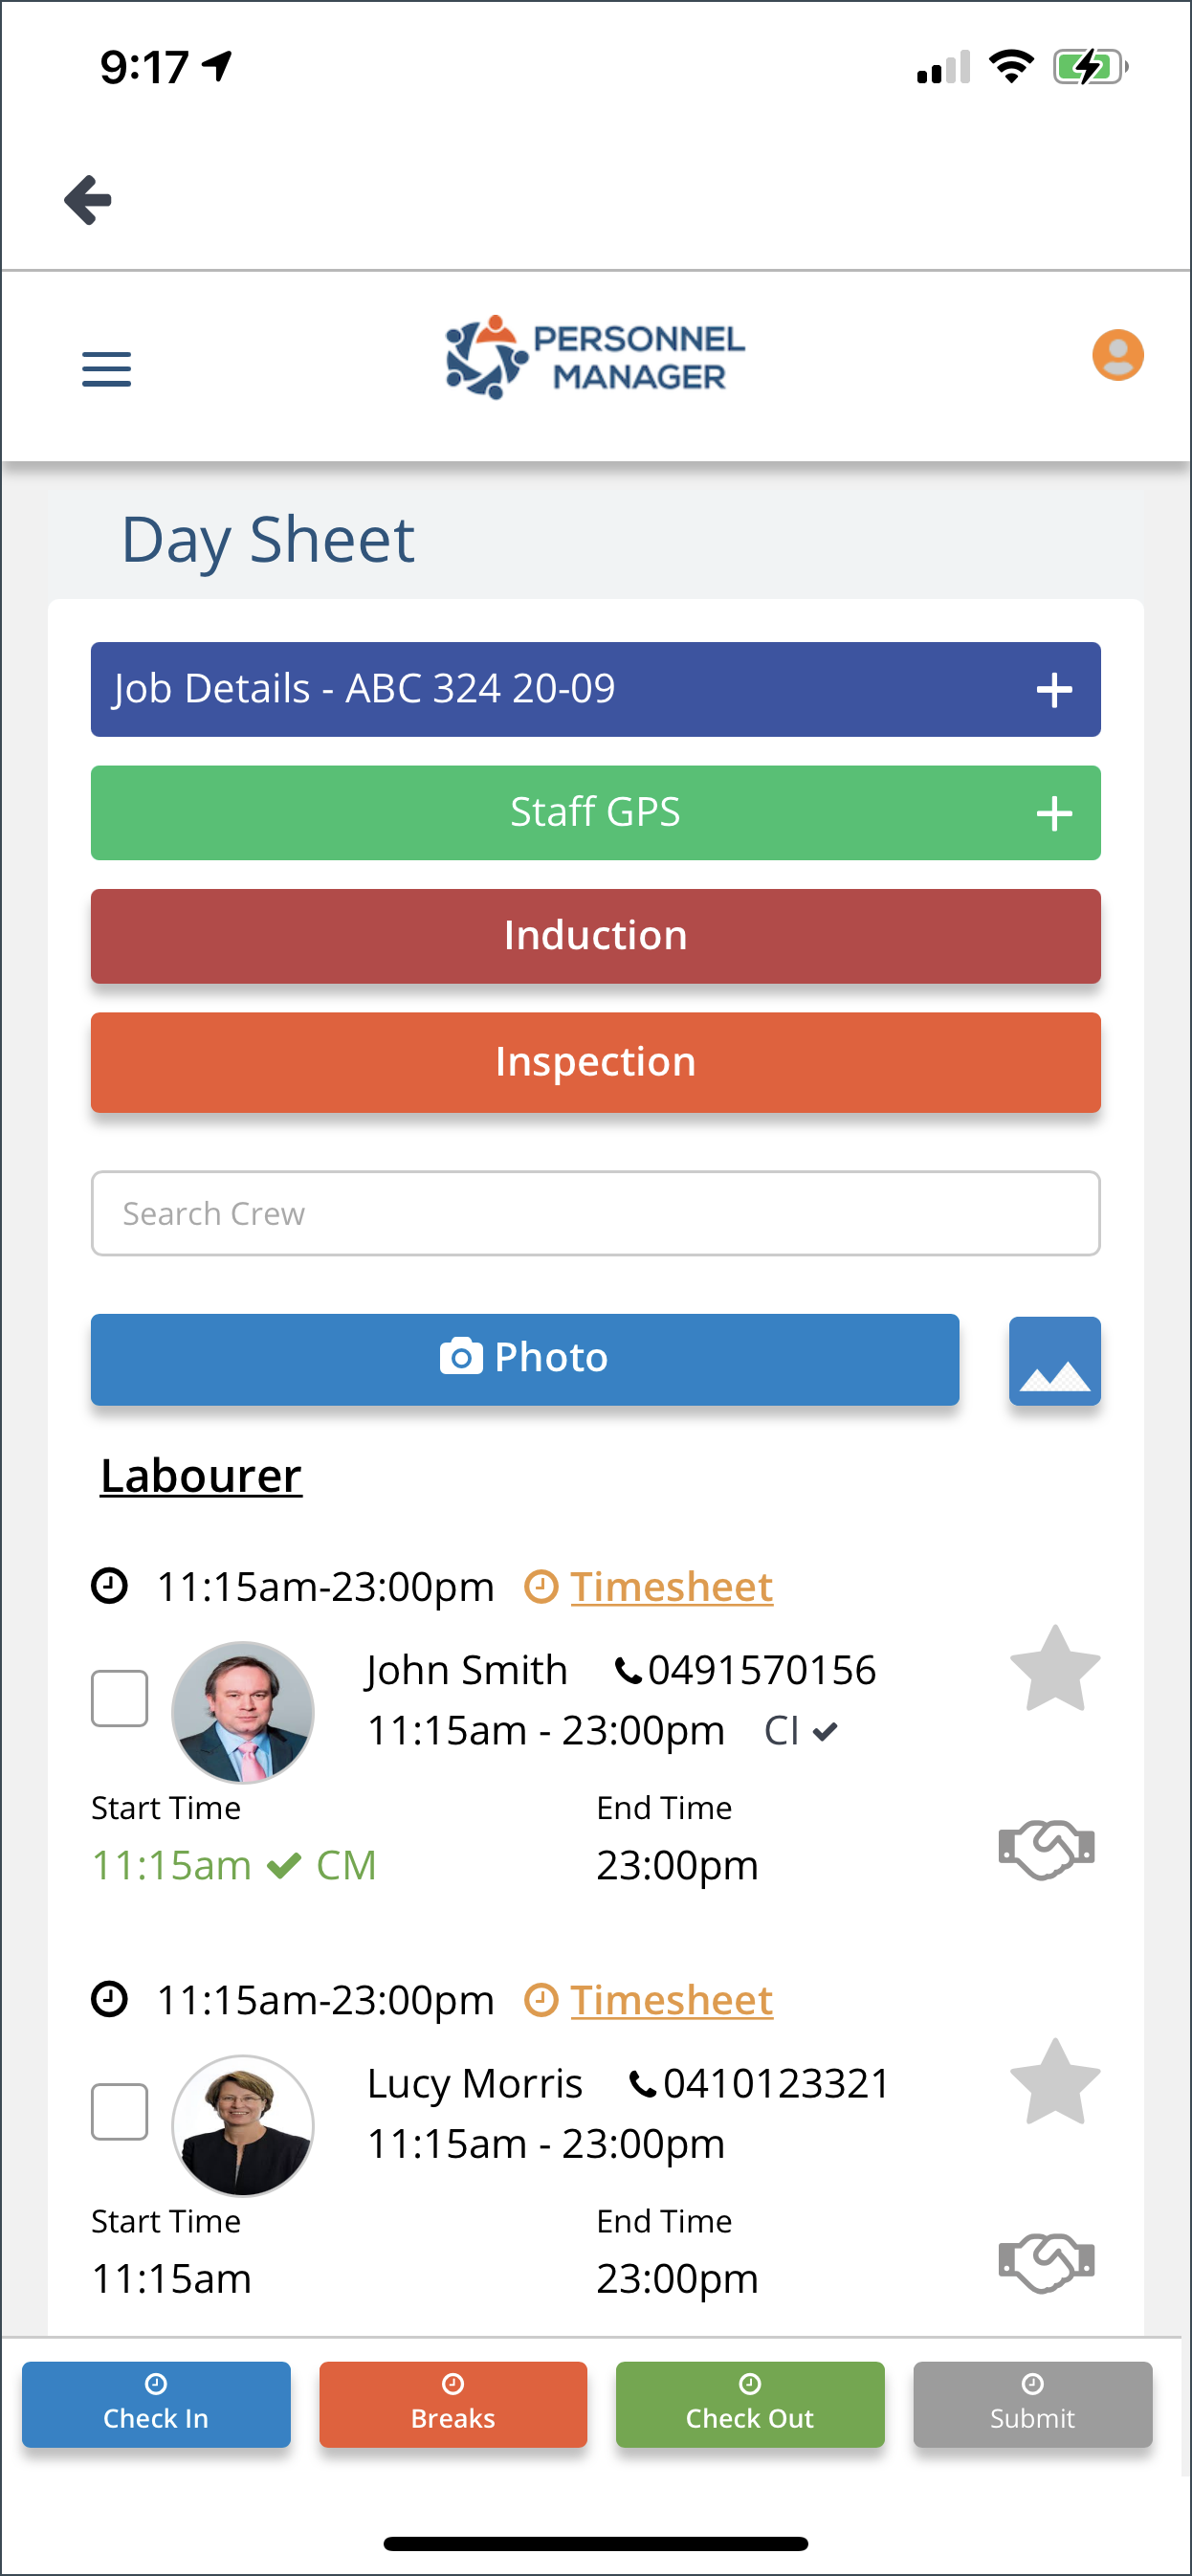
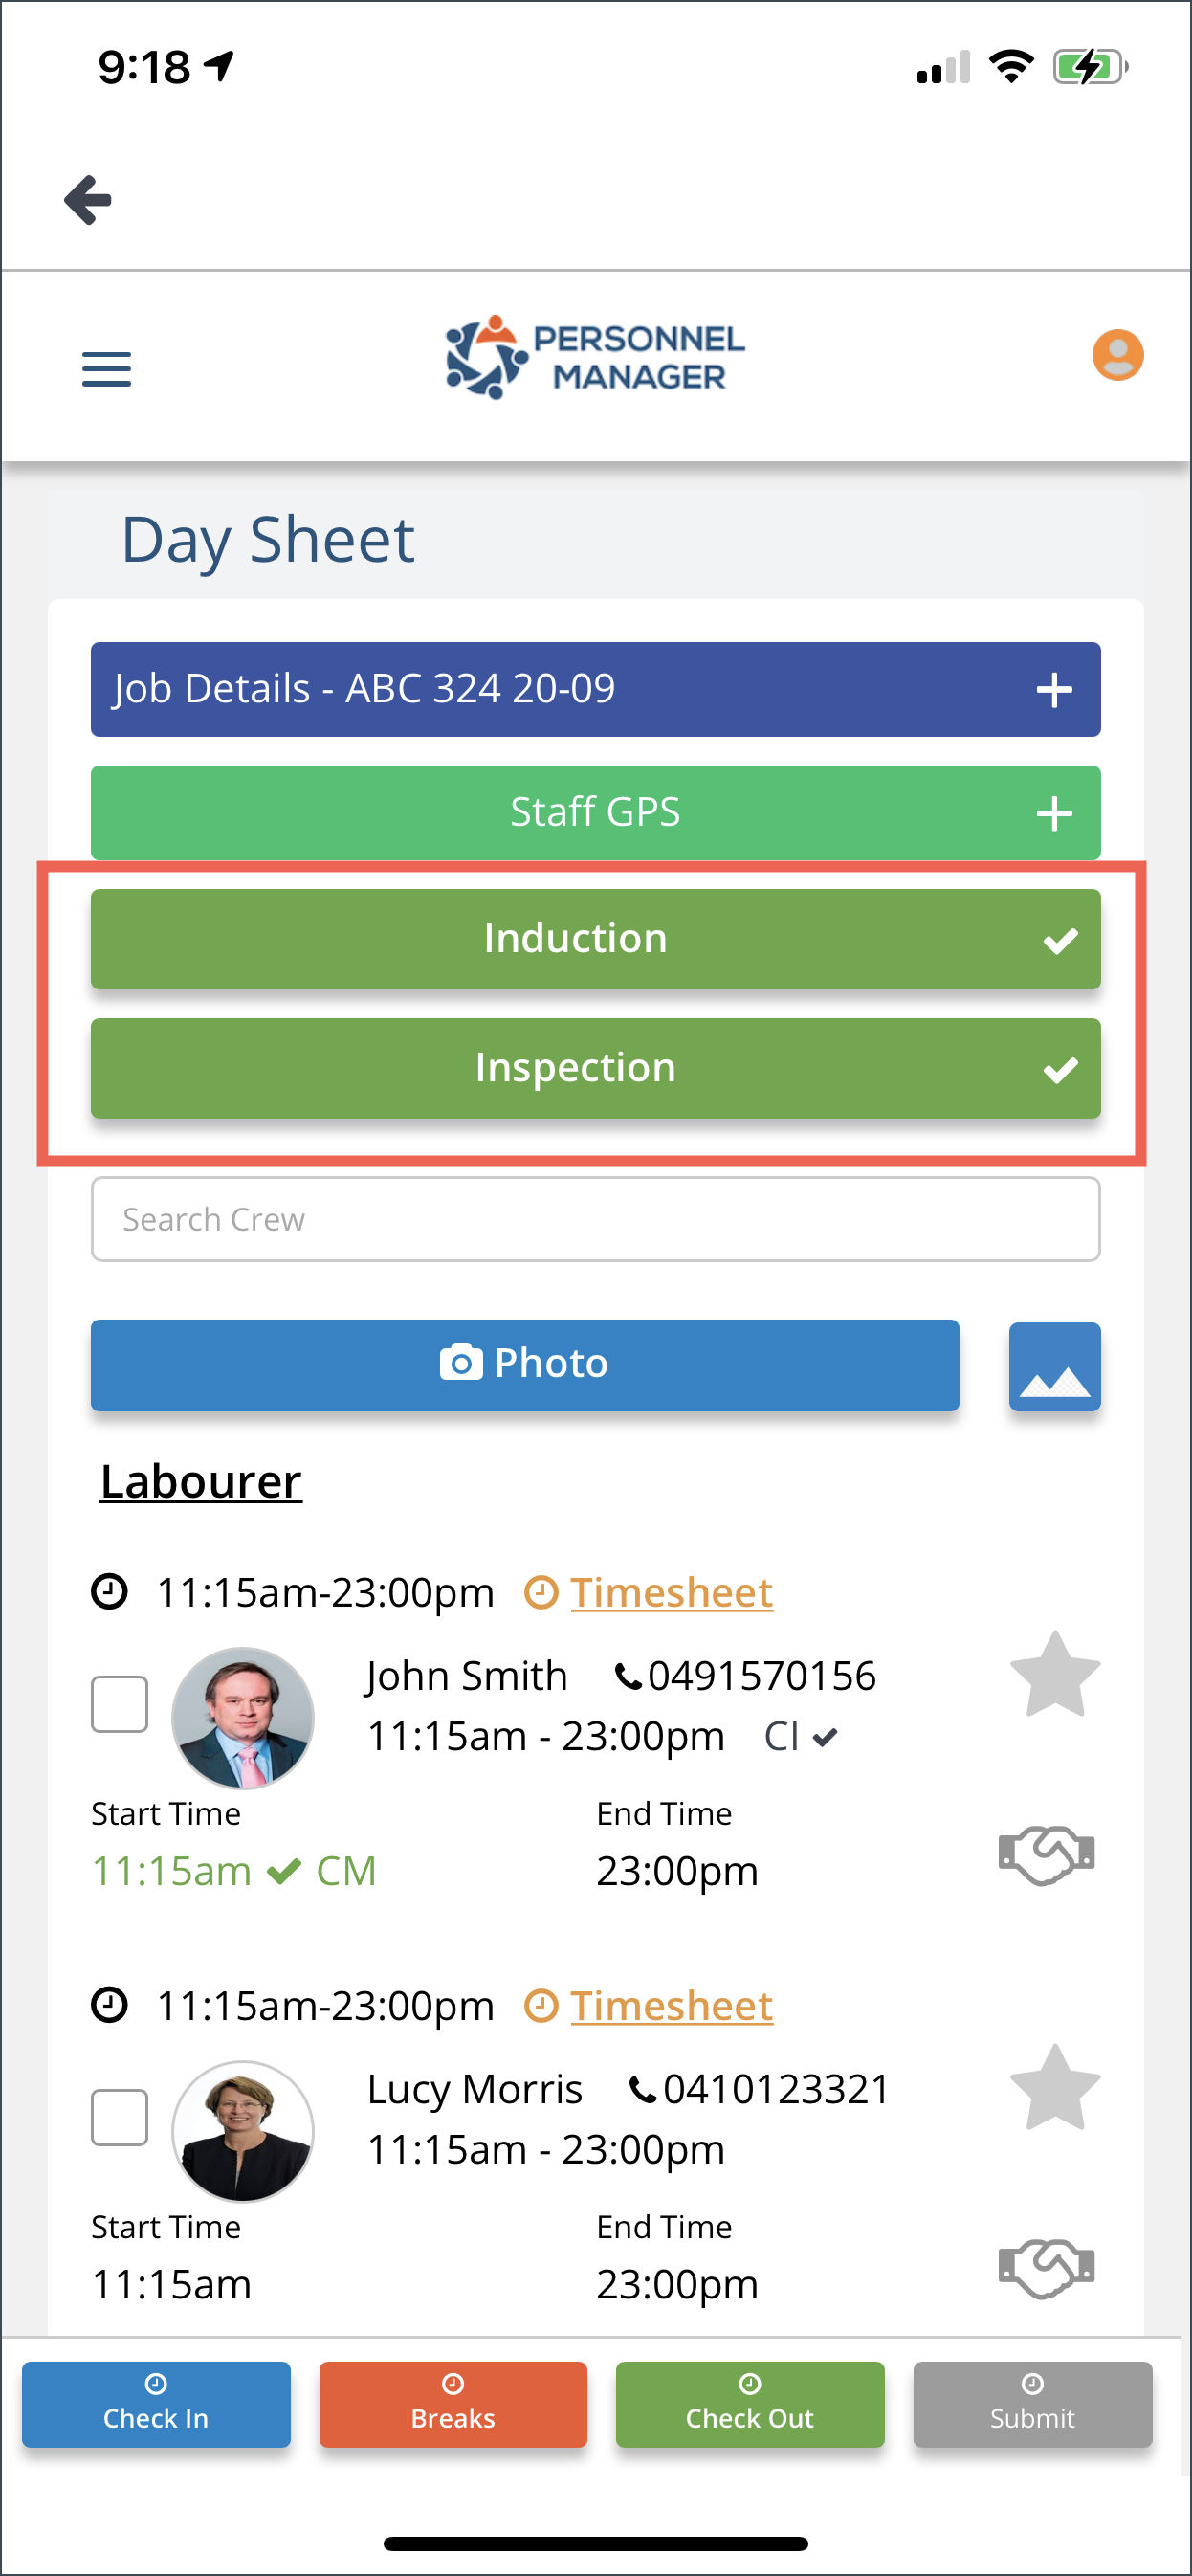
The Team Leader Day Sheet has a tab for Induction and Inspection. Tap on these tabs and it will open the safety forms which you will need to complete and submit.
Once these forms have been accomplished, a check mark will appear on the tabs.
For instruction on how to fill out Inspection & Induction, please see Safety Forms.
Handshake Icon
After you have conducted the Safety Induction and other safety discussions, you need to instruct your crew member to click the Handshake icon on their PM Crew App to signify that they understood the SWMS/Tool Box, Induction, Policies, etc.
When they tap on the handshake icon, the colour will change to green and it will reflect back on your own Team Leader Day Sheet. Alternatively, you can ask them to tap the handshake icon on your Day Sheet to signify they agree with all the policies and other safety matters that have been discussed.
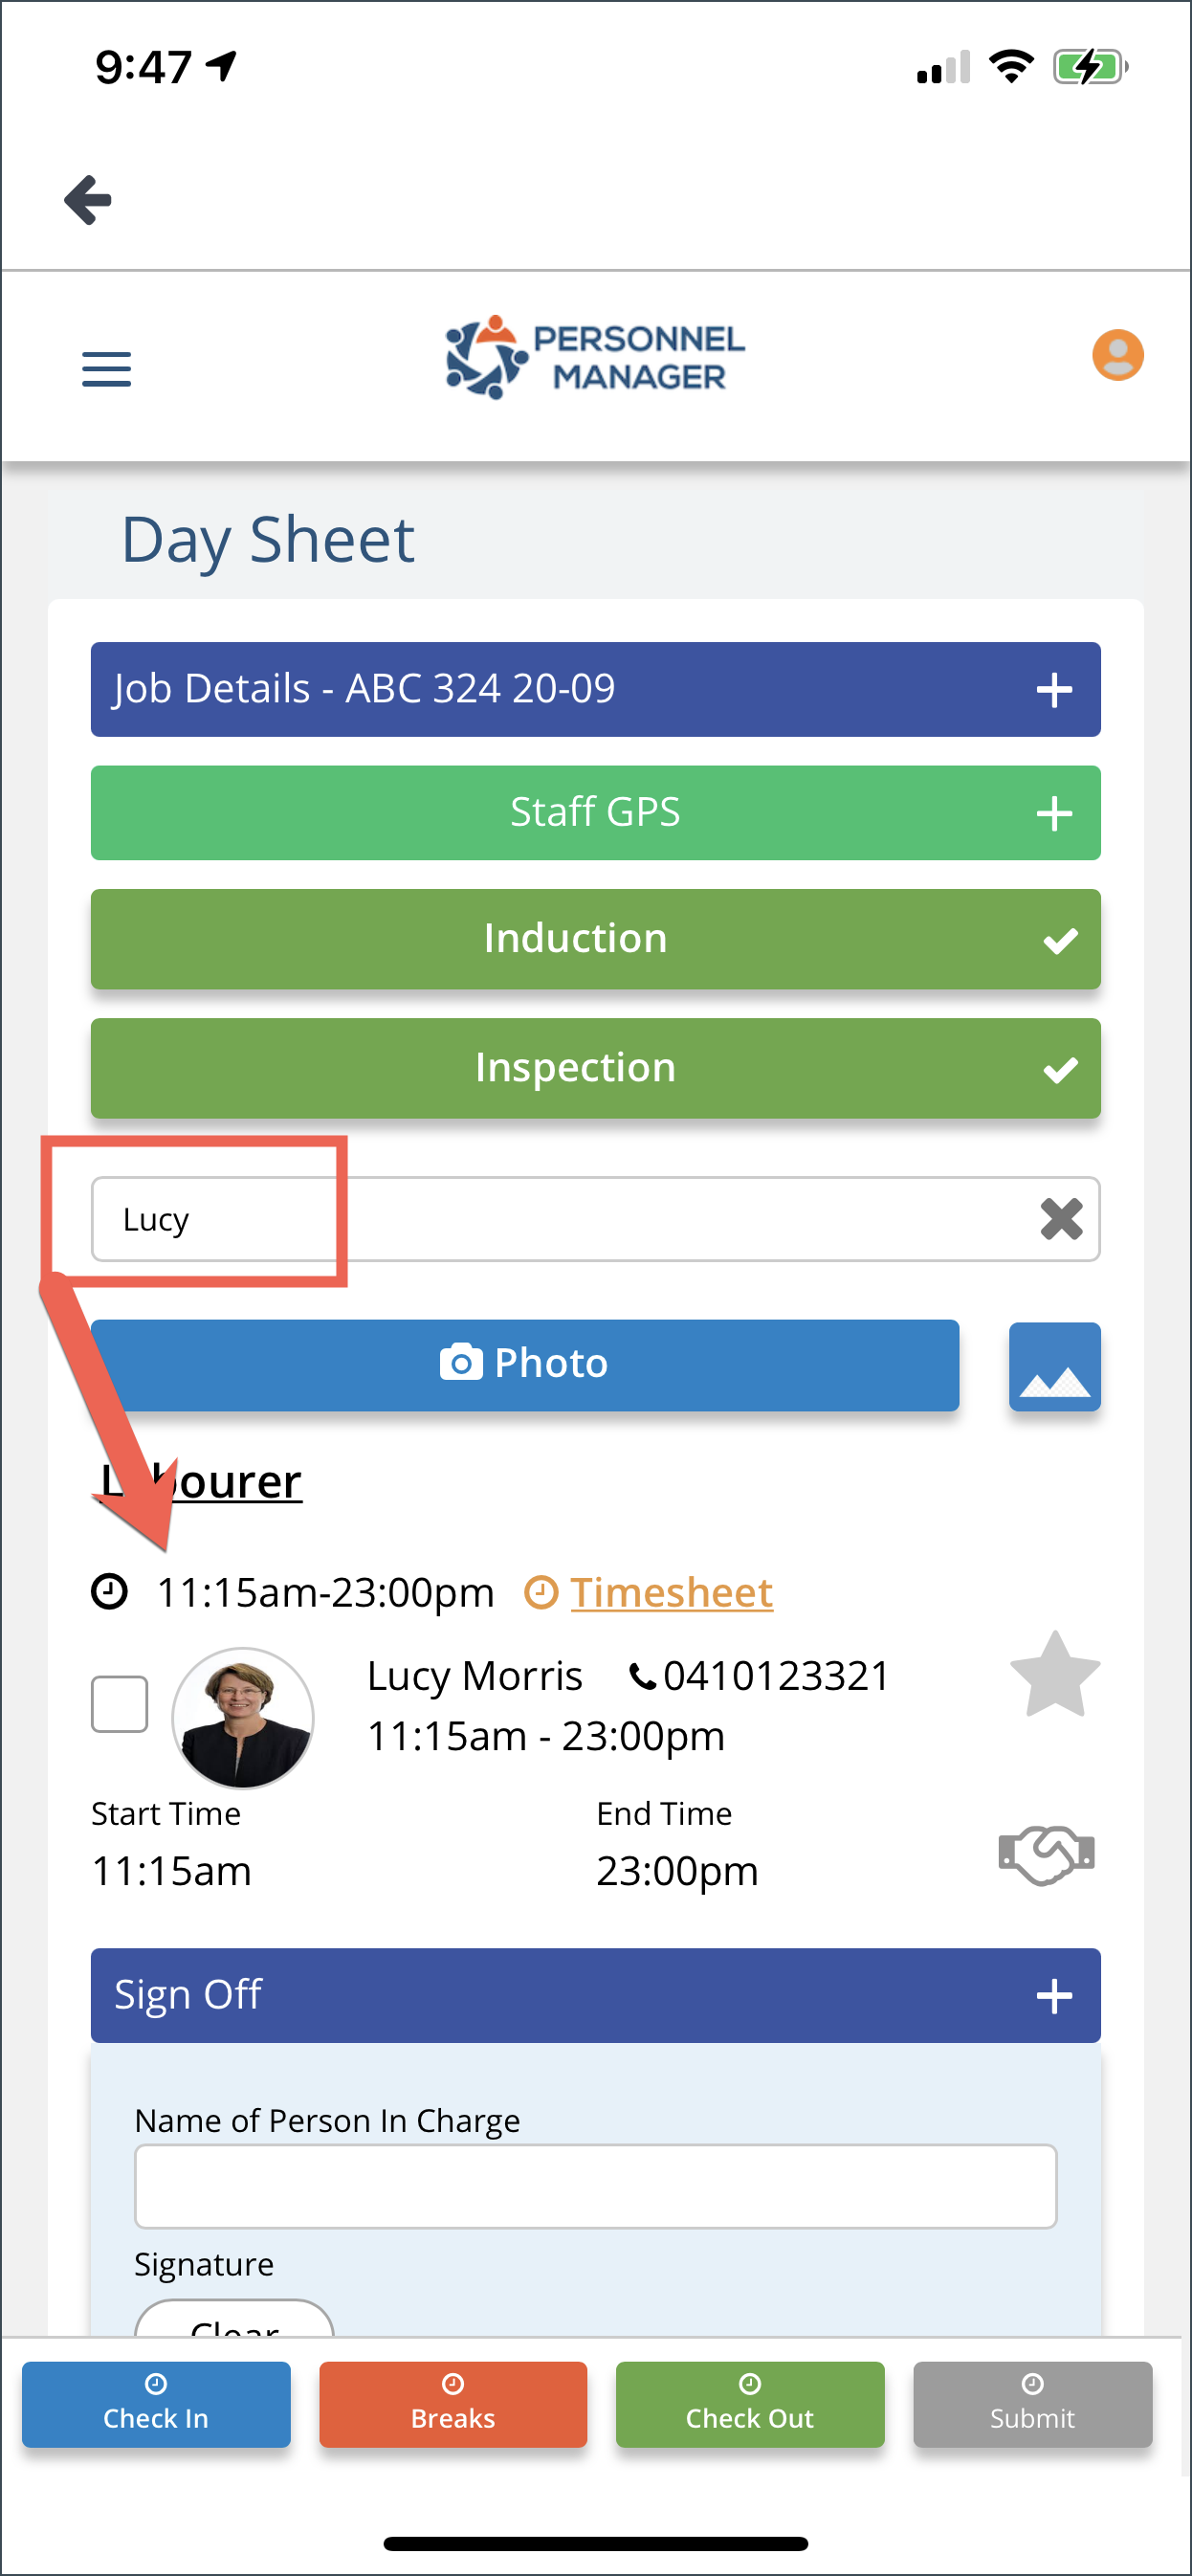
Search Crew
The search function is useful when there are a lot of crews confirmed in a job. Simply type on the search field and the crew will appear.
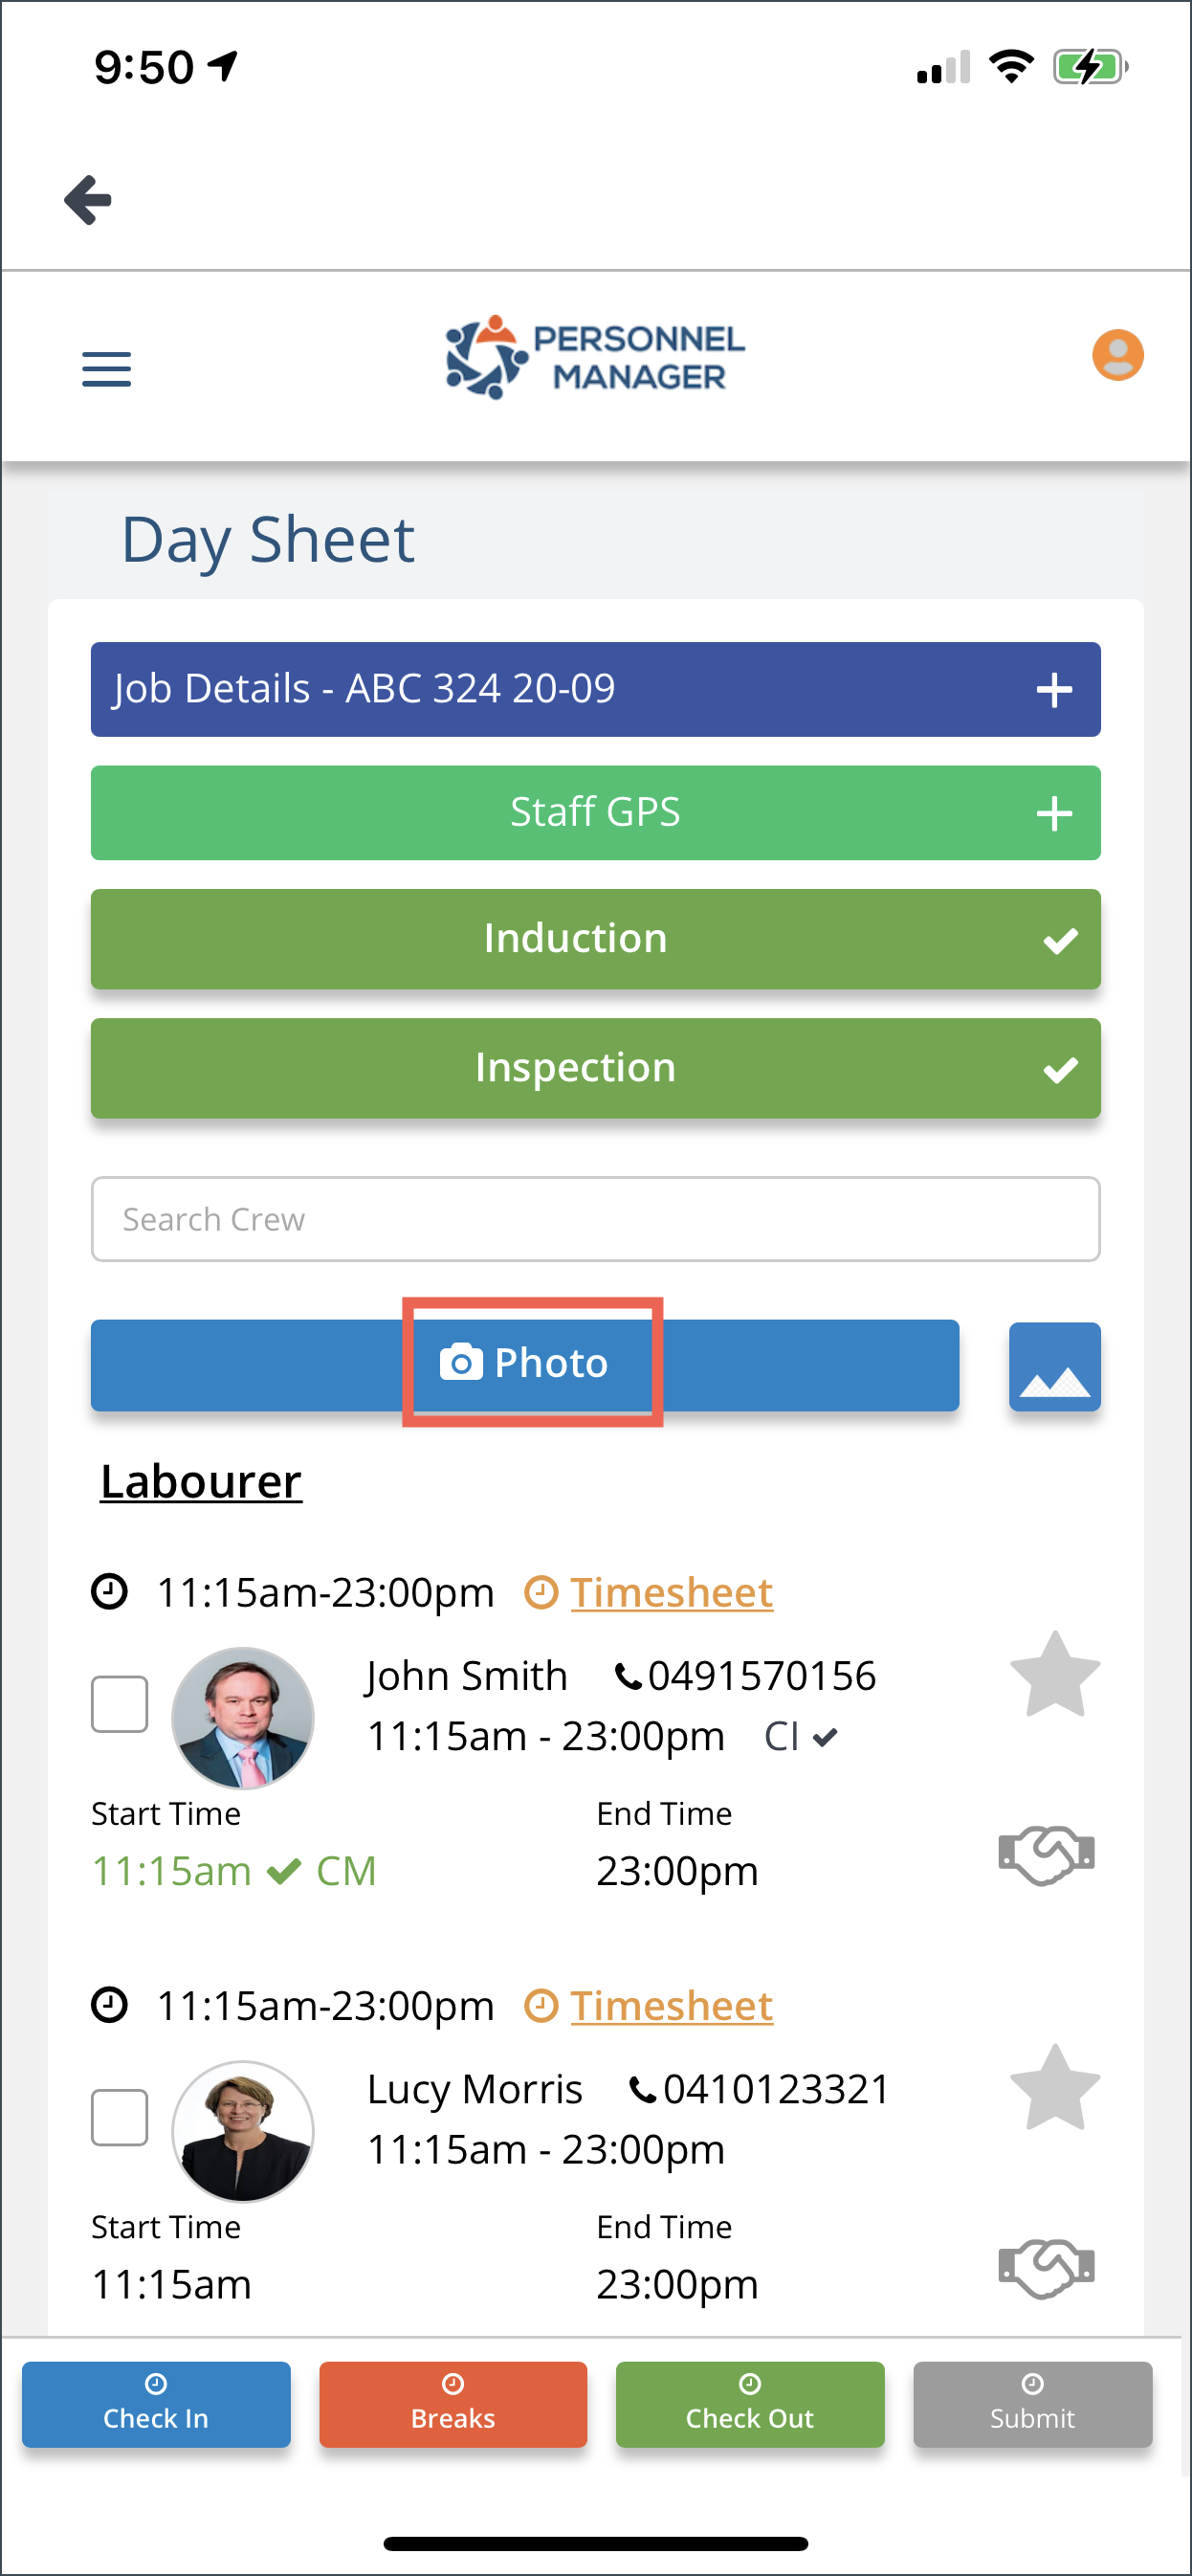
Photo
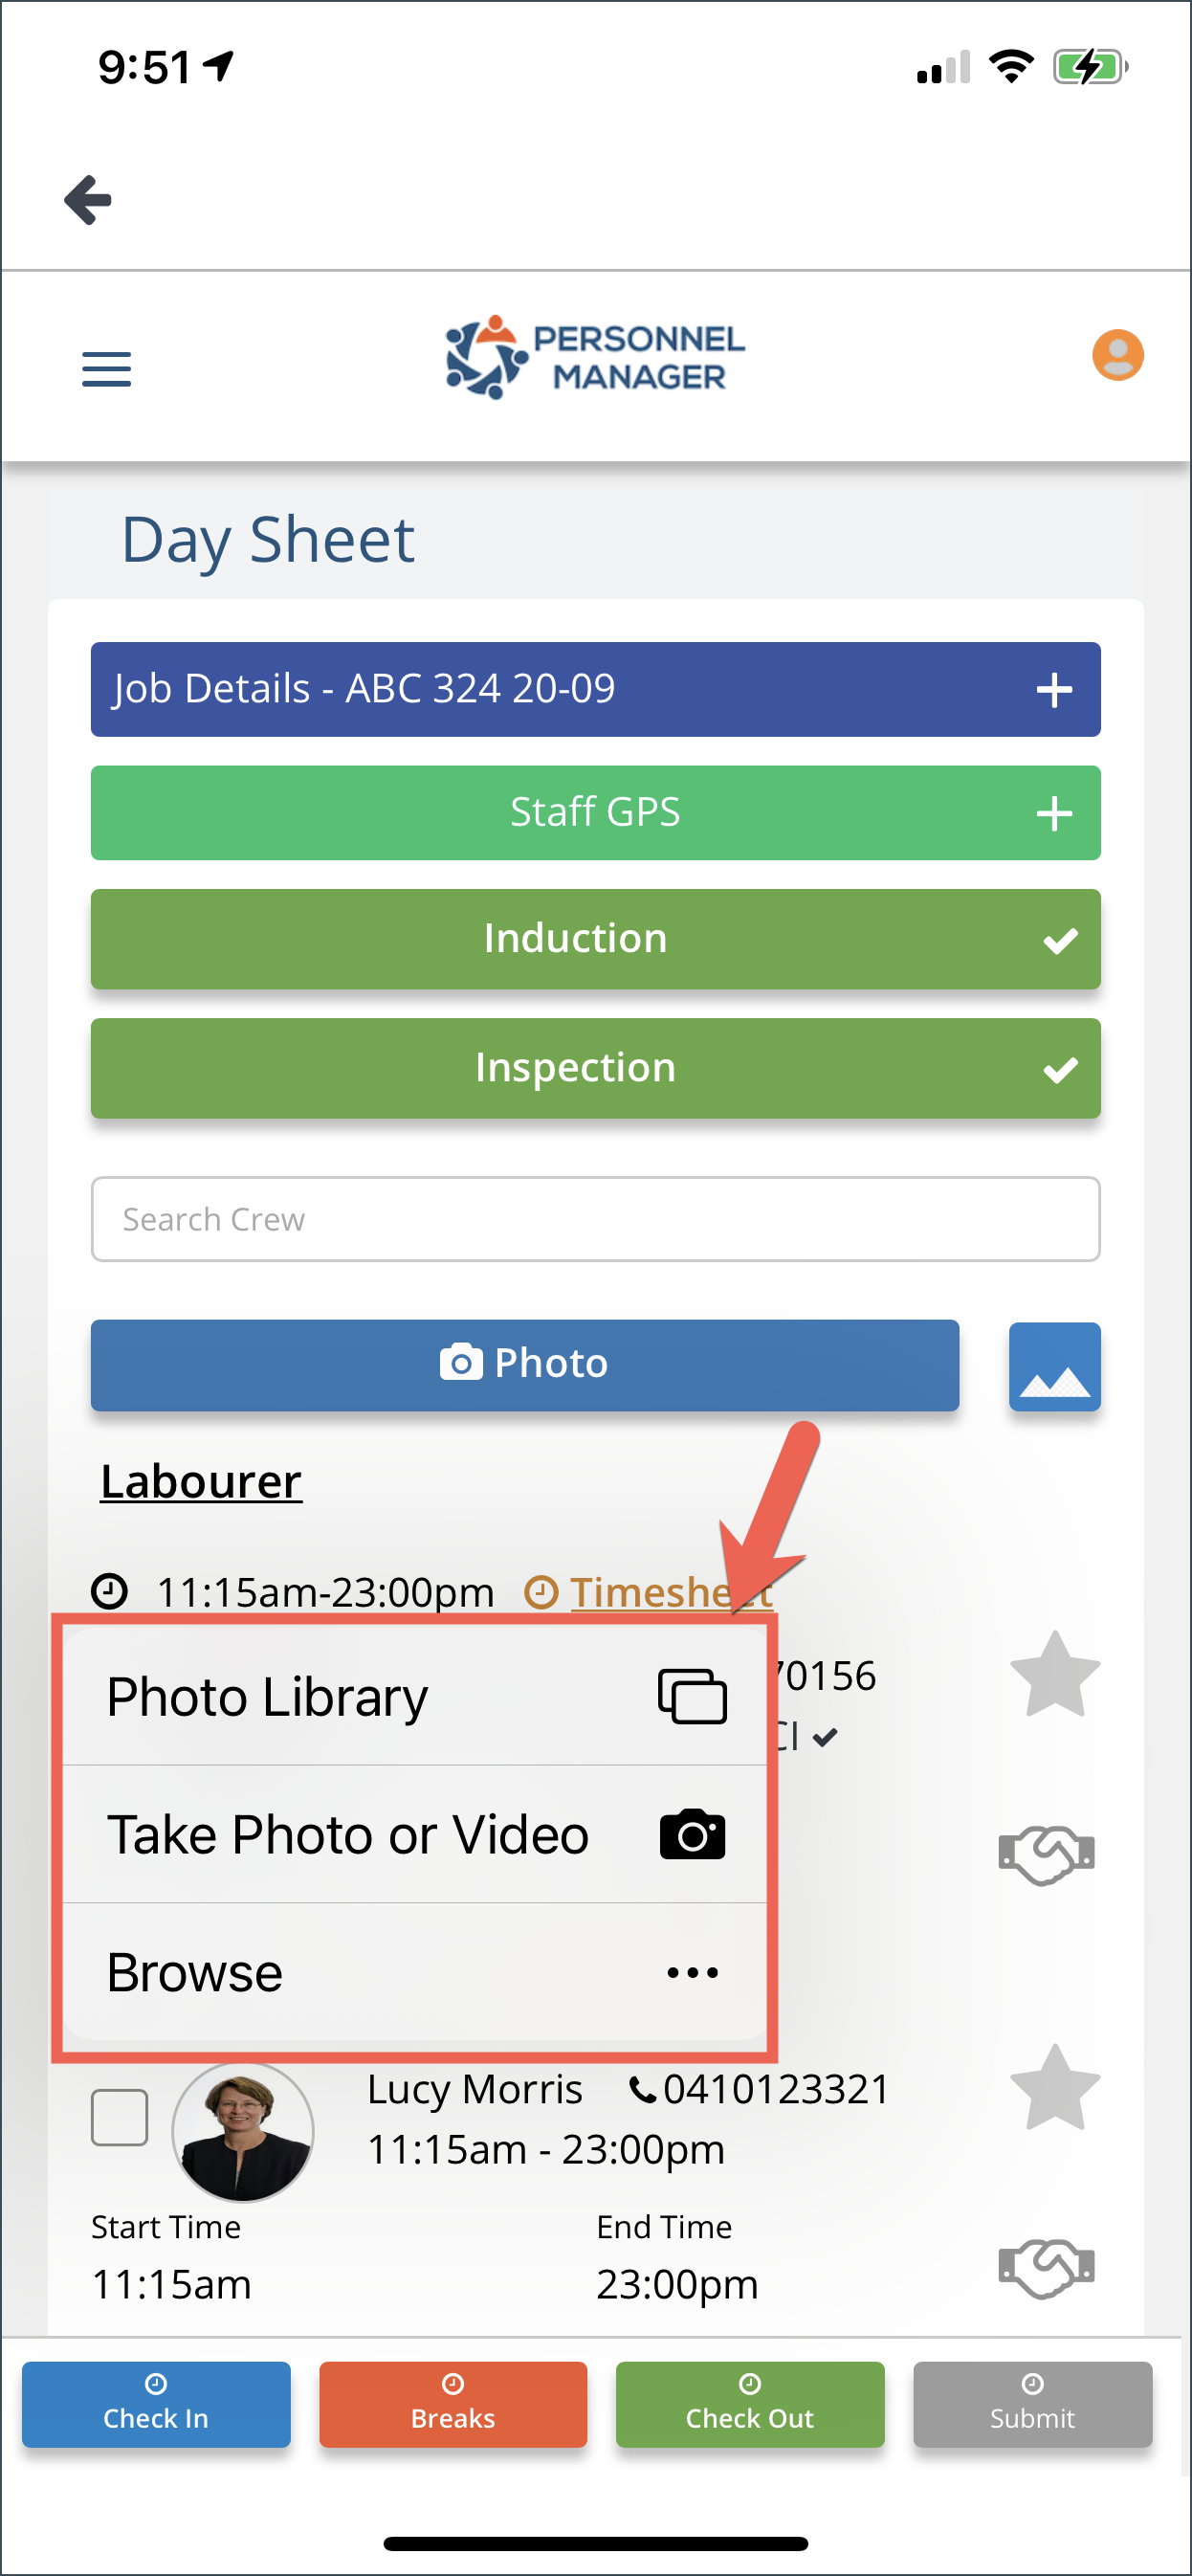
Some clients require for photo to be submitted. Simply click on the Photo button, then you can choose to select photos from your gallery or use the camera of your phone.
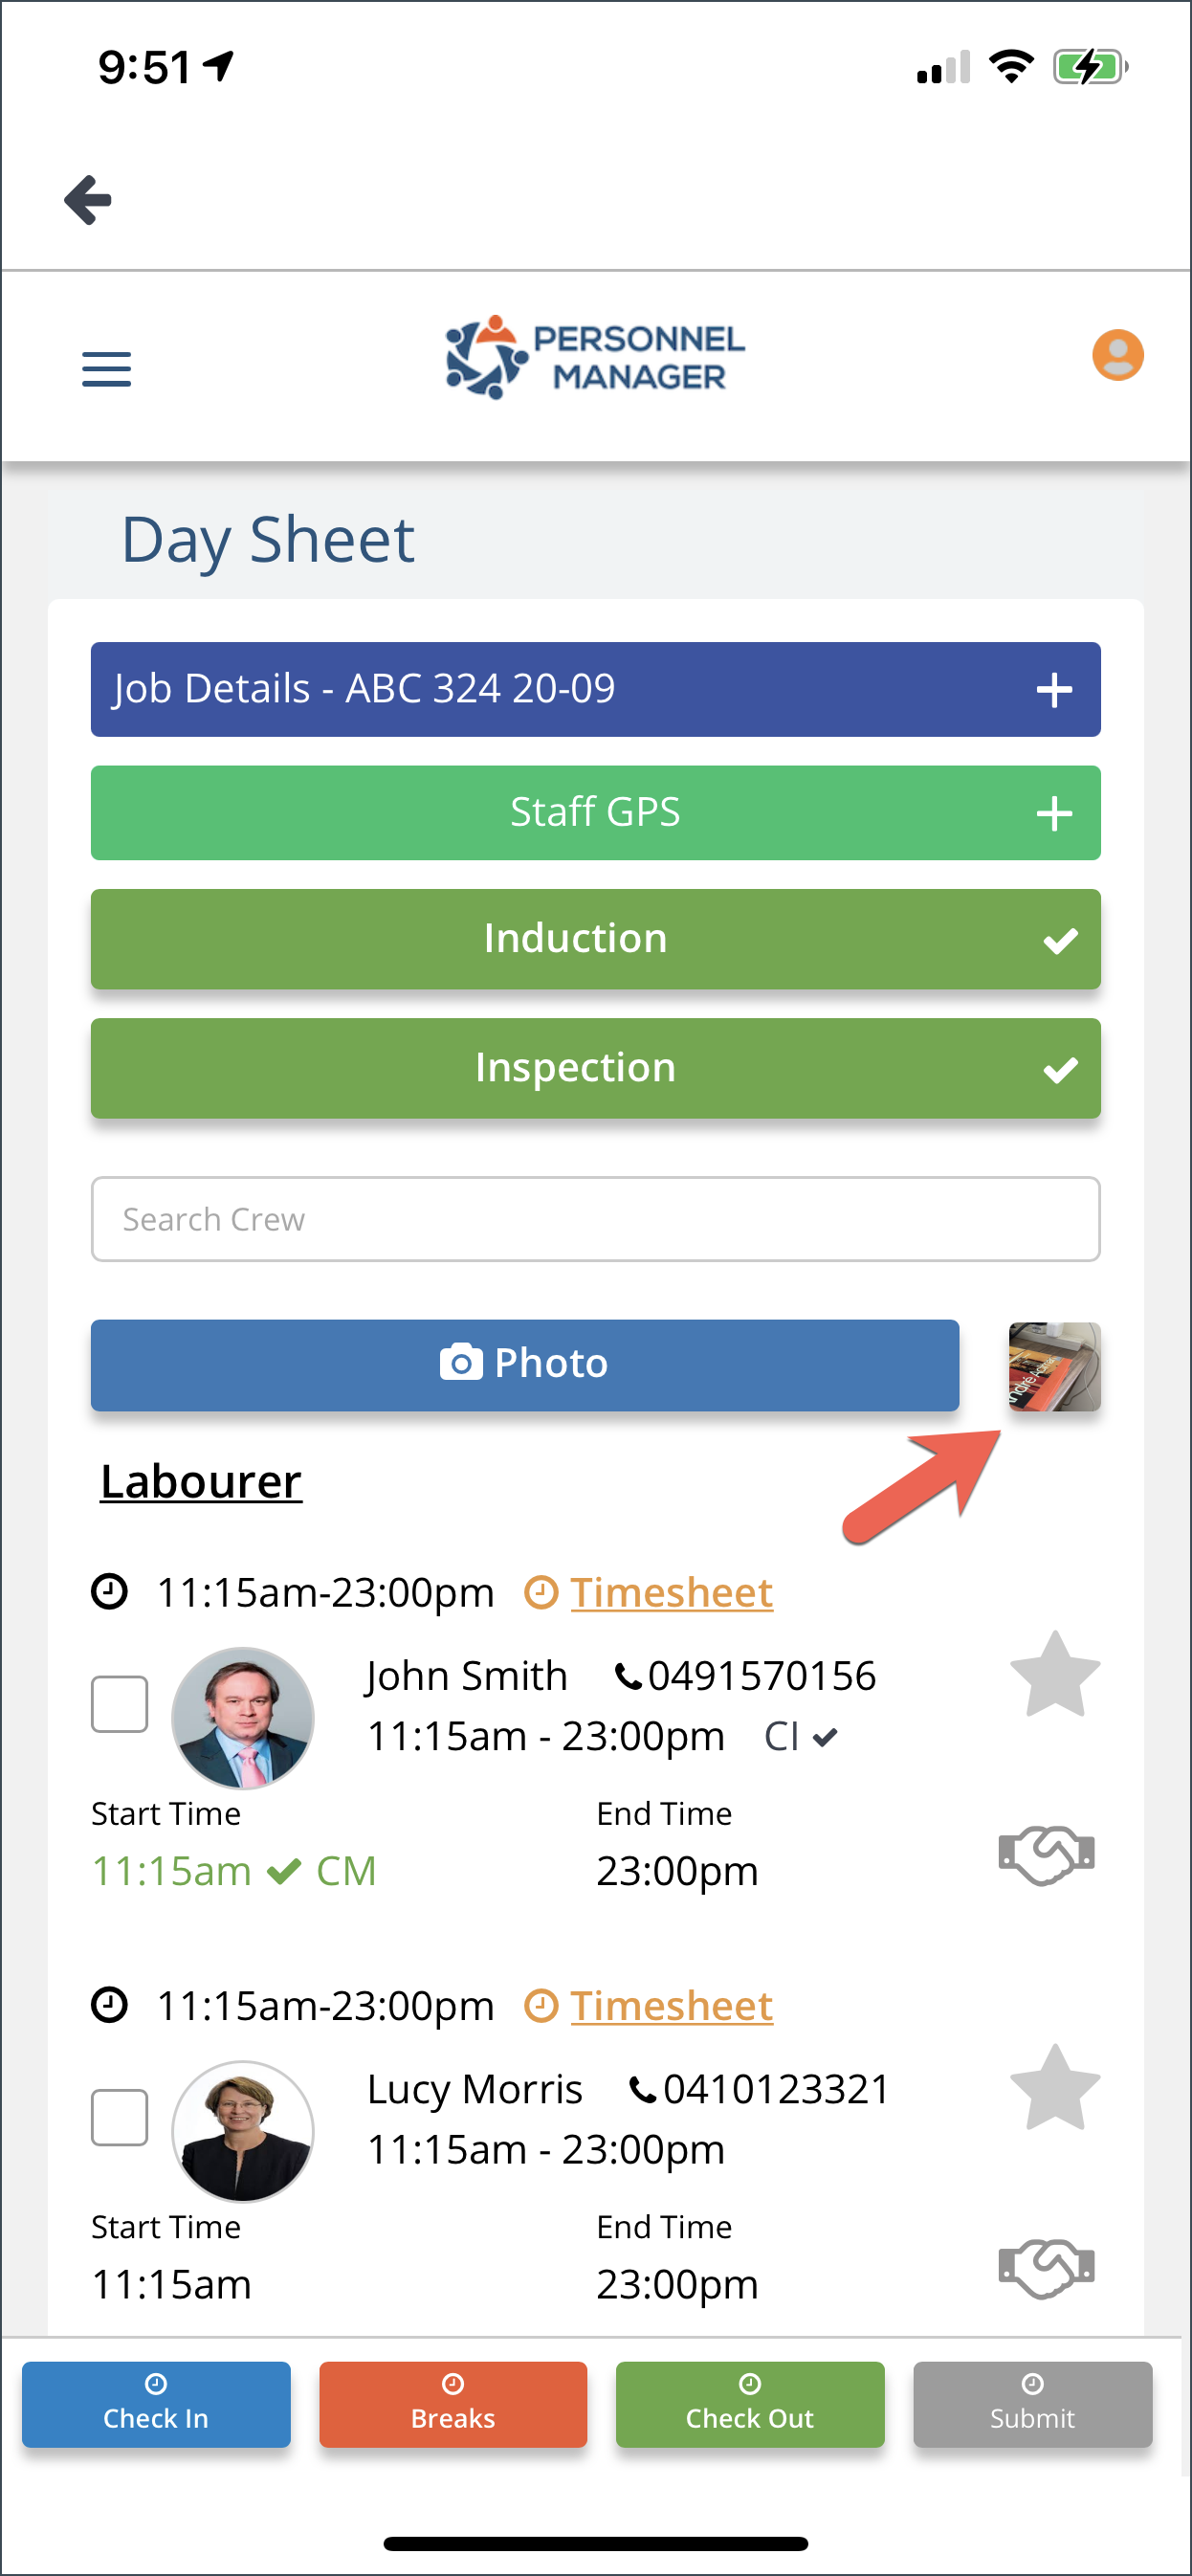
Once photo has been selected or taken, and you confirm to use the photo, it will appear on the Day Sheet.
Crew Rating
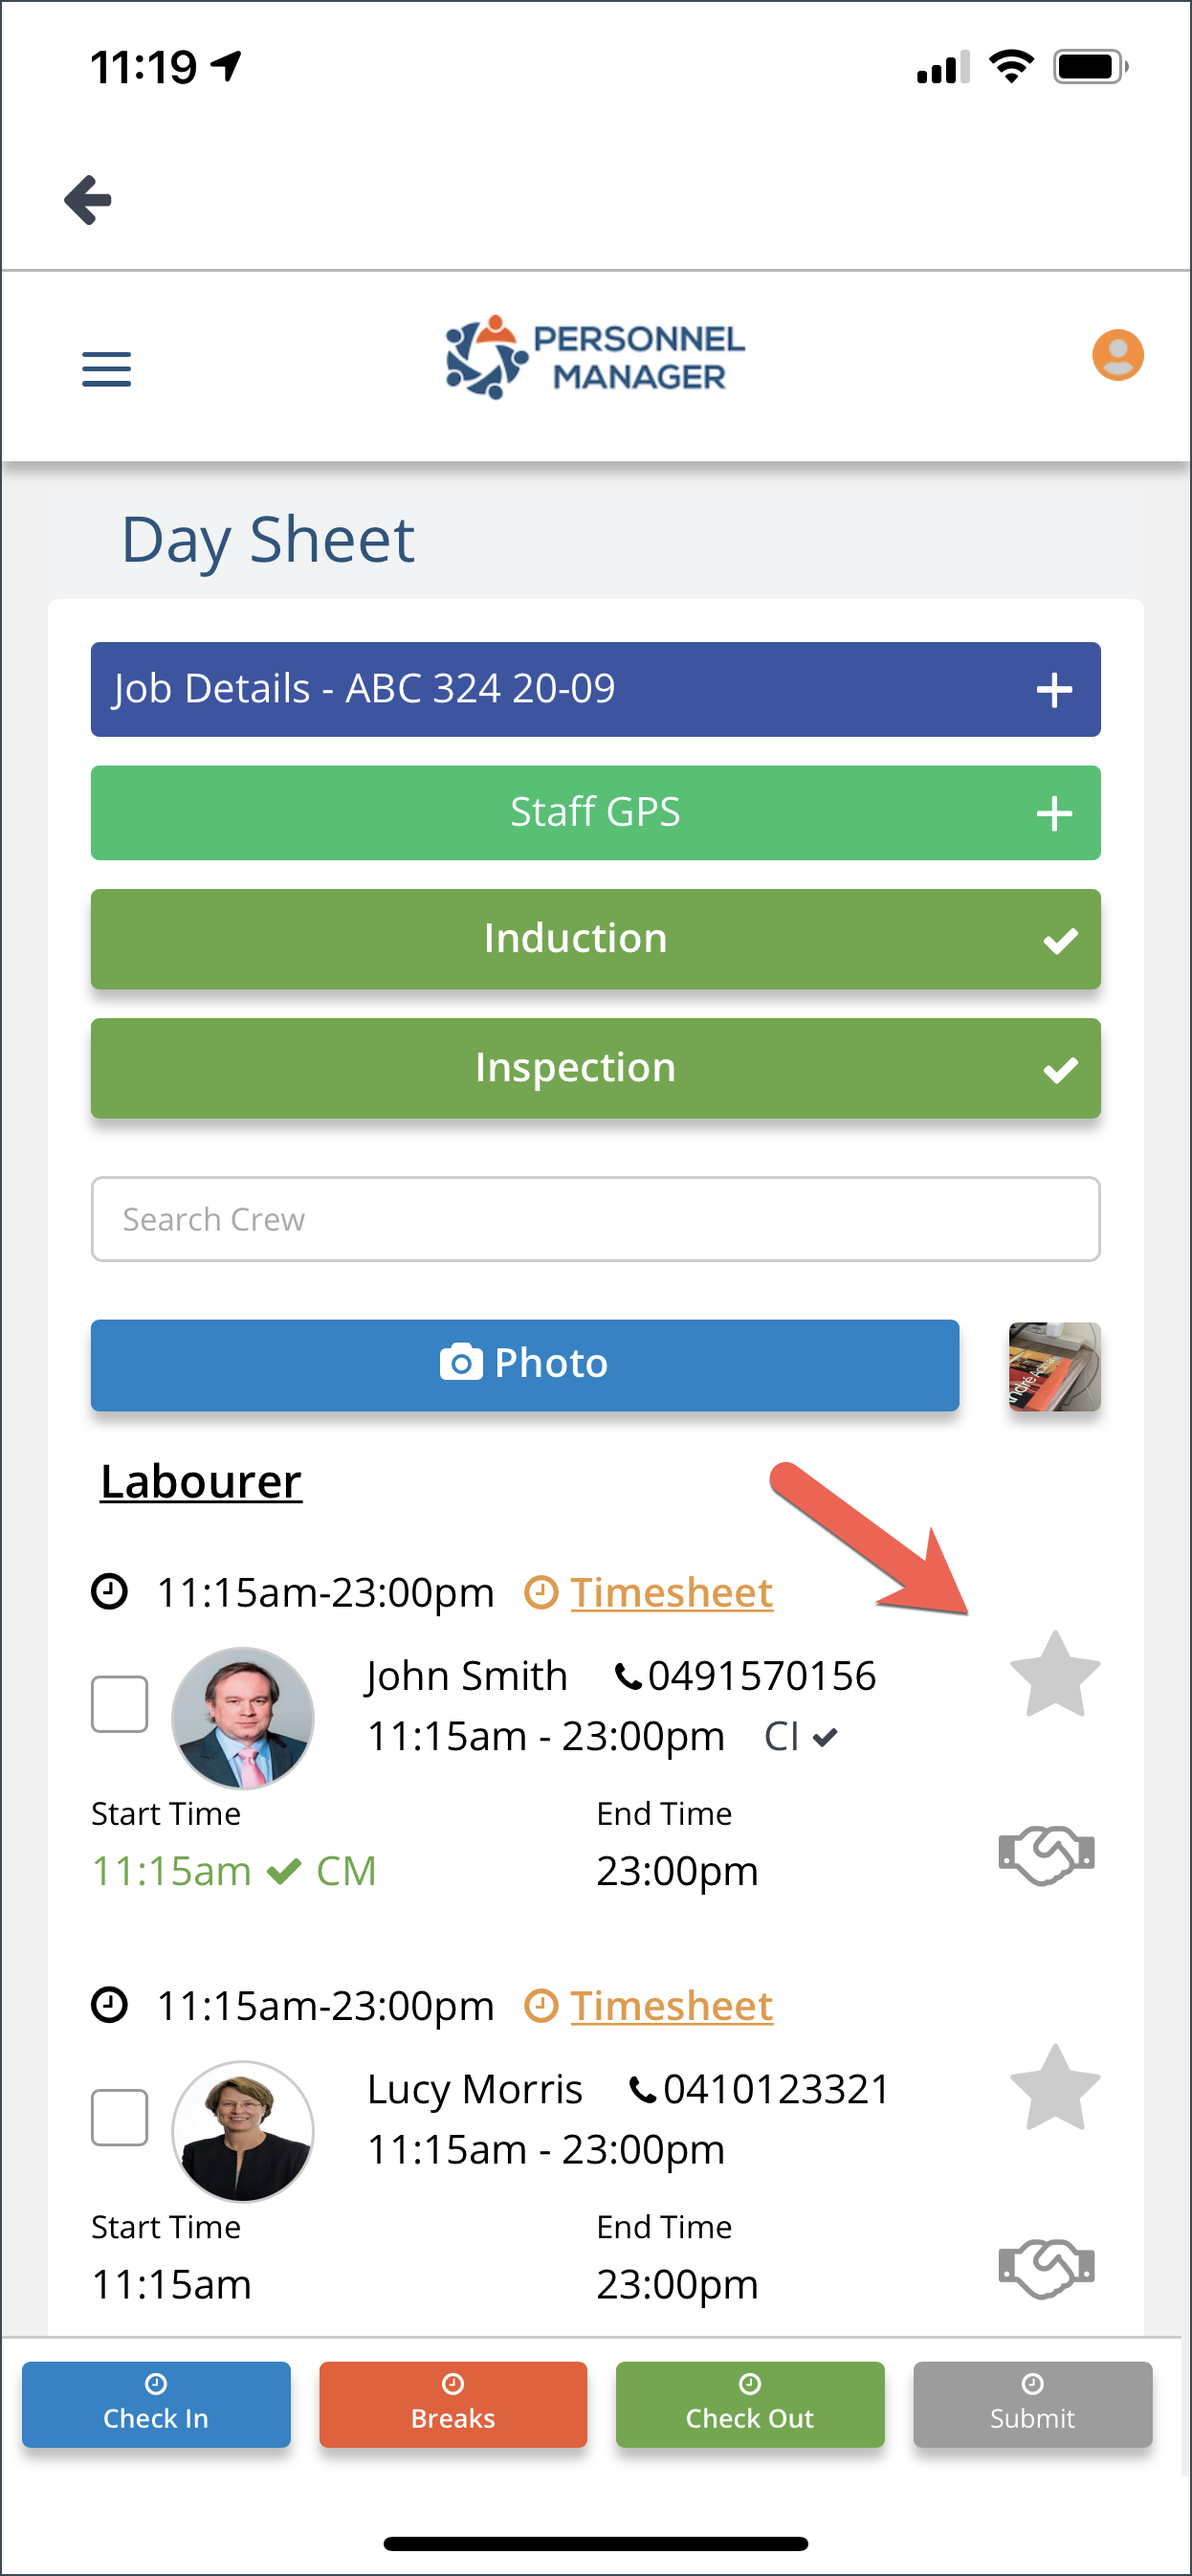
As a Team leader you can give crew ratings based on their performance and other factors. Tap the star icon to start rating the crew.
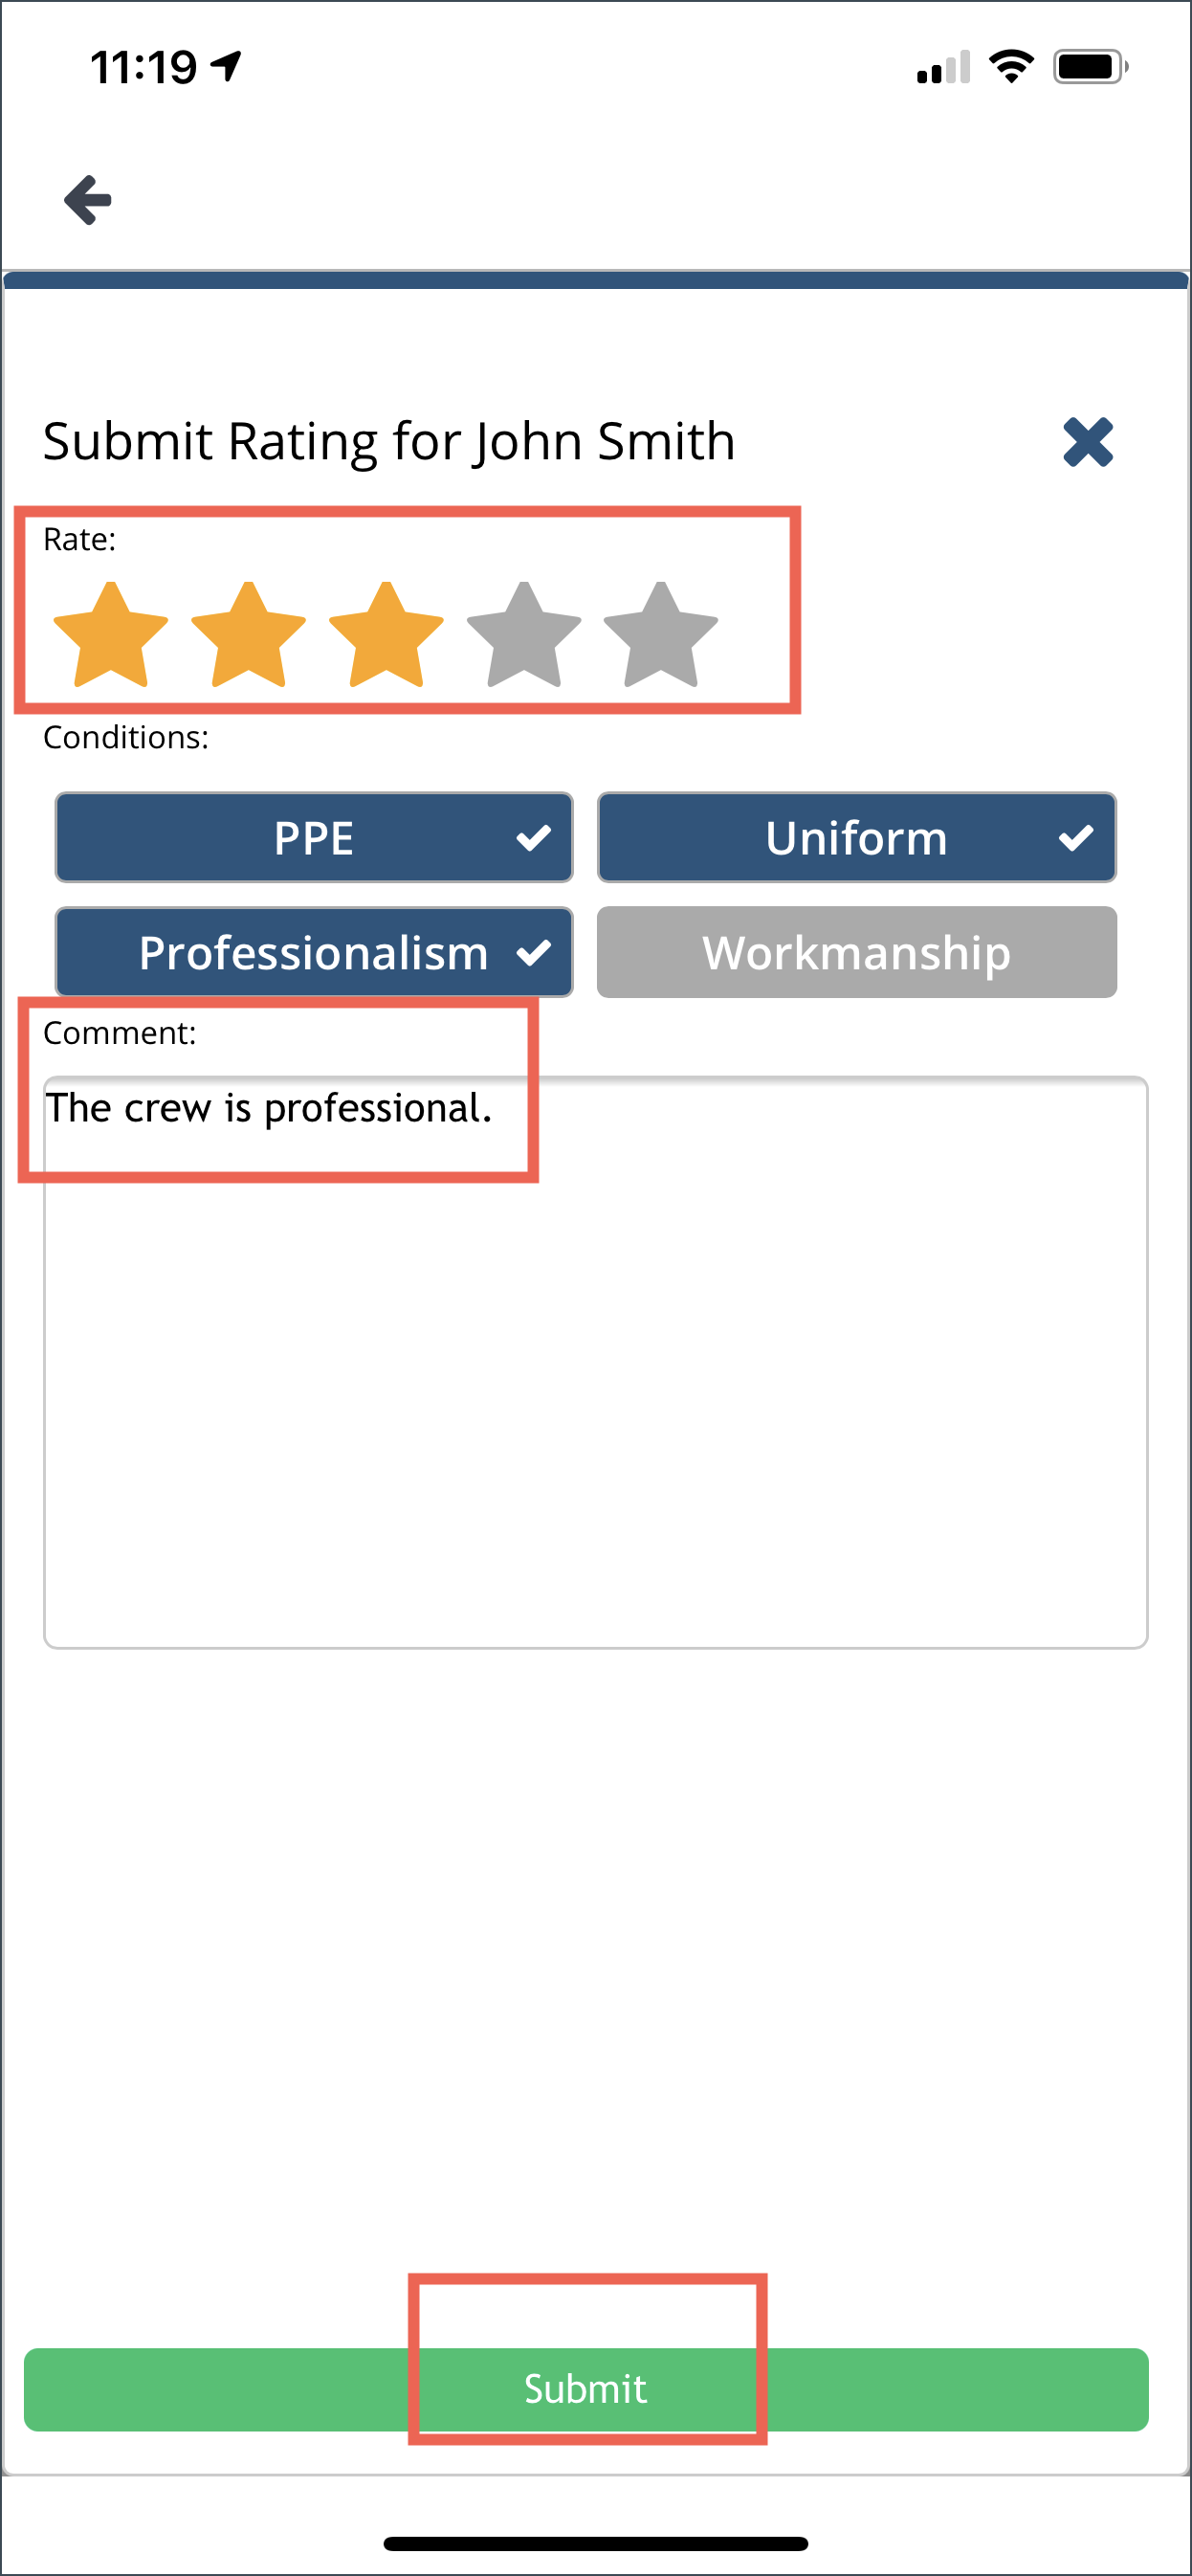
Select the Rate by tapping on the stars. This will automatically select the Conditions. Add a Comment on the field then click Submit.
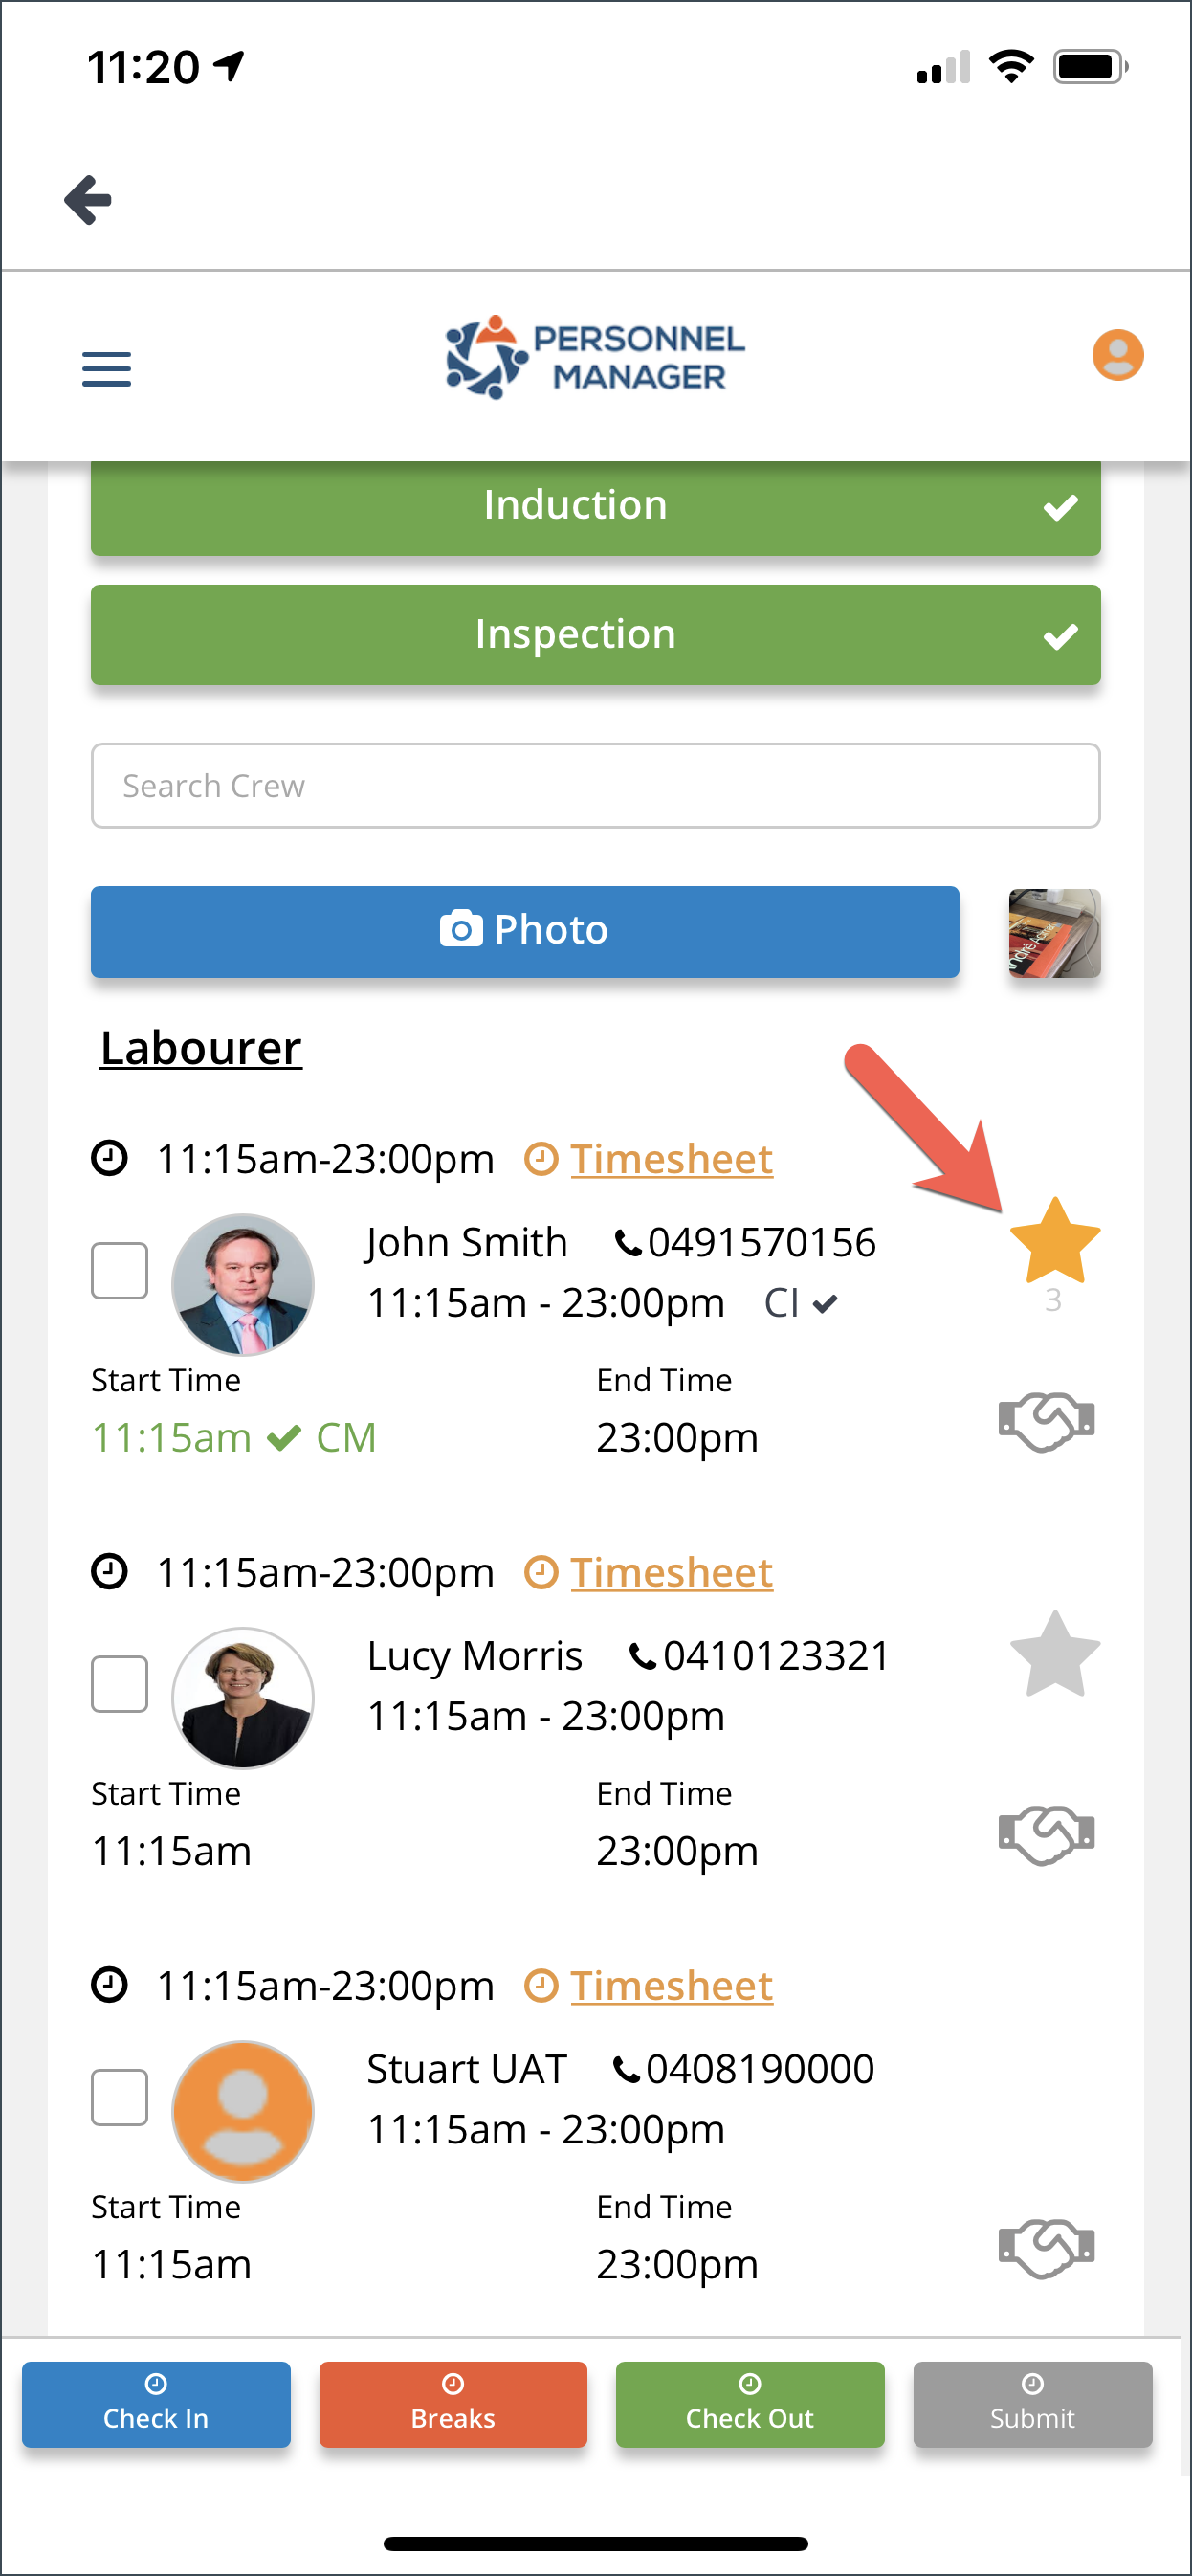
Once rating is submitted, the star will turn to yellow together with the rating you have selected.
Check In, Check Out and Break
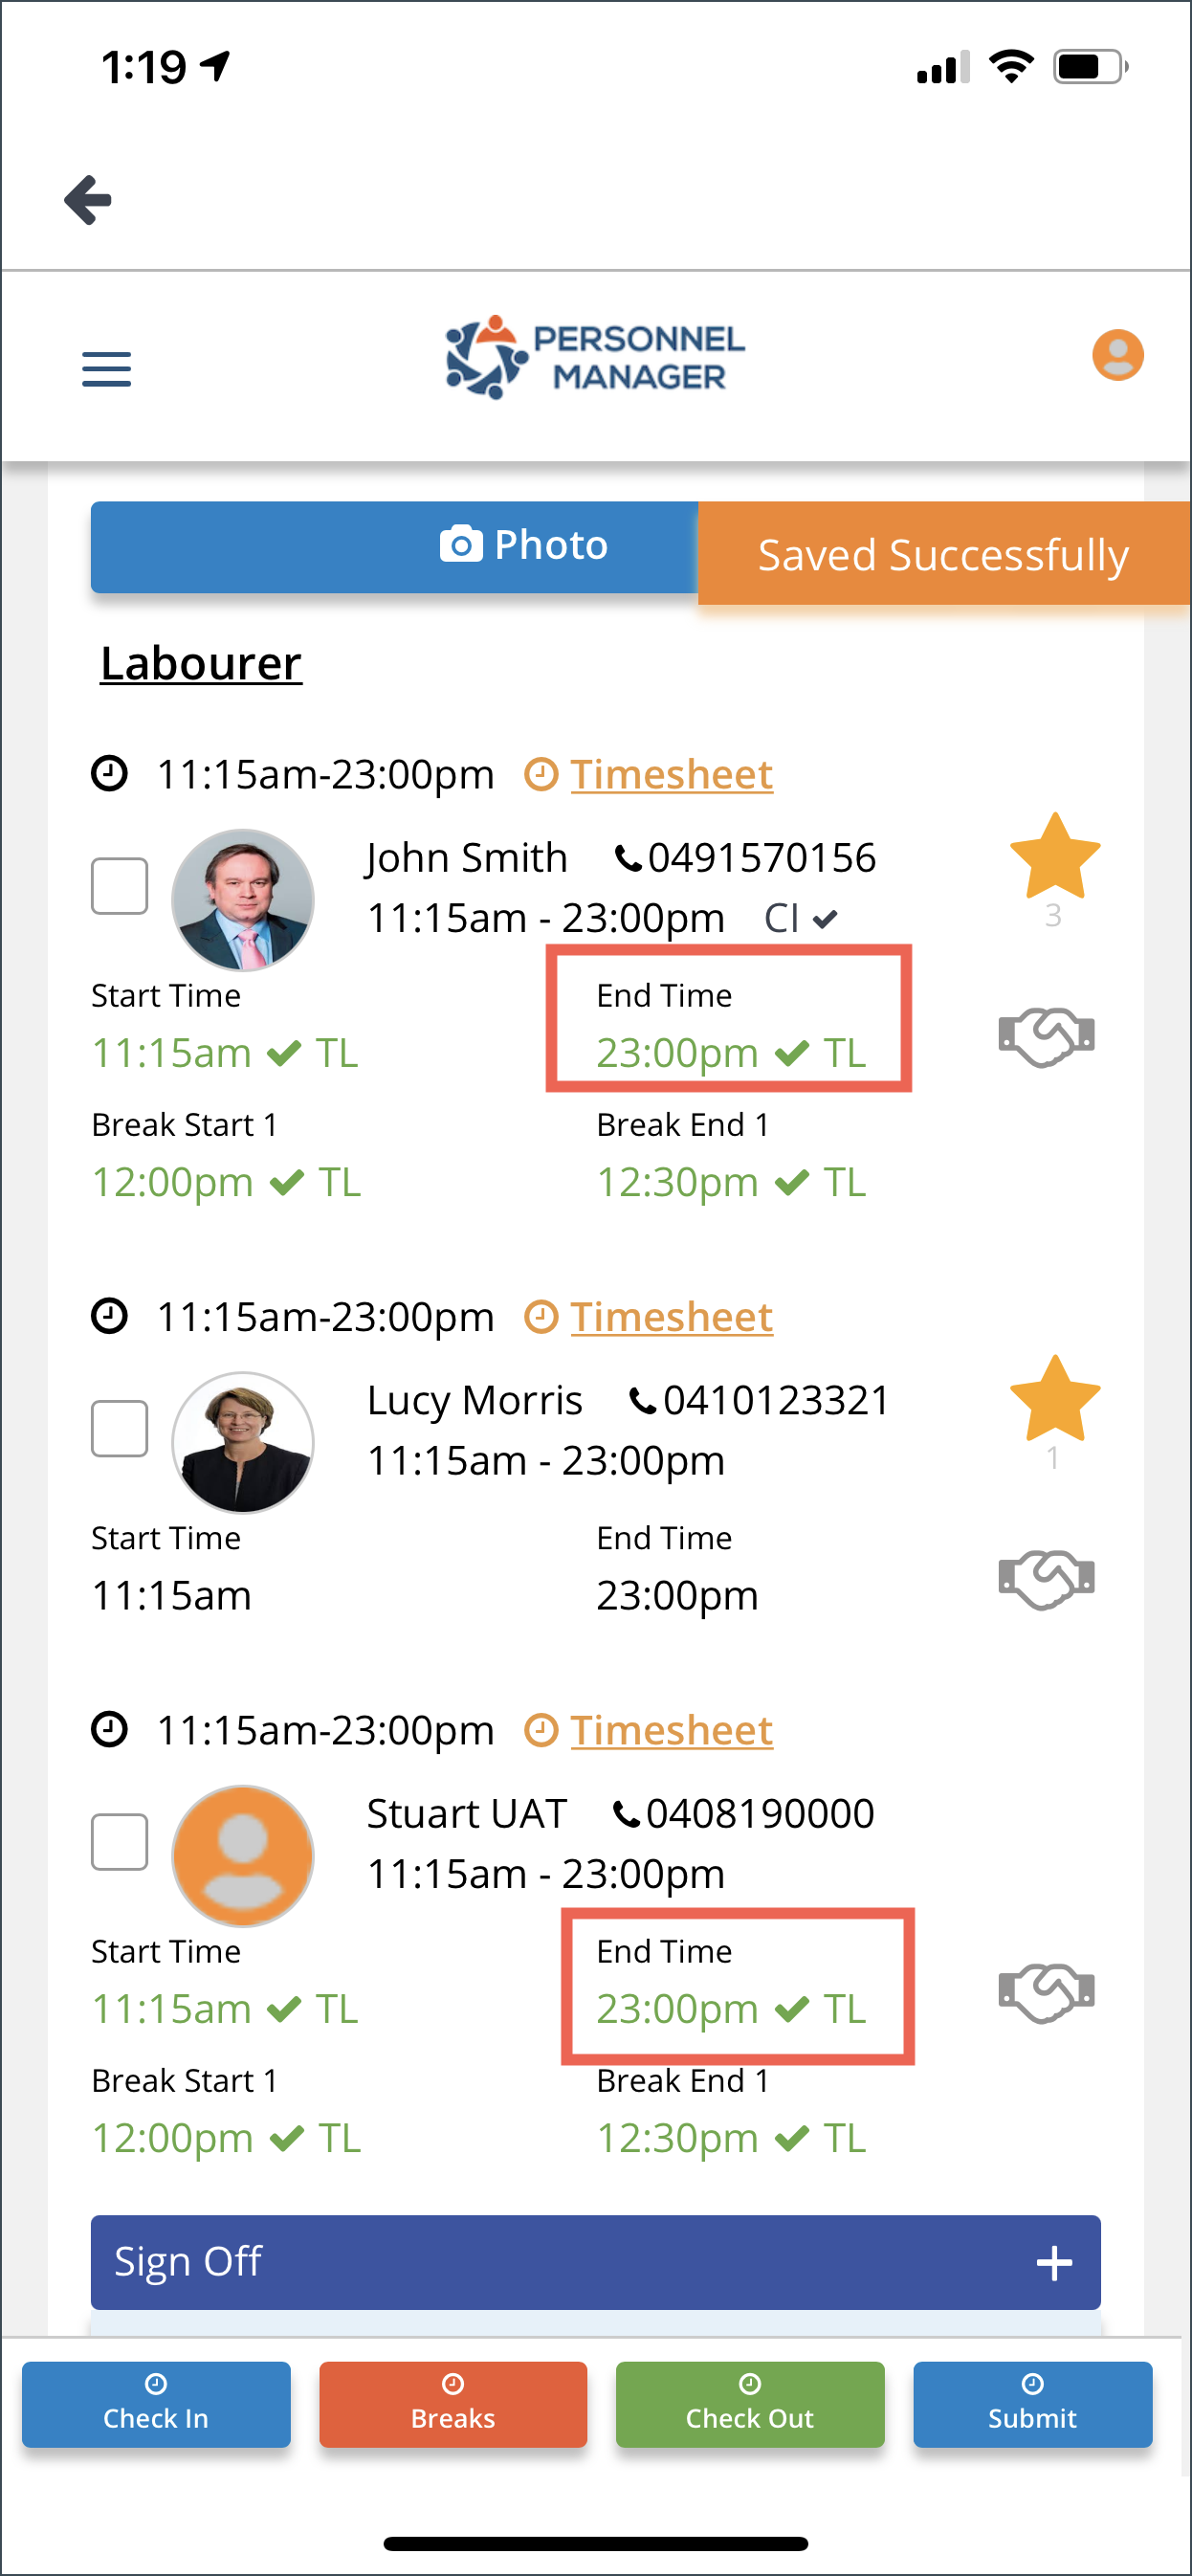
As a Team Leader you can enter times for all the crew. Simply put a check on the box of the crew name, click the Check In button, select the time from the dropdown menu and click OK.
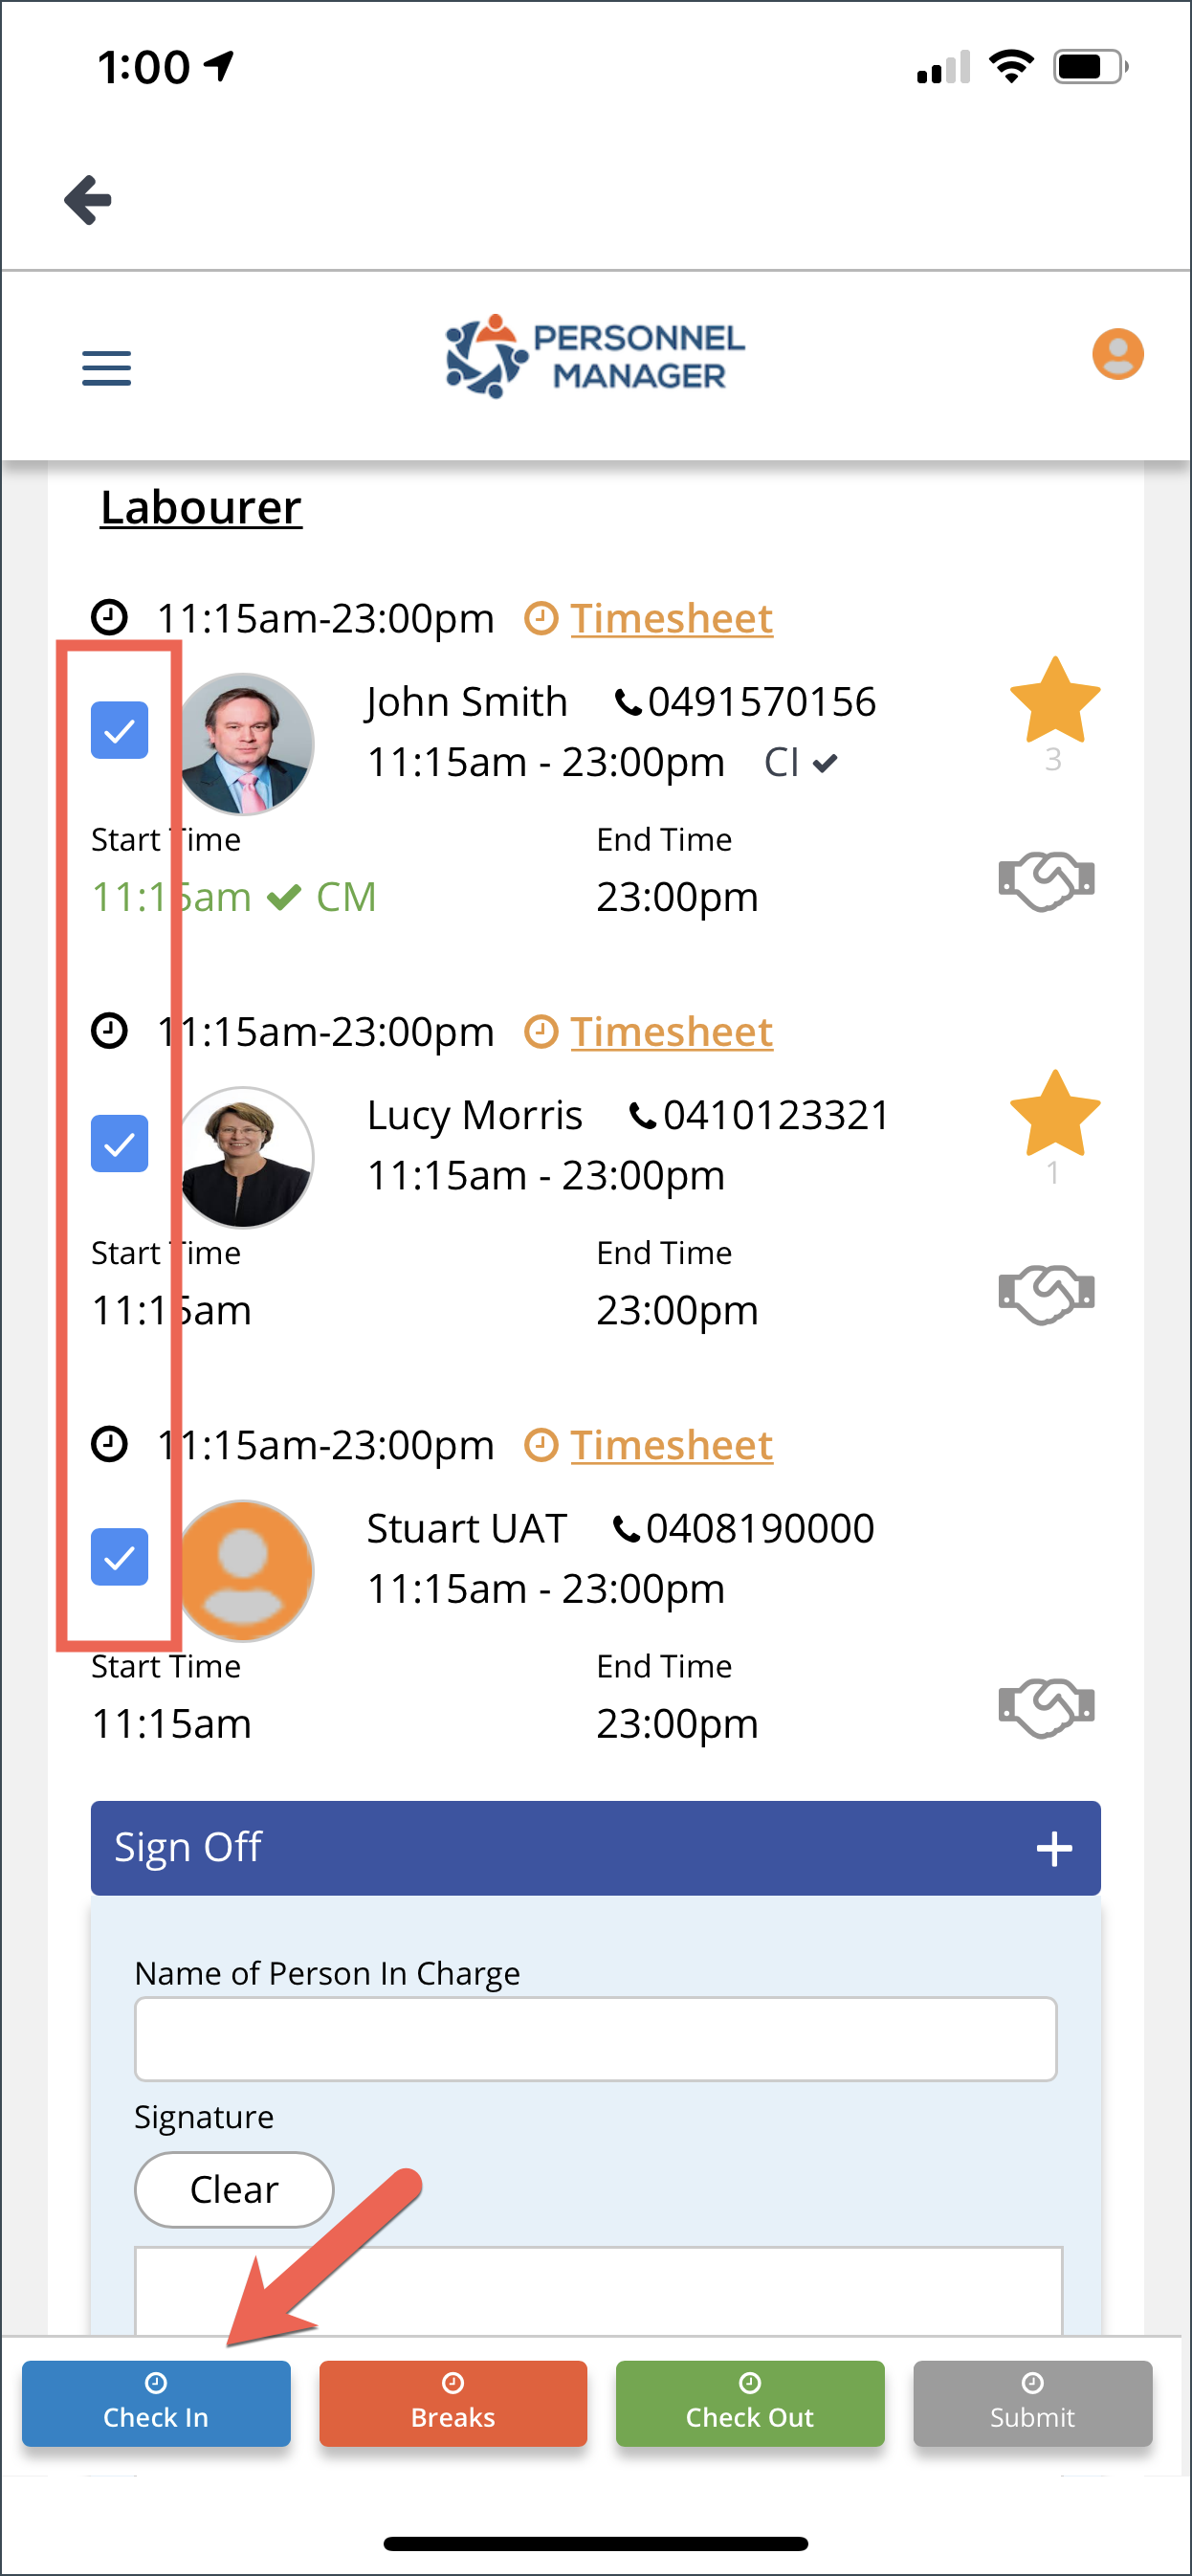
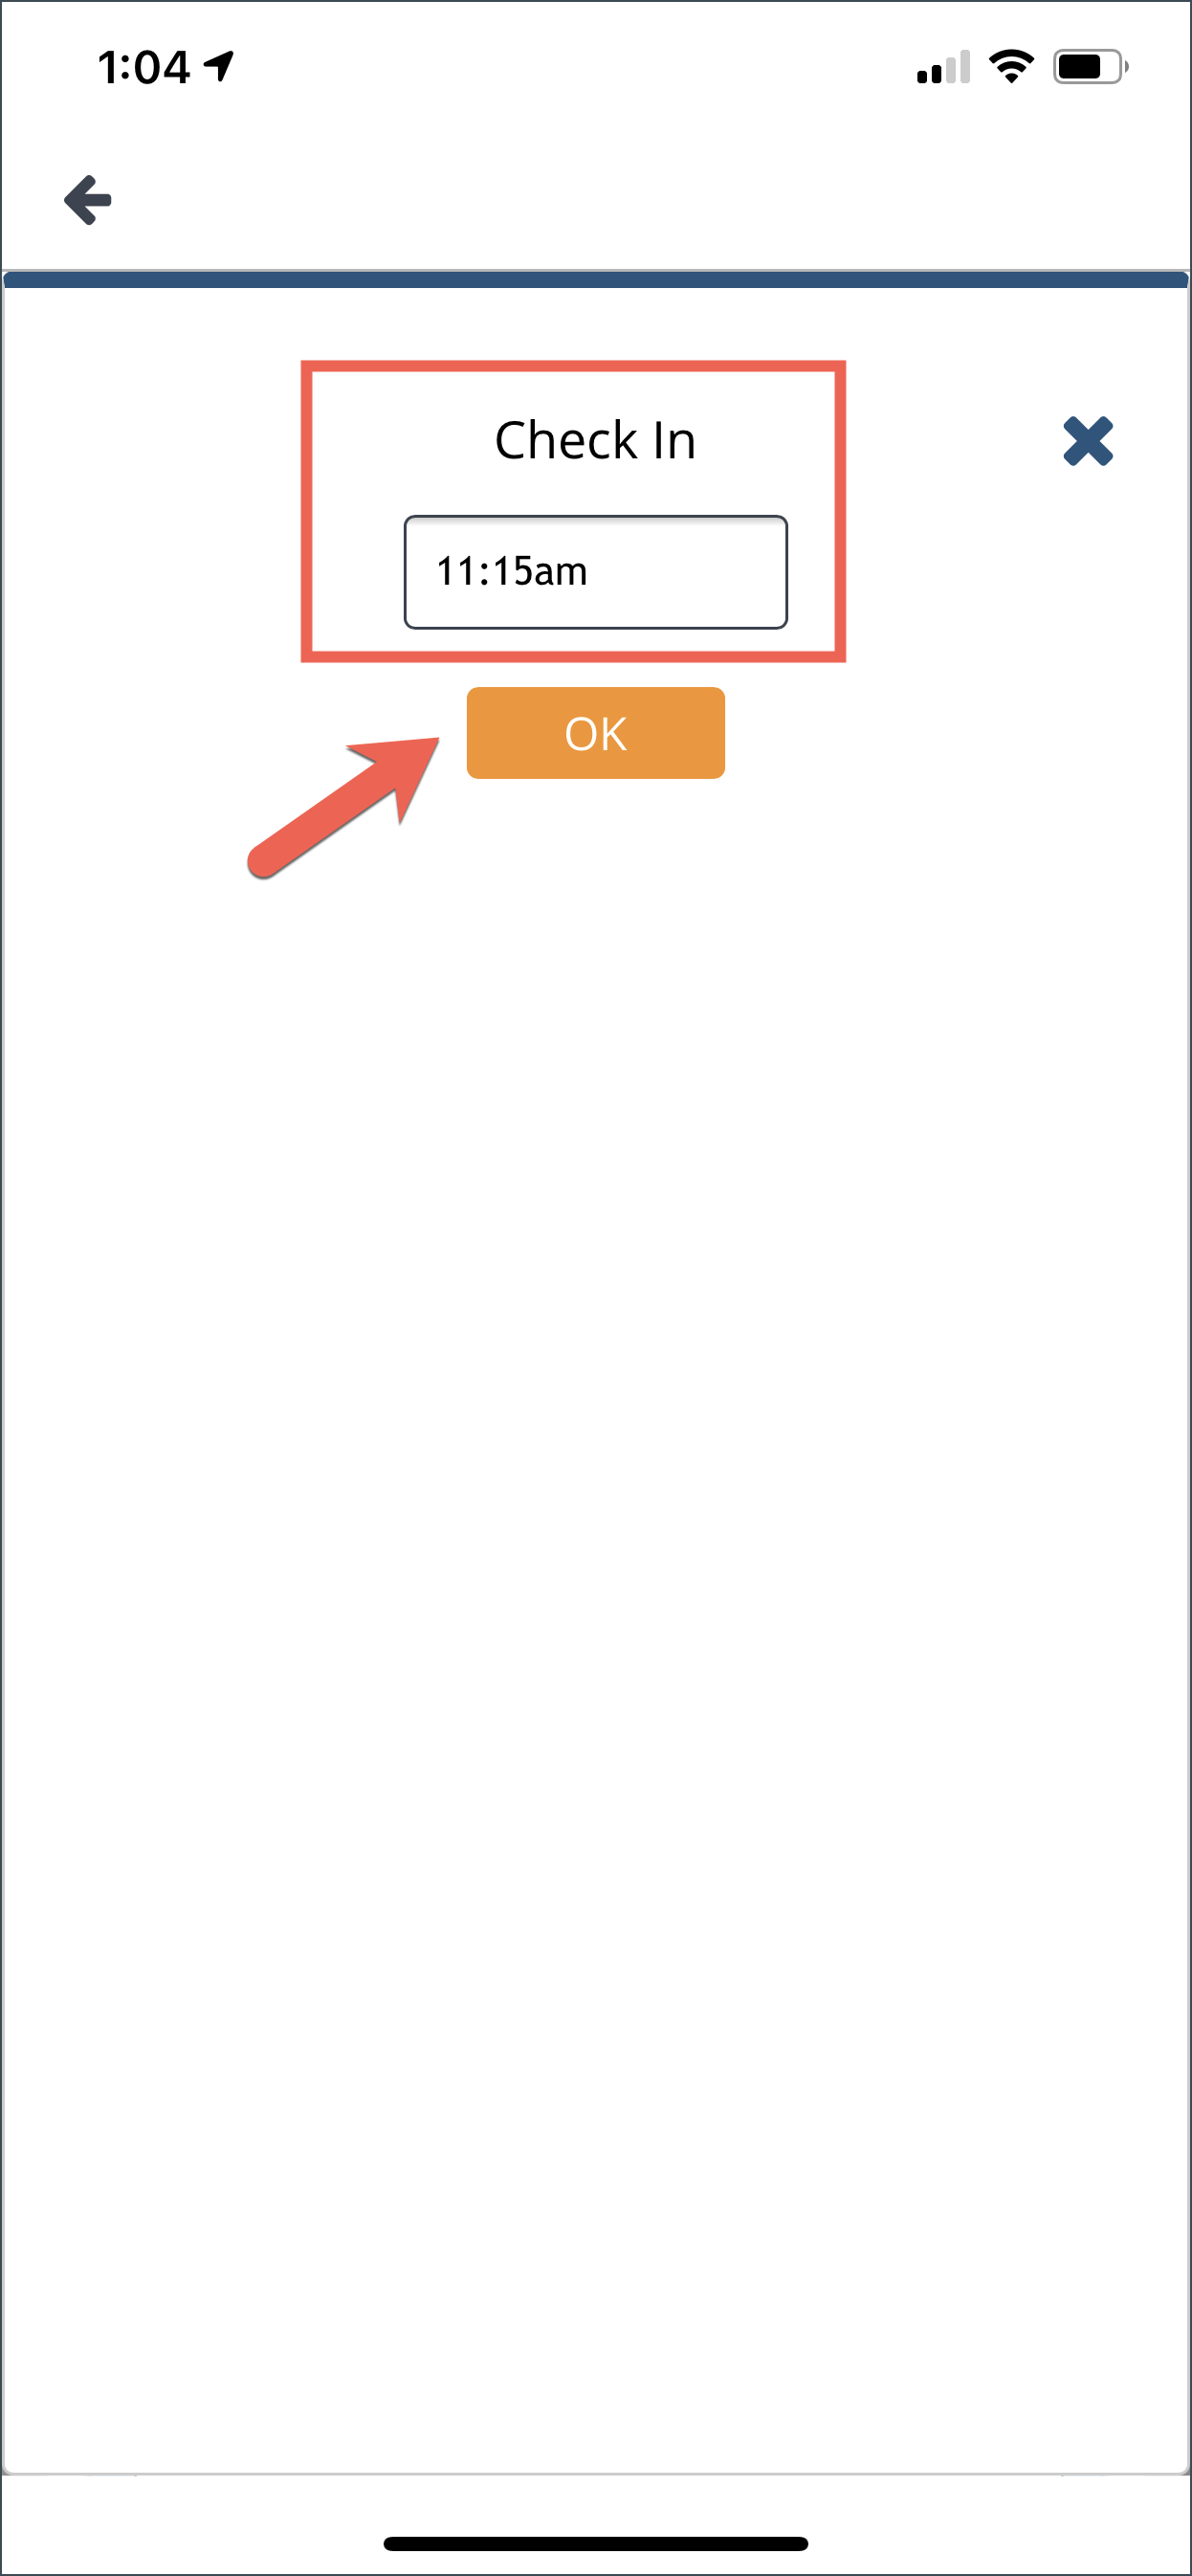
The Day Sheet will refresh and the selected Check In time will be reflected in green font with “TL” mark for Team Leader.
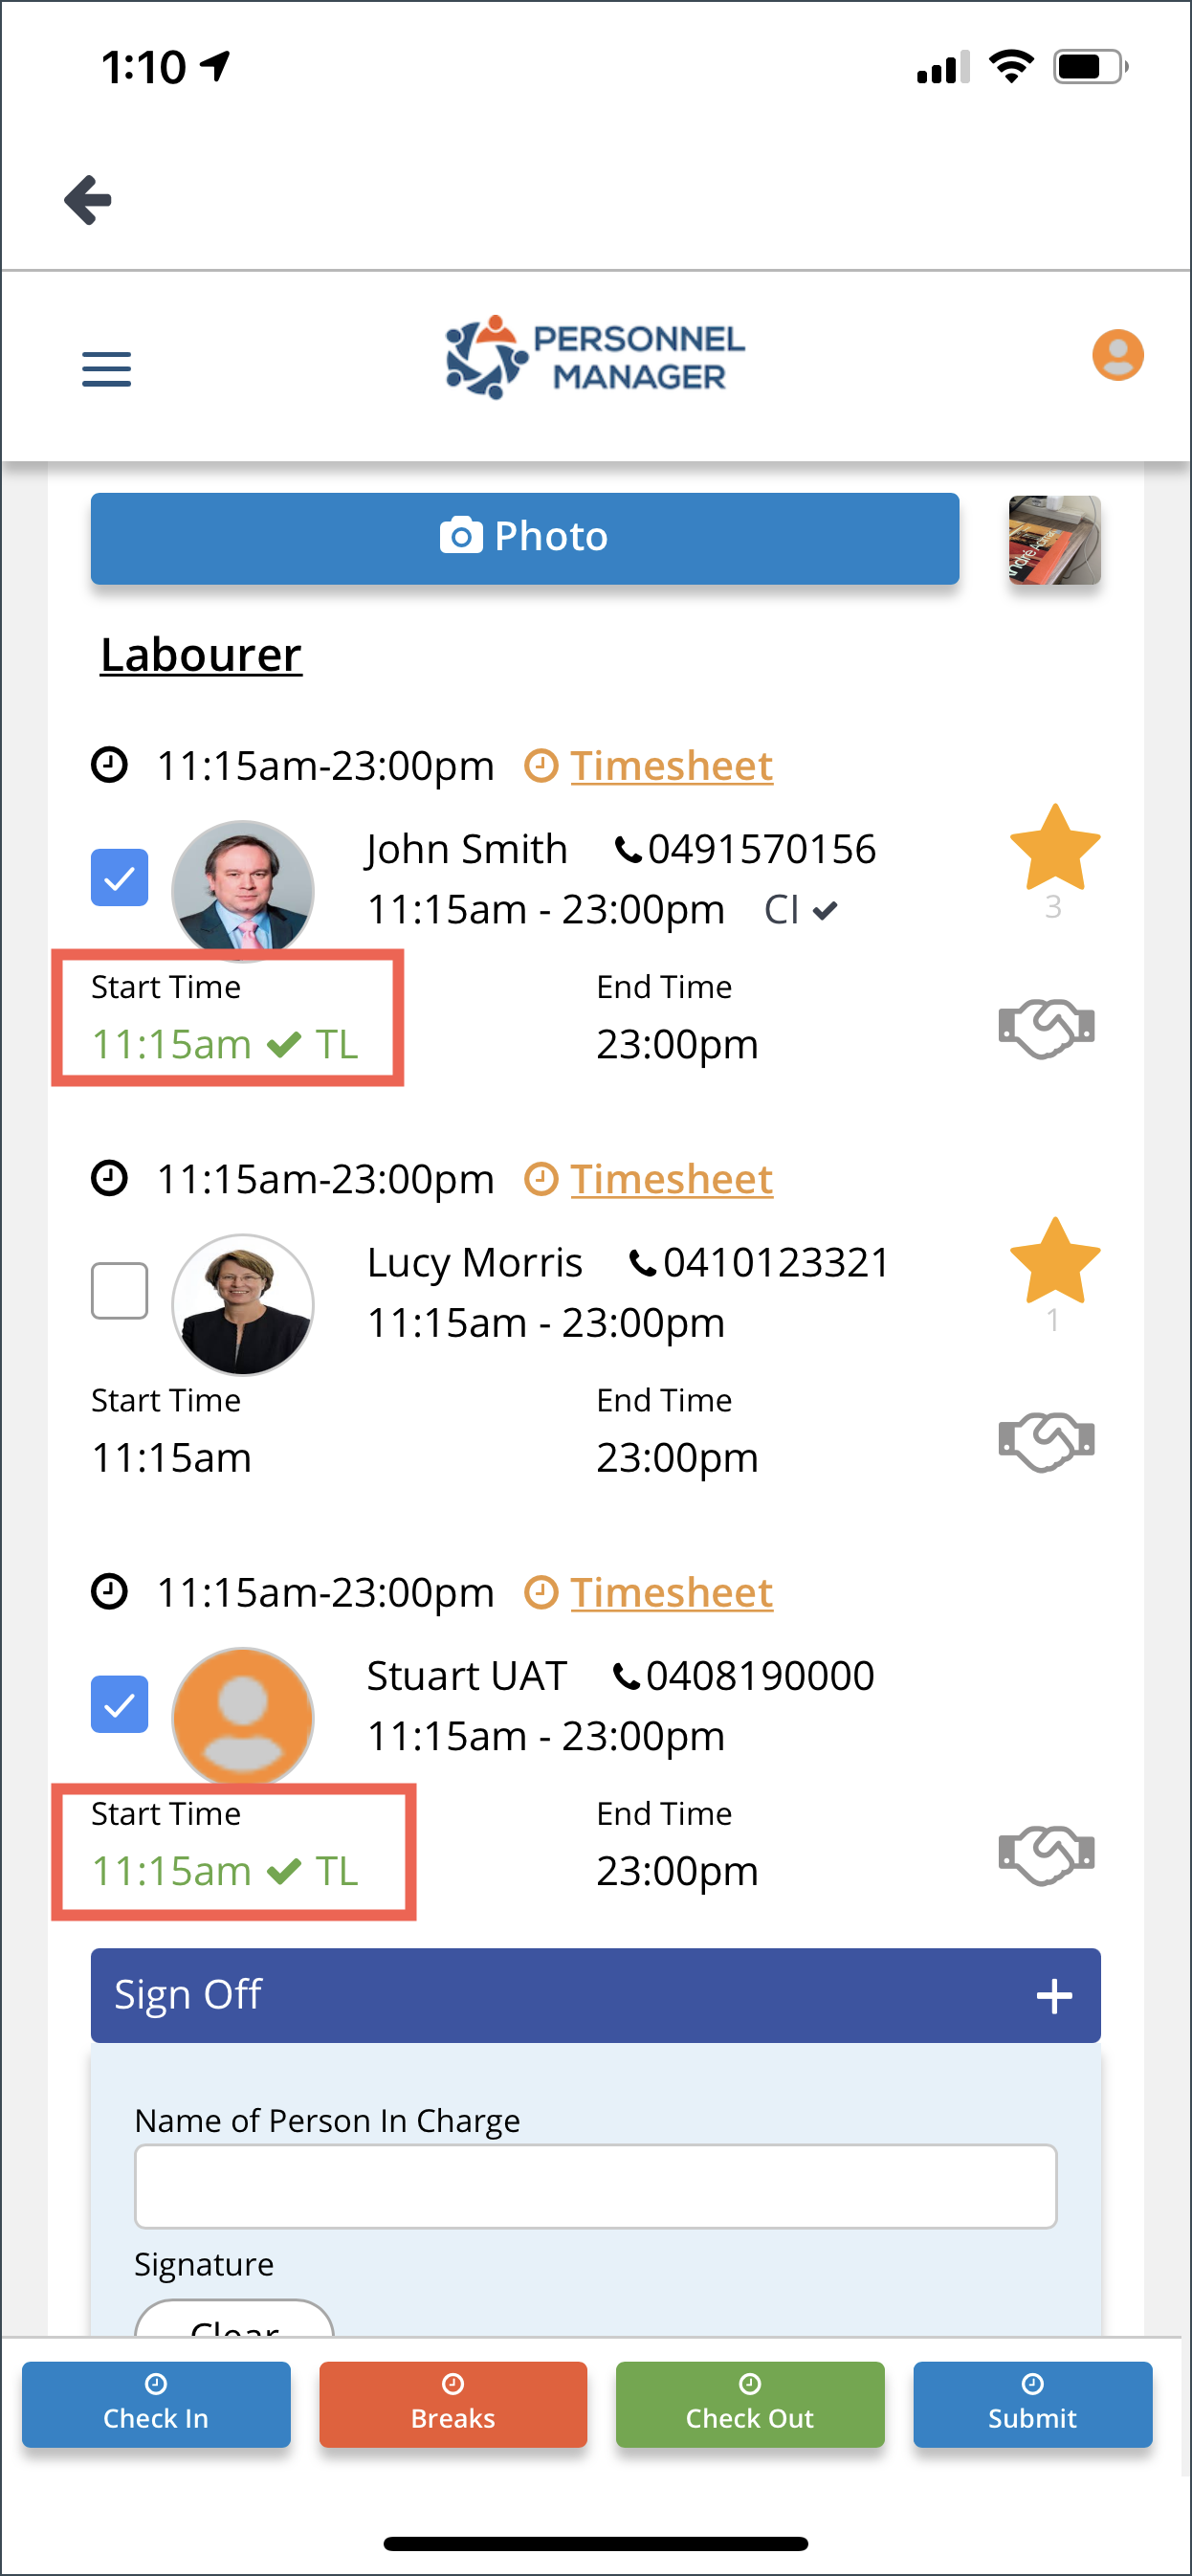
Do the same for break time, Tick the box of the crew where you want to add break time.
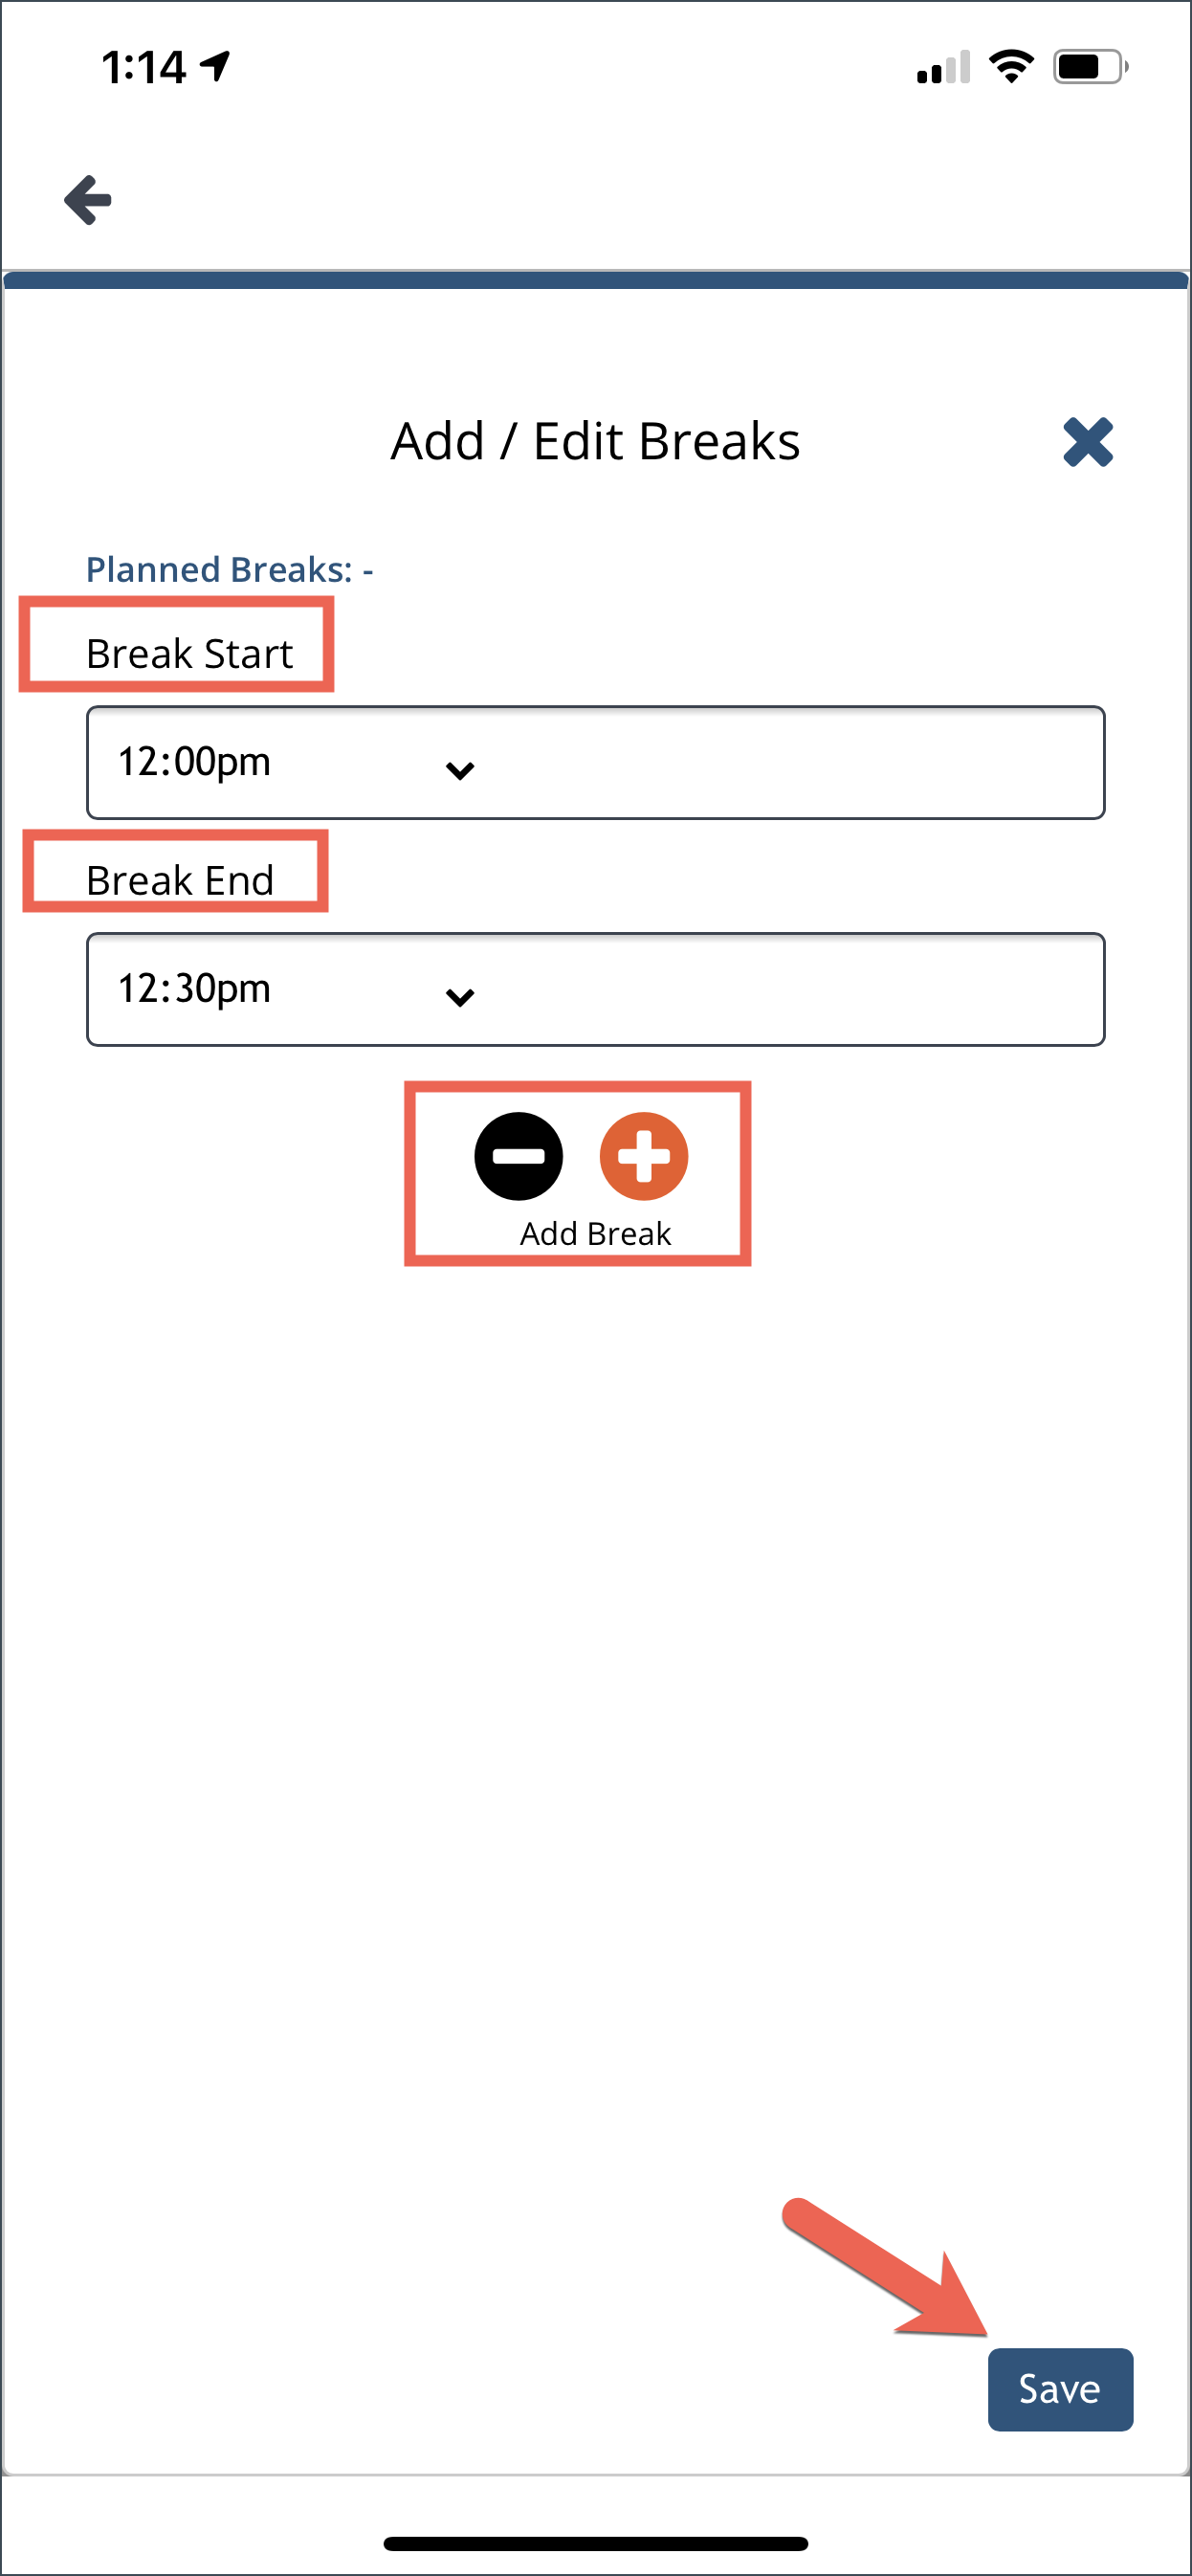
Click the plus icon to add a break time.
Then select time for Break Start and Break End. Click Save.
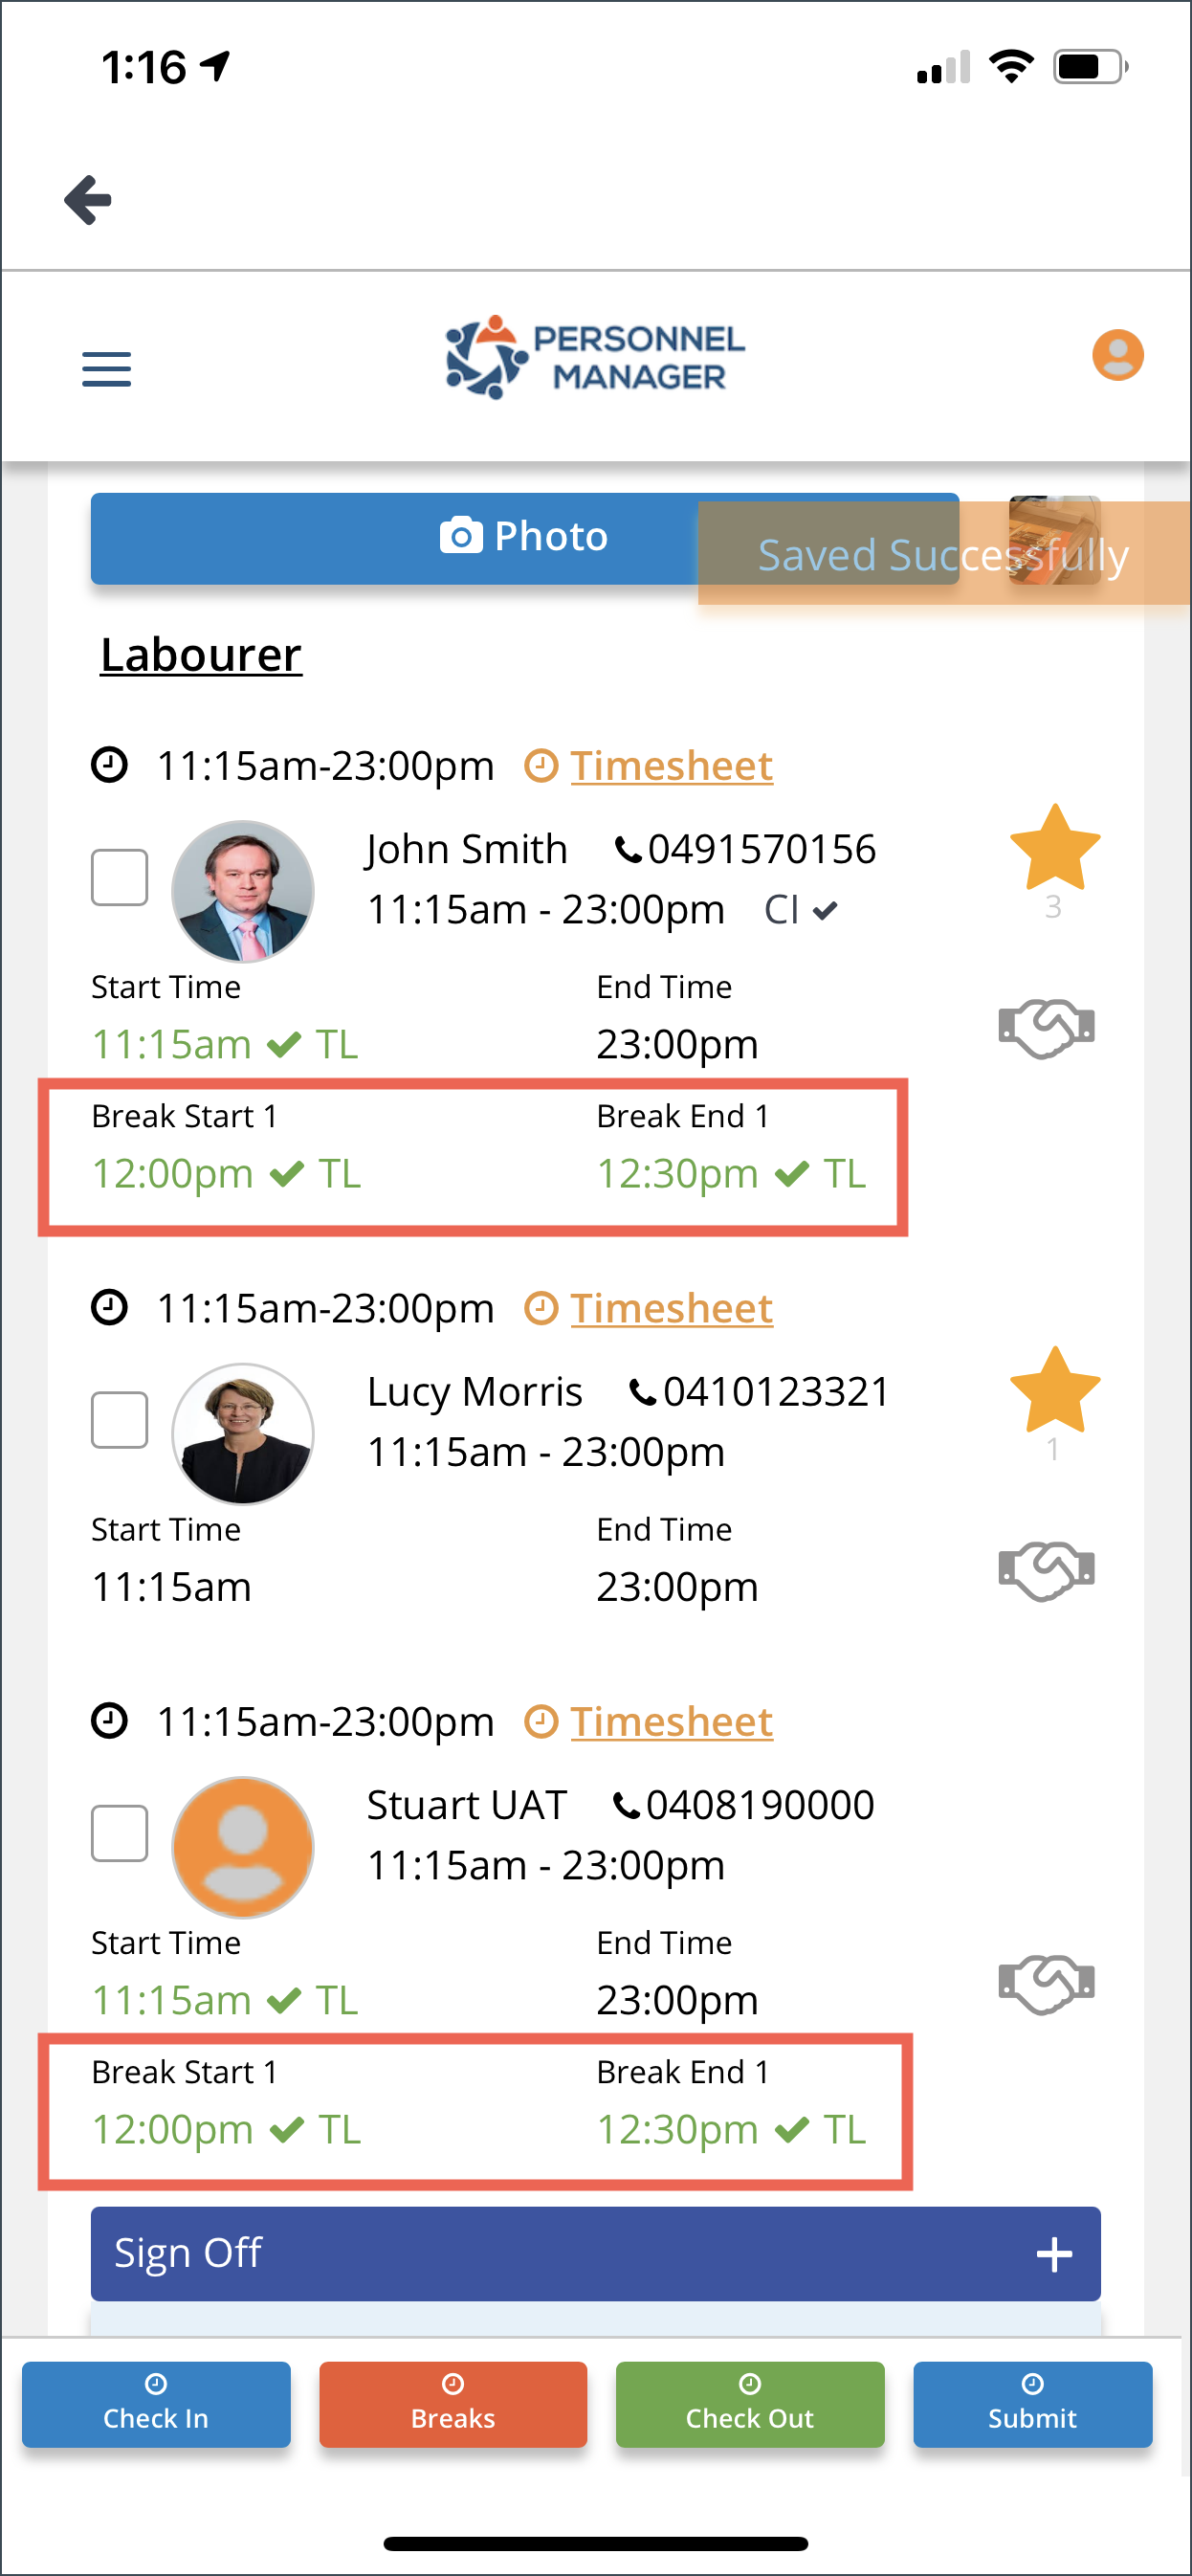
For the Check Out time, follow the steps in the Check In but instead of clicking Check In tap the button of Check Out.
Marking Crew Absent
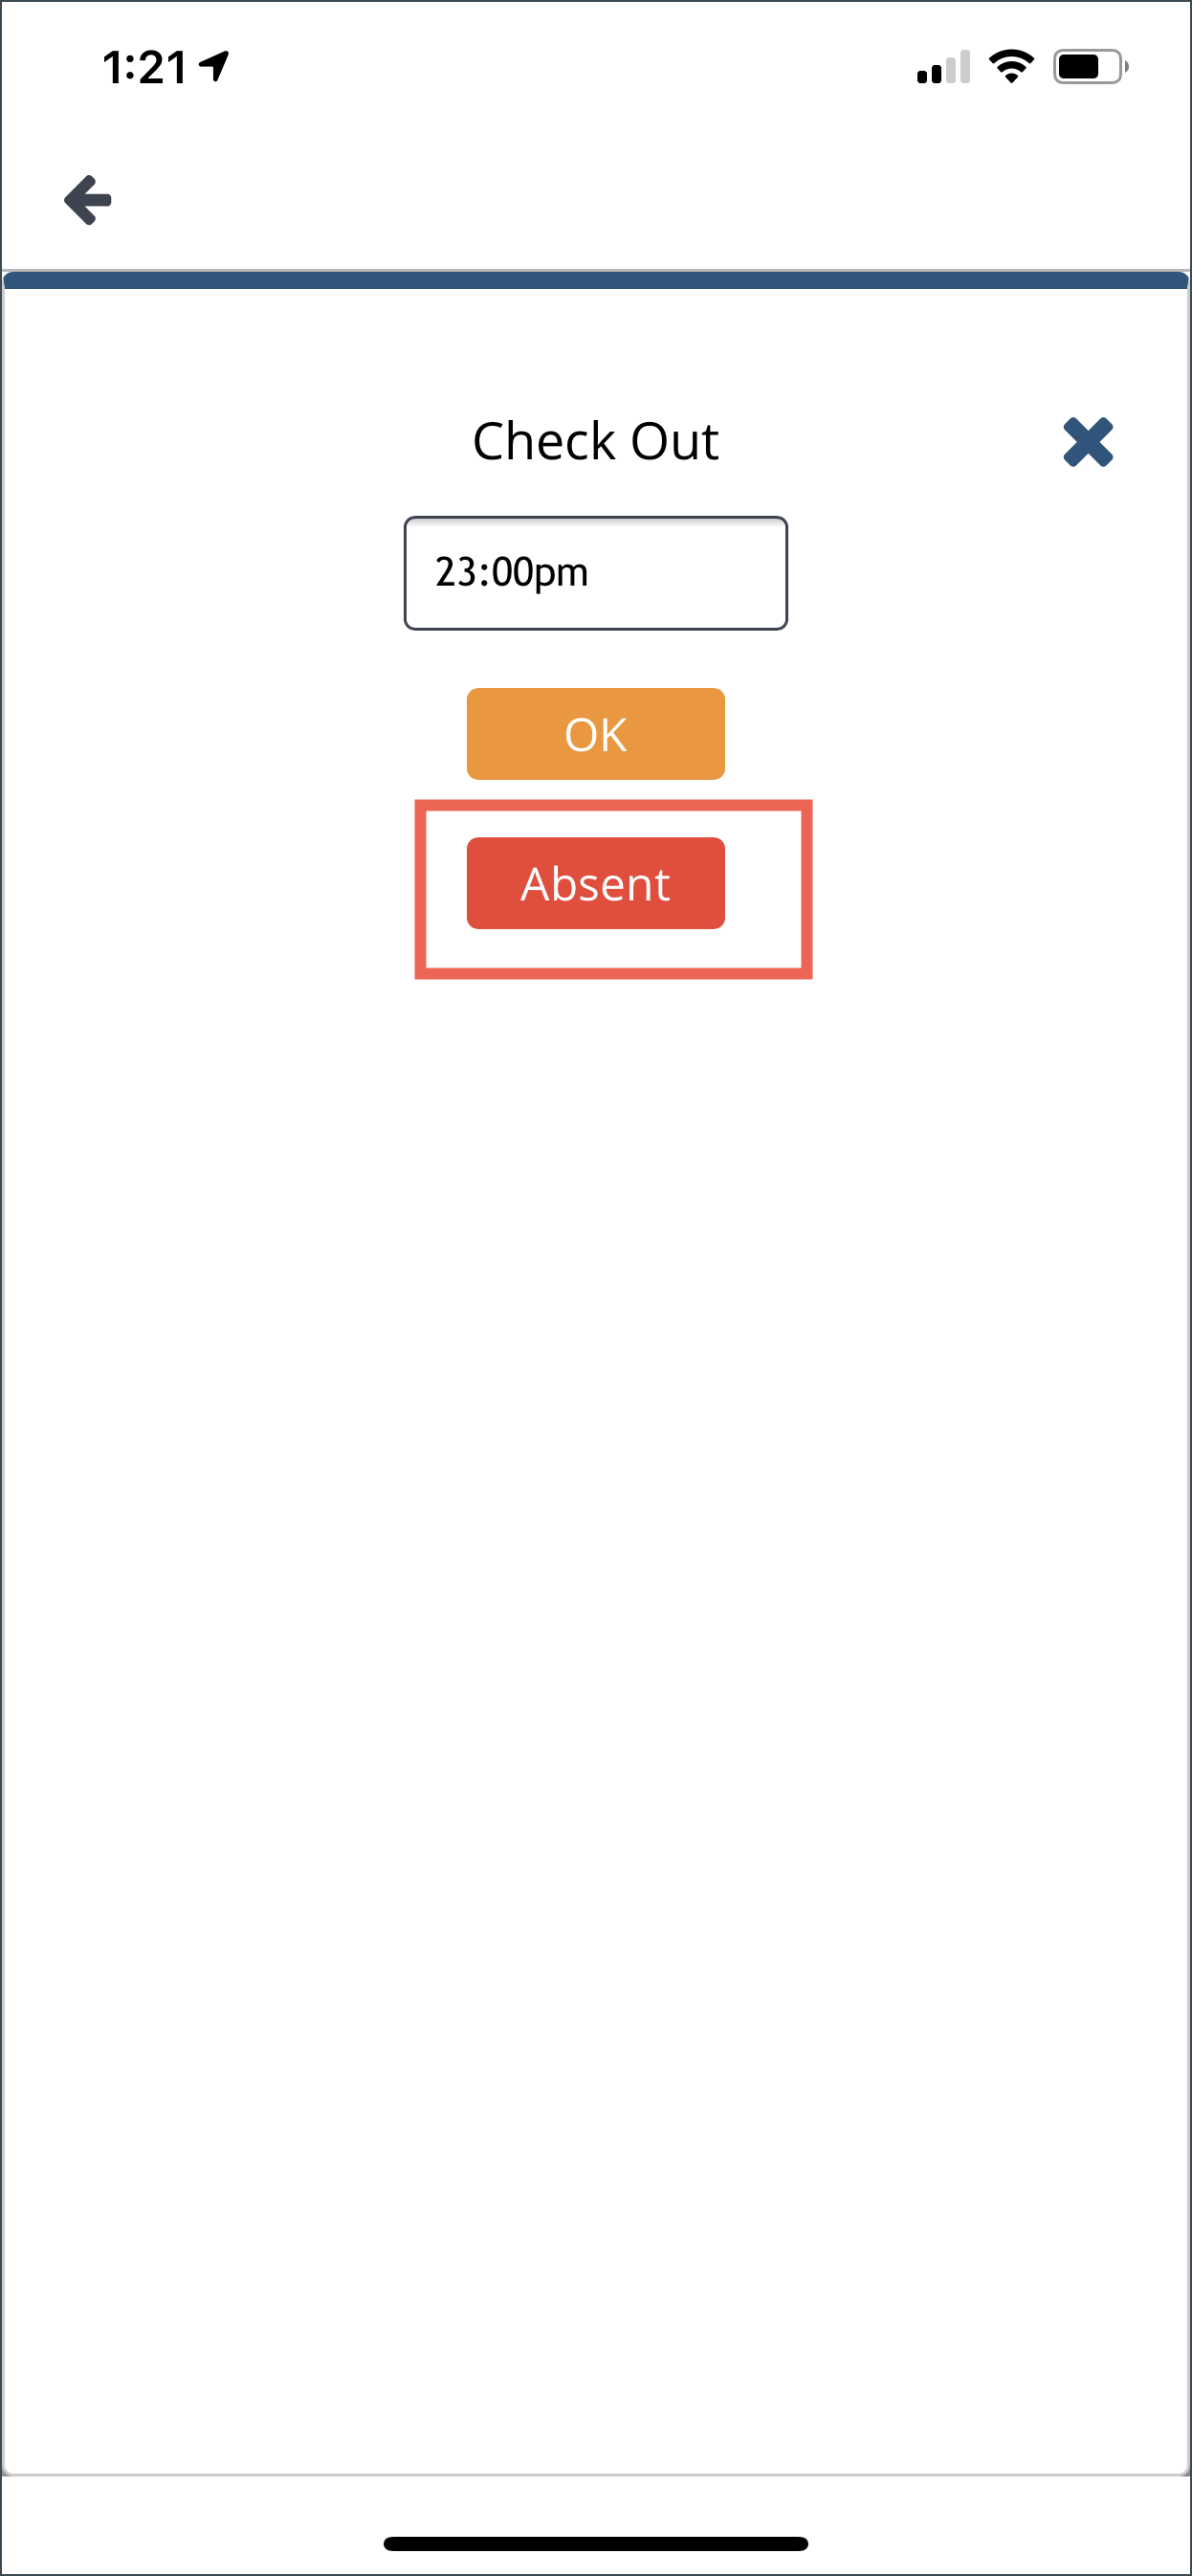
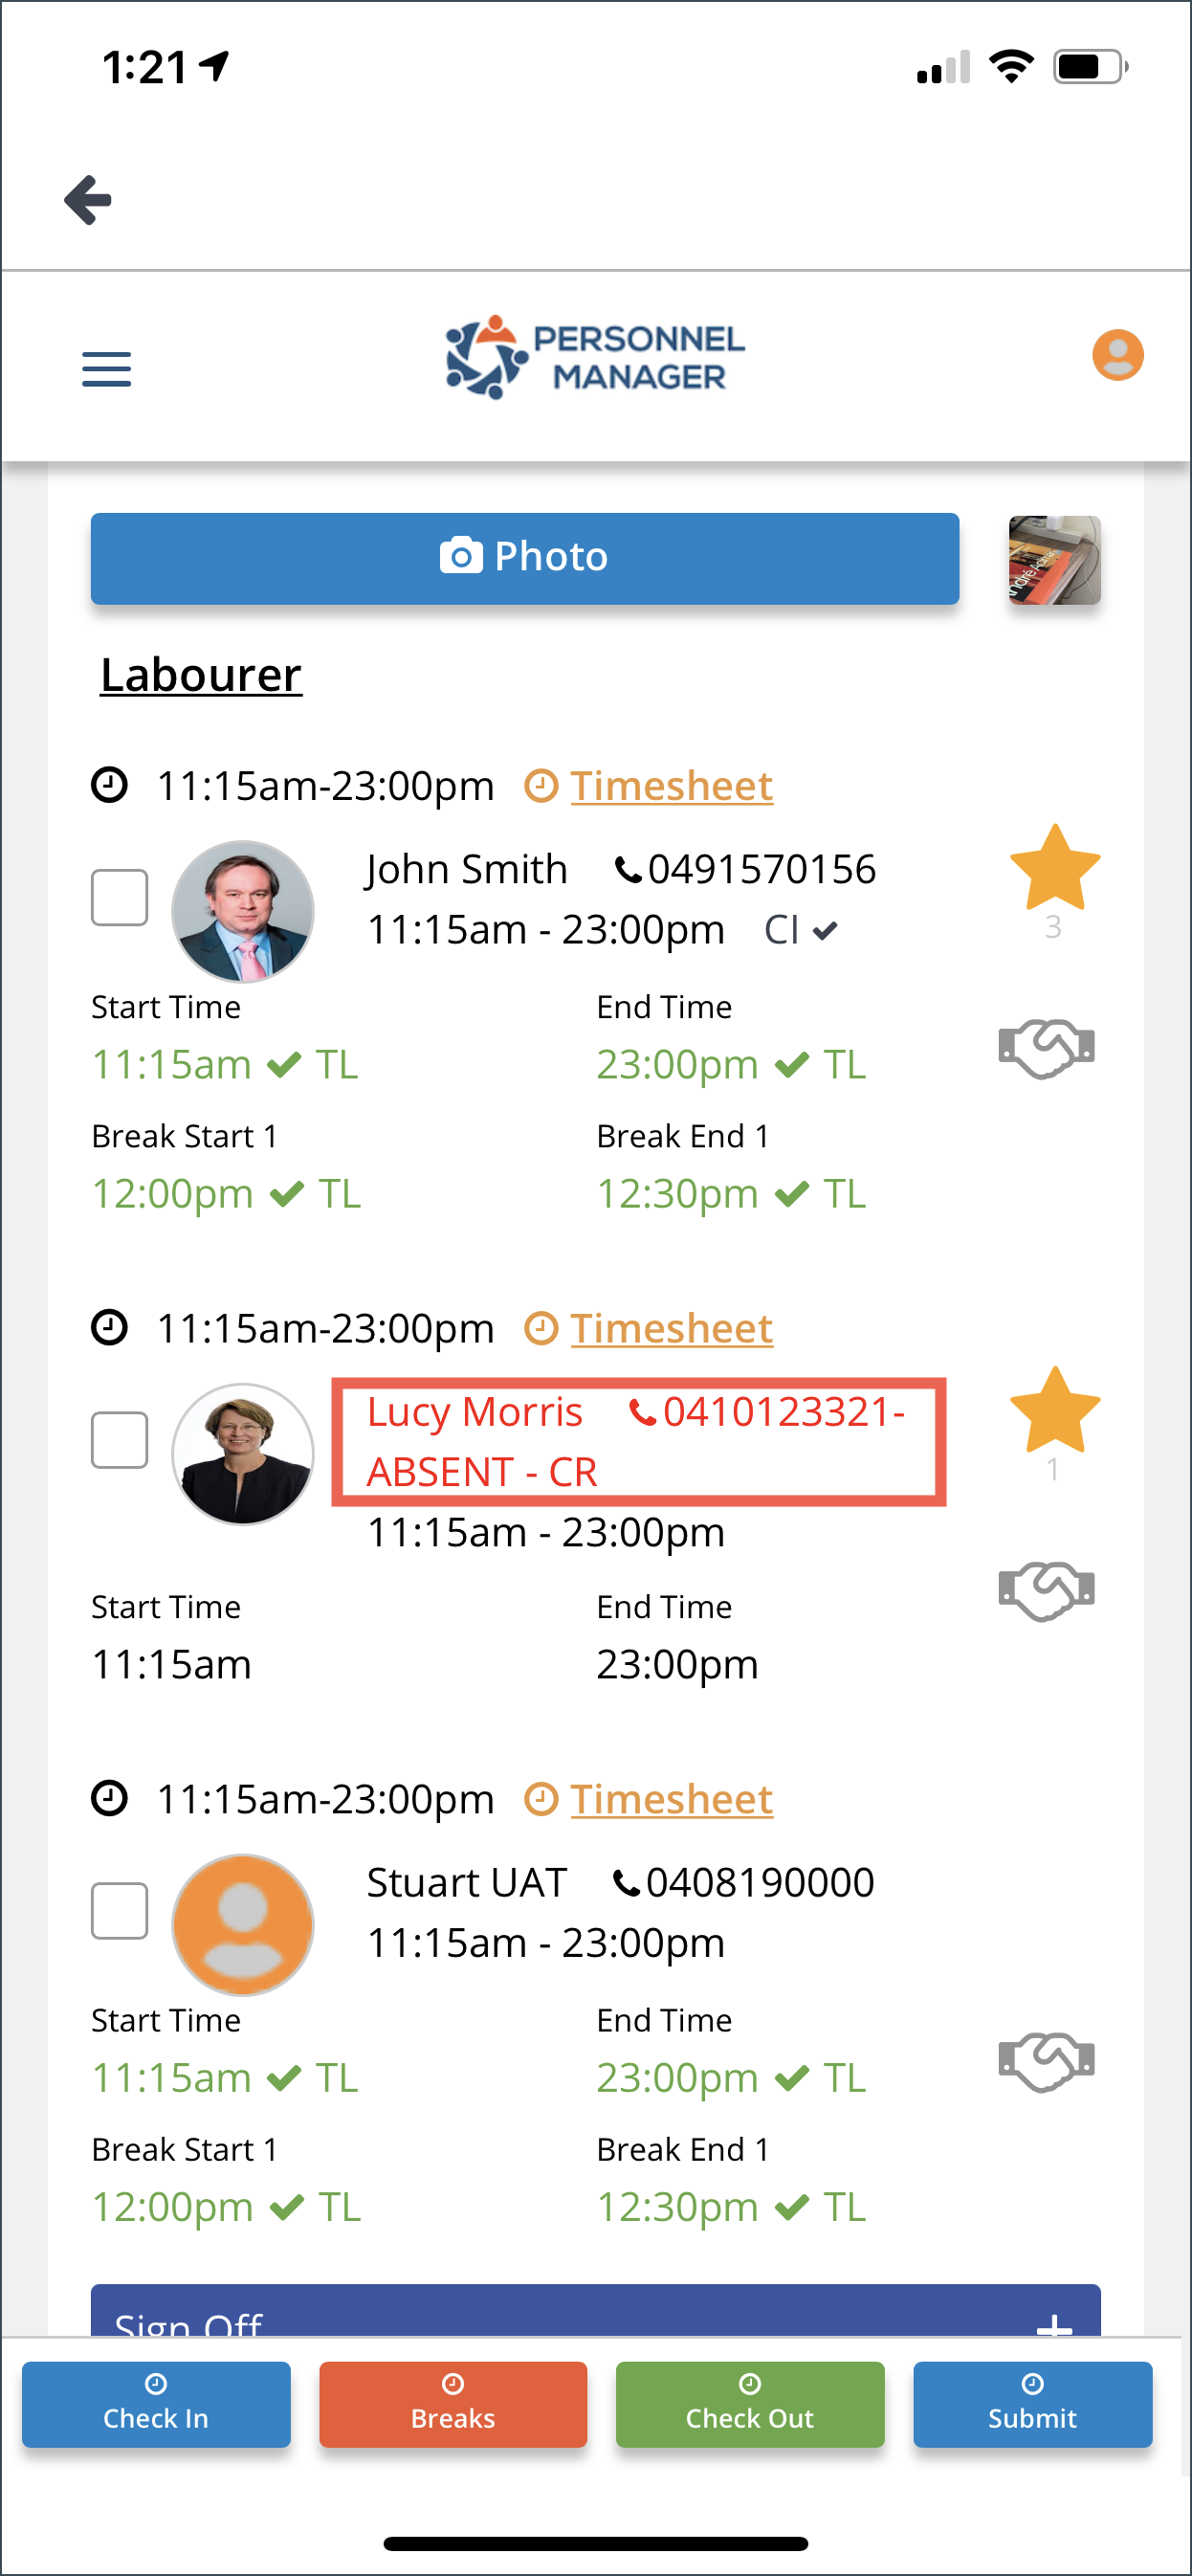
To mark a crew absent, tick the box of the crew then tap the Check out button, then tap Absent button.
Timesheet
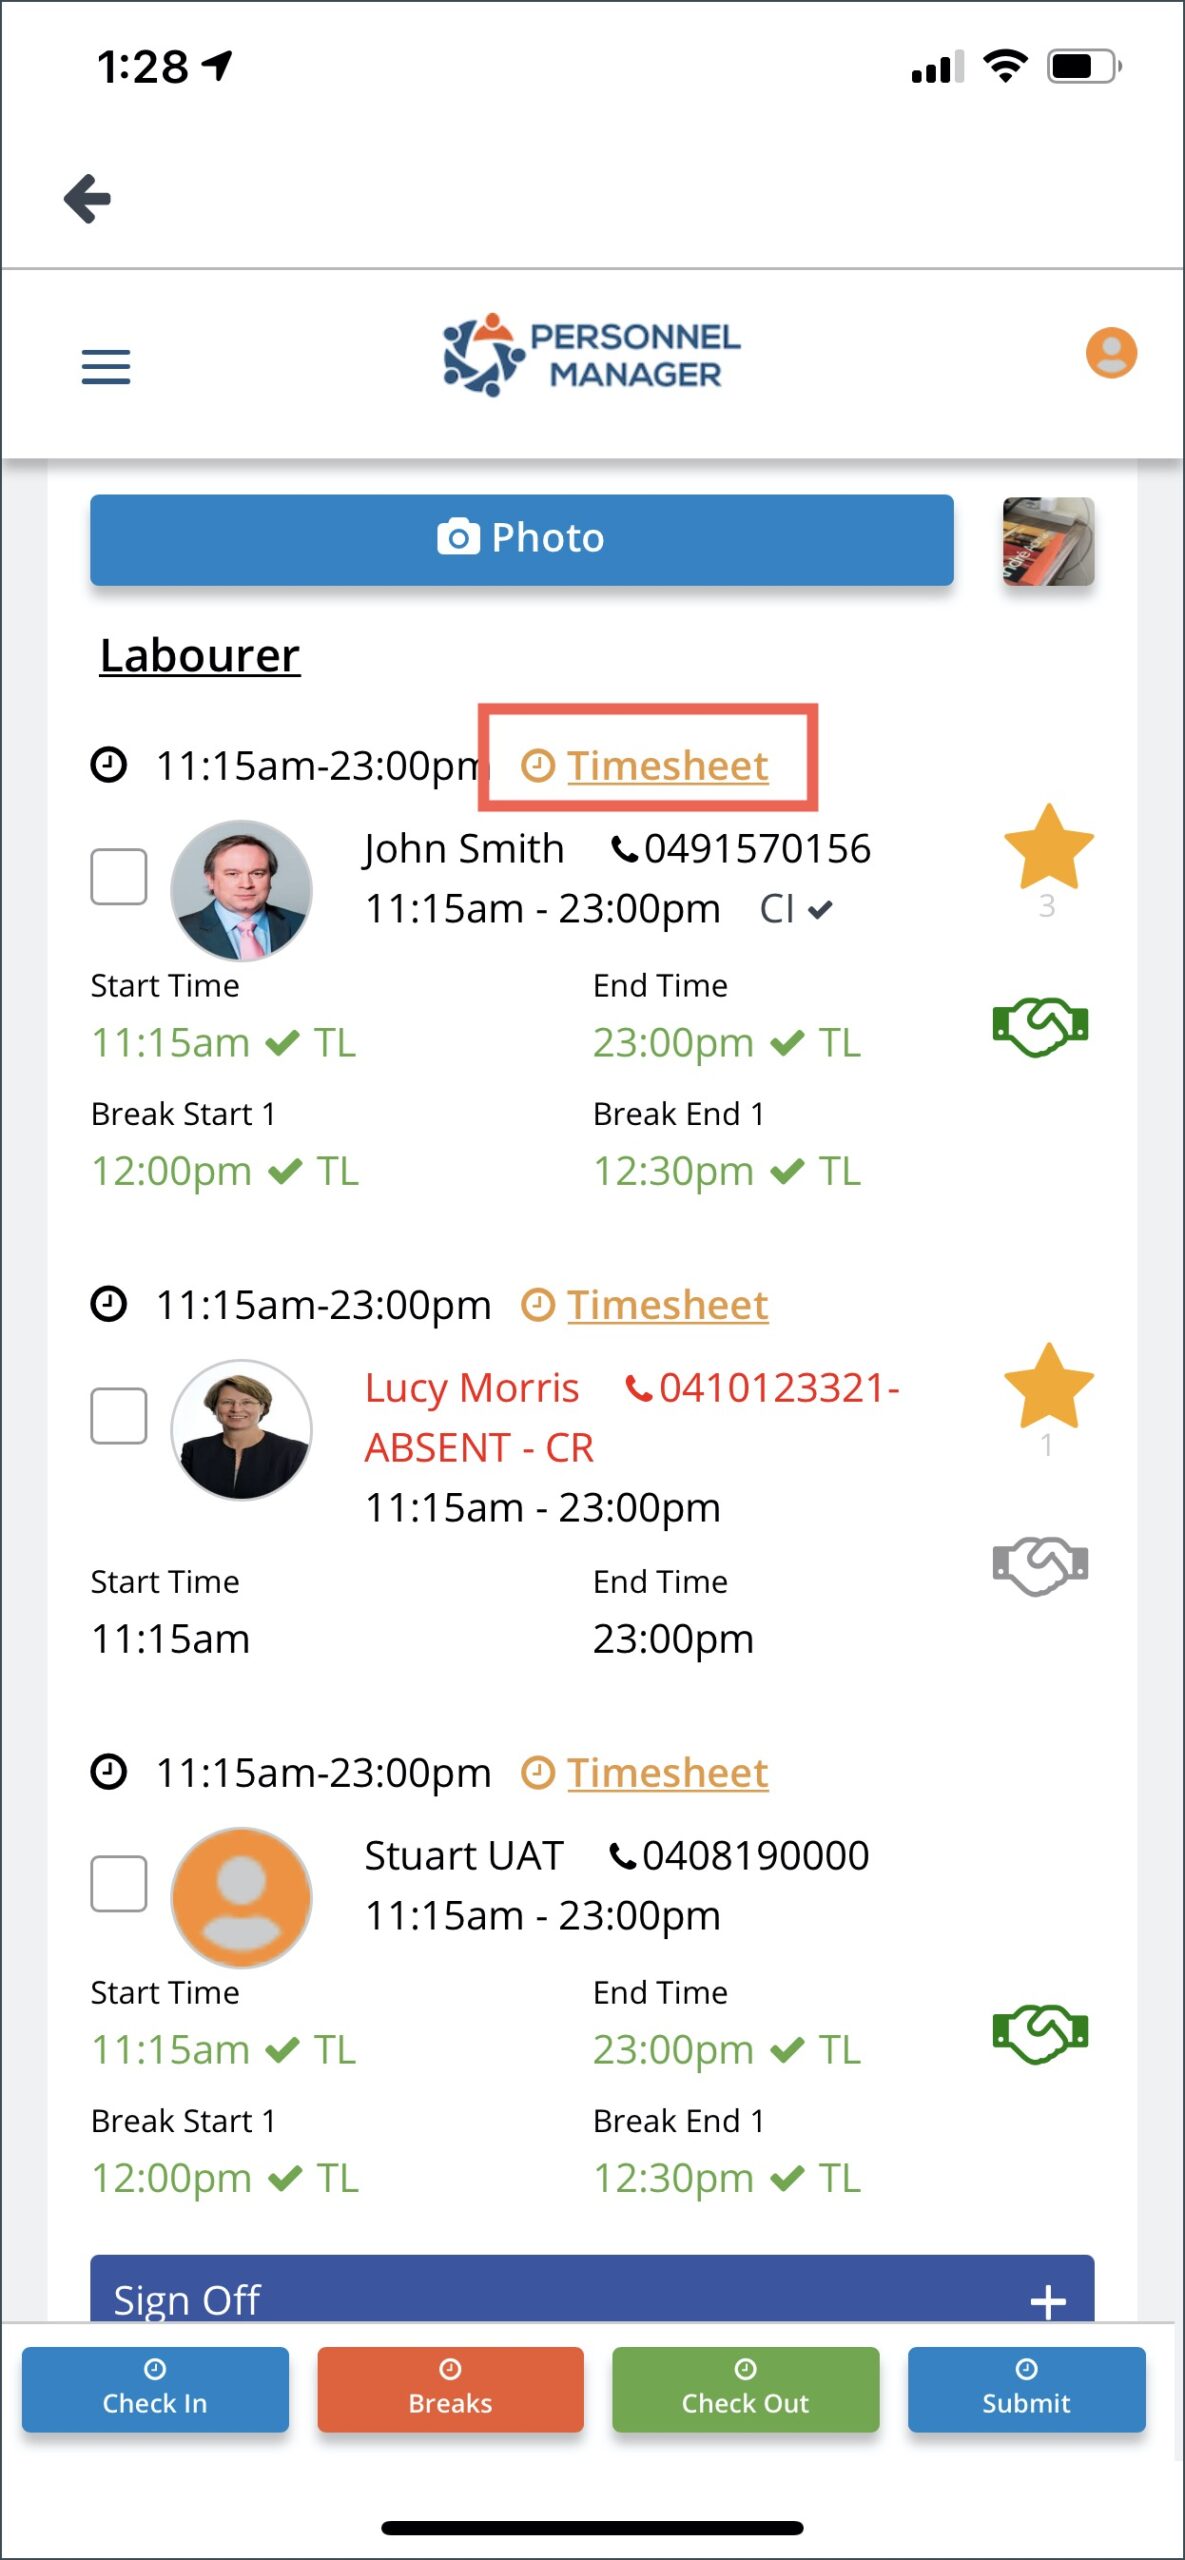
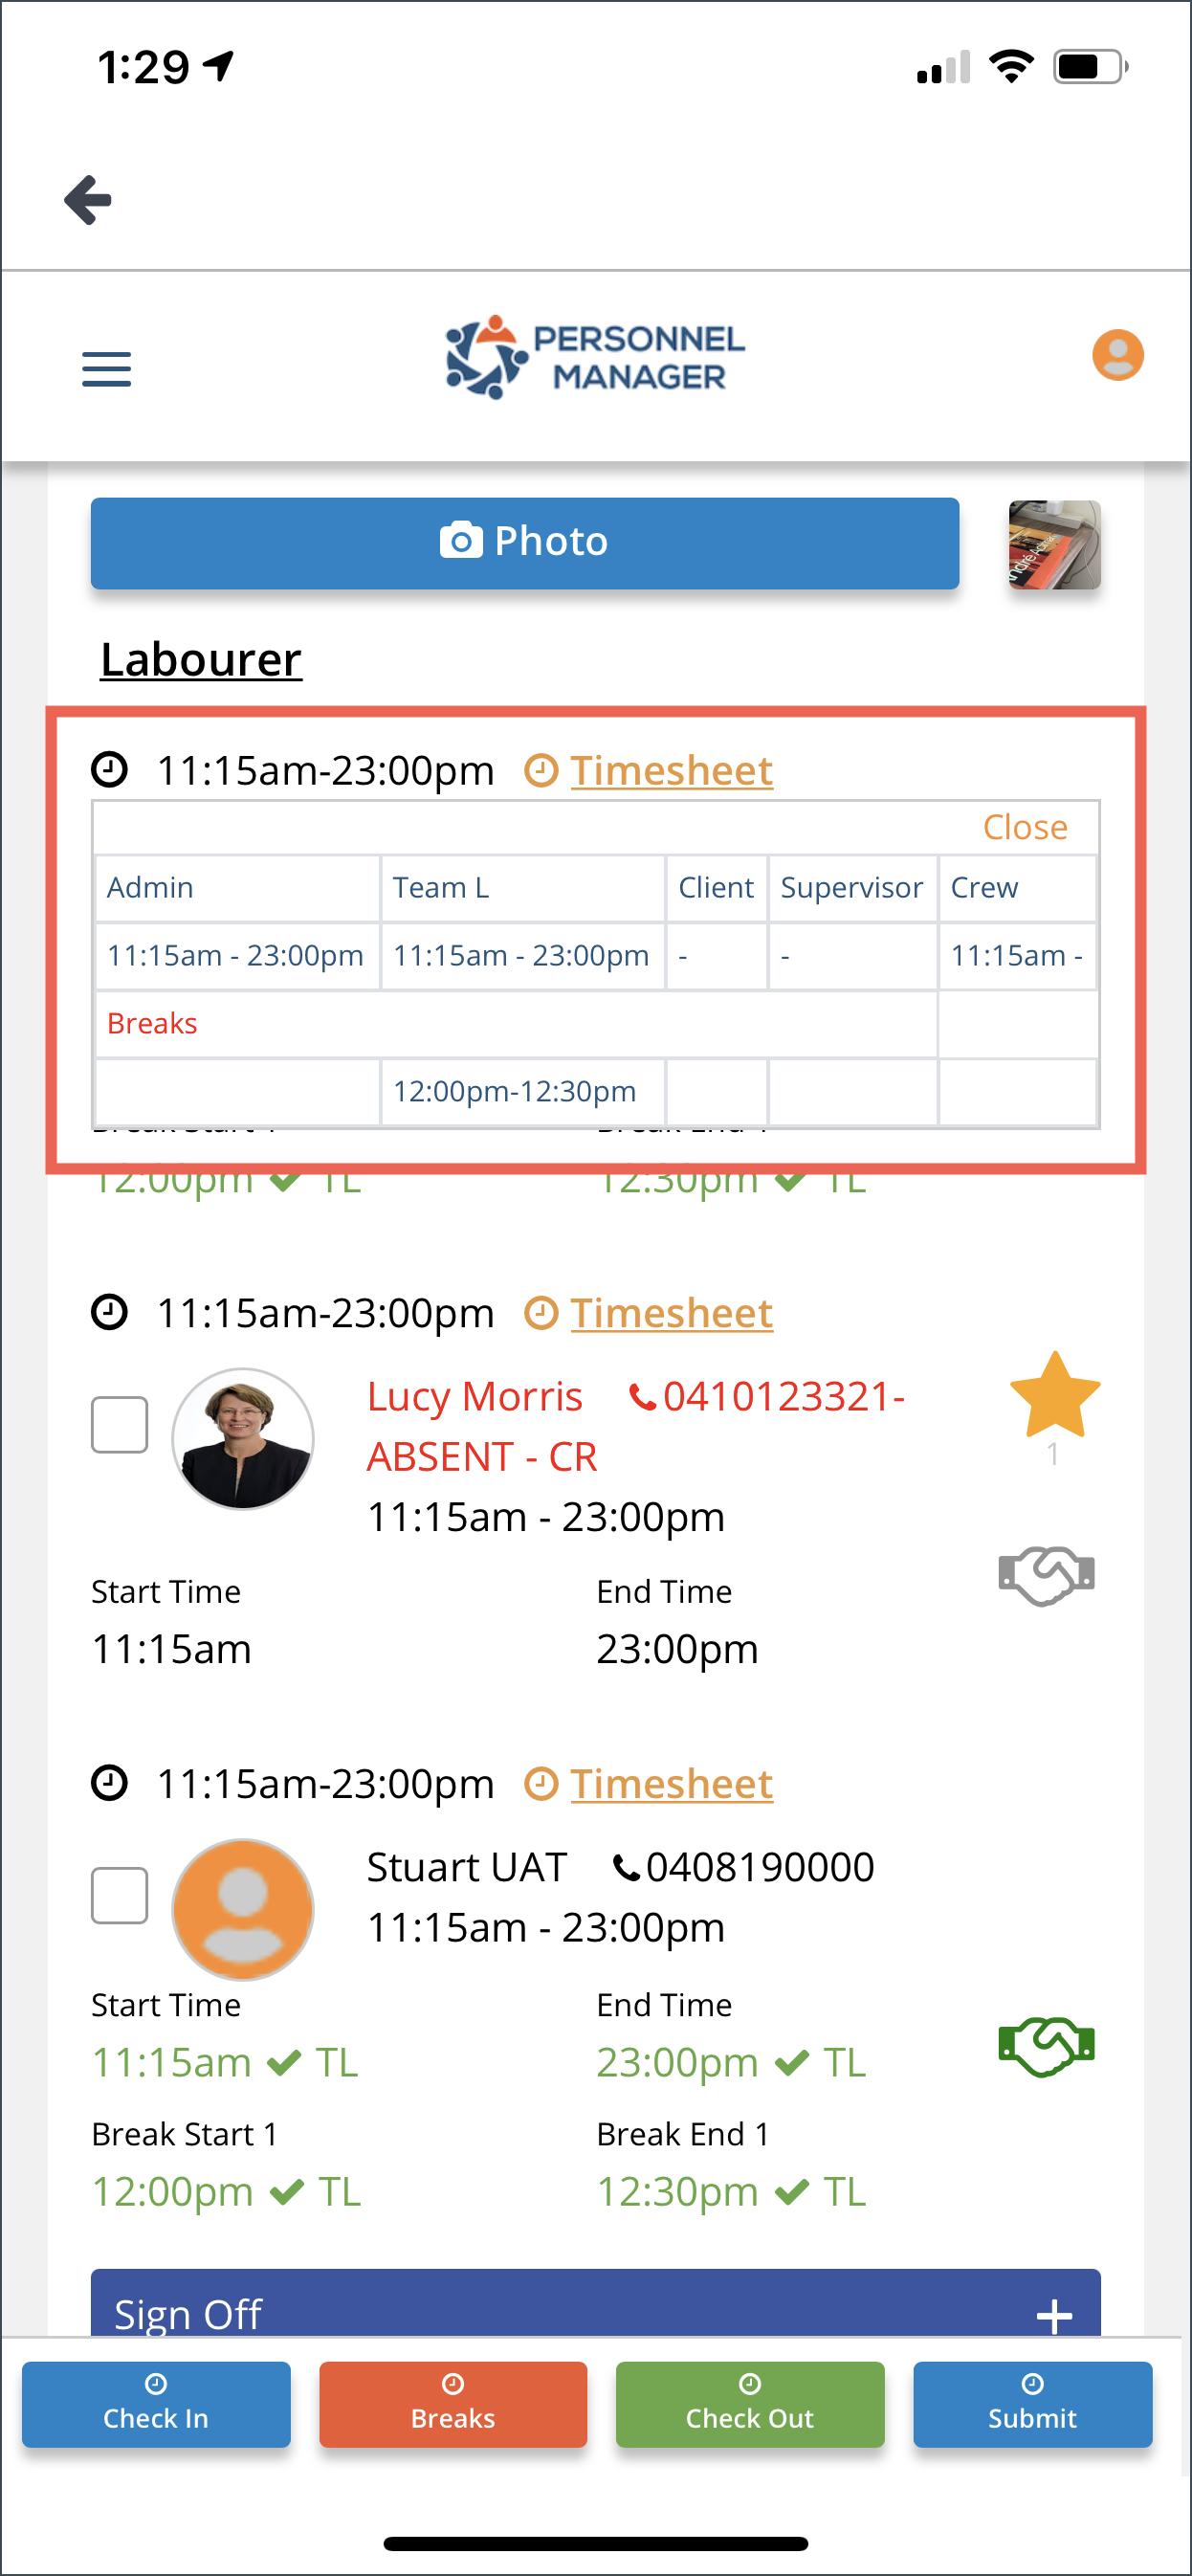
Click the Timesheet link on the Day Sheet to view the time entered by Crew, Supervisor, Team Leaders, Admin and Duty Managers.
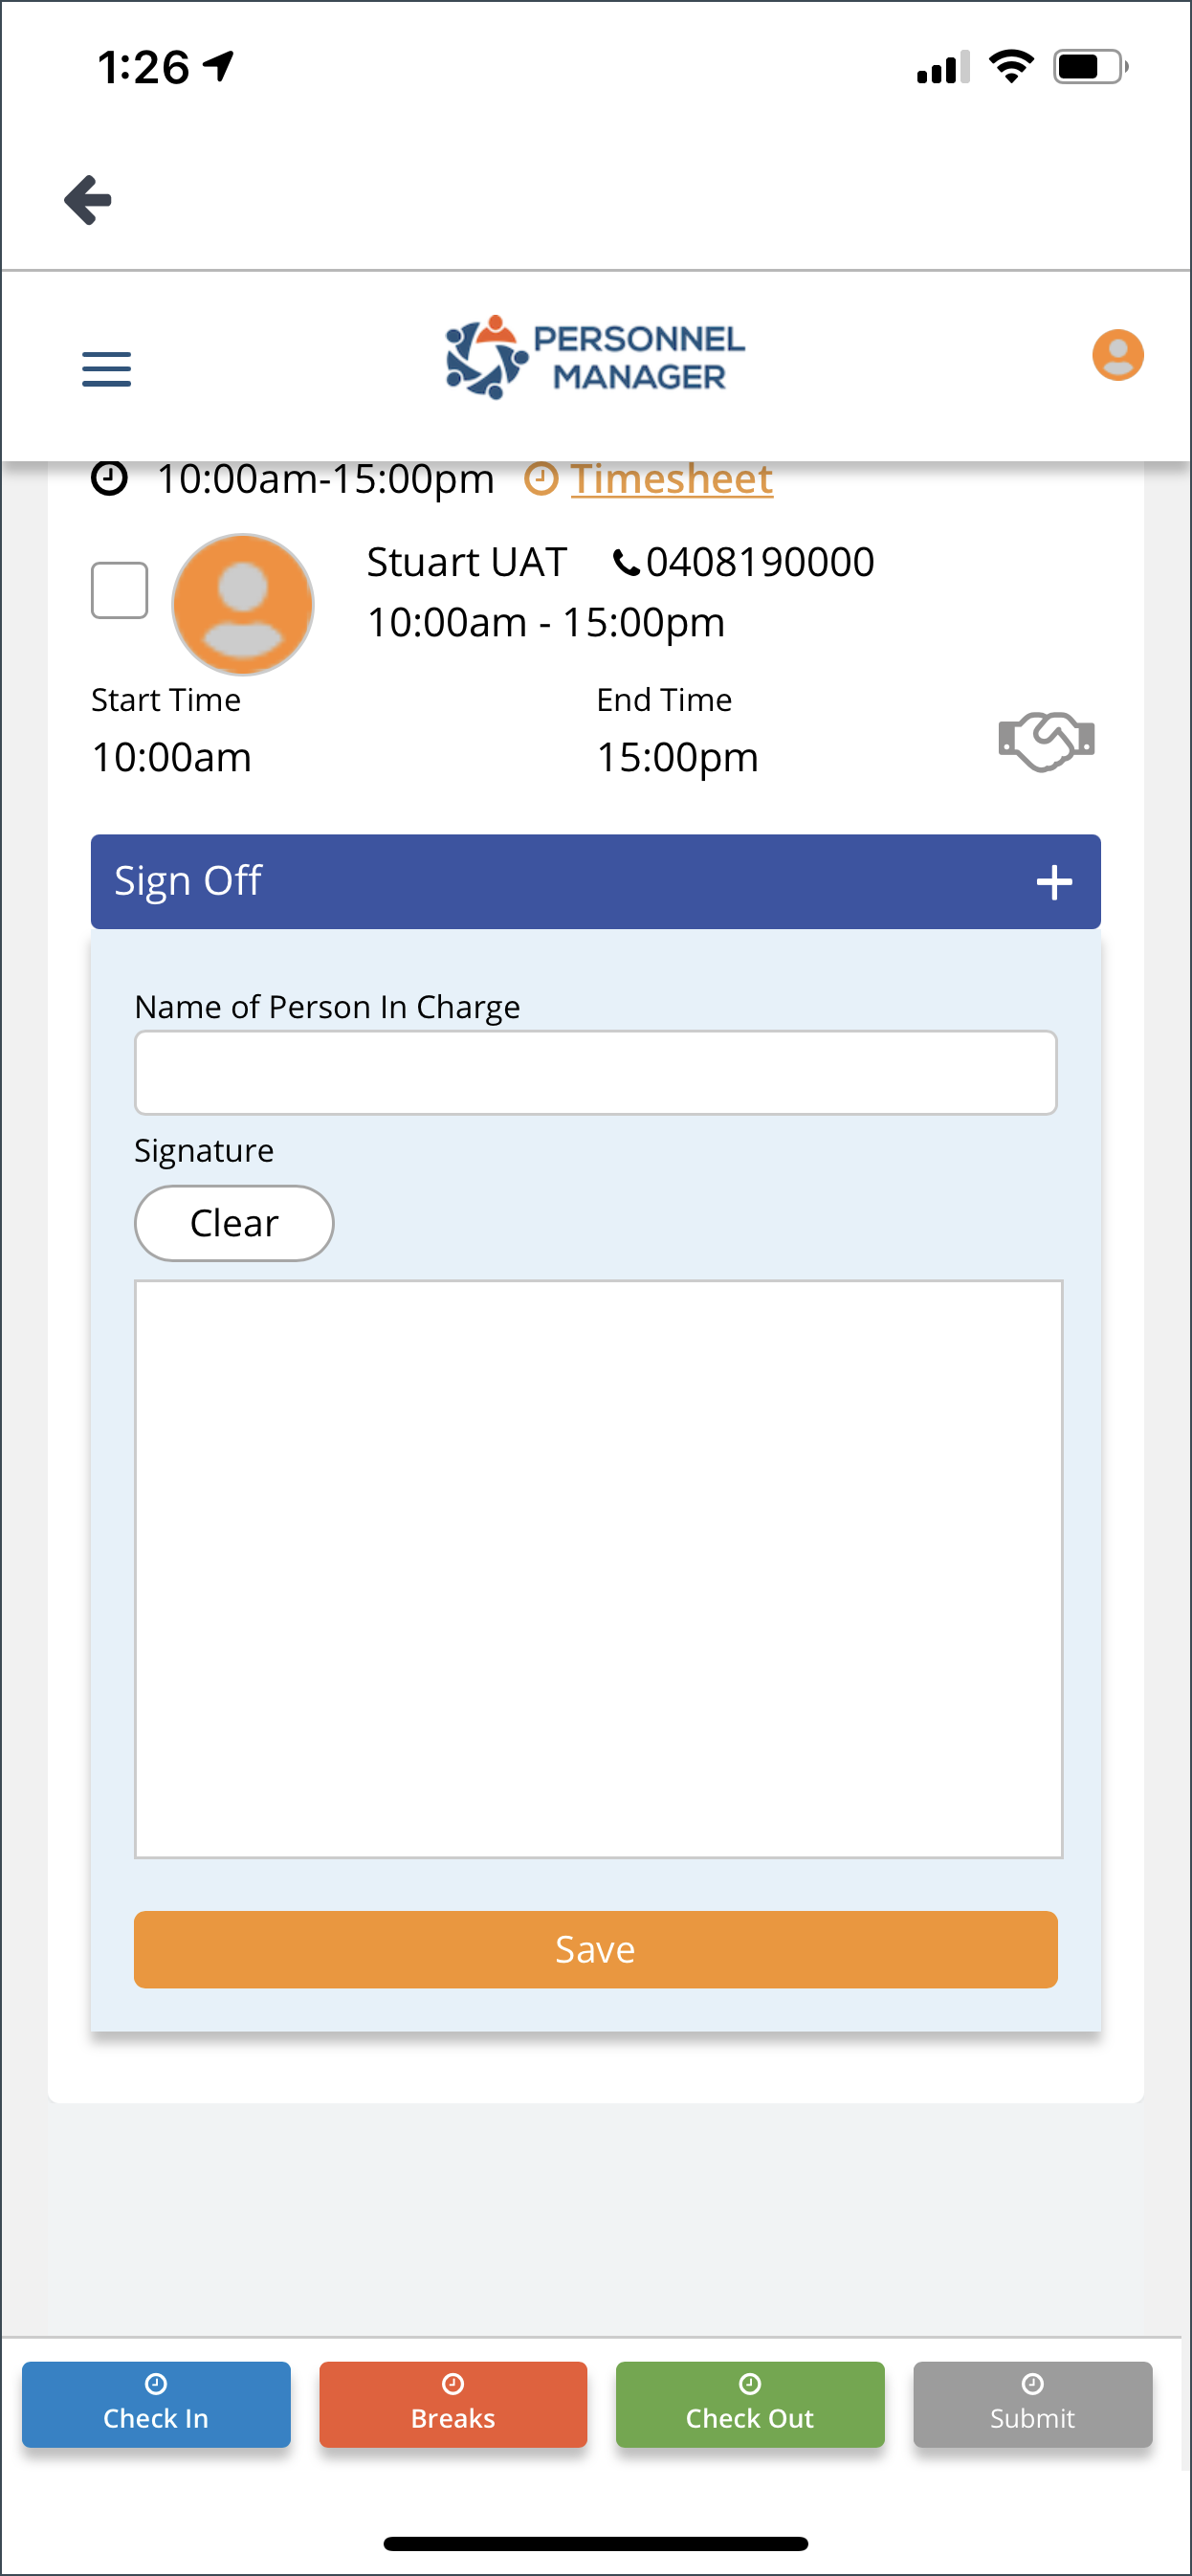
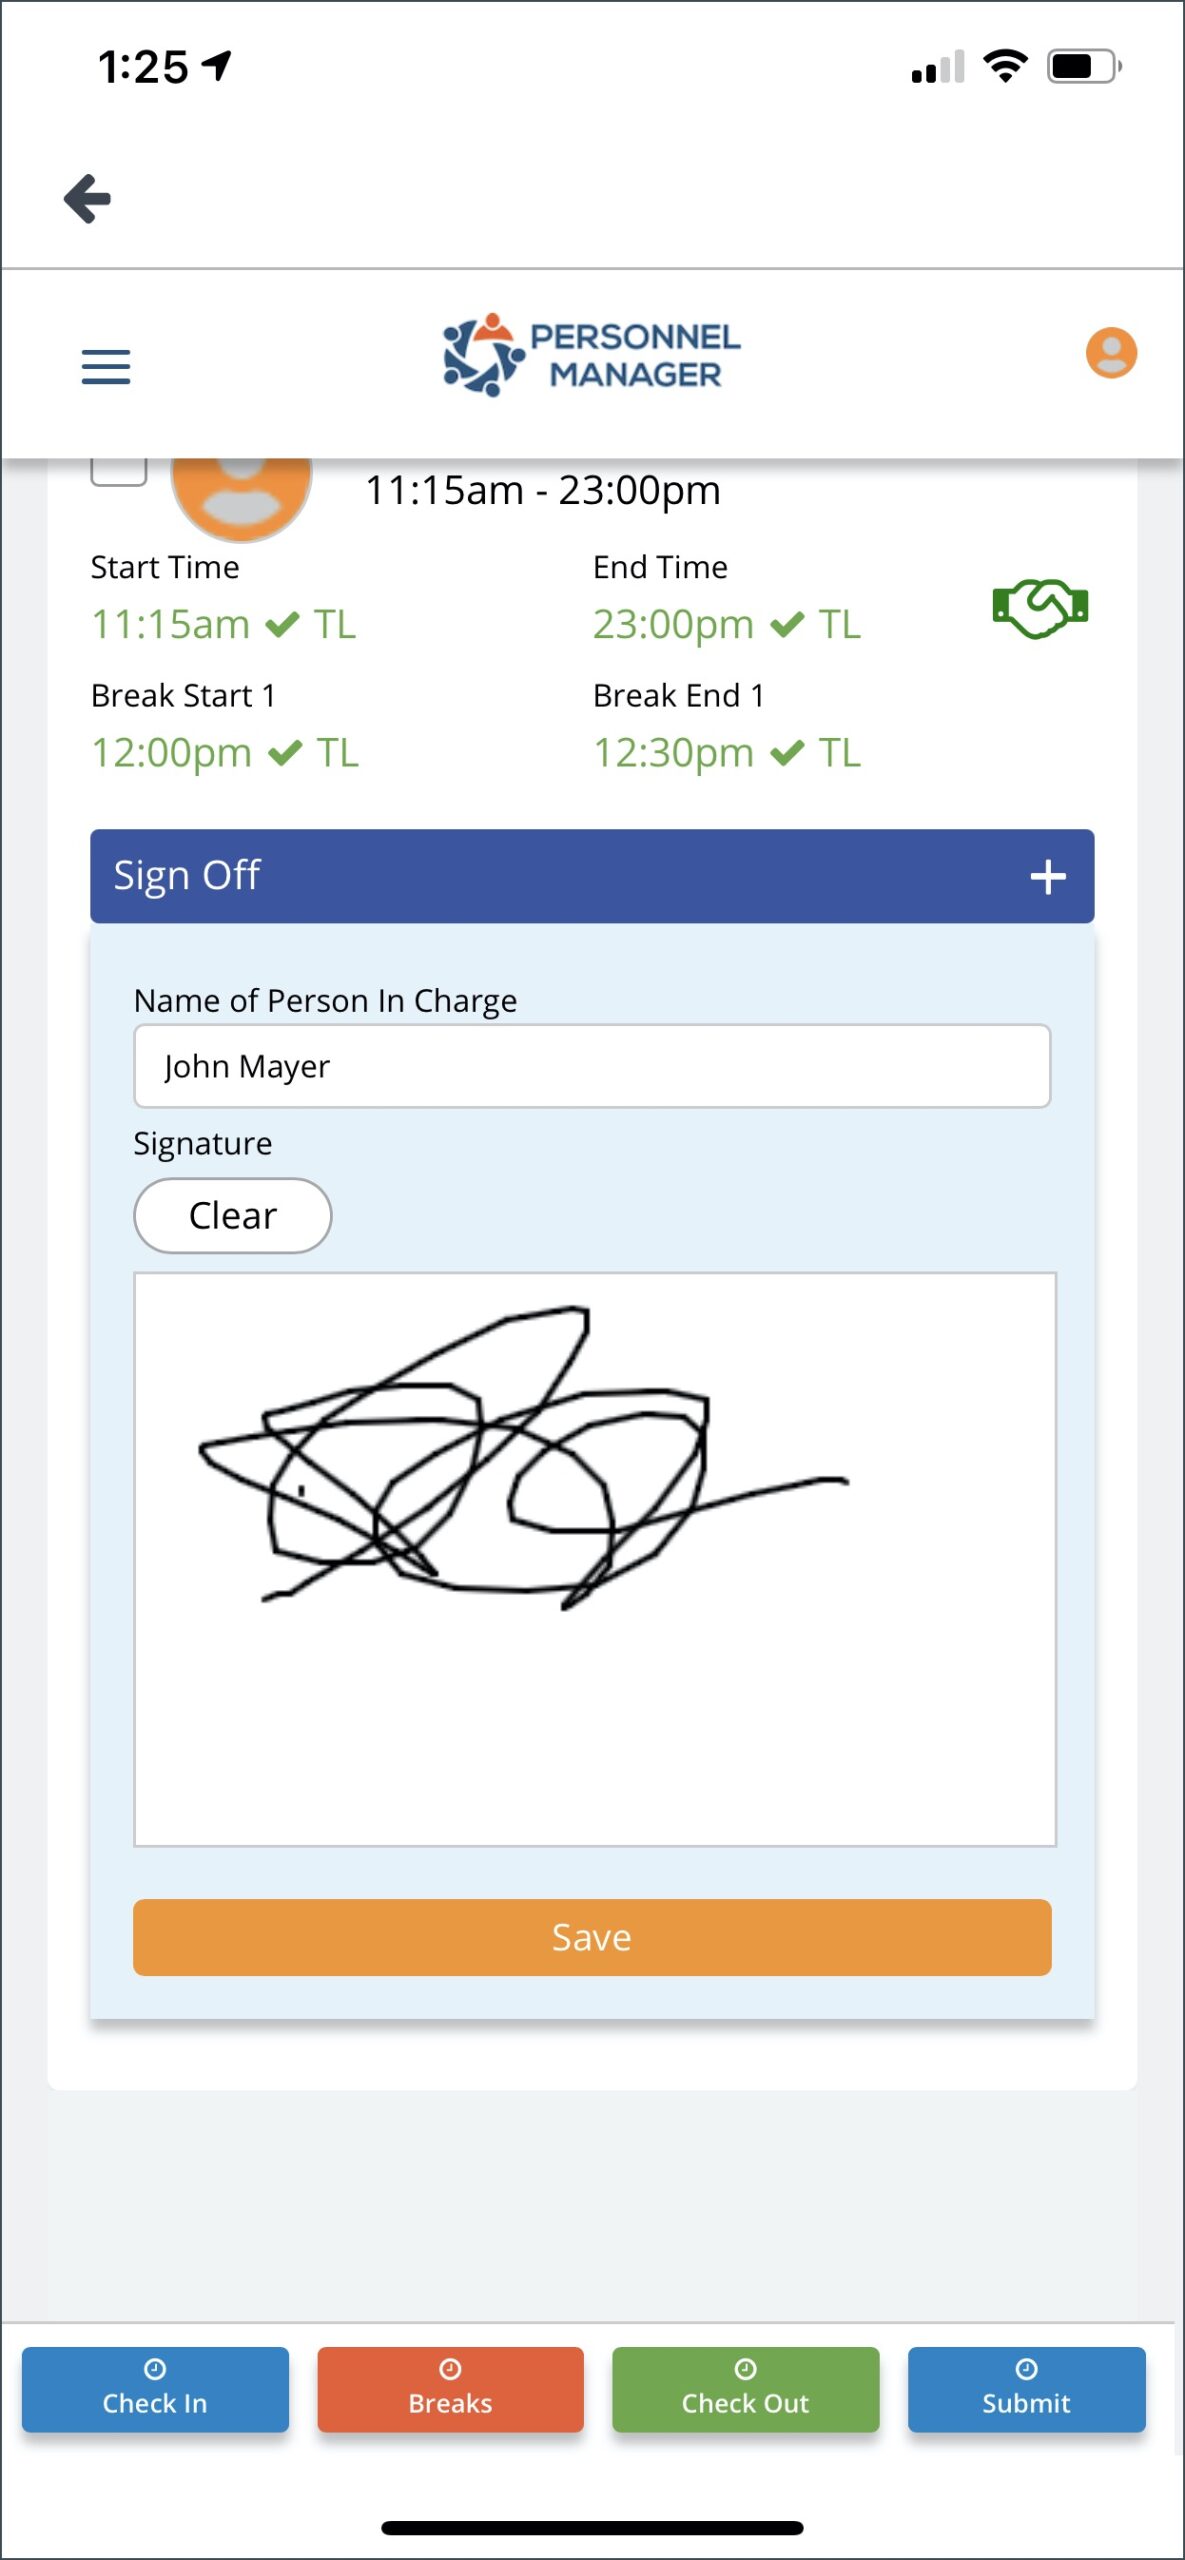
Sign Off
The sign off section is for the client. As Team Leader, you need to get their signature affixed on the Day Sheet to signify that the work they have ordered has been completed.
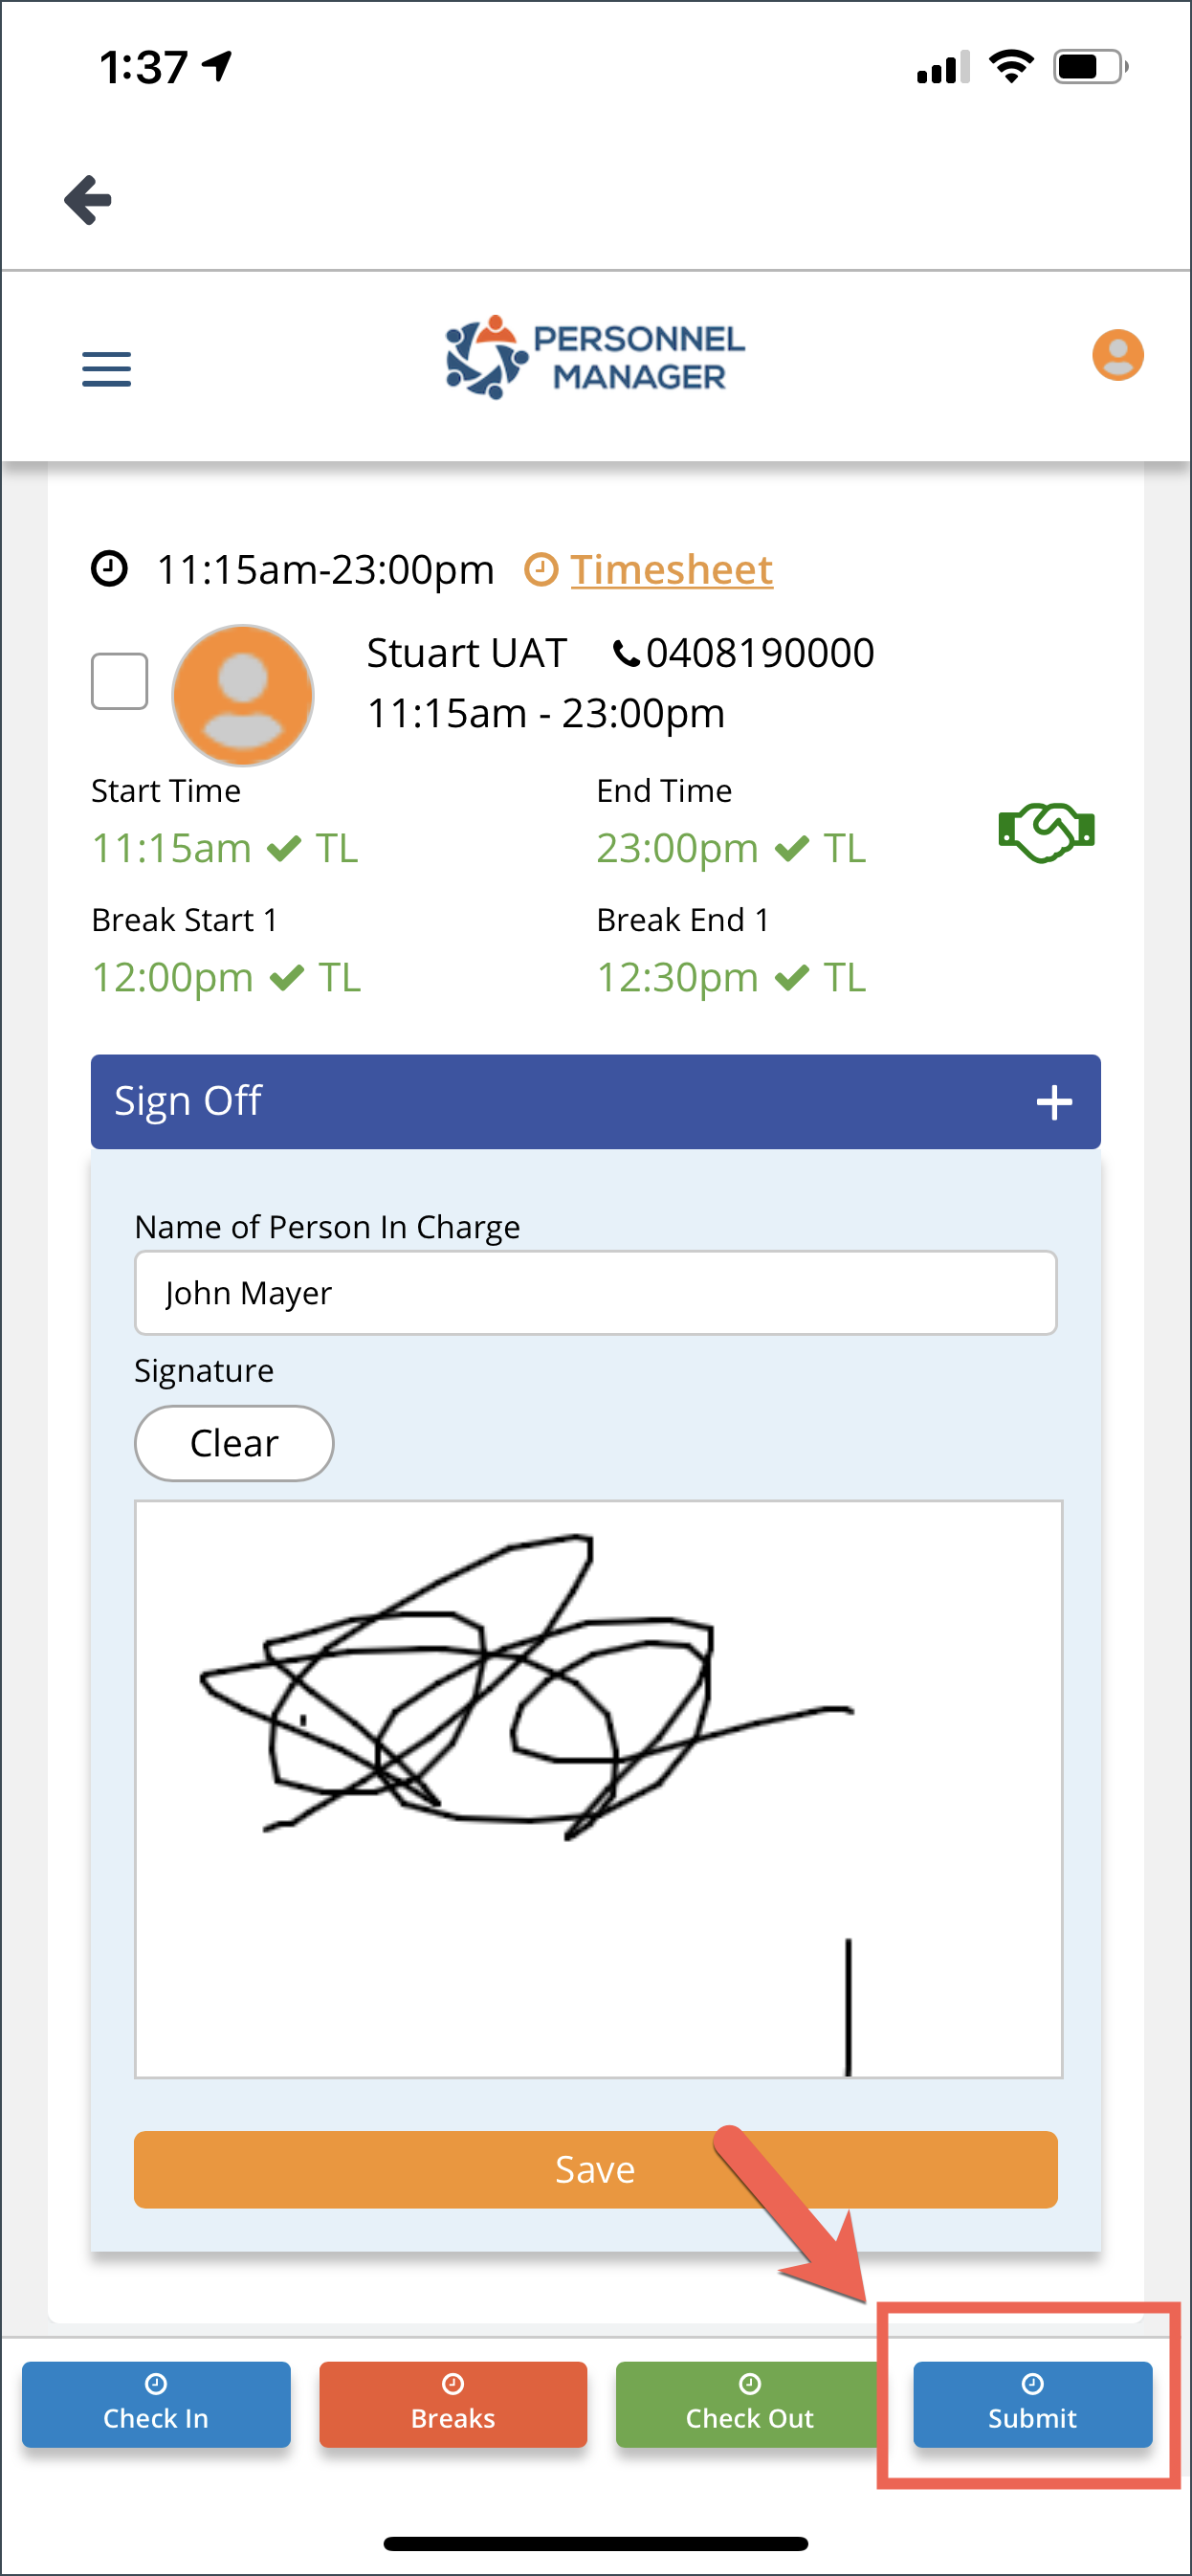
Day Sheet Submission
Click the Submit button to submit the Day Sheet. A checklist of requirements will appear for your review before submitting the Day Sheet.
Once you are certain that everything is in order, click Yes.
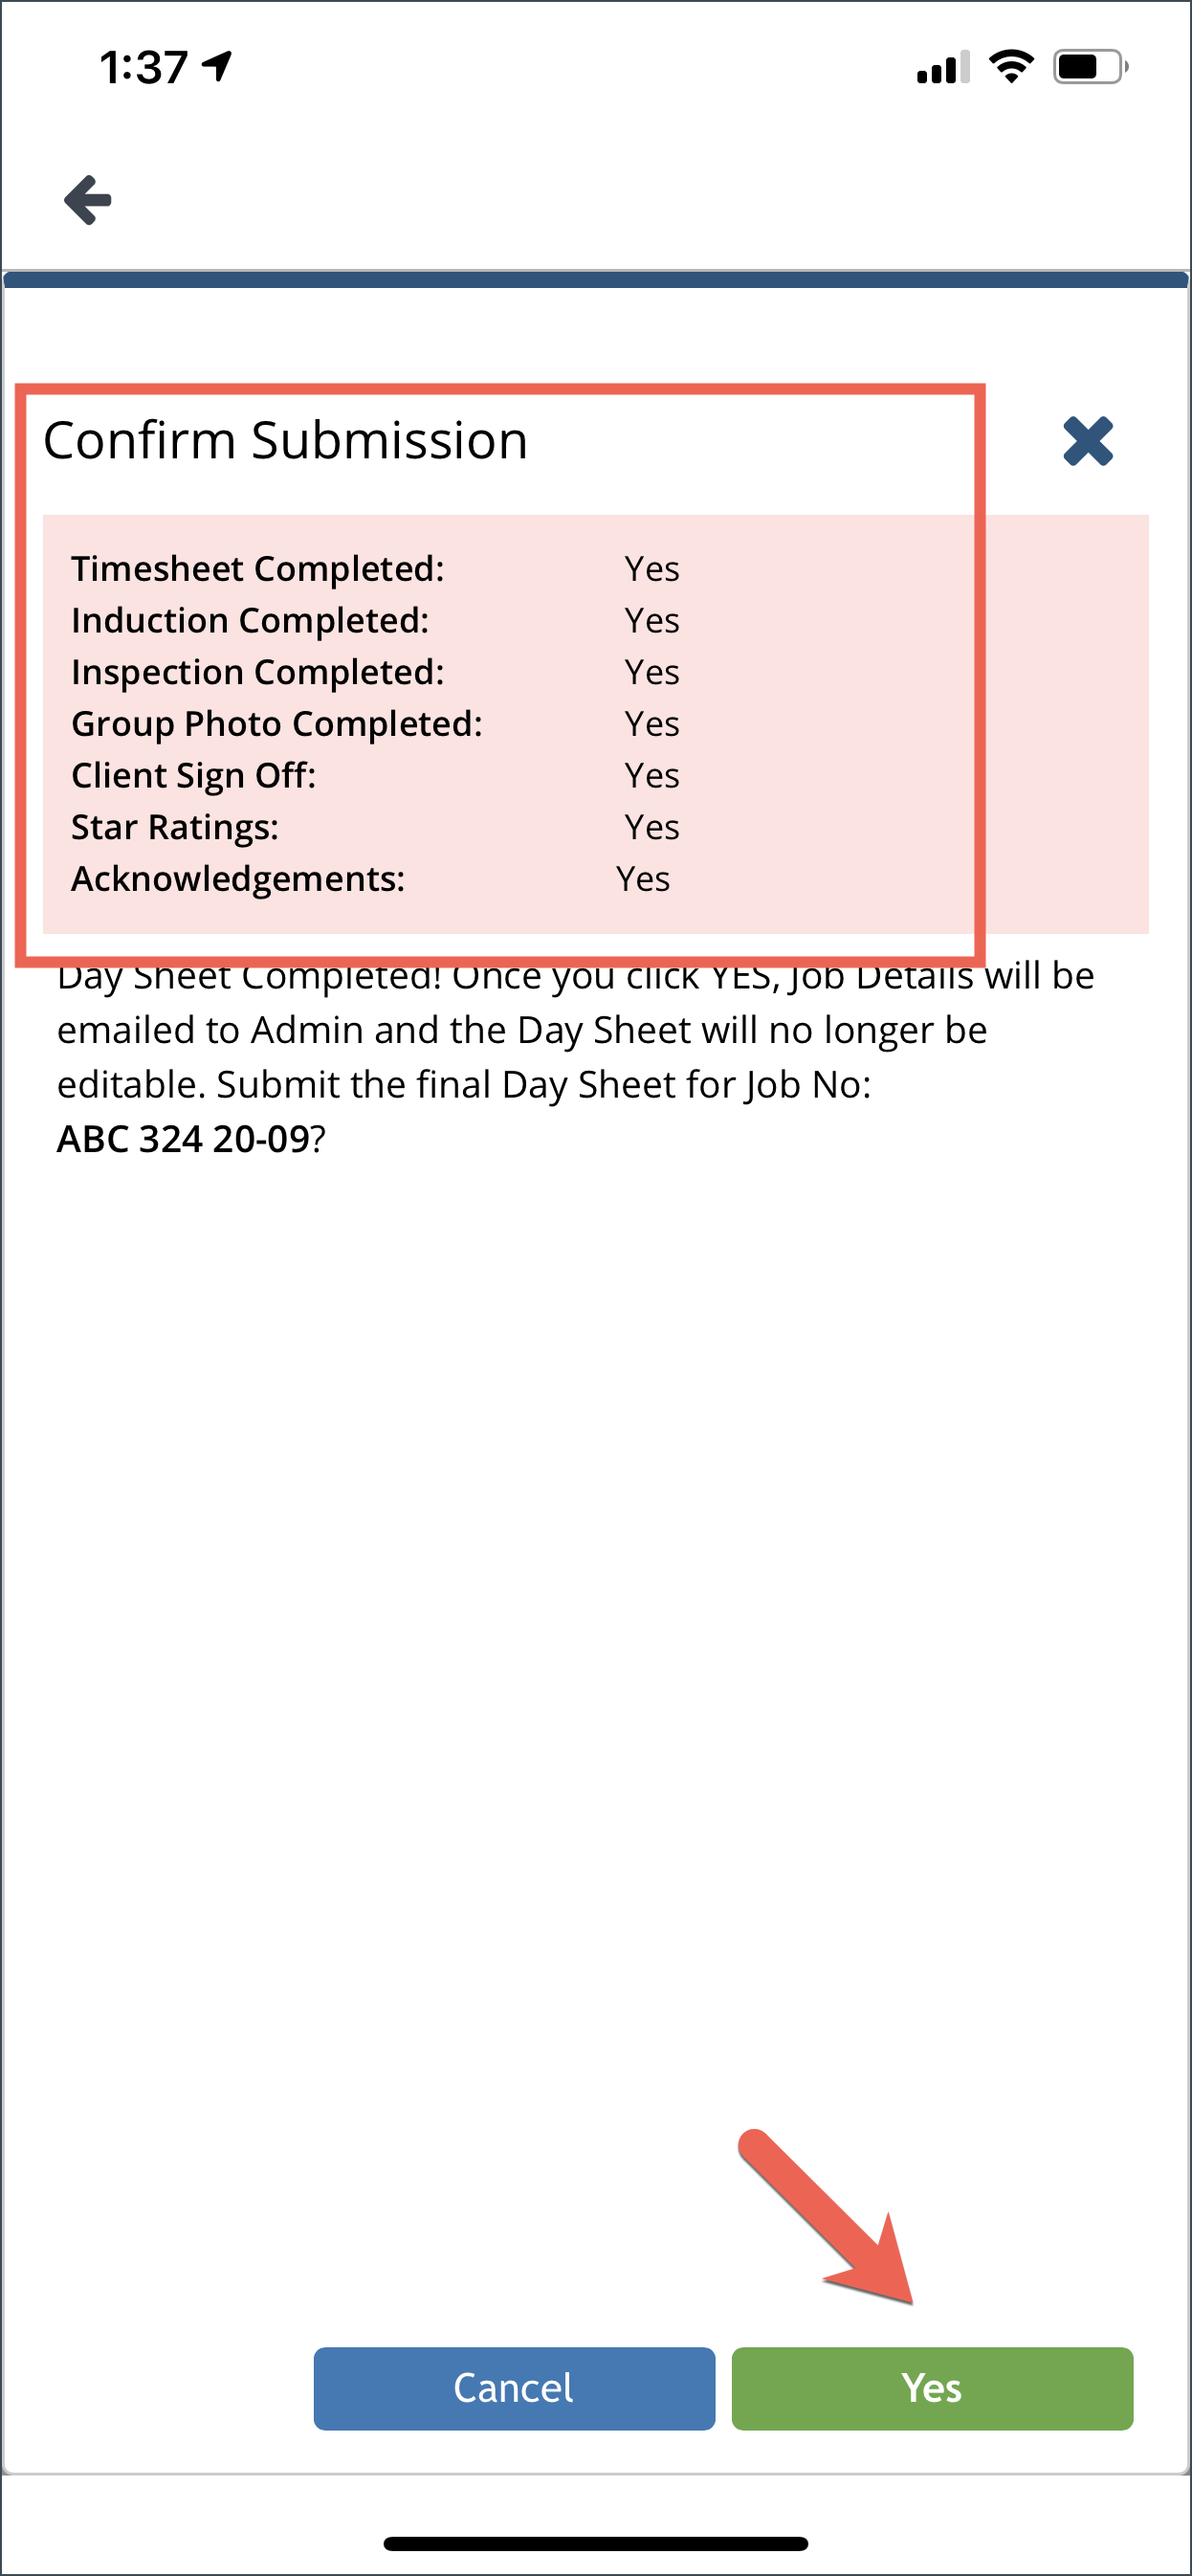
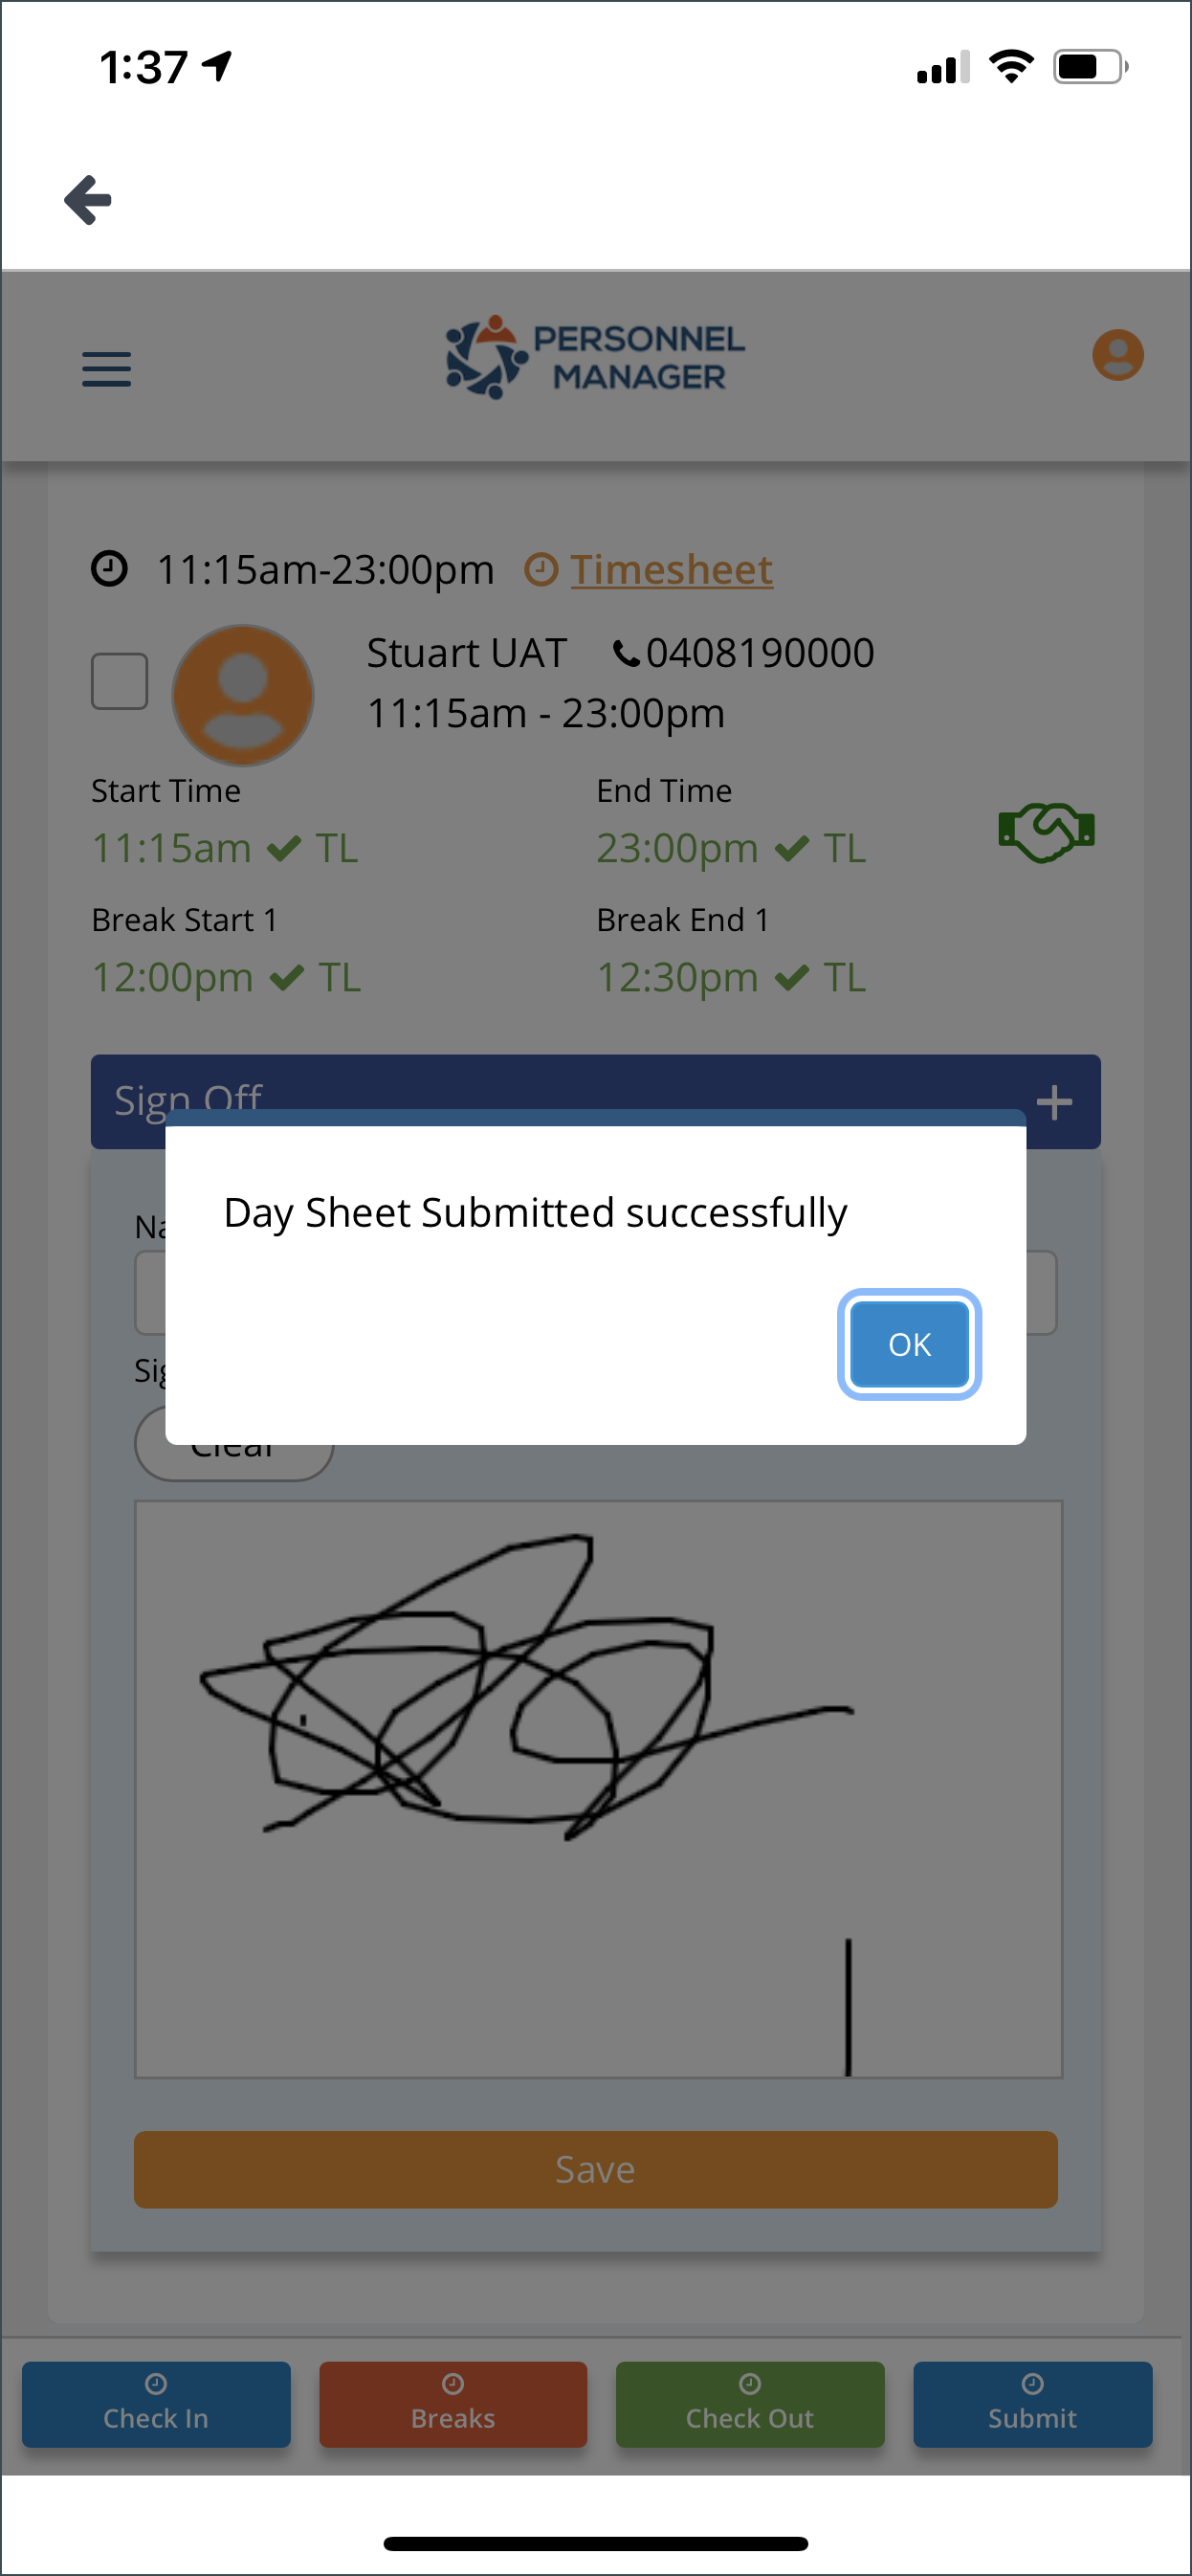
Click OK. Day Sheet is now submitted and lock icon will appear.
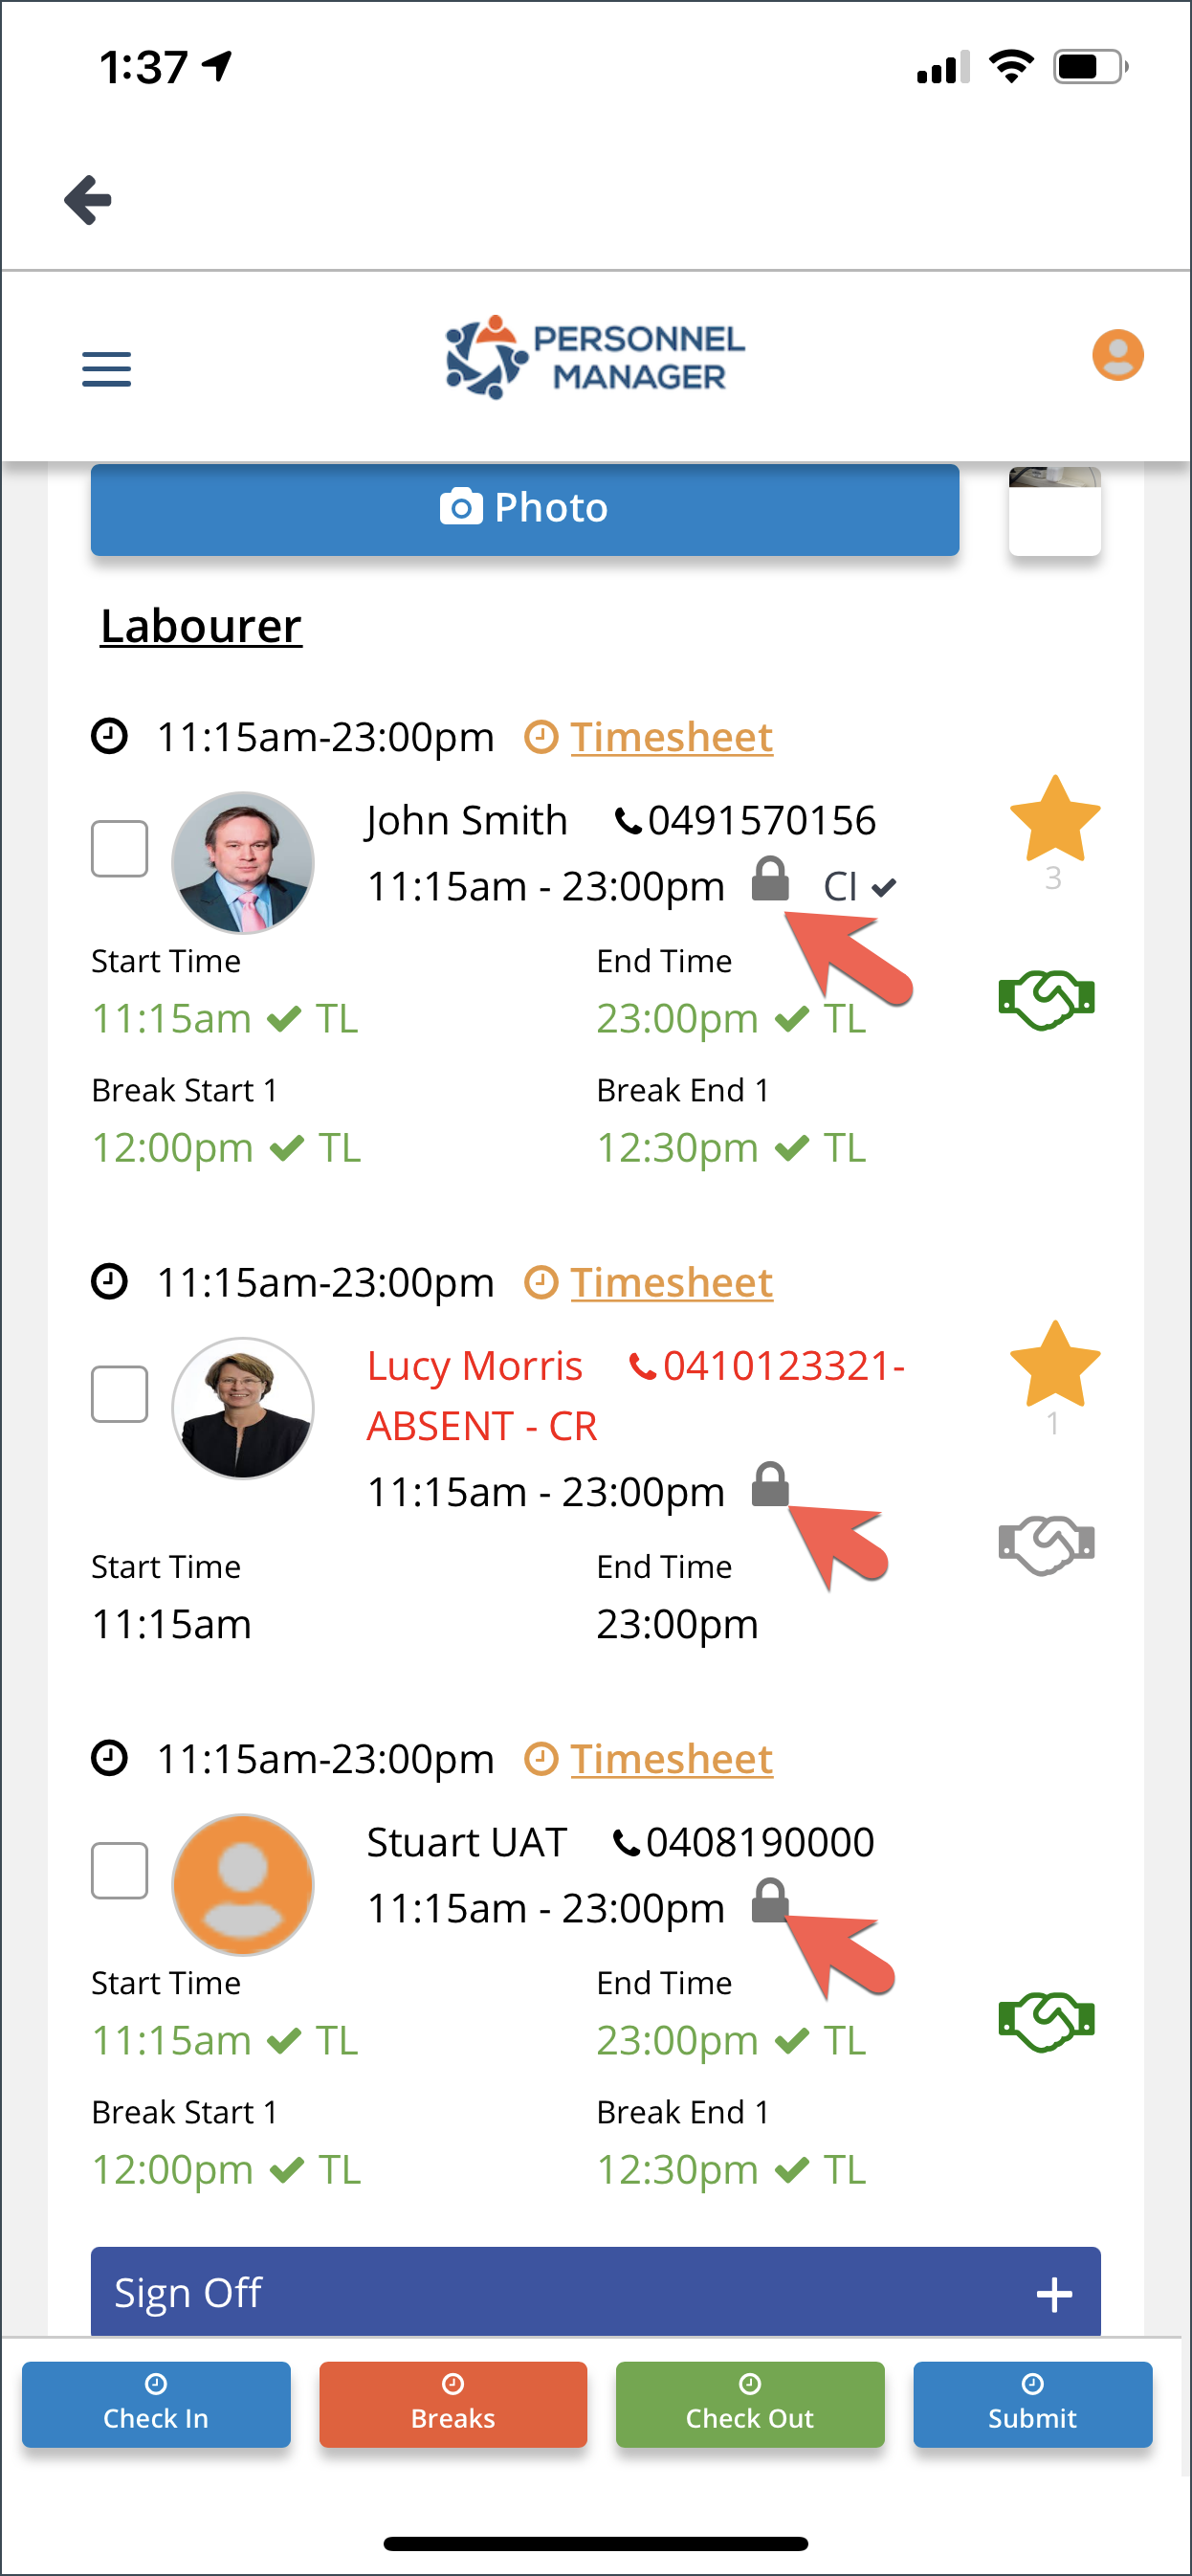
On the Job List page of the PM Crew App, the job is now greyed out and locked.
