6.2.1 Action Forms
The job may require that crew members are properly inducted about the venue, or before a crew can start a job, they will need information about health and safety.
The Action Forms is where you can set up actions that a crew needs to read and understand before they can complete a job.
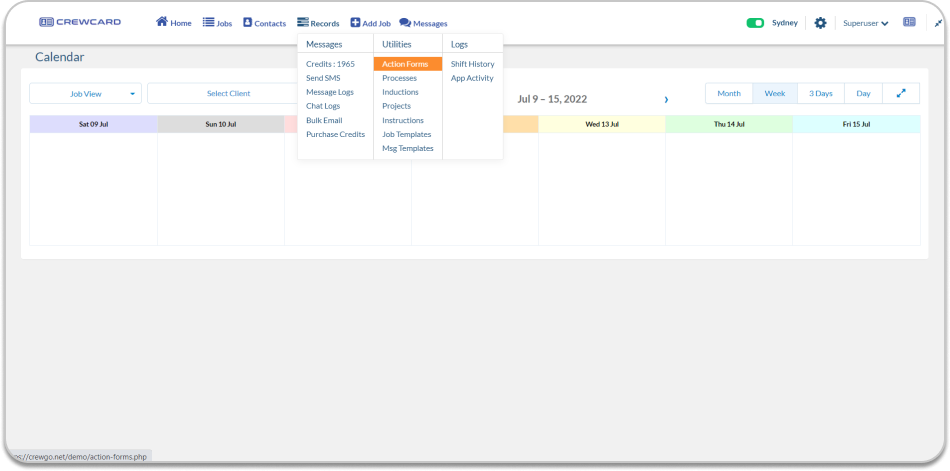
To add an action, Go to Messages and Select Action Forms under Utilities Column.
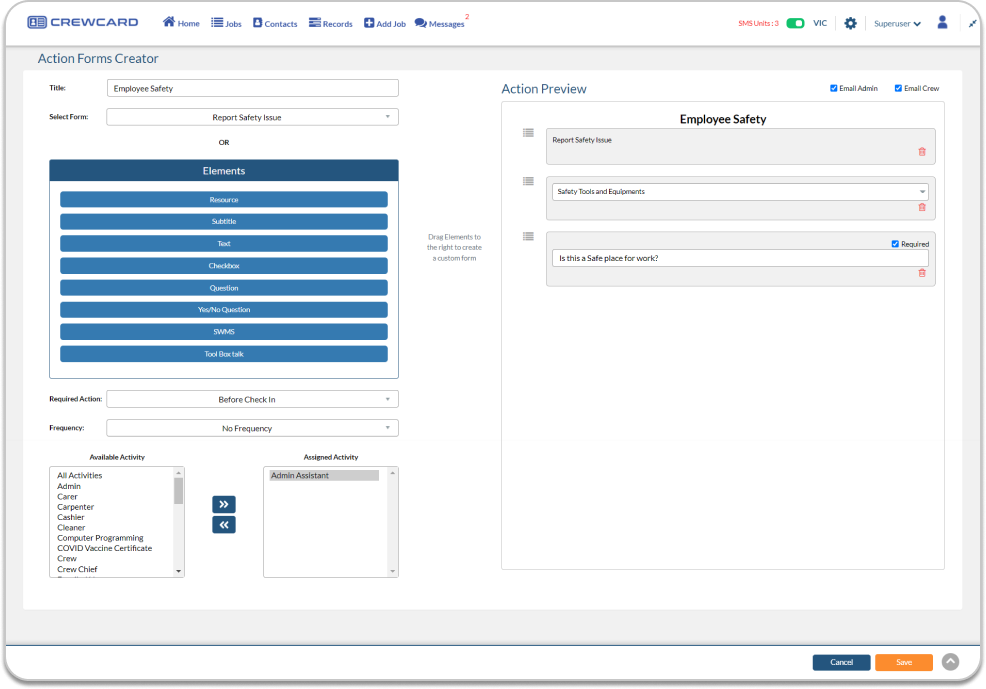
Click the +Add New Action Form button to open the window for adding Action Form.
Enter the title of the Action Form in the provided field. You can select an action form or start adding elements to the Action Form.You can just drag the Elements to the Action preview to create a custom form. There are different Elements that you can add to an Action Preview.

These are the available steps that you can add to your Action List:
- Resource – This can be a policy, procedure or any other important information that the crew can access using the Crew Access or via the app.
- Subtitle – this is a text which can be used as an additional information
- Text – information in the form of texts
- Checkbox – checkboxes which you can set as mandatory or not
- Question – a question step where crew members will have to answer
- Yes/No Question – a question step answerable by yes/no
- SWMS – This will display on the venue’s inductions when a crew is on shift.
- Toolbox Talk – Providing you with fully fledged and dynamic safety inductions for every occasion.
Required Action, allows you to select when action will takes place such as the following:
- First Time App Login
- Before Accept Shift
- Before Check In
- Before Check Out
Frequency
Forms can also be provided to staff at certain programmed times, such as the first time they are confirmed on a shift, or every time they are confirmed, monthly, quarterly, every six months or every year. For example, you may have a Forklift Induction that needs to be sent to a Forklift driver prior to their first shift, or you may require staff to complete a questionnaire every year to prove they are up to date with your latest policies and procedures.
Available Activity
This allows you to select which activity will take action to the Action Form assigned to a shift.
Email Admin and Email Crew can be ticked if you want them to receive an email notification for the Action required by the crew.
Once the action has been filled out, Click the Save button.
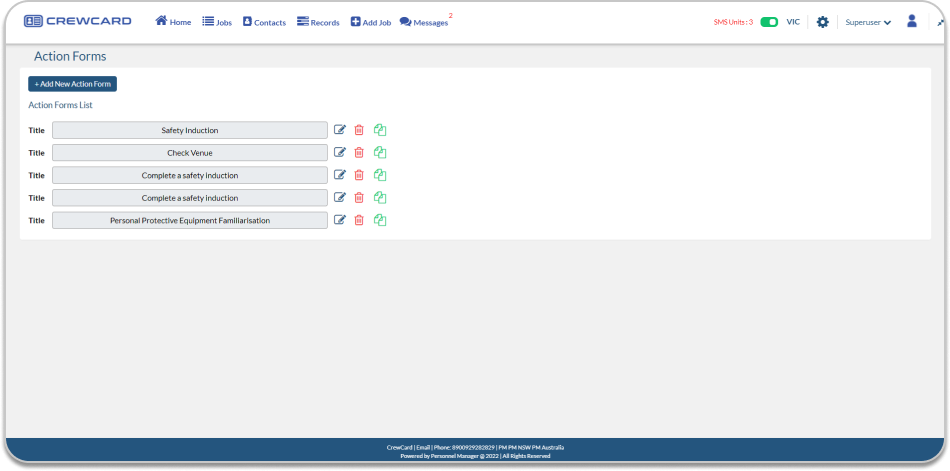
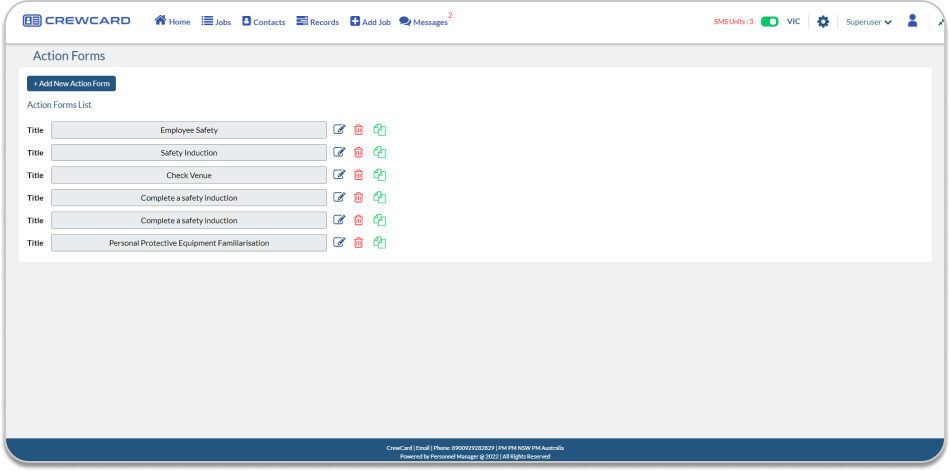
The newly saved Action forms will be added in the Action Form List. You may edit, delete or copy the Action Form.
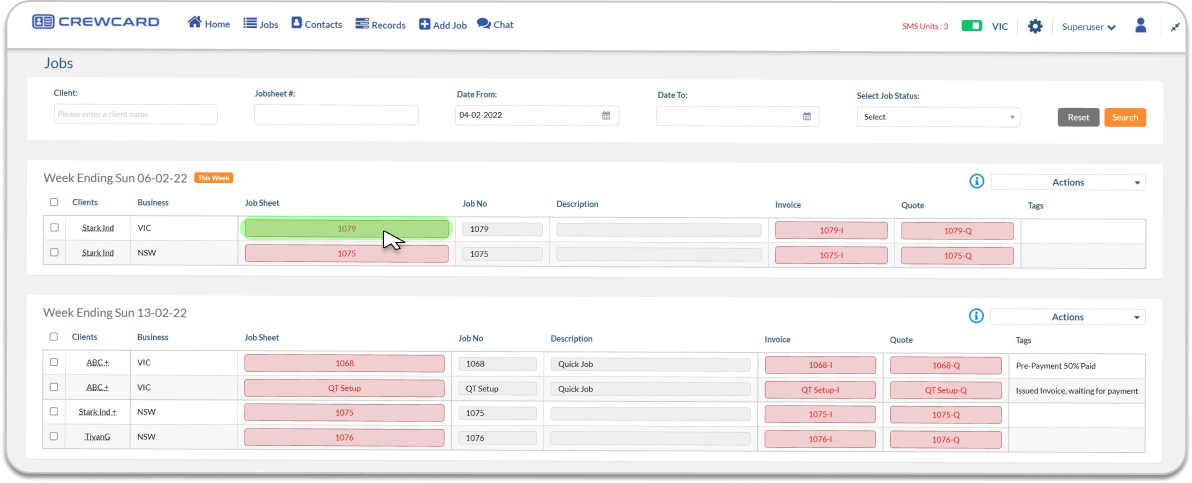
Assign the Action form to a job by going to the Jobs Page.
Select a Job Sheet where you want to assign the Action Form.
Scroll down at the bottom part of the page.
Select an Action from the drop down list and click save.
Action form is now assigned to a Job.
6.2.2 Processes
Internal documents and office processes can be stored and accessed using the Processes page. This enables your Administrator and Duty Managers to easily search processes in the system. These initiatives have been implemented with a view to reduce the systems required for operations management.
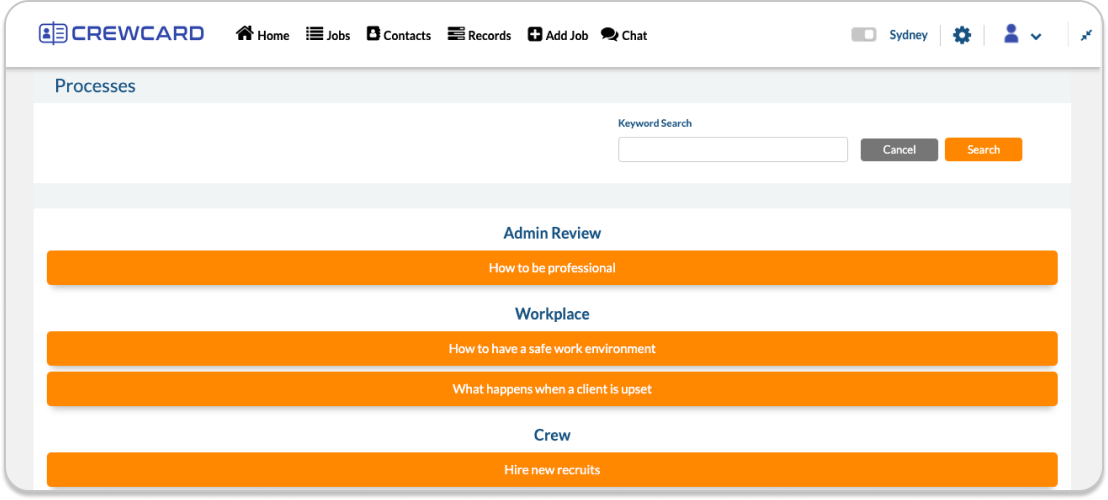
See guide 10.8 Processes Settings
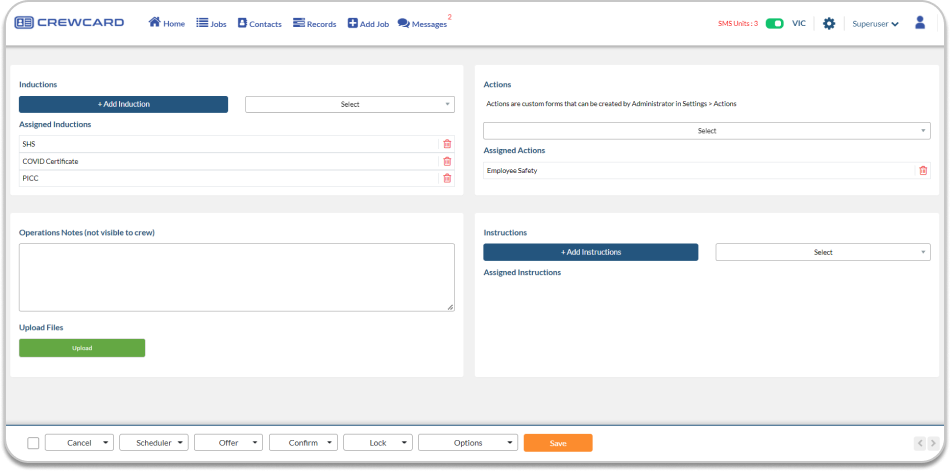
6.2.3 Inductions
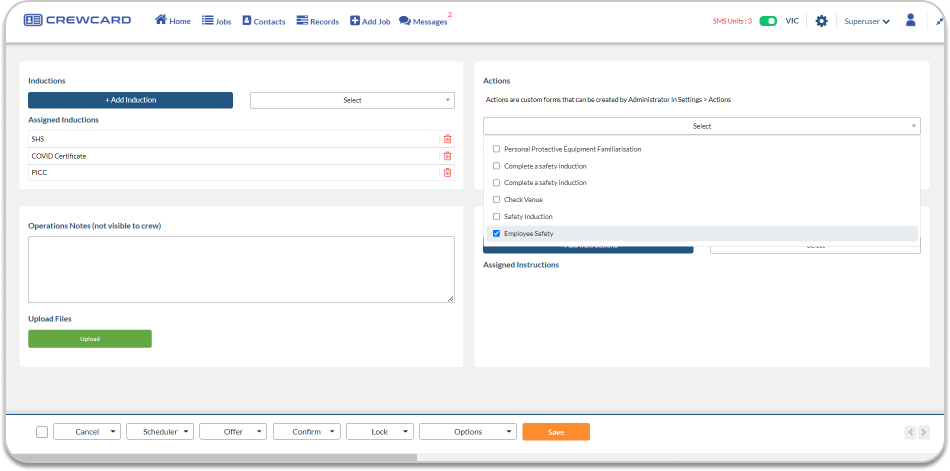
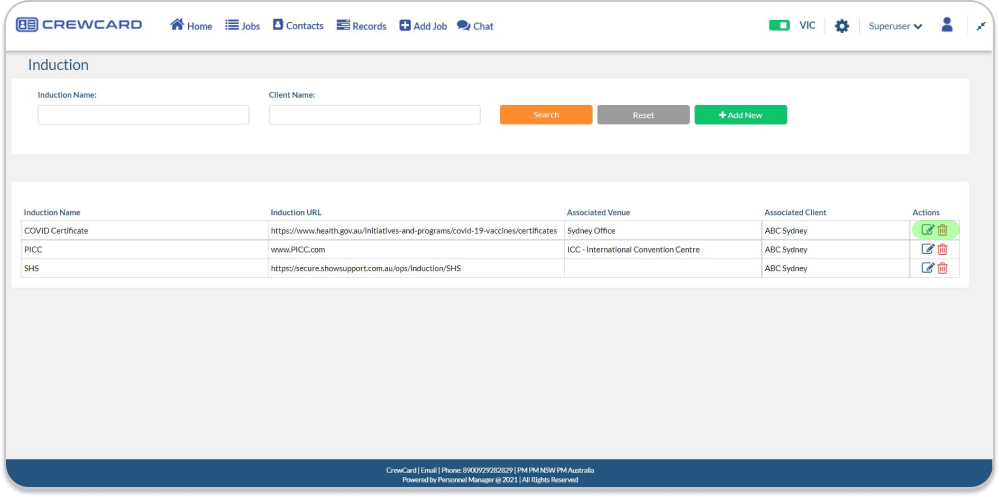
Induction is important to a job as it educates the crew about important information about a job that they may not be aware of. Use this page to store and view all induction in the system
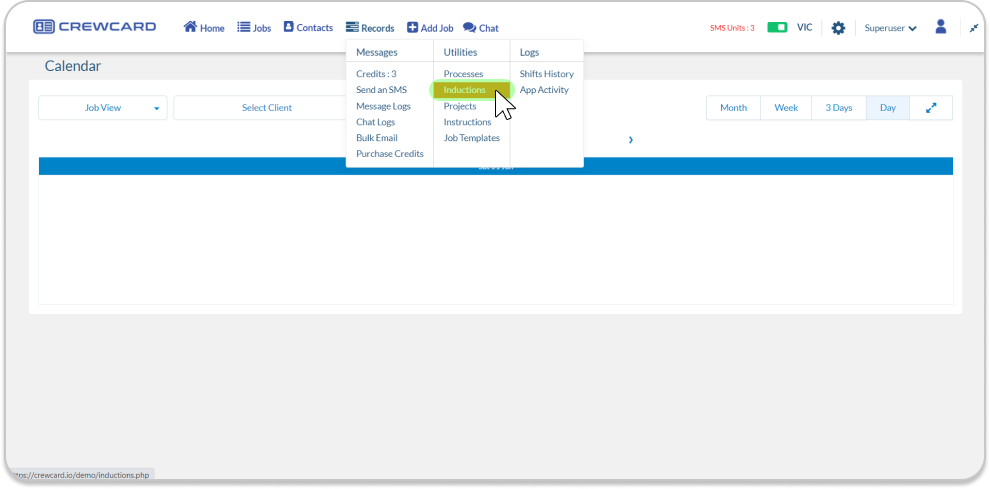
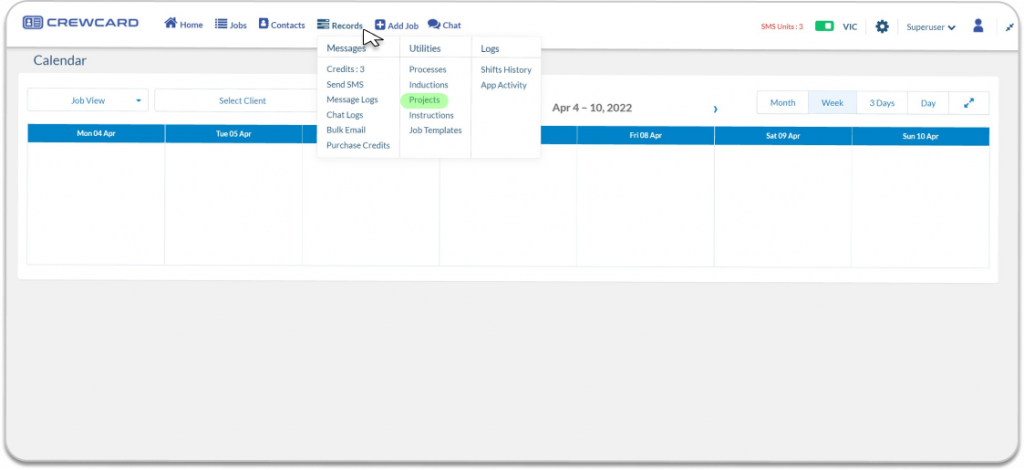
To access induction, click Records in the Central Navigation bar and select Inductions under the Utilities column.
At this page, you can see lists of inductions that have been made/ saved before.
You can Click + Add New button to create a new Induction.
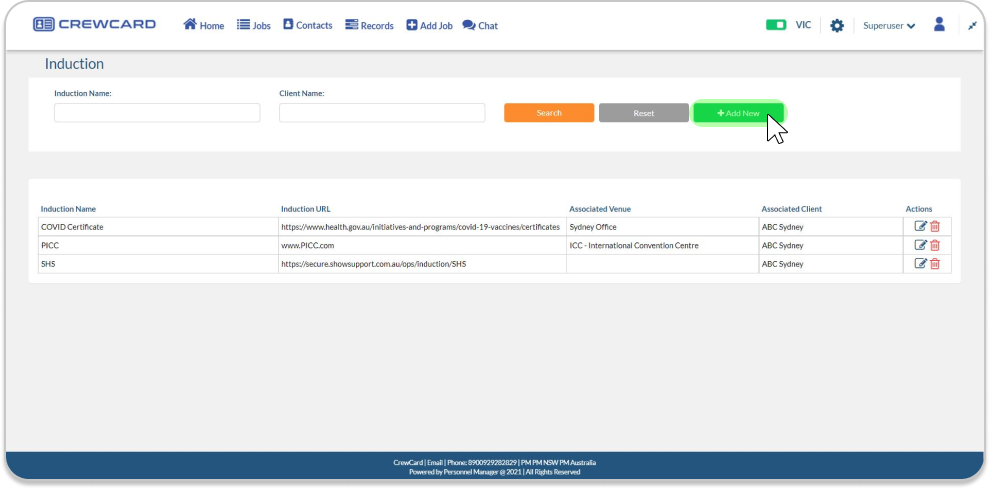
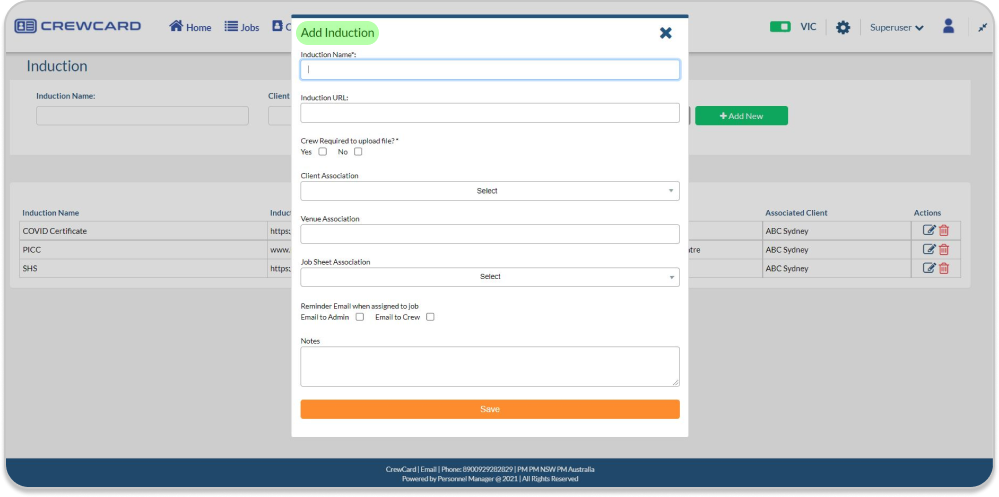
Fill out the form.
Induction Name: Enter the Induction name
Induction URL: Enter the URL of the Induction
Crew Required to Upload File: Select Yes/ No
Client Association: Select a Client associated to this Induction
Venue Association: Select the Venue associated to this Induction
JobSheet Association: Select a Job Sheet associated to this Induction
Reminder Email when assigned to Job: Select Email to Admin/ Email to Crew
Notes: Enter Notes
Click Save once completed .
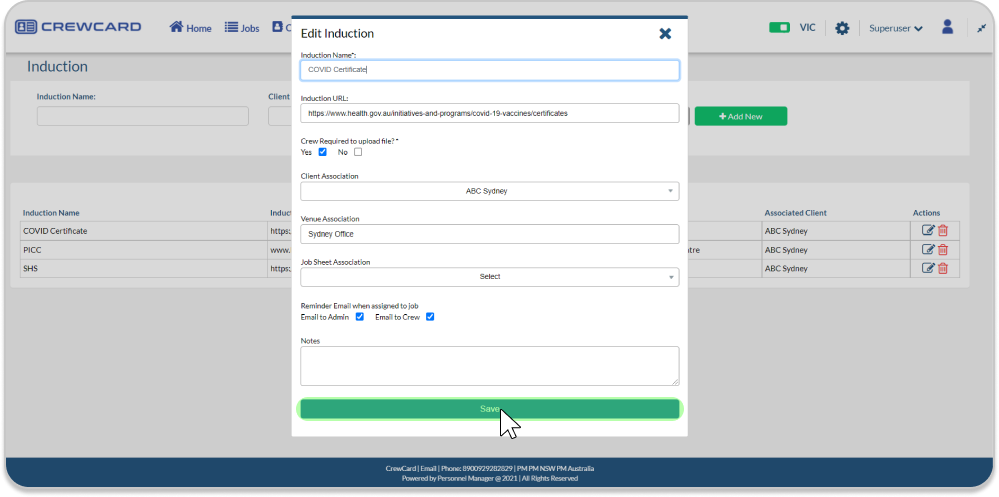
Once the Induction has been created you may edit the induction by clicking the edit icon and if you want to delete the induction,click the delete icon.
For more details about Instruction, See Easily Manage Site induction Page.
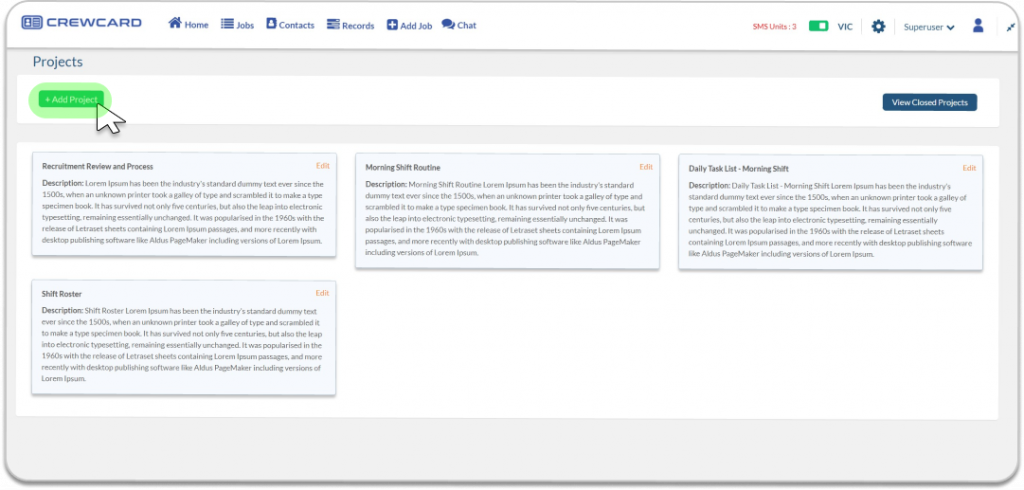
6.2.4 Projects
CrewCard includes a complete project management module called ‘Projects’ which allows easy team collaboration in a user-friendly and visual interface.
To access the Projects page, click Records in the header and select Projects under the Logs column.
Click the + Add Projects button on top left-hand side to create a new Project. Once a Project has been created, open it and start creating tickets by clicking the + Ticket button on the top left-hand side. This way, you can have multiple different Projects for different departments, events or teams as you require. The tickets within the projects can be allocated to multiple Crew Members. Tickets include the following information: Ticket Name, Owner Name, Owner Email, Activity, Assign To (multiple crew), and Description where the bulk of the project information is added, such as the tasks required to be completed by the staff the ticket has been assigned to.
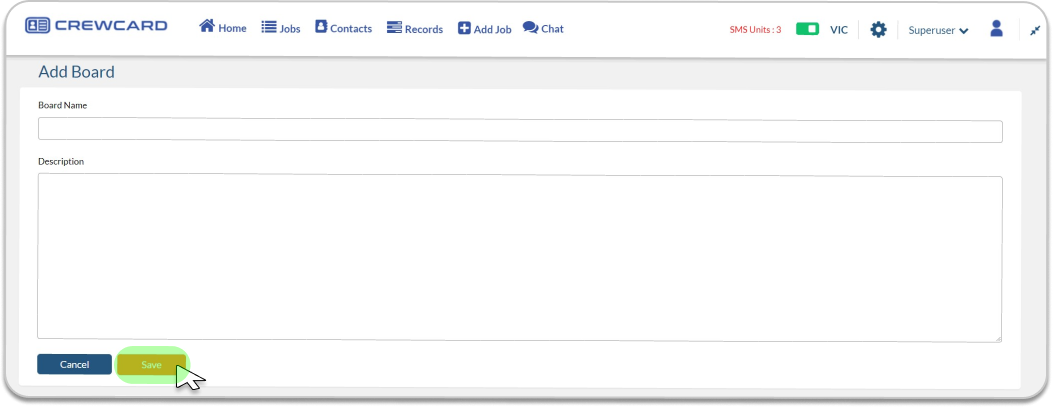
This will take you to a new page where you have the ability to fill out the information on the job you wish to create.
Board Name: This is the title of the board that the tickets will be under
Description: Add a description of the board which informs users what is under the the board
Click Save and this will add to the board.
If you wish to edit or close a board, click edit on the board you wish to perform the action to.
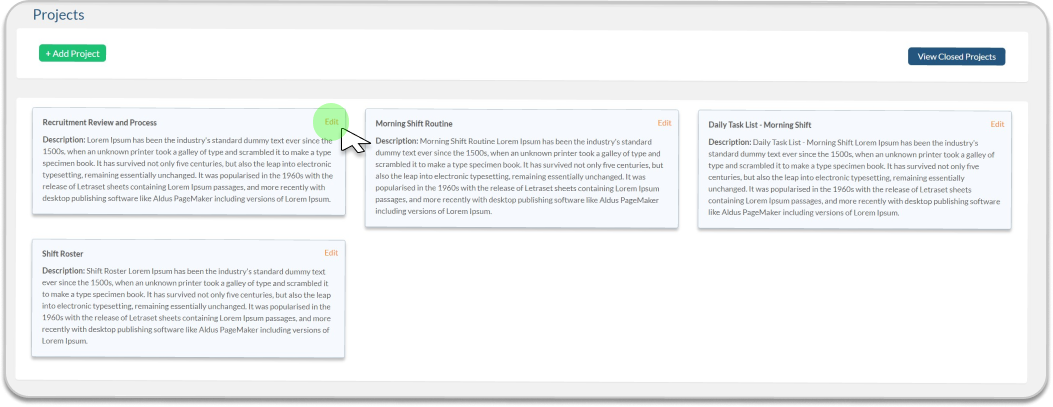
This will open up the board where you can edit the name and the description. If the jobs under the board are completed, click close.

This will move the board to closed projects. You can open up closed boards at anytime.
Tickets
After creating a board, click the board you wish to open.

Once a Project has been created, you can open it and start creating tickets by clicking the + Ticket button on top left-hand side. This way, you can have multiple different Projects for different departments, events or teams as you require. The tickets within the projects can be allocated to multiple Crew Members. Tickets include the following information: Ticket Name, Owner Name, Owner Email, Activity, Assign To (multiple crew), and Description where the bulk of the project information is added, such as the tasks required to be completed by the staff the ticket has been assigned to.
Below this, the ticket requires a start date and time, deadline date and time, and reminder date and time so that each party to the ticket, owner and assignees may be reminded of the work required to be completed by a certain deadline. Once the ticket is completed by the assignee/s, they submit it to be reviewed which notifies the ticket owner to check the Review Column of the Project’s Kanban board of tickets.
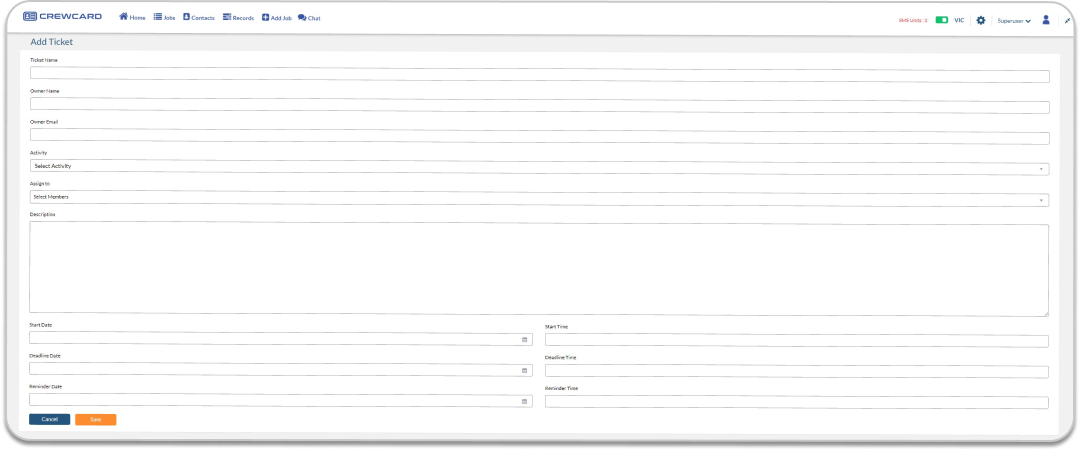
Ticket Name: Brief description of the job ticket
Owner Name: Enter the name of the person who created the ticket
Owner Email: Enter the email of who creates the ticket
Activity: Use the pre-uploaded activities to highlight who it belongs to
Assign To: Click the box and a list of the crew will be displayed. You can select one or more crew to allocate this ticket to
Description: Write a detailed description of the task that needs to be performed
Start Date: Use the calendar to select the date you want the task to commence on
Deadline Date: Use the calendar to select the end date for the task. This will inform the crew when the task needs to be completed by
Reminder Date: Use the calendar to select the date that the crew will be reminded of the task
Start Time: Click the box to select the start time of the task
Deadline Time: Click the box to select the end time of the task
Reminder Time: Click the box to set a time to the reminder to be sent out
Click Save once completed
Each Project opens to a Kanban board where tickets are displayed in four columns: Plan, Current, Review and Completed. These can be dragged and dropped into place as per the status. When assignees have completed a ticket, it is automatically moved from the Current Column to the Review Column. The owner may then review them and decide it has been successfully completed and then drag it into the Completed column. Alternatively, the owner may not be satisfied that the ticket is completed and drag it back to the Current column, which will trigger a new notification to the assignees that they need to work on that ticket again, with new deadline and reminder dates and times to adhere to.
6.2.5 Instructions
To assign an instruction to a job, Simply hover your mouse to Jobs in the central navigation bar and select jobs. Select a Job Sheet where you want to add the instruction.
In the Job Sheet page, scroll down until the Instruction section. Click + Add Instruction button to add an instruction.
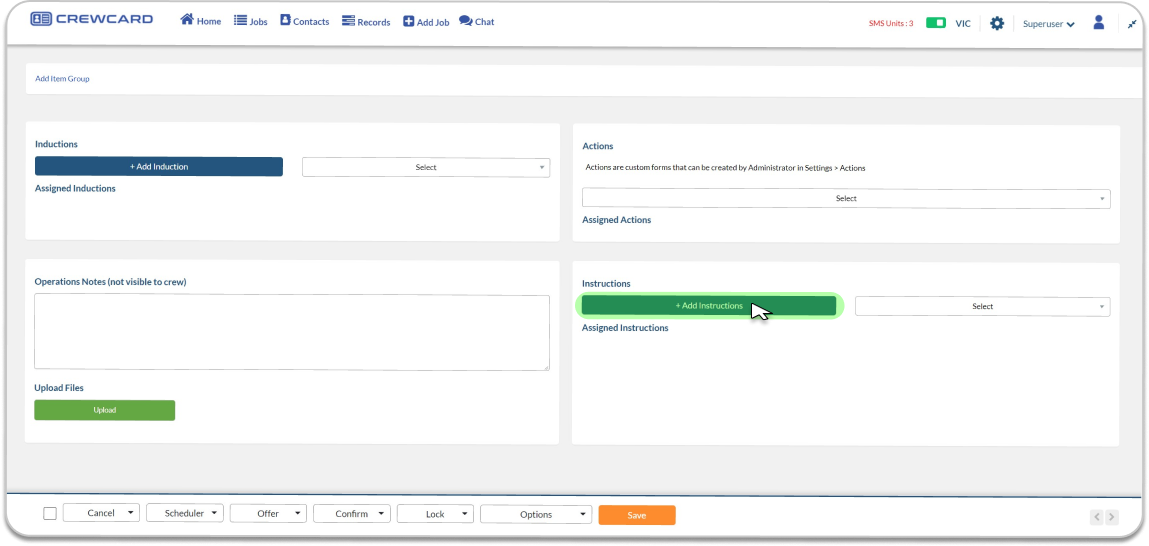
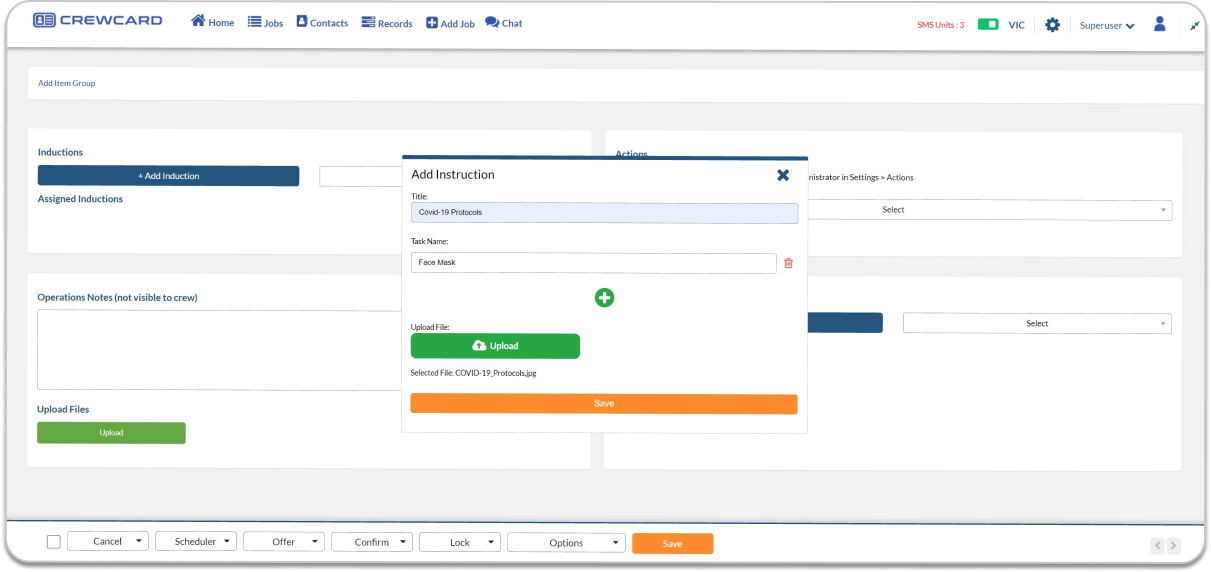
The instruction window will pop out and fill out the form. Note that you may add more than 1 task by clicking the + Icon.

Click the Upload button to upload an image or photo. Once the file has been uploaded you may be able to view it by clicking the file below the Upload button.
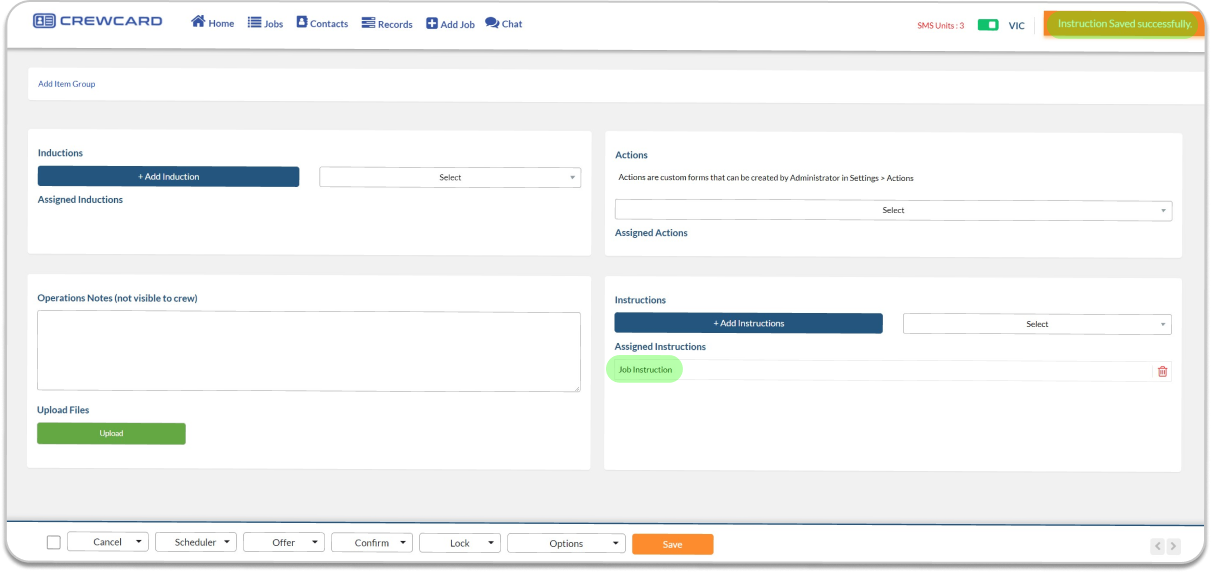
A notification will prompt on your upper right screen that “Instruction Saved successfully”. You will also notice that the newly created instruction was added under the assigned instruction. Additionally you may select existing or saved instructions in the select drop down menu.
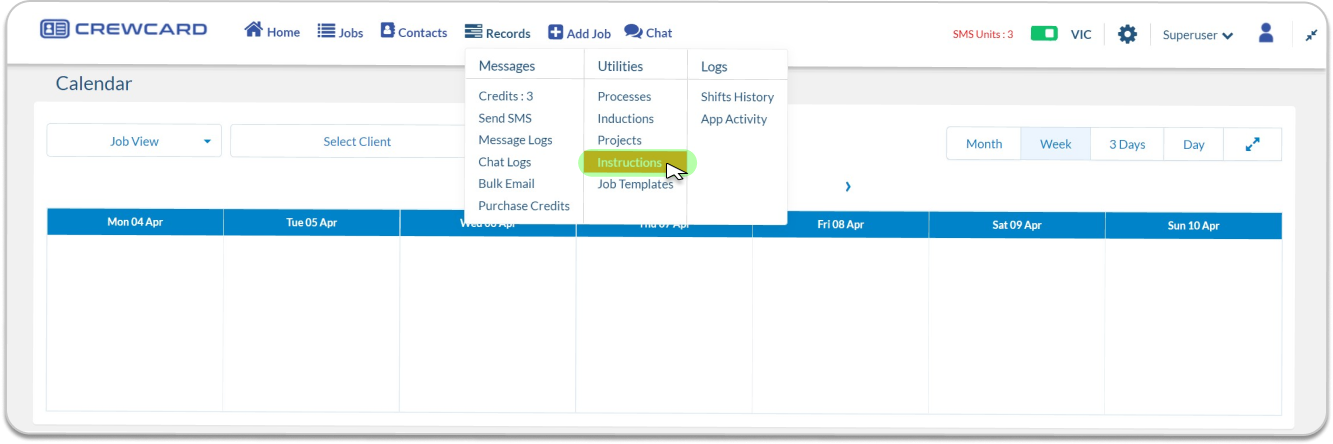
Another way of Adding Instructions is through the Instruction Page, Simply hover your mouse to records in the central navigation bar and select Instructions under Utilities column, this will direct you to the Instruction Page.
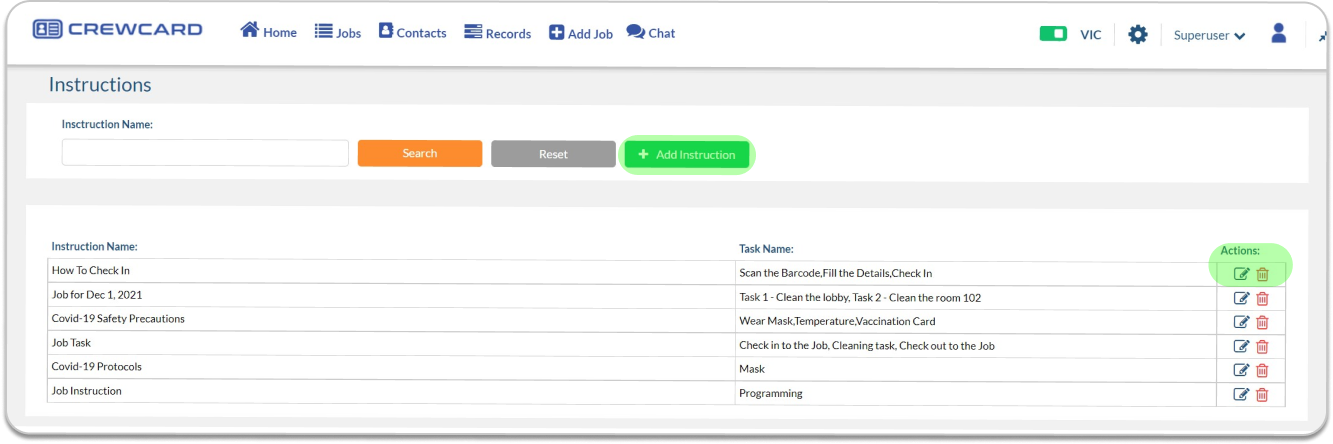
Once you are directed in the Instruction Page, click + Add Instruction to add an instruction, you may also select an instruction from this page and click edit icon if modification is required alternatively click delete icon if instruction needs to be removed.
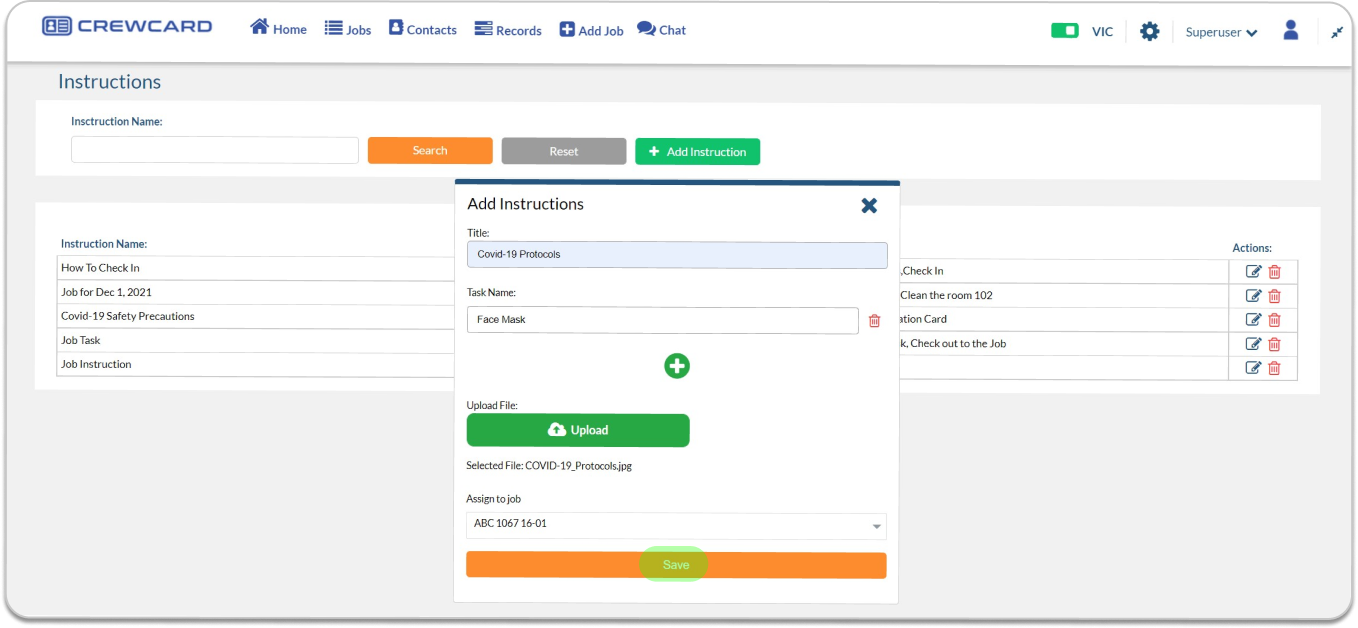
Once the + Add instruction has been clicked, an Add Instruction window will pop up. Fill out the form and please note that we can add more than 1 task by clicking the + icon. Click the Upload button to upload an Image or photo. If there are additional instructions, Enter it in the Notes field. Moreover you may select a Job wherein you can associate the Instruction.

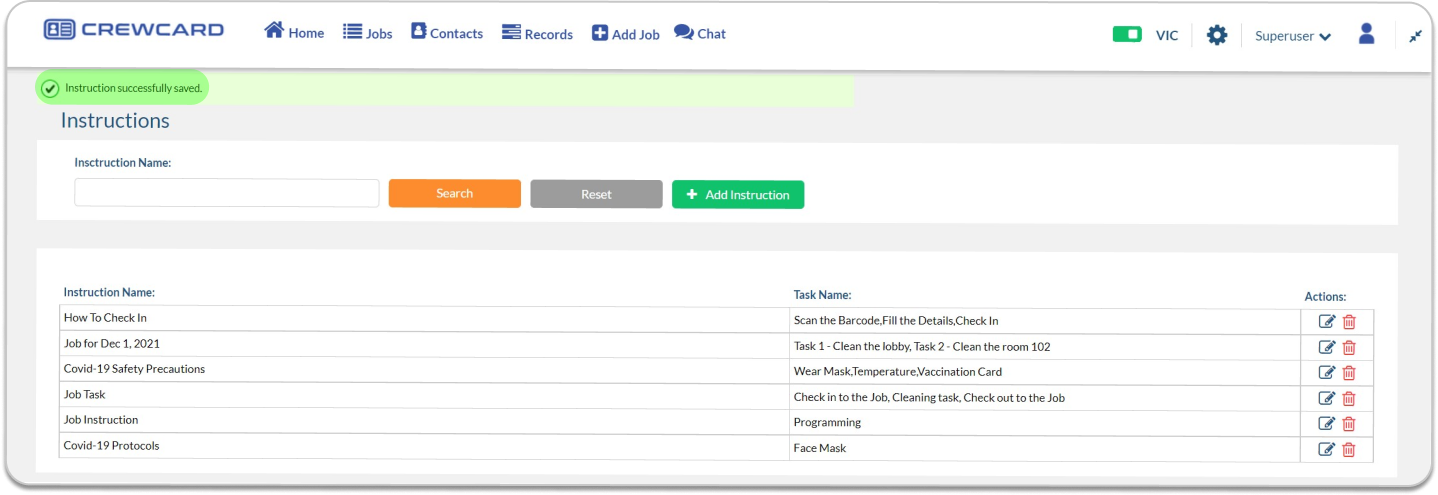
Once done filling out the Add instruction form, Click Save button.
A notification will prompt that “Instruction Saved successfully”. The new added instruction will also be added in the Instructions list on this page.
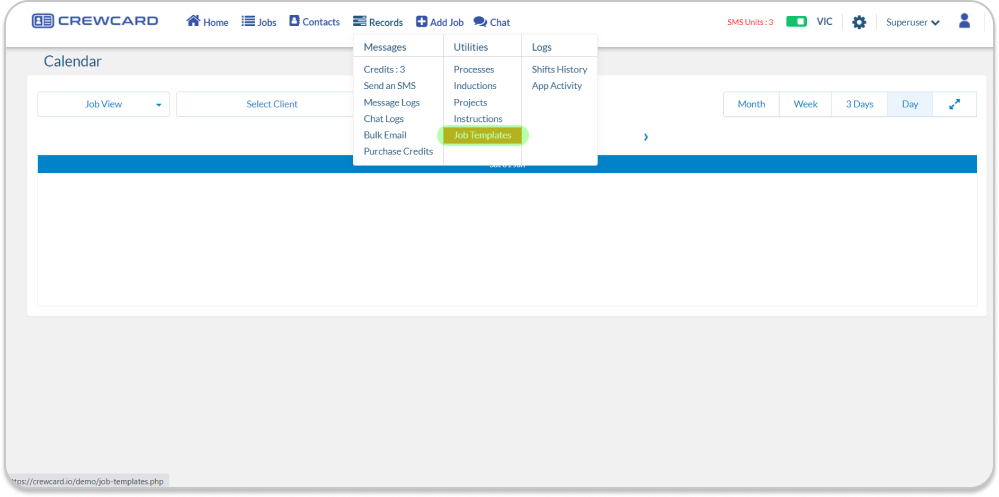
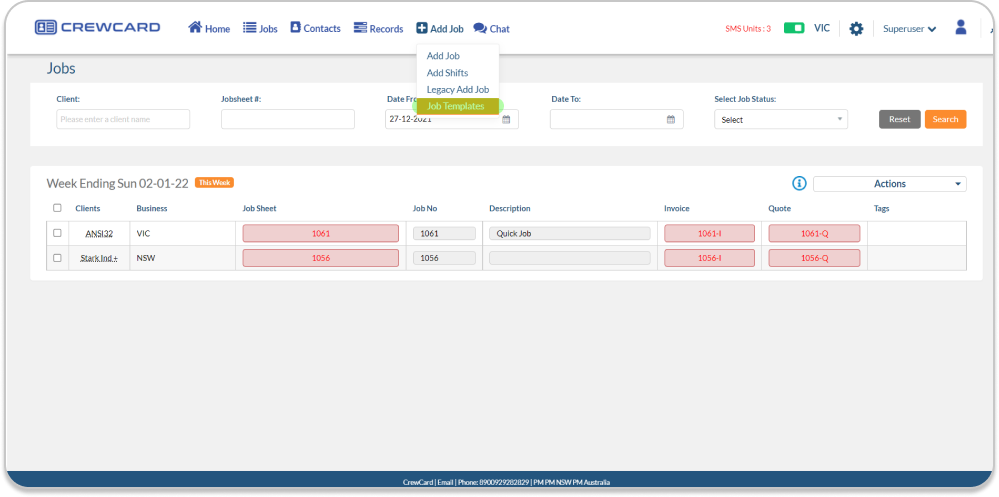
6.2.6 Job Templates
Job Templates allow you to create as many different types of Jobs (schedules, rosters) as you like and save them within each Job Sheet.
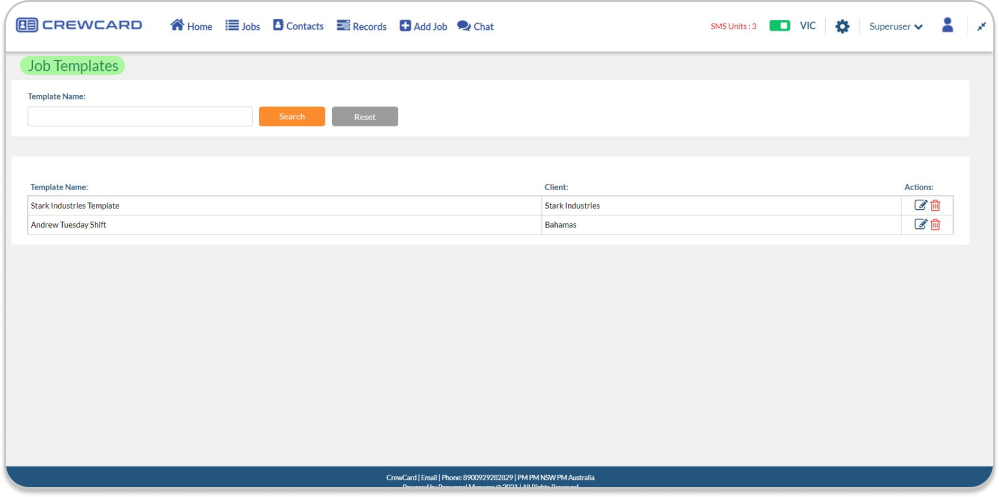
Once your template has been saved in a Job Sheet, you can edit and delete the job templates at the job templates page. It can be opened at any time, with a new start date and all other details the same as previously. It is even possible to recreate the same template under a new client or business.
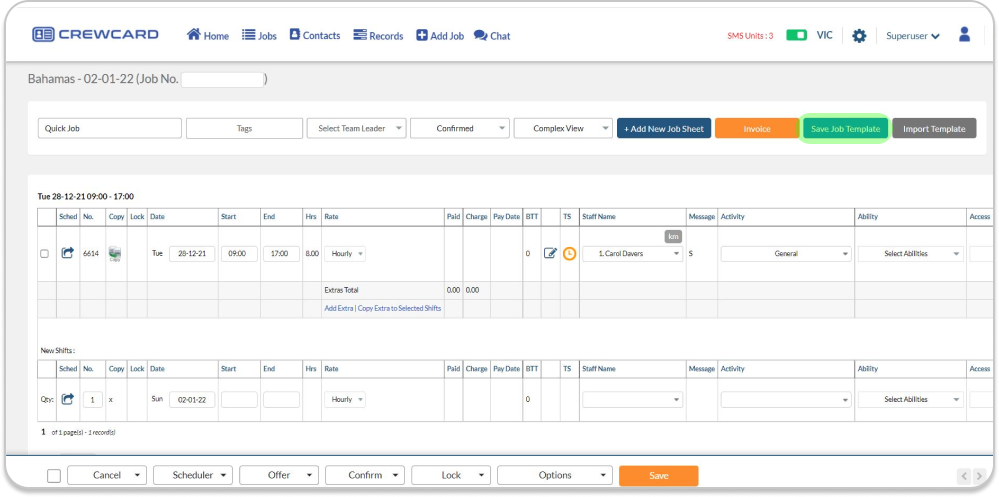
To create a Job template, Simply go to the Job Sheet Page page and click the Save Job Template button.
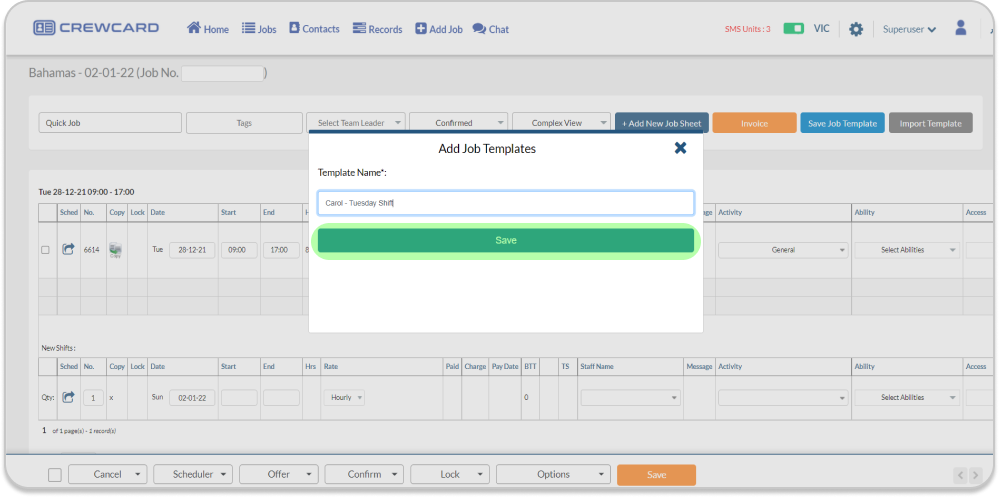
Save Job Template window will pop up, Enter the Job Template name and Click Save button.

To create a job from the save Job Template, Hover your mouse to Add Jobs and select Job Templates. Enter the Job Template name, and click save.
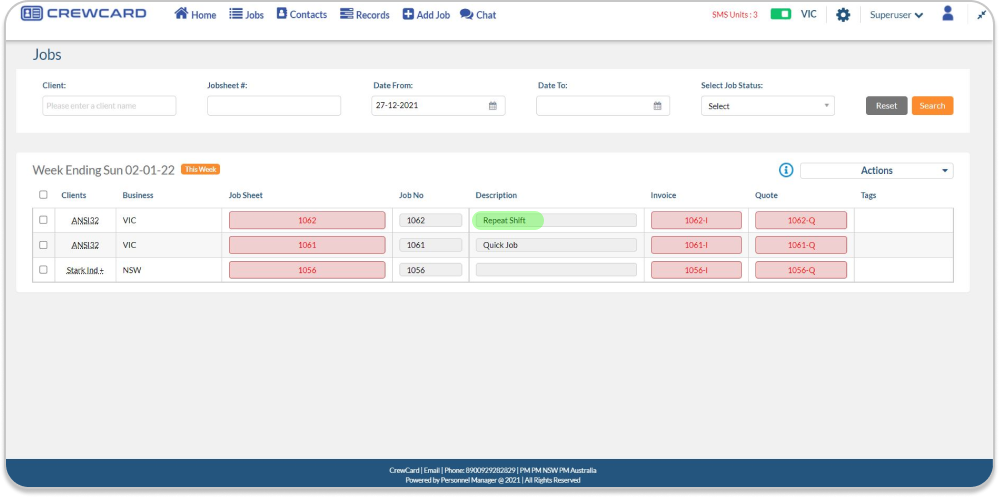
Create a Job from the Job Template, a window will pop up. You can select the saved Job Templates, fill up all the empty fields, and click open.

Once the open button has been clicked a notification will pop up on your upper right screen that Job has been added to the template.

Additionally the created job from the saved template will be available from the jobs page as shown on the below screenshot.
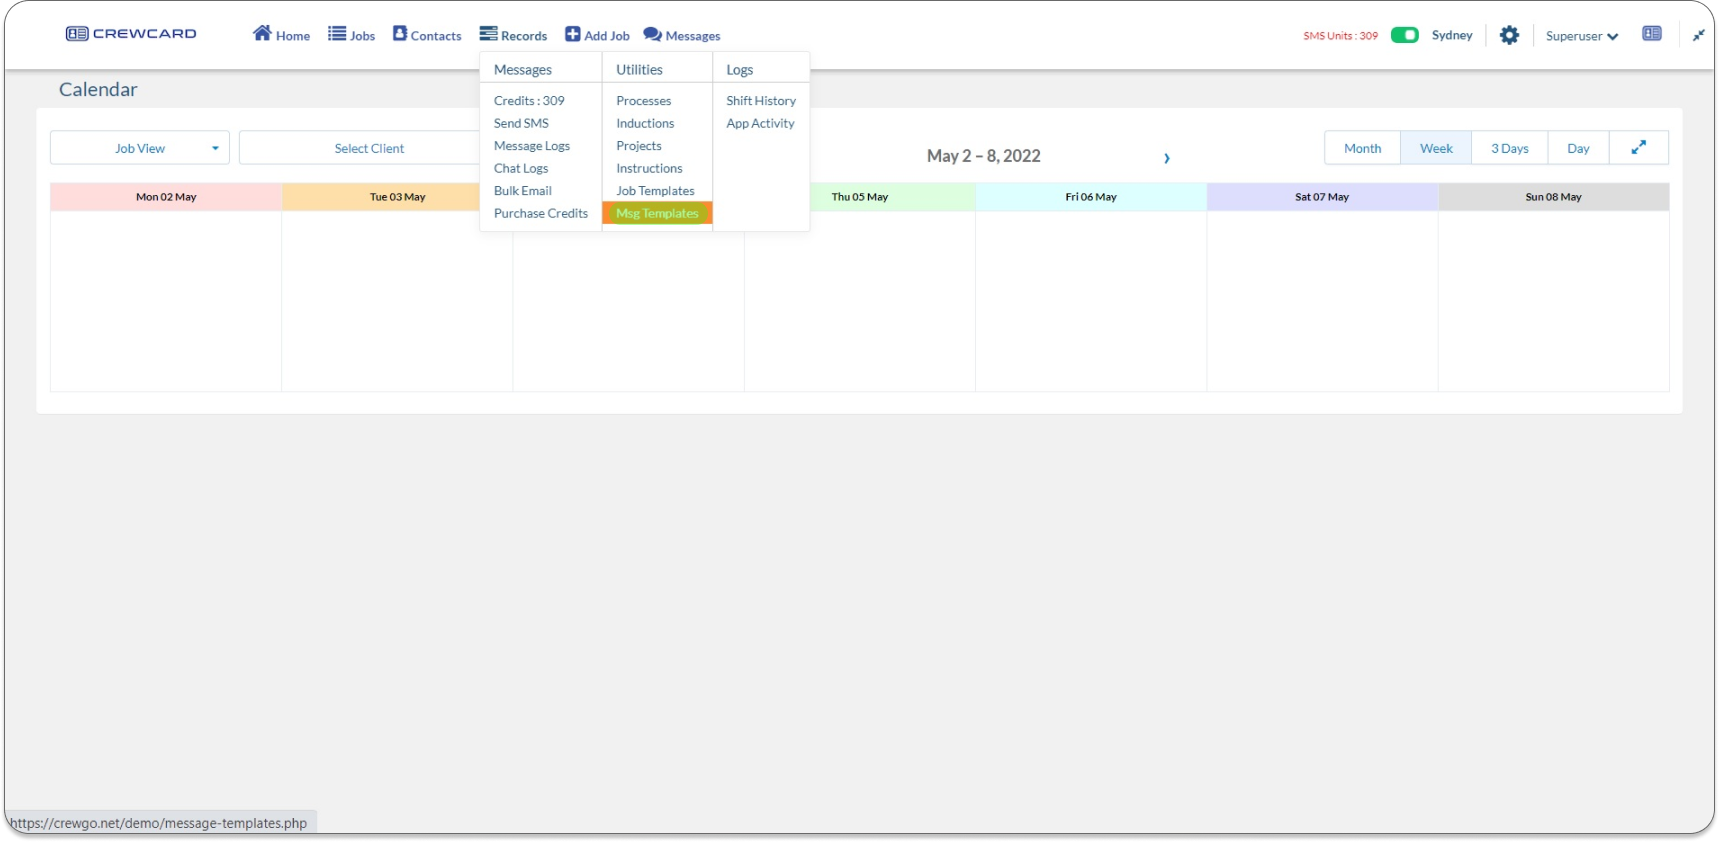
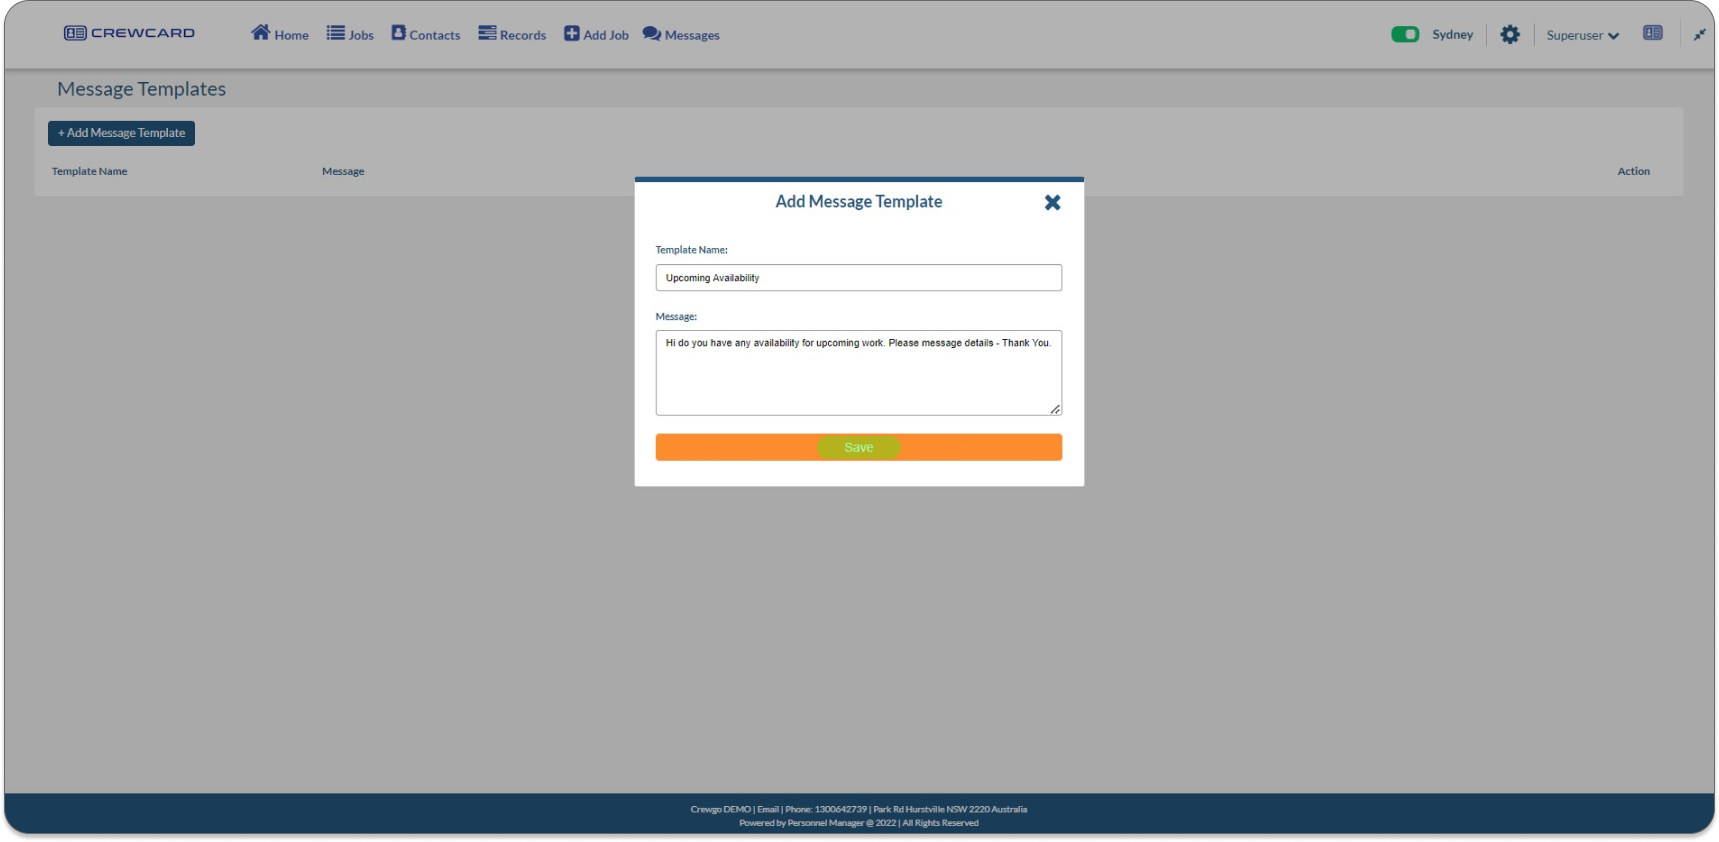
6.2.7 Msg Templates
Crewcard created a solution to a constant flow of communication, by using Message templates to simplify customer communication. This feature is used to create a set of standard messages that allow you to use previously configured messages to reply, send new messages and send SMS. This means that you do not have to manually type the messages you can use the Msg Template field to automatically fill in the information to your message on top of that message templates allows you to respond faster and in a quicker way.
To create a Message Templates, simply hover your mouse to Records and select Msg Templates.
In the Msg Template page, Click + Add Message Template button to create a new template.

The Add Message Template window will pop up, Enter the Template Name and the message.
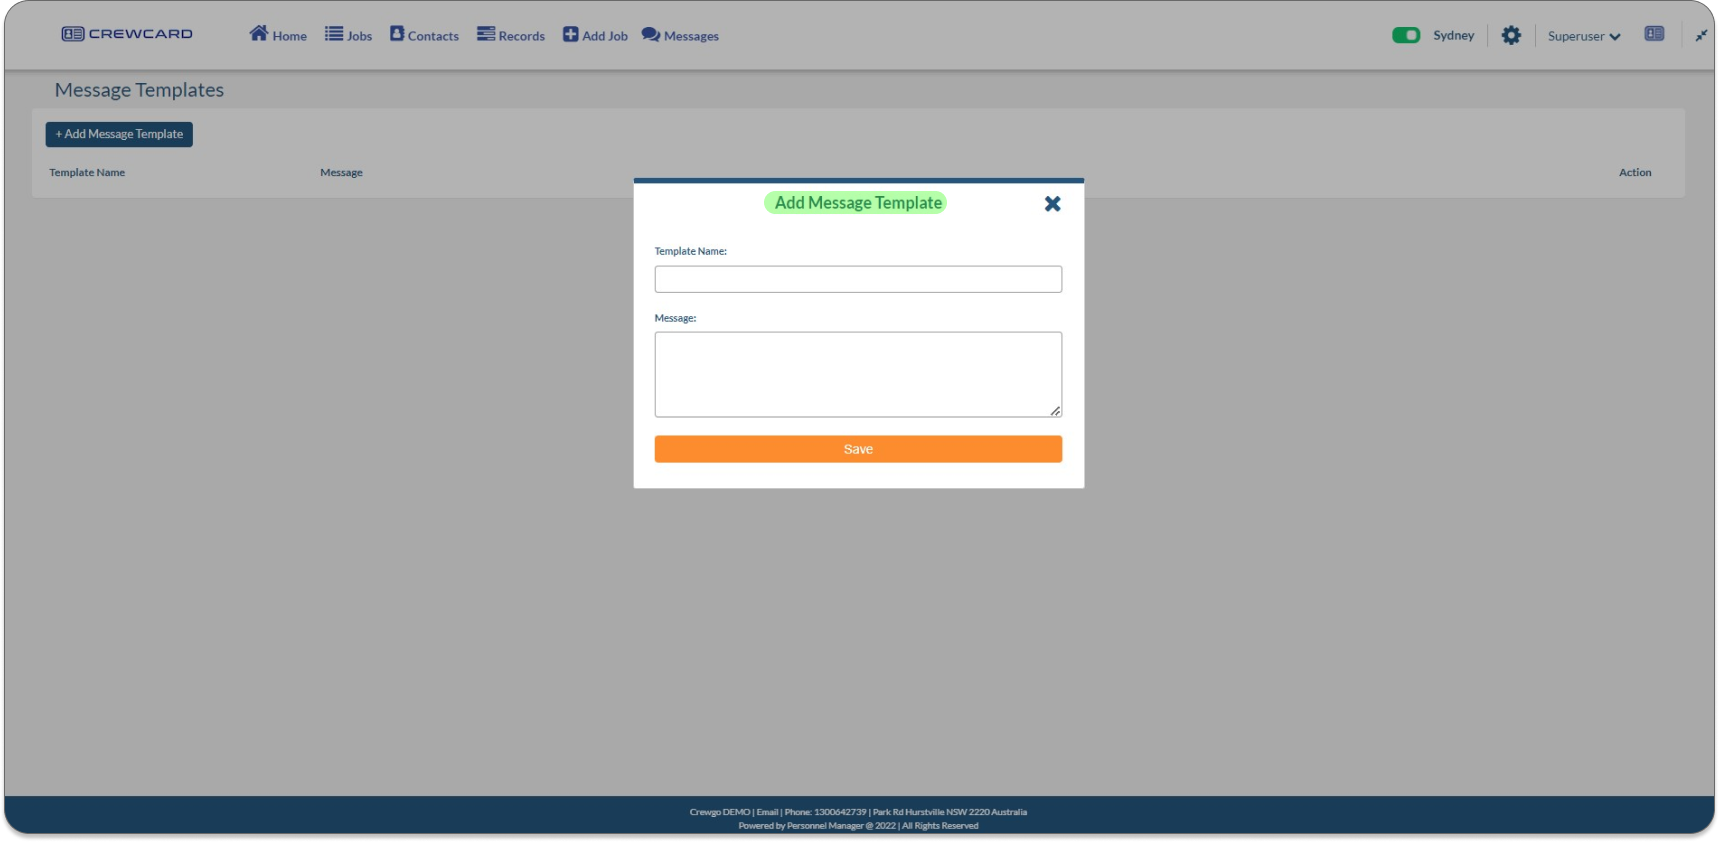
Once the Template name and Message has been entered, click the Save button.
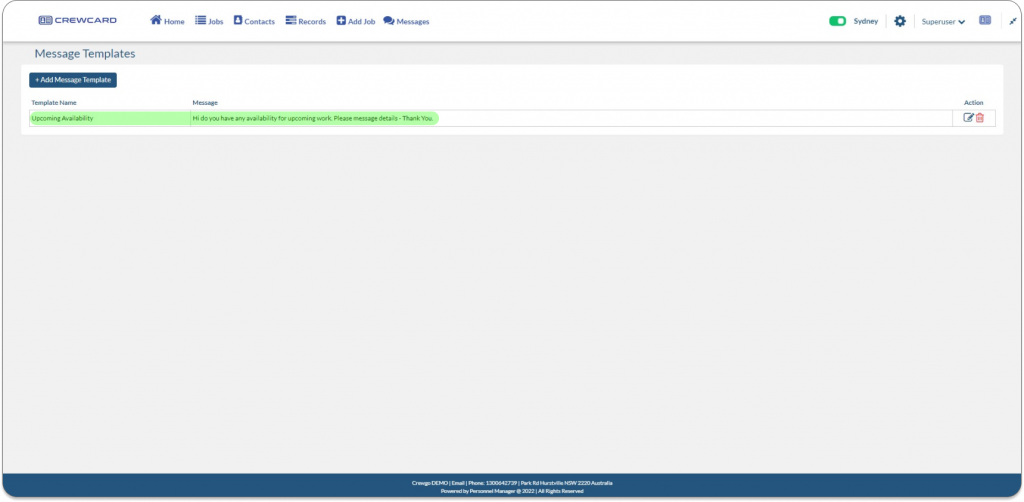
The Saved Msg Template will appear below the list of Msg templates list alternately you can edit or delete the Msg Template.
To send a message using the created message template, you can choose the message template from the Send Message page or Send SMS page.

