Key: A / DM / M
There are three types of creating jobs in CrewCard: Add Job, Add Shifts and Legacy & Add Job. This guide will help guide and create a better understanding of the different types. Hover your mouse over Add Jobs on the CNB:
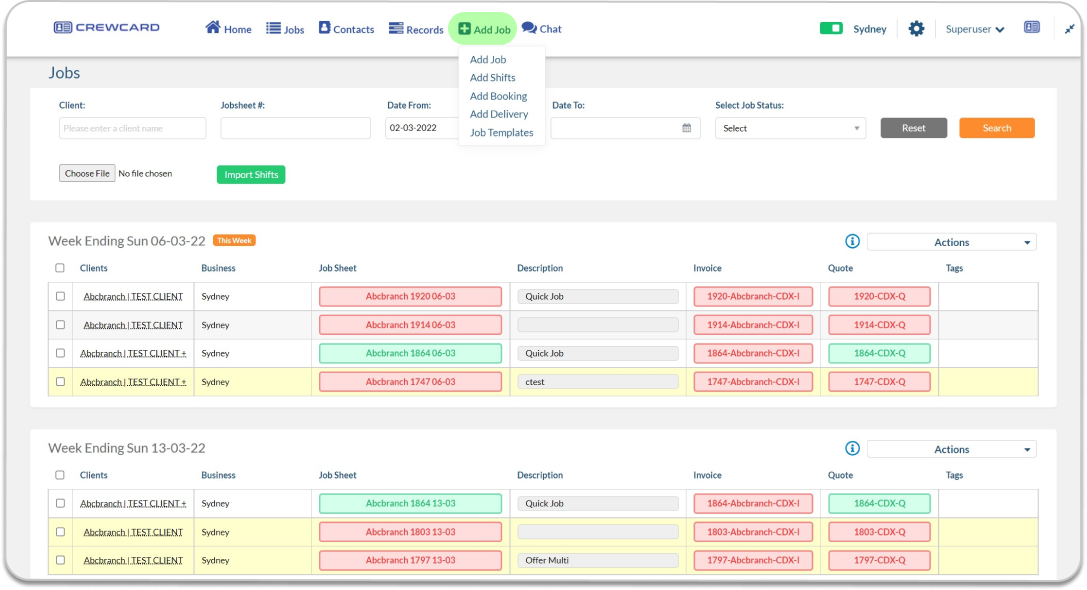
7.0.1 Add Jobs
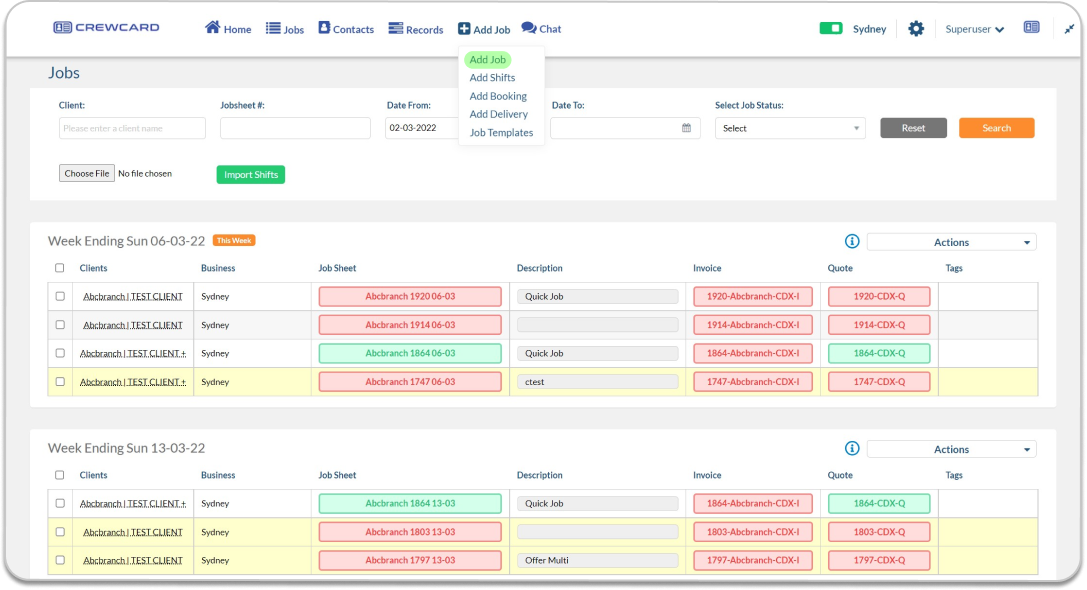
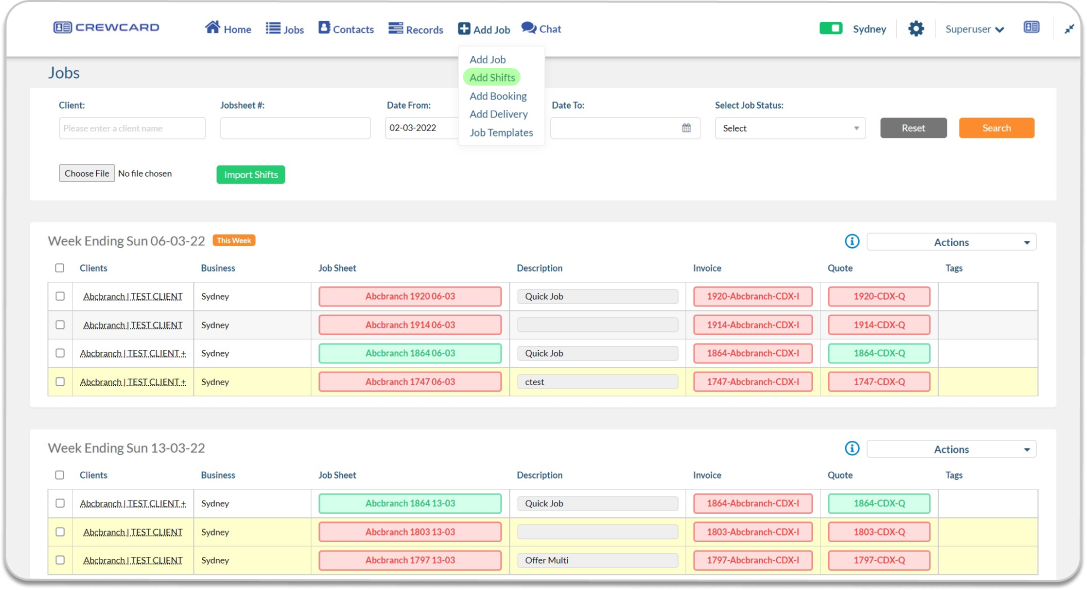
Add Jobs feature takes you through a detailed way of adding jobs into your system. Hover your mouse over the Add Jobs on the CNB and click Add Job:
The following window will pop out.

It will take you to a new page. Fill out all fields.
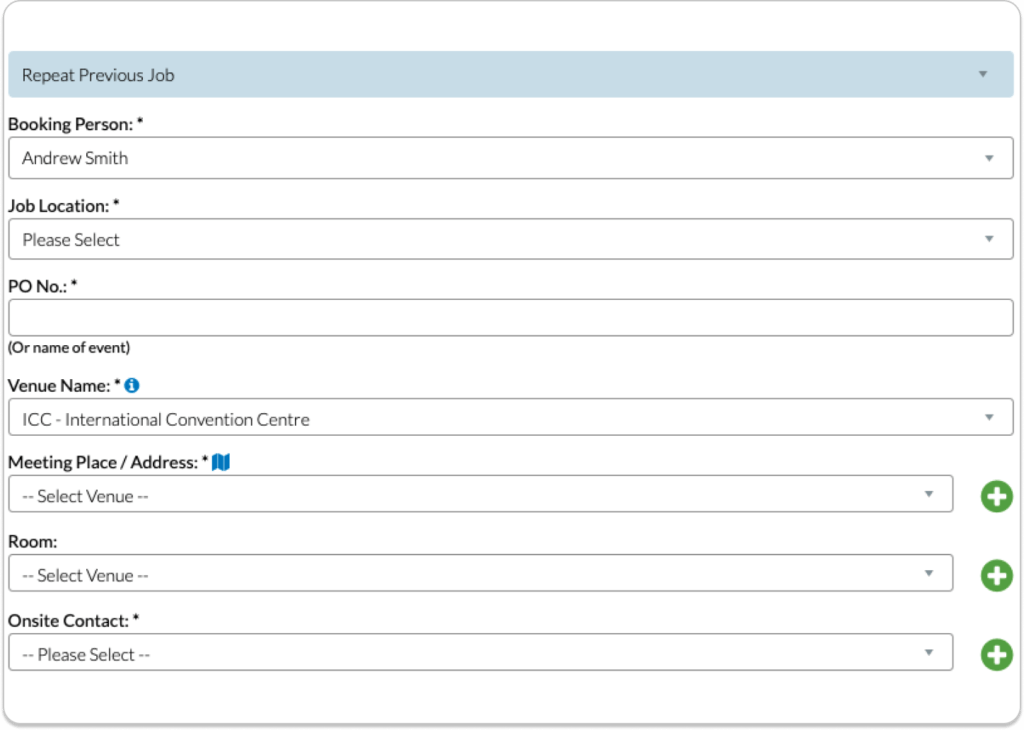
Booking Person: The person who create the job or responsible for the job
Job Location: Click to open the drop-down menu to display the location the booking person falls under
PO No: Enter a reference number or job name
Venue Name: Enter the name of the venue
Meeting Place/ Address: Click the text box to open a drop-down menu with a list of pre-uploaded locations or use the plus button to add a venue. This is the address that the crew will go to for the job.
Room: This field helps guide the crew to the right location when they arrive at the venue, click the field for a drop-down menu of all the meeting marks related to the venue or use the plus button to add a new one.
Onsite Contact: Click the field to present a list of all onsite contacts that associate with the client or use the plus button to add a new onsite contact
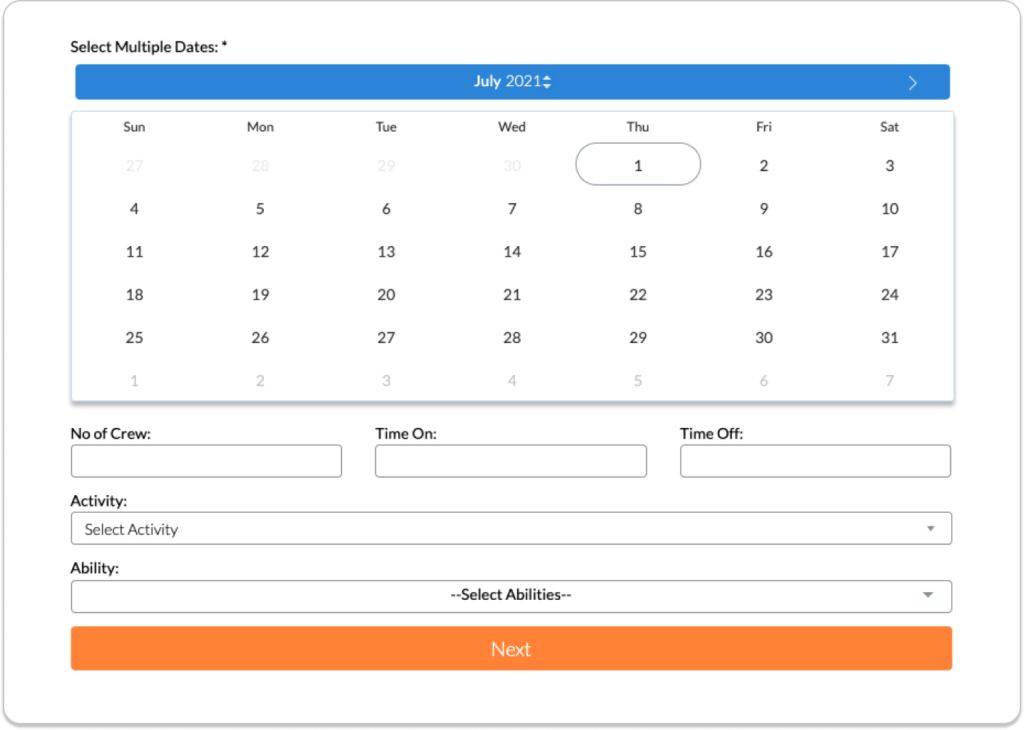
Select date, No of Crew, Time on/off, Activity & Ability.
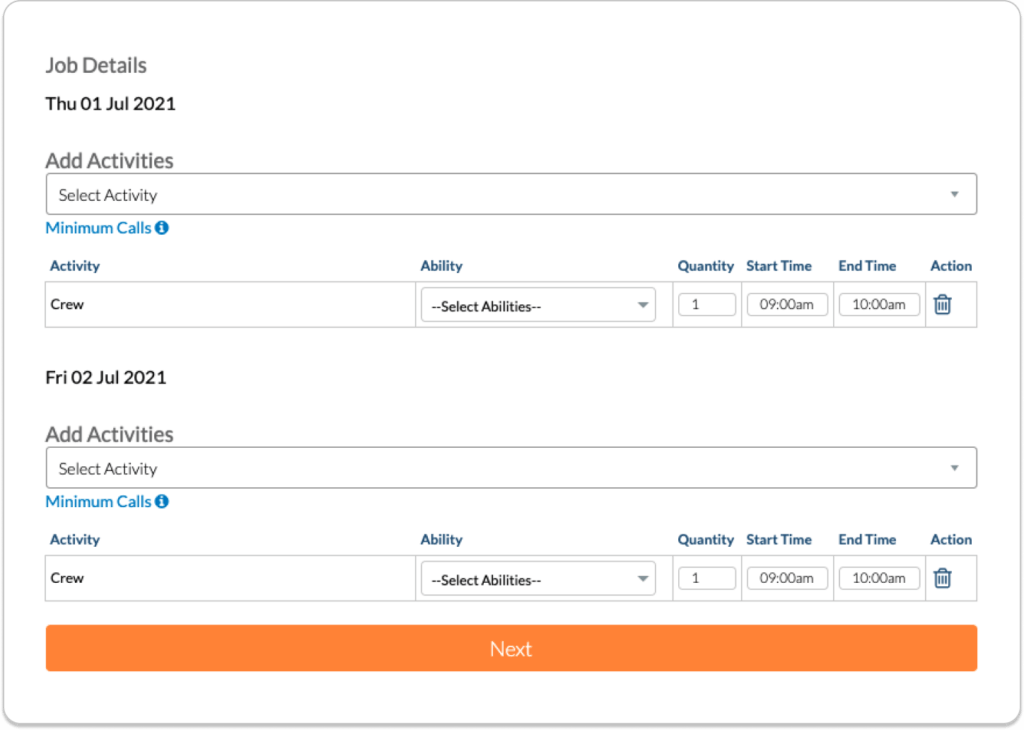
The next page will open, it will display the individual shift. Edit any information.
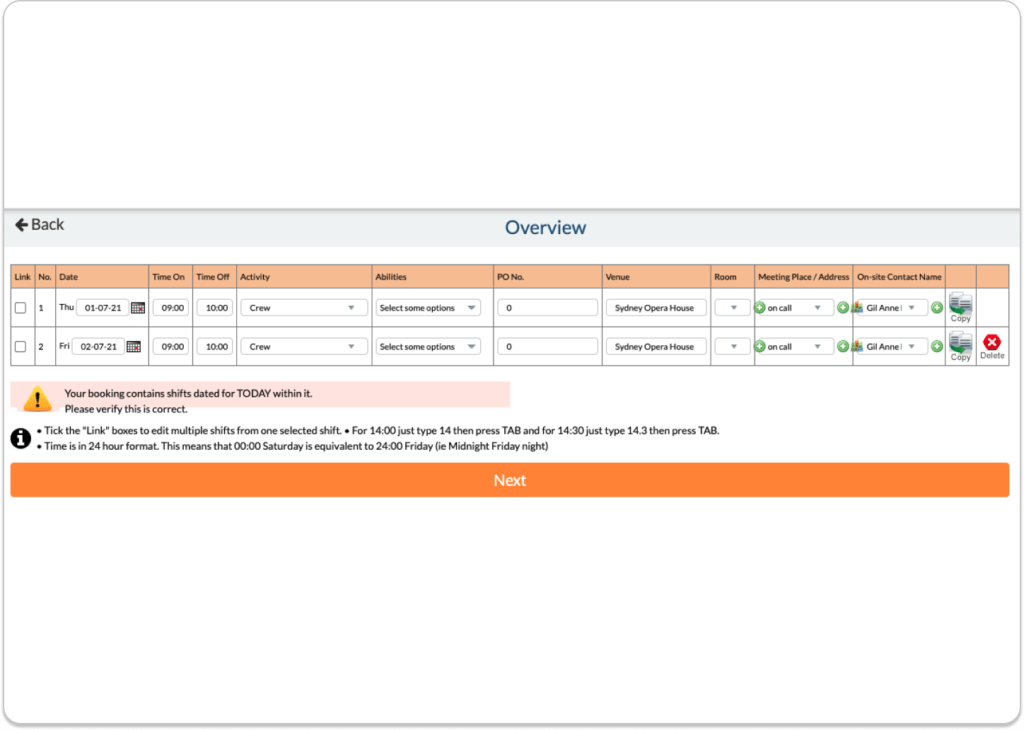
After clicking Next you will be taken to the overview of the job.
Click next, you will be taken to the Final Info page.

Click confirm booking to create the job.
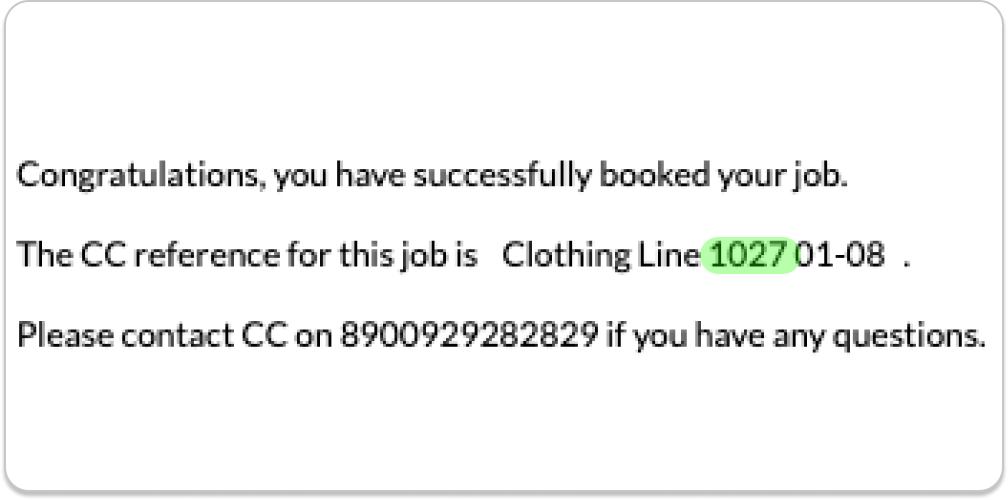
The following message will be displayed including the job reference number. This is highlighted in green in the below screenshot.
Please see guide 7.1 Jobs Sheets learn how to fill out a job sheet.
7.0.2 Add Shifts
Add Shifts is another way to create a job. Click Add Shifts:
A pop-out window will show, fill out all fields and press save.
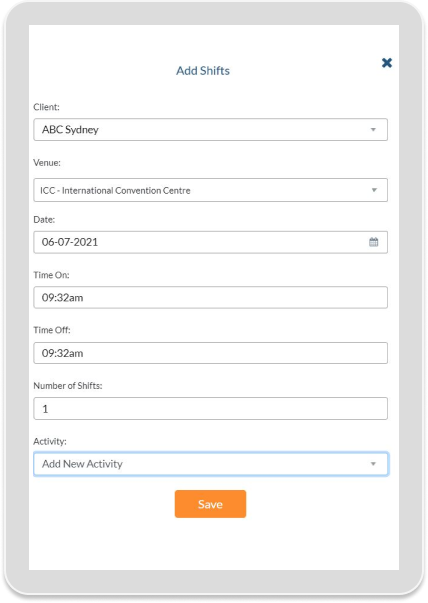
NOTE: You can only Add Shifts if the information for client & venue are already in the system
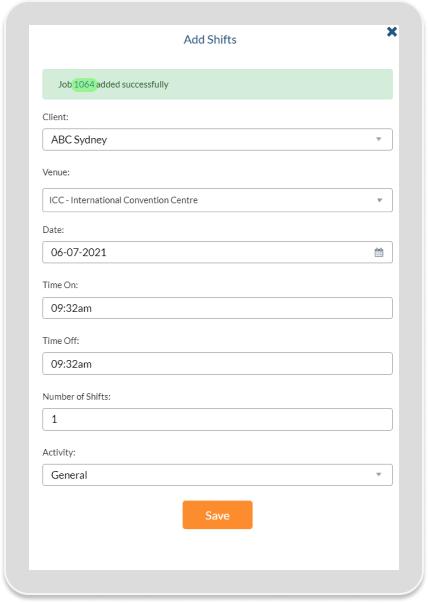
Once successfully added, a message will appear at the top of the pop-out window, which includes the job number. If you wish to edit the job sheet, you can click the number which will open a new tab with the job sheet ready to be filled out.
This will open the job sheet. The job description will automatically be entered as Quick Job, click the text box to overwrite the description.
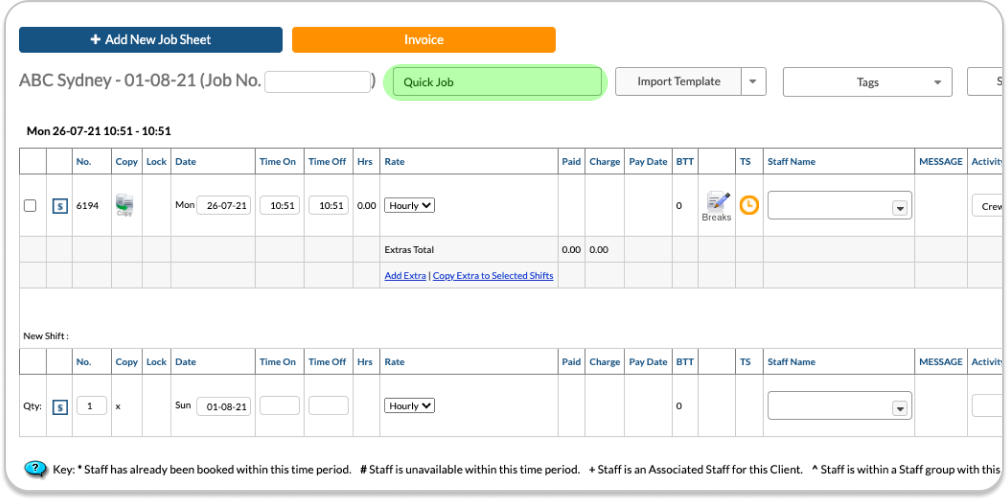
Please see guide 7.1 Jobs Sheets to learn how to fill out a job sheet.
7.0.3 Add Booking
Add Booking will open the job sheets for the selected client. Click Add Booking:
This will open up a pop-out window. Select the client and date you wish to open a job sheet for, and click go.
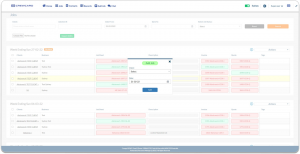
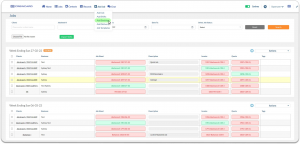
This will open the job sheet page. If the client has a job on the date you have selected, the existing job sheets will be displayed with a new job shift under the existing one. Please see guide 7.1 Jobs Sheets to learn how to fill out a job sheet.
In the screenshot below, ABC Sydney has an existing job on the day selected, the new shift displays under the existing shift. Please note that this shift does not relate to the existing one.
After editing the shift, use the footer to perform an action.
If you wish to open a blank job sheet for a client, click Add Job sheet. This will open up a blank job sheet for the client.

7.0.4 Job Templates
Job Templates allow you to create as many different types of Jobs (schedules, rosters) as you like and save them within each Job Sheet.
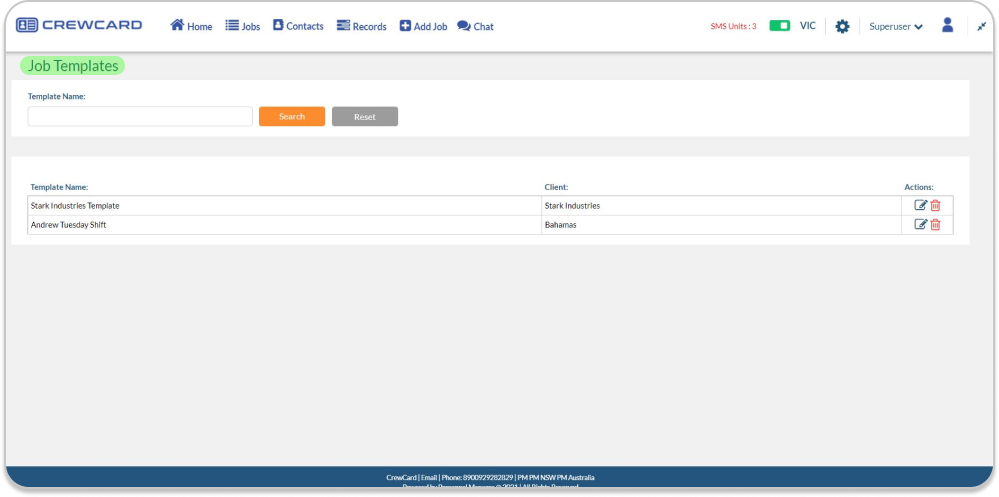
Once your template has been saved in a Job Sheet, you can edit and delete the job templates at the job templates page. It can be opened at any time, with a new start date and all other details the same as previously. It is even possible to recreate the same template under a new client or business.
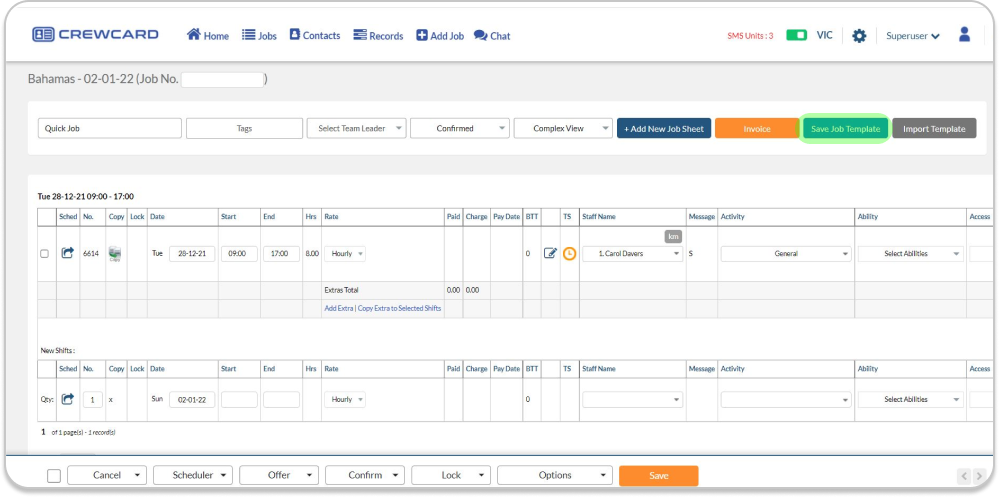
To create a Job template, Simply go to the Job Sheet Page page and click the Save Job Template button.
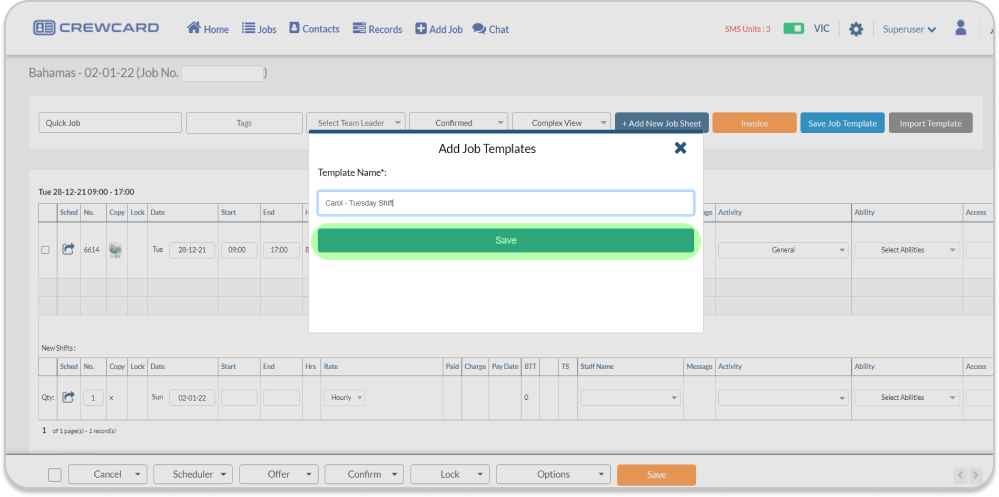
Save Job Template window will pop up, Enter the Job Template name and Click Save button.
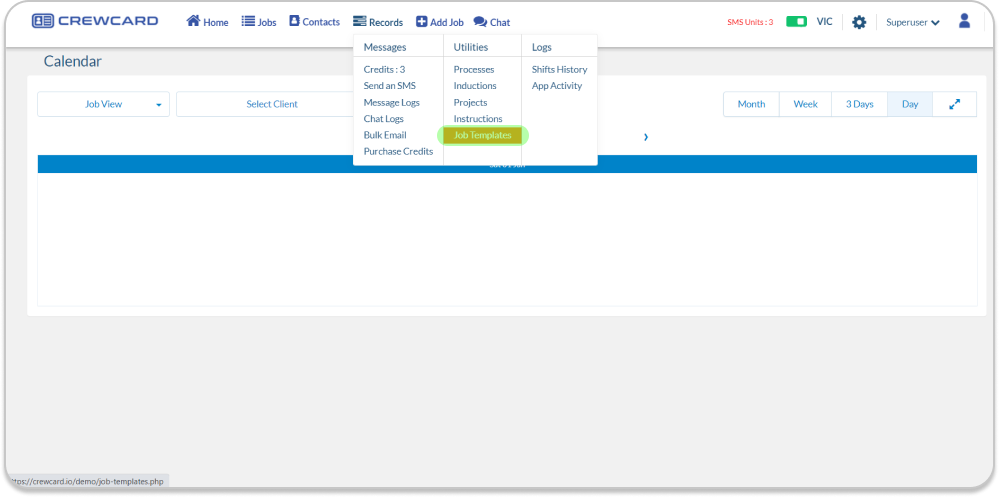
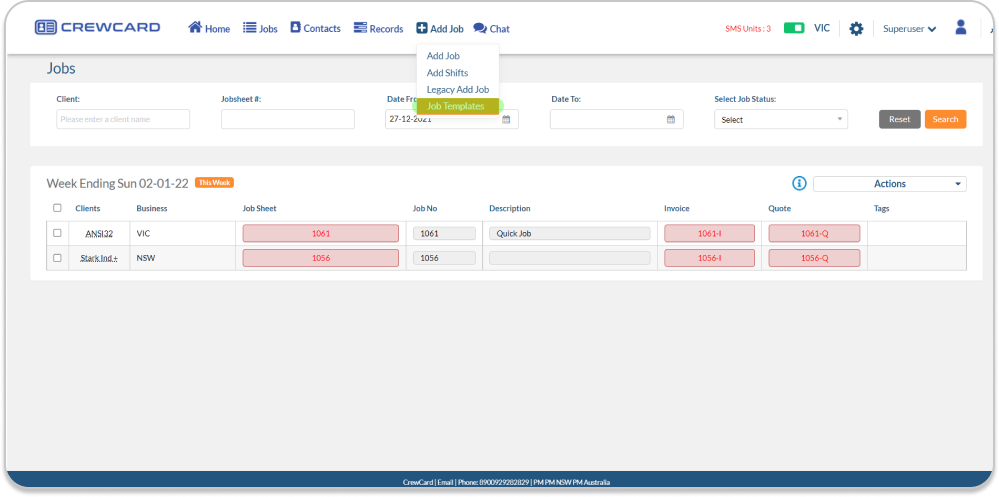
To create a job from the save Job Template, Hover your mouse to Add Jobs and select Job Templates. Enter the Job Template name, and click save.
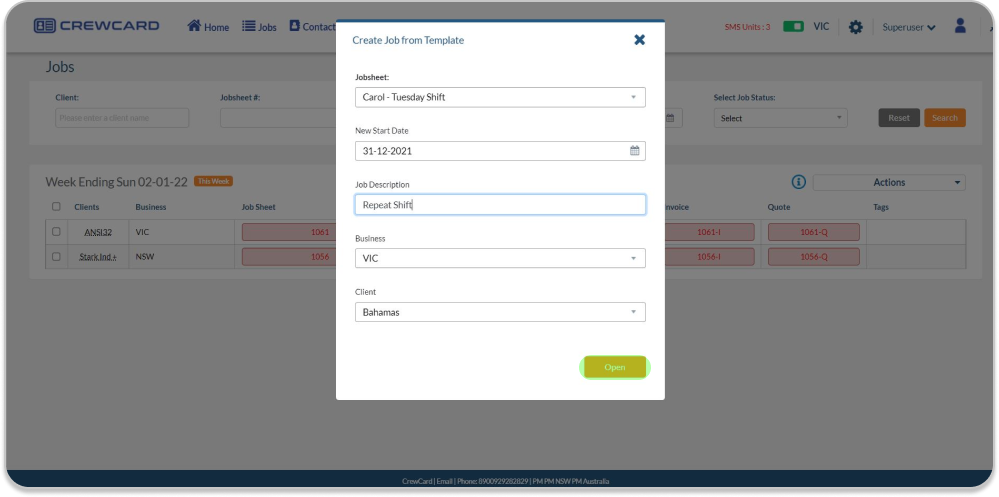
Create a Job from the Job Template, a window will pop up. You can select the saved Job Templates, fill up all the empty fields, and click open.
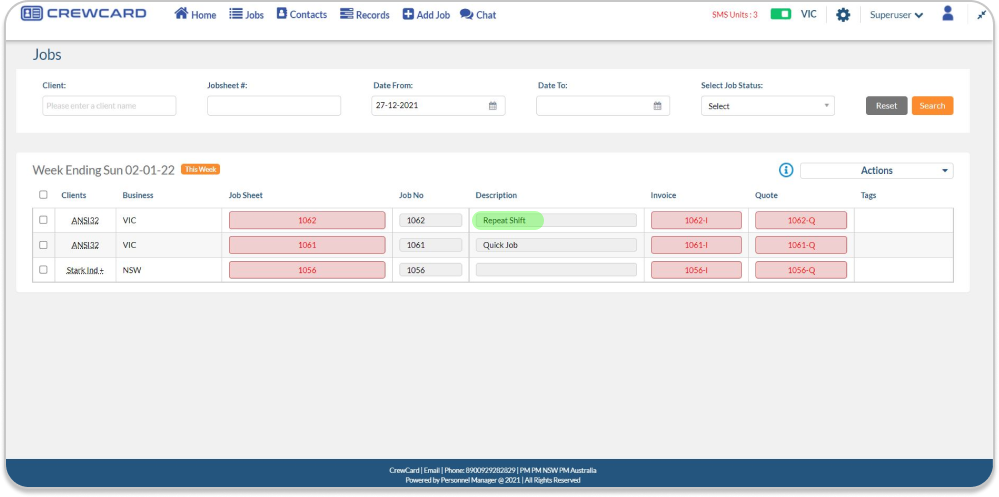
Once the open button has been clicked a notification will pop up on your upper right screen that Job has been added to the template.

Additionally the created job from the saved template will be available from the jobs page as shown on the below screenshot.
7.0.5 Add Import
Add Import allows users to create Jobs under Add Jobs wherein they can customise your download template and upload the excel template to create a Job.
Required PM Fields for Add Import
| First Name | Crew Profile> Personal Details > First Name of the Crew |
| Last name | Crew Profile> Personal Details > Last Name of the Crew |
| Client Short Name | Client Profile> Client profile> Client’s Short Name |
| Approved Box in Timesheet | Yes/ No |
| Job Scheduled Start Date | This must be entered in dd-mm-yy format e.g. 28-04-22. Job start date |
| Job Scheduled Start Time | This must be entered in 24 hour format e.g. 00:00, 14:00. Job start time |
| Job Scheduled End Date | This must be entered in dd-mm-yy format e.g. 28-04-22. Job end date |
| Actual Start Date | Actual start date of the job |
| Job Scheduled End Time | Scheduled end time of the shift |
| Actual Start Time | Actual start time of the shift |
| Actual End Date | Actual End date of the shift |
| Actual End Time | Actual end time of the shift |
| Break 1 Start | Break 1 Start is the start time of the break per shift |
| Break 1 End | Break 1 End is the end time of the break per shift |
| Activity | Activity assigned to Crew |
| Venue | Details of the location that crew members will meet for the shift to commence. |
Optional PM fields for Add import
| Break 2 Start | Break 2 Start is the start time of the break per shift |
| Break 2 End | Break 2 End is the end time of the break per shift |
| Break 3 Start | Break 3 Start is the start time of the break per shift |
| Break 3 End | Break 3 End is the end time of the break per shift |
| Total Working Hours + Break Time | The total working hours including break times |
| Total Working Hours | The total working hours excluding break times |
| Ability | Abilities that a crew can perform |
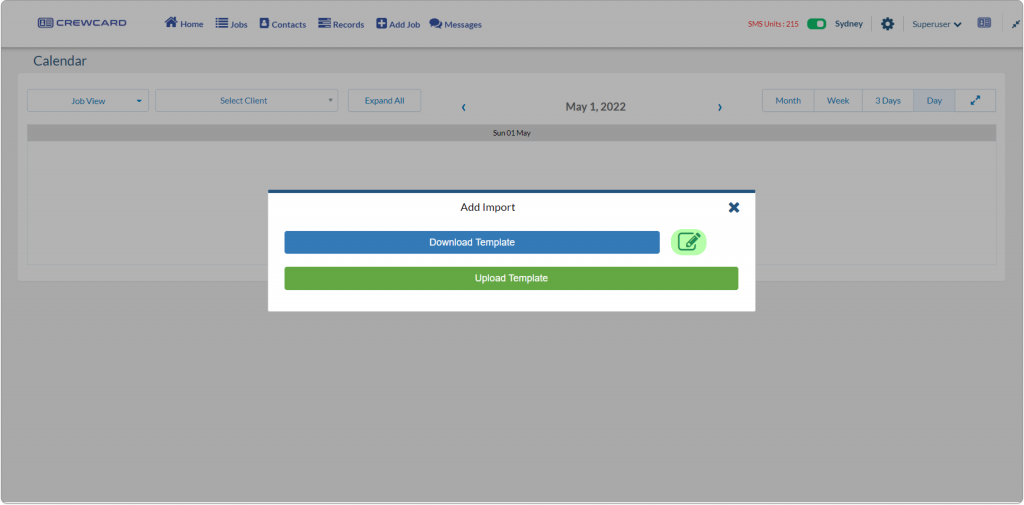
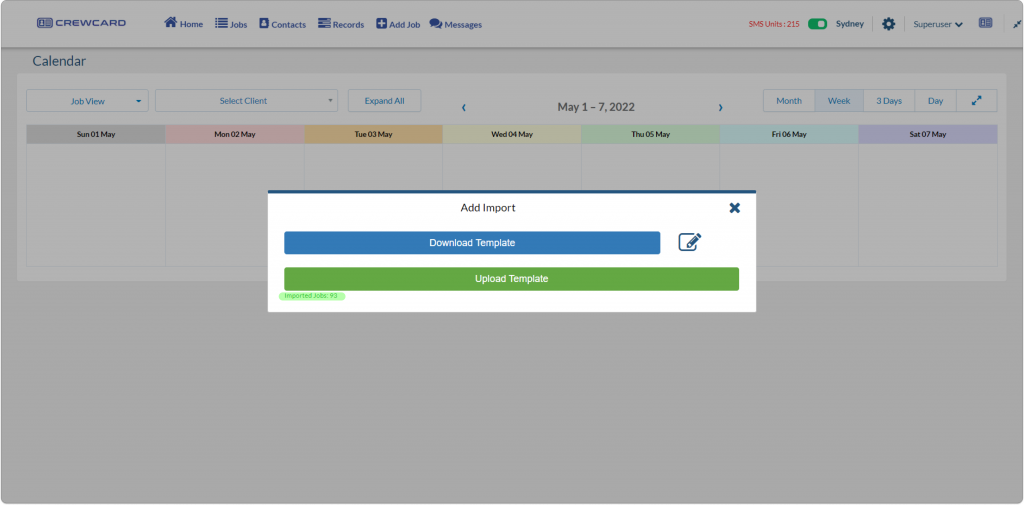
To begin with, hover your mouse to +Add Job and select Add Import.

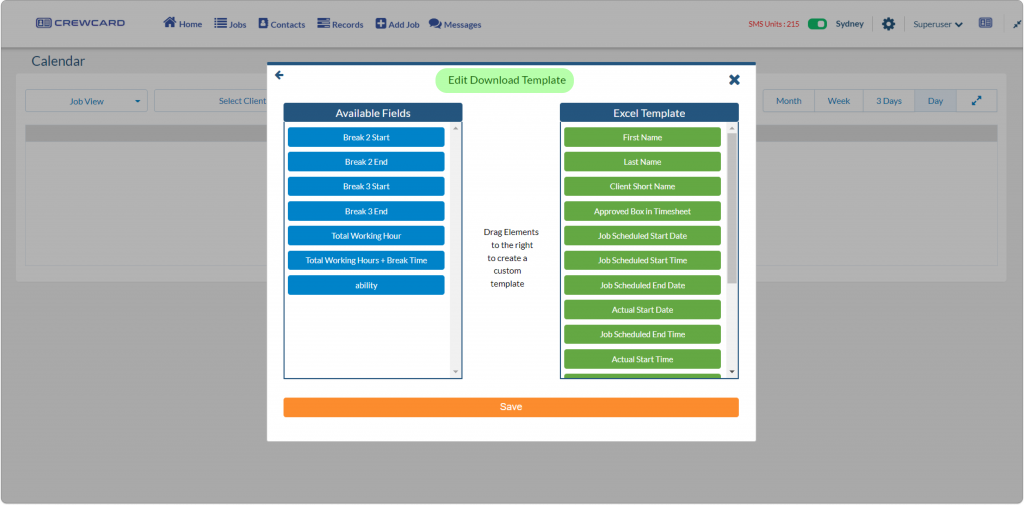
To edit the Add Import Template, simply click the edit icon
In the Edit Download Template, you can drag and drop the elements from the Available Fields to Excel template to create a custom template.
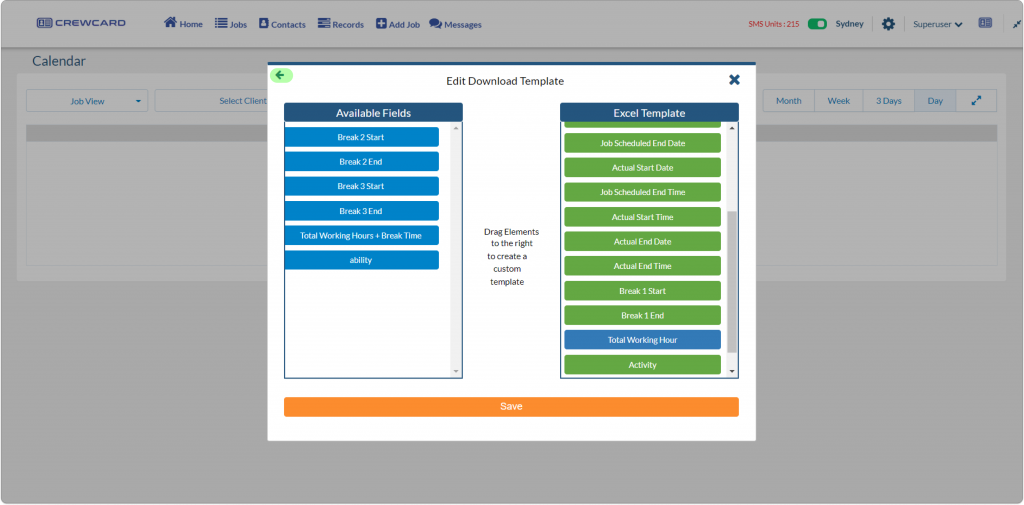
As an example I will drag the Total Working Hours to Excel template. Once done, Click the save button.

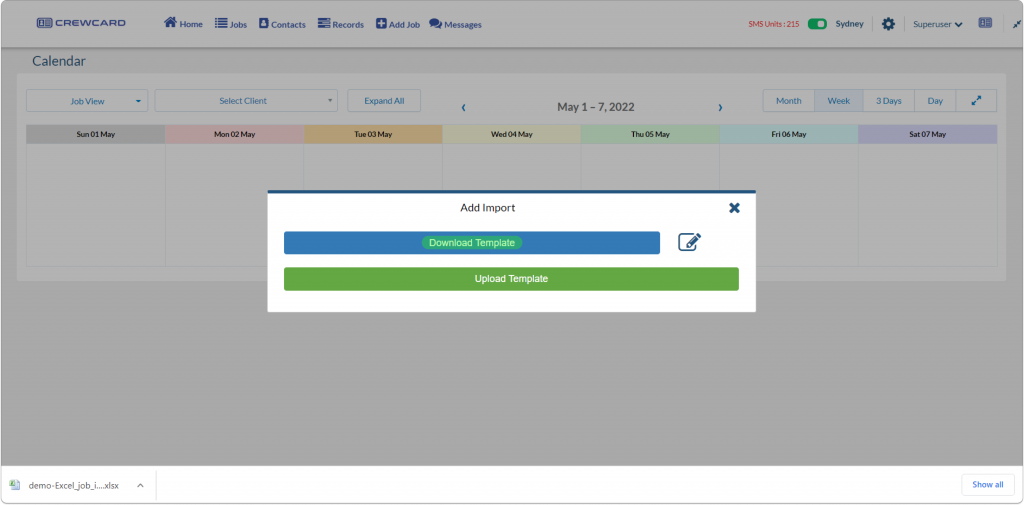
To upload the custom template, go back to the Add Import window by clicking the left arrow key.
Click the Download Template button to download the customise excel template. Once downloaded, open the excel file.
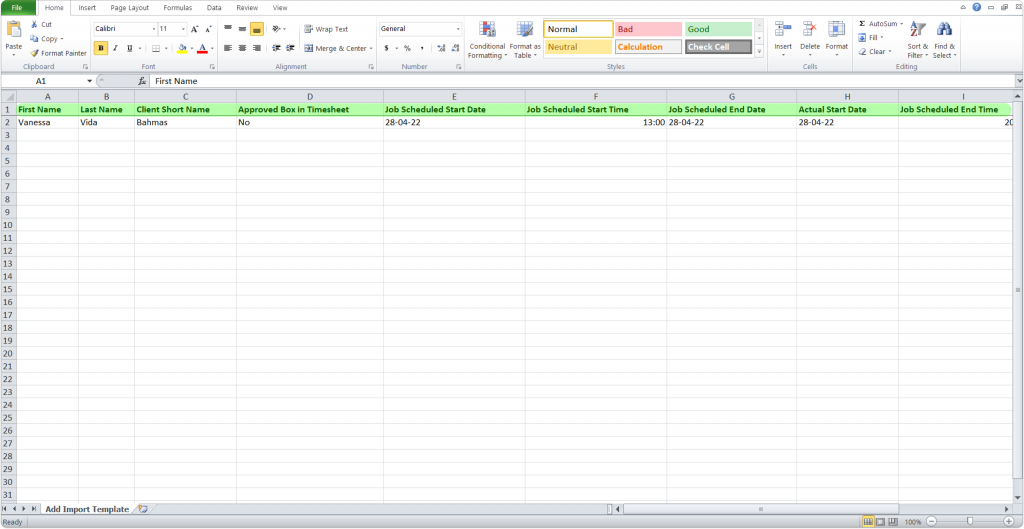
Fill out the fields required in the excel template and save the template to your local drive.
Go back to the Add Import window and click Upload Template. Select the excel file to your local drive and click the open button.

Below the Upload Template button you will notice that the Imported Job has been completed with the Job No.
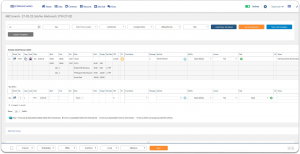
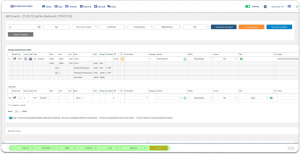
To view the Job, Go to the Jobs Page. Search and open the job.

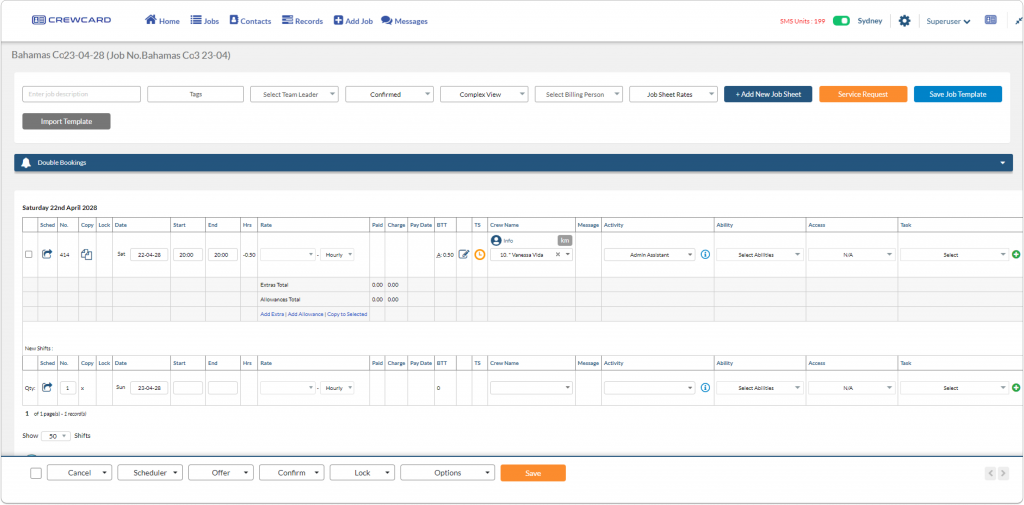
Here’s the sample Job Sheet created using the Add Import function.