The Crew profile has the following fields.
Overview – Crew Notes – Files Pending Approval – Personal Details – Resume/ CV – Address – Banking Details – Super Fund Details – TFND – Emergency – Recruitment Info – Send Messages – Crew Status – Experience / Reliability – Business Association – Client Association – Categories – Crew Groups – Available Activities – Activities Tags – Warnings – Citizenship Status – Expiry Date Warning – Exceed Weekly – Exceed Shift – Qualifications – Training – Inductions – Visas – Personal File – Permanent Files – Additional Information – Crew Ticketed List – Agreements – Contracts Invite Contracts – Actions –Invite action – Forms
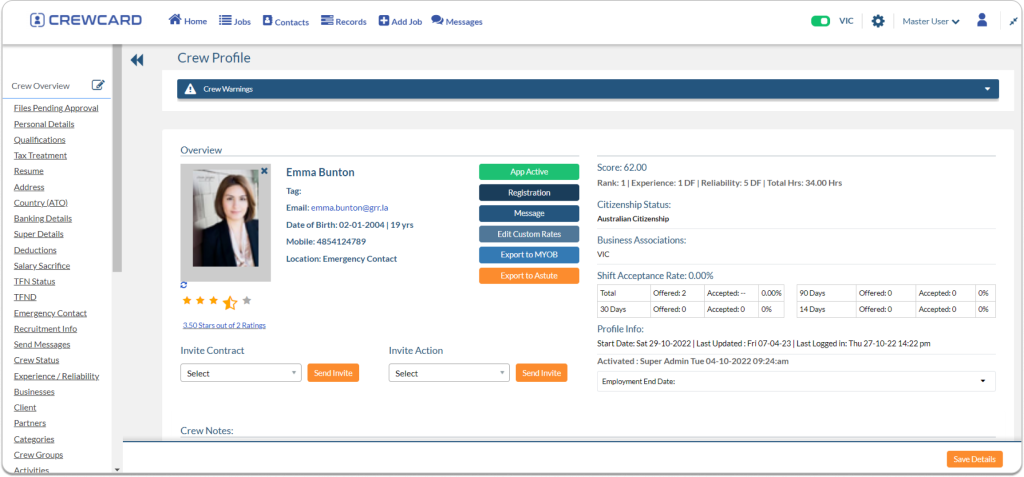
9.1.2 Crew Profile Overview
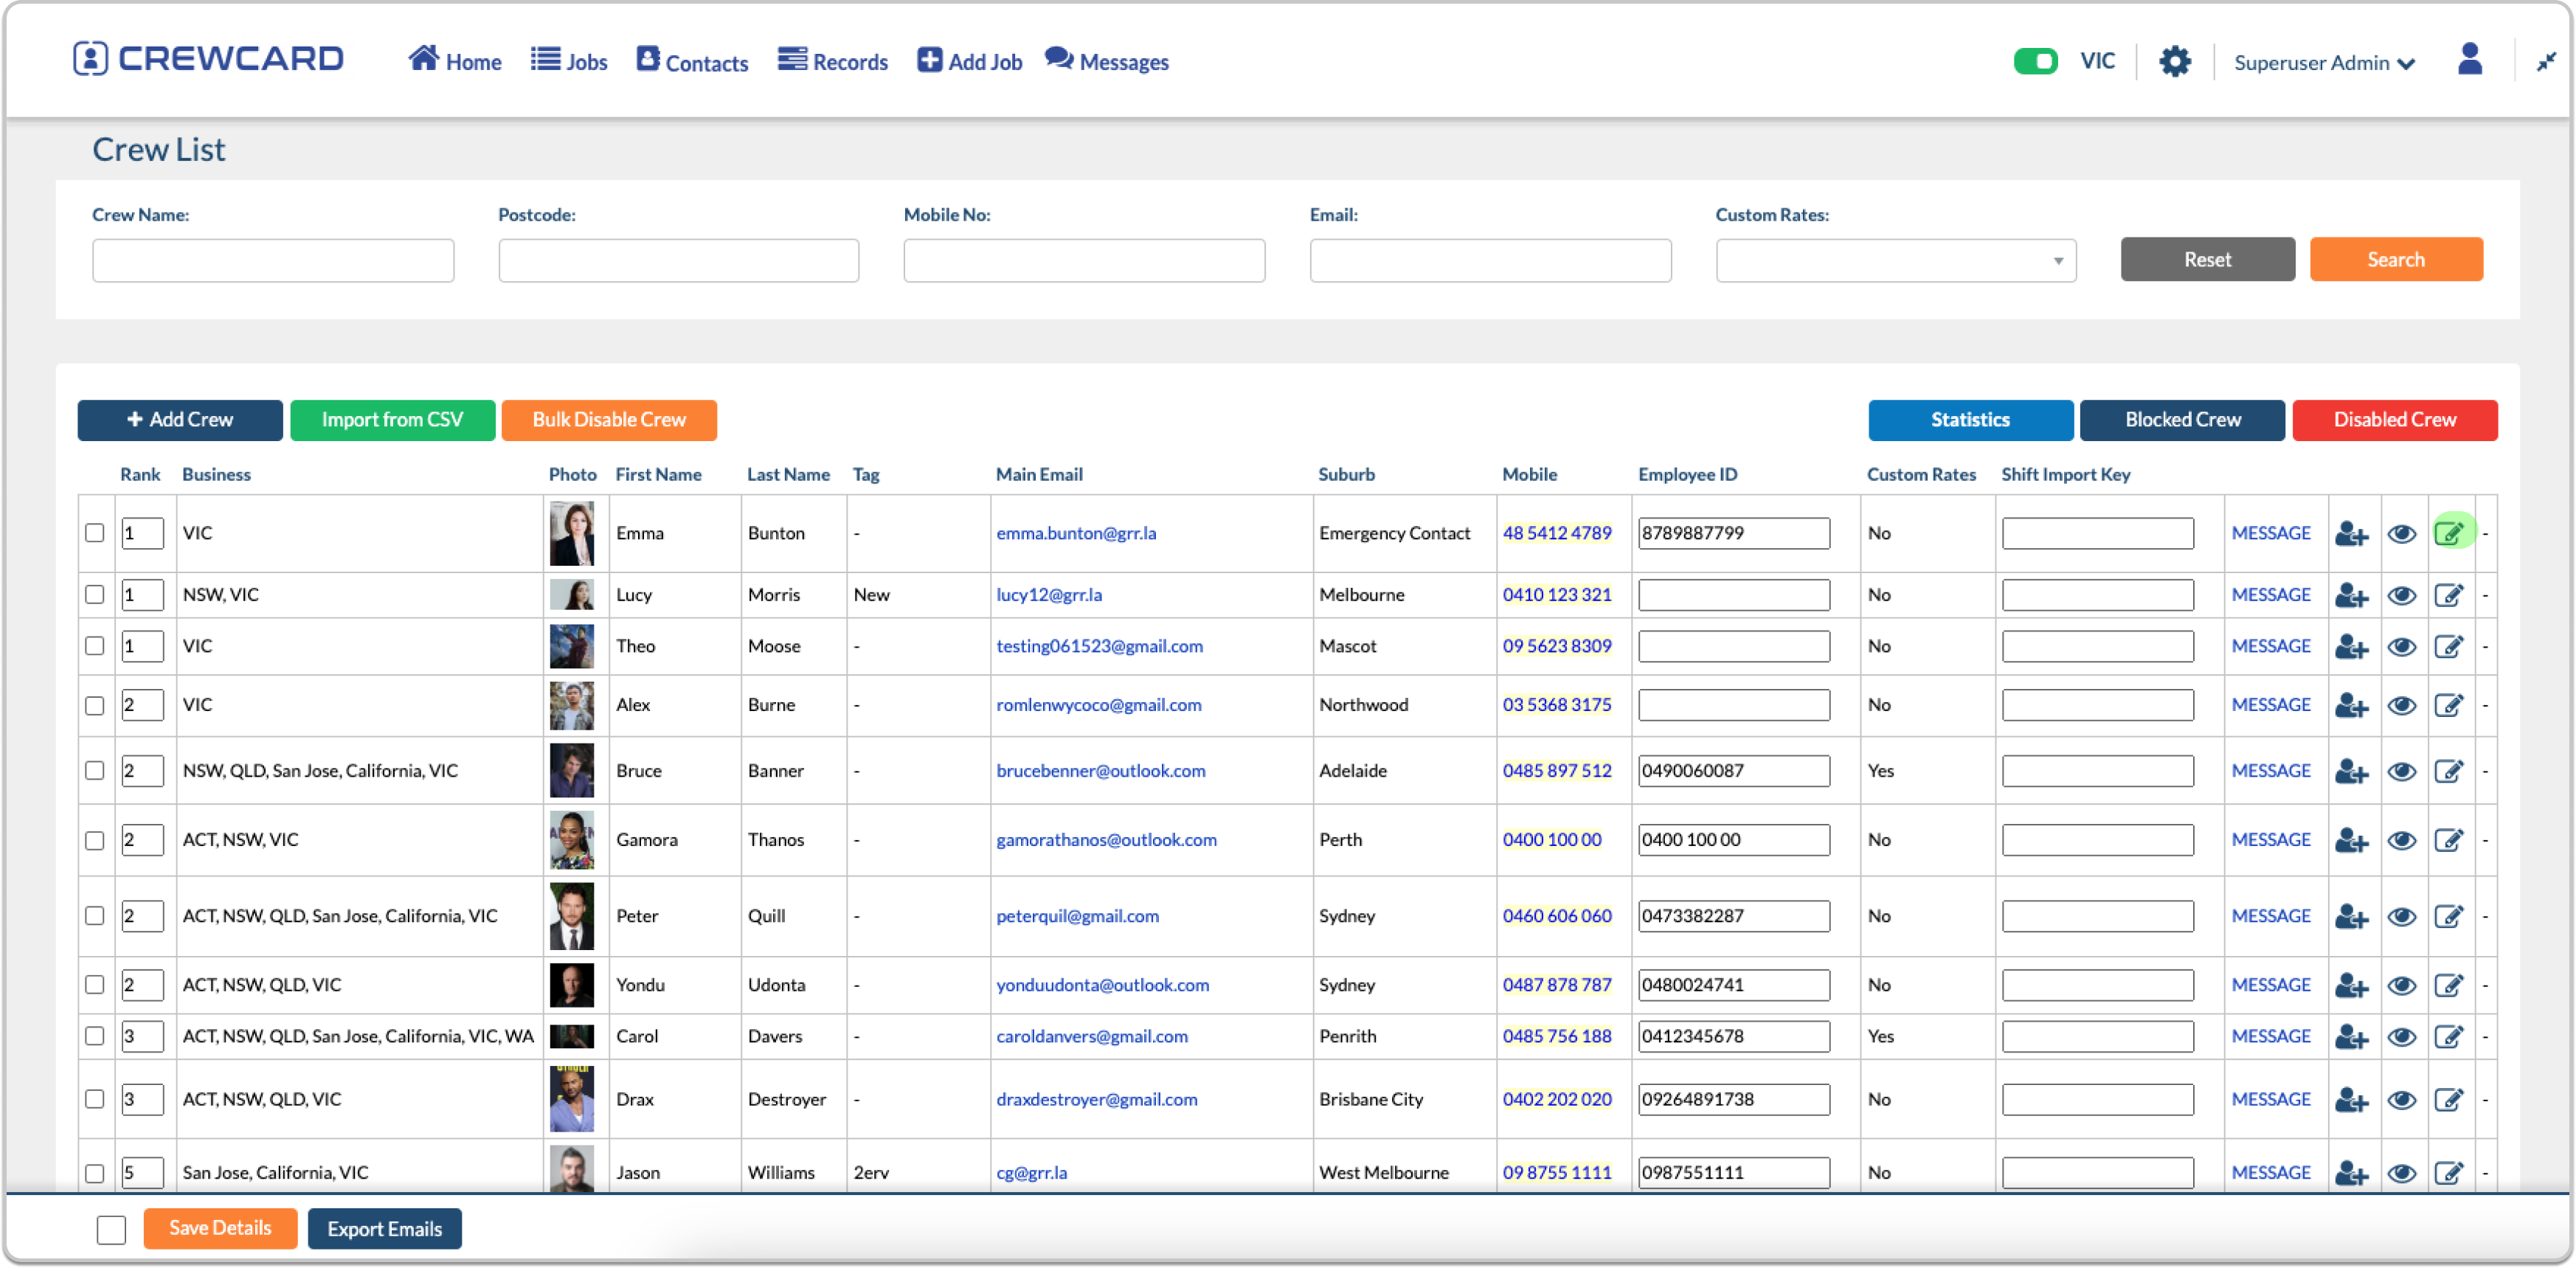
In order to access a Crew Profile Overview, select Crew List from the Contacts tab, located in the Central Navigation Bar.
Once you have access to the Crew List, select the edit icon, located on the far right column of any crew profile row. Once selected, you will be taken to the Crew Overview Page, click the Edit icon beside it.

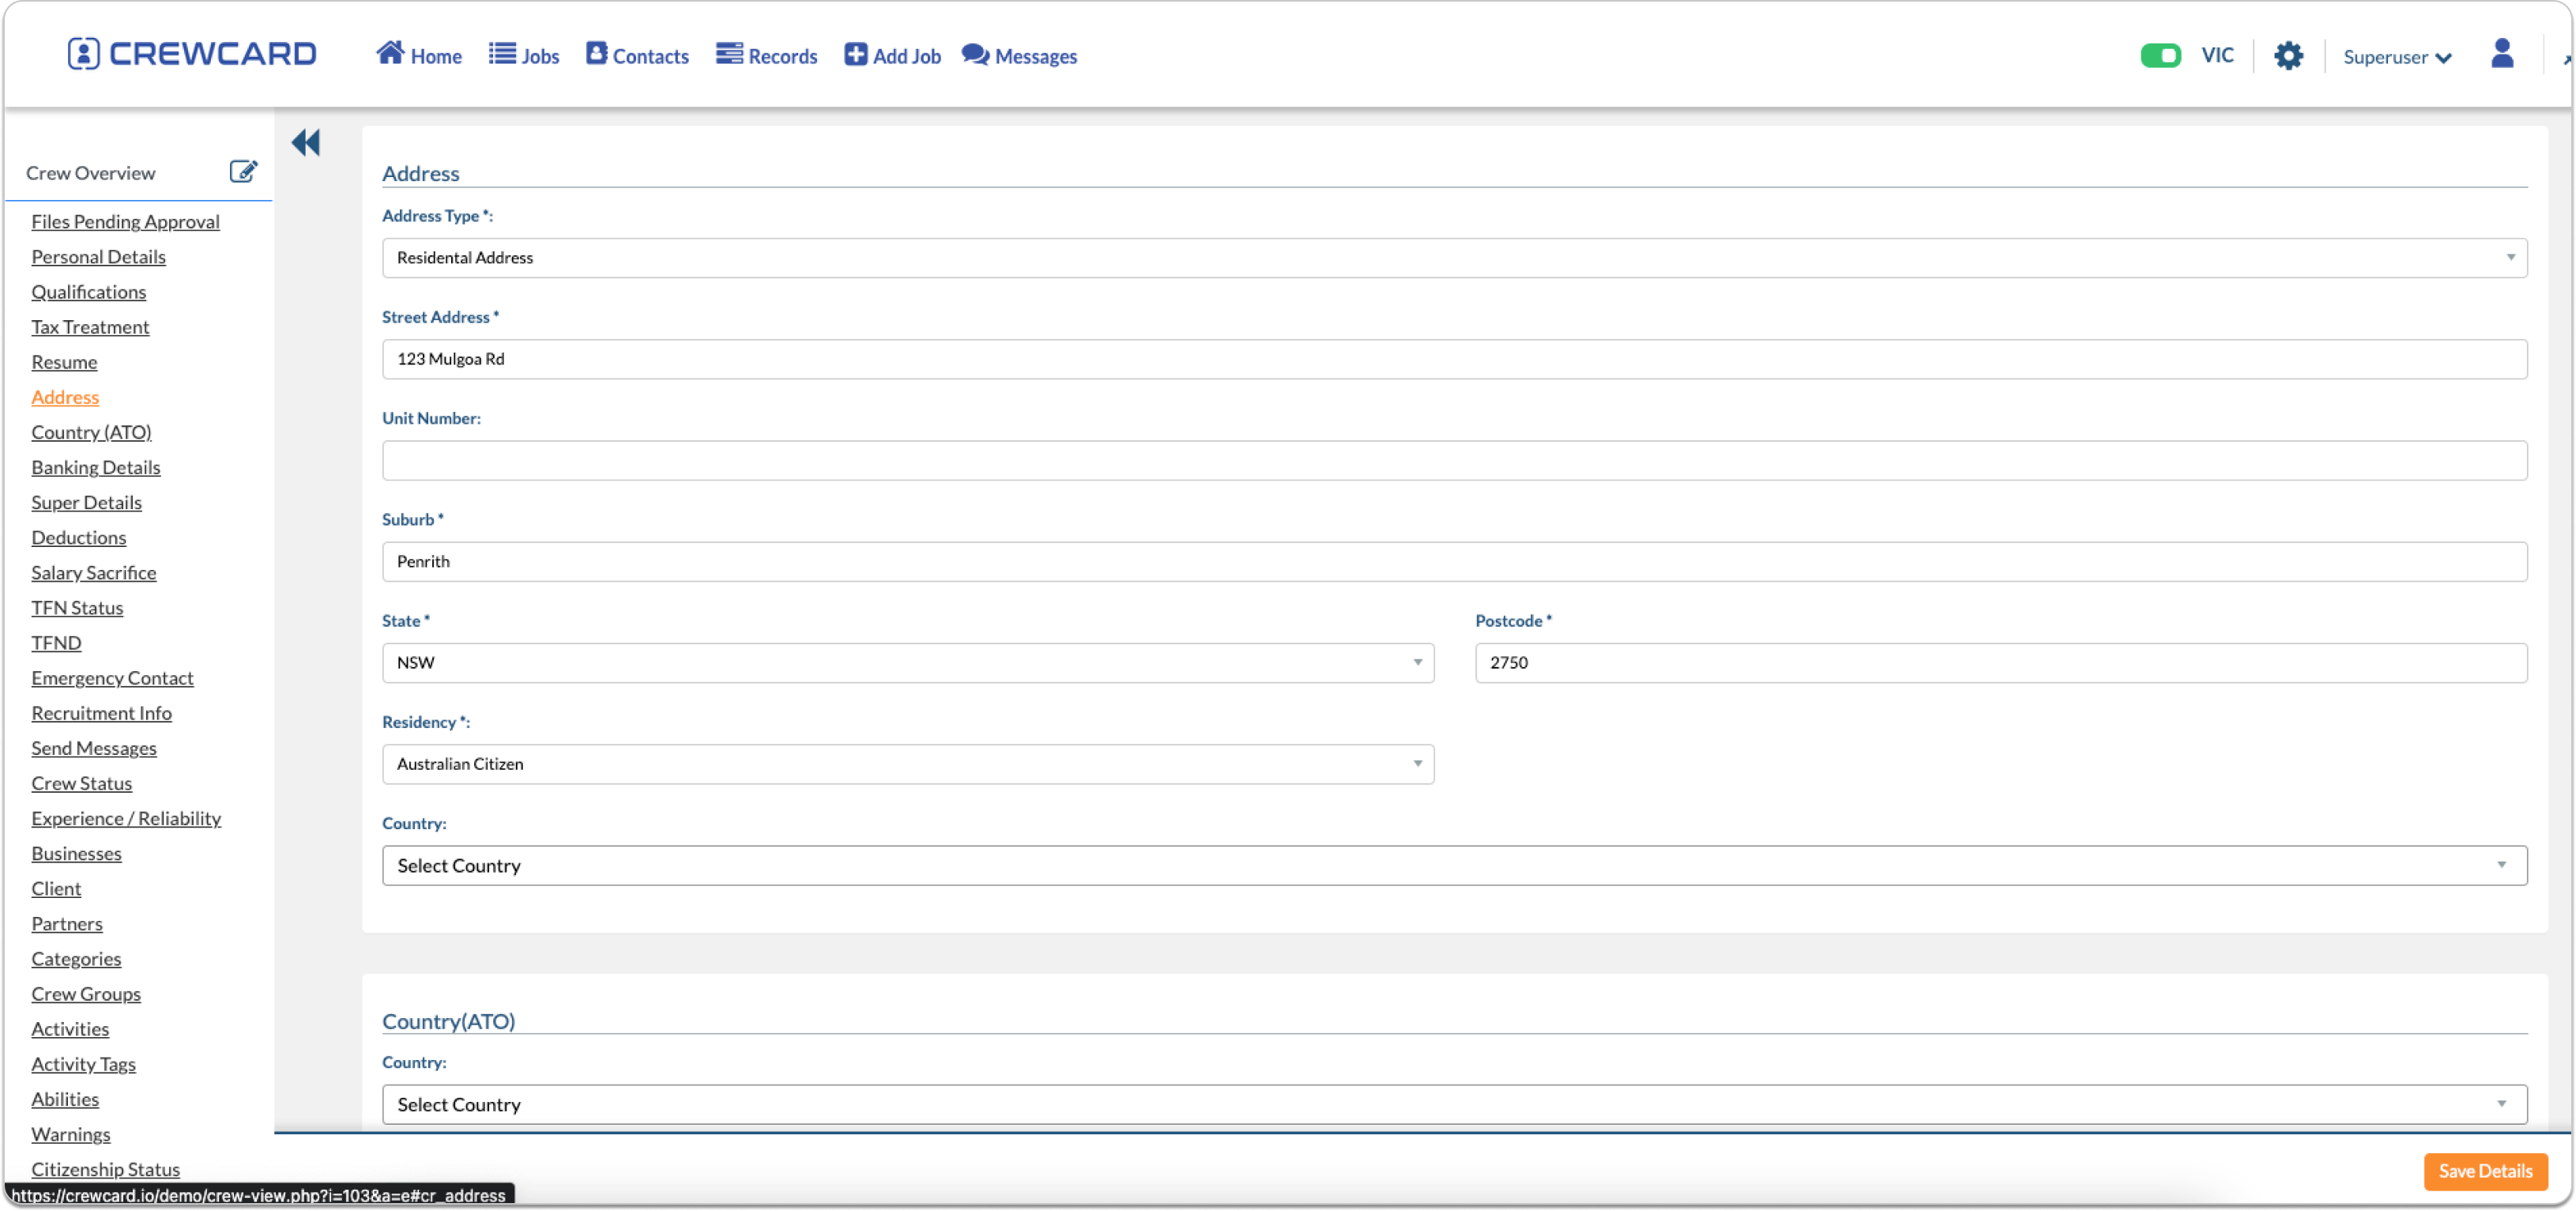
The Crew Overview sub headings are located to the left of the screen. The green eye icon that appears next to each heading indicates that the section will be displayed on the Crew Profile Overview once the editing function has been exited and the Profile is in viewing mode.
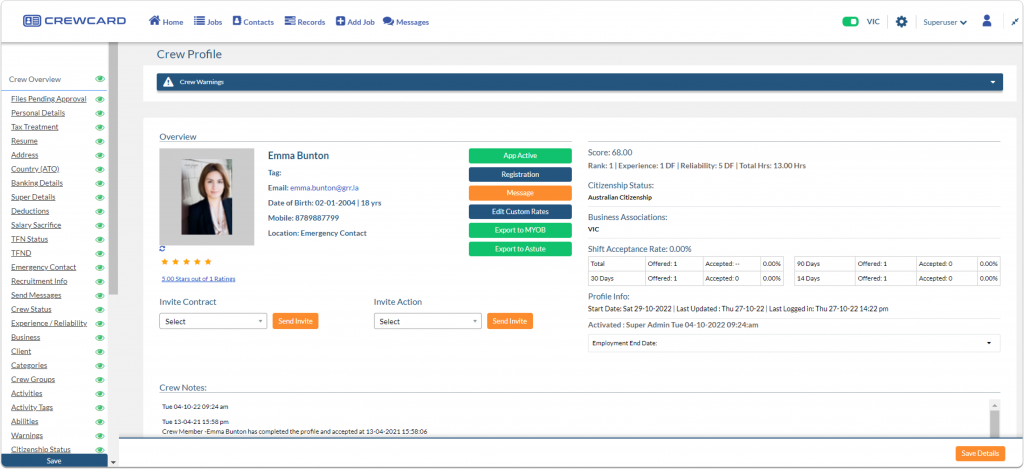
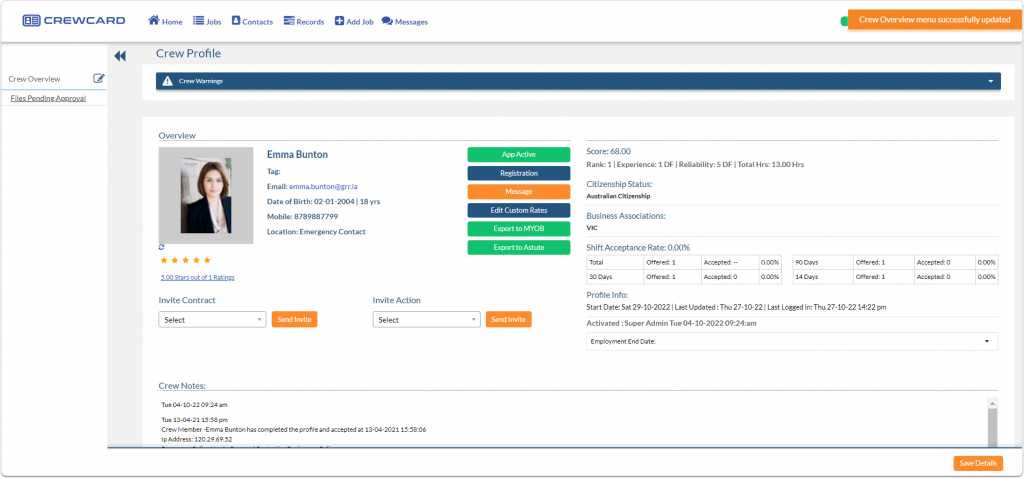
To hide a sub heading from the menu in viewing mode, select the eye icon and it will turn grey with a line through it.
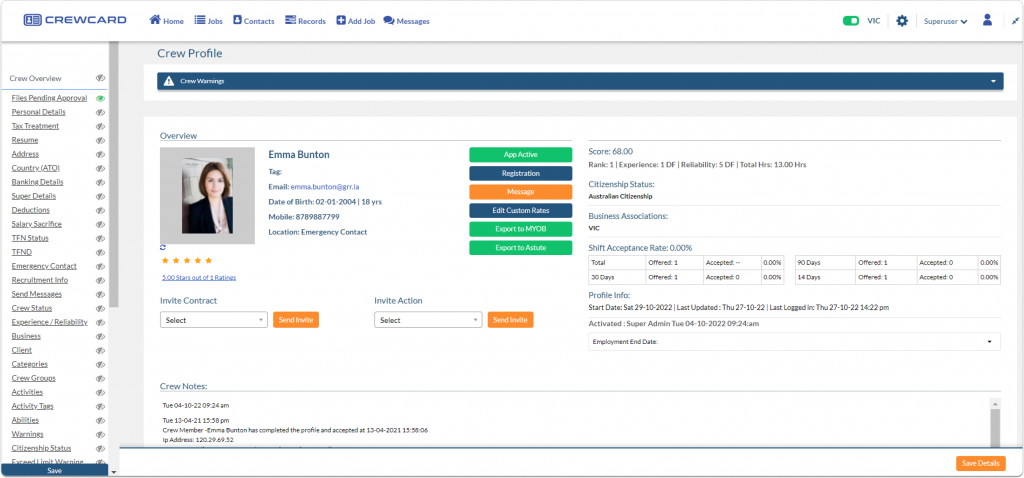
Once you select ‘Save’, the heading/s and the information respective to it will no longer be visible when viewing the Crew Profile Overview.

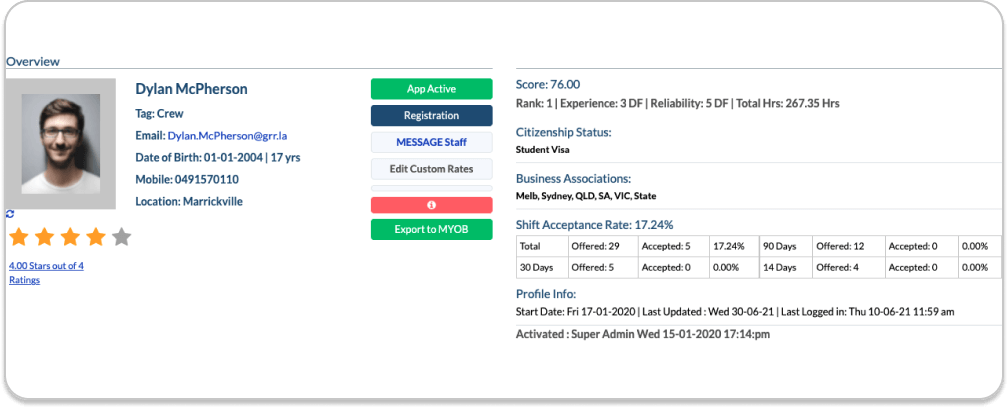
9.1.3 Performance of Crew Calculation
The overall performance rating of a crew member is a measurement by the performance of the crew in terms of experience, crew rating/feedbacks, and reliability. Each crew member is awarded a score out of 100 that is derived from a combination of their star rating (out of 5), experience level (out of 5), reliability level (out of 5) and recent activity level (out of 5) with the formula weighted most heavily on their recent activity level rating.
Score formula:
((Experience) + Rating + Experience # Days + Reliability*#) *#)
Star Rating:
Star ratings default to a rating of 2DF for crew members not yet rated (DF = Default). Once they are rated in the calendar or app, they will earn an average star rating.
Shift Acceptance Rate:
The shift acceptance rate displays the average acceptance from crew. It shows acceptance rate within 30 days, 90 days, and 14 days.
Experience:
In the dropdown menu for experience, select 1, 2, 3, 4, 5. If you select default for the experience, the rating will be calculated automatically.
Experience Levels are 1 – 5 from least experienced to most experienced. This is defaulted to the total hours crew have worked in the system and are calculated as follows:
Level 0 – 0 Hrs
Level 1 < 100 Hrs
Level 2 100 – 200 Hrs
Level 3 200 – 500 Hrs
Level 4 500 – 1000 Hrs
Level 5 > 1000 Hrs
Once the default setting has been replaced, the experience level will no longer display DF for default.
Example: if a crew member with a lot of industry experience came to work for Show Support, then a level of 1 would not be appropriate and would adversely affect their score. In these cases, we can assign a higher level, such as 4 or 5. The DF will no longer appear after the number to display that the experience level has been manually updated.
Reliability:
Reliability rating from the dropdown menu. Reliability levels are 1 (least) – 5 (most) reliable. Reliability levels default to 5 for all crew. Reliability levels MUST be updated manually (under experience/reliability in their crew profiles) as follows:
Level 5 – No blow outs, no lateness, perfectly reliable.
Level 4 – 1 Blow Out and/or 2 Times Late in the last 12 months
Level 3 – 2 Blow Outs and/or 4 Times Late in the last 12 months
Level 2 – 3 Blow Outs and/or 6 Times Late in the last 12 months
Level 1 – 4 Blow Outs and/or 8 Times Late in the last 12 months
Bias:
Aside from experience and reliability, you can also enter bias in the crew profile page. Only admin has access to this feature. If you are using a different login credential, this option will not appear. Enter the value of bias in the provided field.
Recent Activity:
Recent Activity Levels are 0 (least) – 5 (most) active. Recent activity is based on the number of hours a Crew member has worked in the last 60 days.
Level 0 – 0 Hrs
Level 1 – 0 – 75 Hrs
Level 2 – 75 – 150 Hrs
Level 3 – 150 – 250 Hrs
Level 4 – 250 – 340 Hrs
Level 5 – 340 Hrs
Ranking Using Crew Score:
You can order ranks by hours, score or inactive.
- Score
- Bias
- Hrs – Total Working Hours of the Crew
- Hrs 7 – Total Working Hours of the Crew within a week
- EXP – the experience rating
- REL – the reliability rating
- REC – the recent activity rating.
Address Type: Crew can select between the options of Residential Address or PO Box
9.1.5 Activities Tags
Activities tag is an additional field in the Crew Profile page. Administrators, Duty Managers, Managers can access this page, but not within Client/Crew access. Crew tags are identification marks so that you can easily recognise a crew.
9.1.6 Warning Message
Warning Dev allows you to send announcements or warning messages to your crew members separately via email or push notifications.
To begin, navigate to Settings and select the warning option.
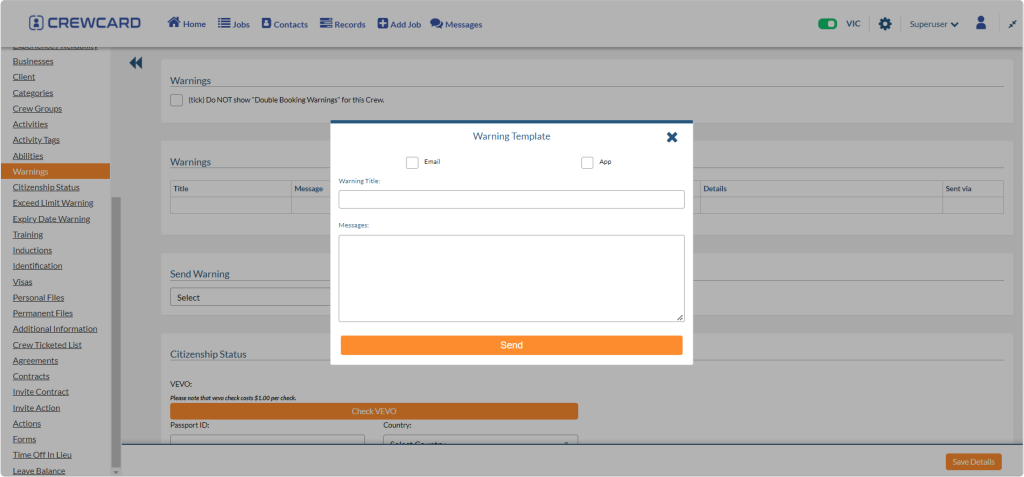
Simply click the Add Warning Template button to add a Warning Template. A new window will appear.
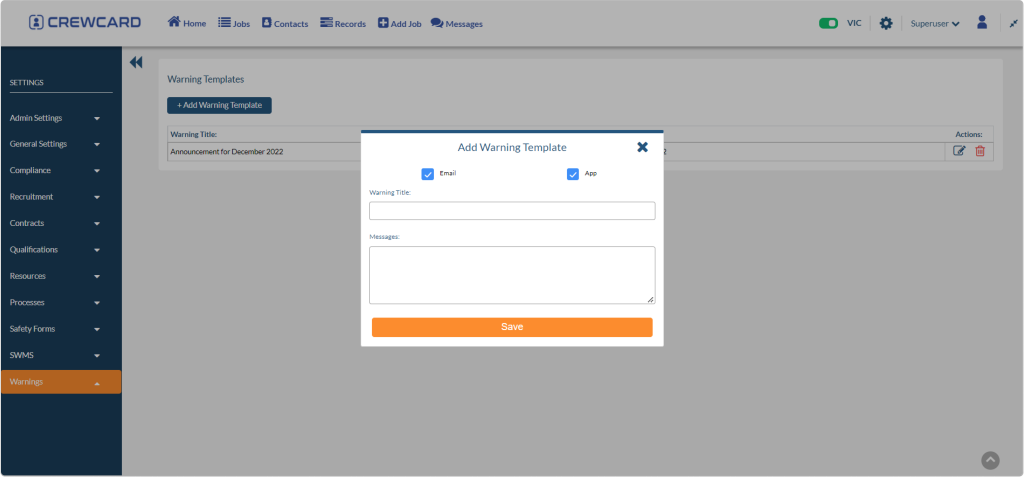
If you want your crew to receive the Warning message via email, select Email; otherwise, select APP to receive it via push notification. You can also select both checkboxes if you want your team to receive it via email and push notification.
Warning Title: Enter the title of the warning message
Messages: Enter the content of the warning message
Save button: To save the changes, click Save.
X button: To close or cancel, click the X button.
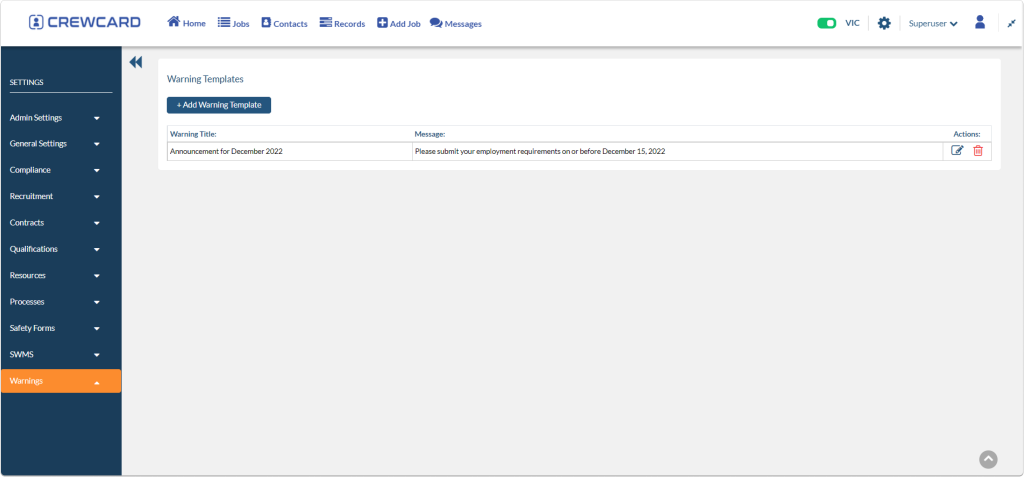
After you save the warning message, it will appear in the warning template lists, as shown in the screenshot below.
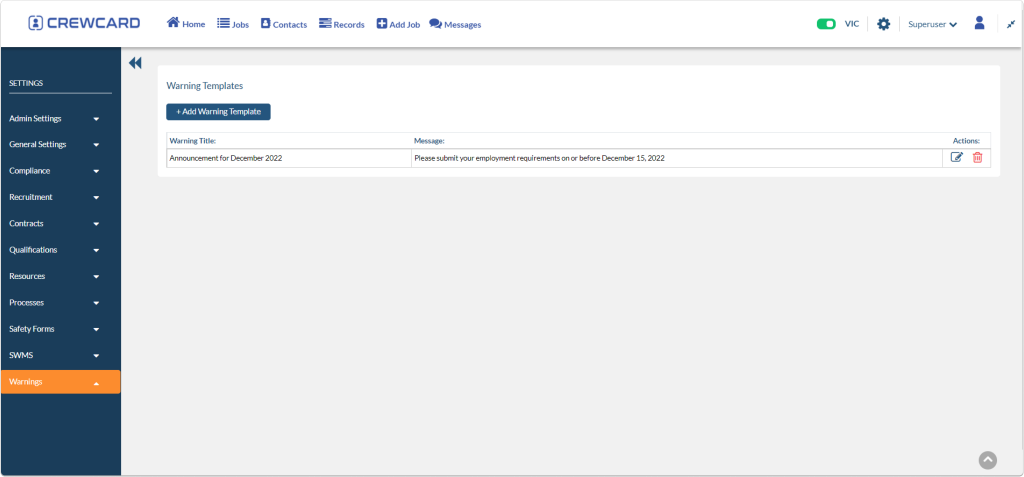
It will also allow you to edit or delete the warning you have created on the Warning Page. Click the Edit icon to modify the warning template. Alternatively, you may click the delete icon to delete the warning template.
Once the Warning templates have been created, navigate to the Crew List Page. Click the edit icon to select the crew of which you want to send the warning message to.
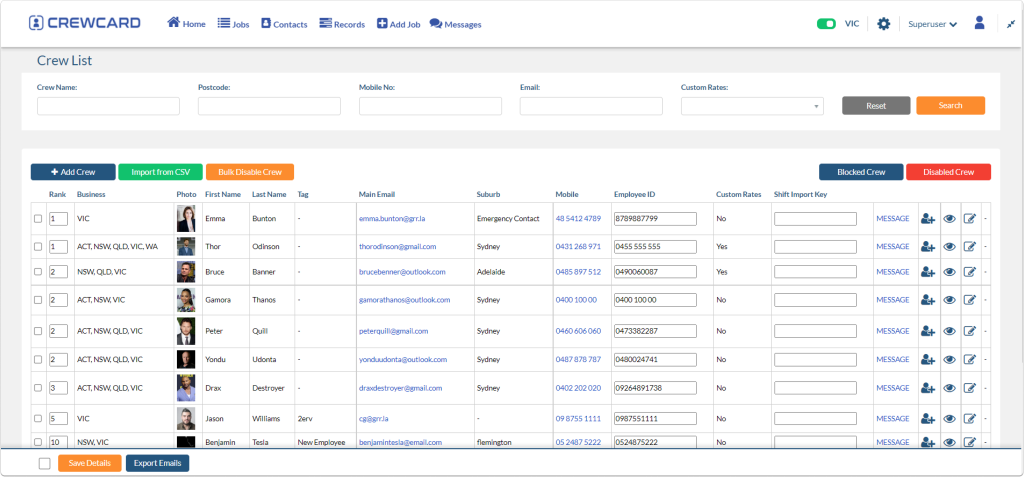
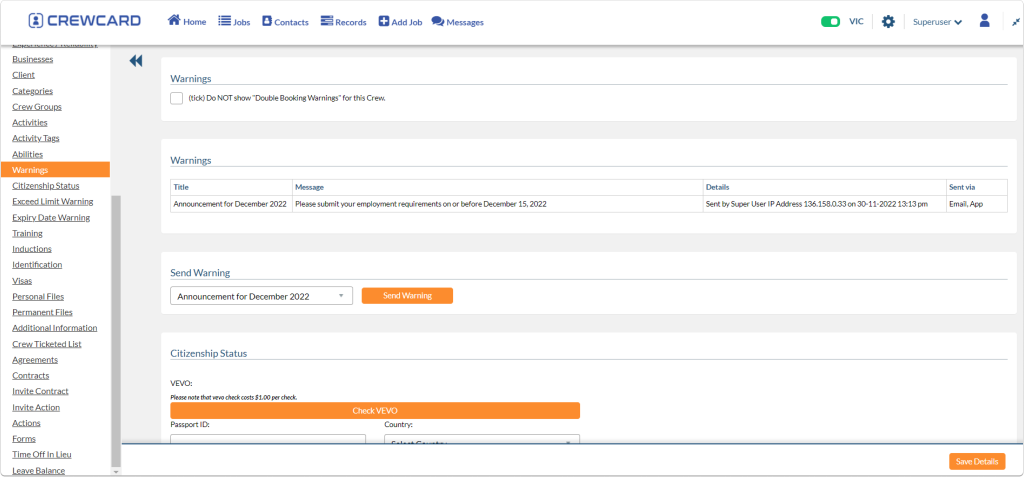
Select warning from the crew profile page to go to the warning section.
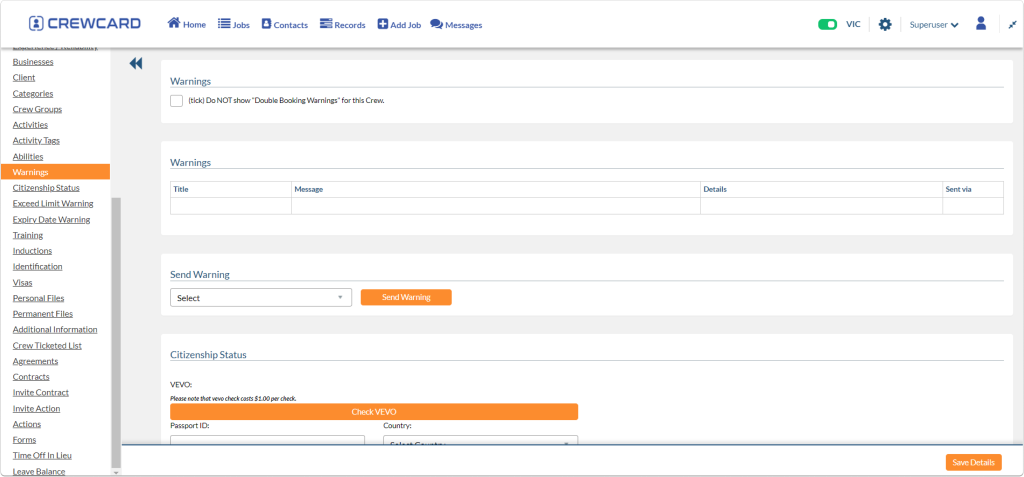
Select the Warning message from the dropdown list to see the warning template you created in the warning settings.
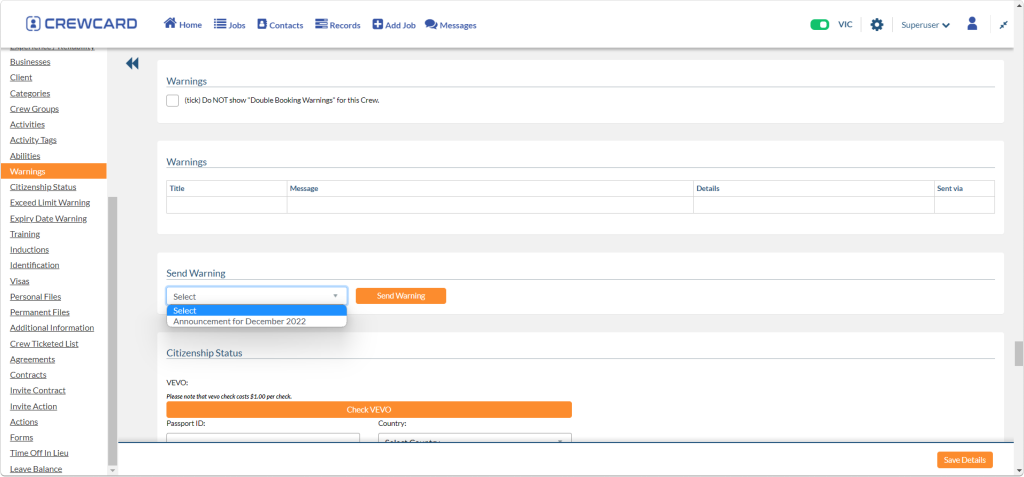
If you want to create a new warning message, click the Send Warning Message button. Fill out the form and click the send button.
Once the warning message has been sent, a pop-up will appear in the upper right corner of the screen stating “Warning sent successfully,” and the record will appear in the warning logs.
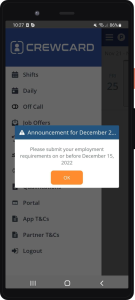
Crew will receive the warning message when they log in to their crewcard app. If the admin sends multiple warning messages, crew will receive consecutive warning messages when they log in to the app.
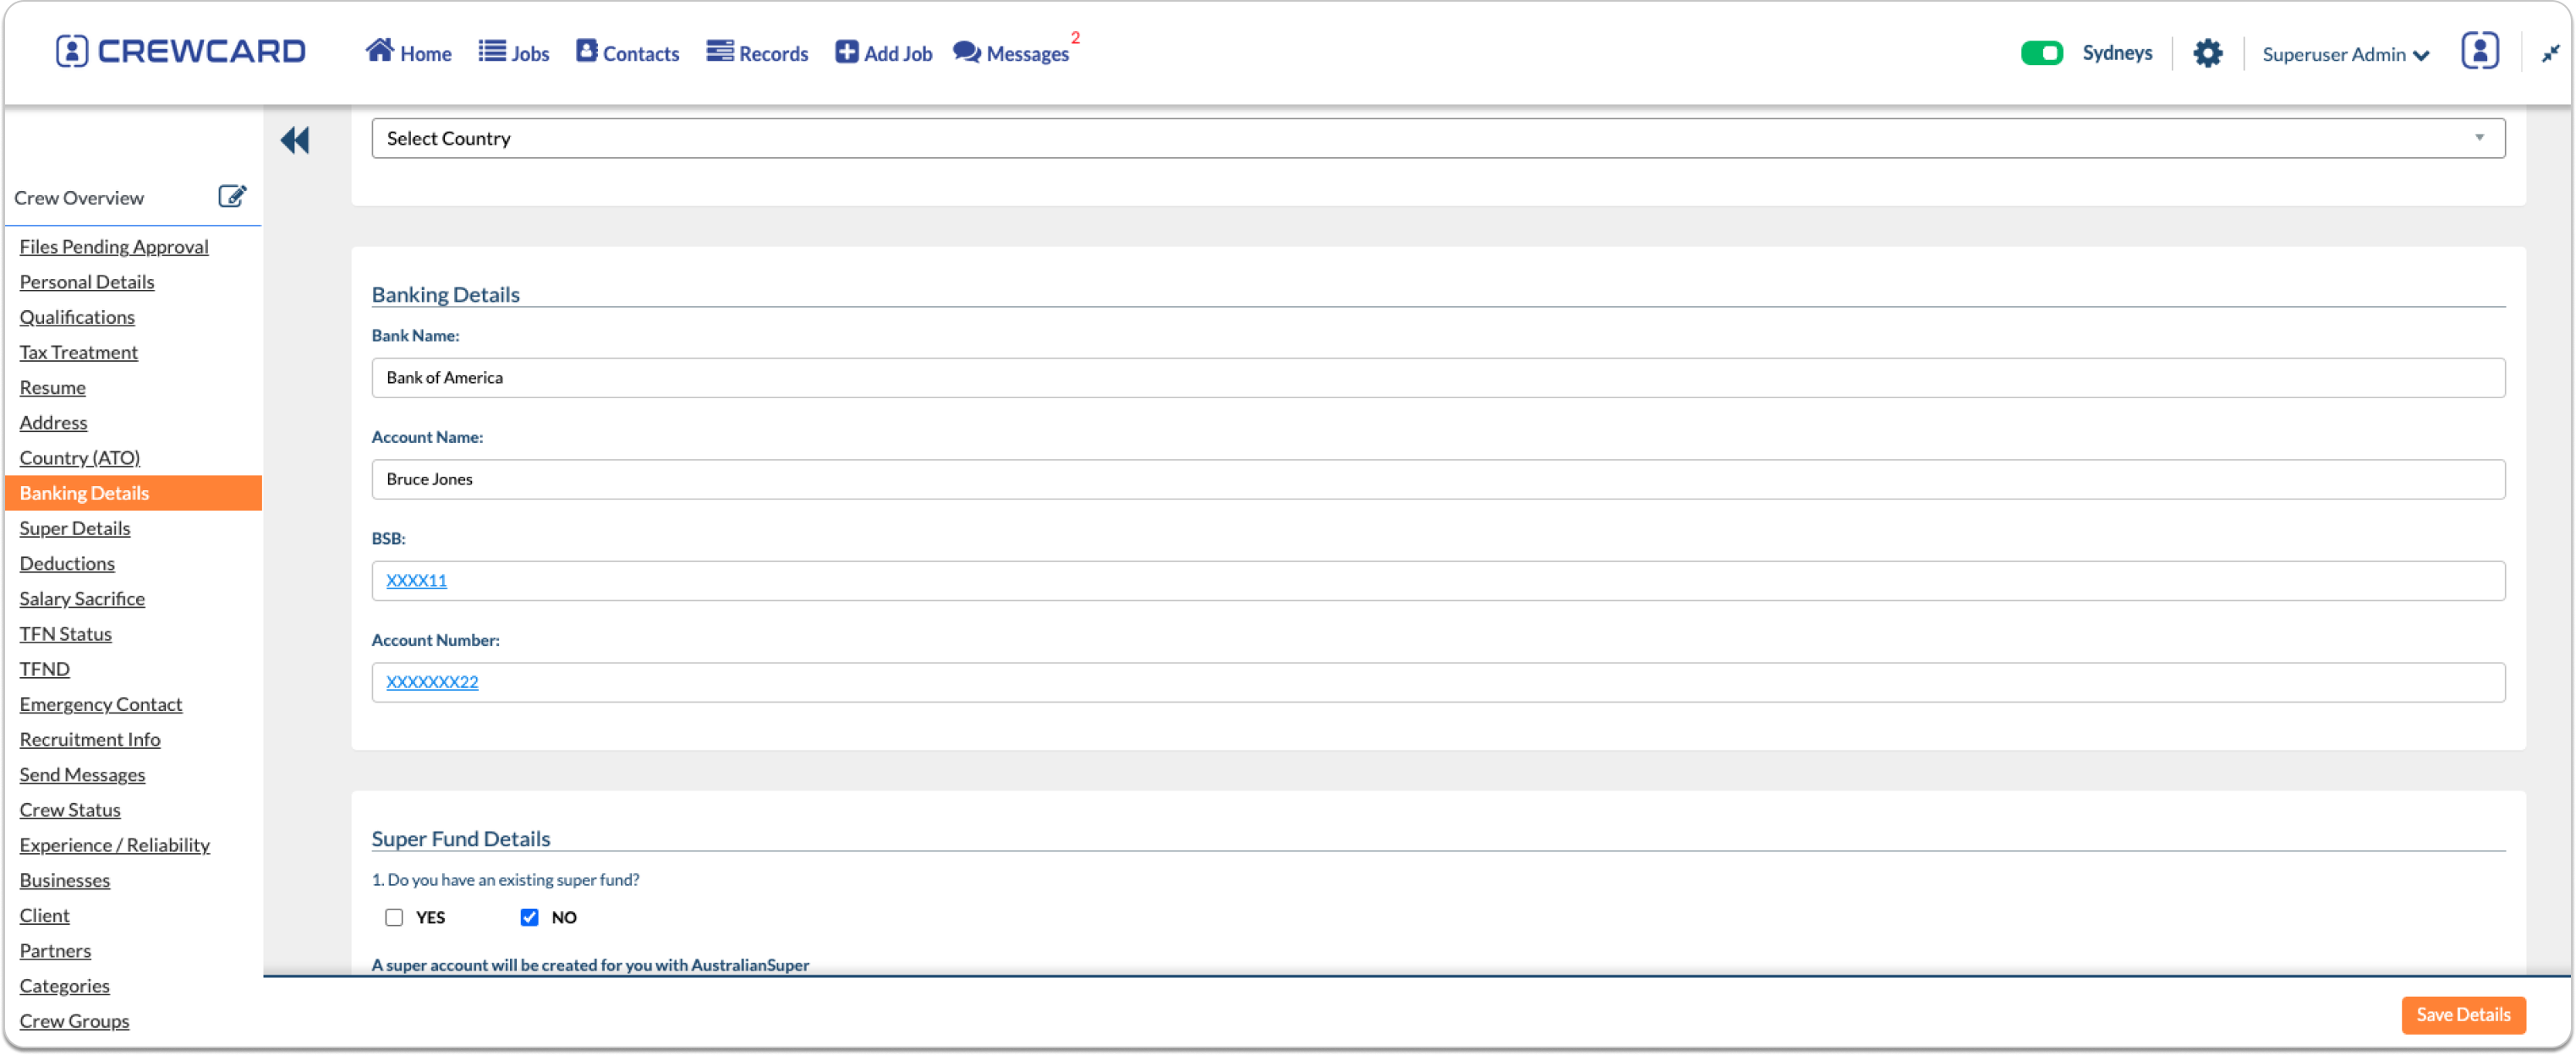
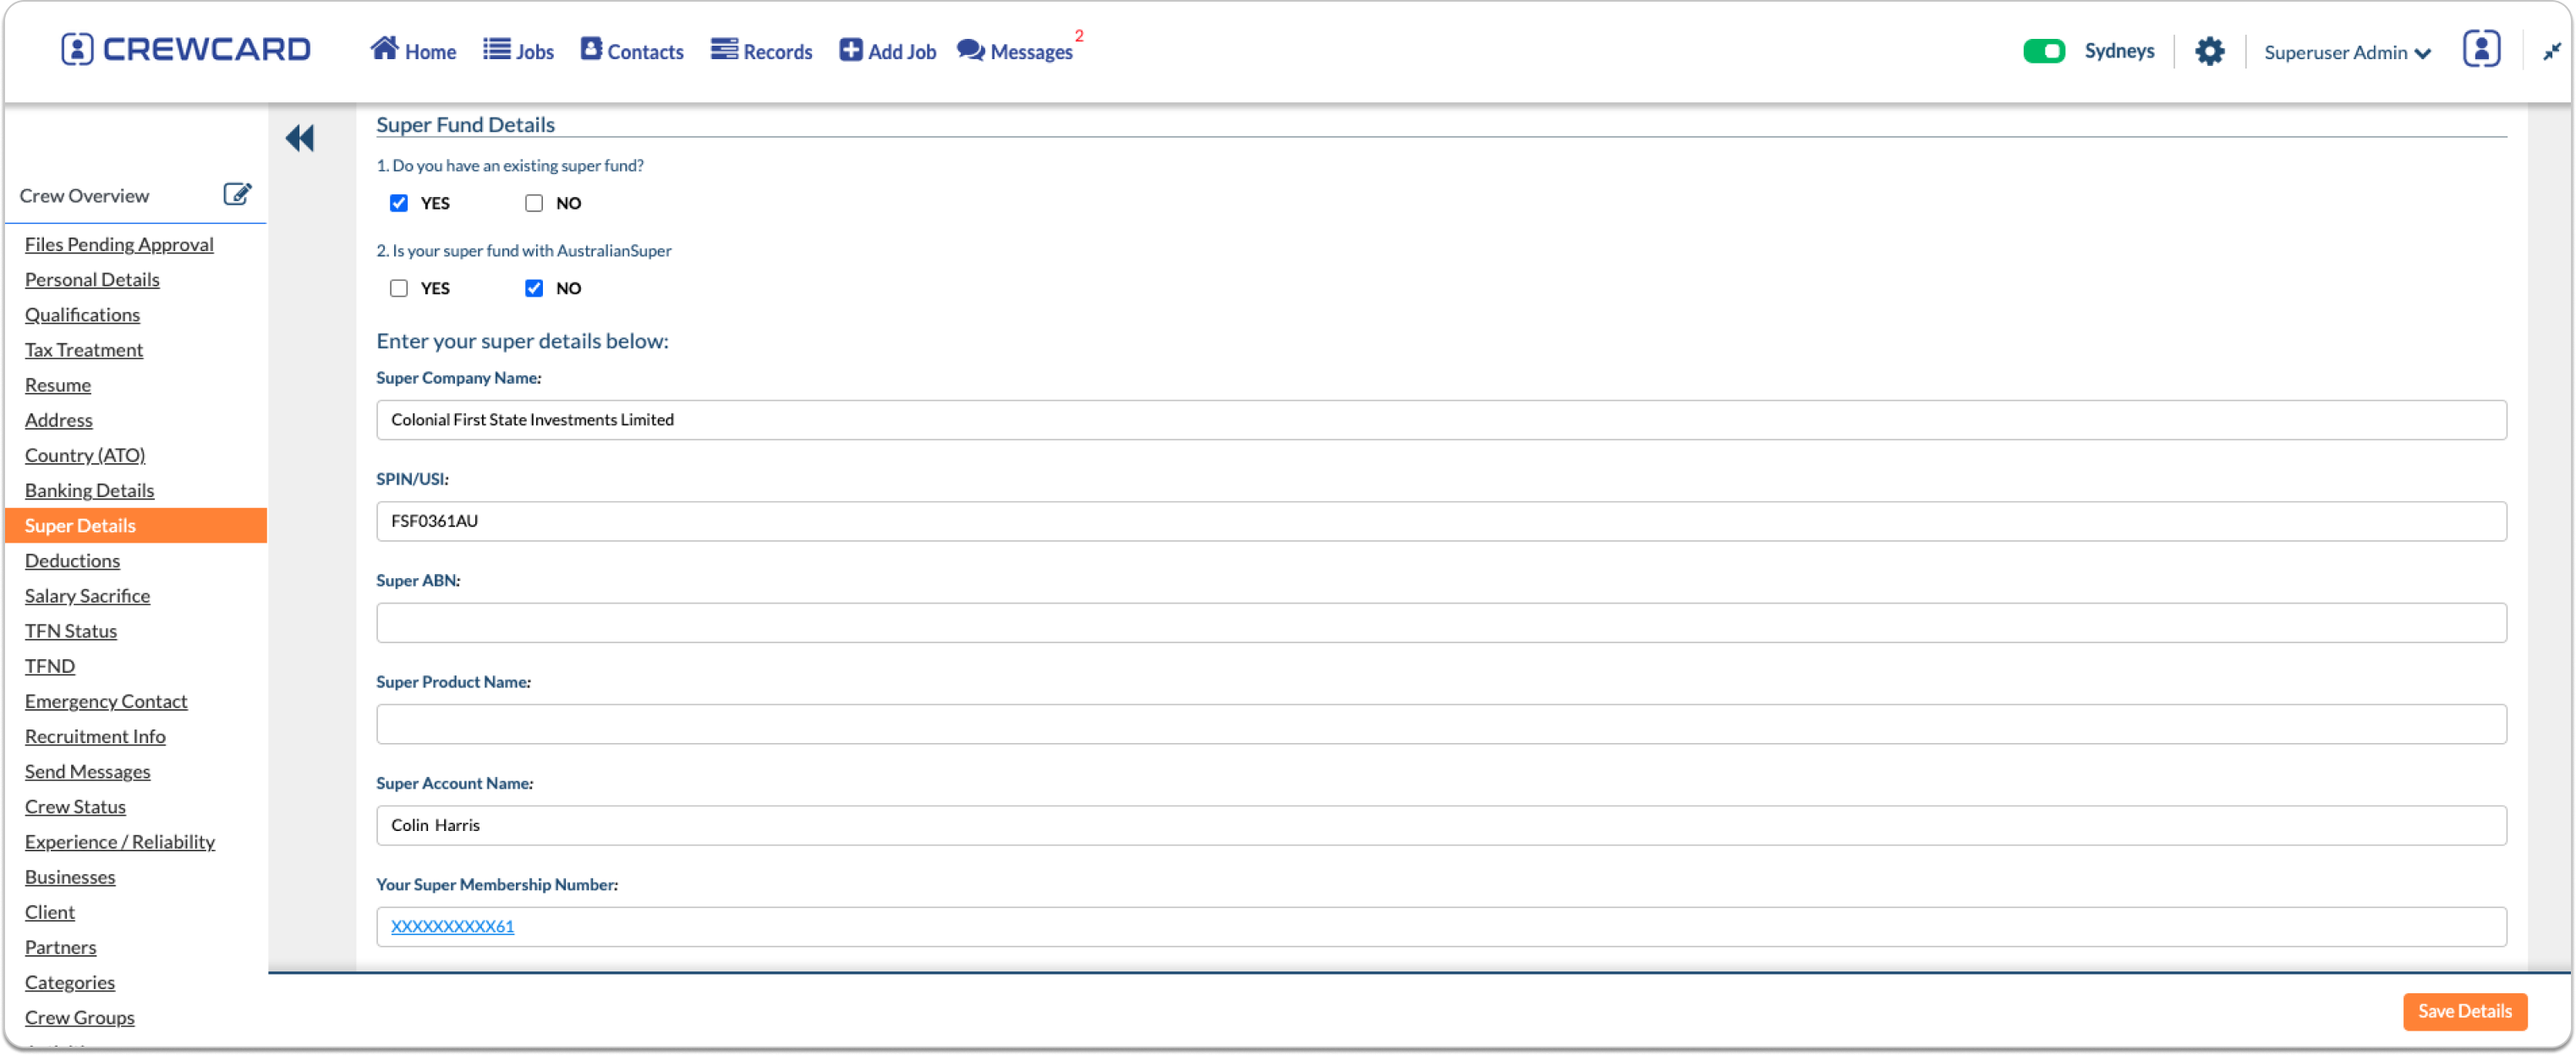
9.1.6 Encryption of Banking and Super Details
CrewCard has instilled encryption at rest for the banking and super details of crew members in order to add an extra layer of security. Encryption at rest is designed to protect data that is stored on a disk or backup media. Only Duty Managers are able to see the details provided. For users other than the Duty Manager and the Crew member themself, the information presented in the crew profile is hidden.
9.1.7 Crew Profile Photo
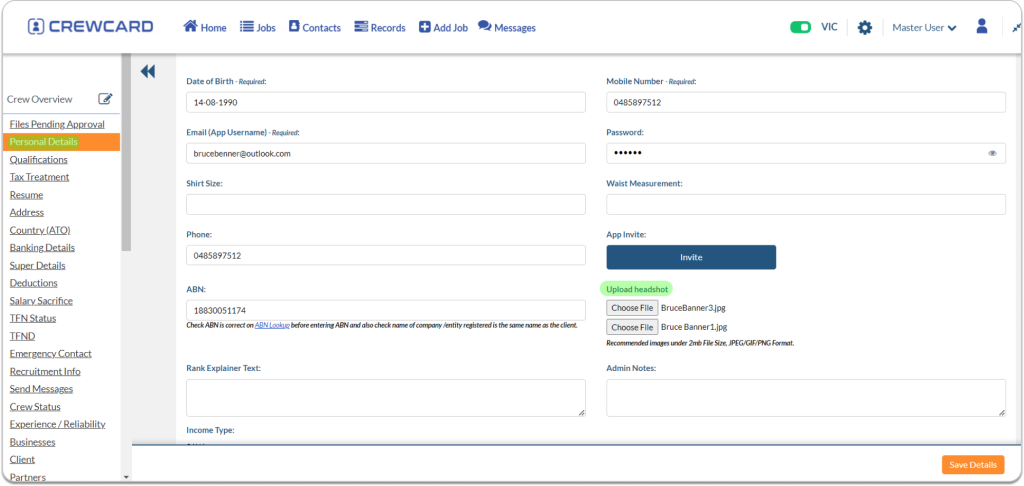
To add a Crew Profile Photo, first navigate to the Crew Profile section and click on “Personal Details” in the side menu.

Then, locate the “Upload headshot” section below the “App Invite” and upload up to three images.
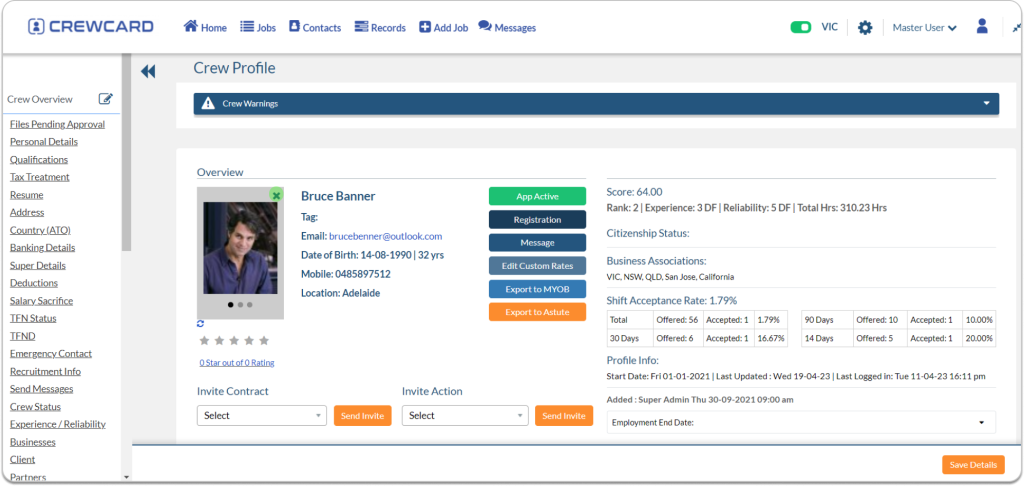
If needed, an Admin can delete the Profile Photo by clicking the “x” button.
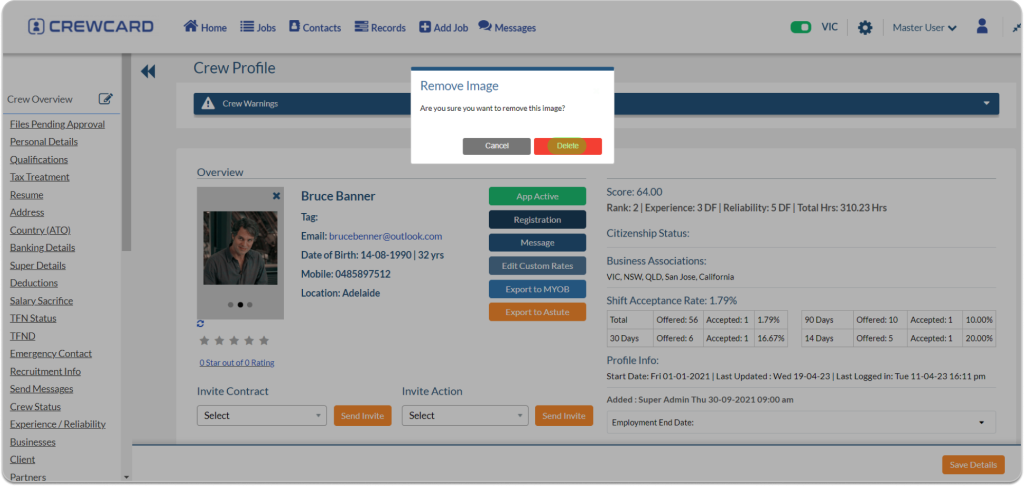
A pop-up confirmation will appear, asking for confirmation to delete the Crew Profile Photo. Click the “Delete” button to confirm the deletion. Alternatively, you can select the “Cancel” button to abort the removal of the Crew Profile Photo.
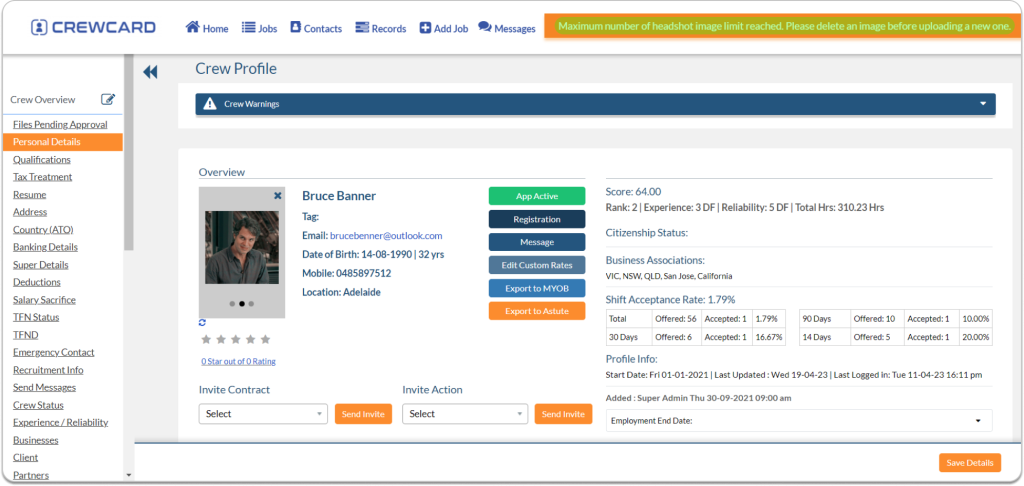
Please keep in mind that Admins can only upload up to three Crew Profile Photos. If the Admin attempts to upload more than three, a pop-up message will appear stating, “Maximum number of headshot image limit reached. Please delete an image before uploading a new one.”
9.1.7 Export Crew Notes
To export crew notes into a PDF format, first access the Crew Profile.
Then, navigate to the Crew section and click “Export to PDF”
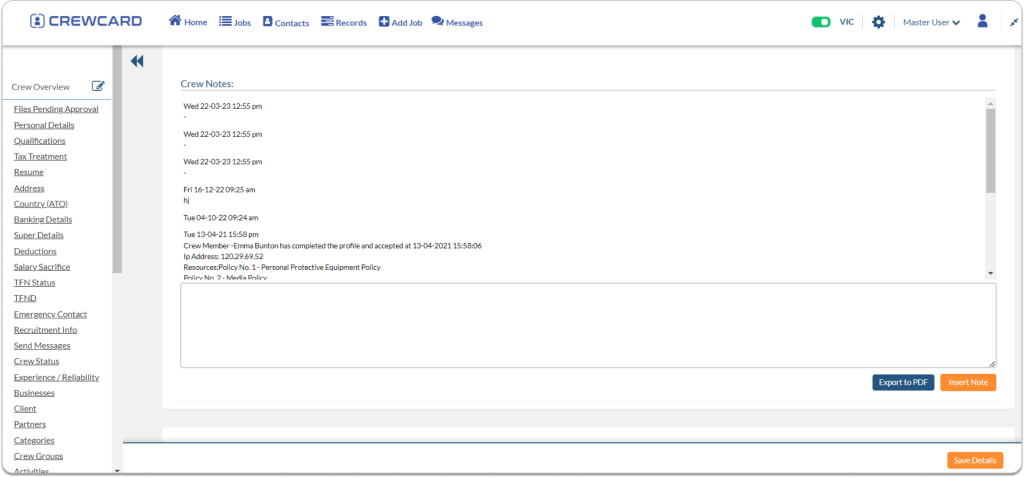
After the system generates the PDF file, open it with a PDF viewer to access the crew notes.
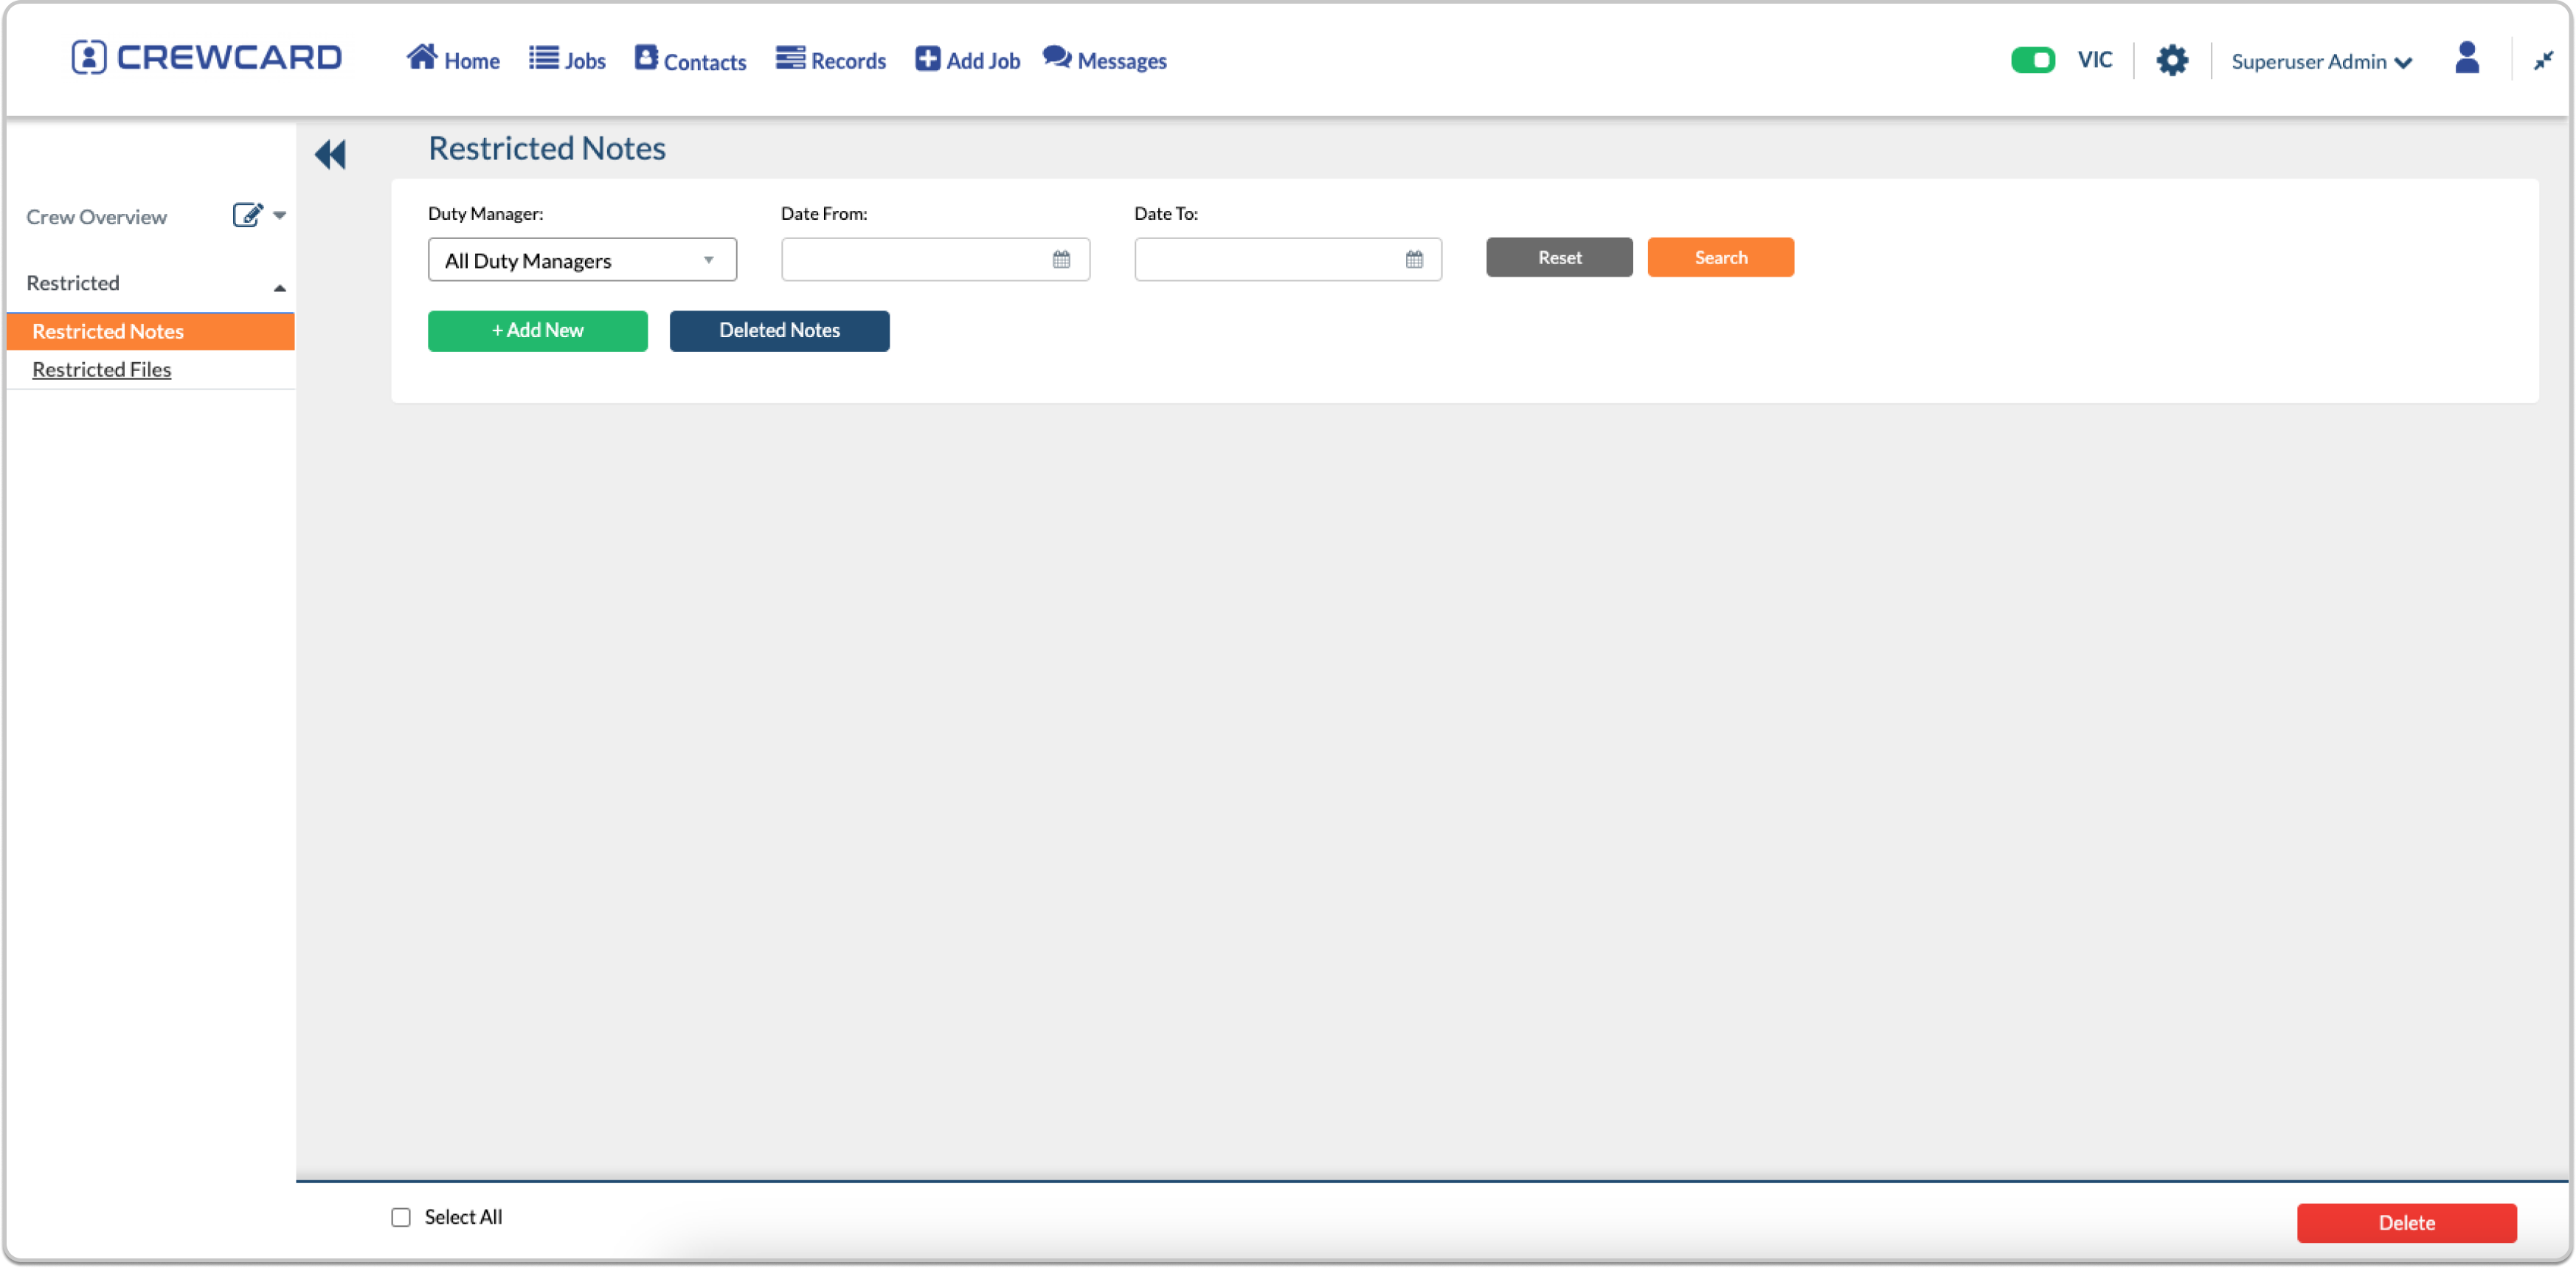
9.1.8 Restricted Notes and Files
The purpose of this feature is to provide exclusive access for Admins and Duty Managers to discrete and confidential information about a Crew Member in the form of Notes and Files that is best kept hidden from ordinary office staff that have access to CrewCard / PM as Duty Managers or Admin.
As a Duty Manager or Admin, you can log in and access the crew profile to gain access to restricted notes and files. However, it’s important to note that permission to view these fields will only be granted to individuals who have been specifically authorised to do so.

To access the restricted notes and files, follow these steps:
Open the crew list and locate the “Edit” button.
Once you are on the crew overview page, scroll down until you find the “Restricted” tab.

Alternatively, you can close the crew overview dropdown to reveal the “Restricted” tab.

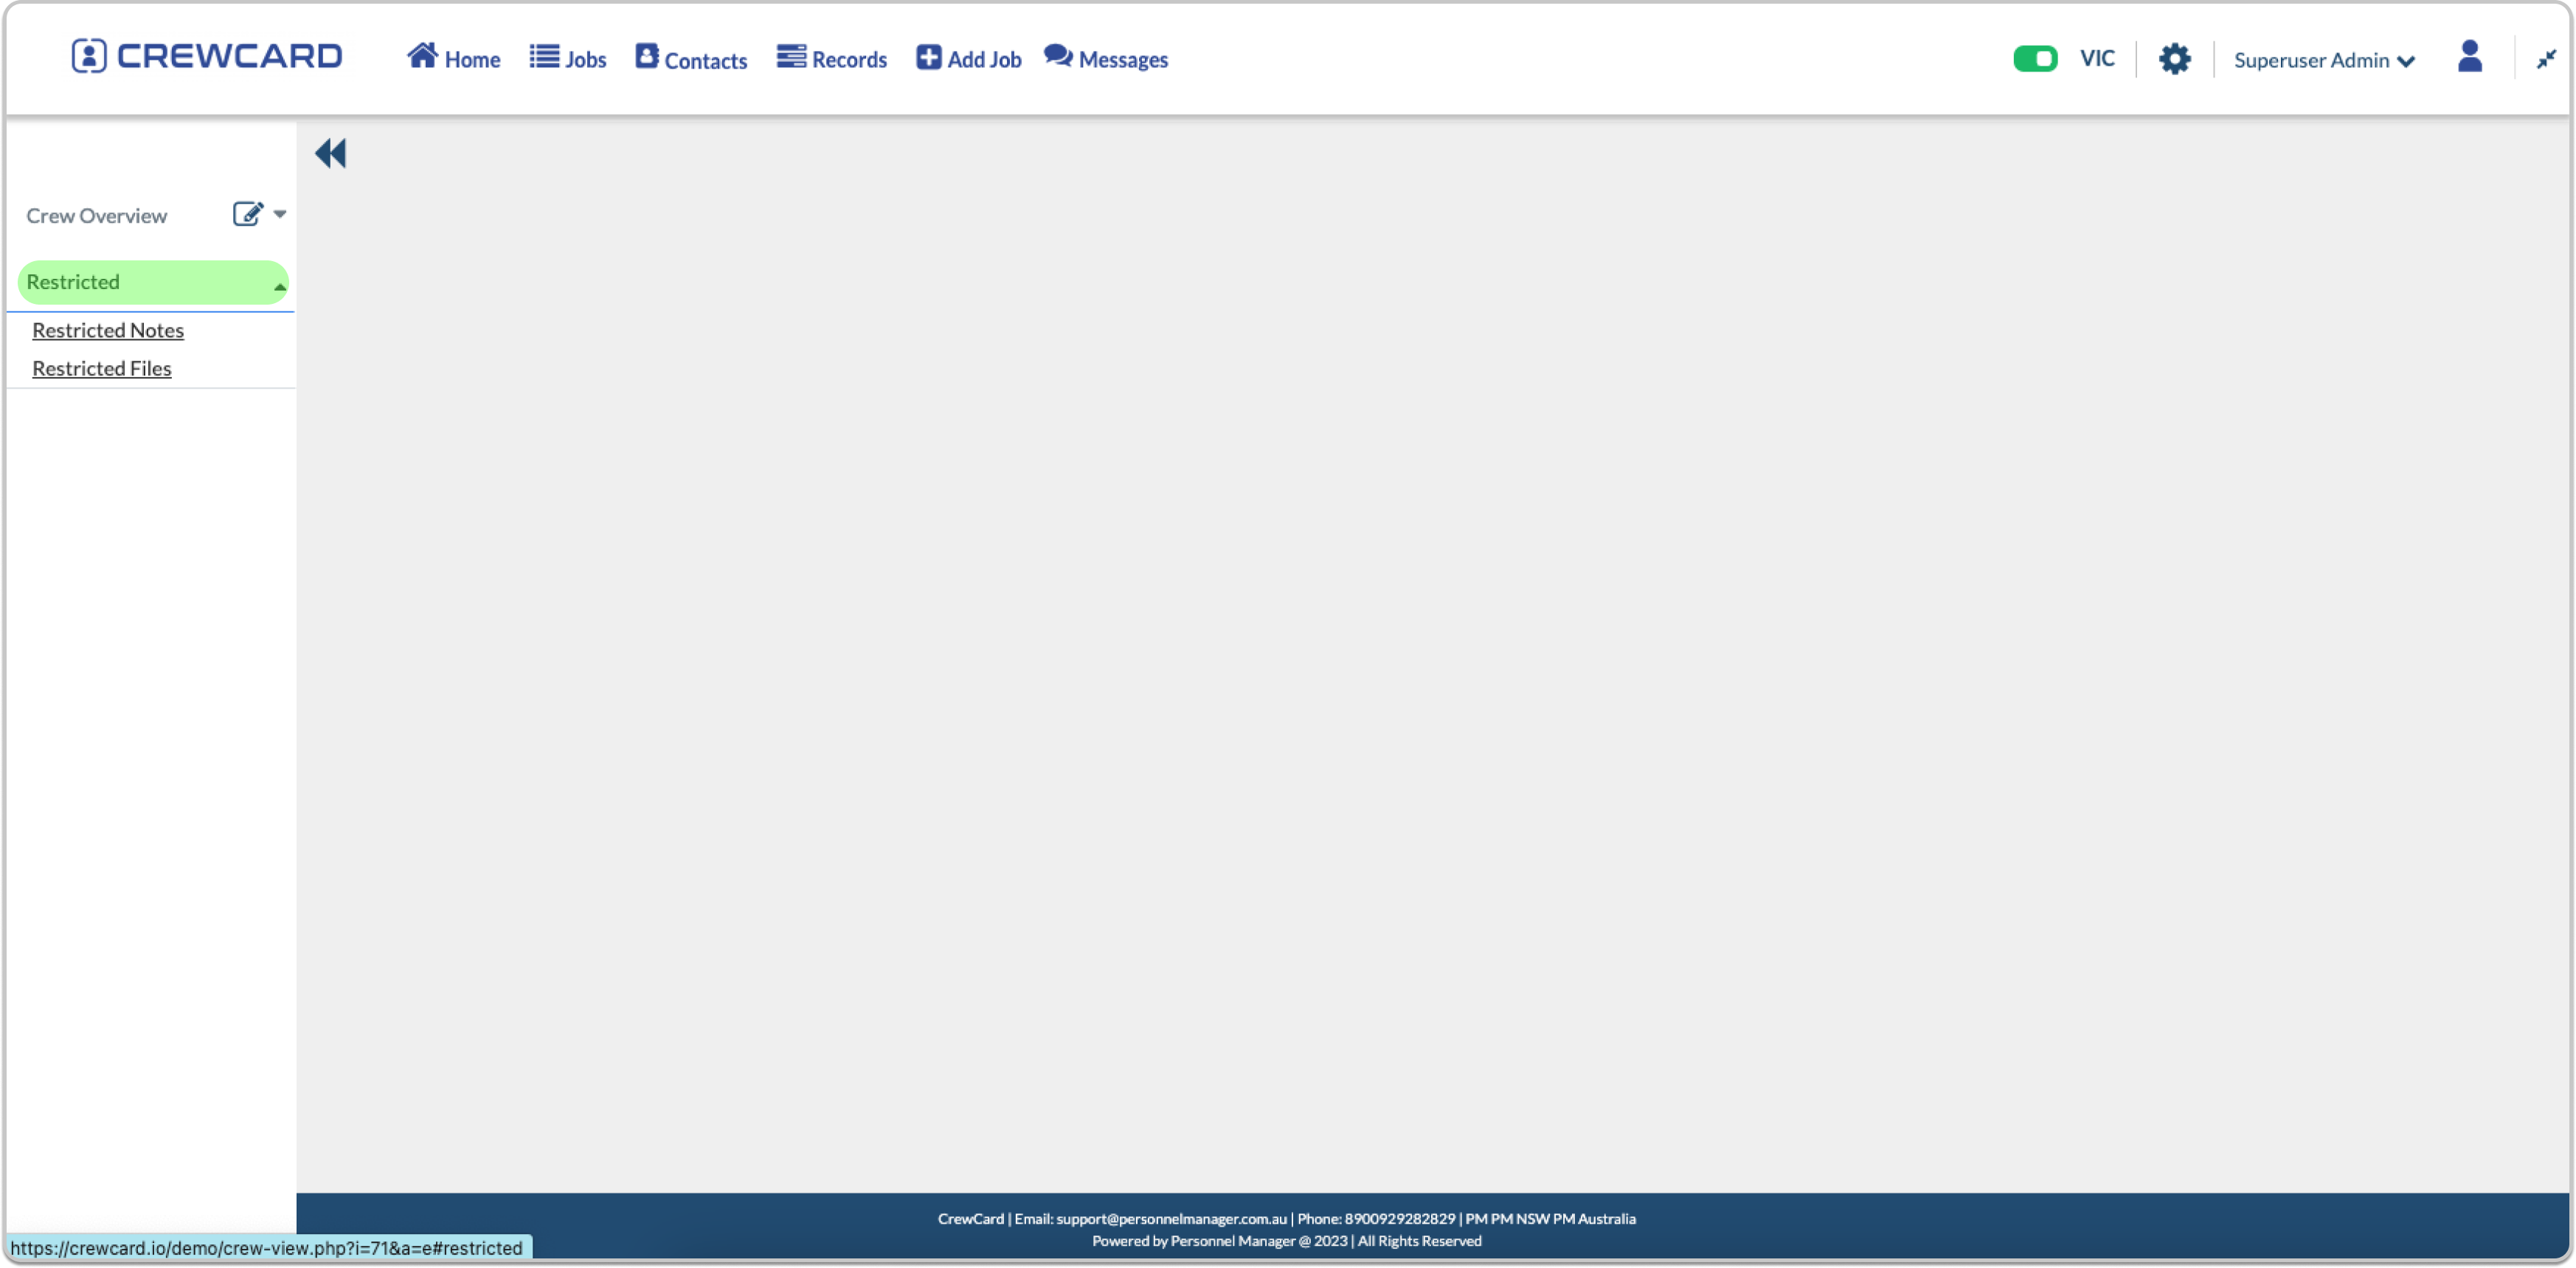
If you have been granted access to the restricted notes and files, you will be able to view both pages as depicted in the provided screenshot.

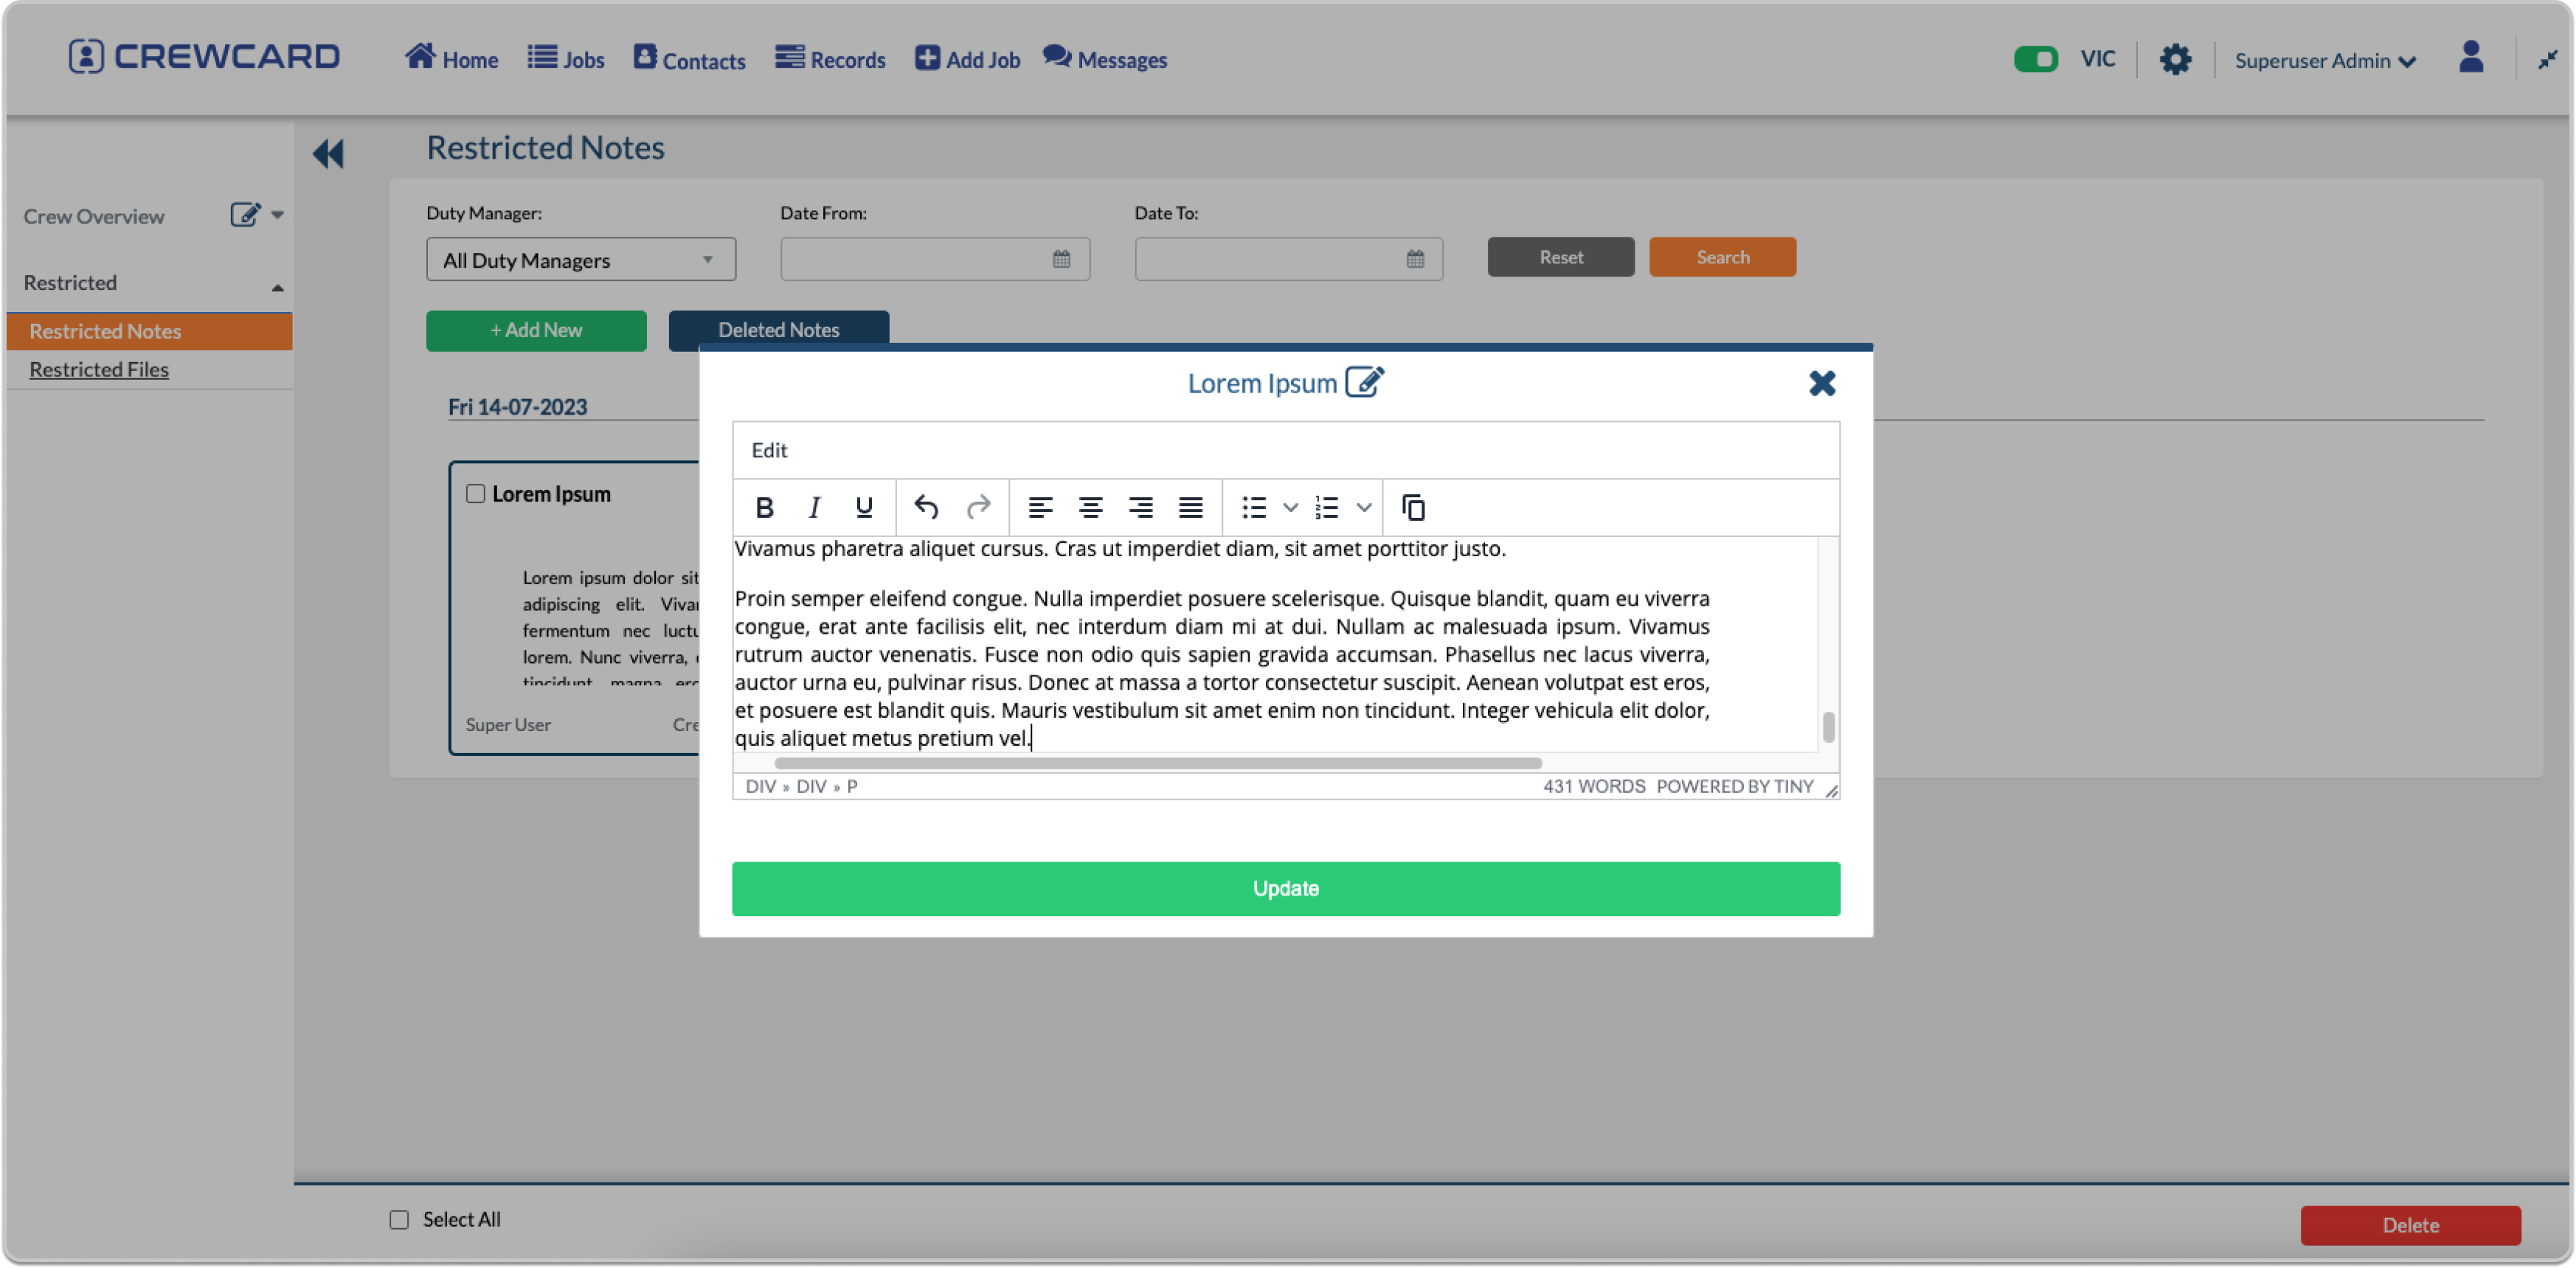
Restricted Notes
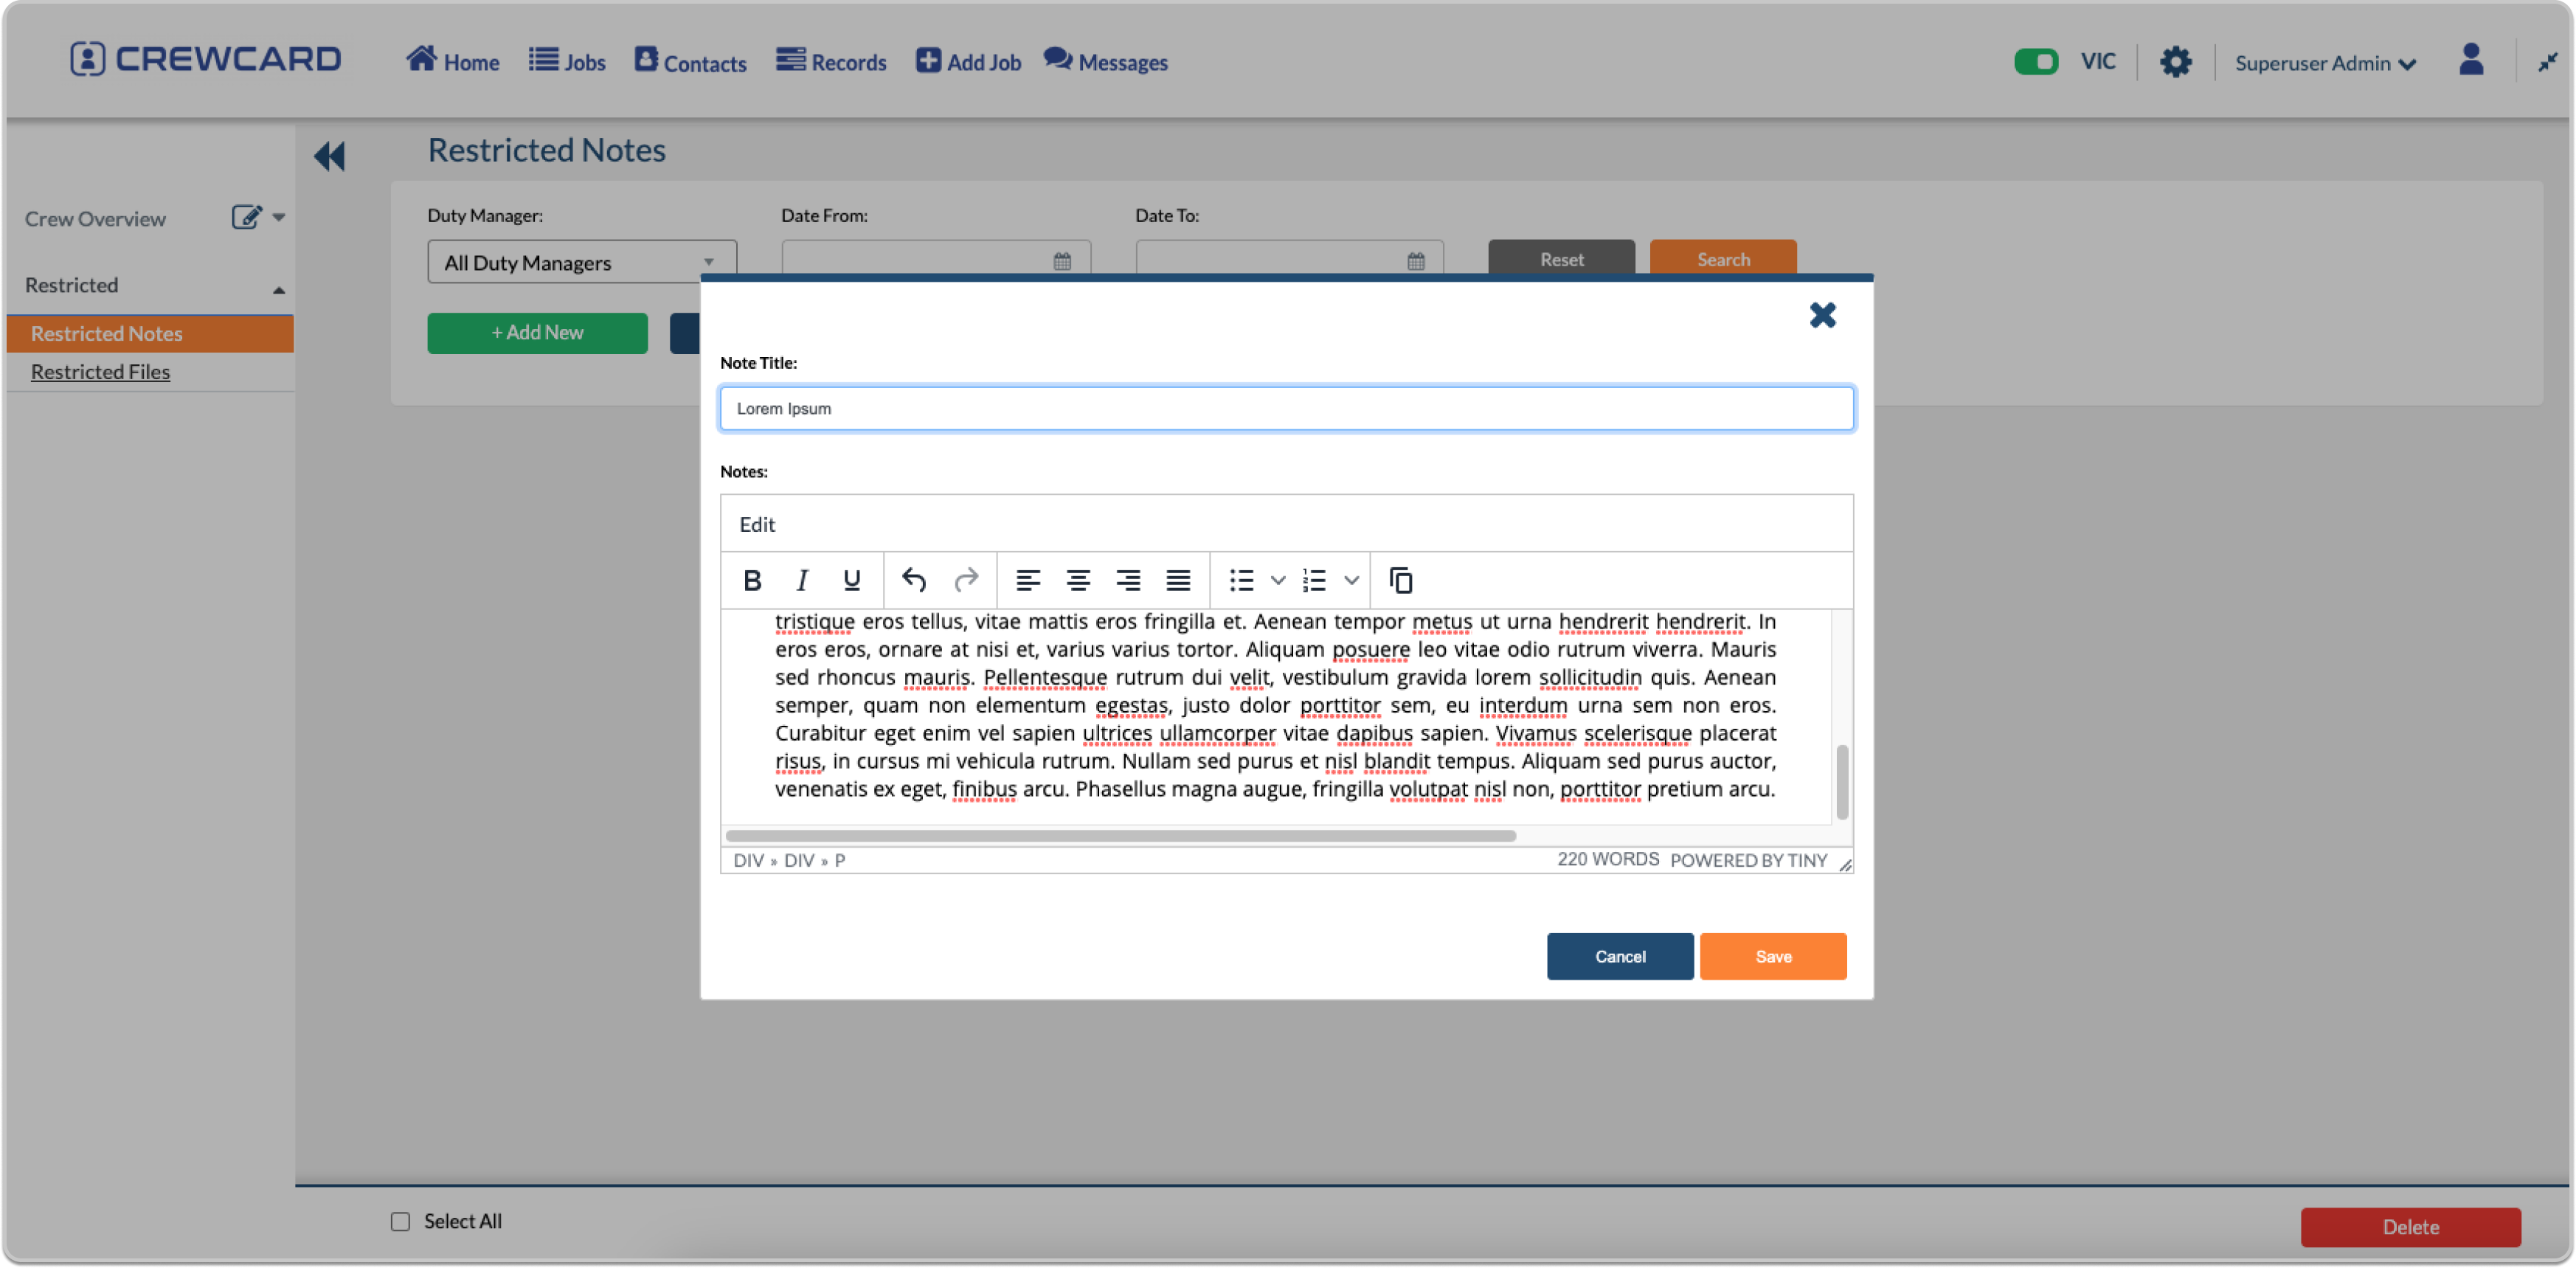
To add a restricted note, follow these steps:
Click on “Add Notes” and enter the title of the note.
Provide the specific information intended for the crew in the note.
Once done, click “Save” to save the note.
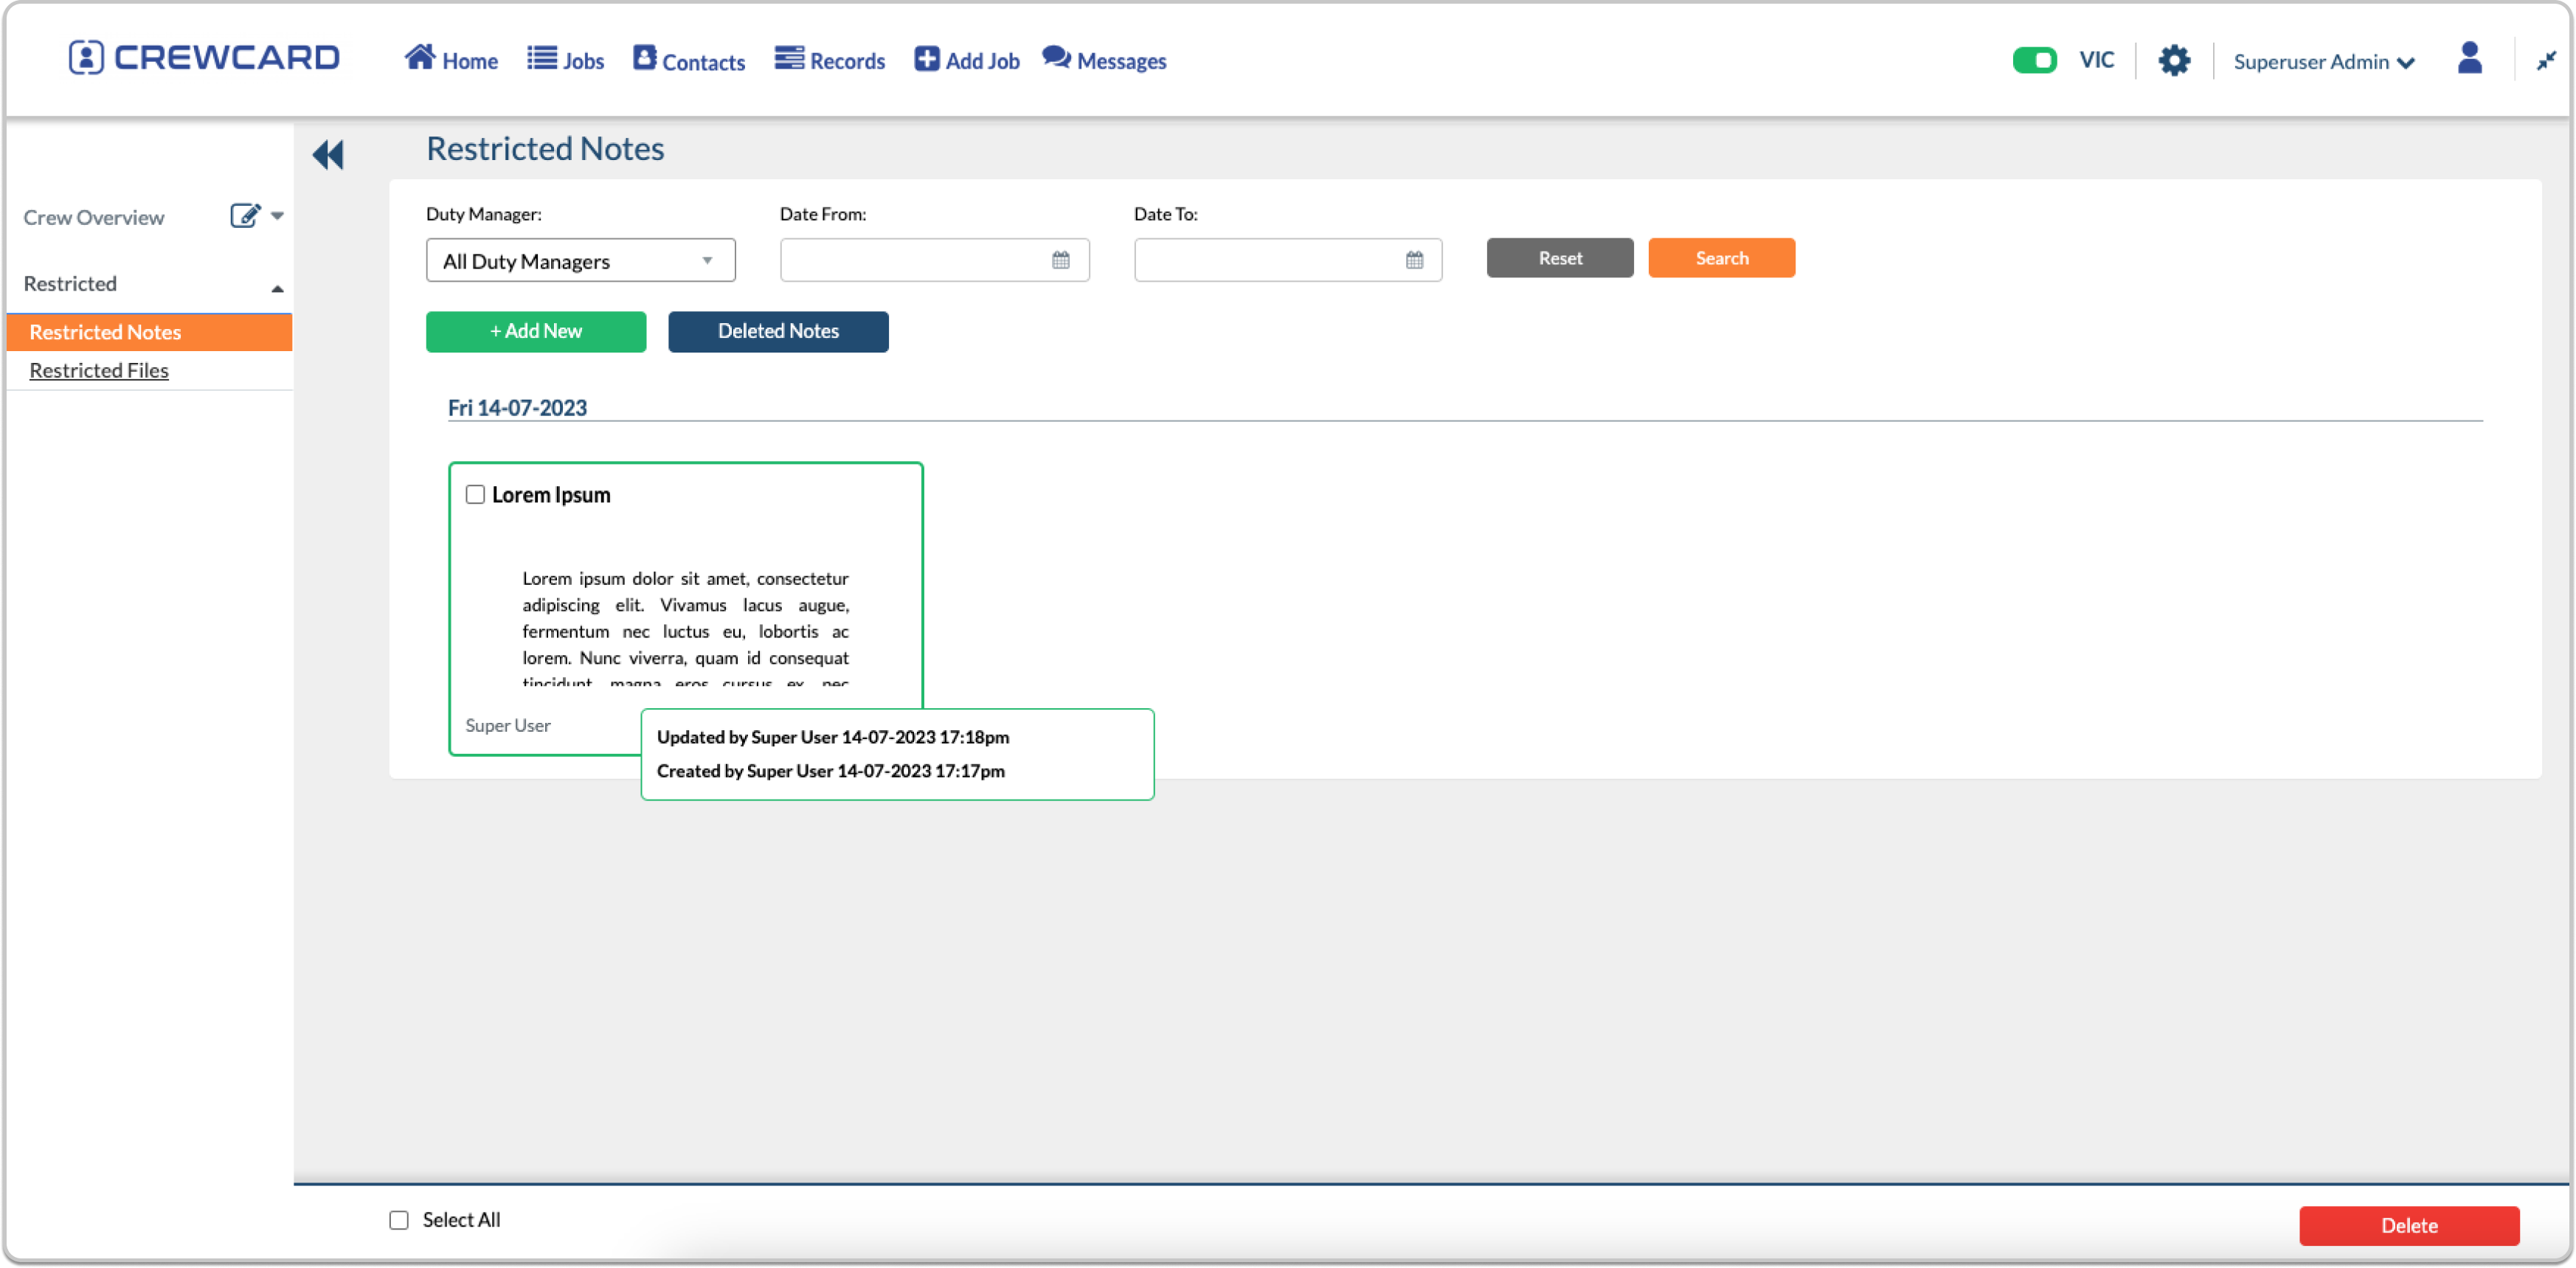
The created notes will include a history indicating who created them and when they were created. If someone else updates the notes, a history icon will appear, and a pop-up will display the updated notes’ history. It will list the relevant information about the modifications made.
To delete a note, follow these steps:
Tick the checkbox next to the note you wish to delete. (Please note that only the user who adds the notes can delete it; other users cannot delete the notes created by someone else.)
Click on “Delete” to remove the selected note.

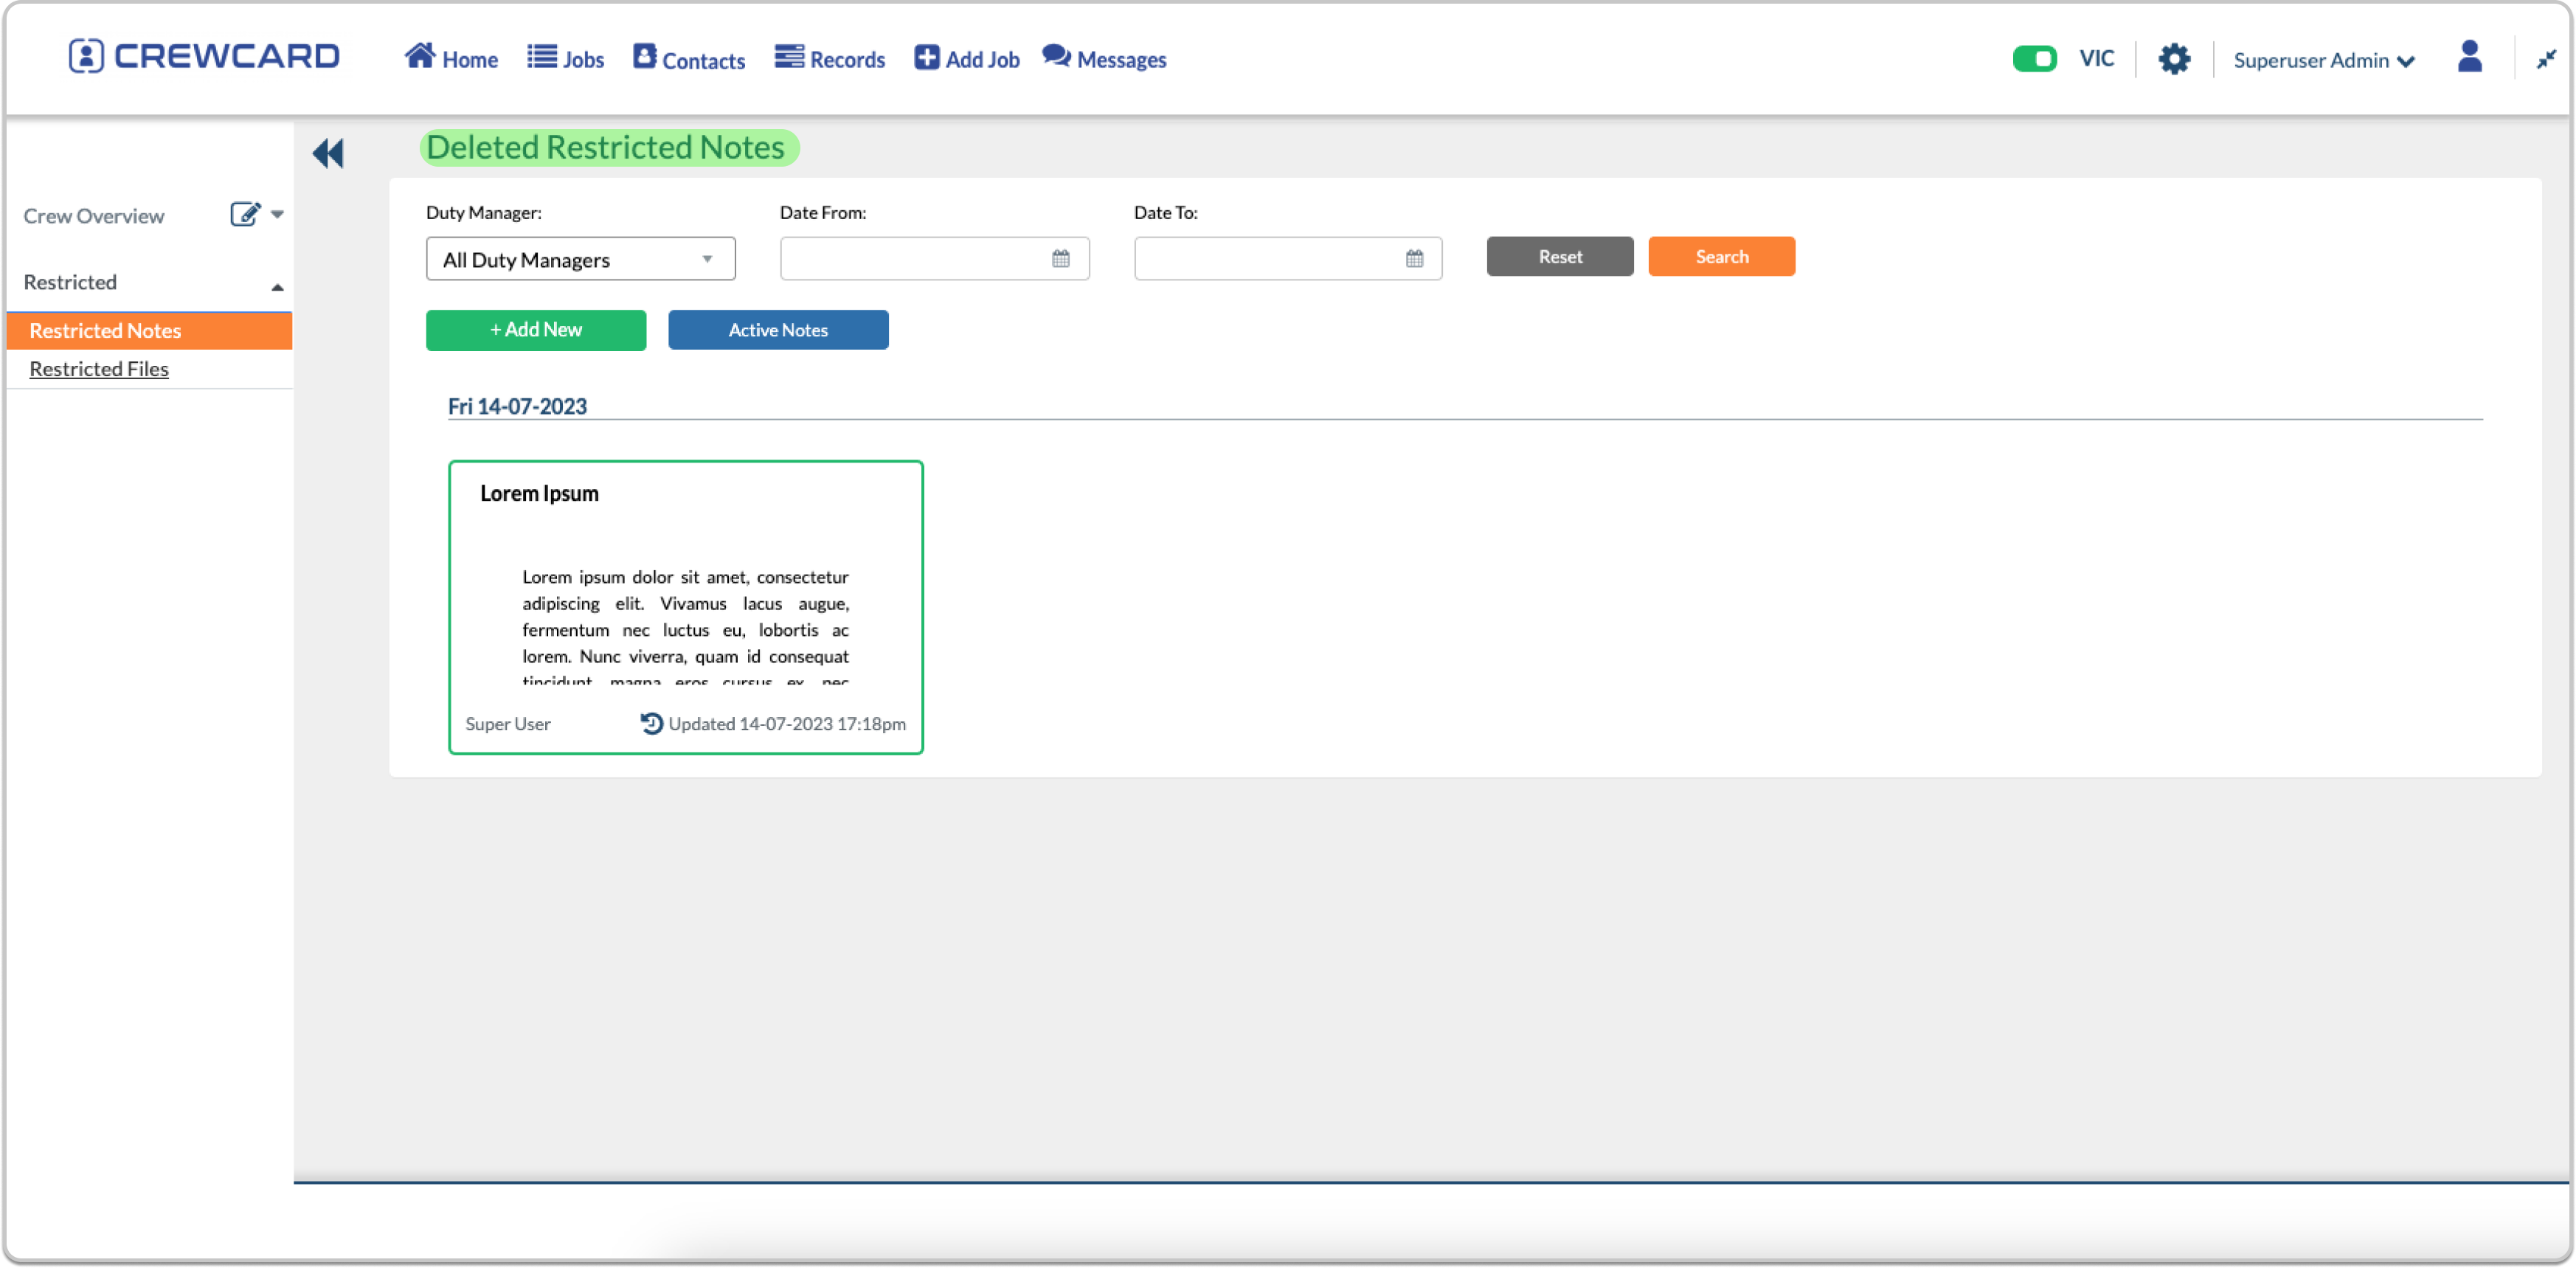
To access the deleted notes, follow these steps:
Click on “Deleted Notes.”
The page will display all the deleted notes for your reference.
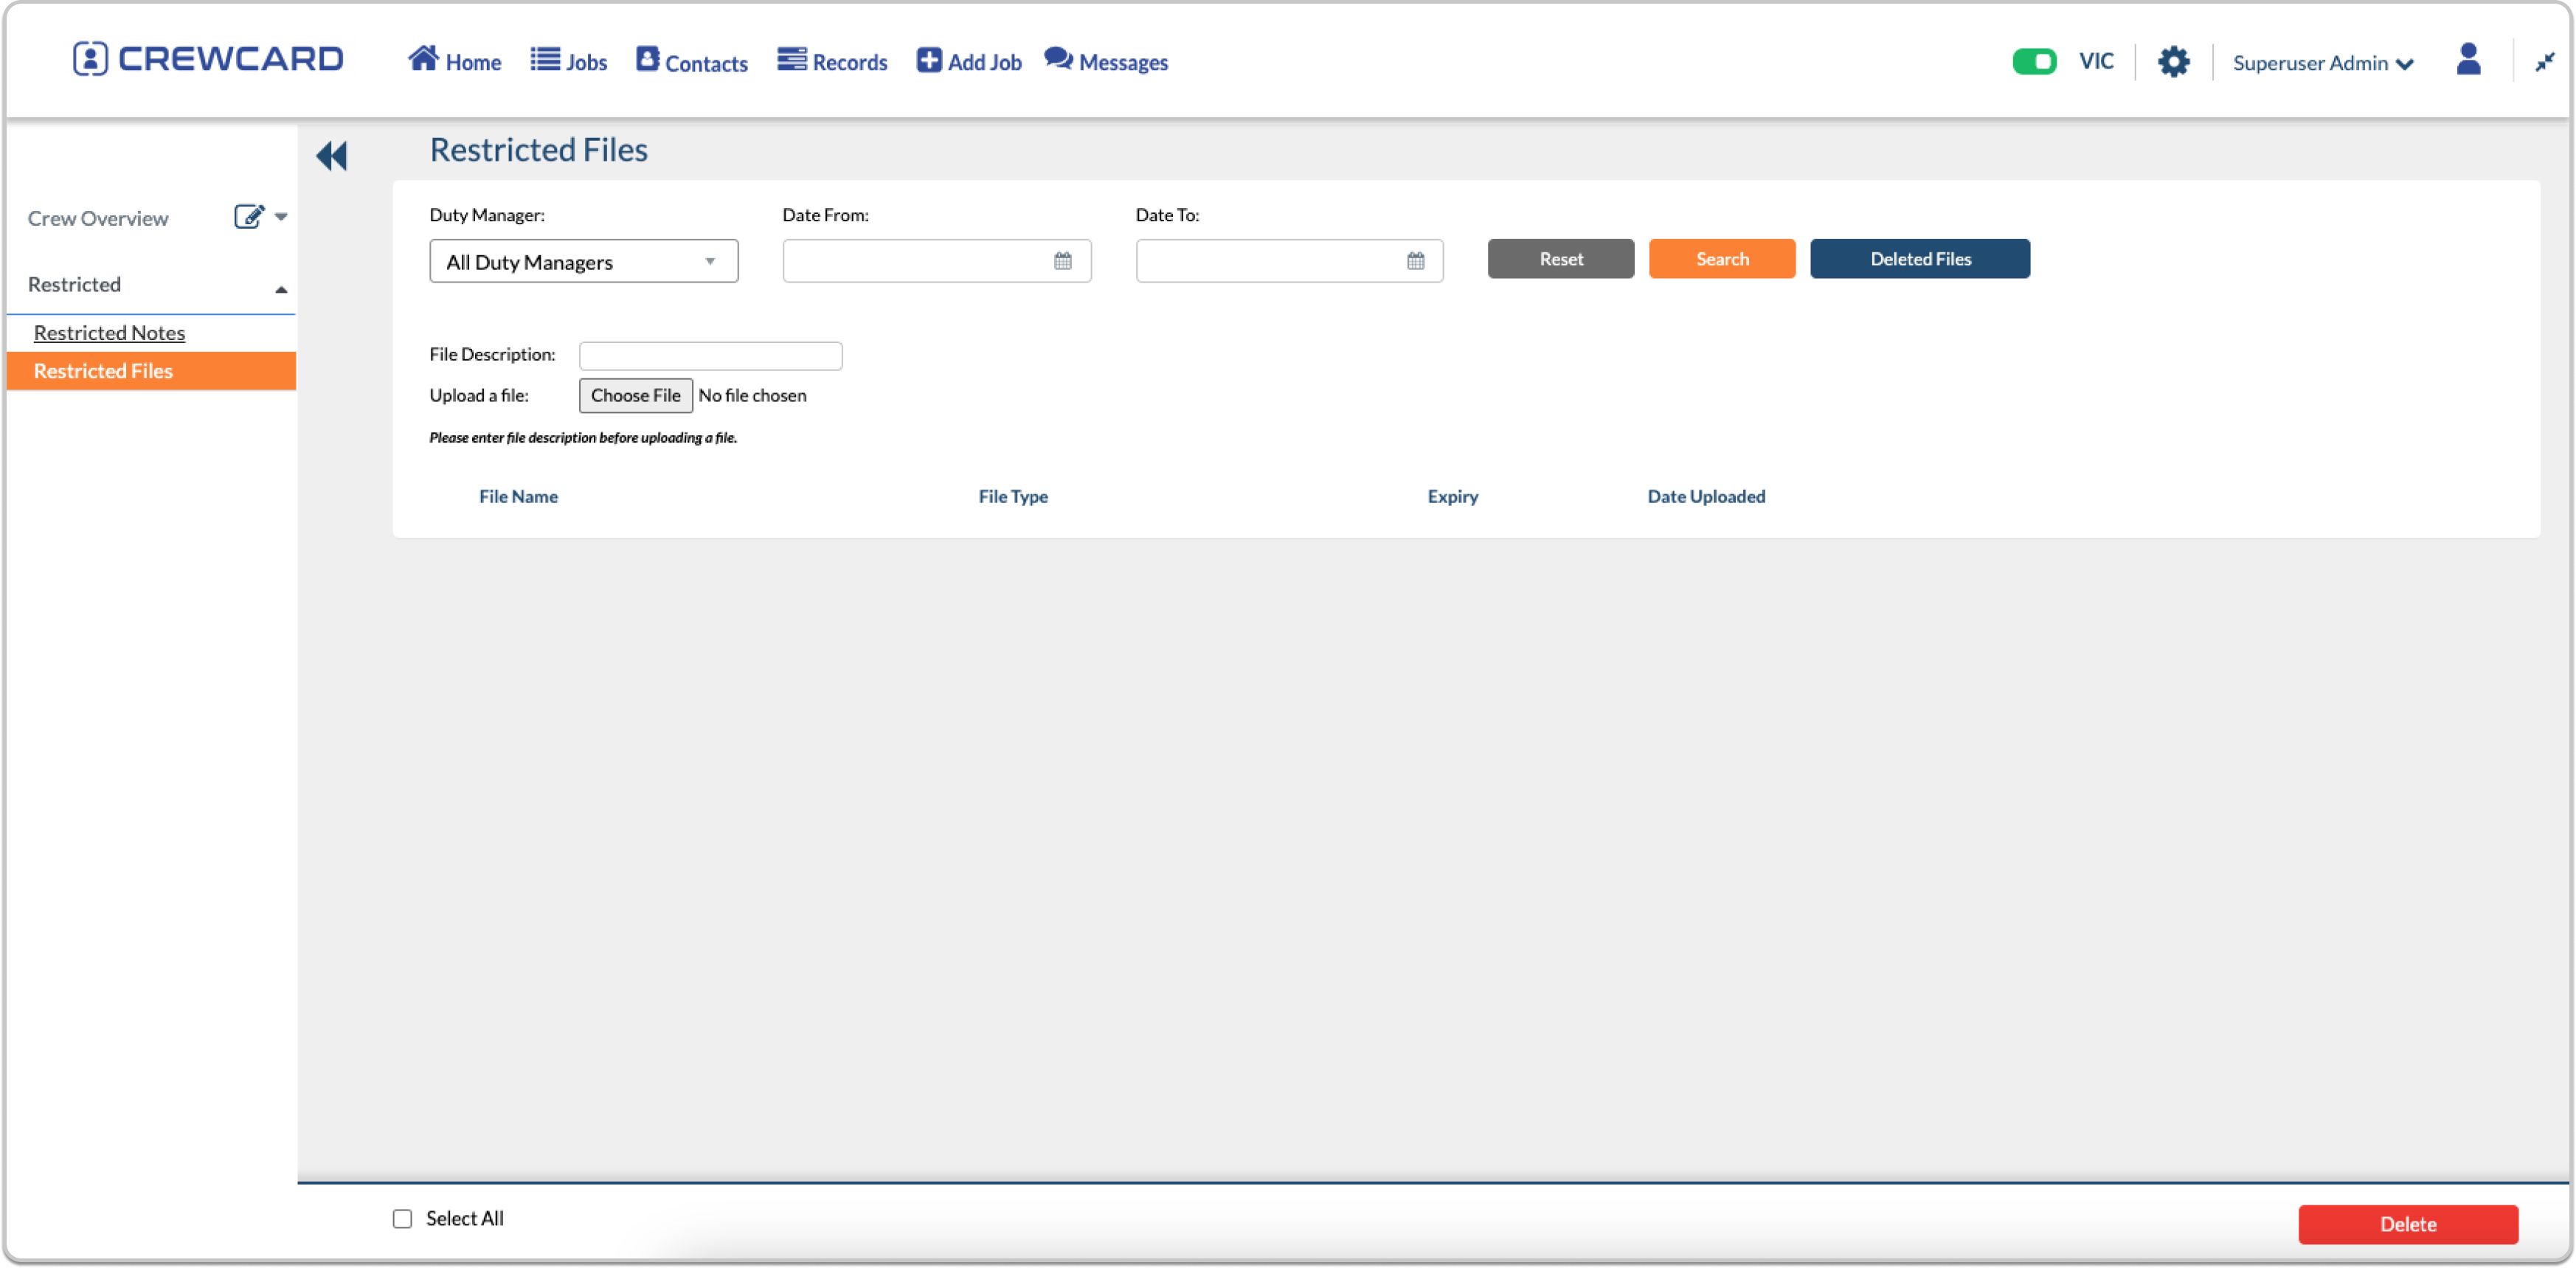
Restricted Files
To add a restricted file, follow these steps:
Add a description for your file.
Upload the file to the designated area.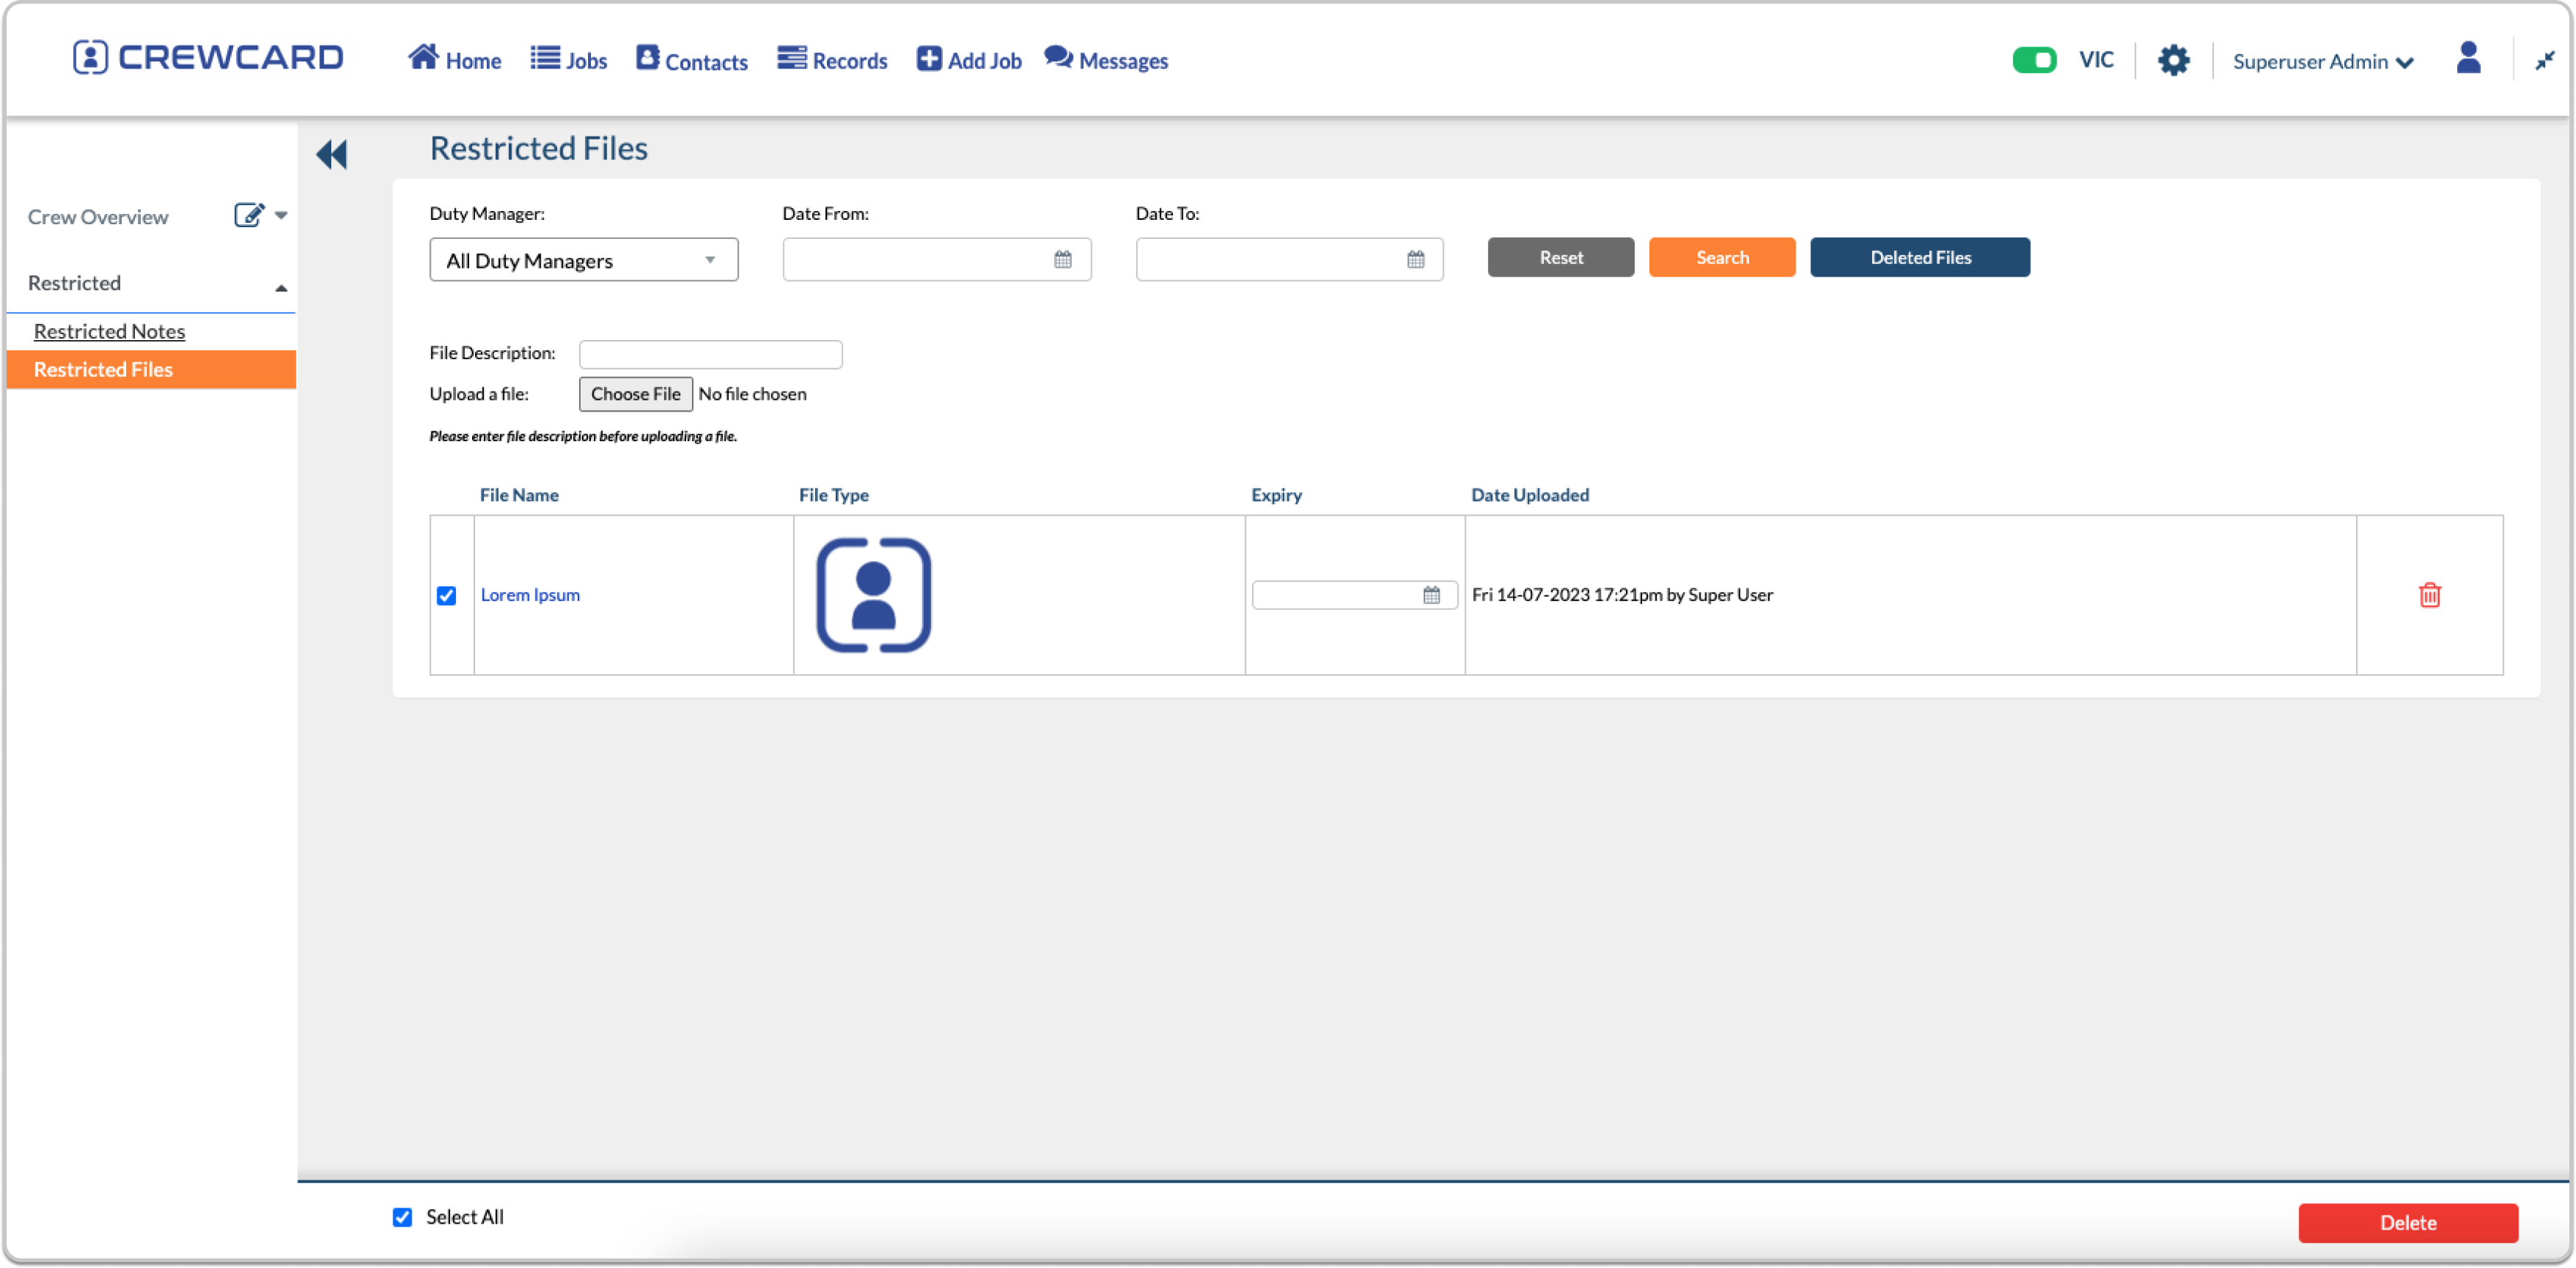
The uploaded file will be displayed at the bottom along with the upload history, including information about who uploaded the file and when.
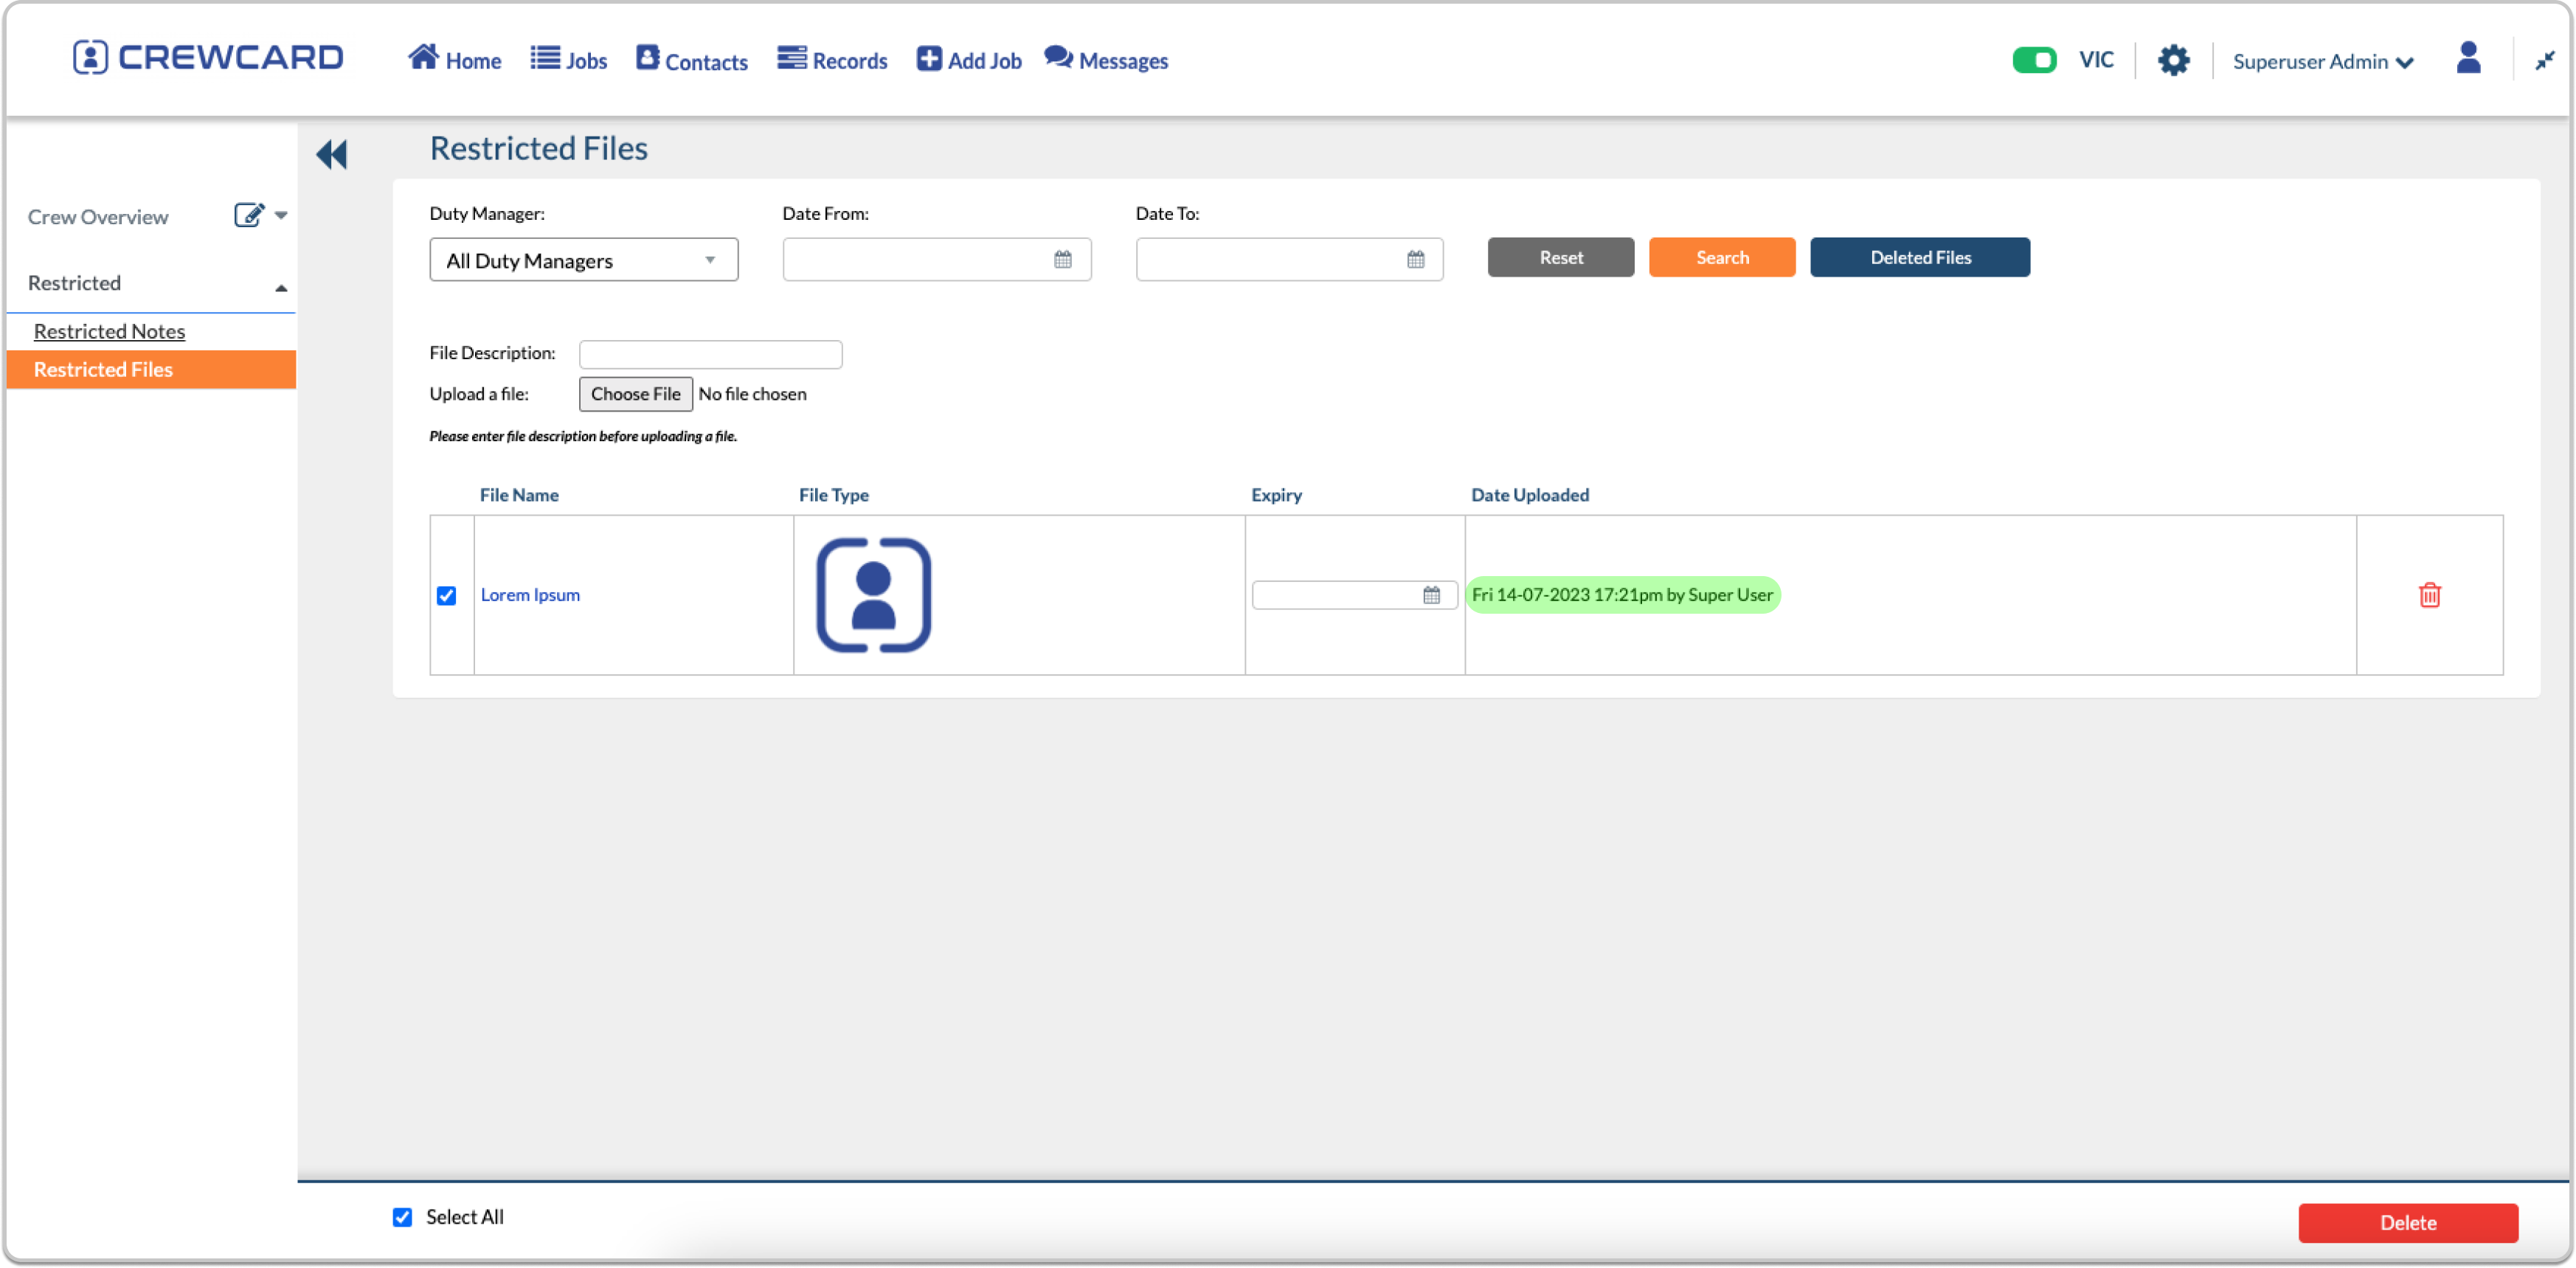
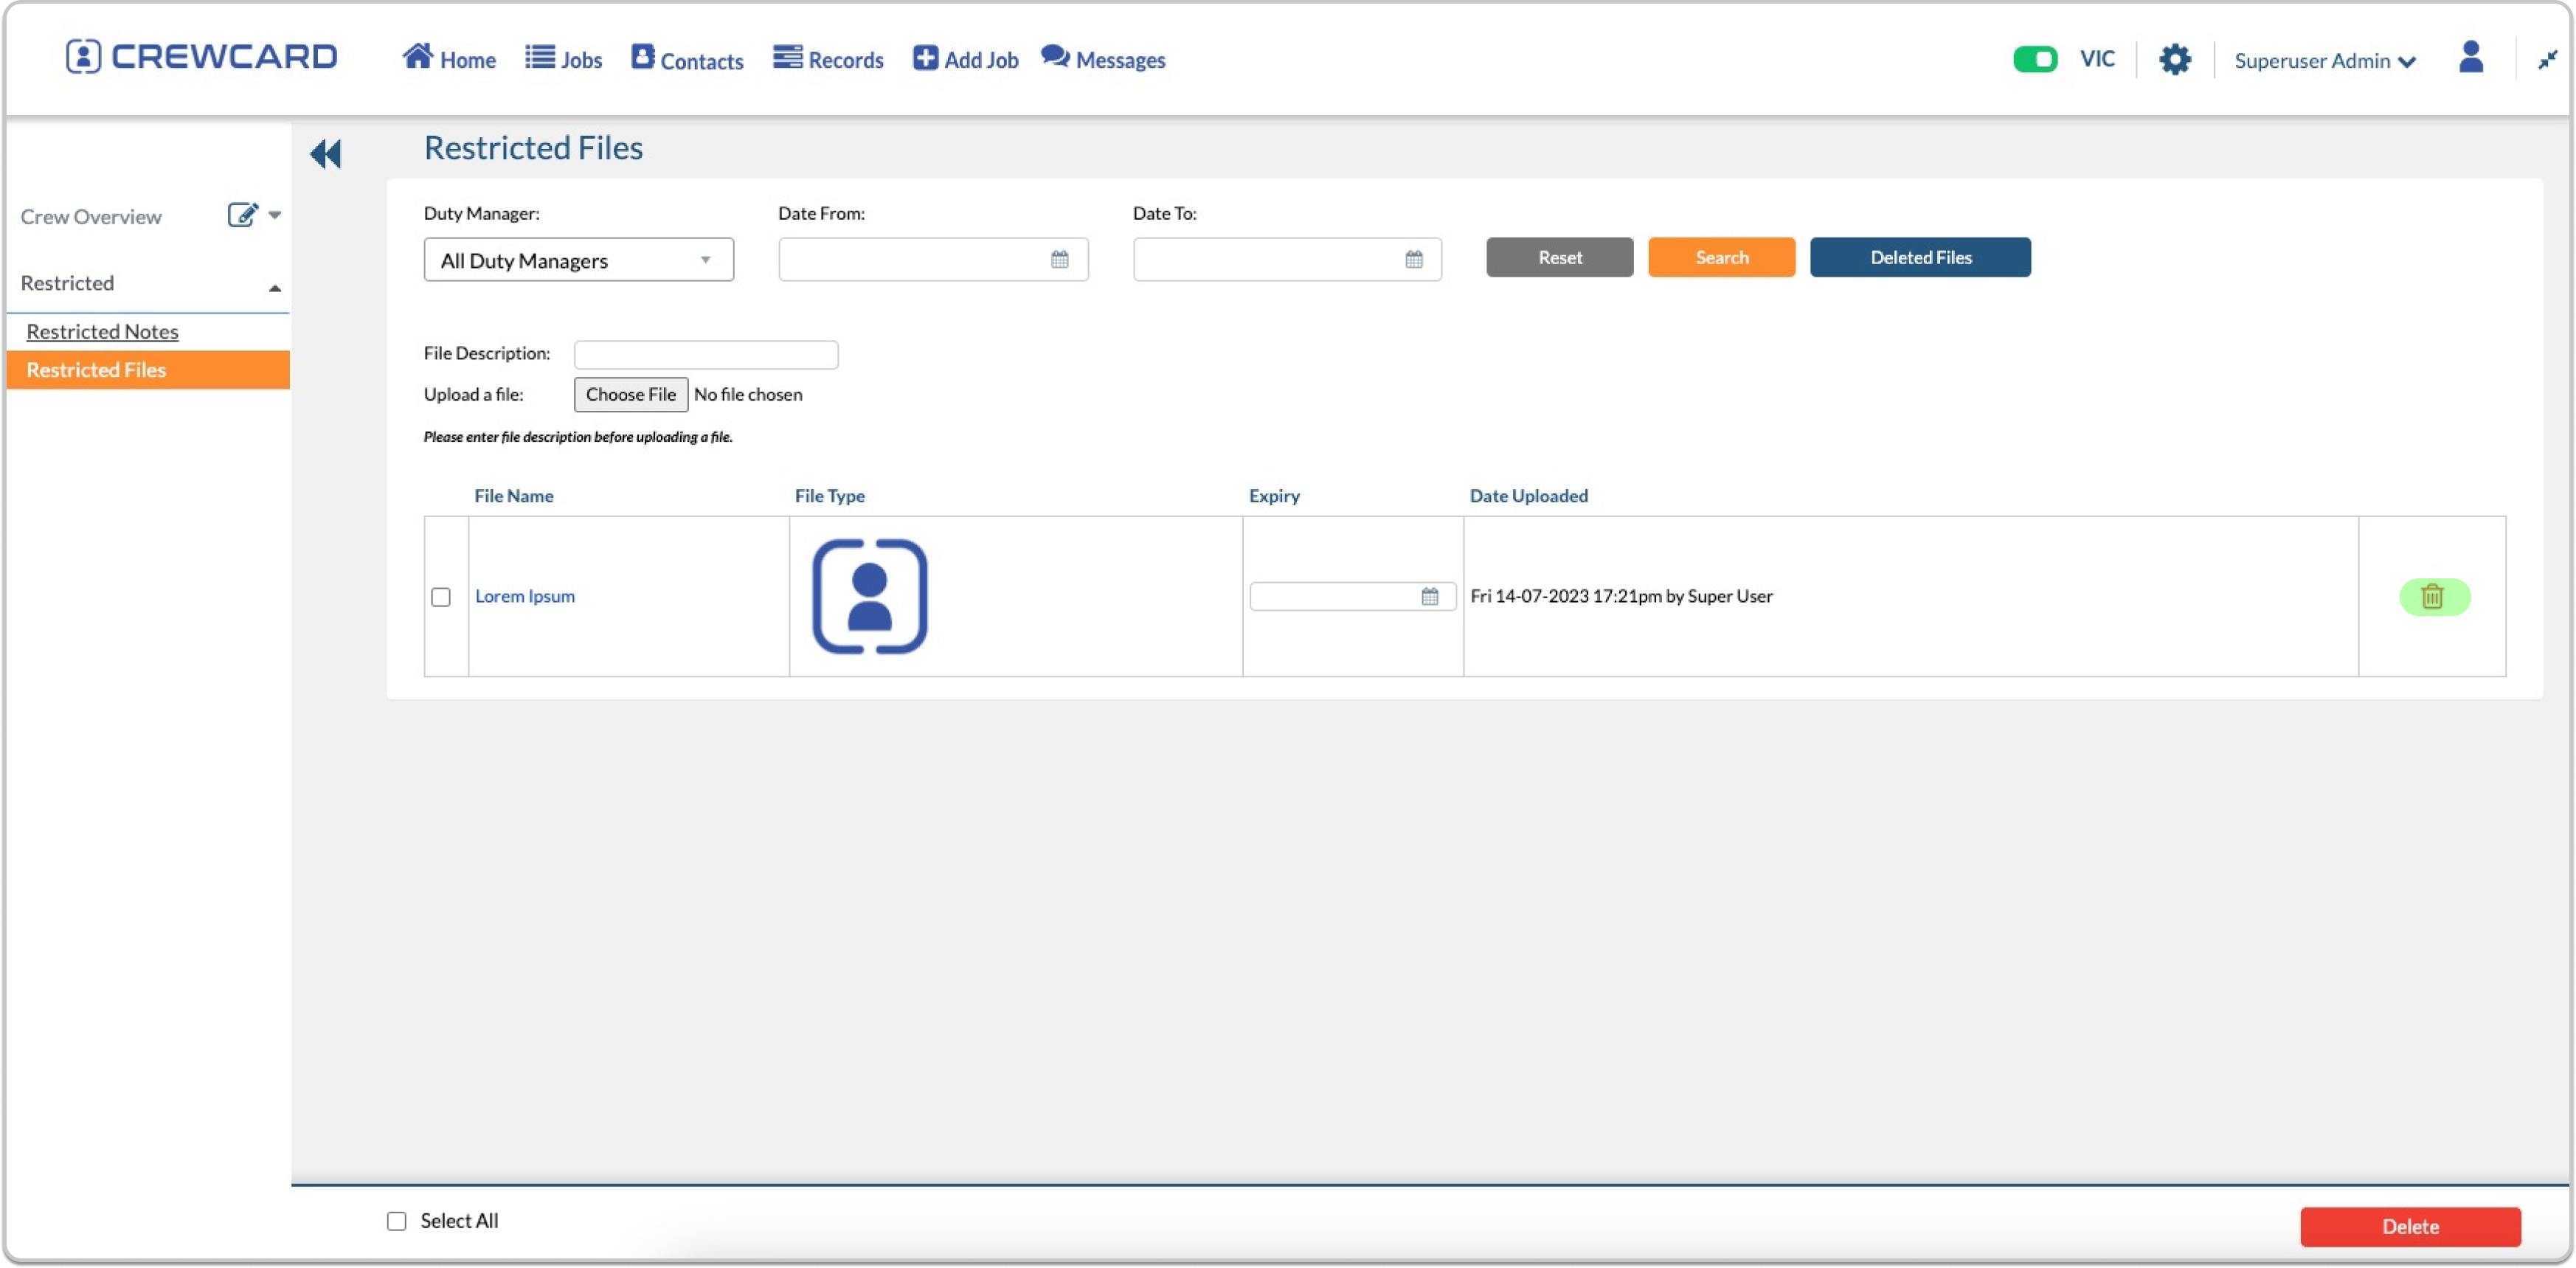
To delete a file, follow these steps:
Simply click on the bin icon next to the file.
(Please note that only the user who uploaded the file can delete it; other users cannot delete files uploaded by someone else.)
Alternatively, to delete multiple files:
Tick the checkboxes next to the files you wish to delete.
Click on the “Delete” button to remove the selected files.

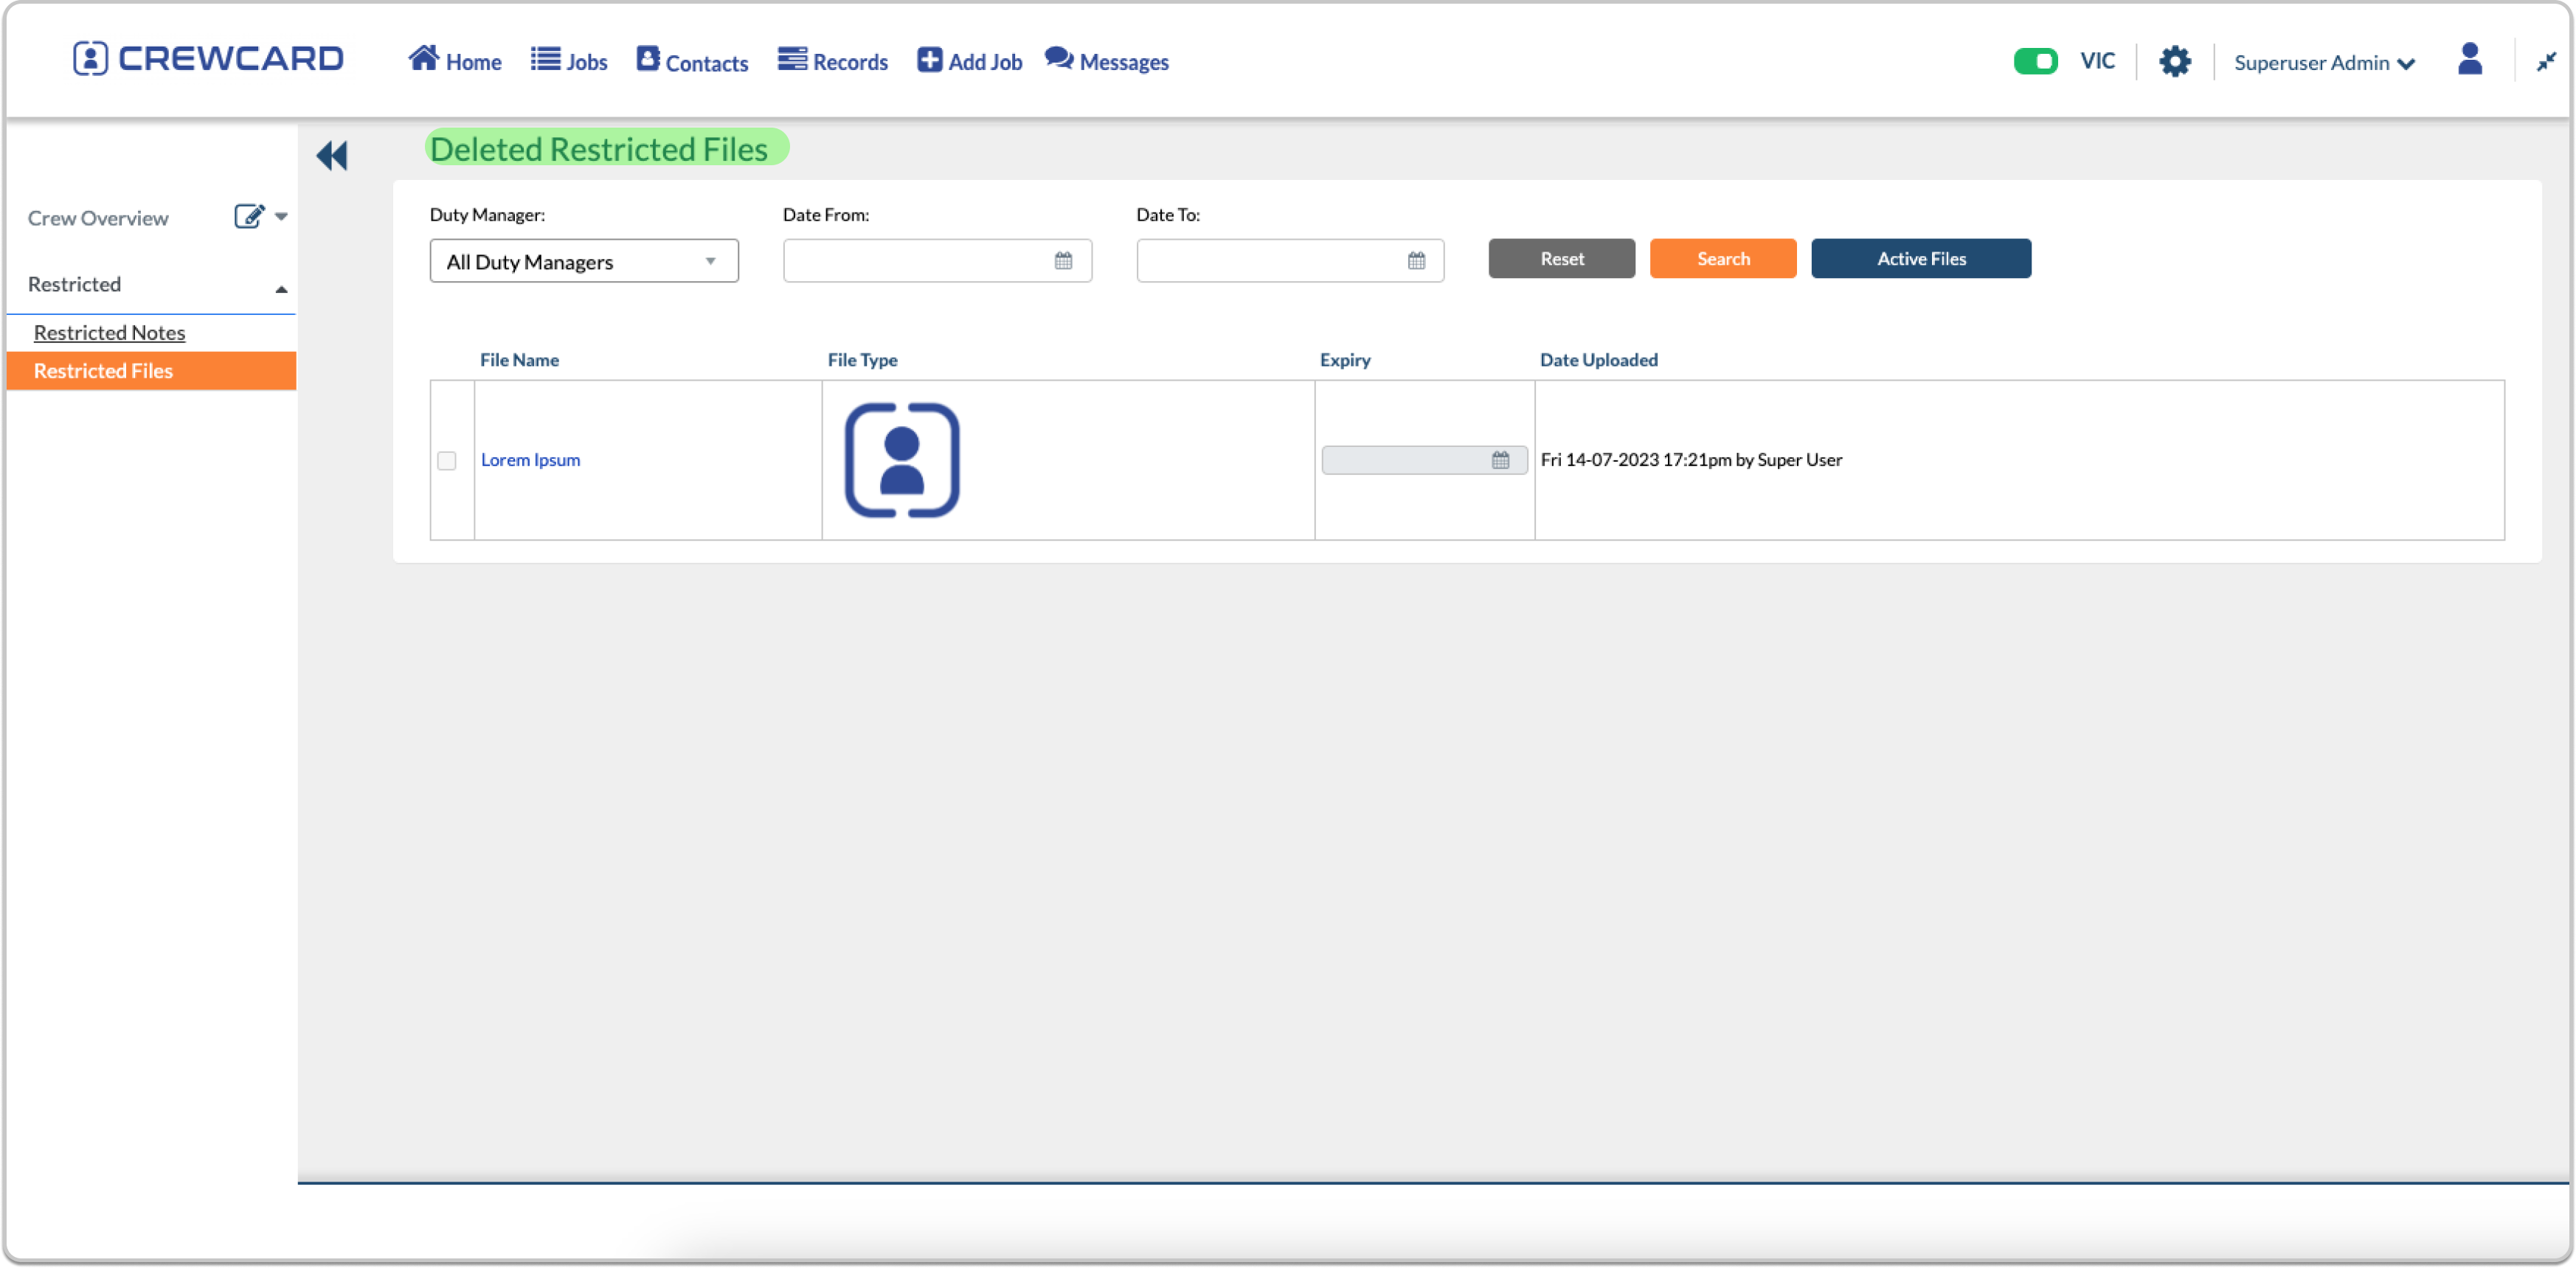
To access the deleted files, follow these steps:
Click on “Deleted Files.”
All the deleted files will be displayed for your reference.
To Grant Access
To grant Restricted Notes and Documents access to your Duty Manager, follow these steps in the Admin Settings (Only available for Super User/ Admin login):
Open the Admin Settings and navigate to the Duty Manager tab.
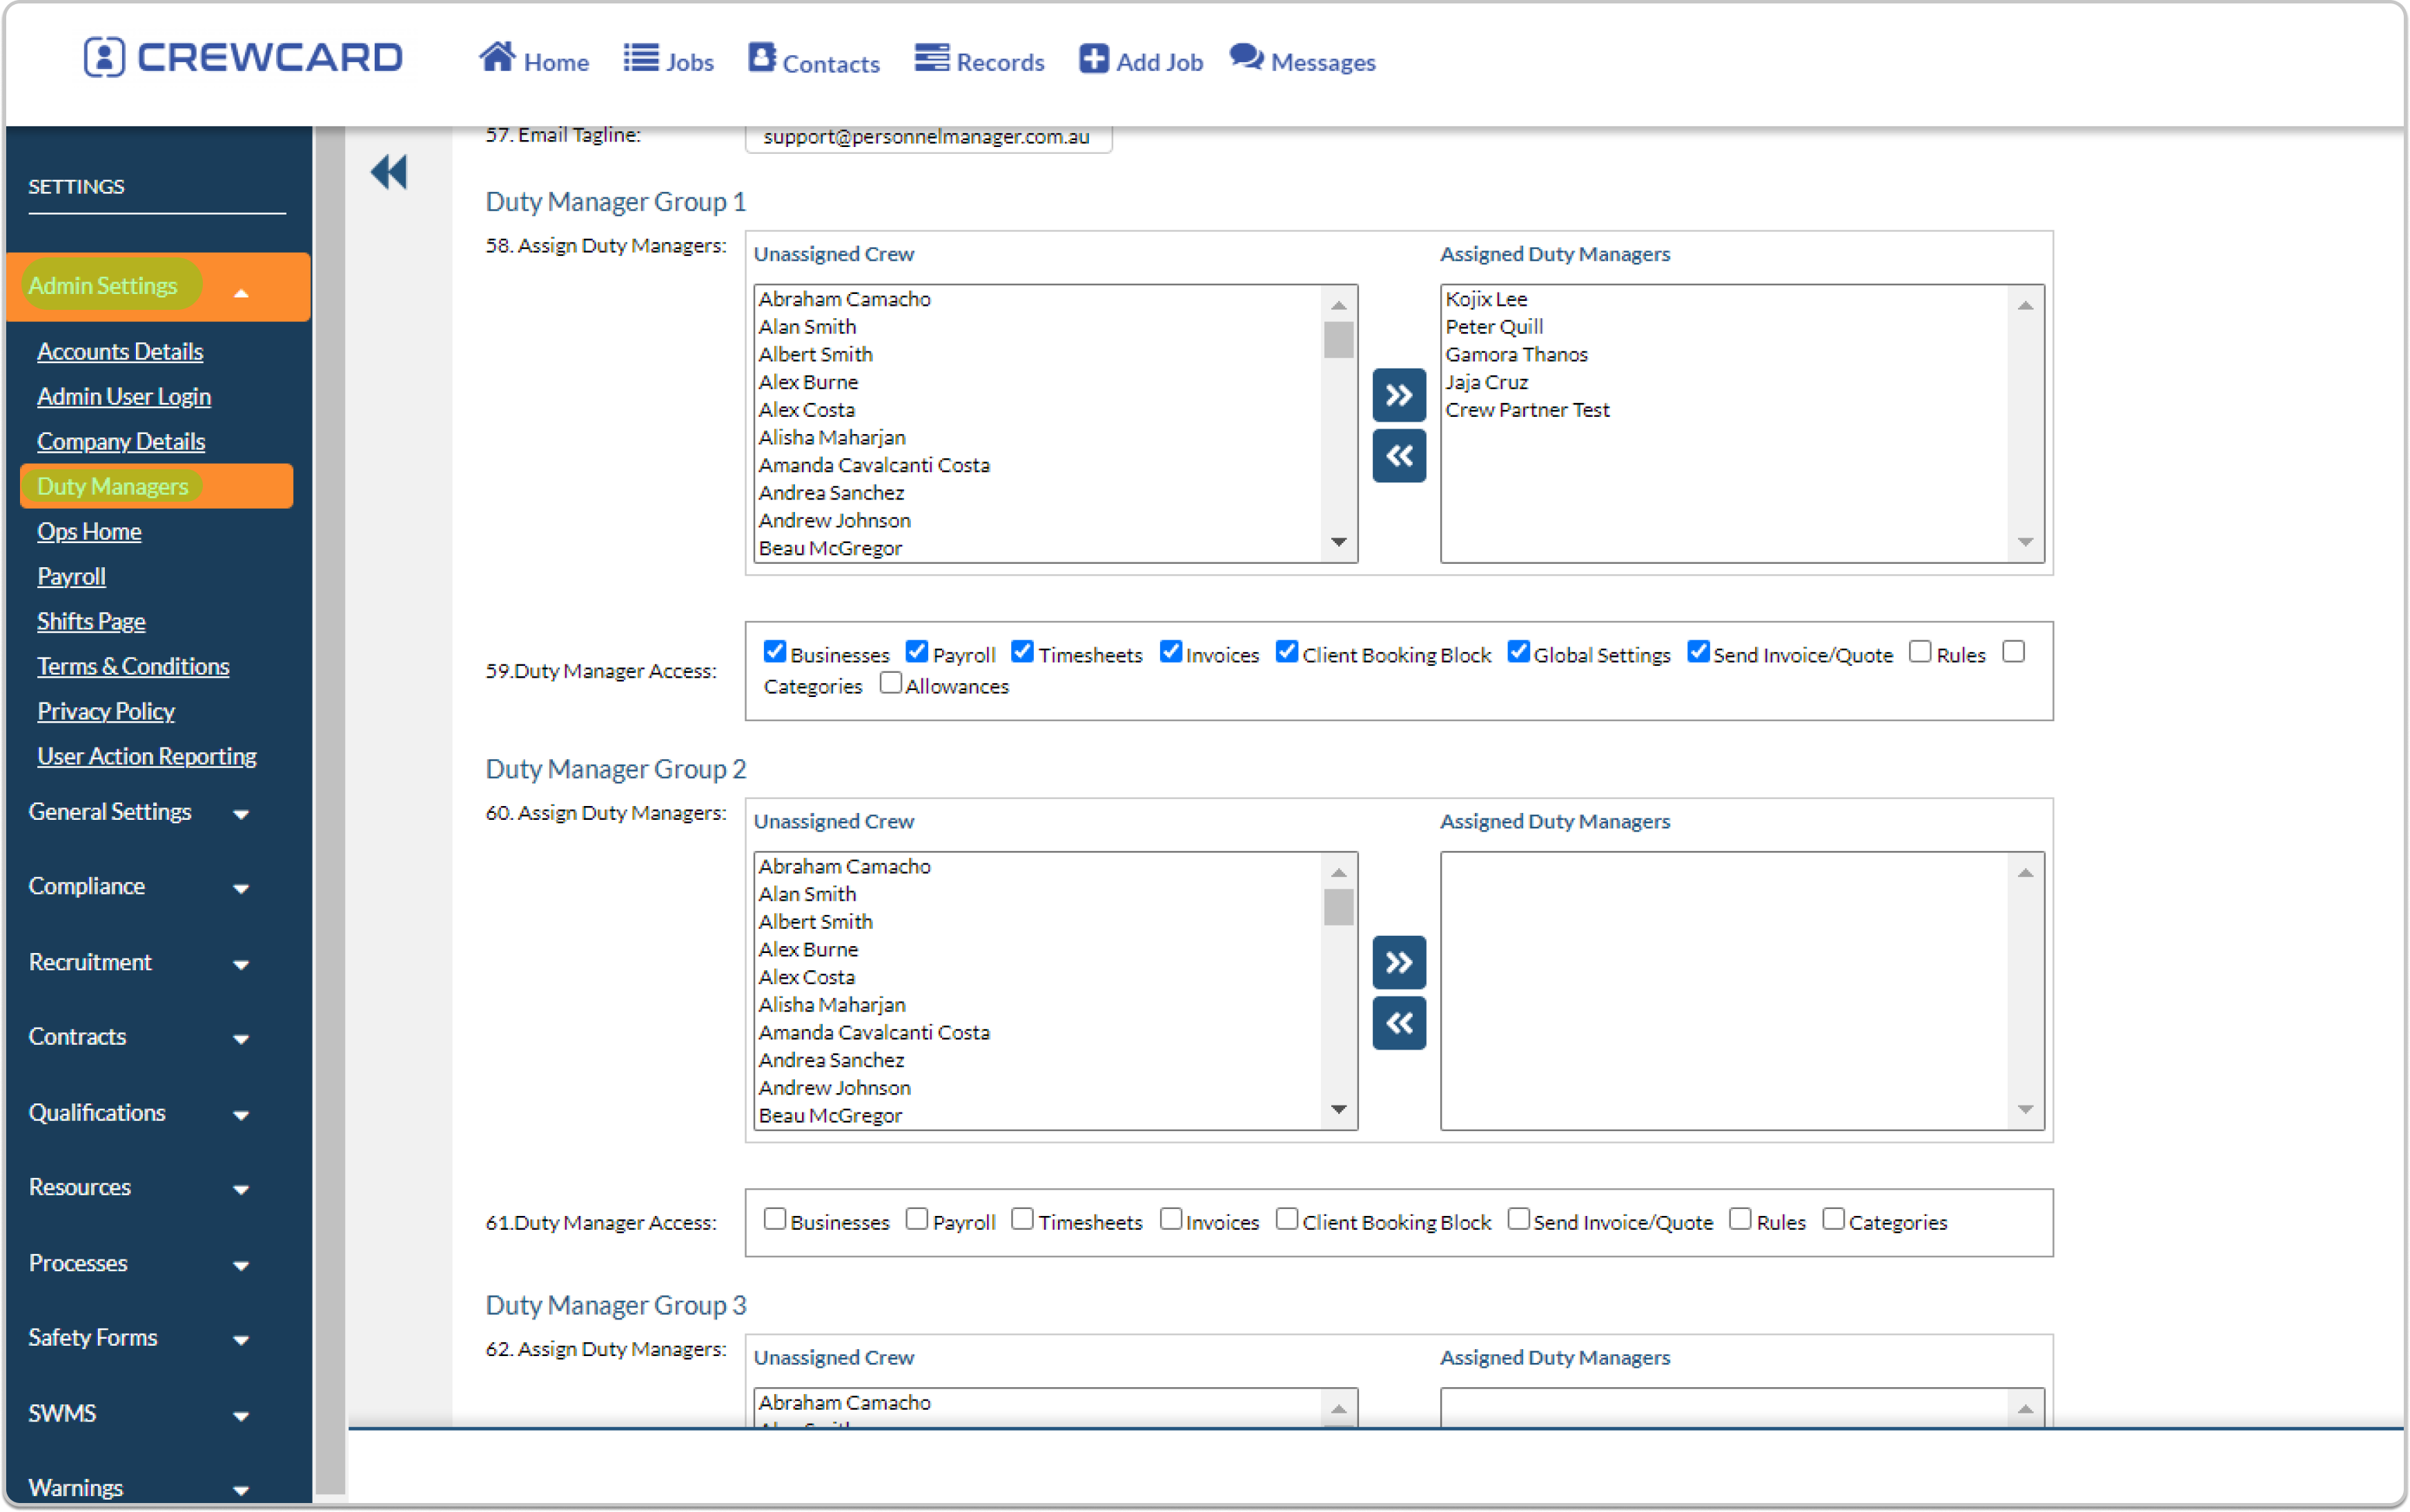
Locate settings number 65A to grant access to Restricted Notes.

Proceed to settings number 65B to grant access to Restricted Files.
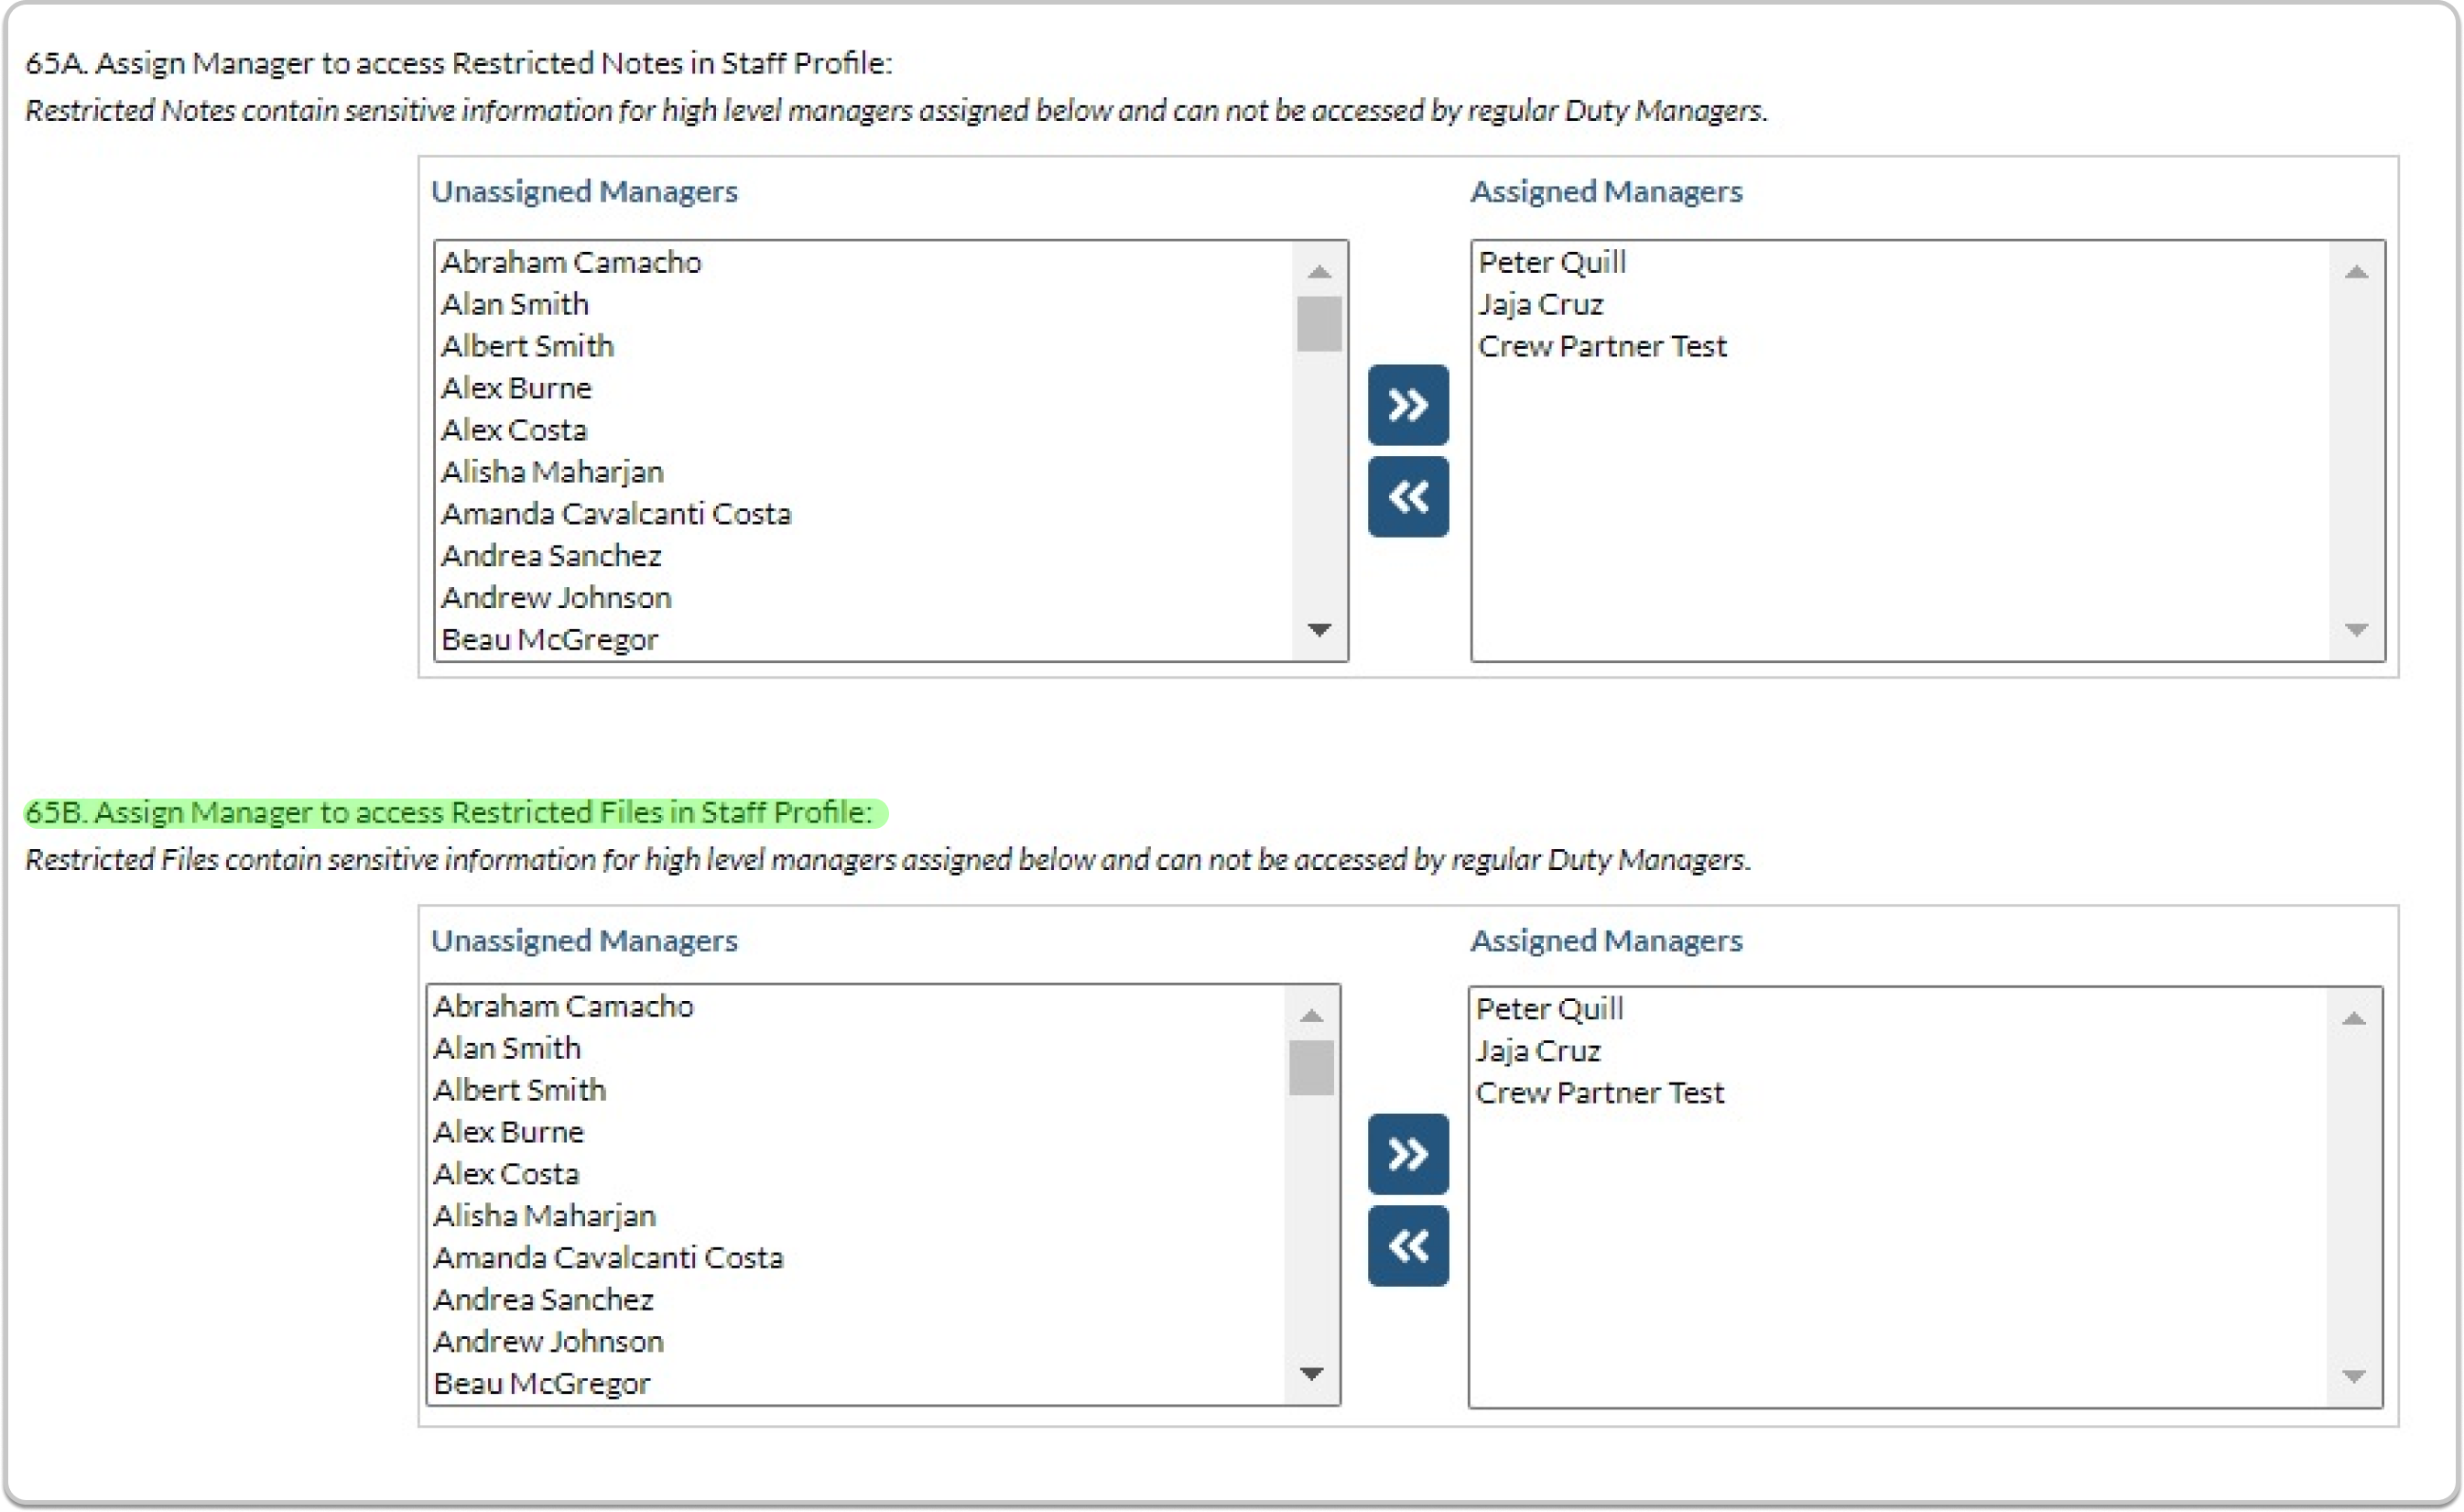
Depending on your preference, you can assign a specific Duty Manager to access both features or assign separate Duty Managers for each feature.

