4.0 Managing Jobs in the PM Client App
Job List Page
The PM Client App offers tools and functions to efficiently manage your bookings.
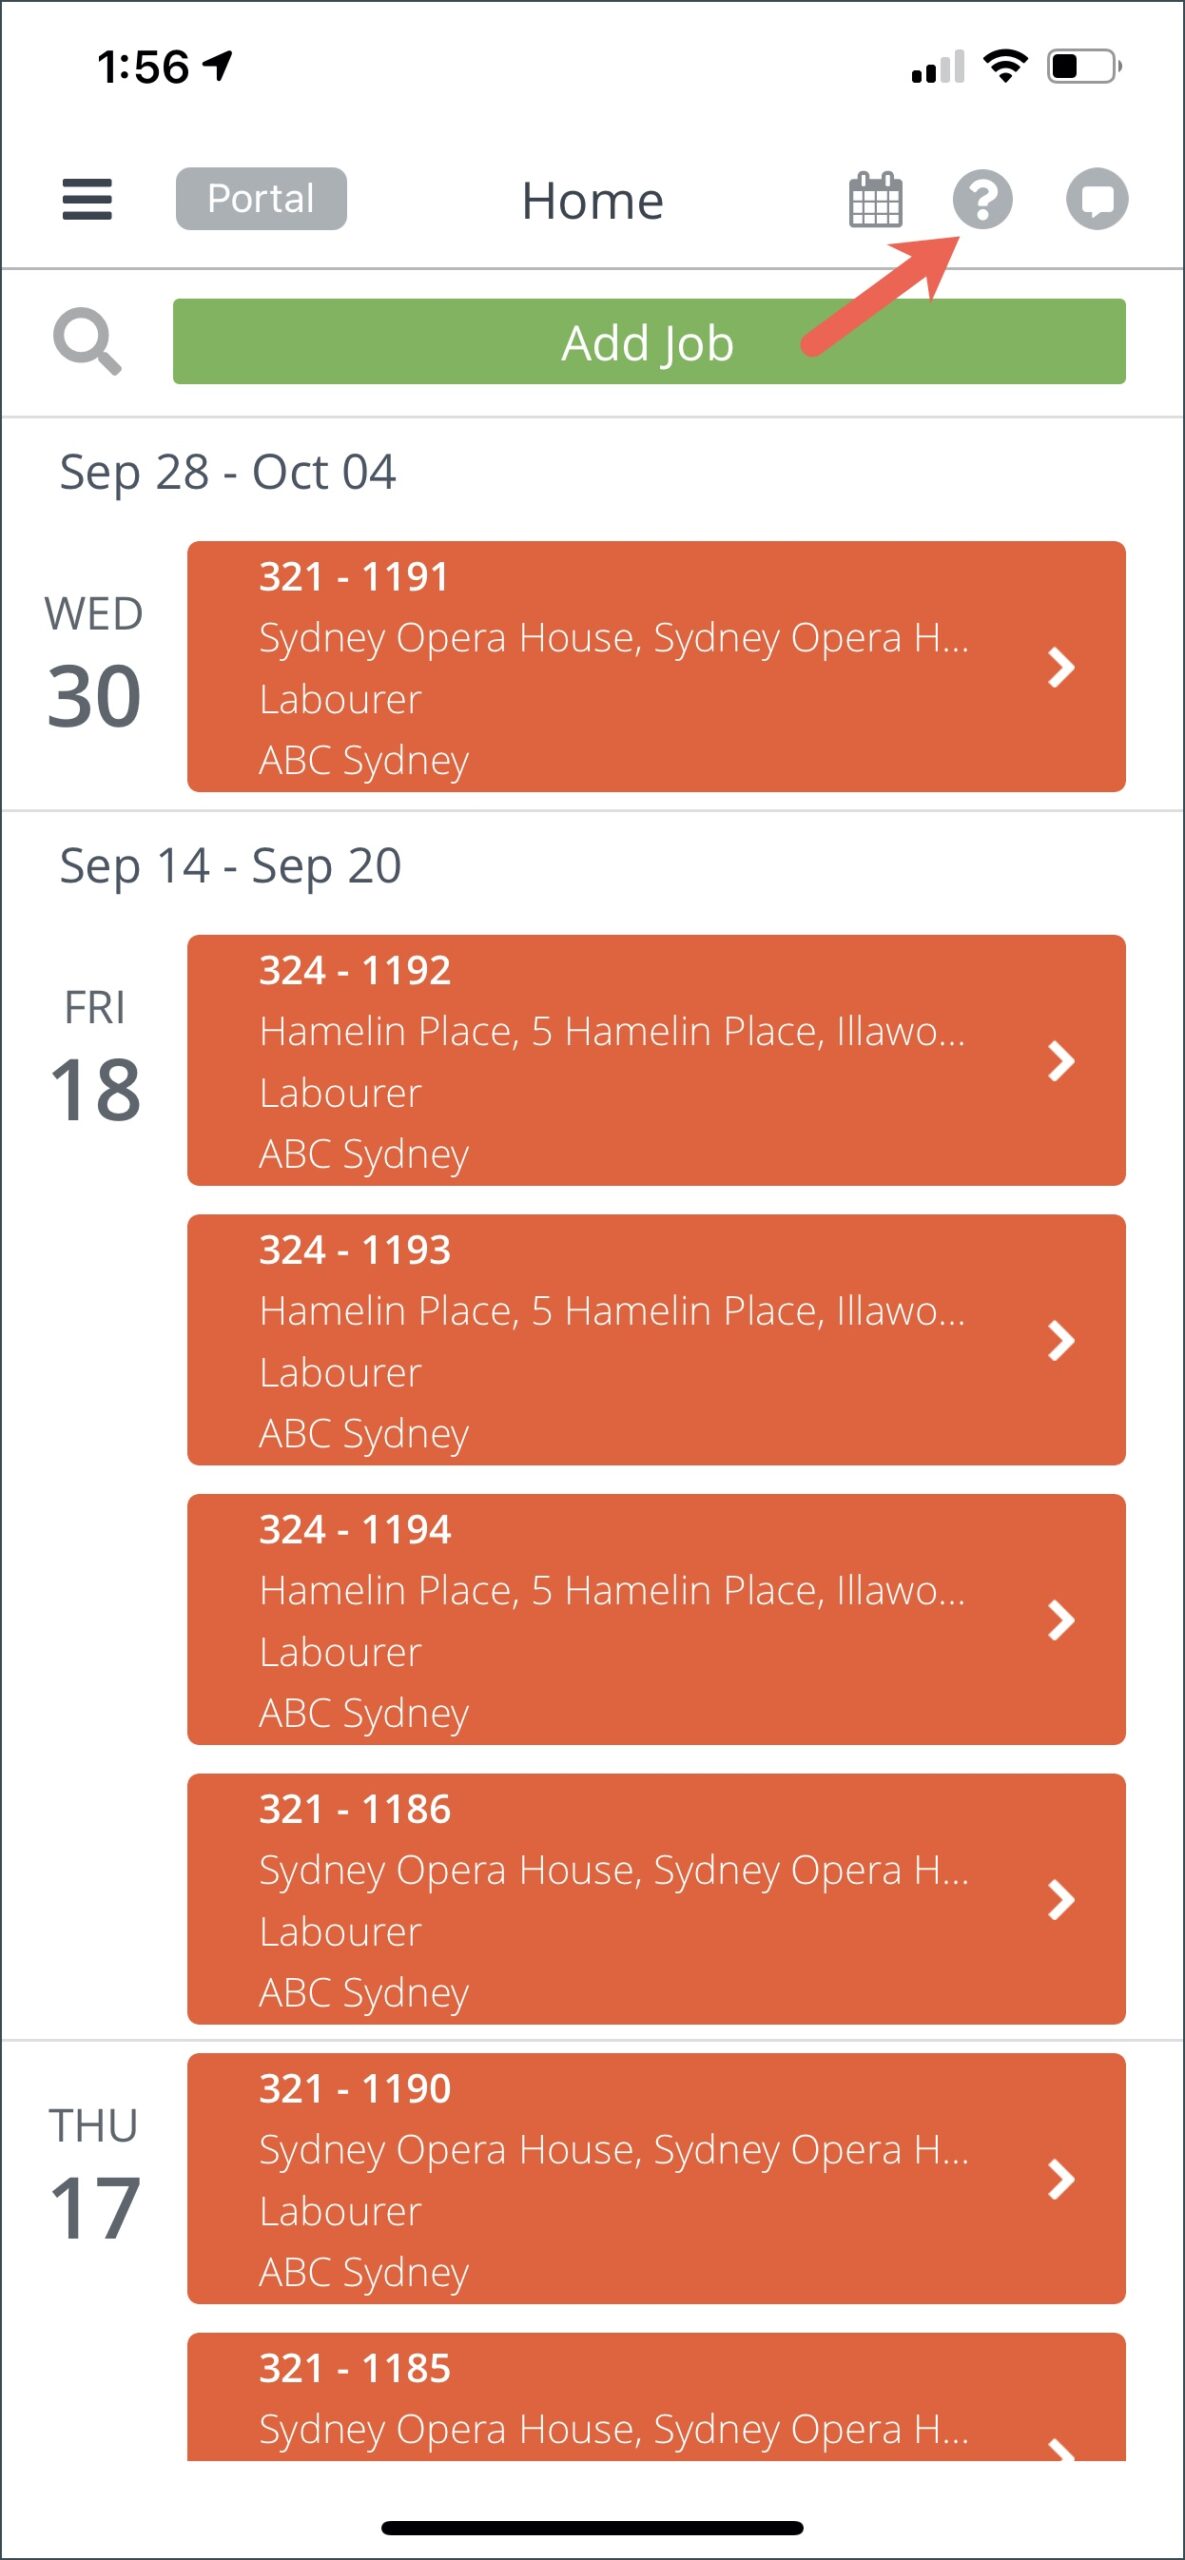
The Job List page is the home page of the PM Client App. From here, you will see job cards for your current job bookings and upcoming job bookings.

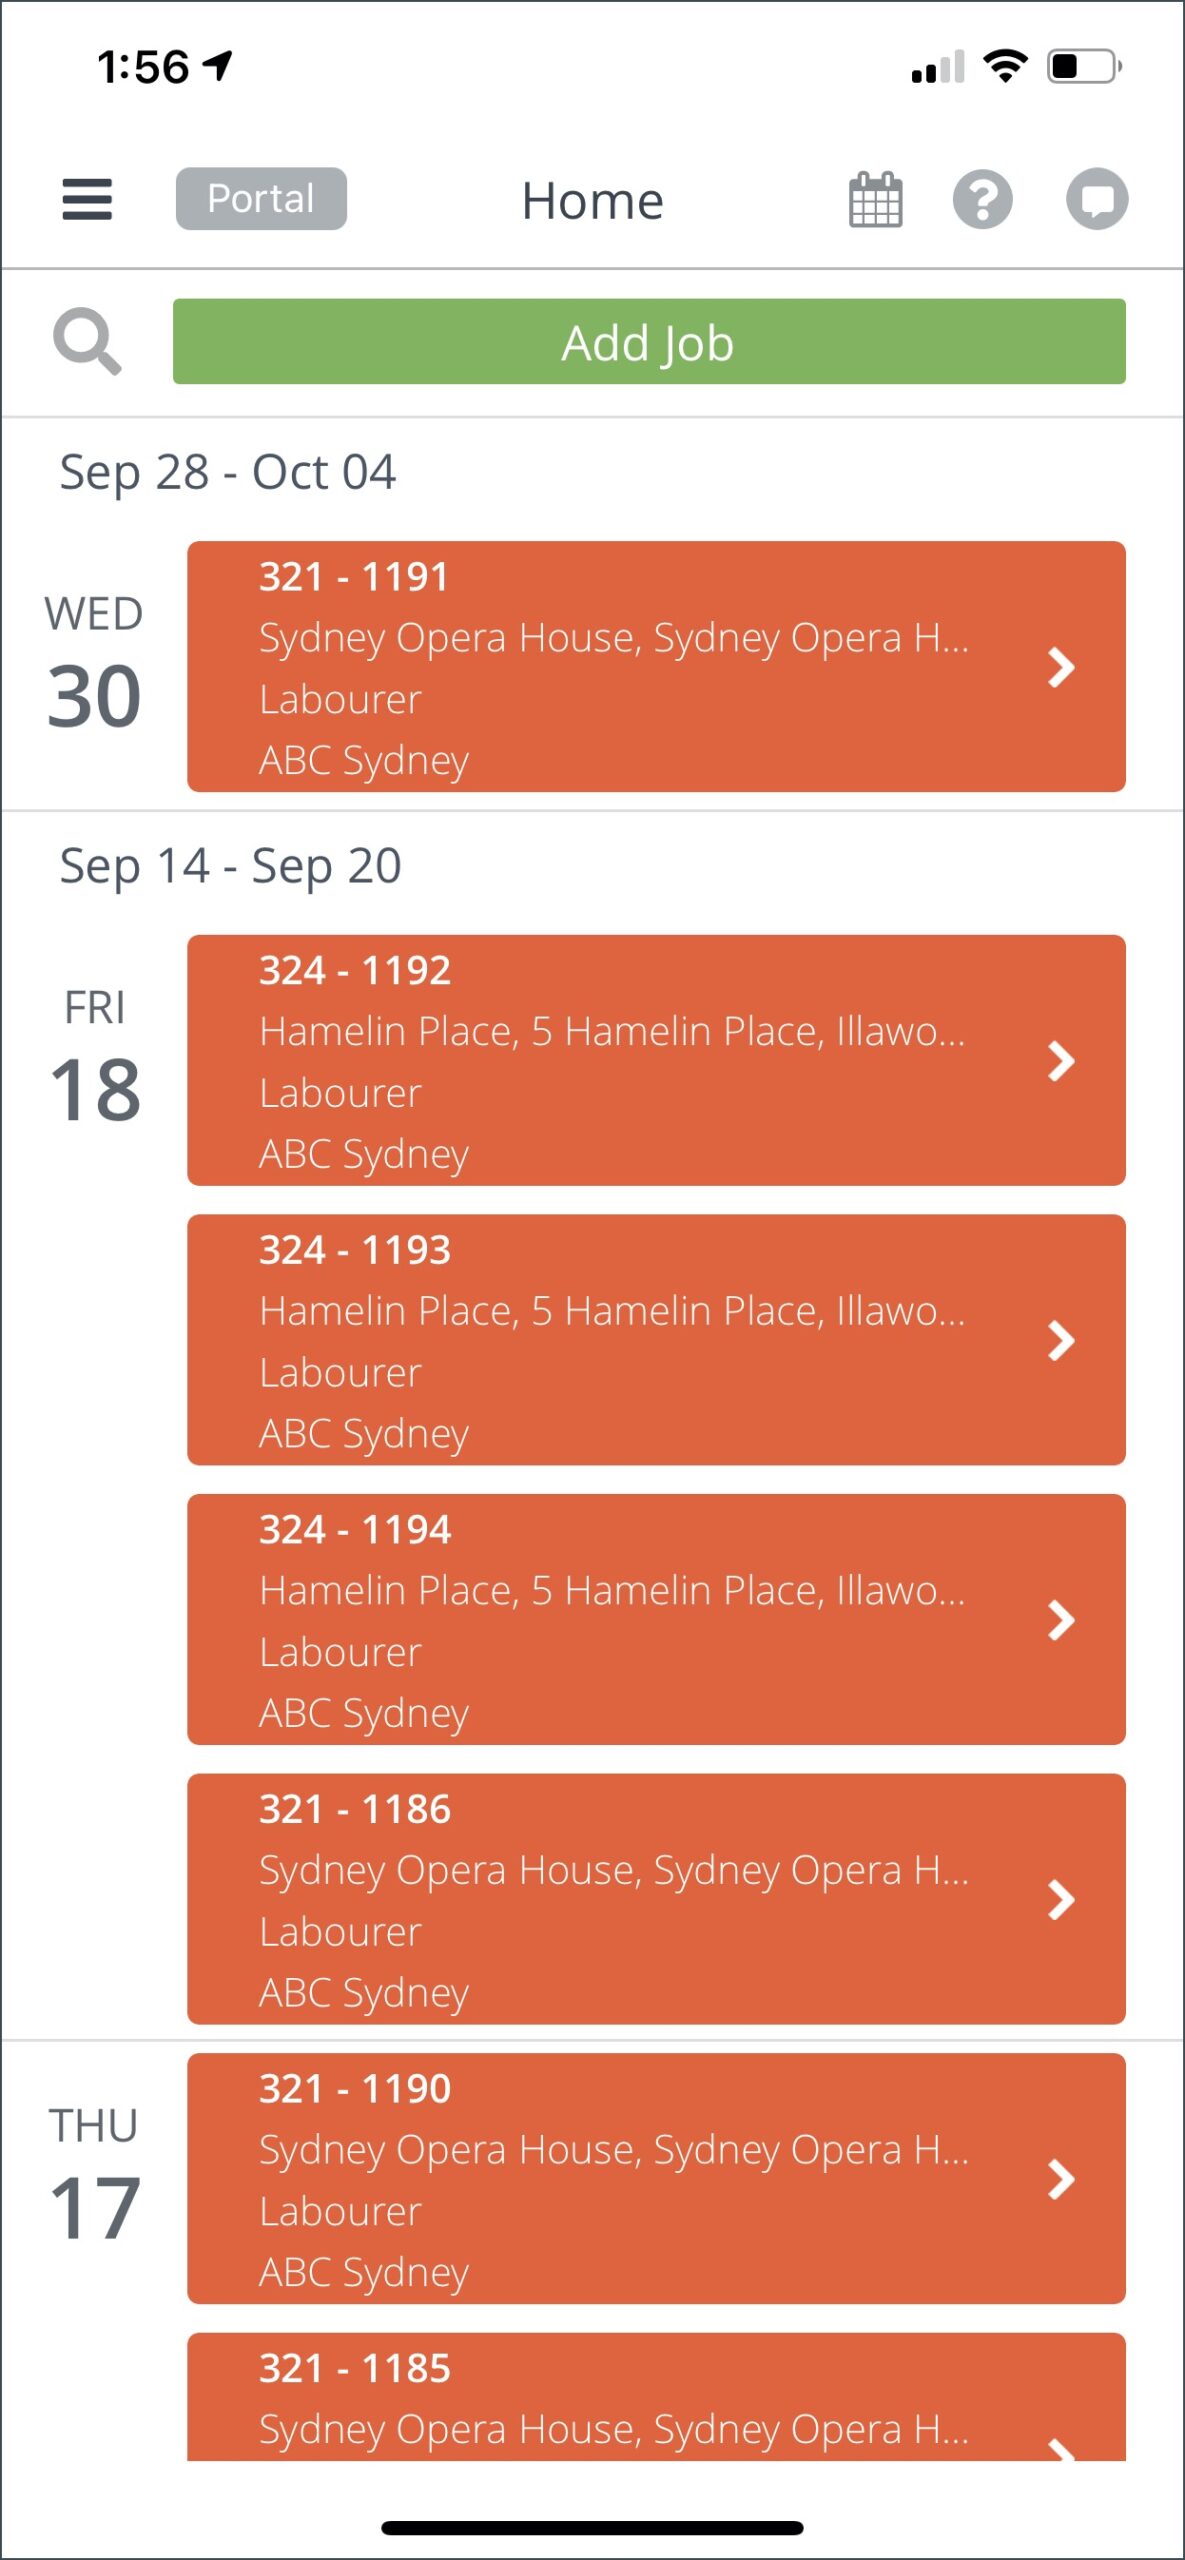
JOB CARD
The job card will have the following details:
- Job Number – Shift Number
- Location of the job
- Activity for the Job
- Client Name

When you tap on a Job Card, it will open to the Job Details page.
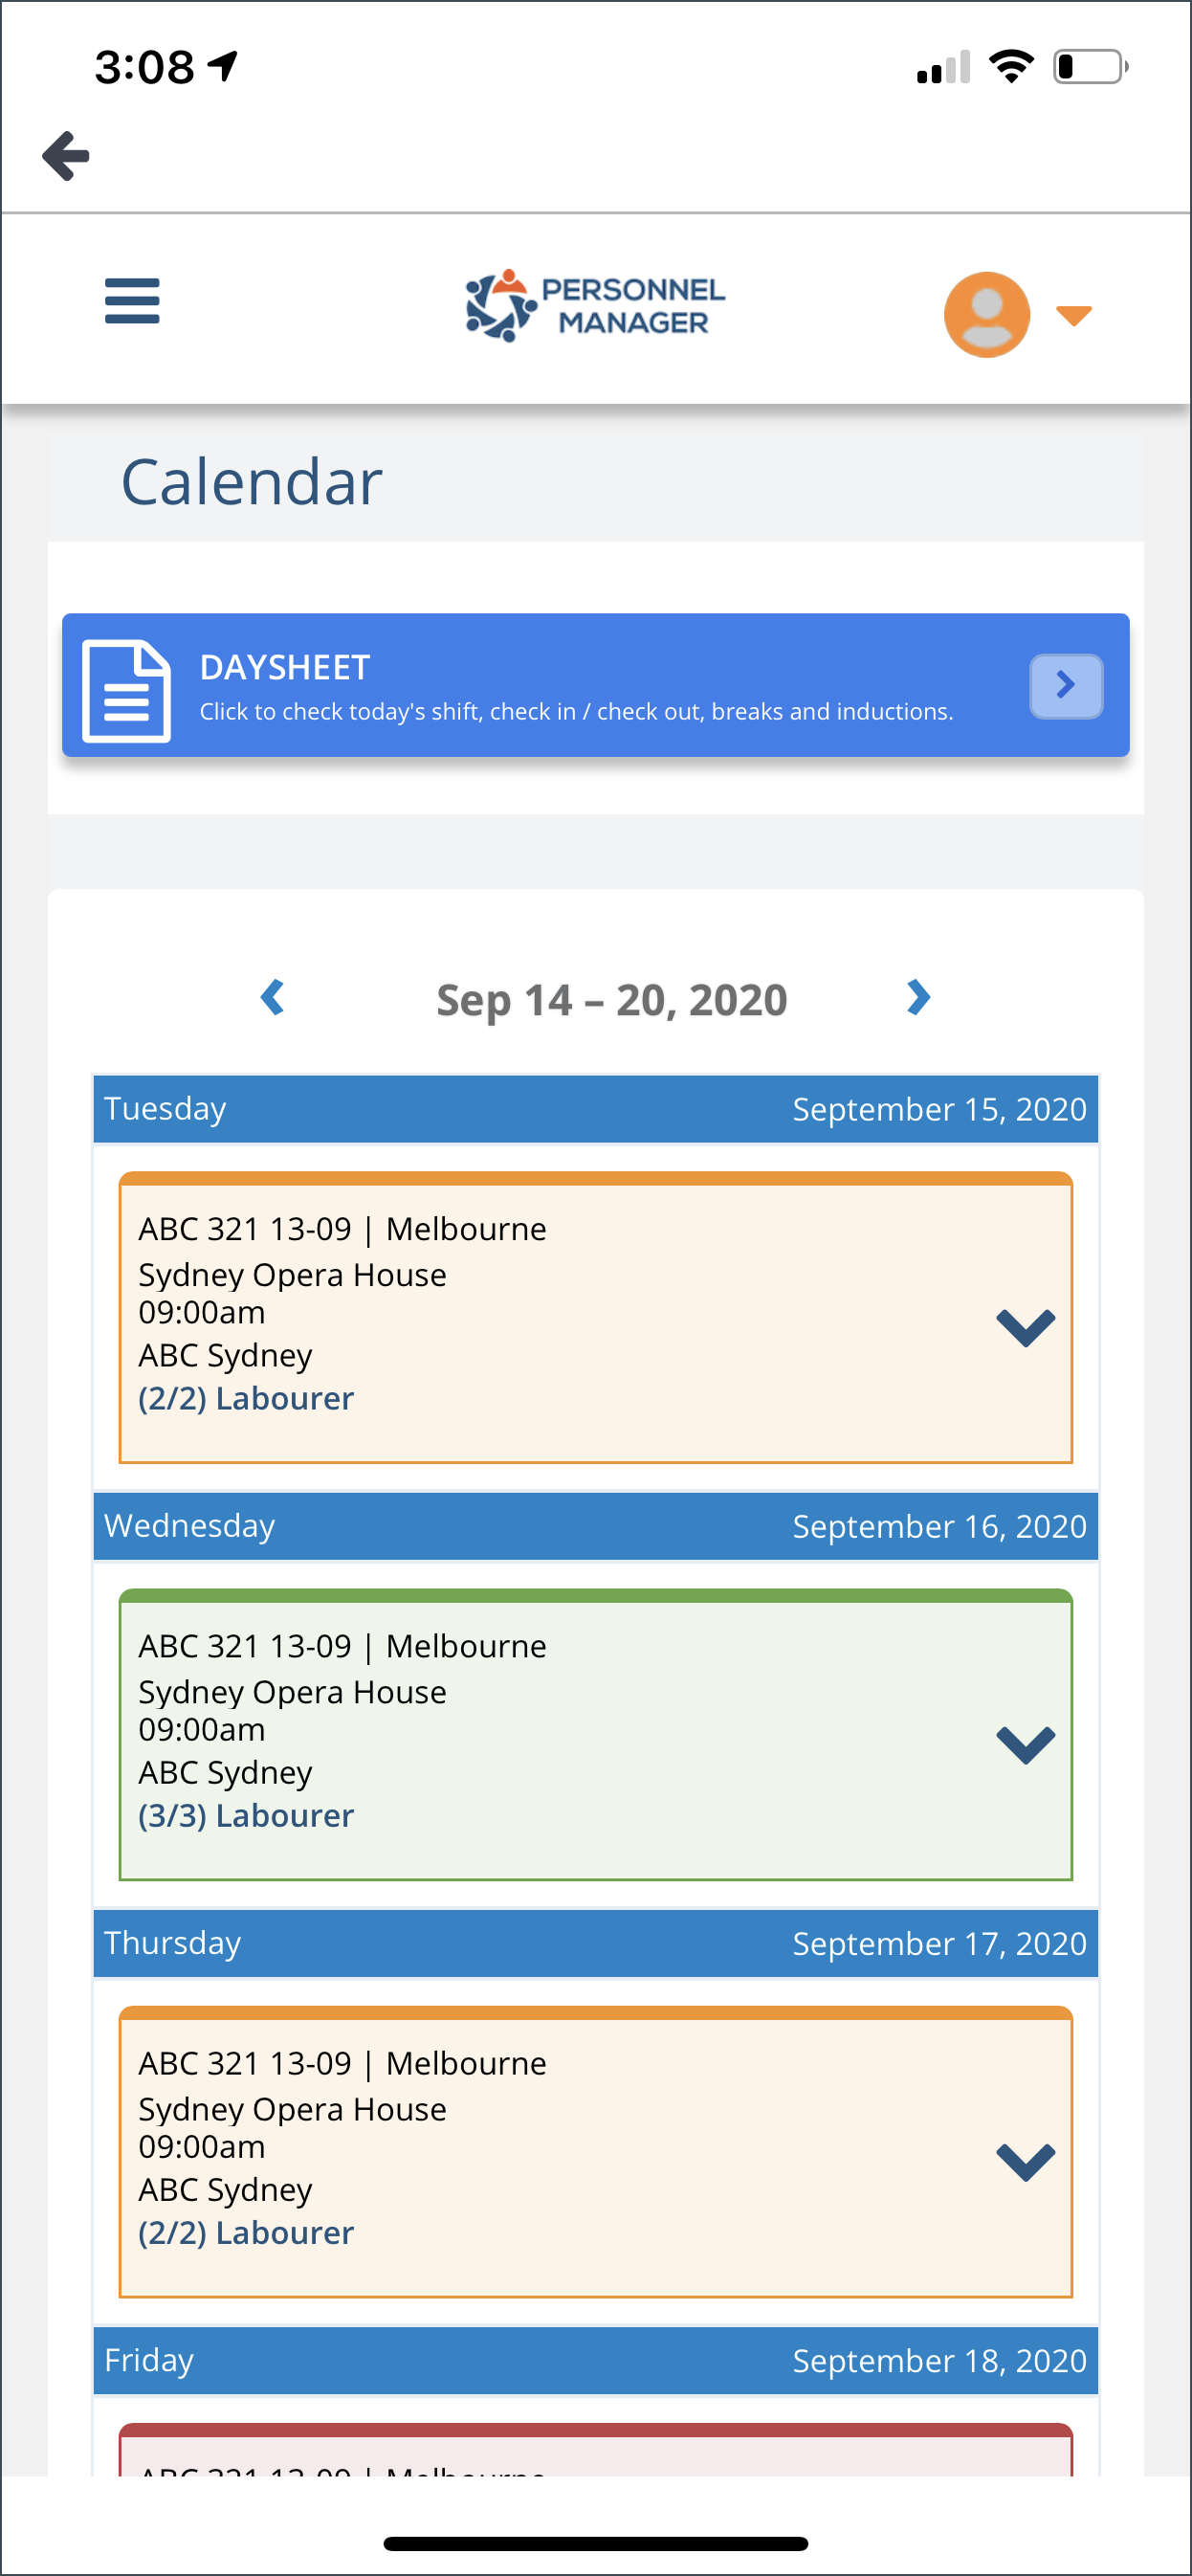
JOB LIST VIEW – CALENDAR VIEW & LIST VIEW
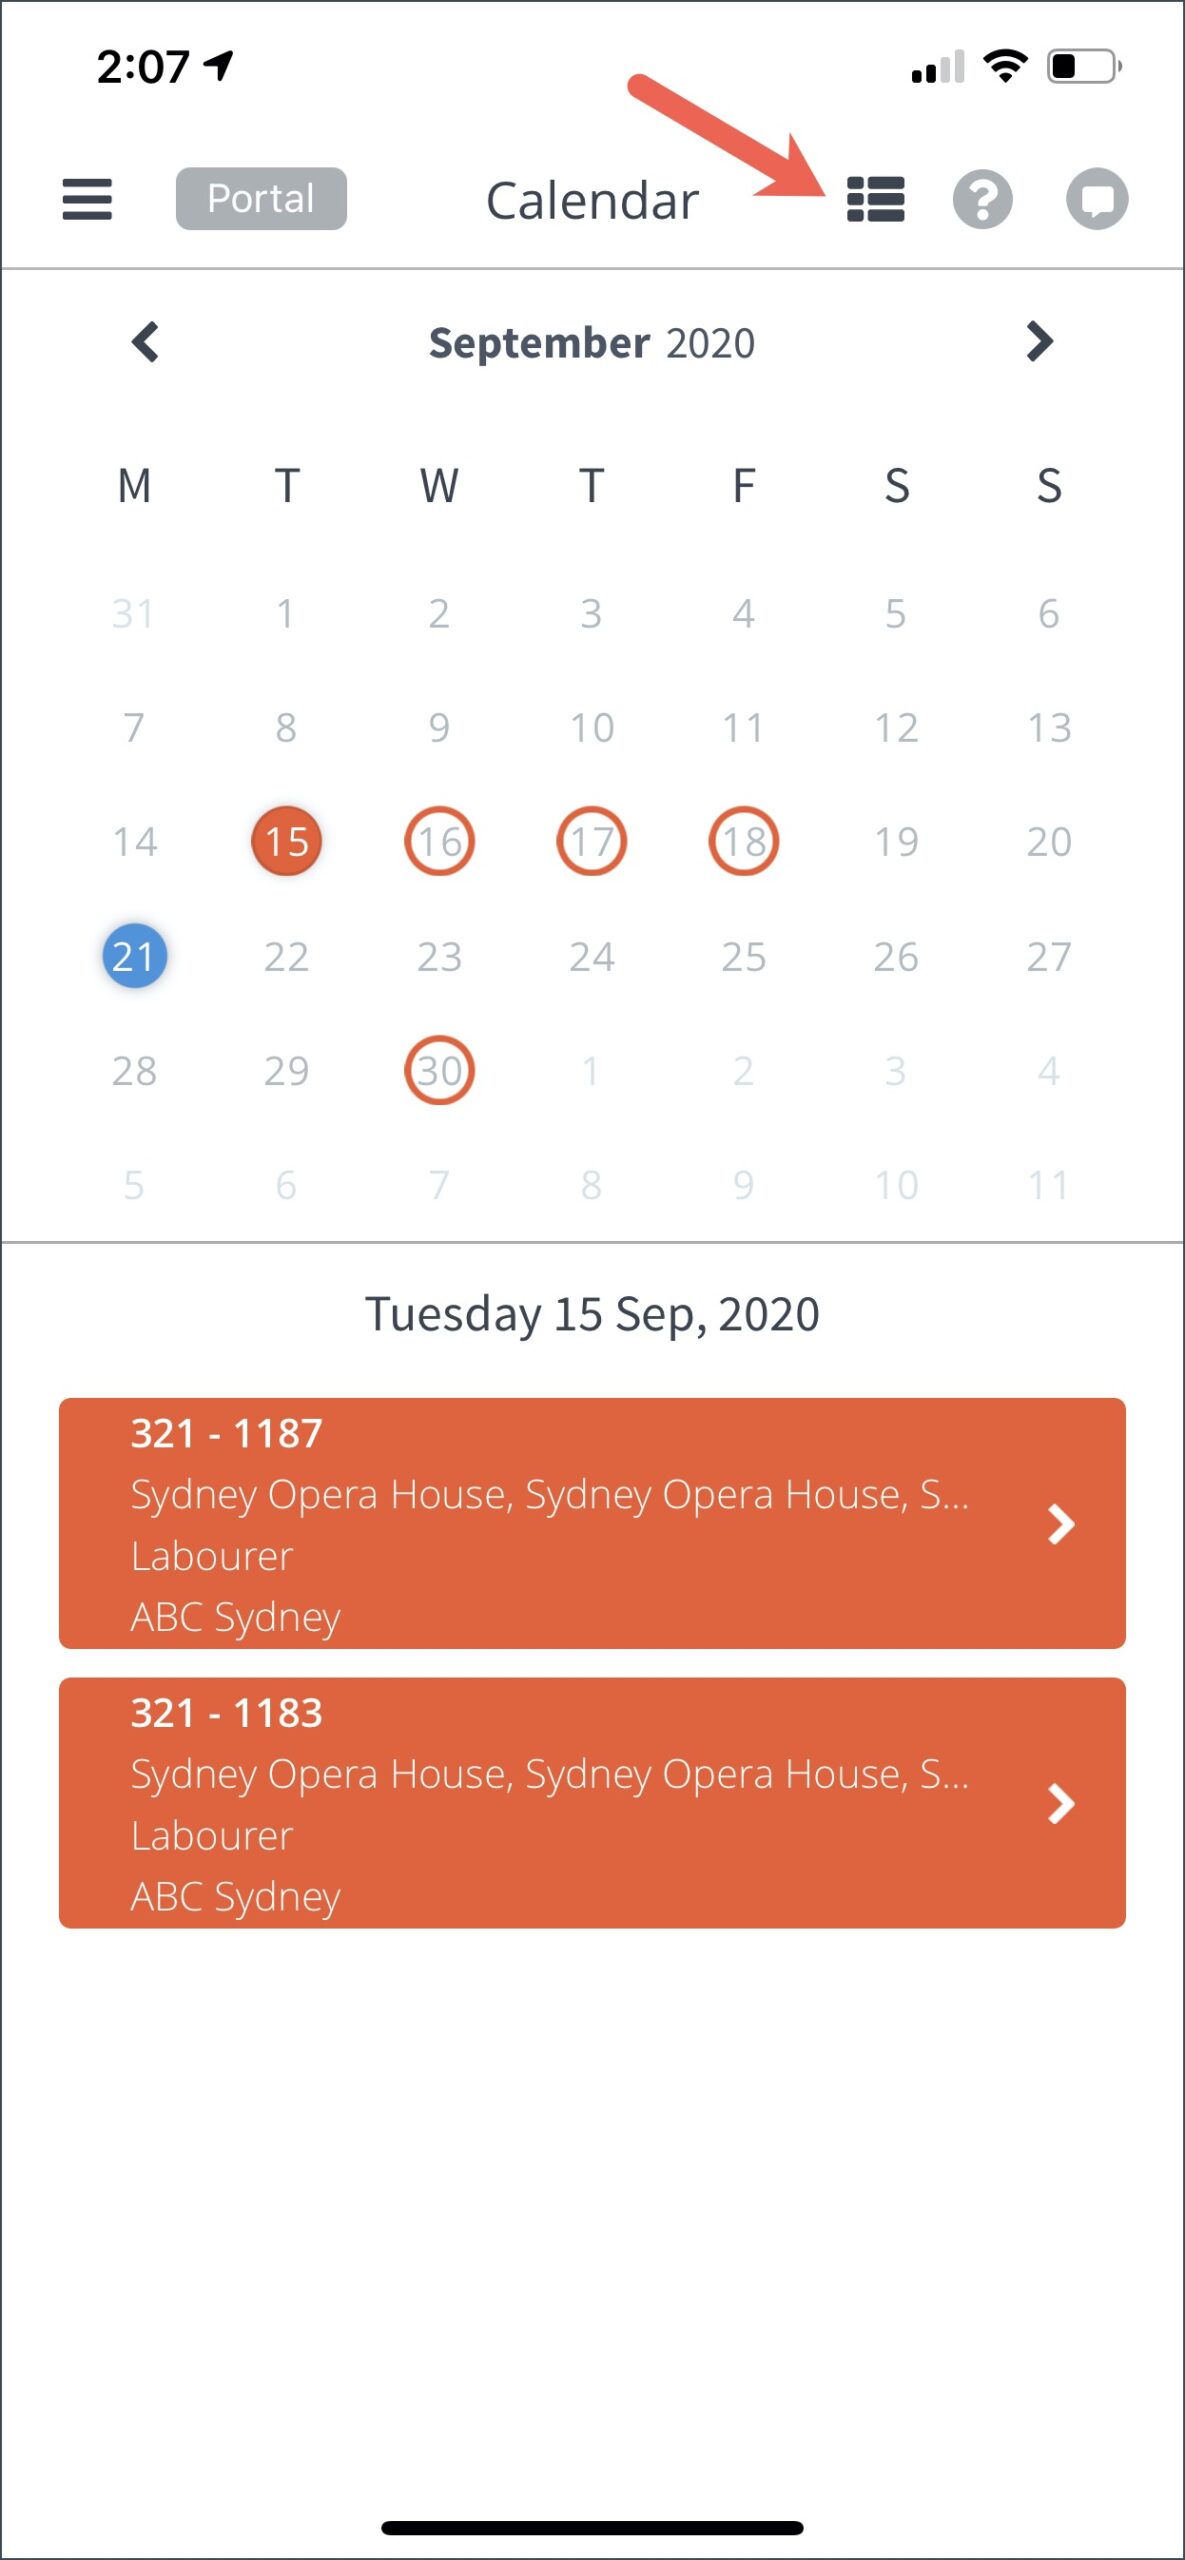
By default, the job cards are displayed on a list type view, when you tap on the calendar icon it will display your confirmed jobs on a calendar interface.
Dates where you have confirmed jobs are encircled. You can tap on these dates and the shift card will appear at the bottom of the page.
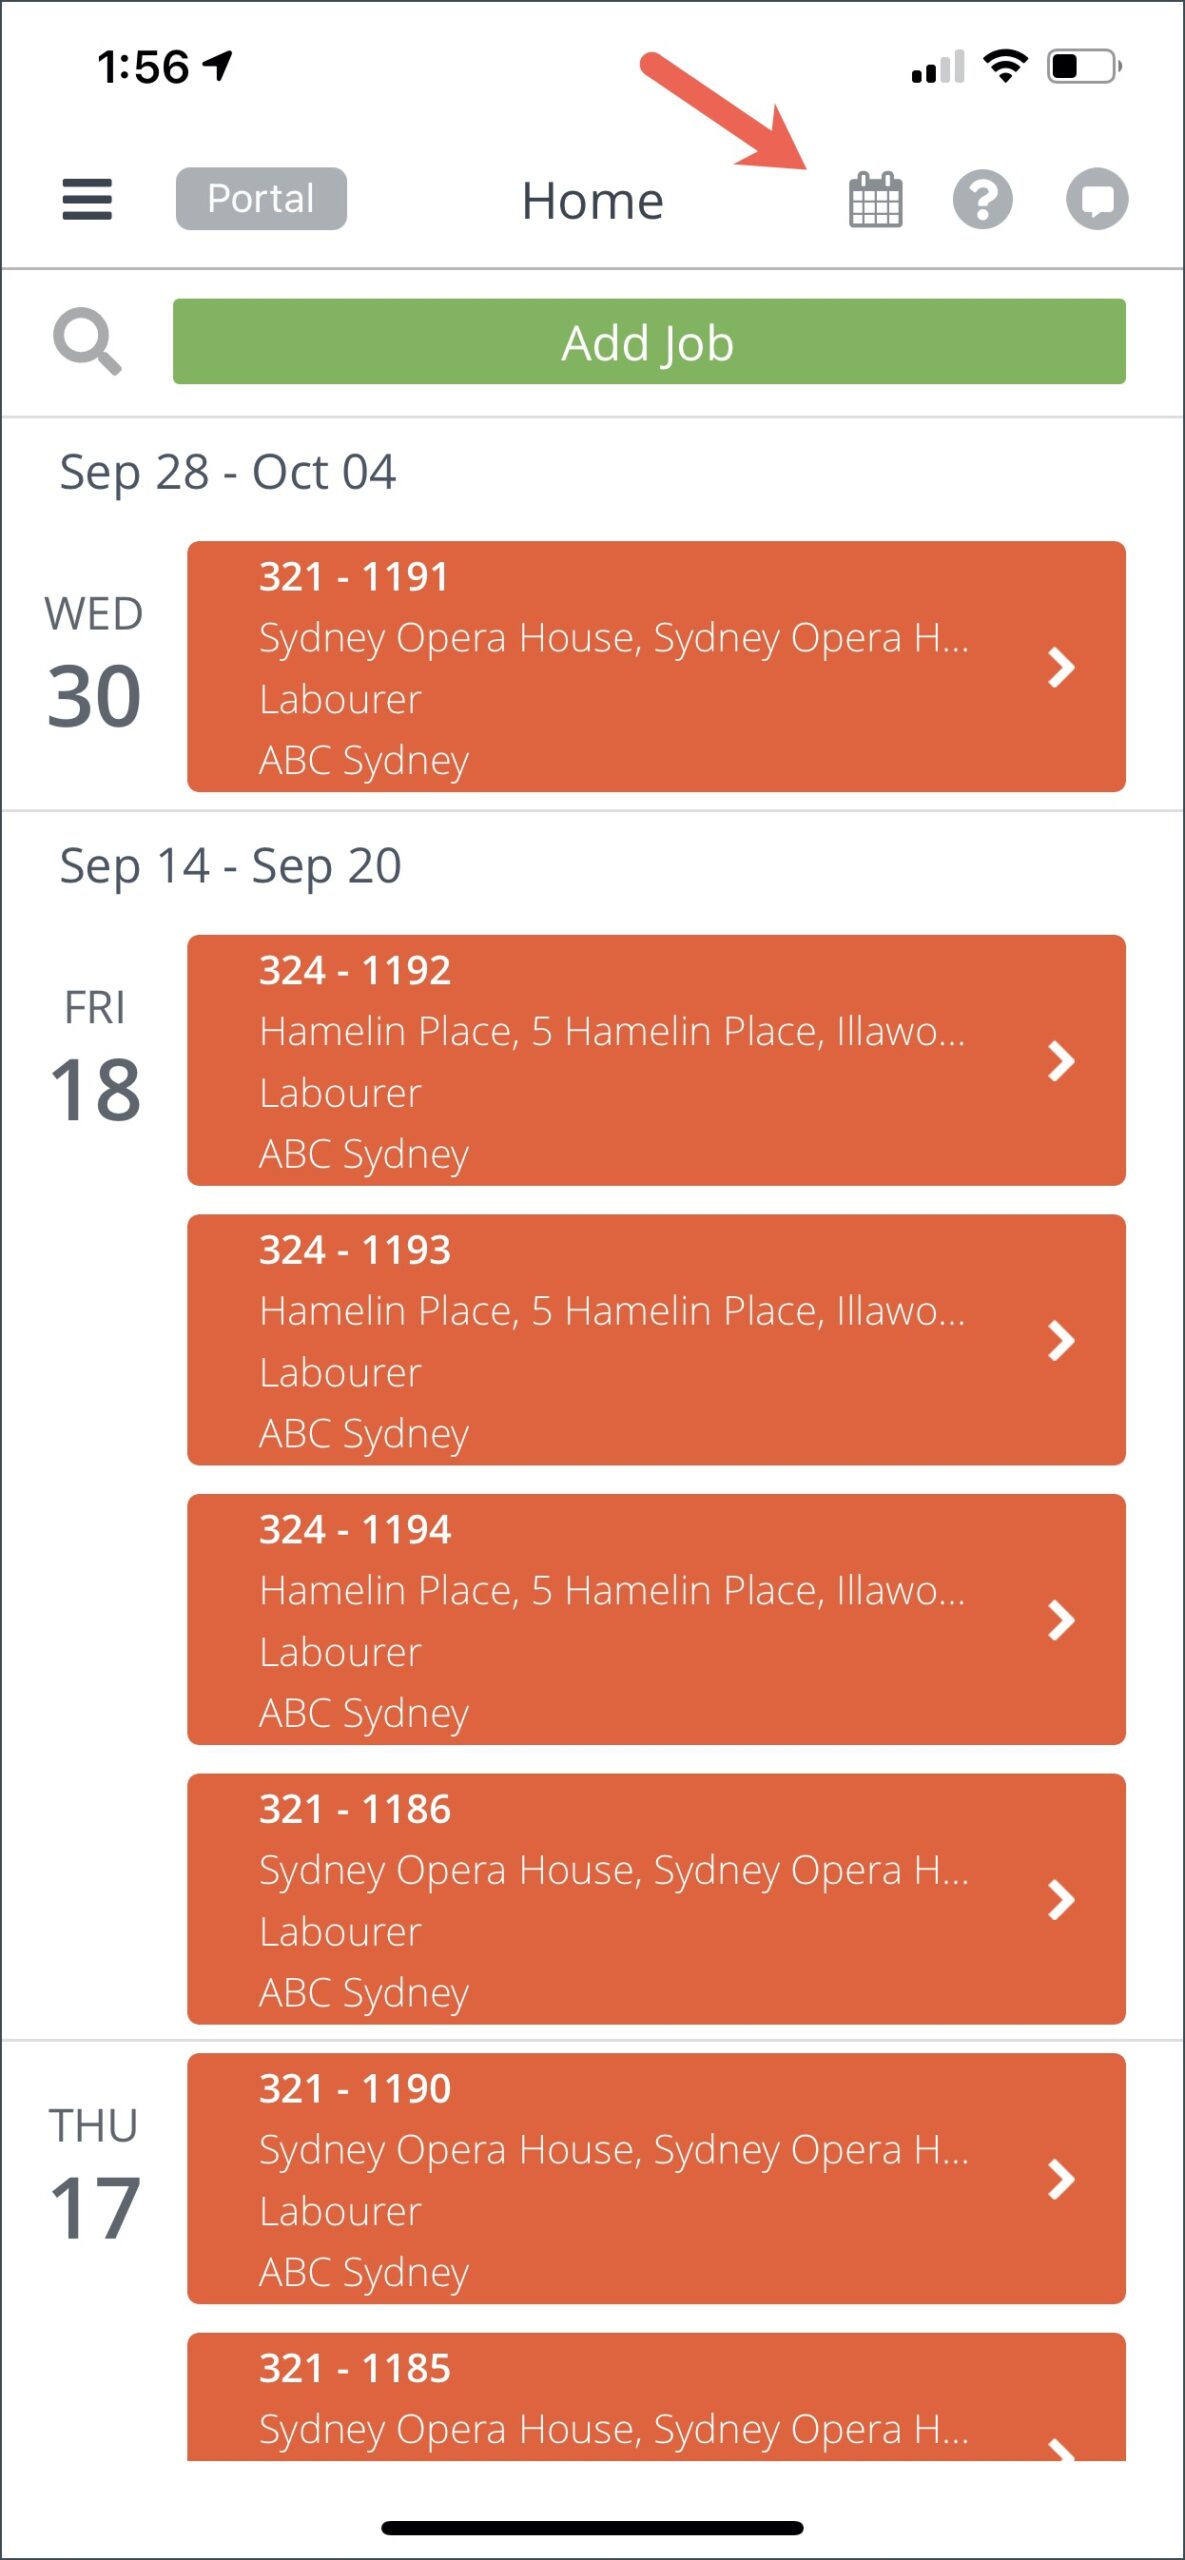
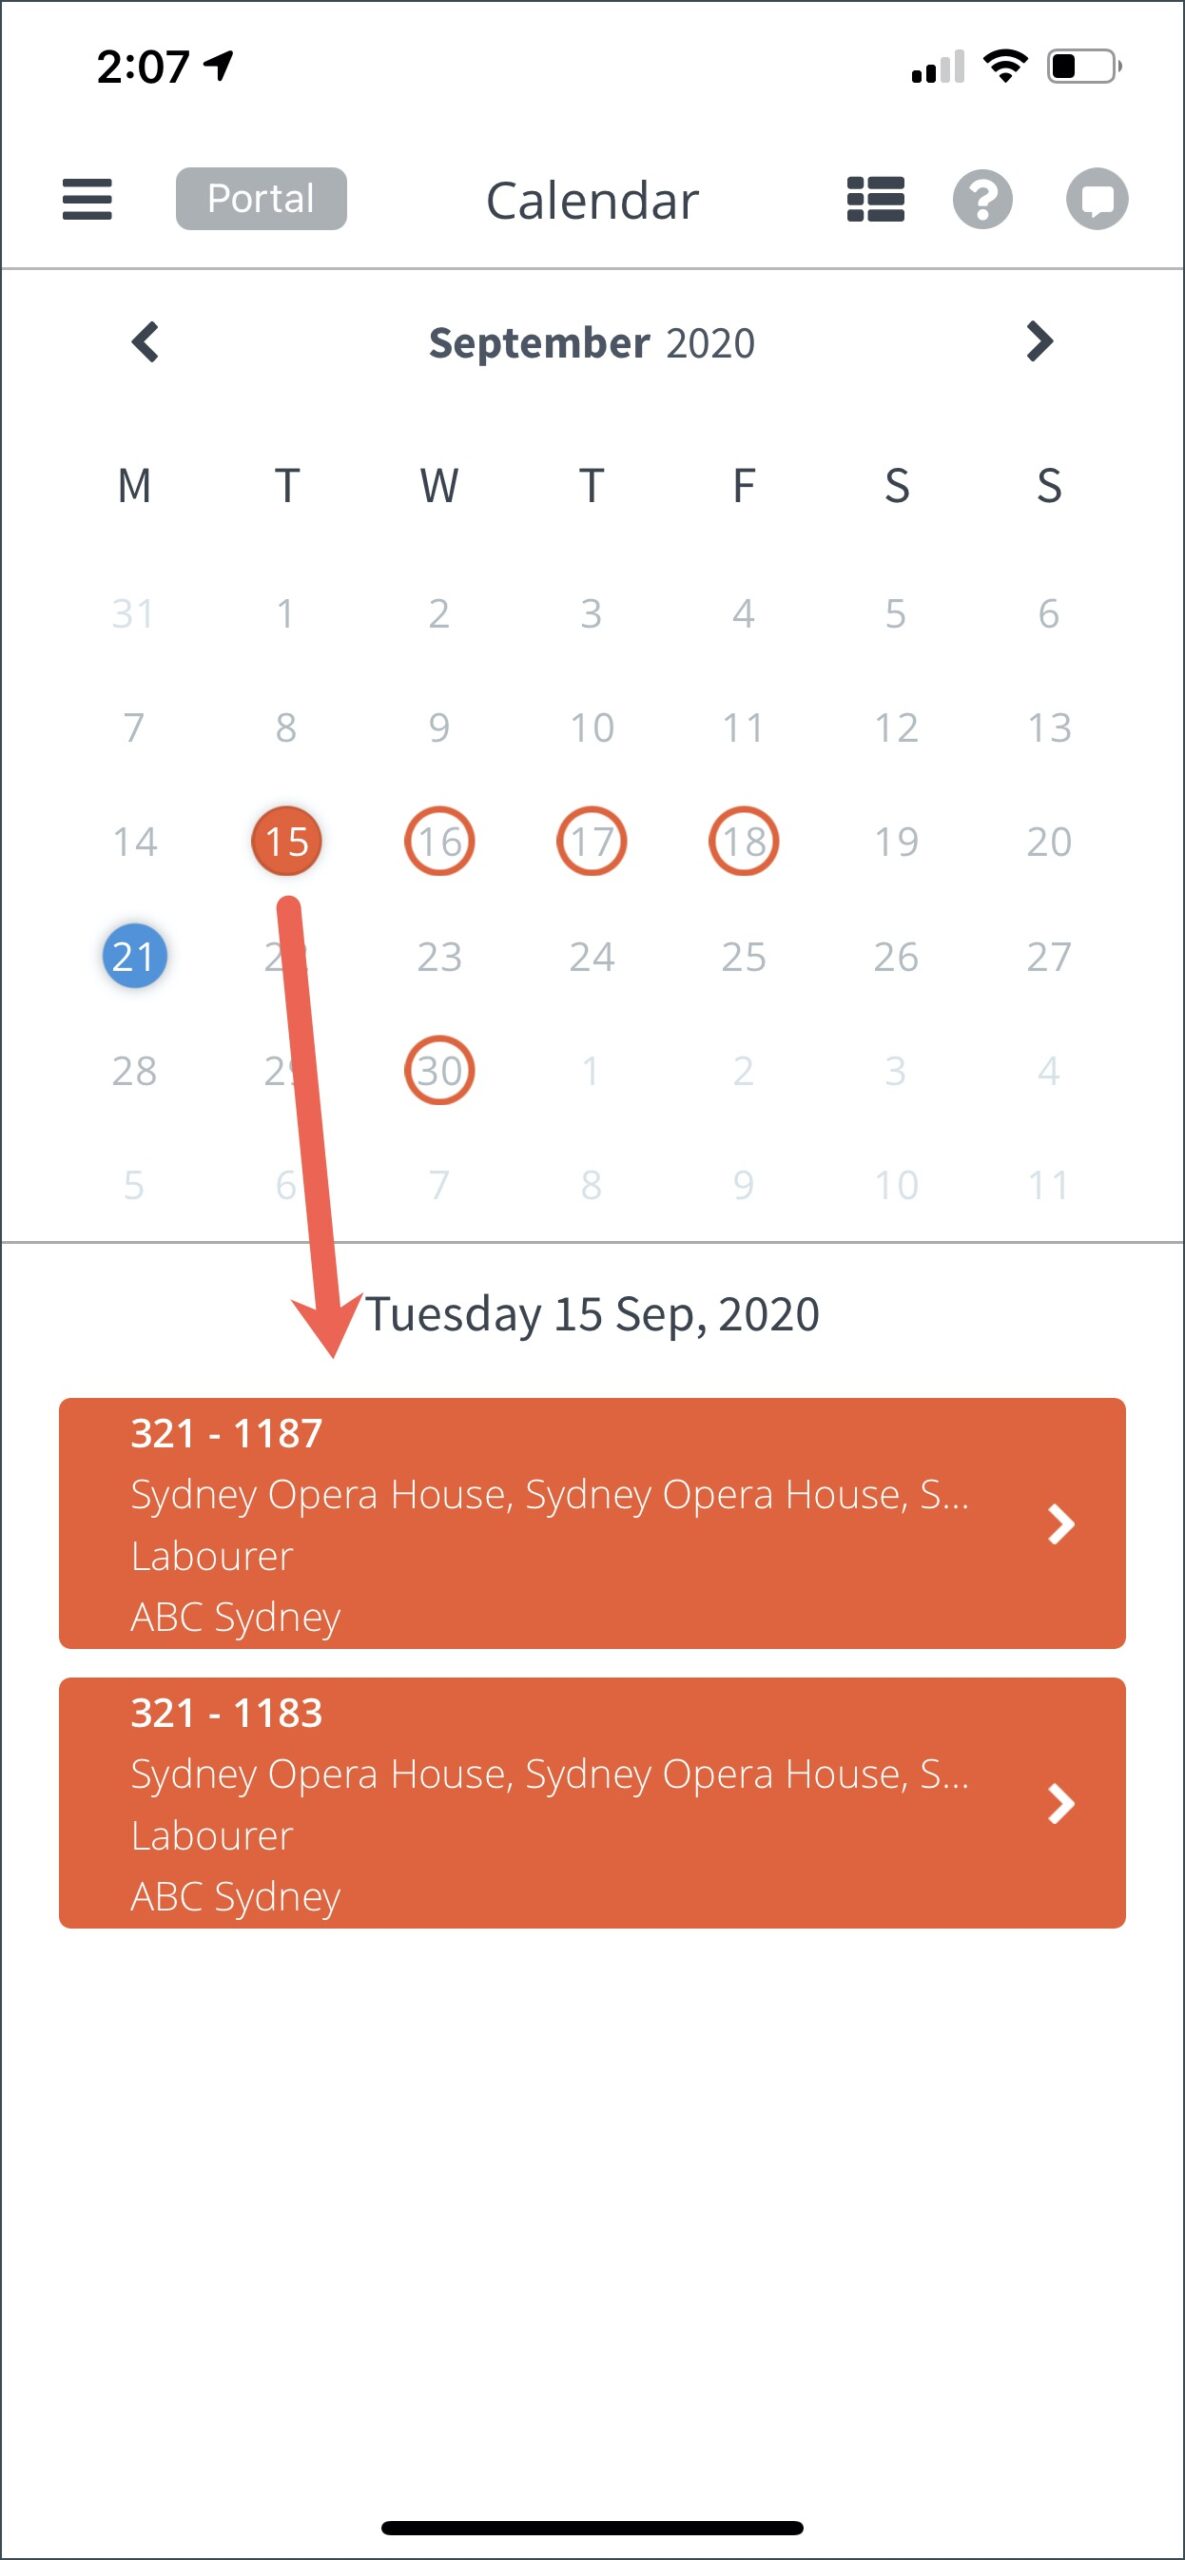
Click on the list icon to display the shift cards on a list view.
QUESTION ICON
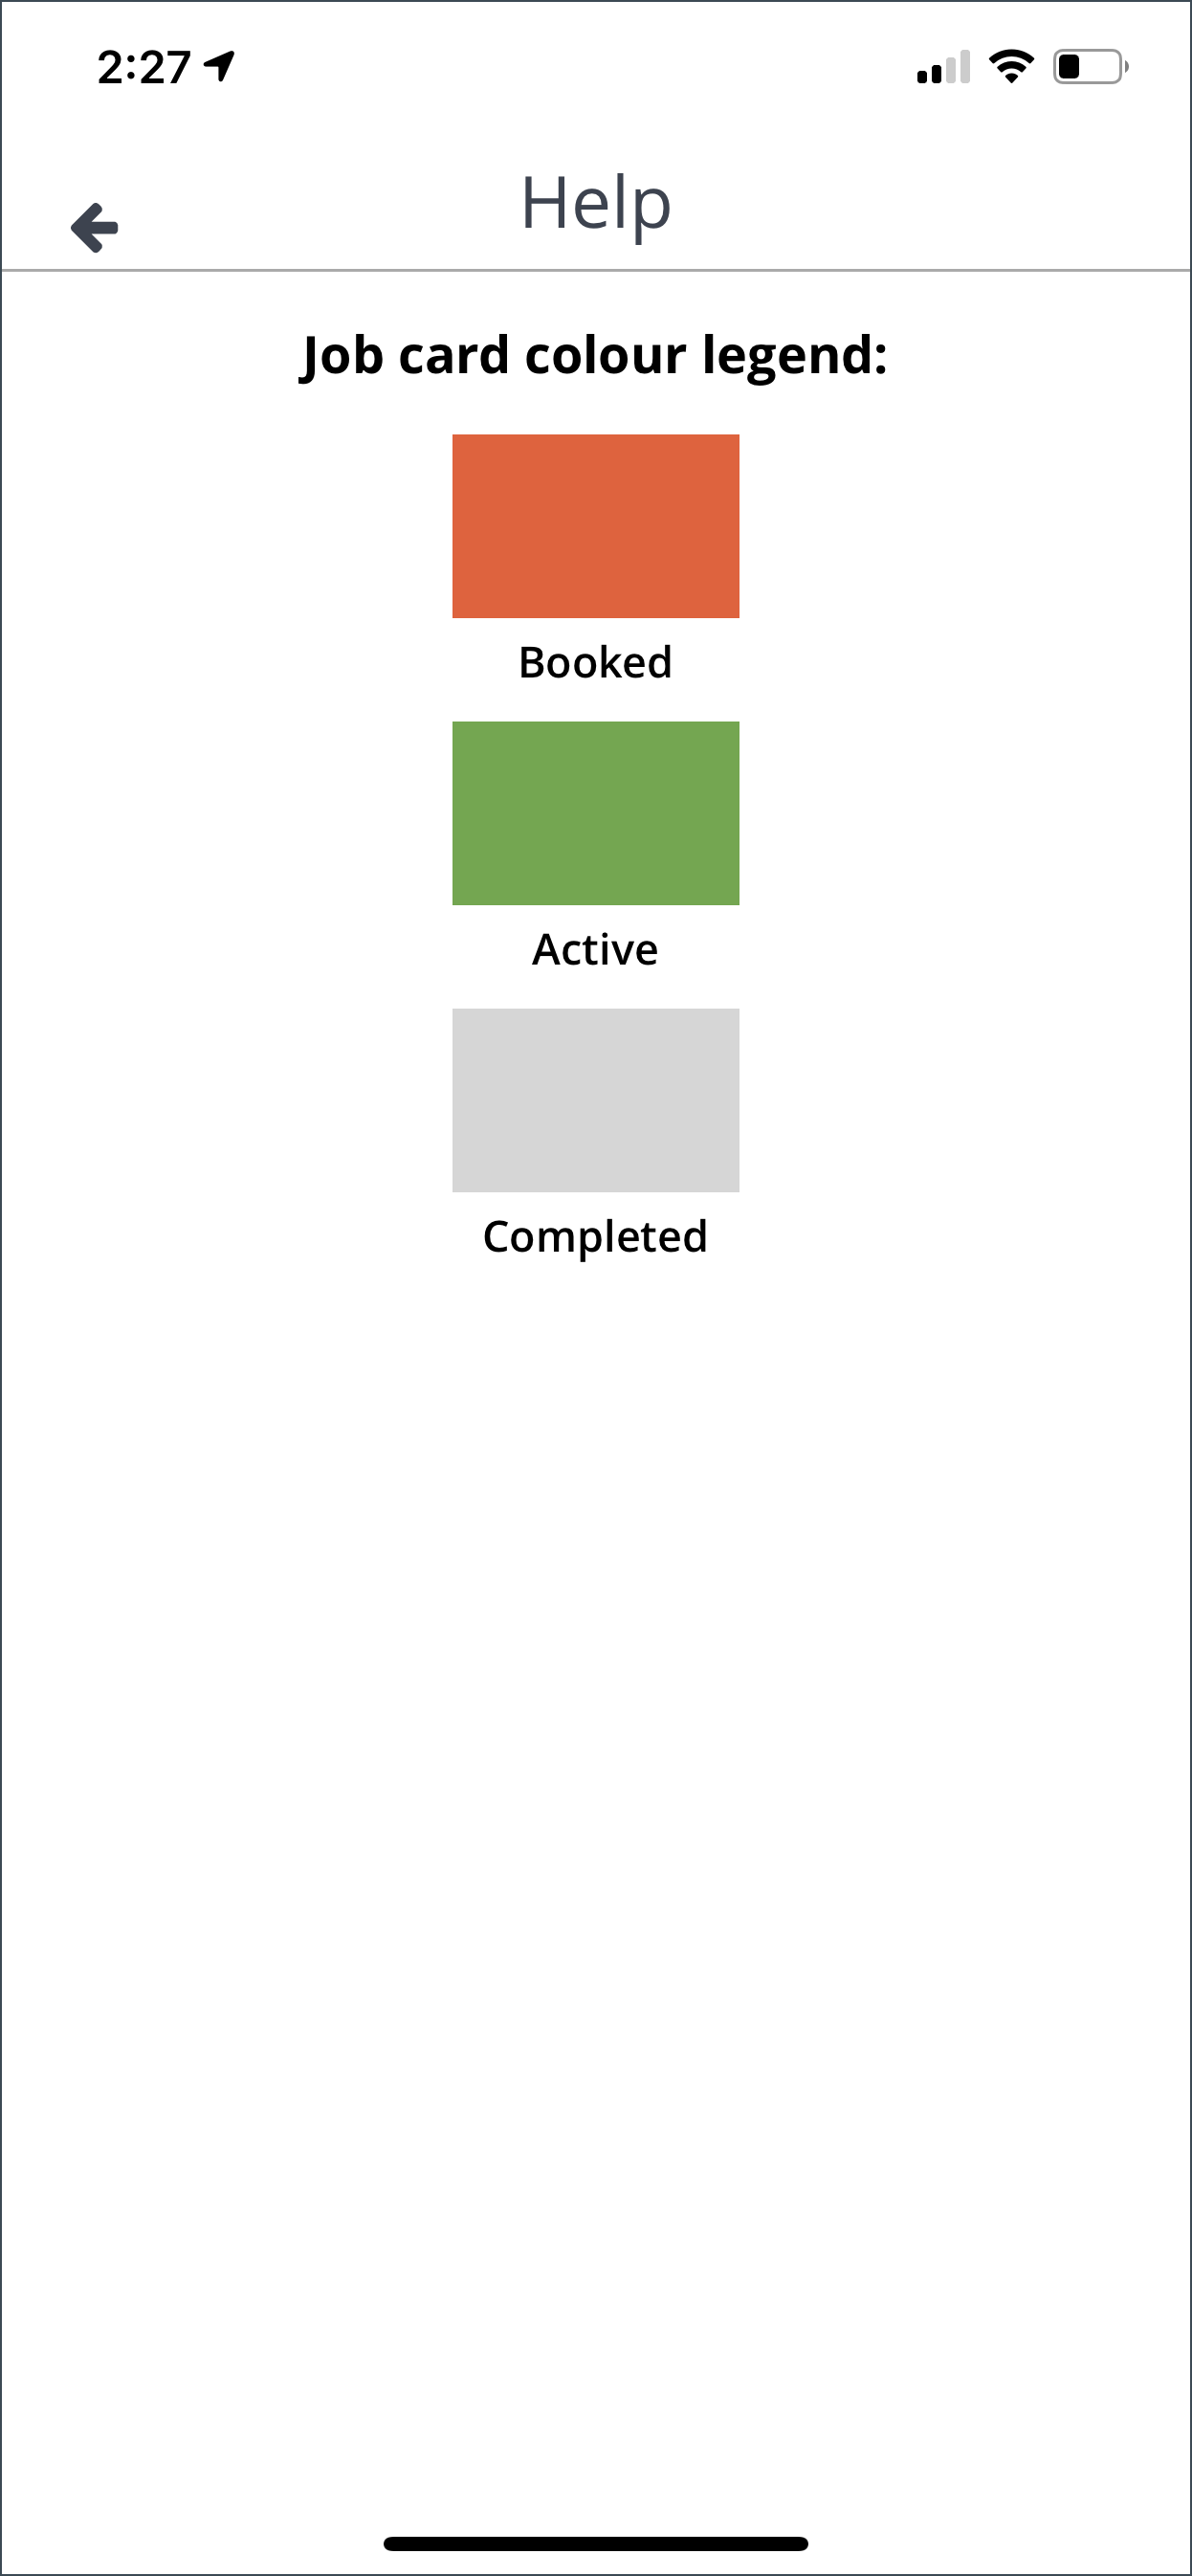
When you click on the Question Mark icon it will display the legend for the colour of the shift cards.
Booked – job is confirmed
Active – job is currently on-going
Completed – job has been completed
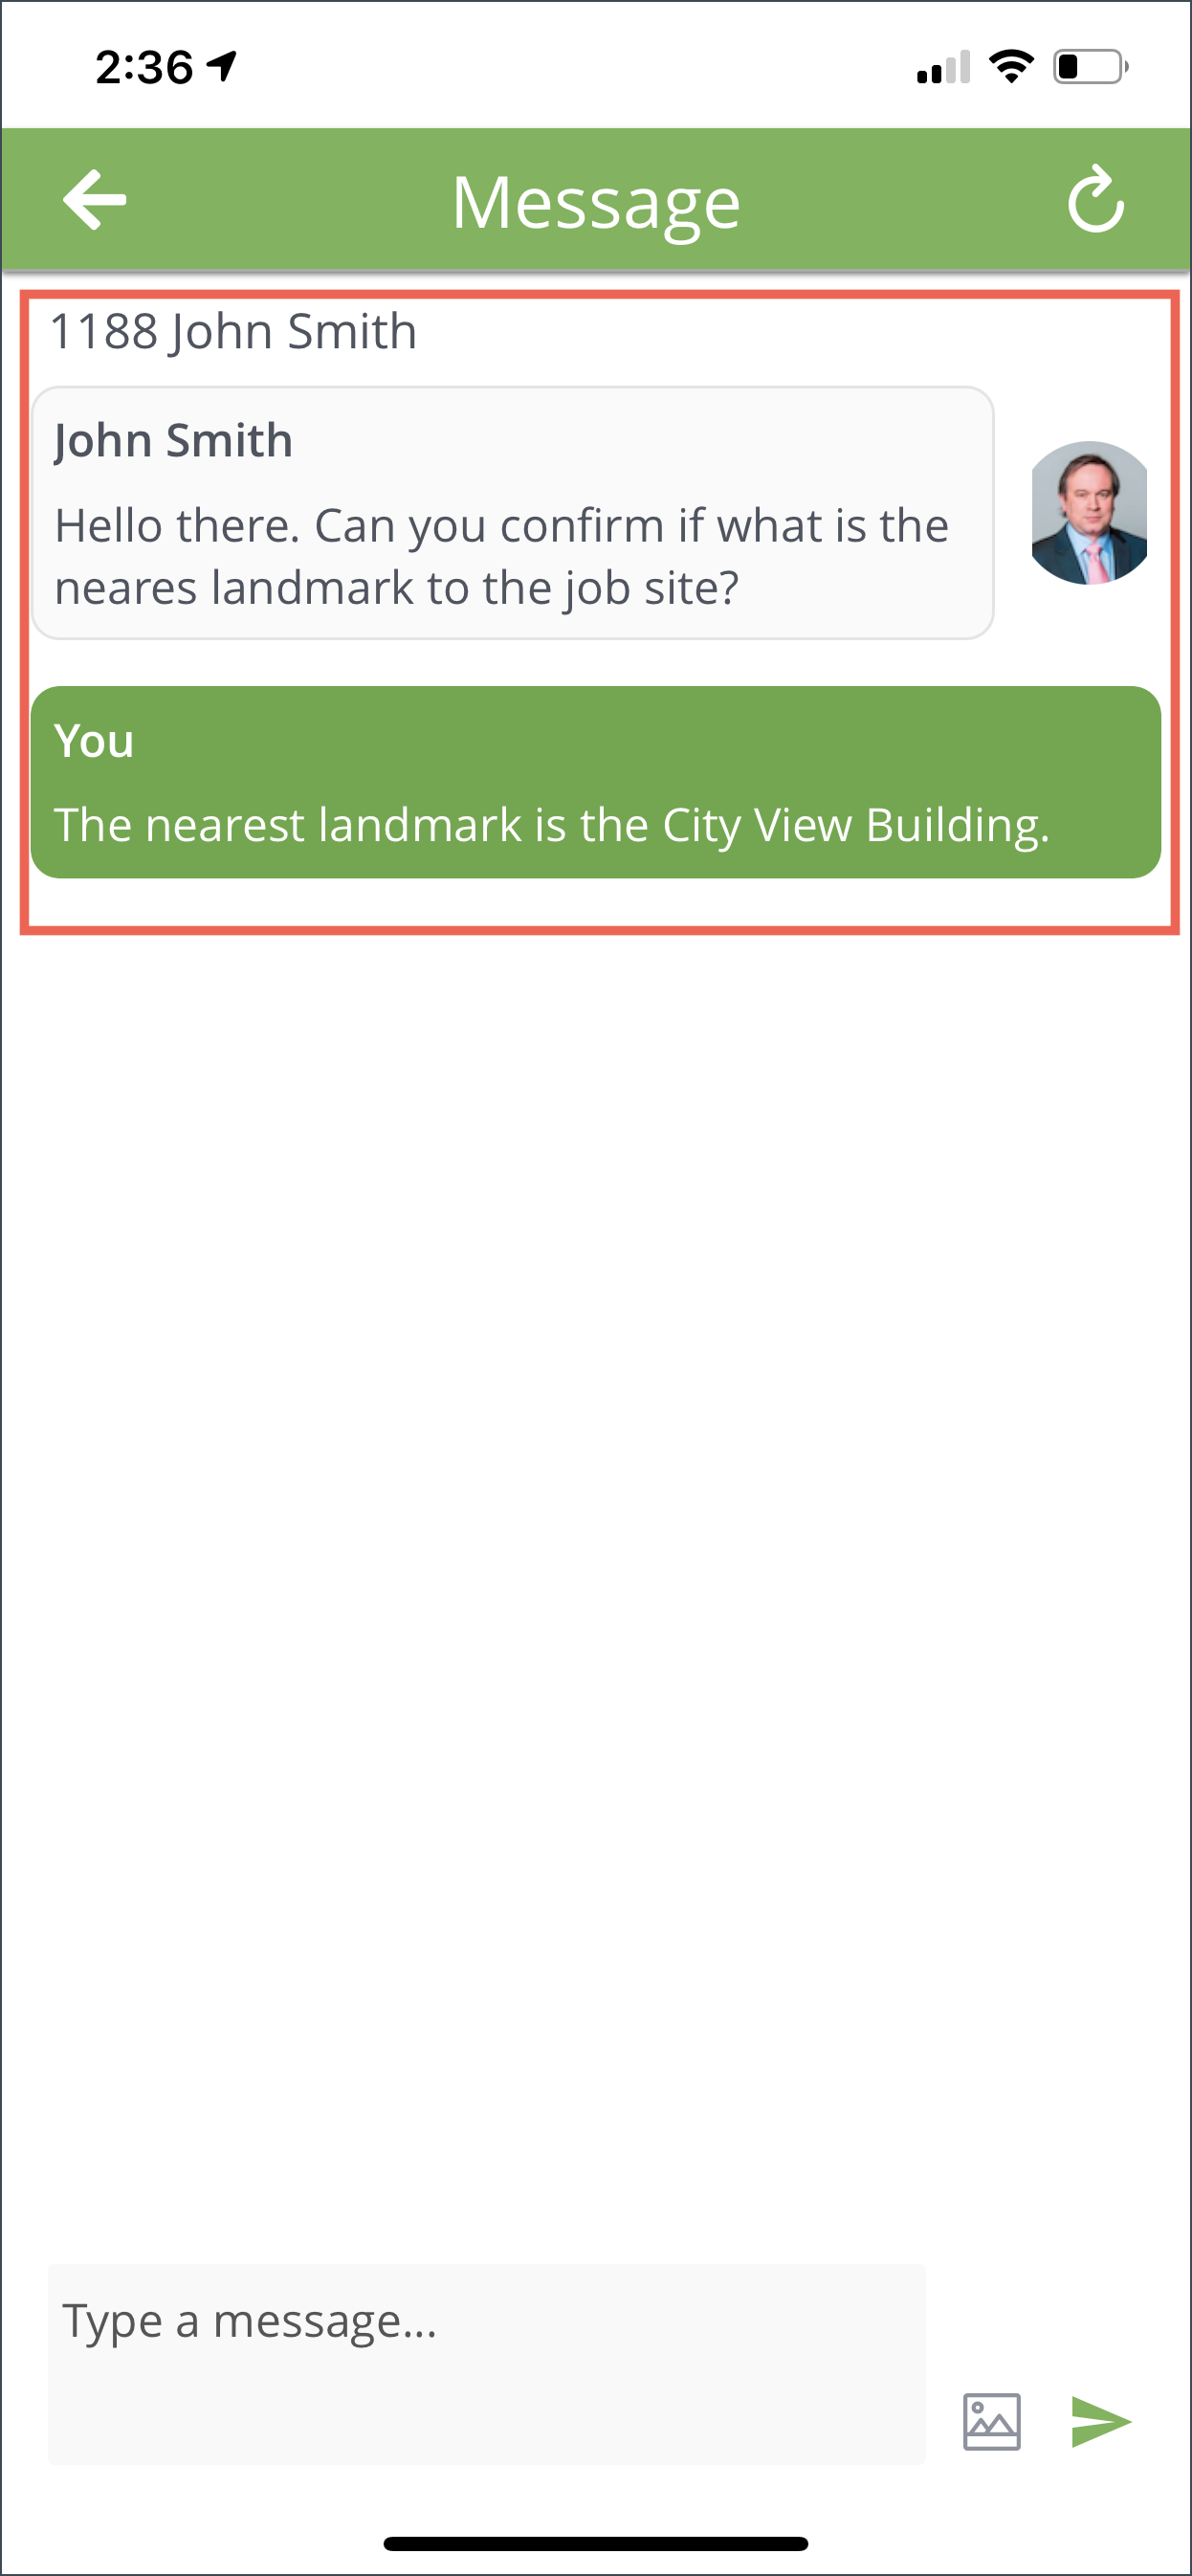
CHAT
The Chat function will allow you to view the messages you have received and the ability to send messages to Admin and Crew.
Note: This icon will also display a number to indicate unread messages. If no number is visible on the icon, it means all messages have been read.
Click on the Message Admin button to initiate chat with the Admin.

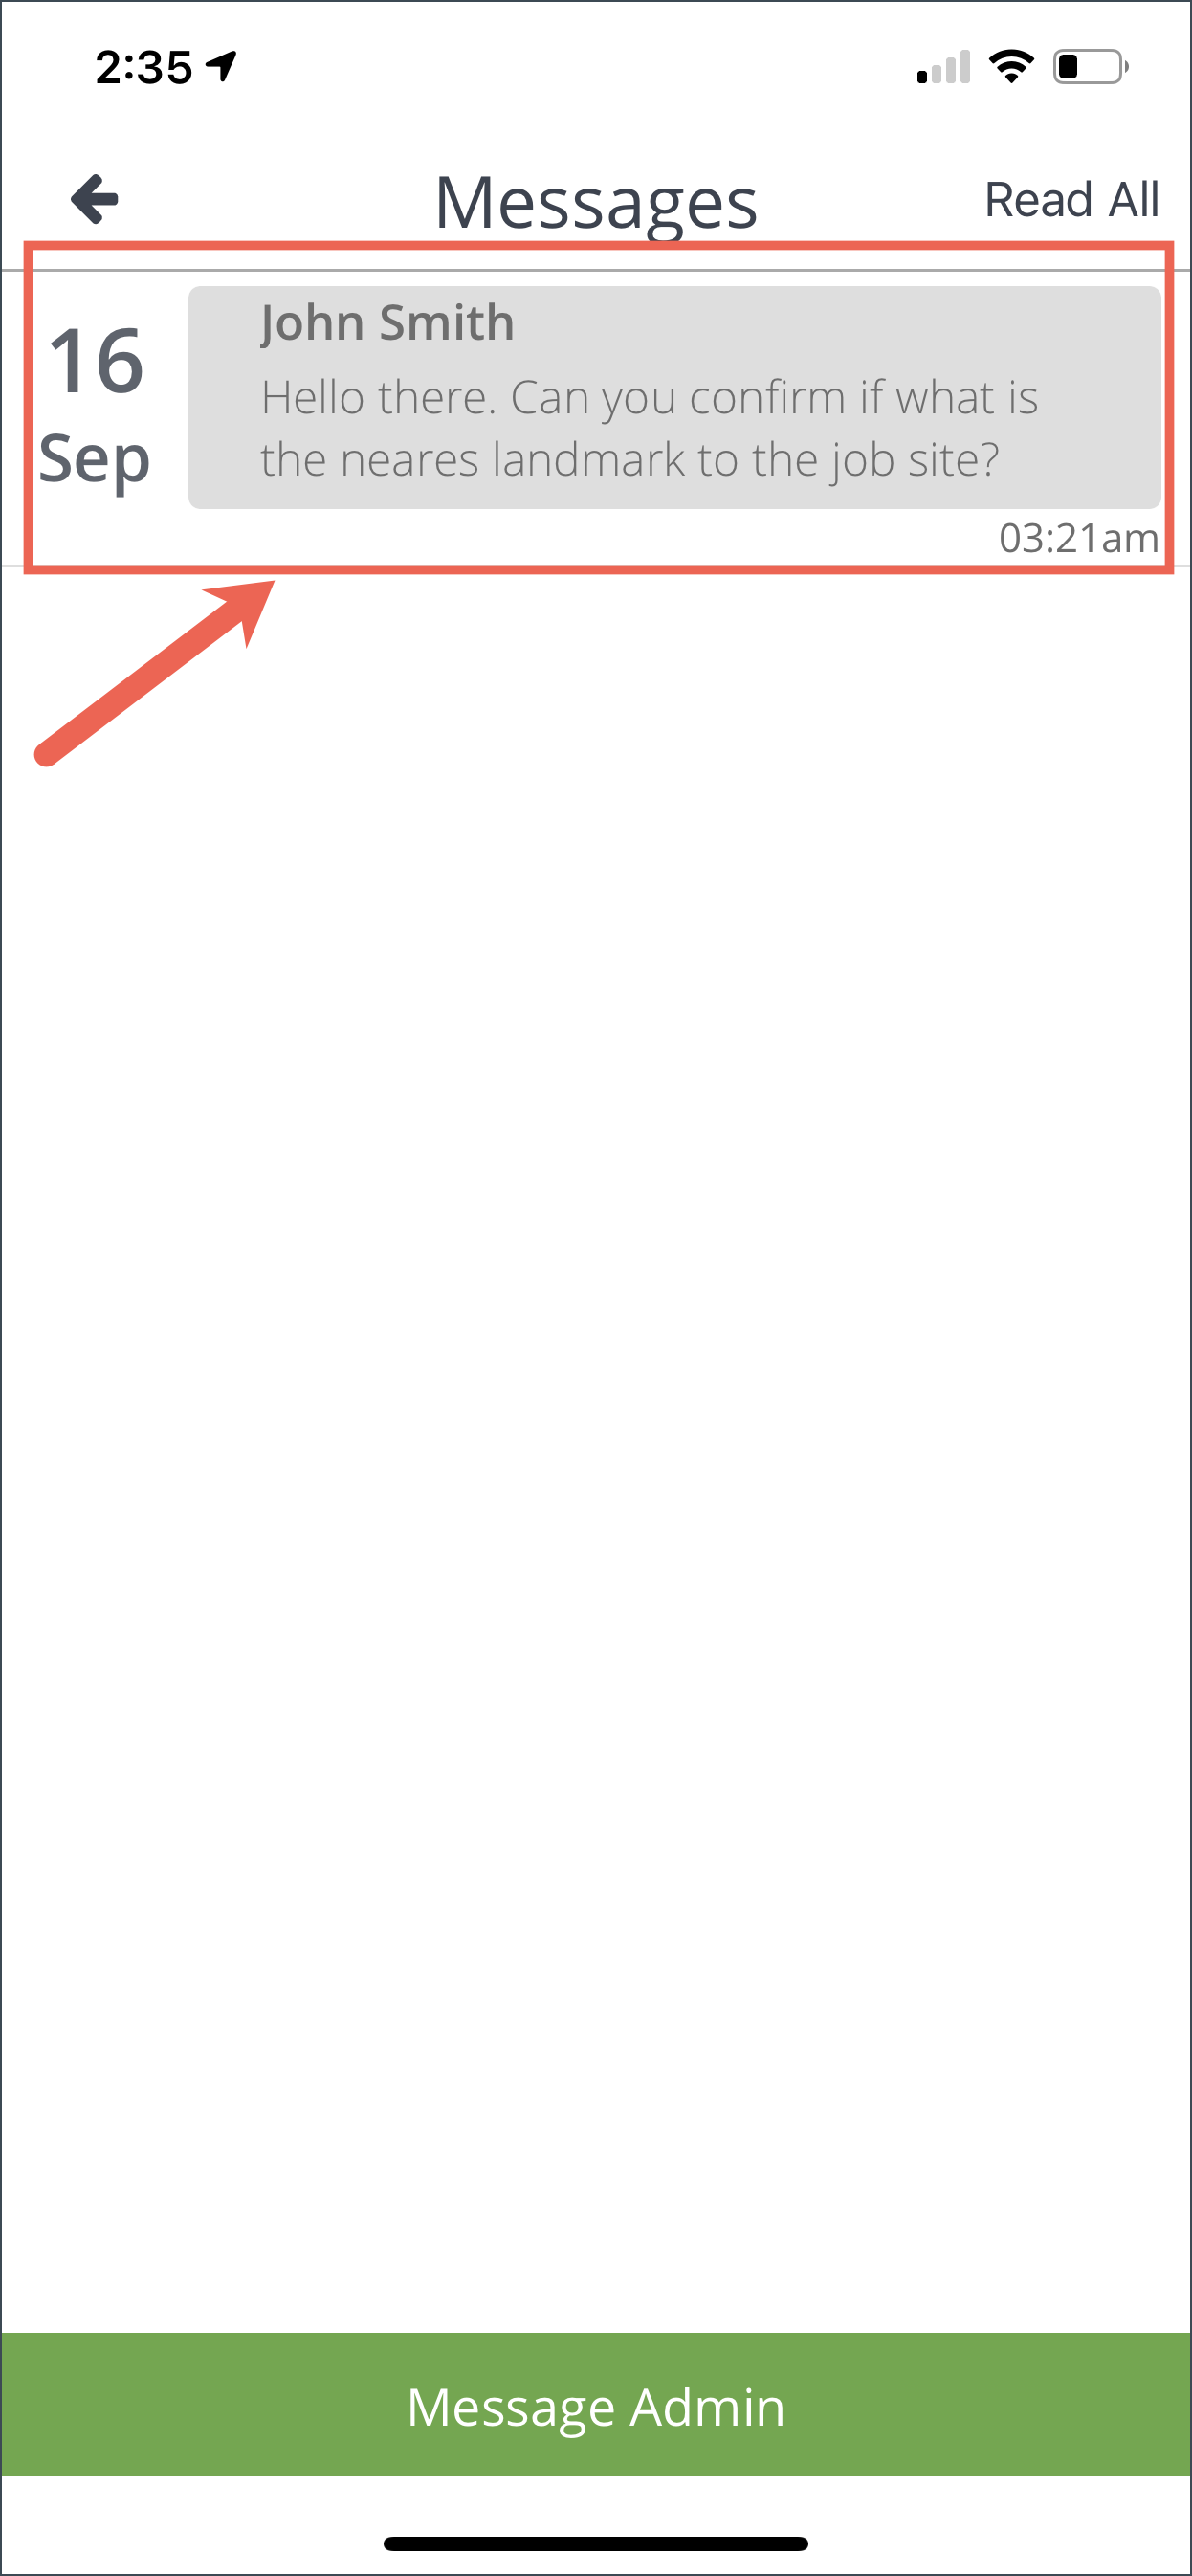
Tap on the message and it will display the full thread of the chat conversation.
PORTAL
When the Portal button is clicked, you will be redirected to the Client Portal view. From here, you can also view your shifts, access day sheet, edit profile and more.
The Client Portal is the web version of the PM Client App.

Job Details
JOB DETAILS INFO
The Job Details page displays information about the job:
- Customer Name
- Date of the Job
- Job Number – Job Title
- Activity
- Crew
- Shift Time
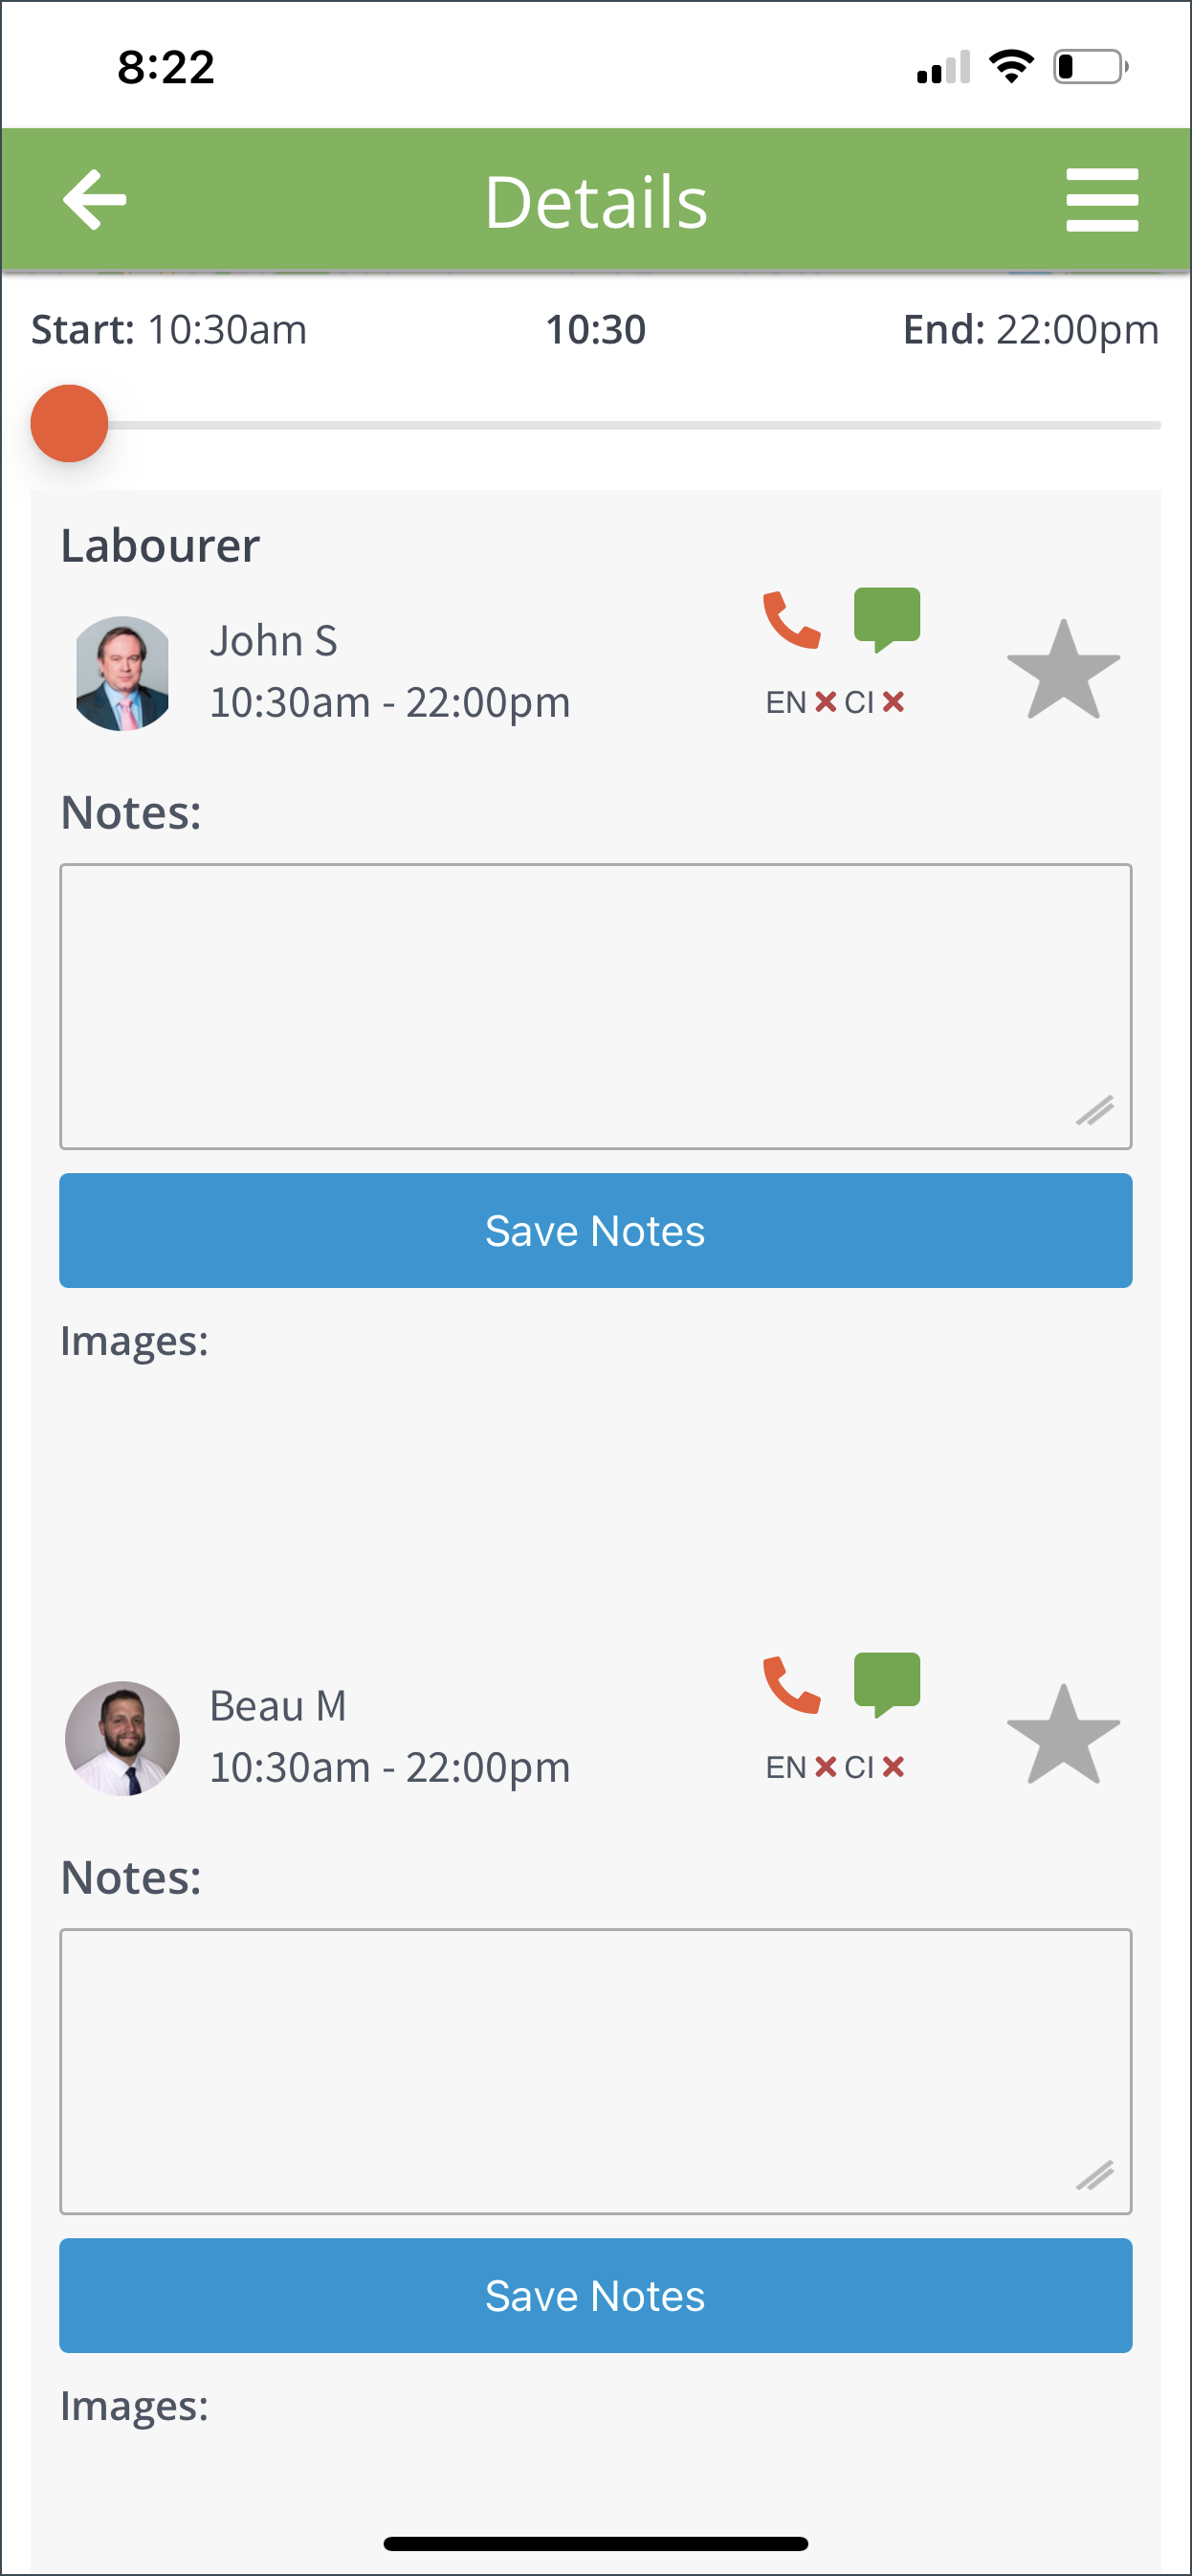
And if there are more than one crew for a job, it will also be listed on the job details page.
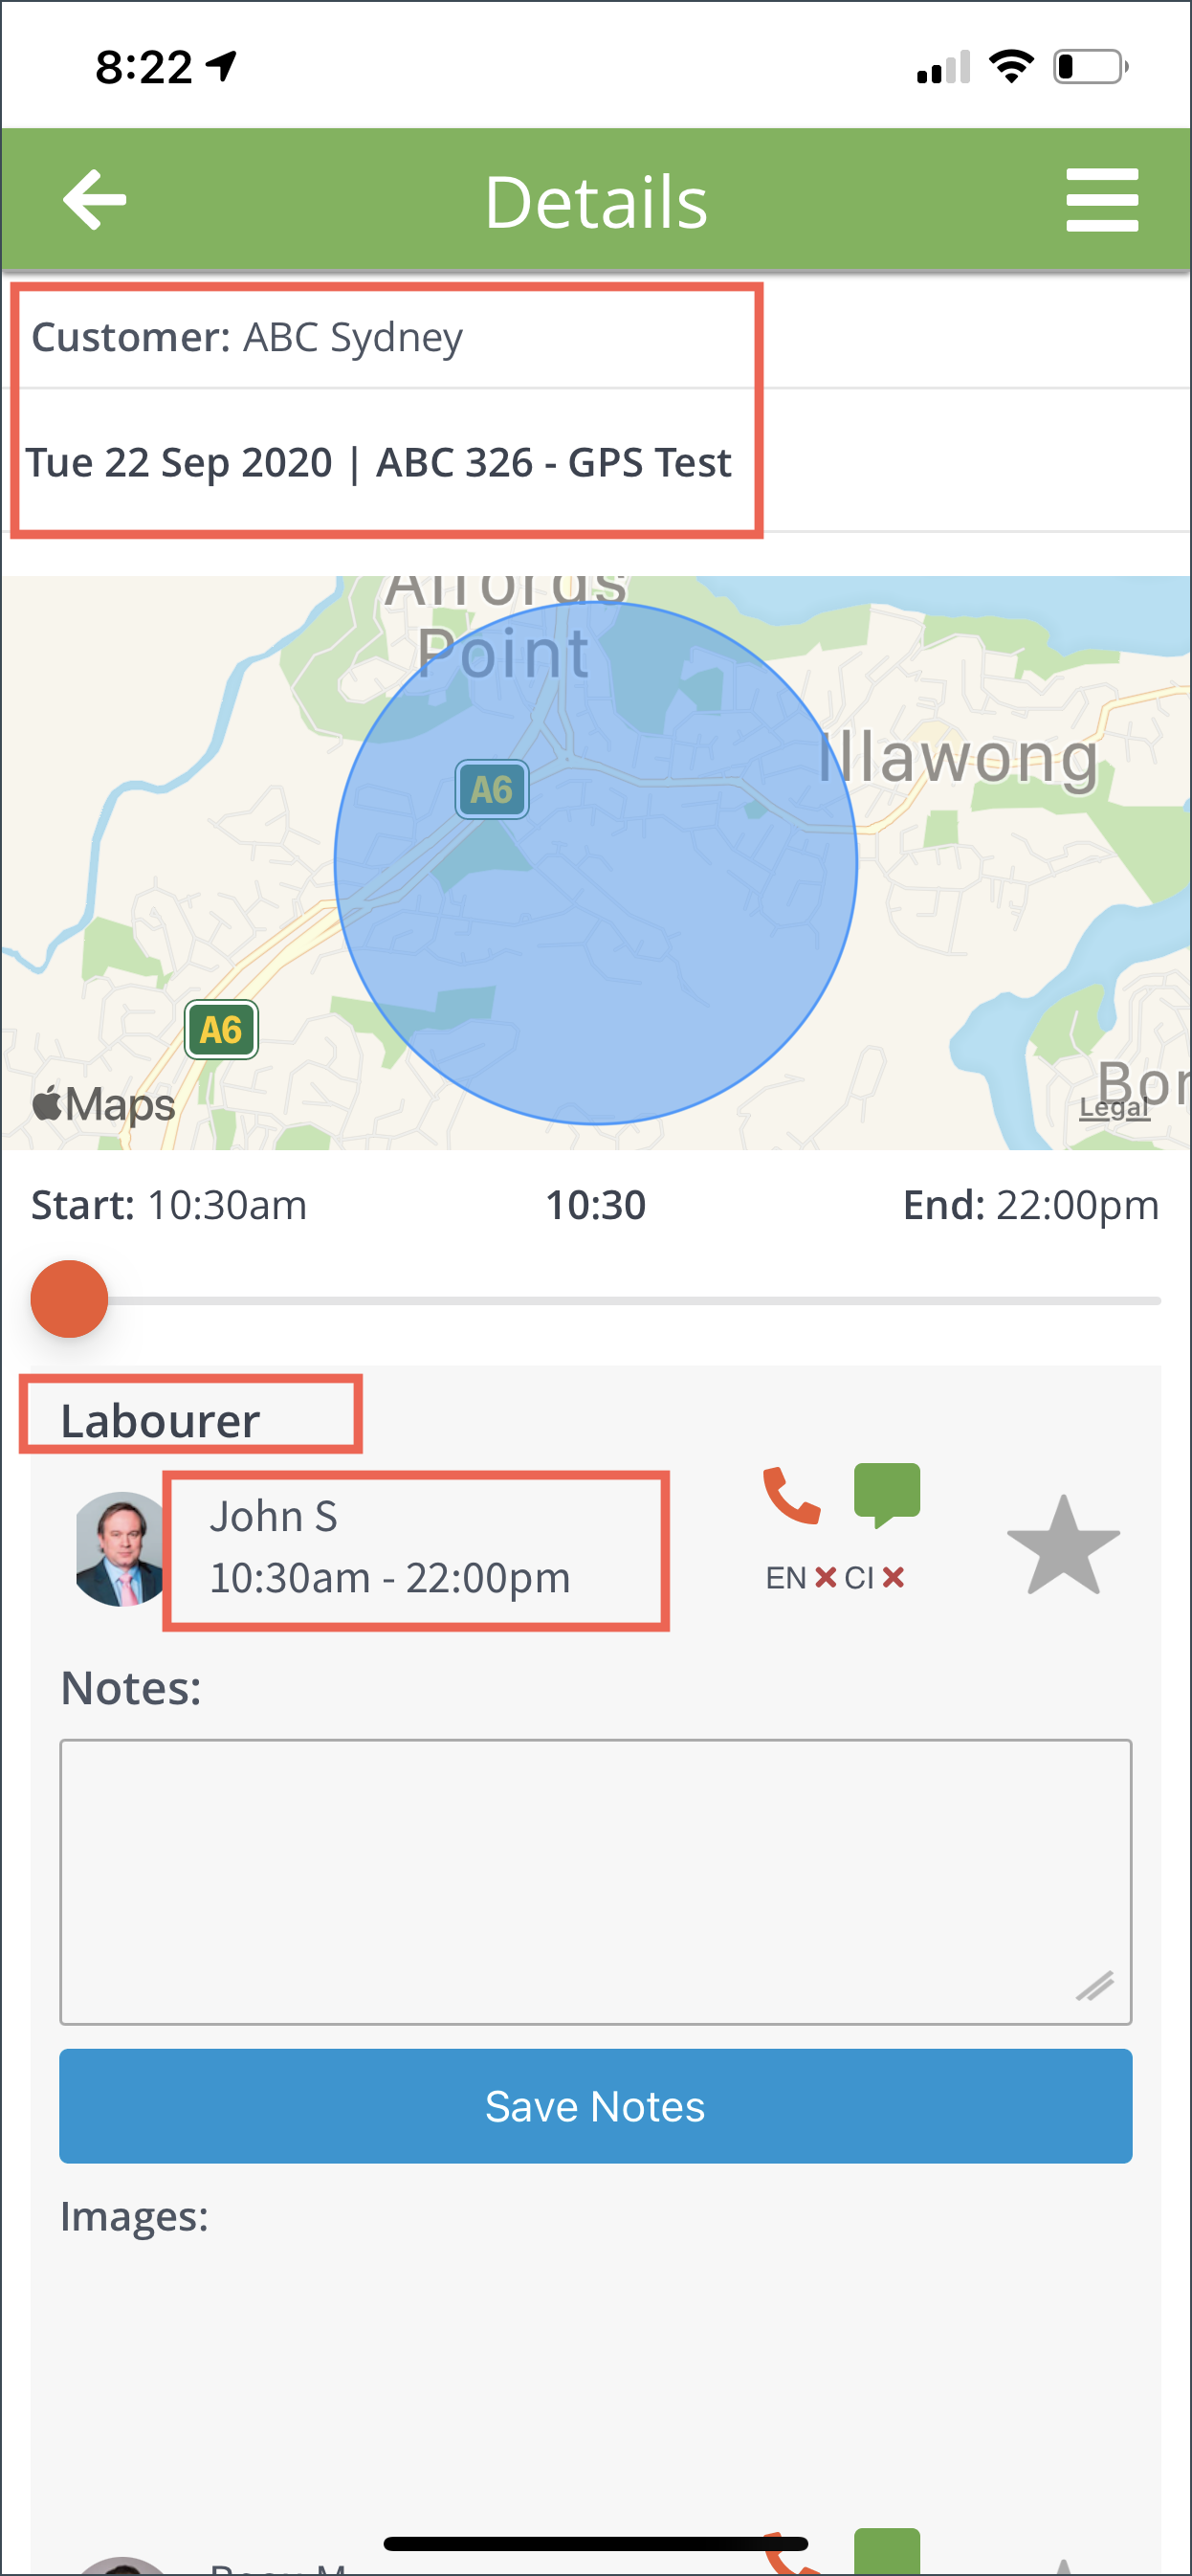
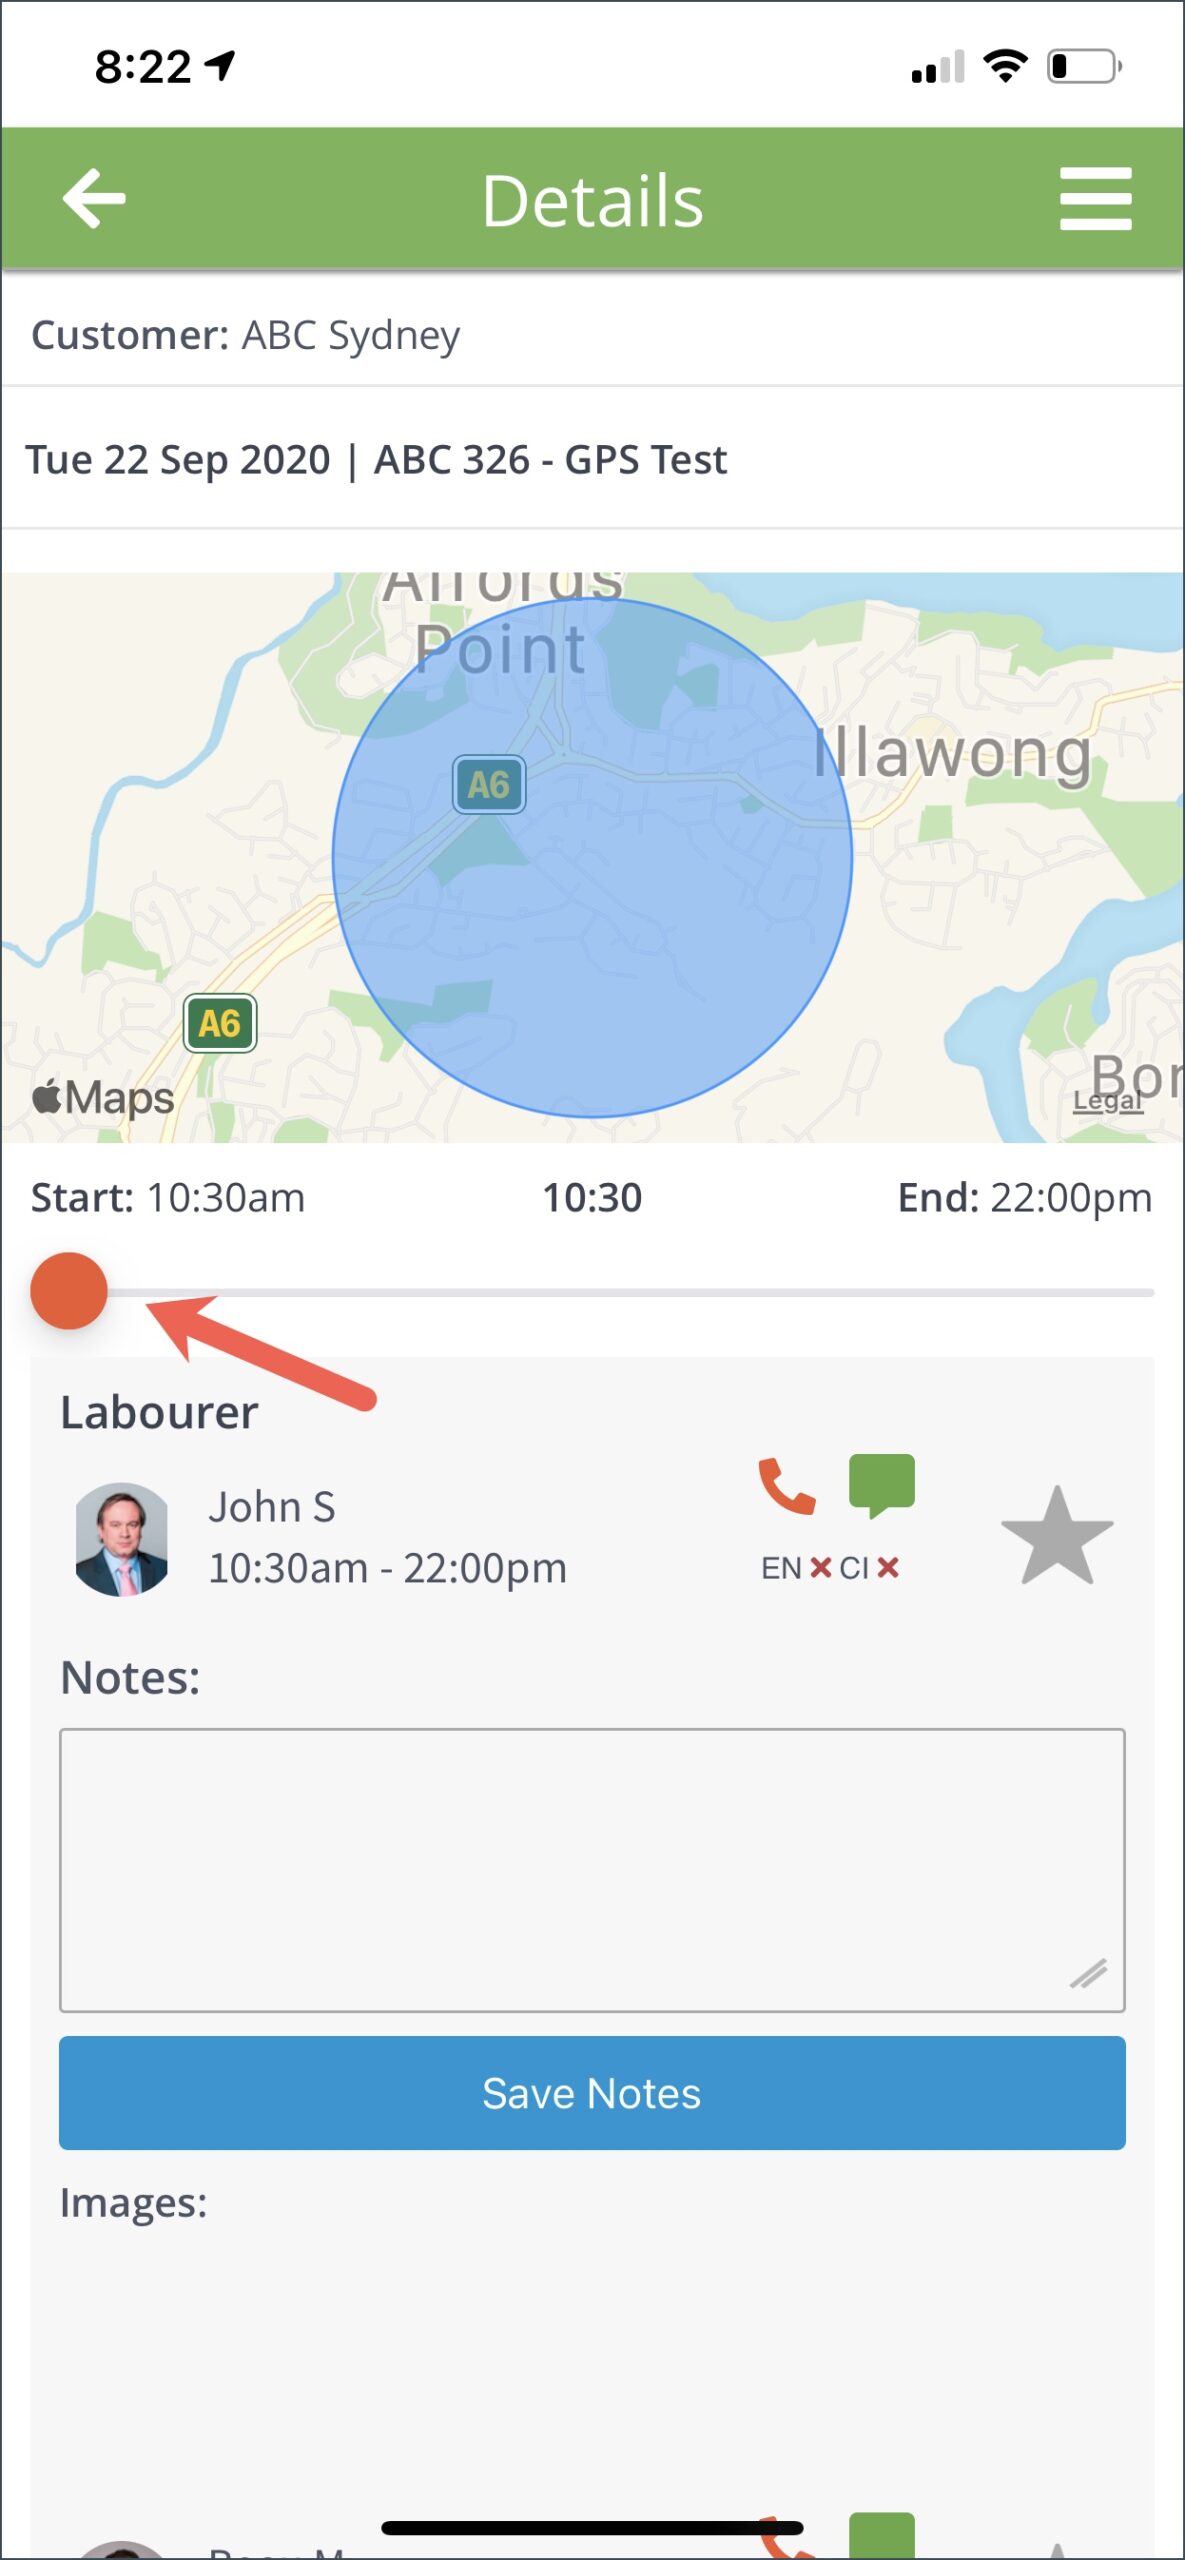
GPS MAP
The GPS maps will display a pin representing the crew members. The pin will determine if the crew is within the vicinity of the job location.

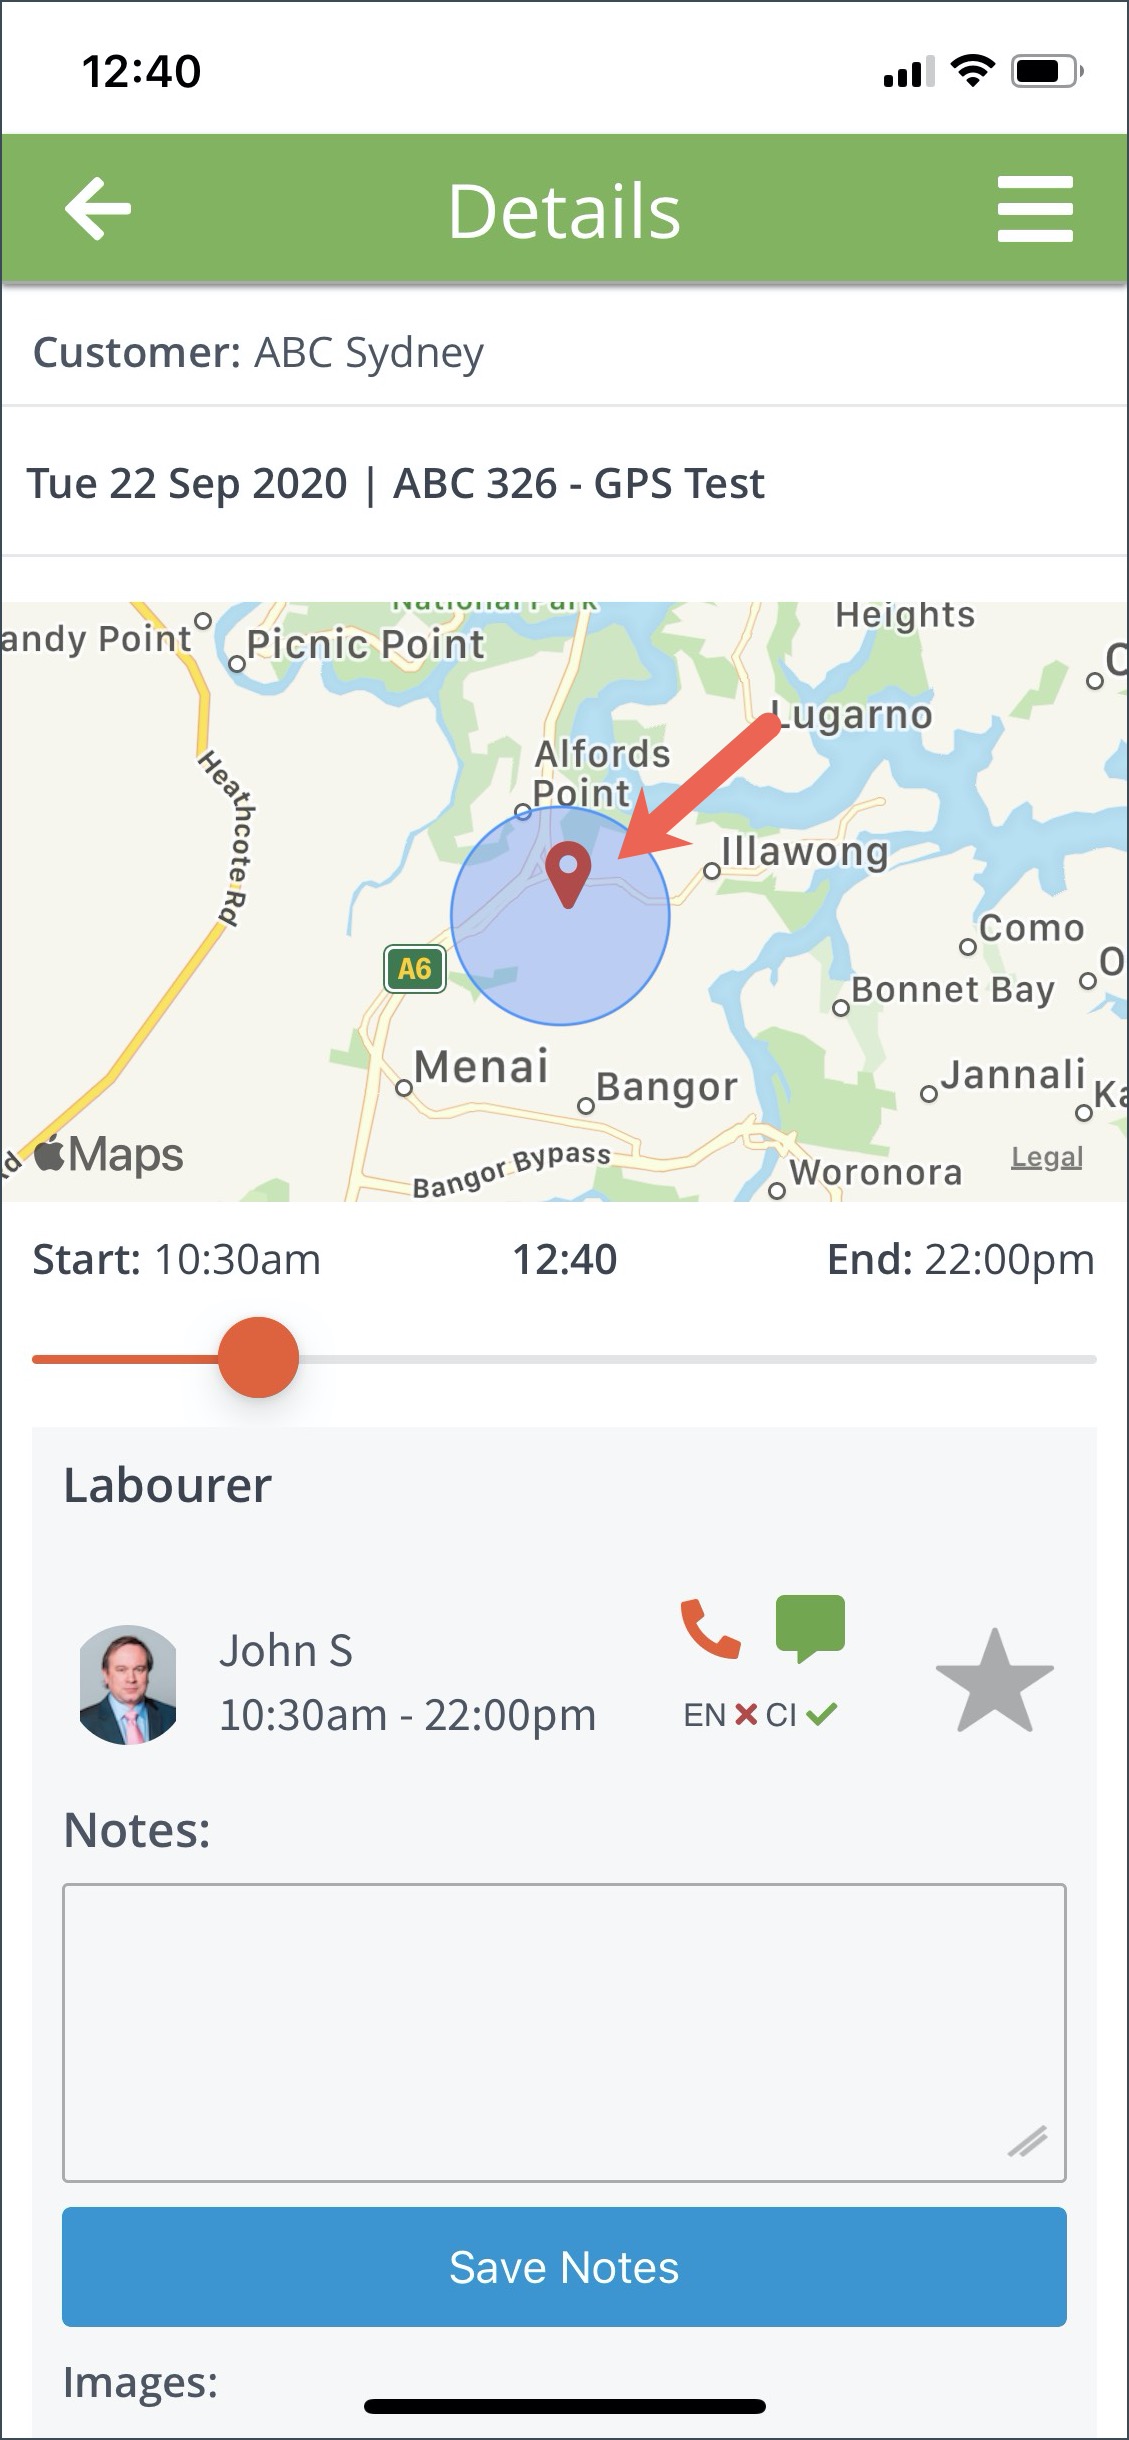
You can also slide the timer to see the whereabouts of the crew on a given time.
APP COMMUNICATION
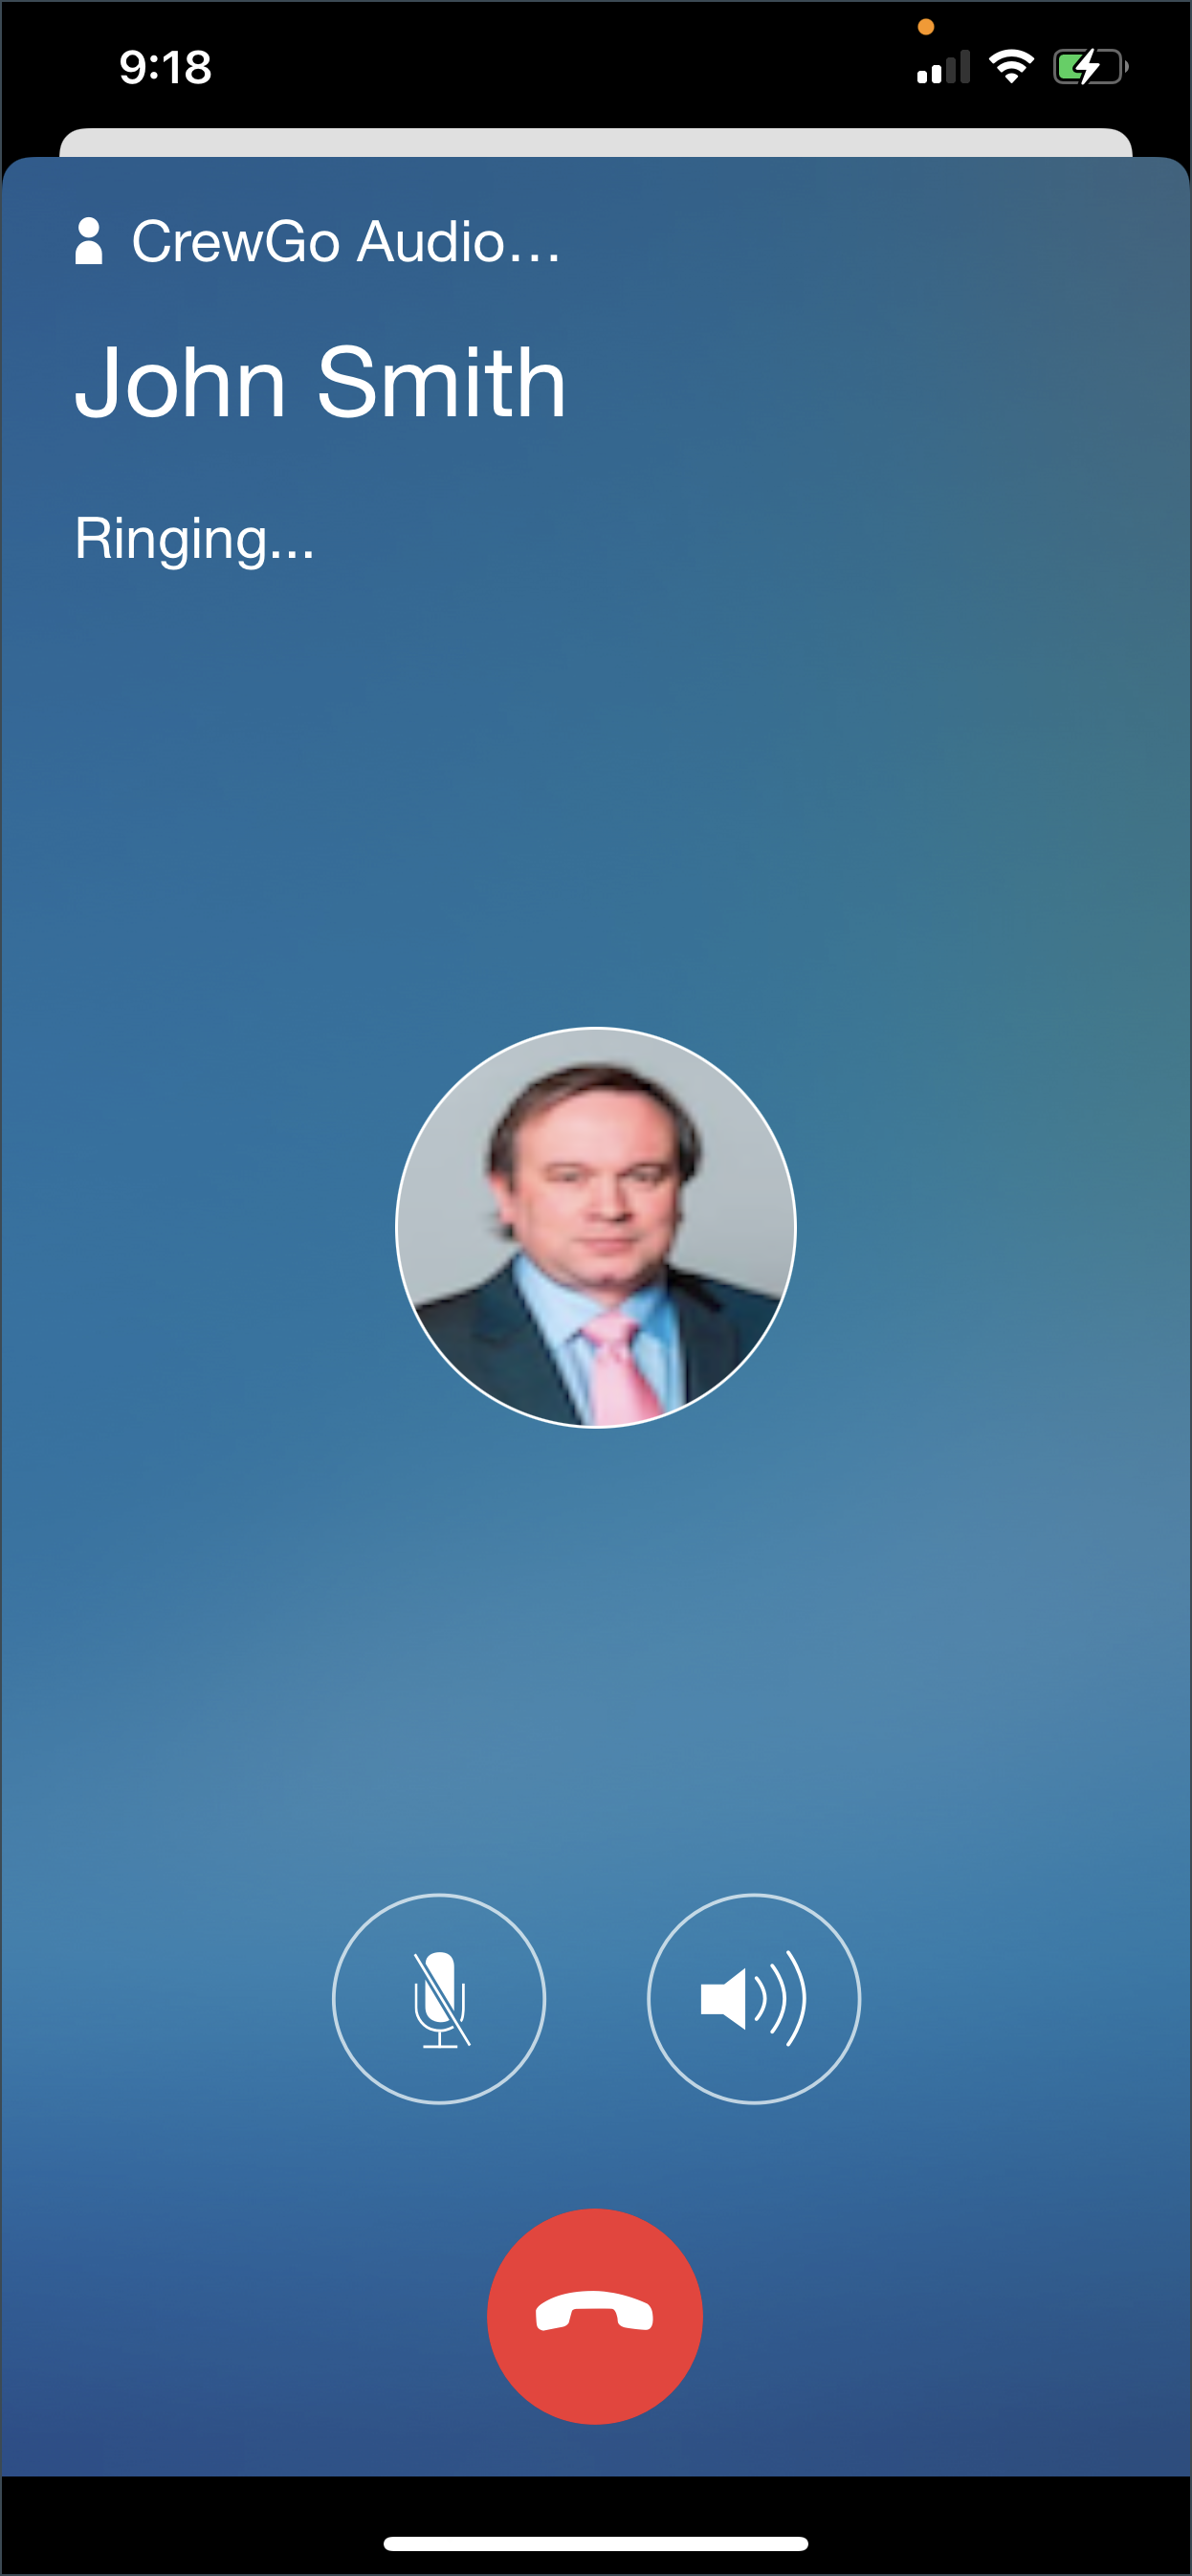
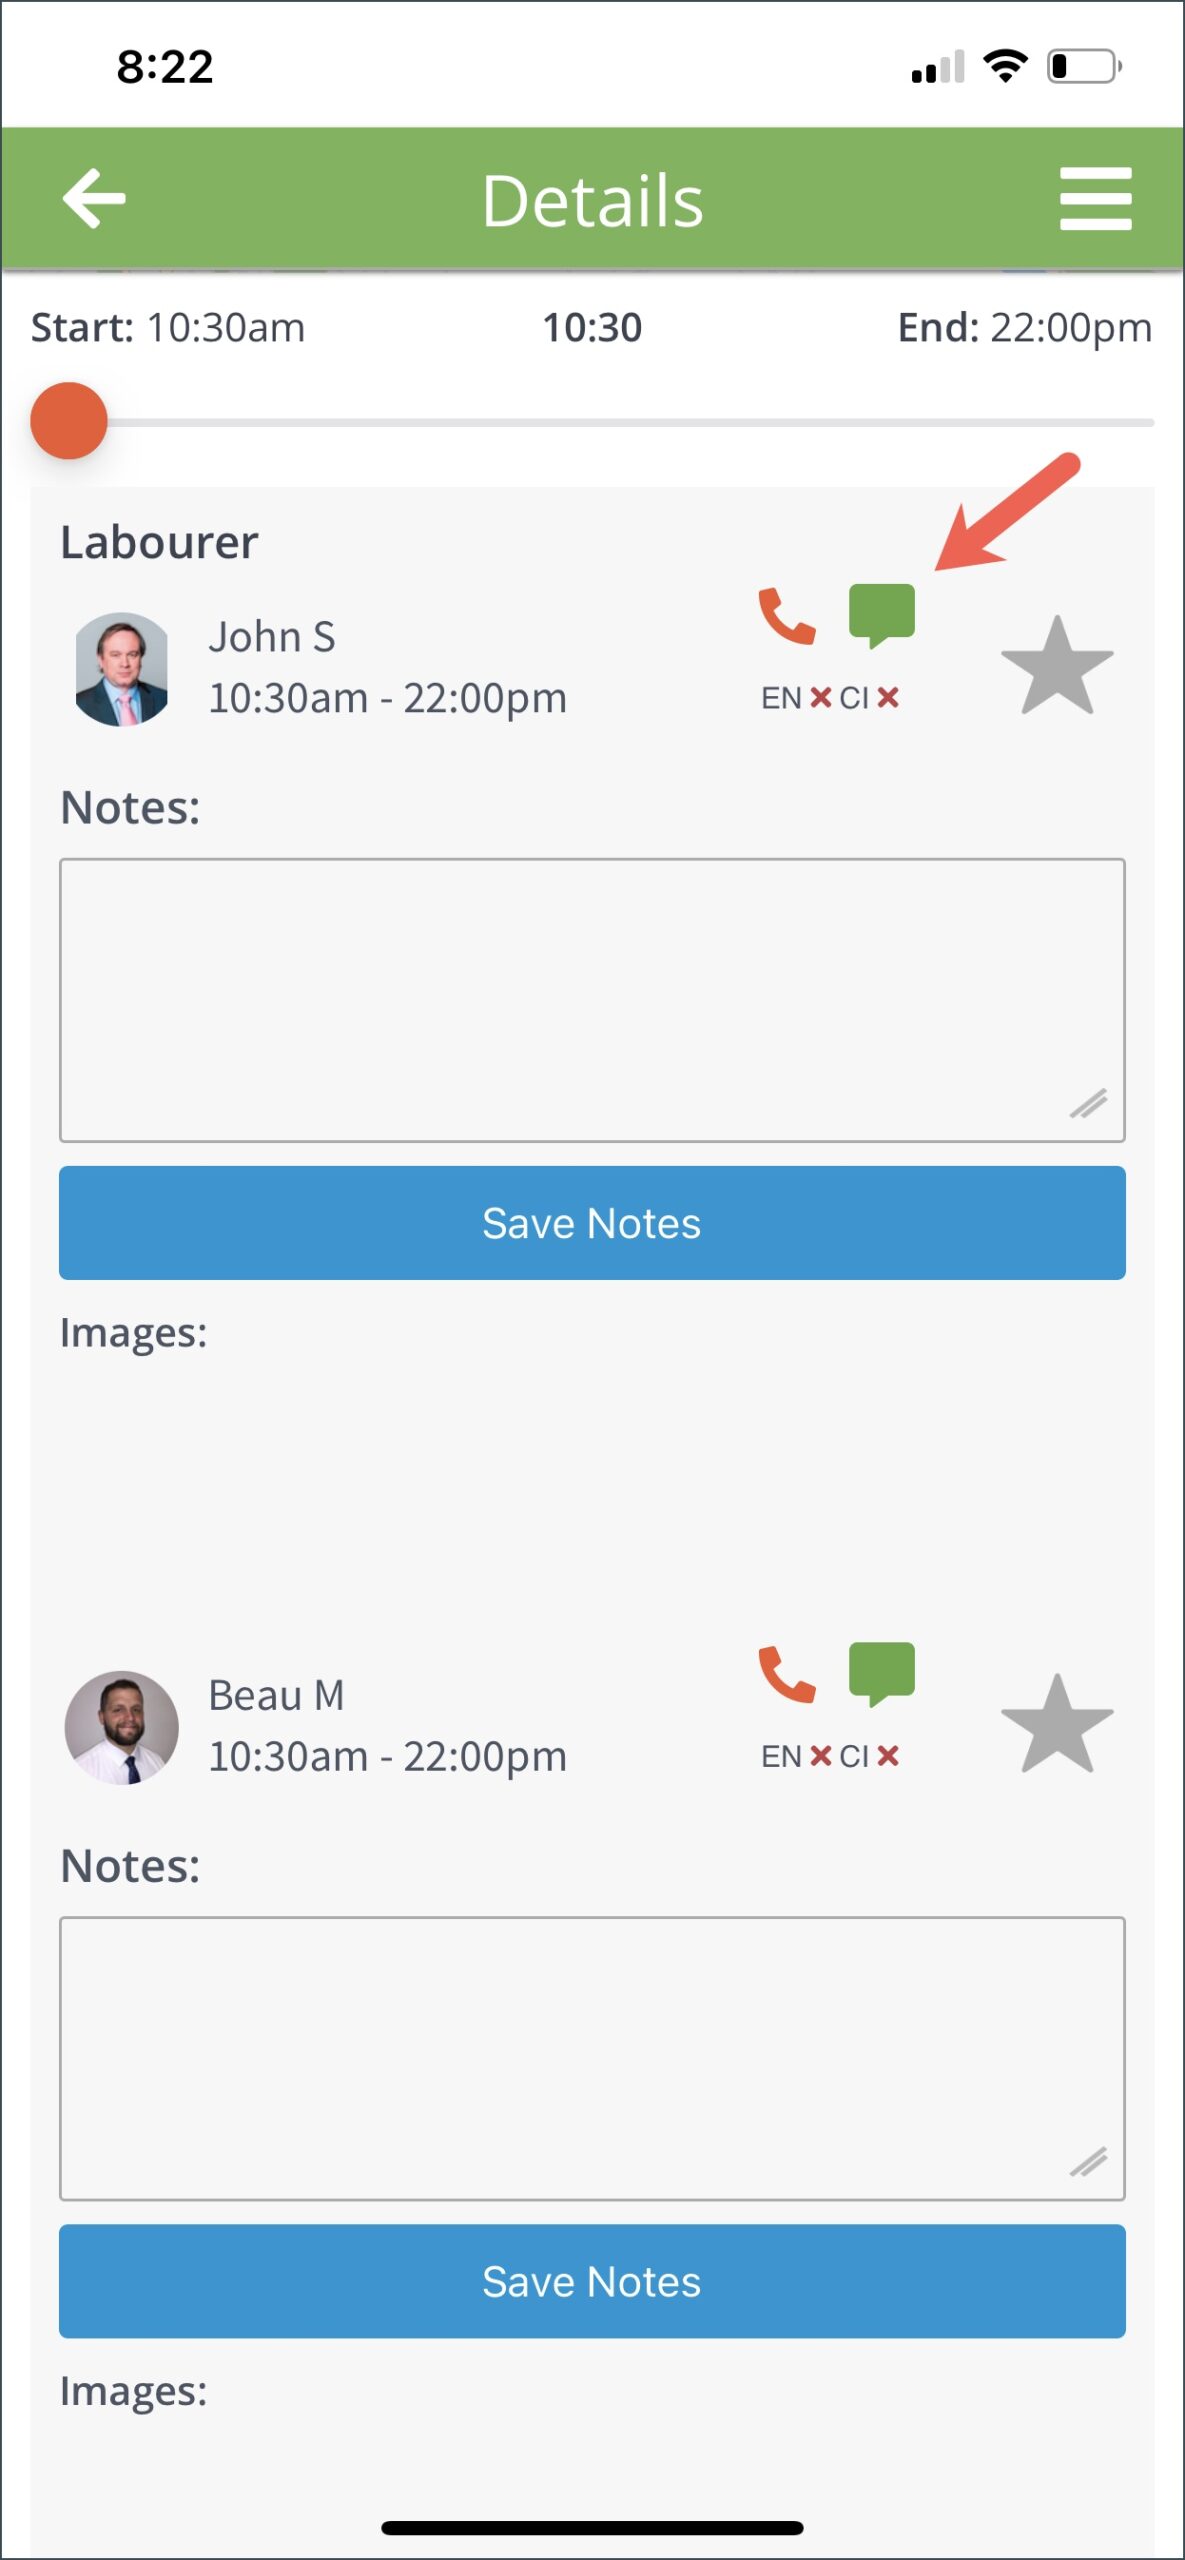
On the Job Details page, you can call or send a message to the staff.
Simply tap on the phone icon of the staff to initiate the call.
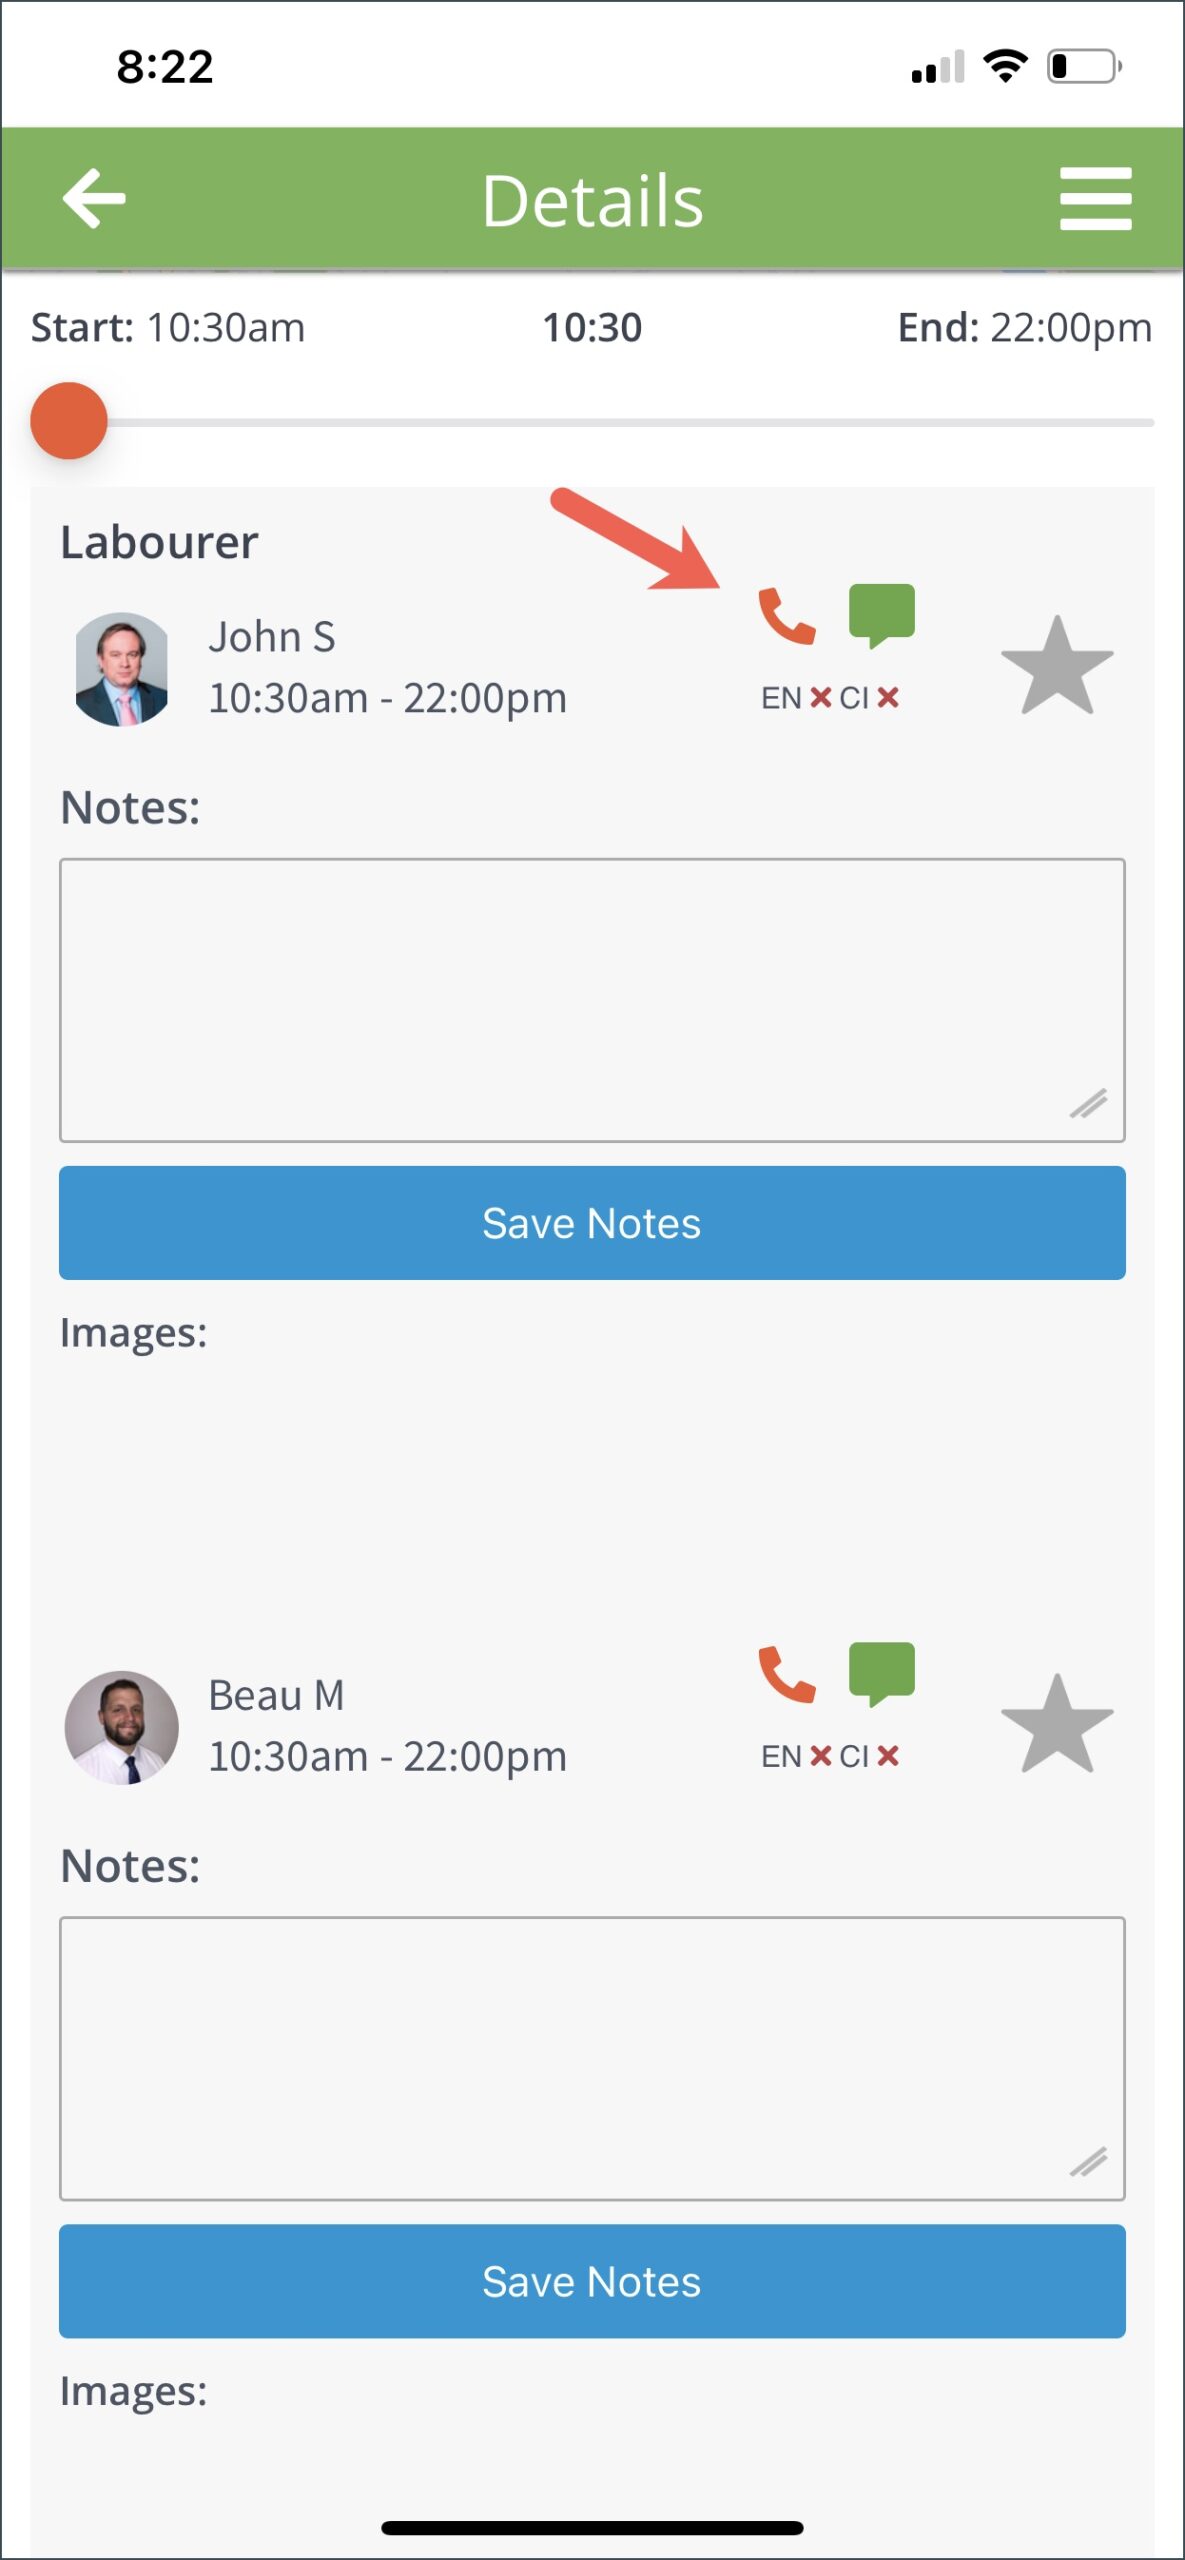
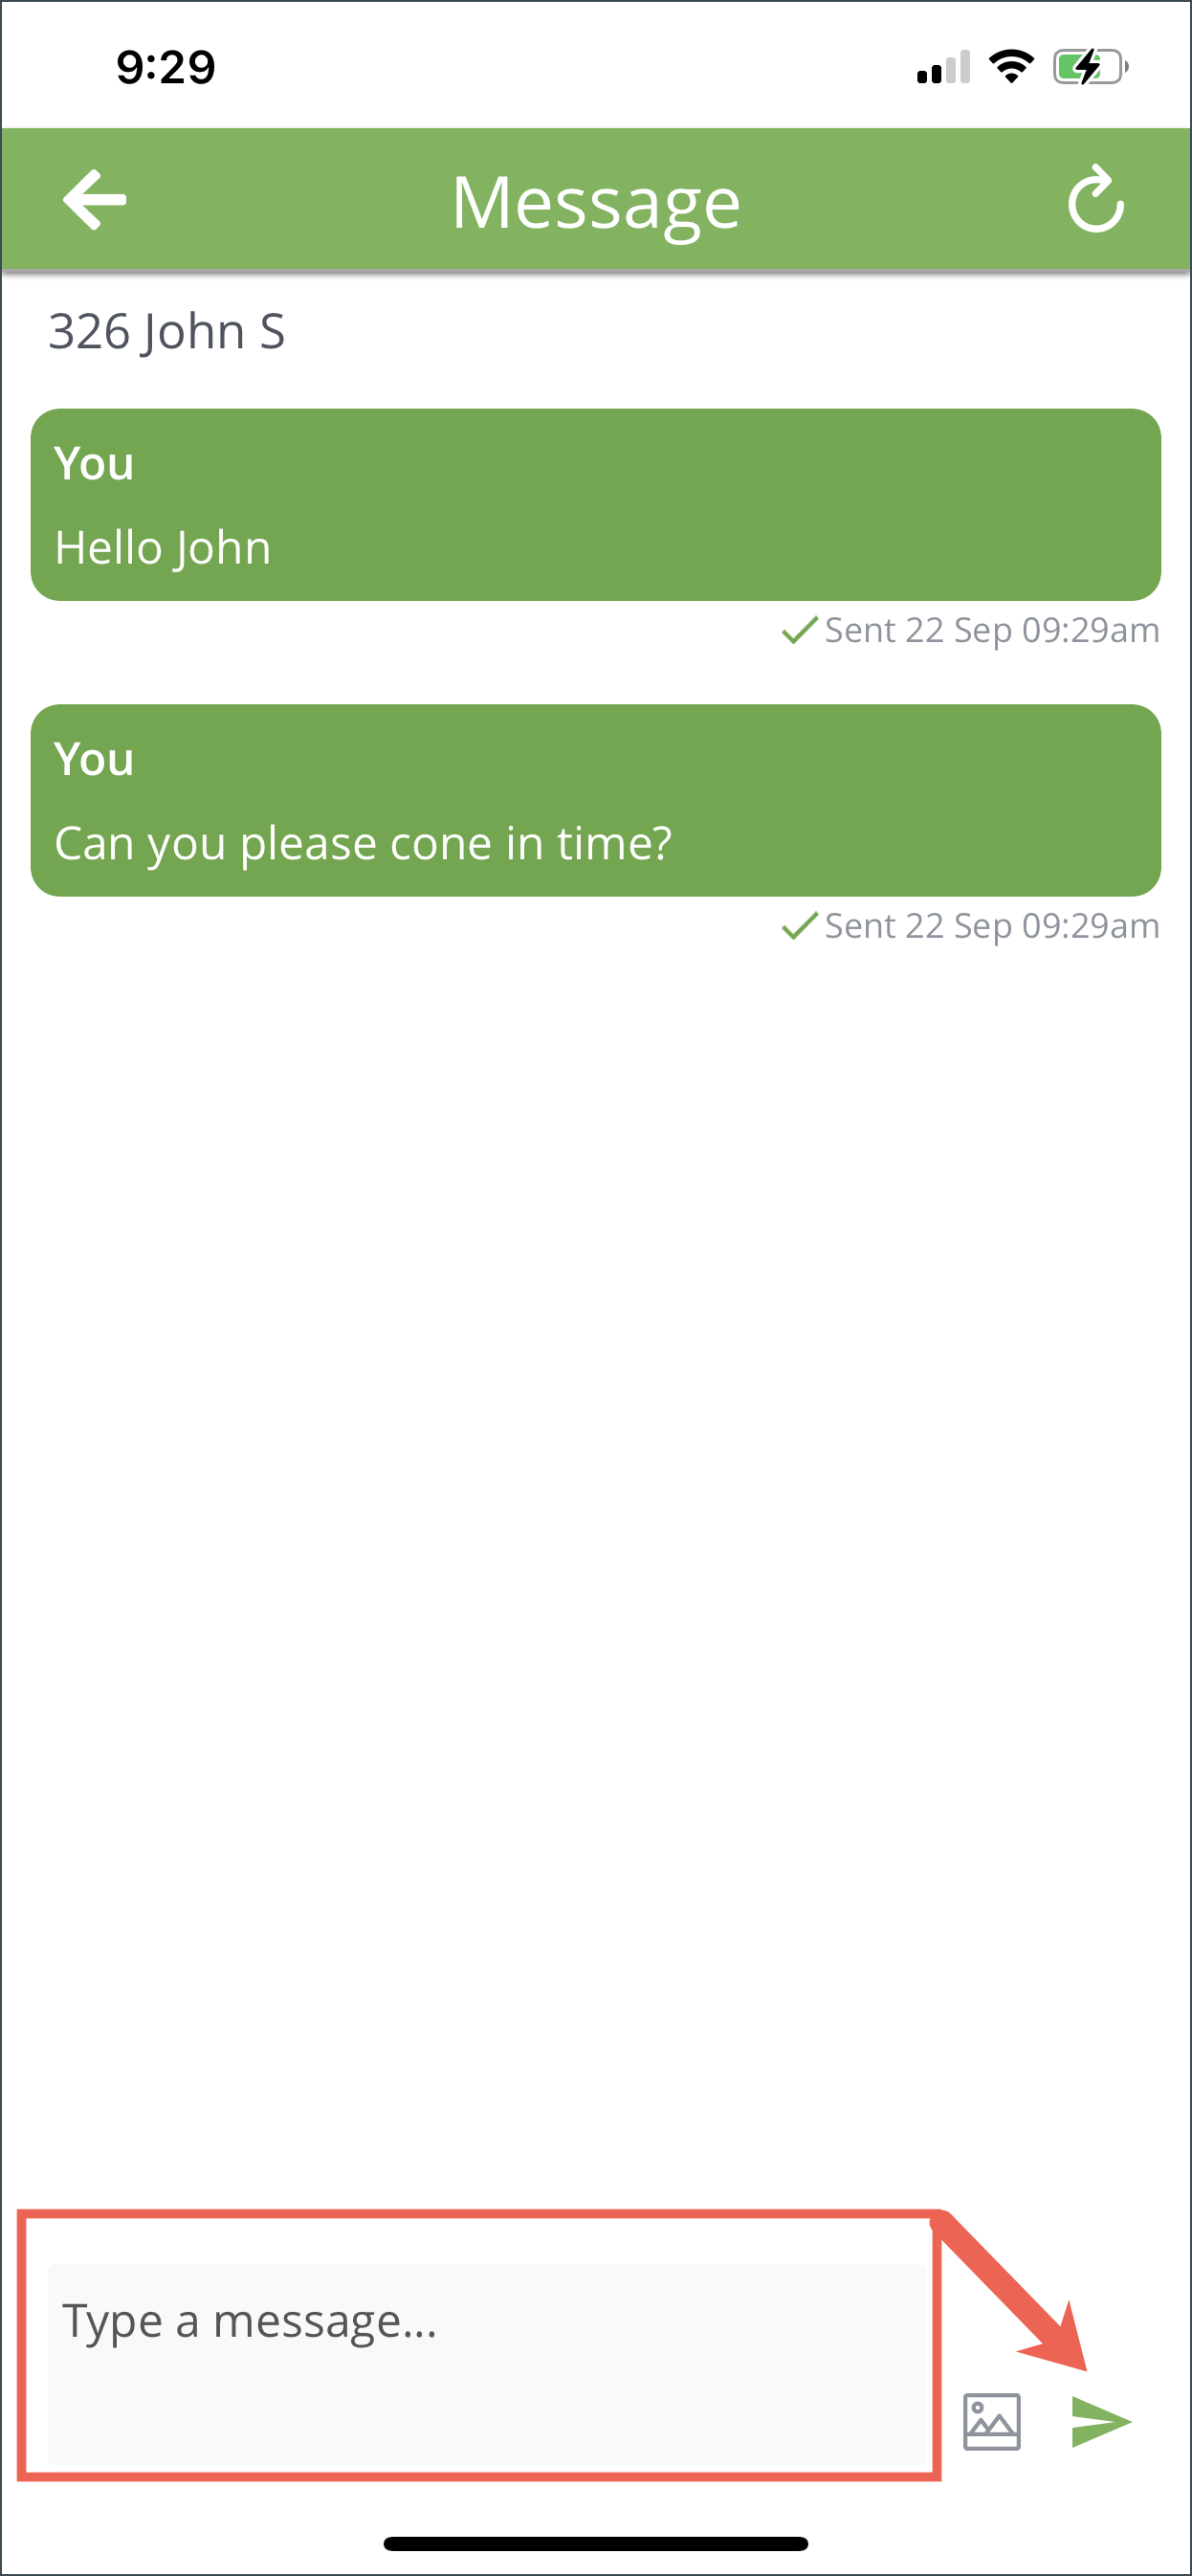
Tap the message icon to start a chat with the selected crew.
Start typing on the chat box and click the send icon.
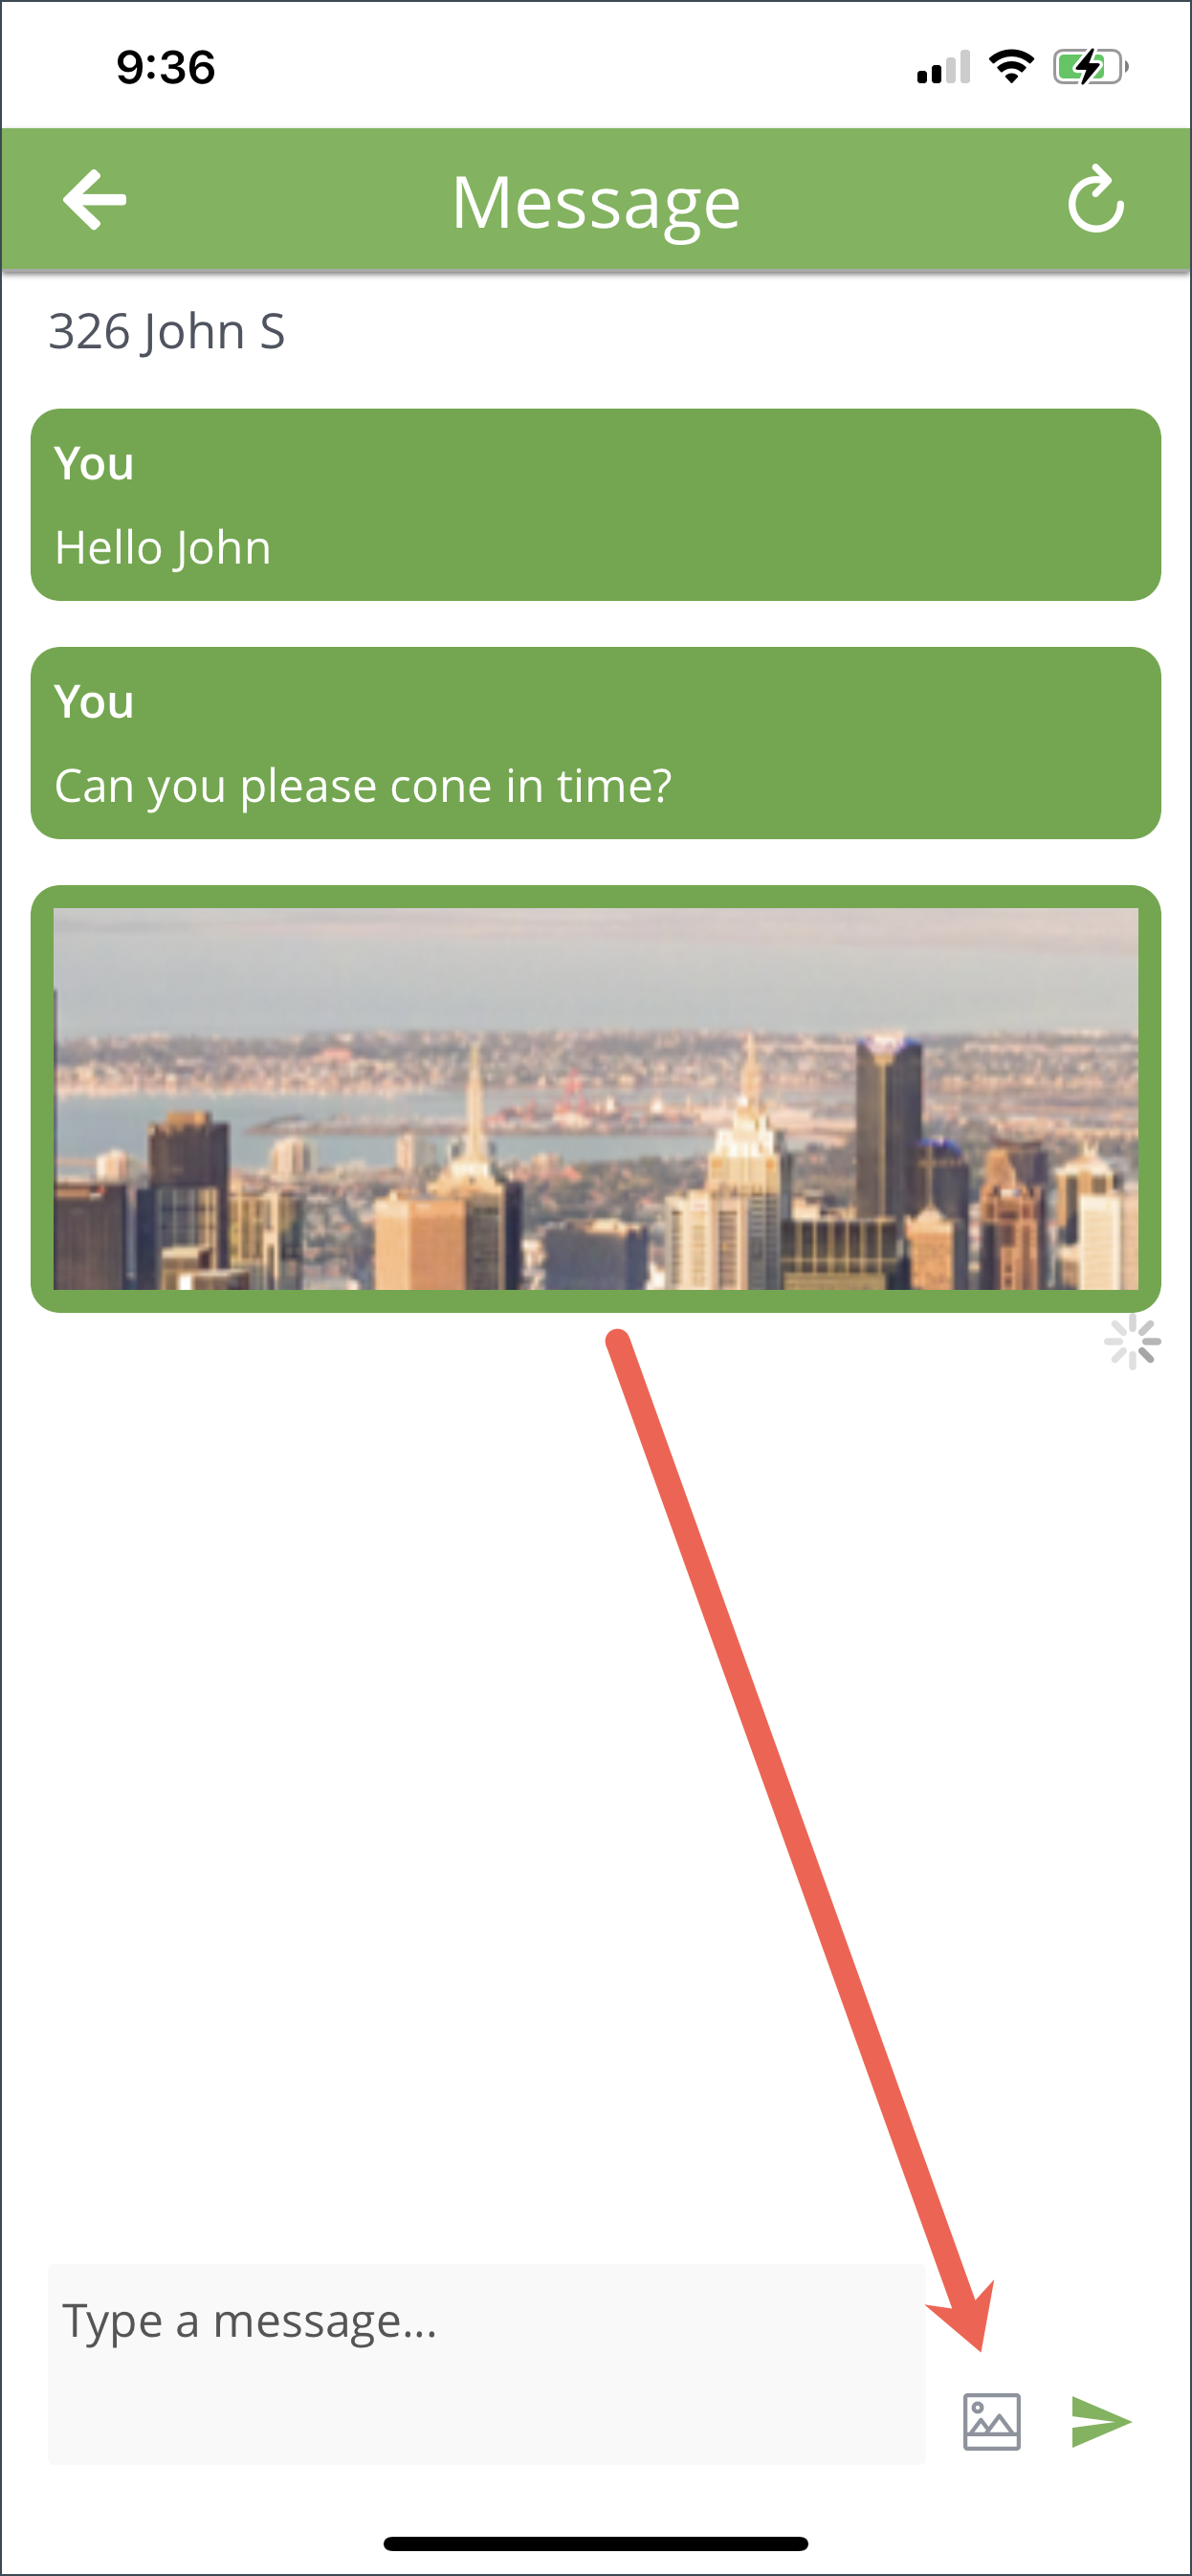
You can also send a photo by tapping on the photo icon.
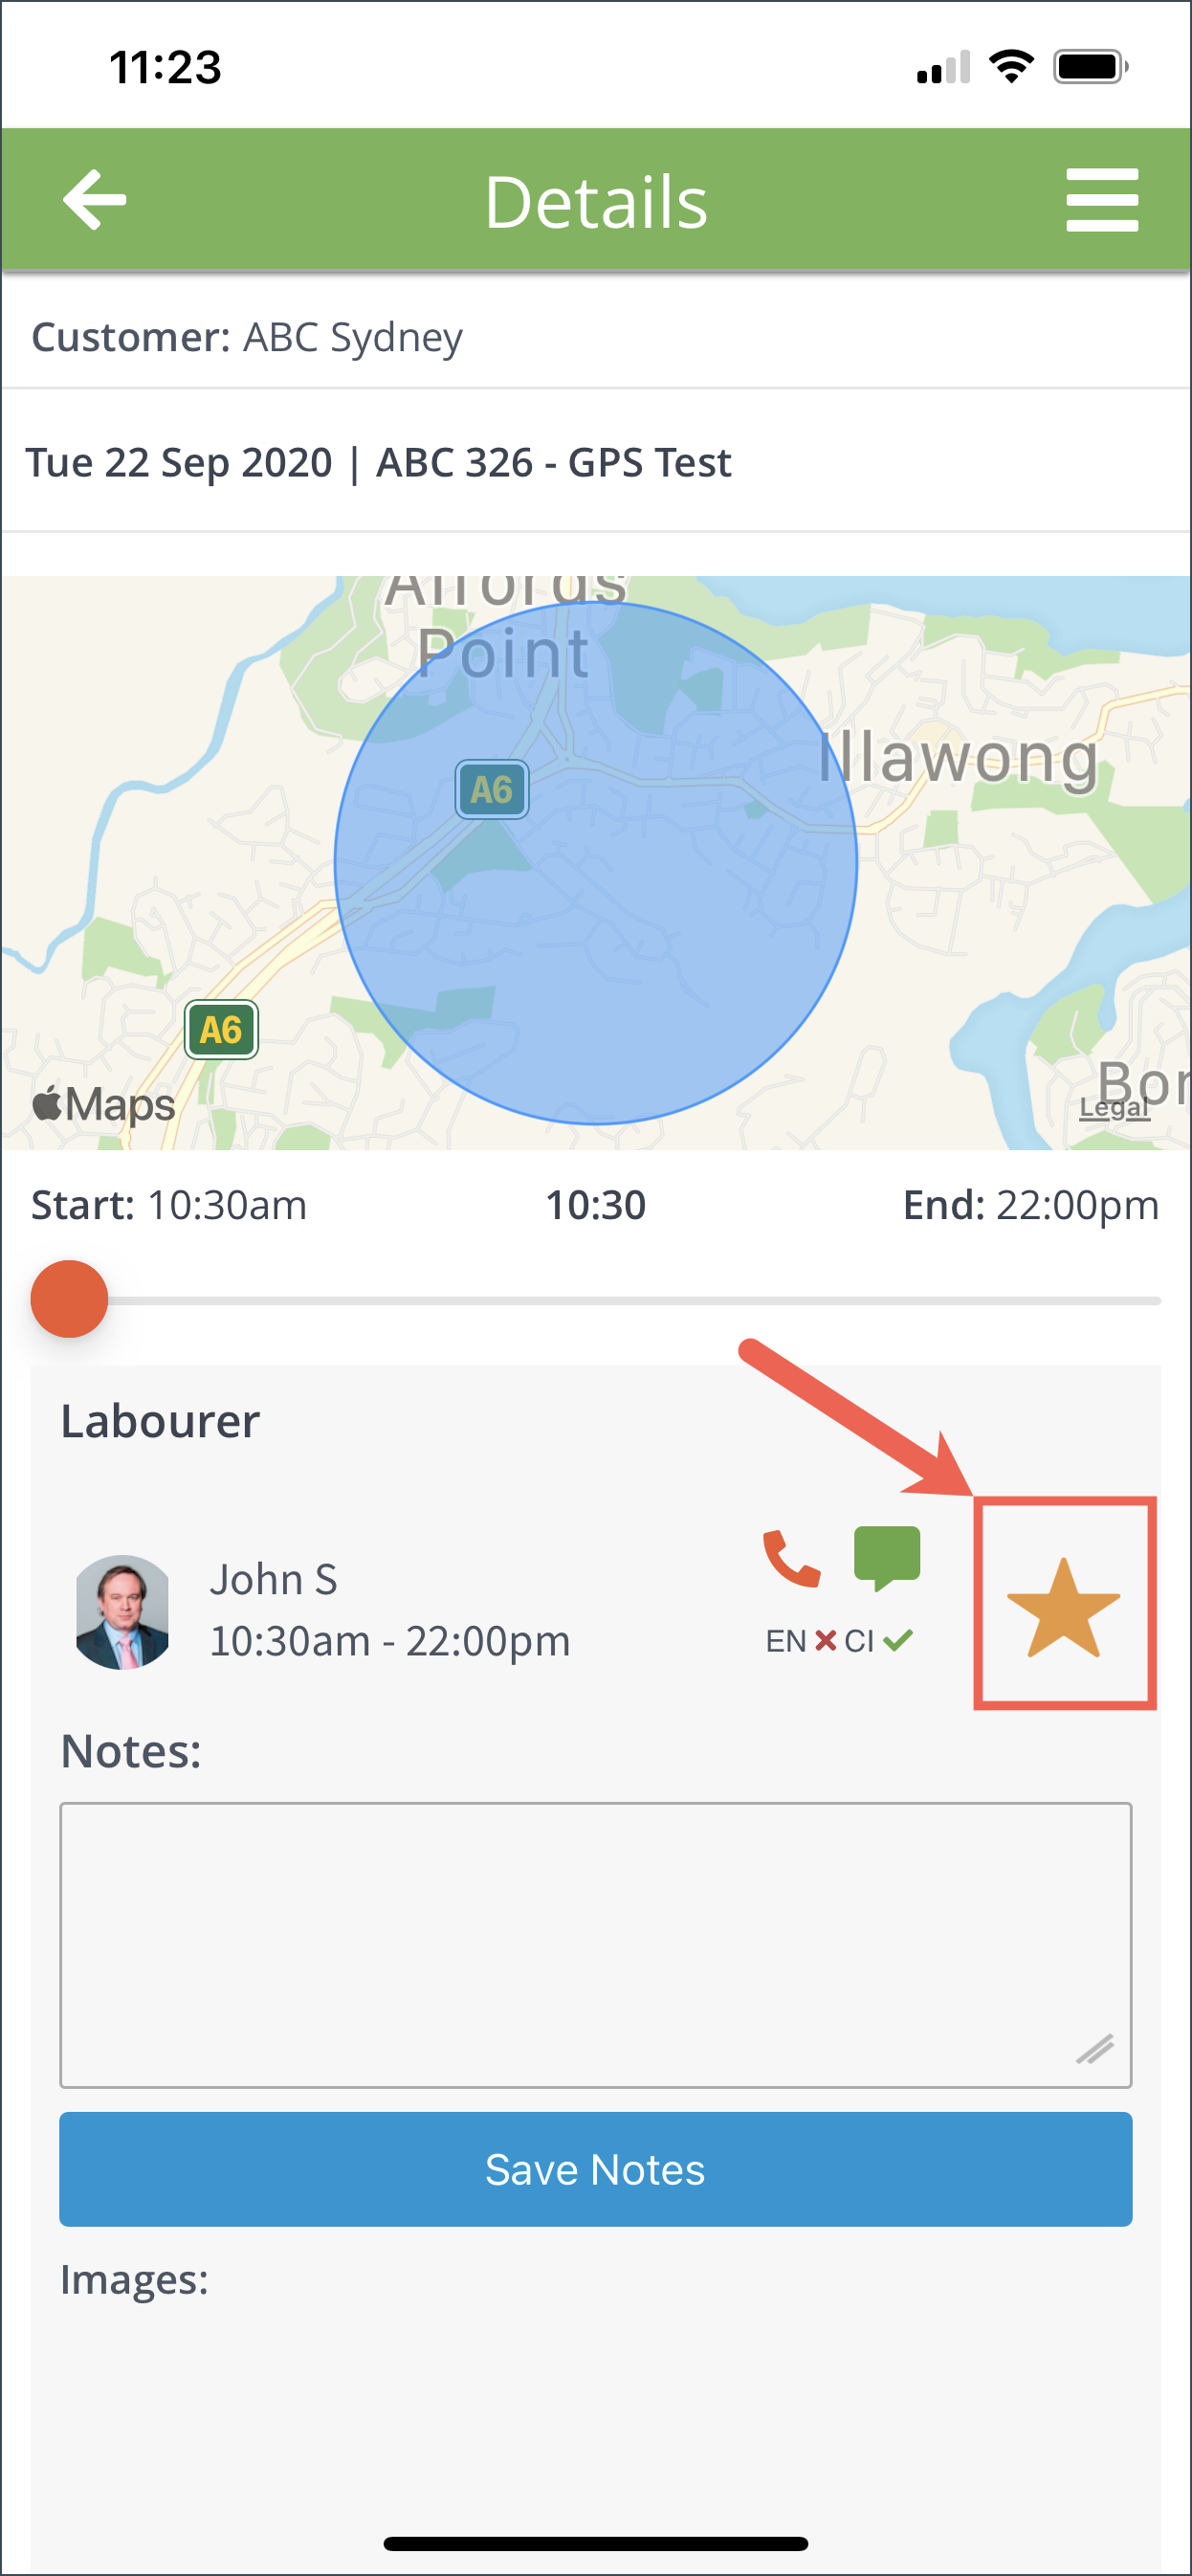
STAR RATING
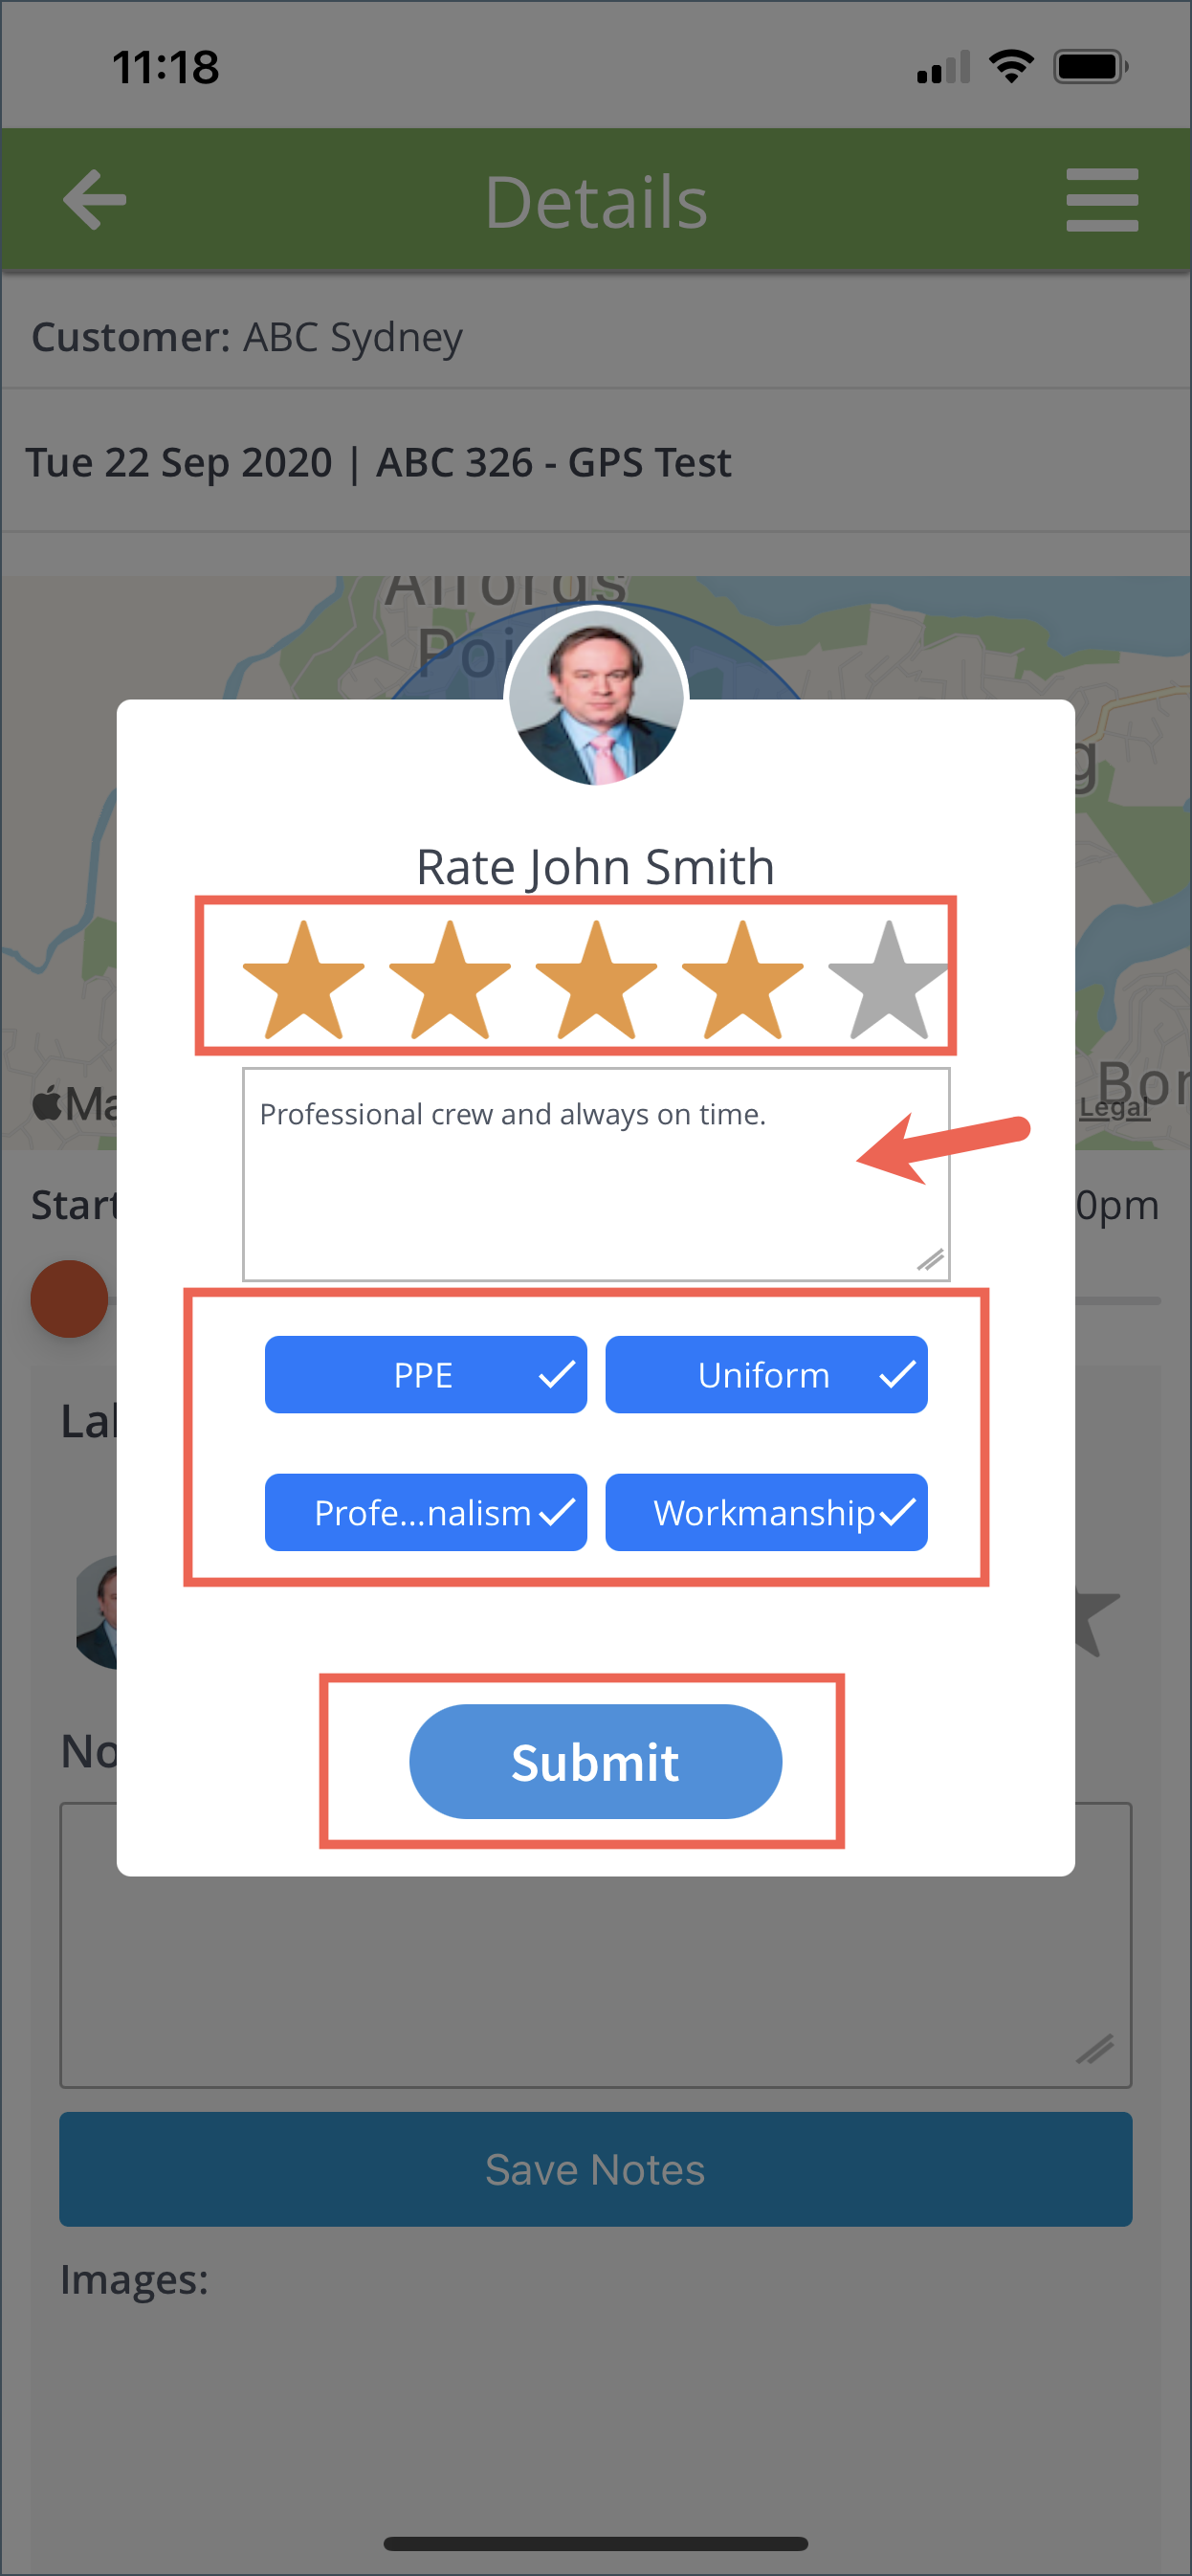
You can rate the star based on his performance. Tap the star icon to open the rating pop-up.
Select the number of stars for the rating of the crew.
You may also leave your feedback and tap the boxes below if they have complete PPE, Uniform, shown Professionalism and workmanship during the entire shift.
Note: The conditions like PPE, Uniform, Professionalism, etc. are configured on the Admin Portal. The content may vary from one client to another.
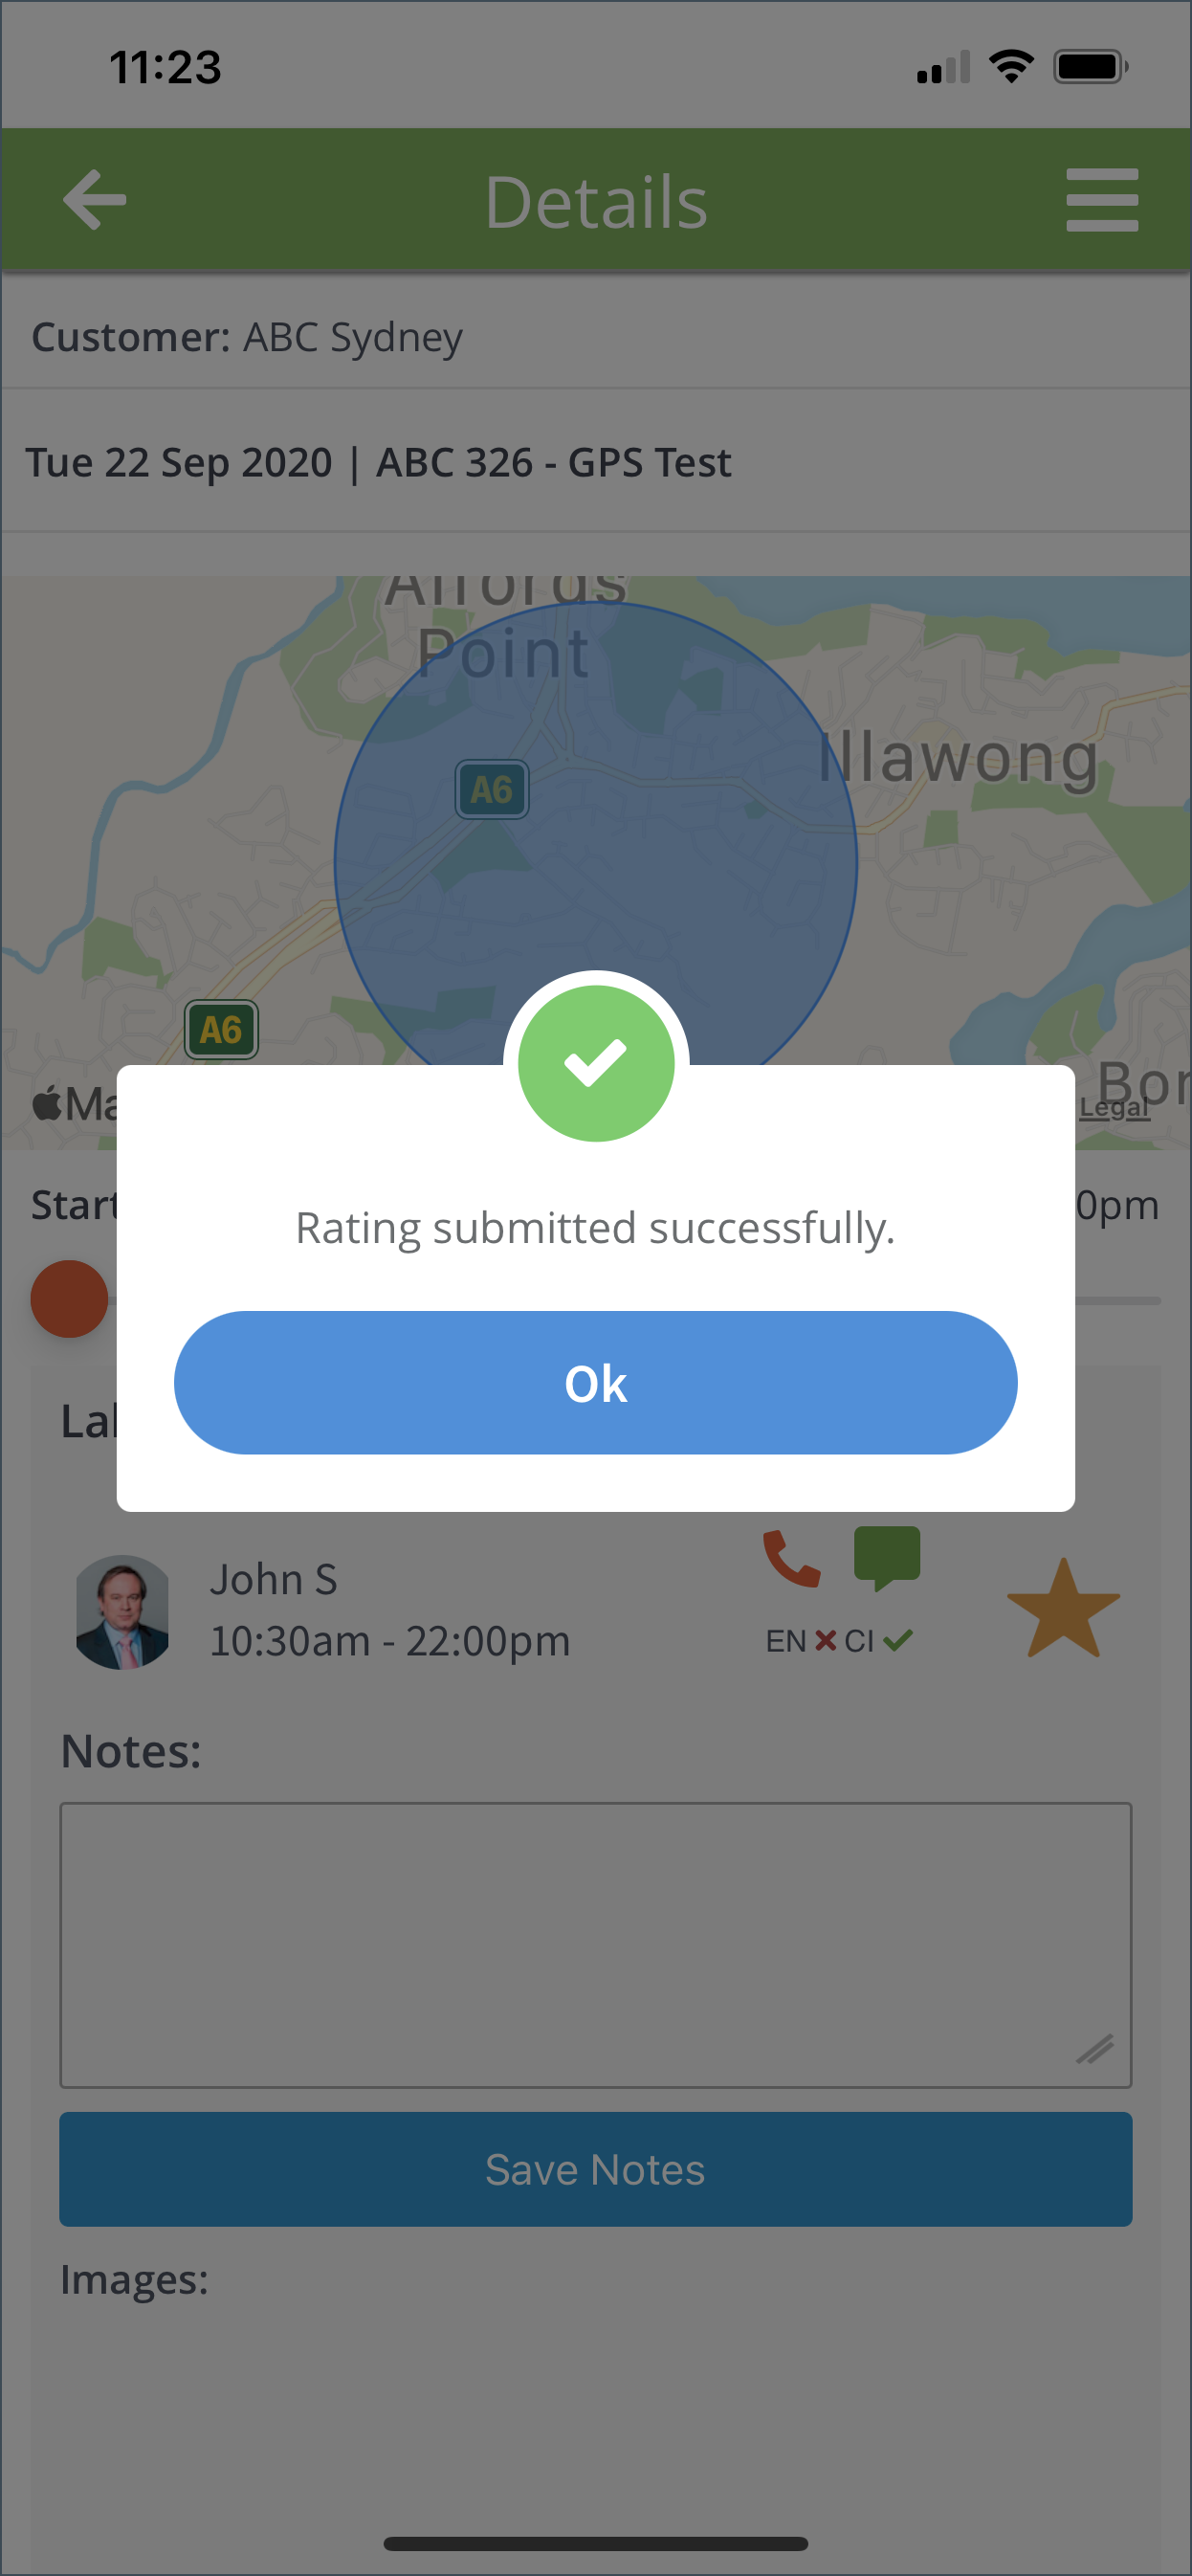
Once the rating is completed, click Submit.
![]()
Rating is submitted successfully and the star icon color will change to yellow.
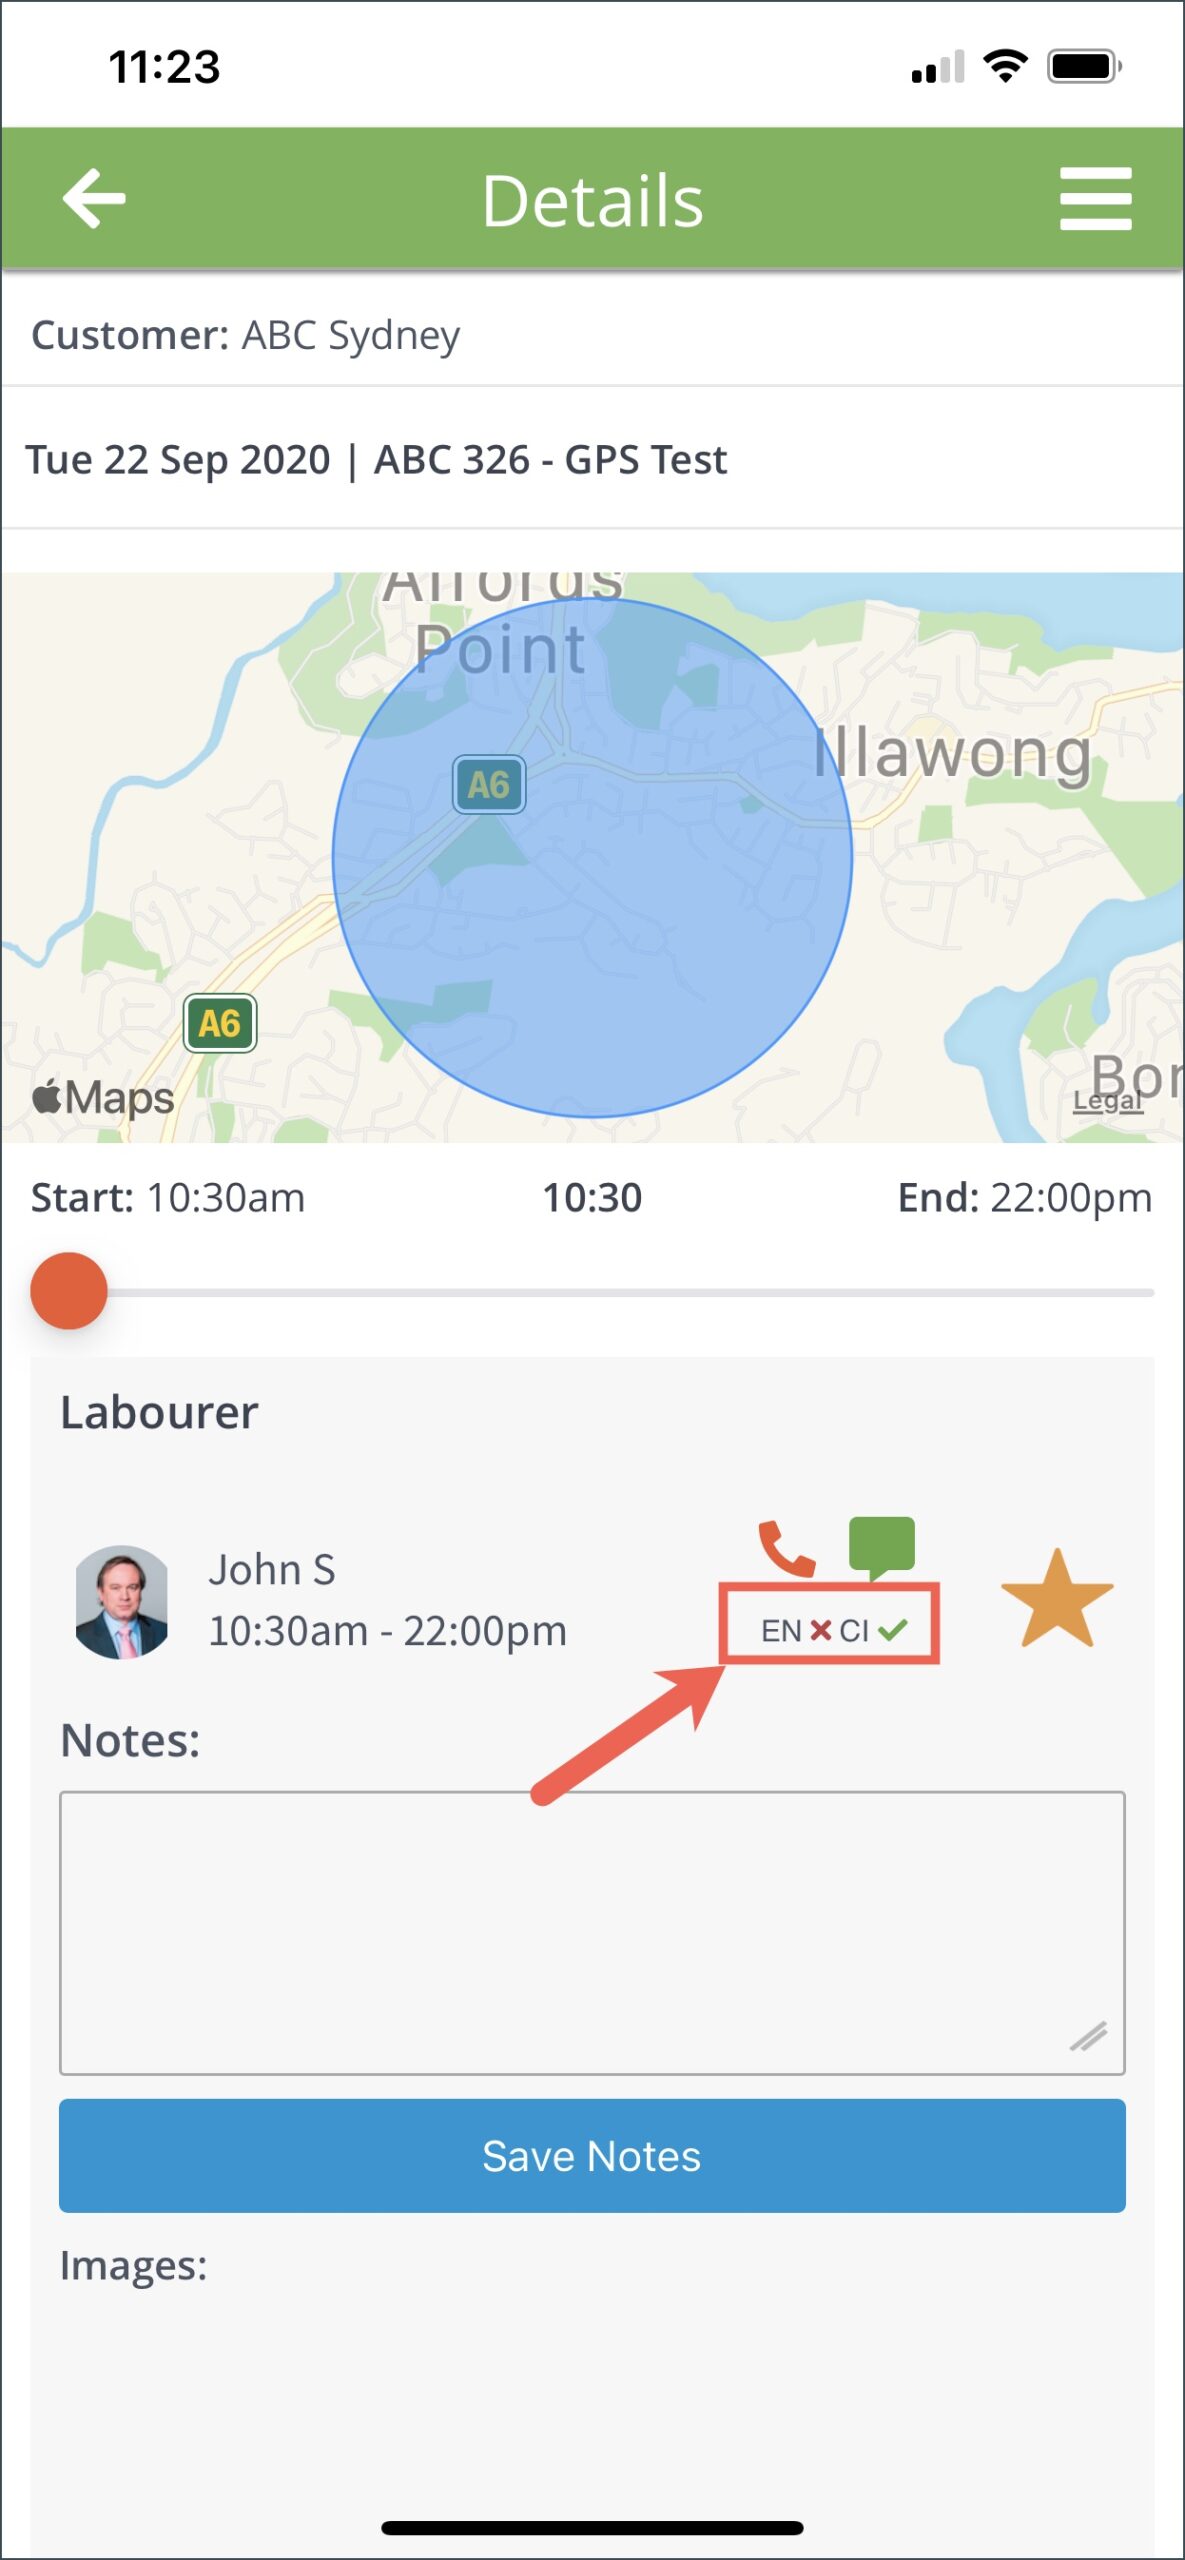
EN ROUTE and CHECK IN
En Route (EN) – a notification will be sent to the crew if they are en route to the job location. If they have confirmed to be en route, a check mark will appear next to “EN”.
Check In (CI) – once crew has checked in to the job, there will be a check symbol next to “CI”.
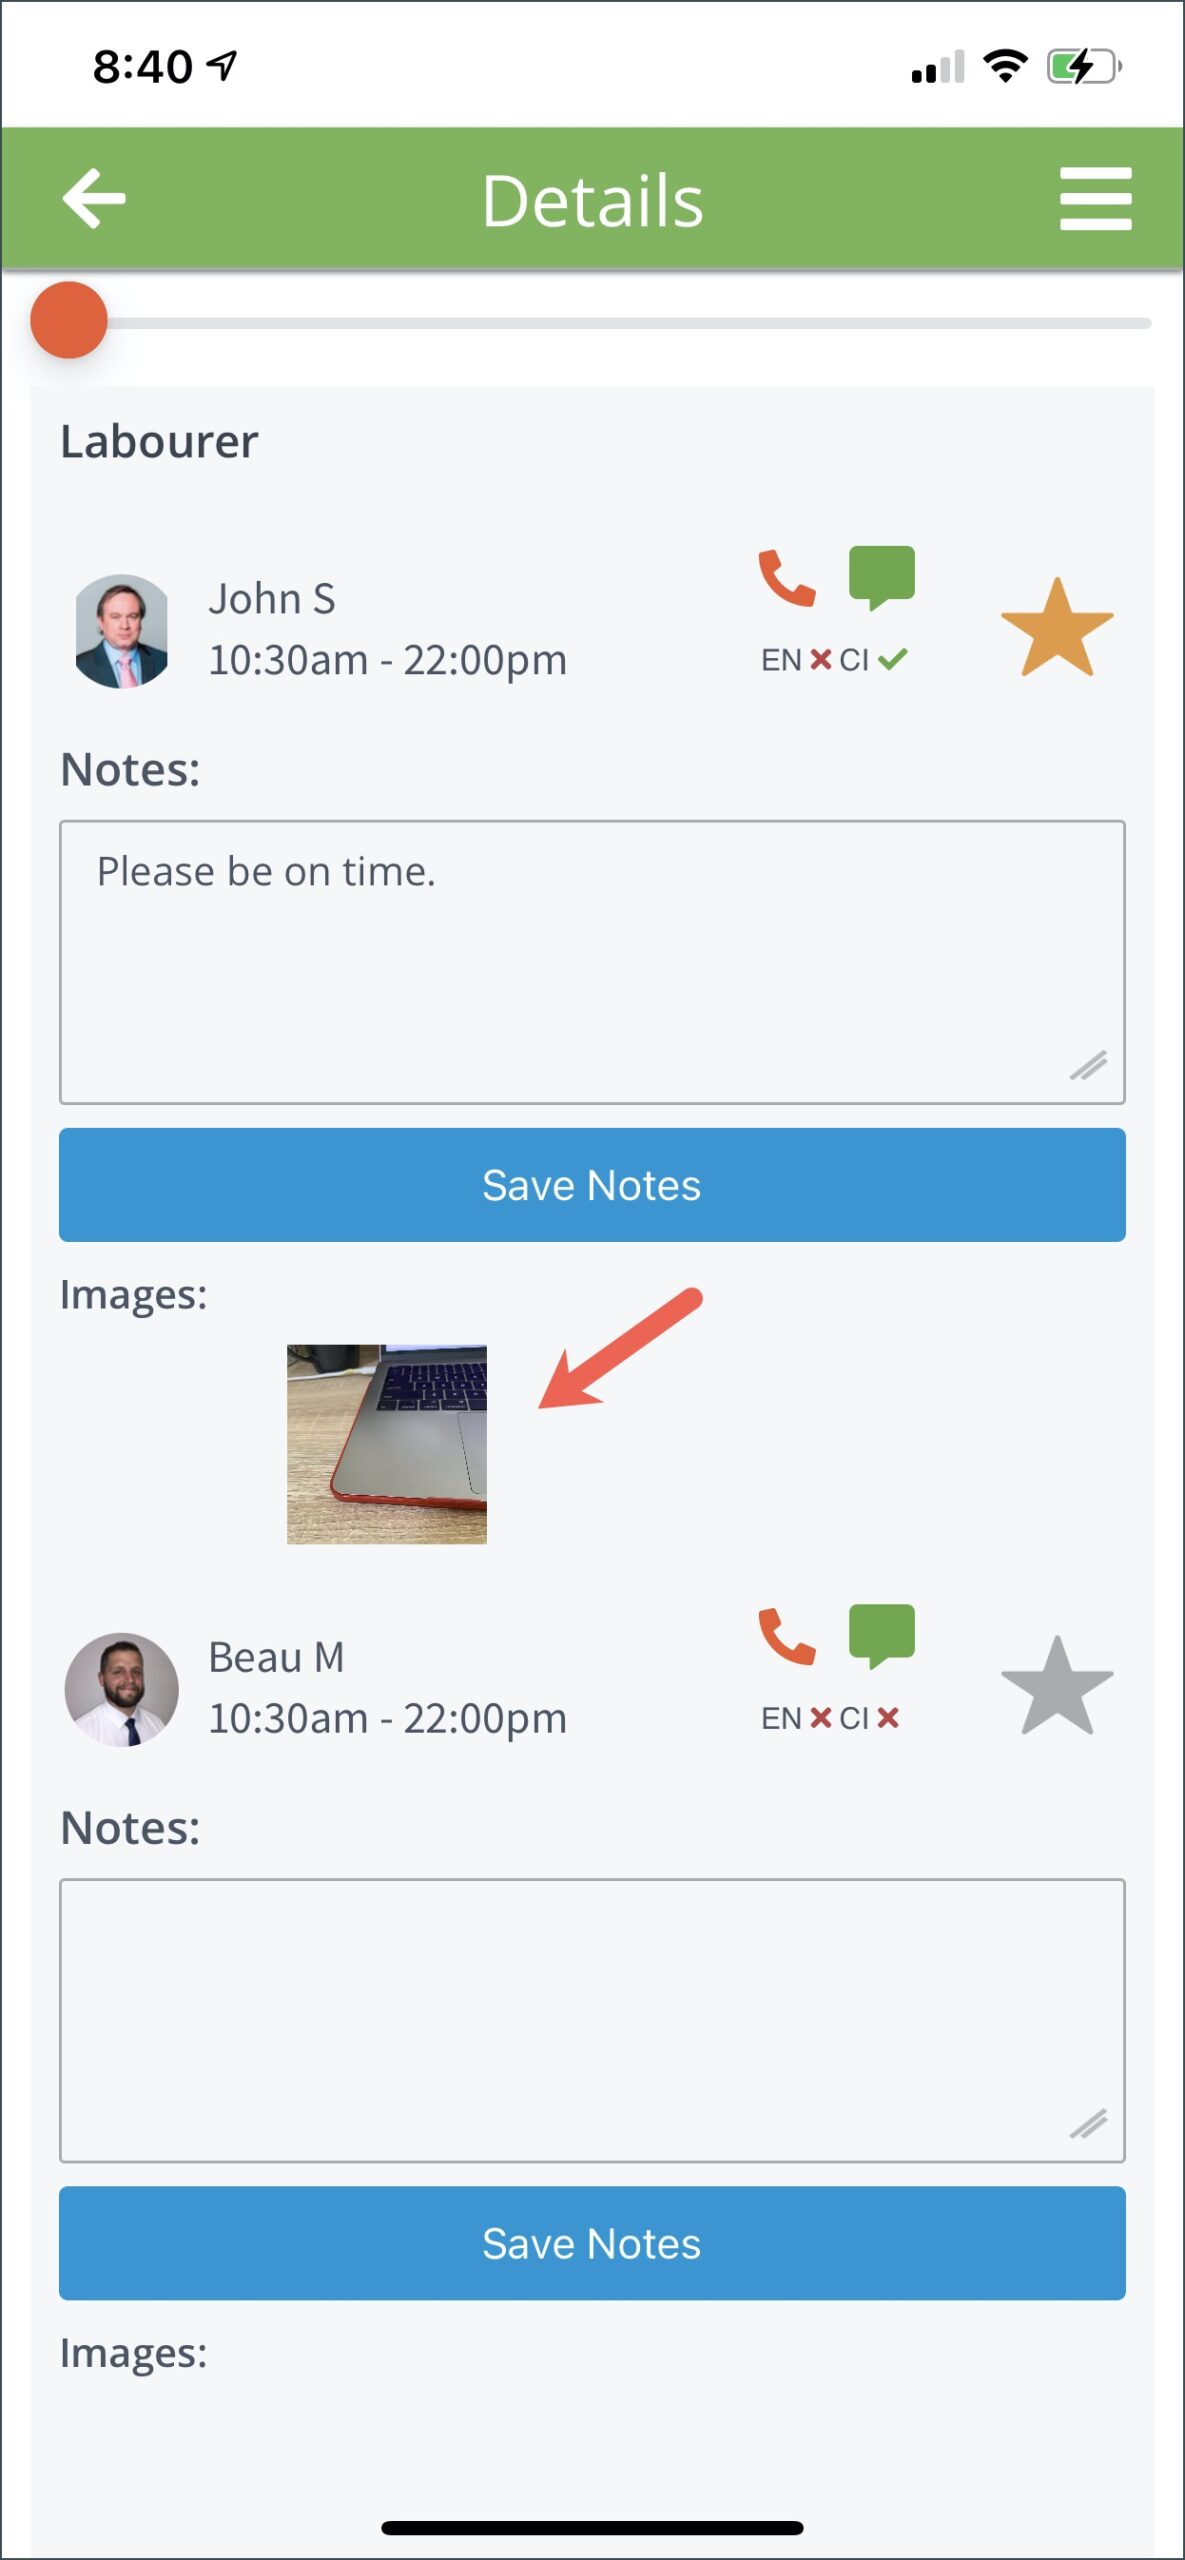
NOTES
You can also enter some notes on the Job Details page. A note can be a reminder for a crew or a specific instruction about the job. Enter the text on the provided field and click Save Notes.

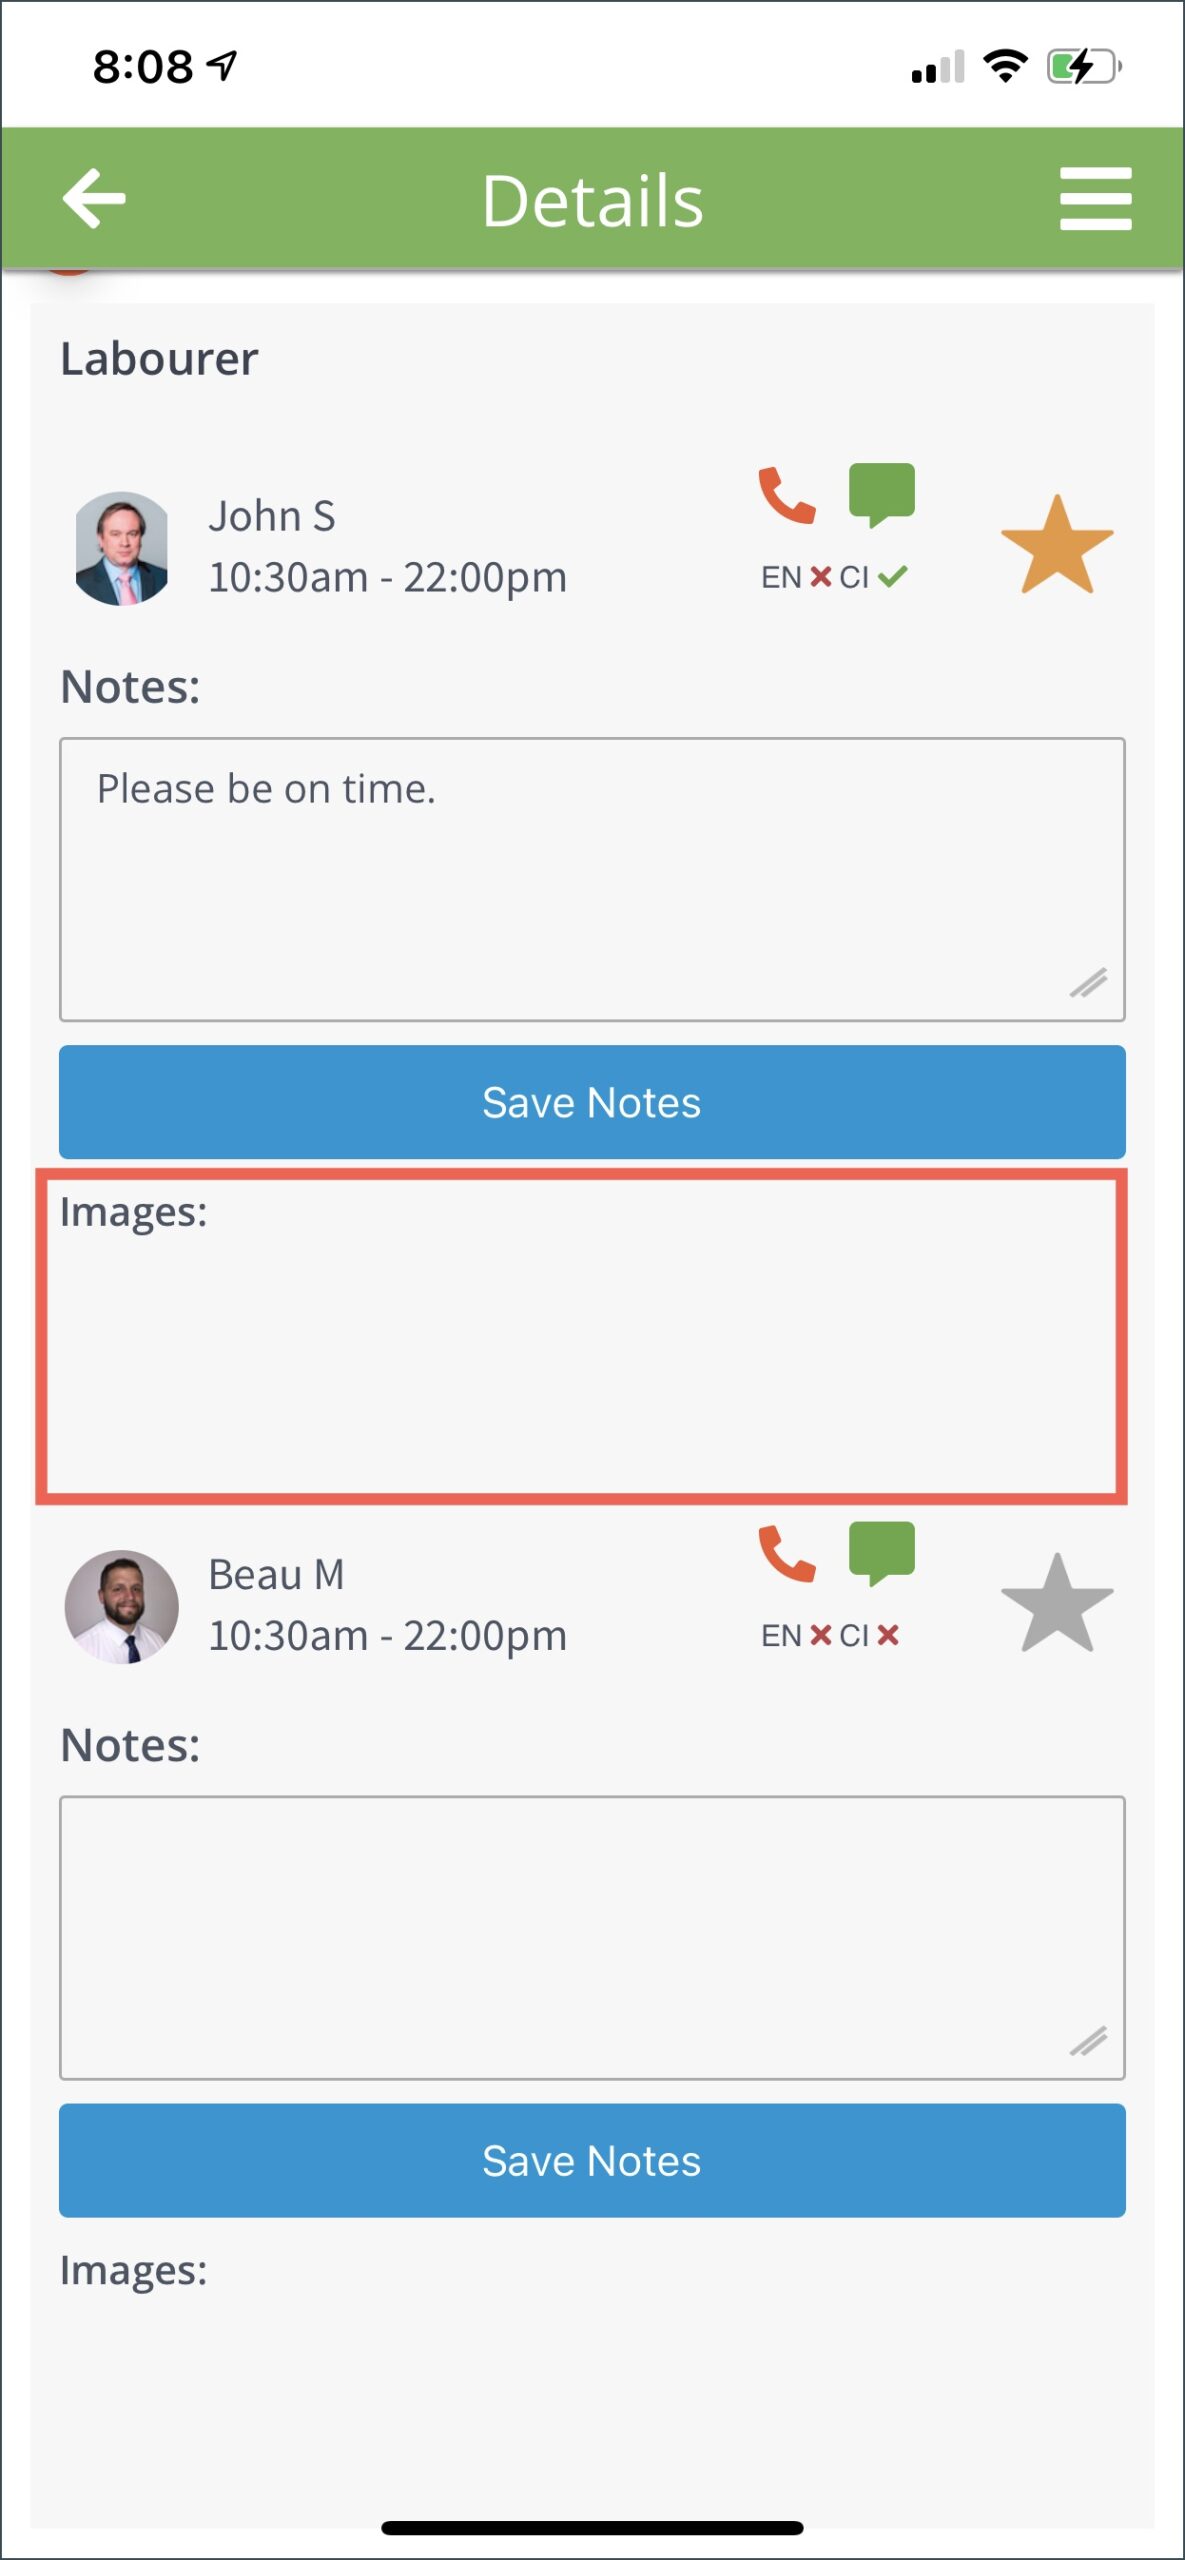
IMAGES
Staff are able to upload photos on their PM Crew App. When they upload a photo it will appear on this section:
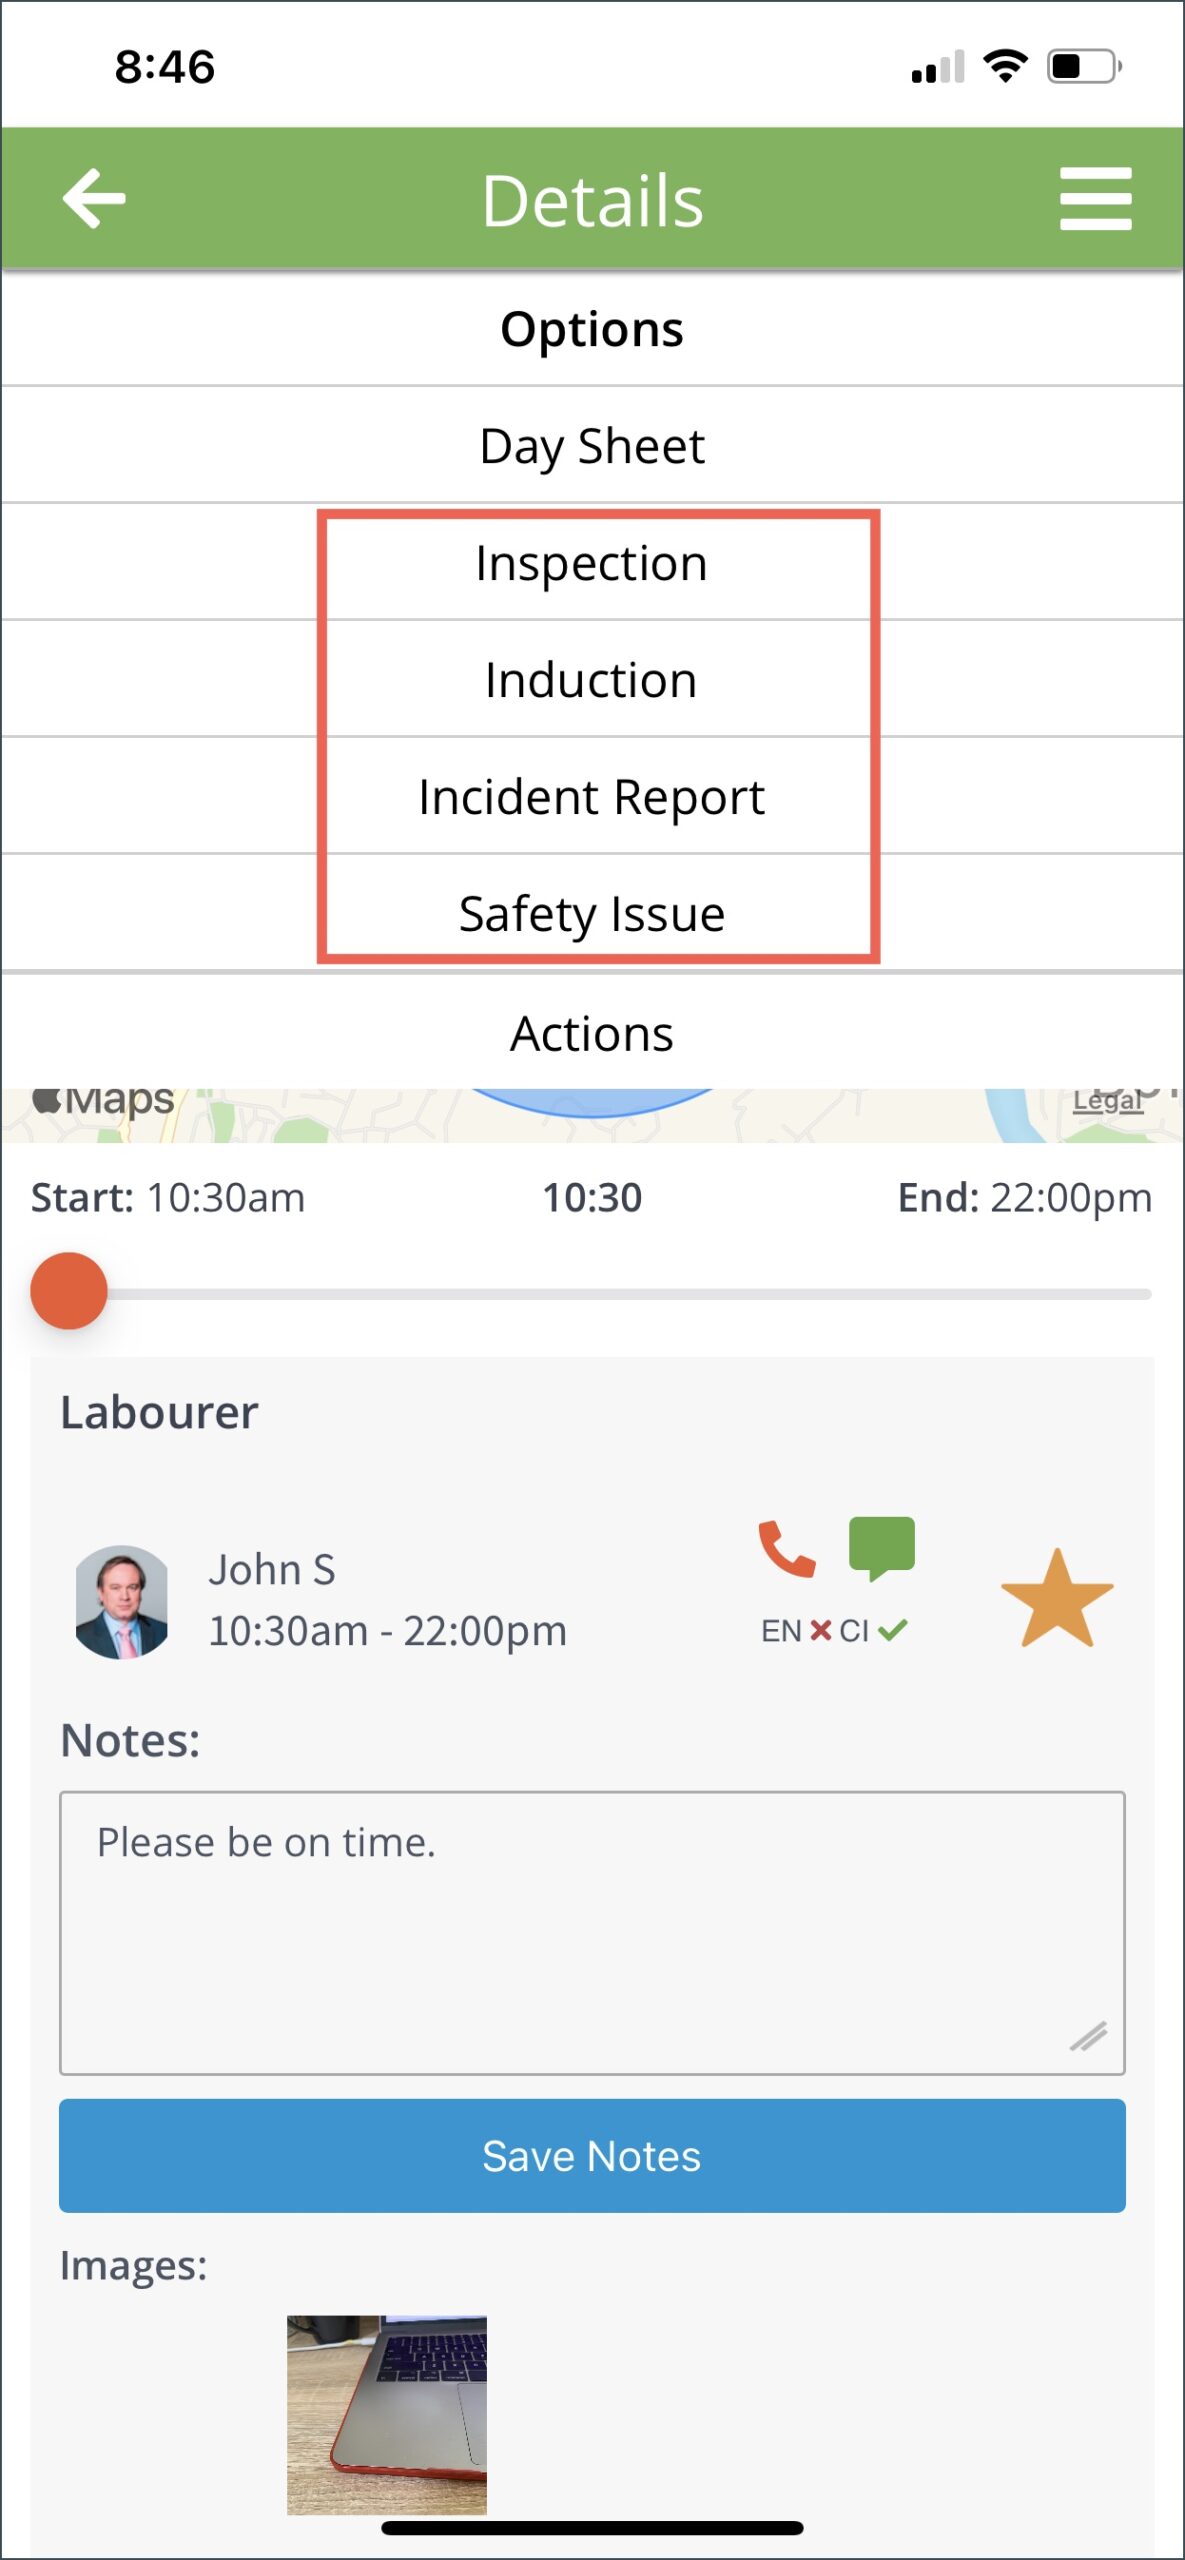
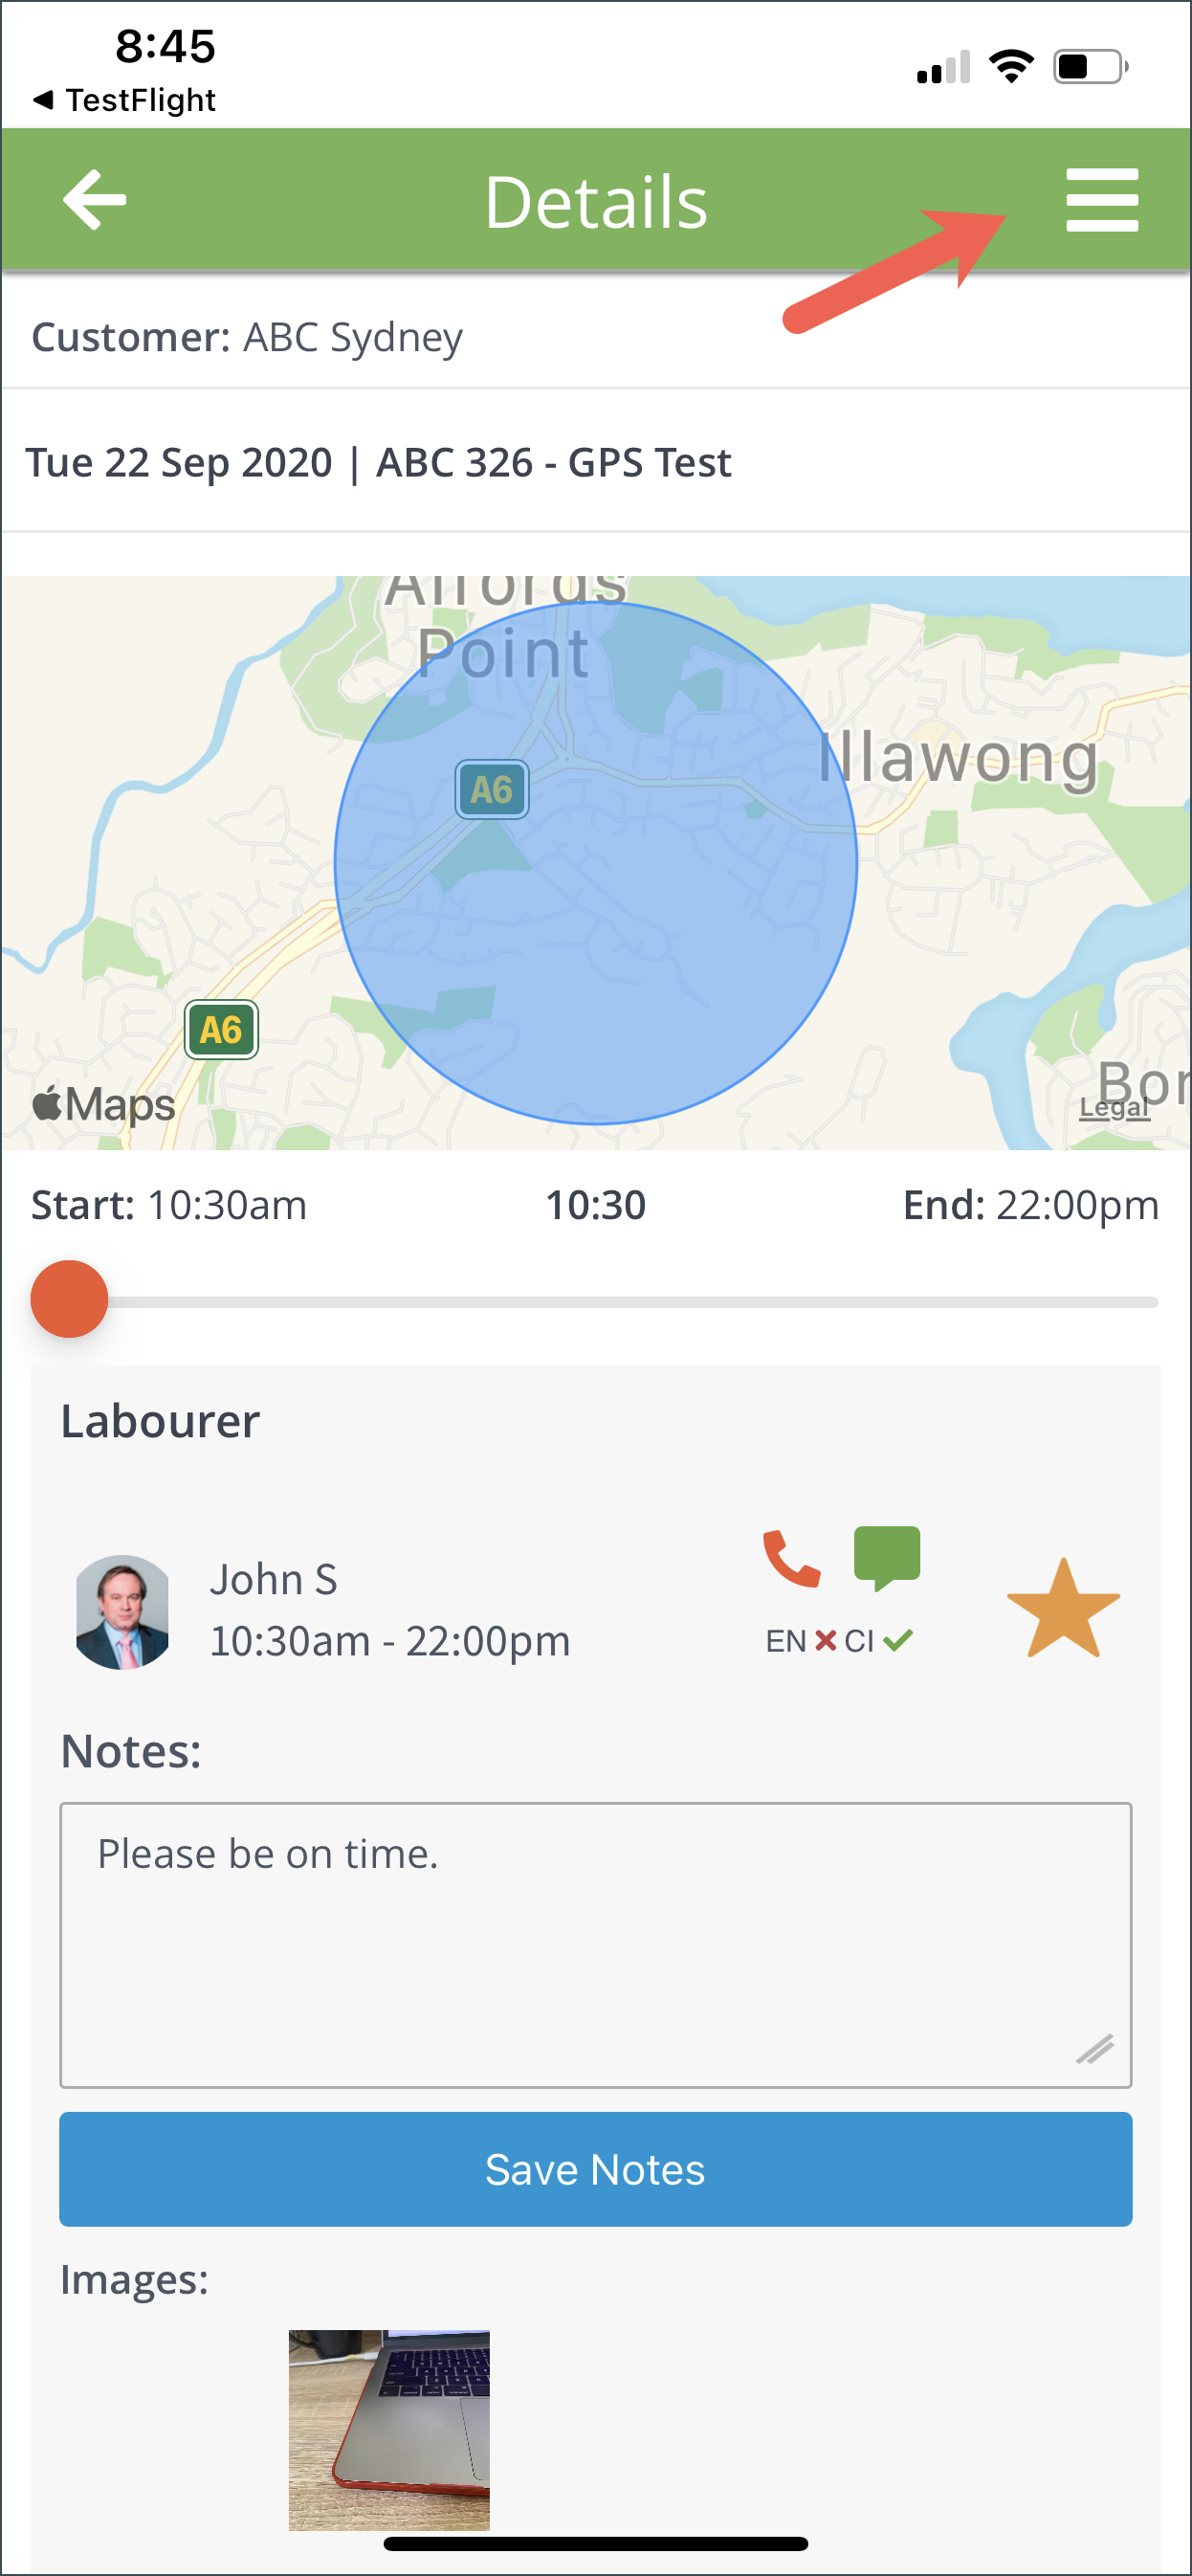
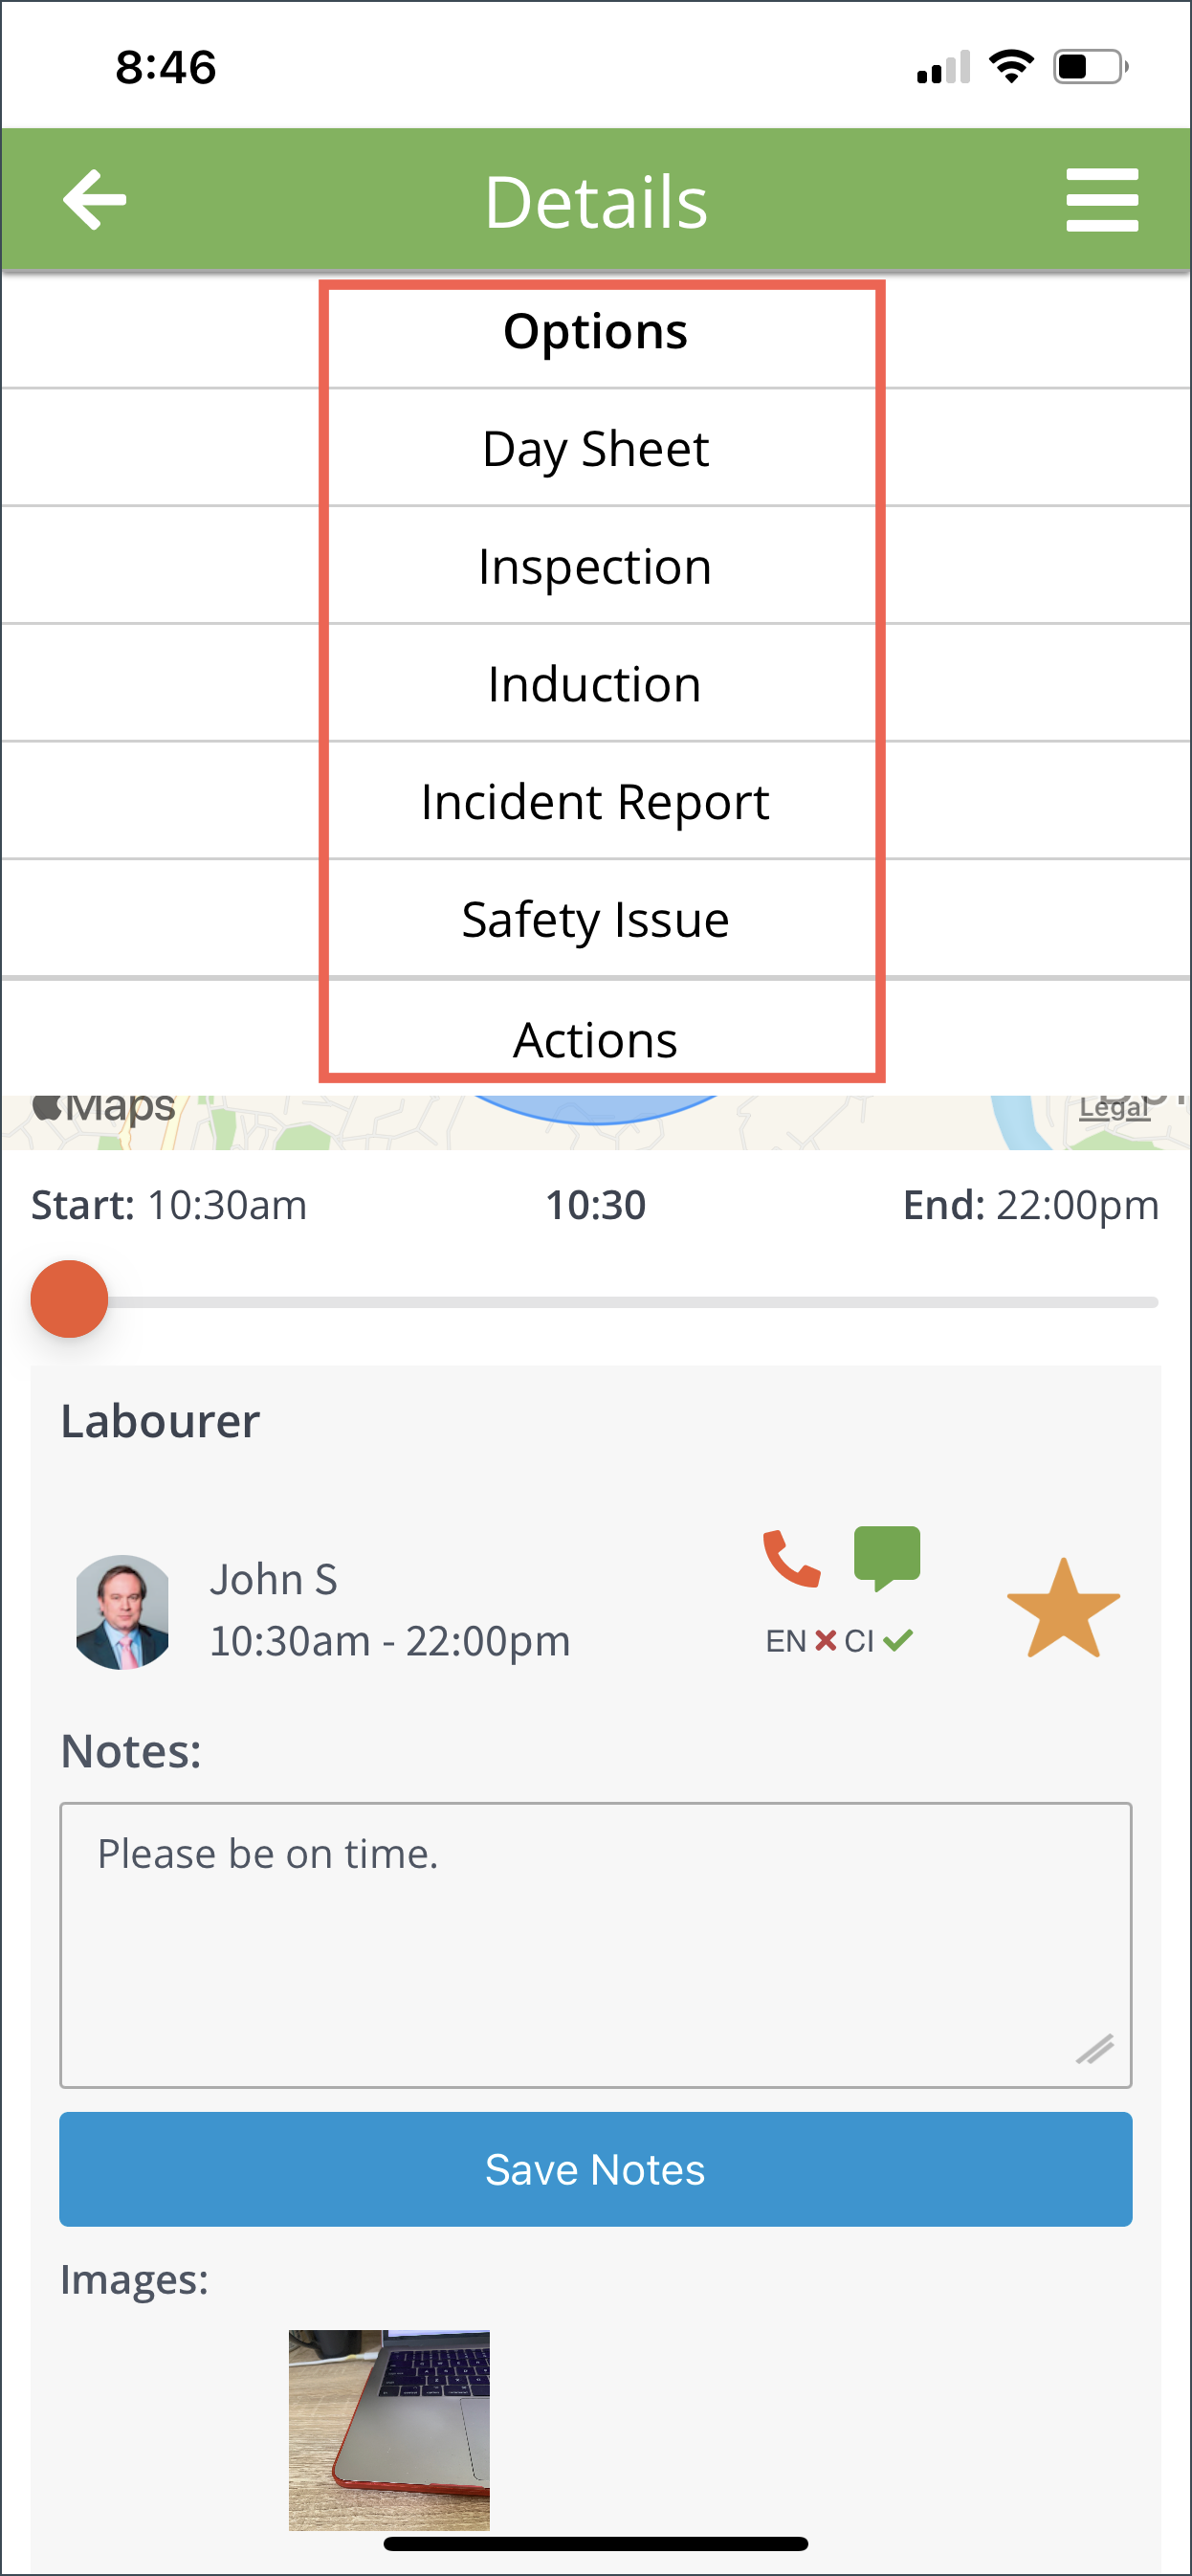
Job Options
Tap the three horizontal lines on the upper right corner of the screen to display the Job Options.
The Job Options include the following:
- Day Sheet
- Inspection
- Induction
- Incident Report
- Safety Issue
- Actions
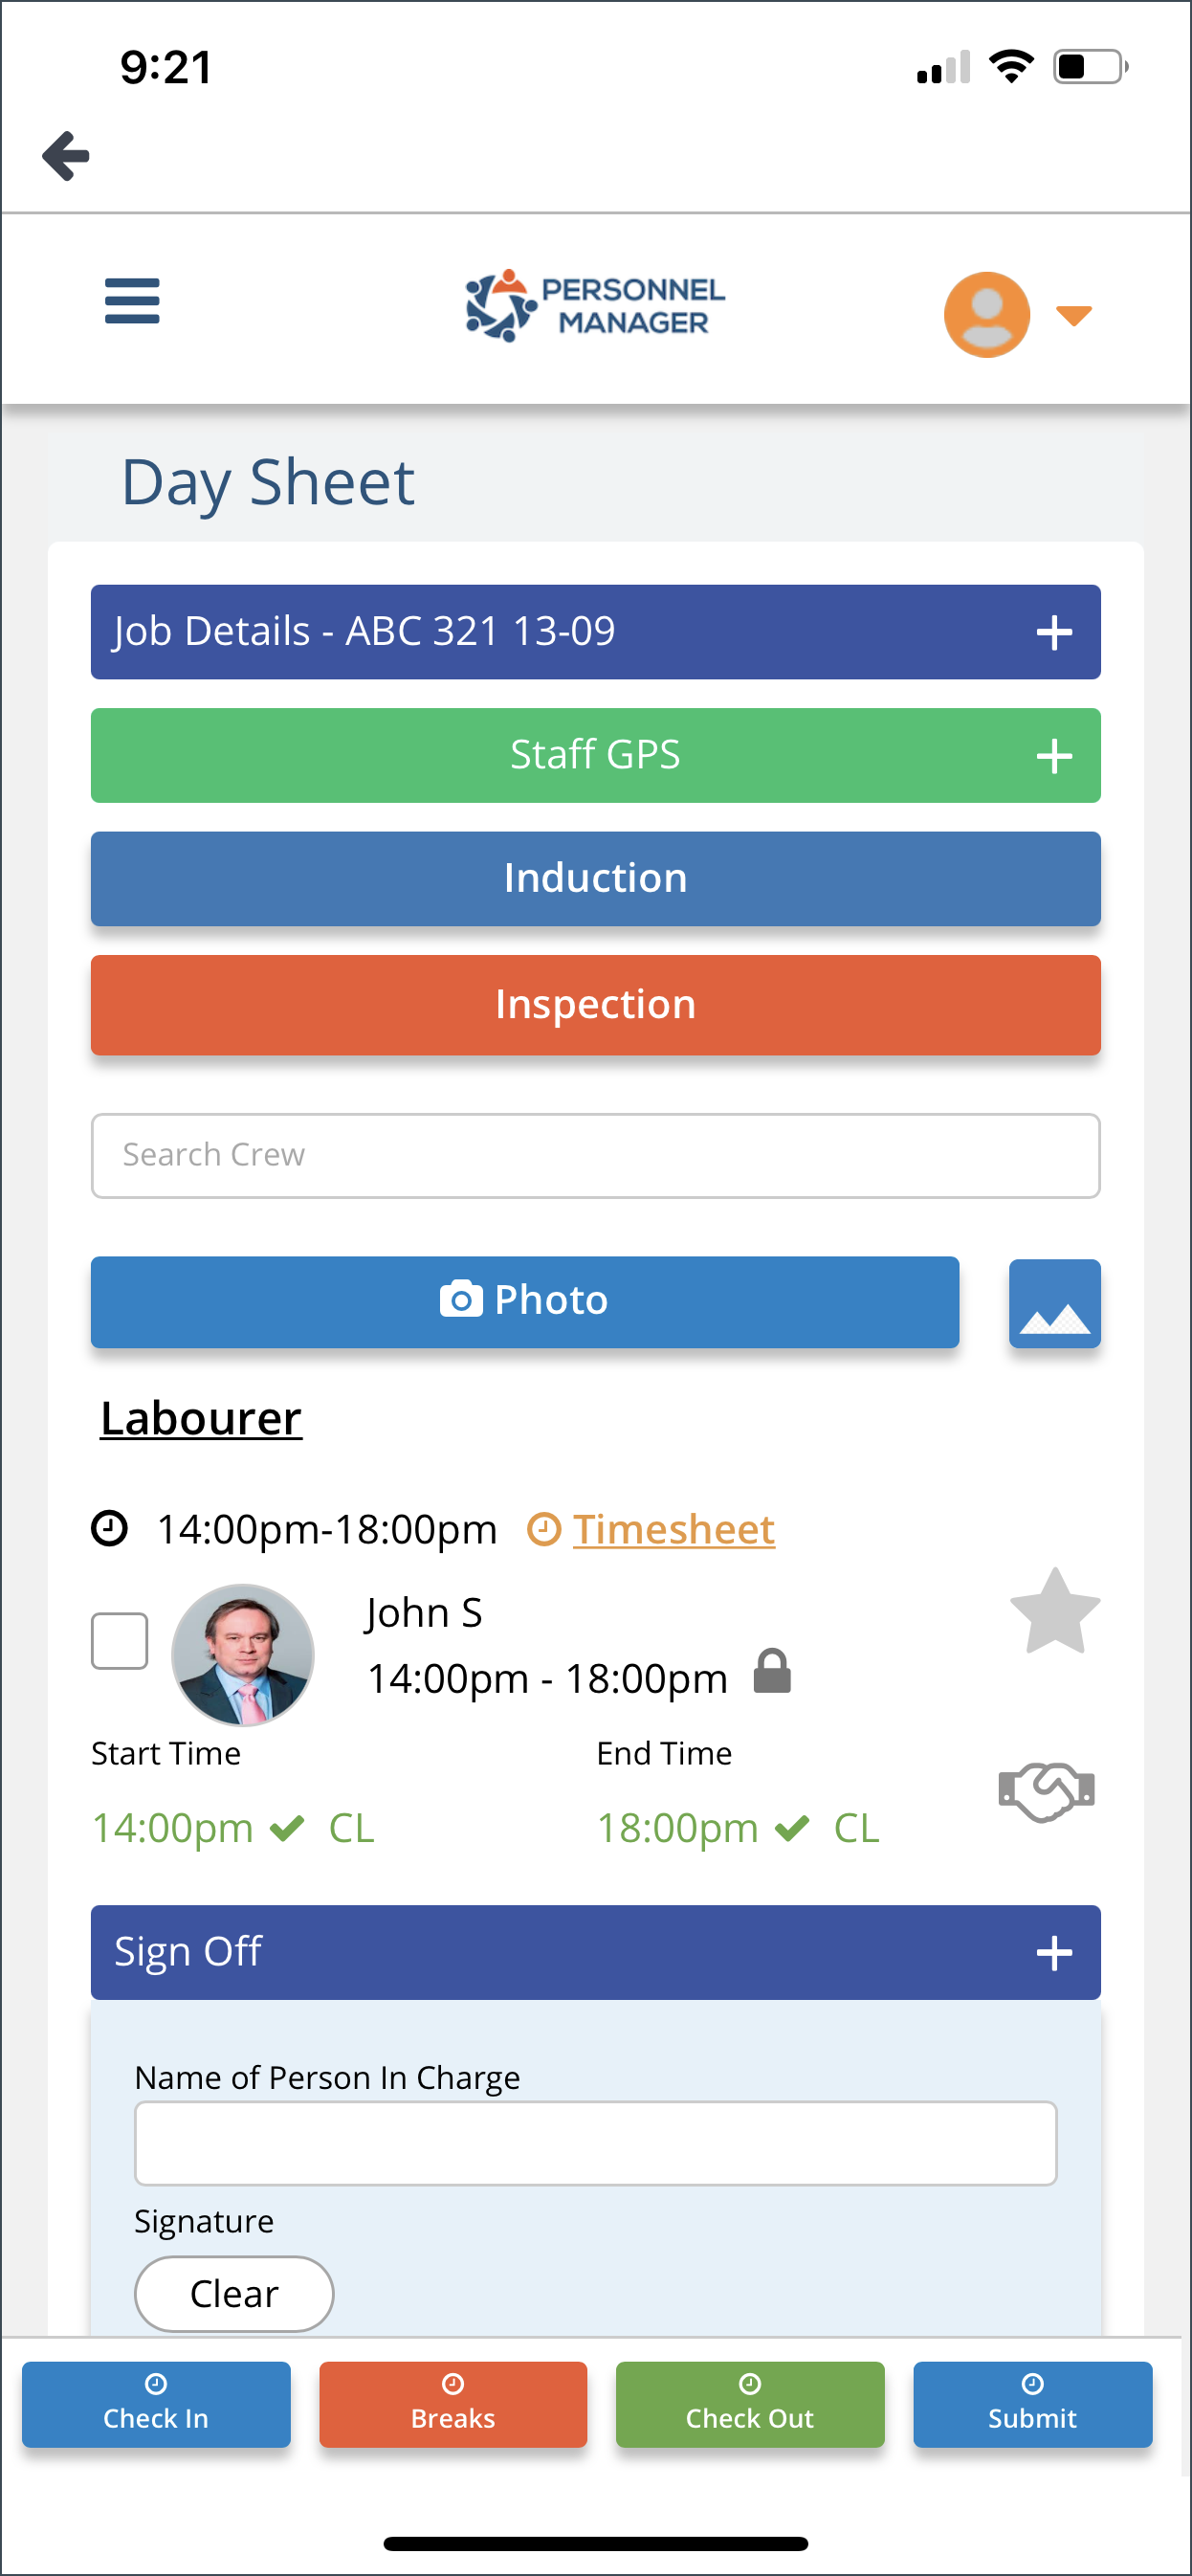
DAY SHEET
The Day Sheet allows you to enter times directly into the system and to report the performance of a crew. You can also process safety inspection and induction.
This is how the Day Sheet looks like for Client.
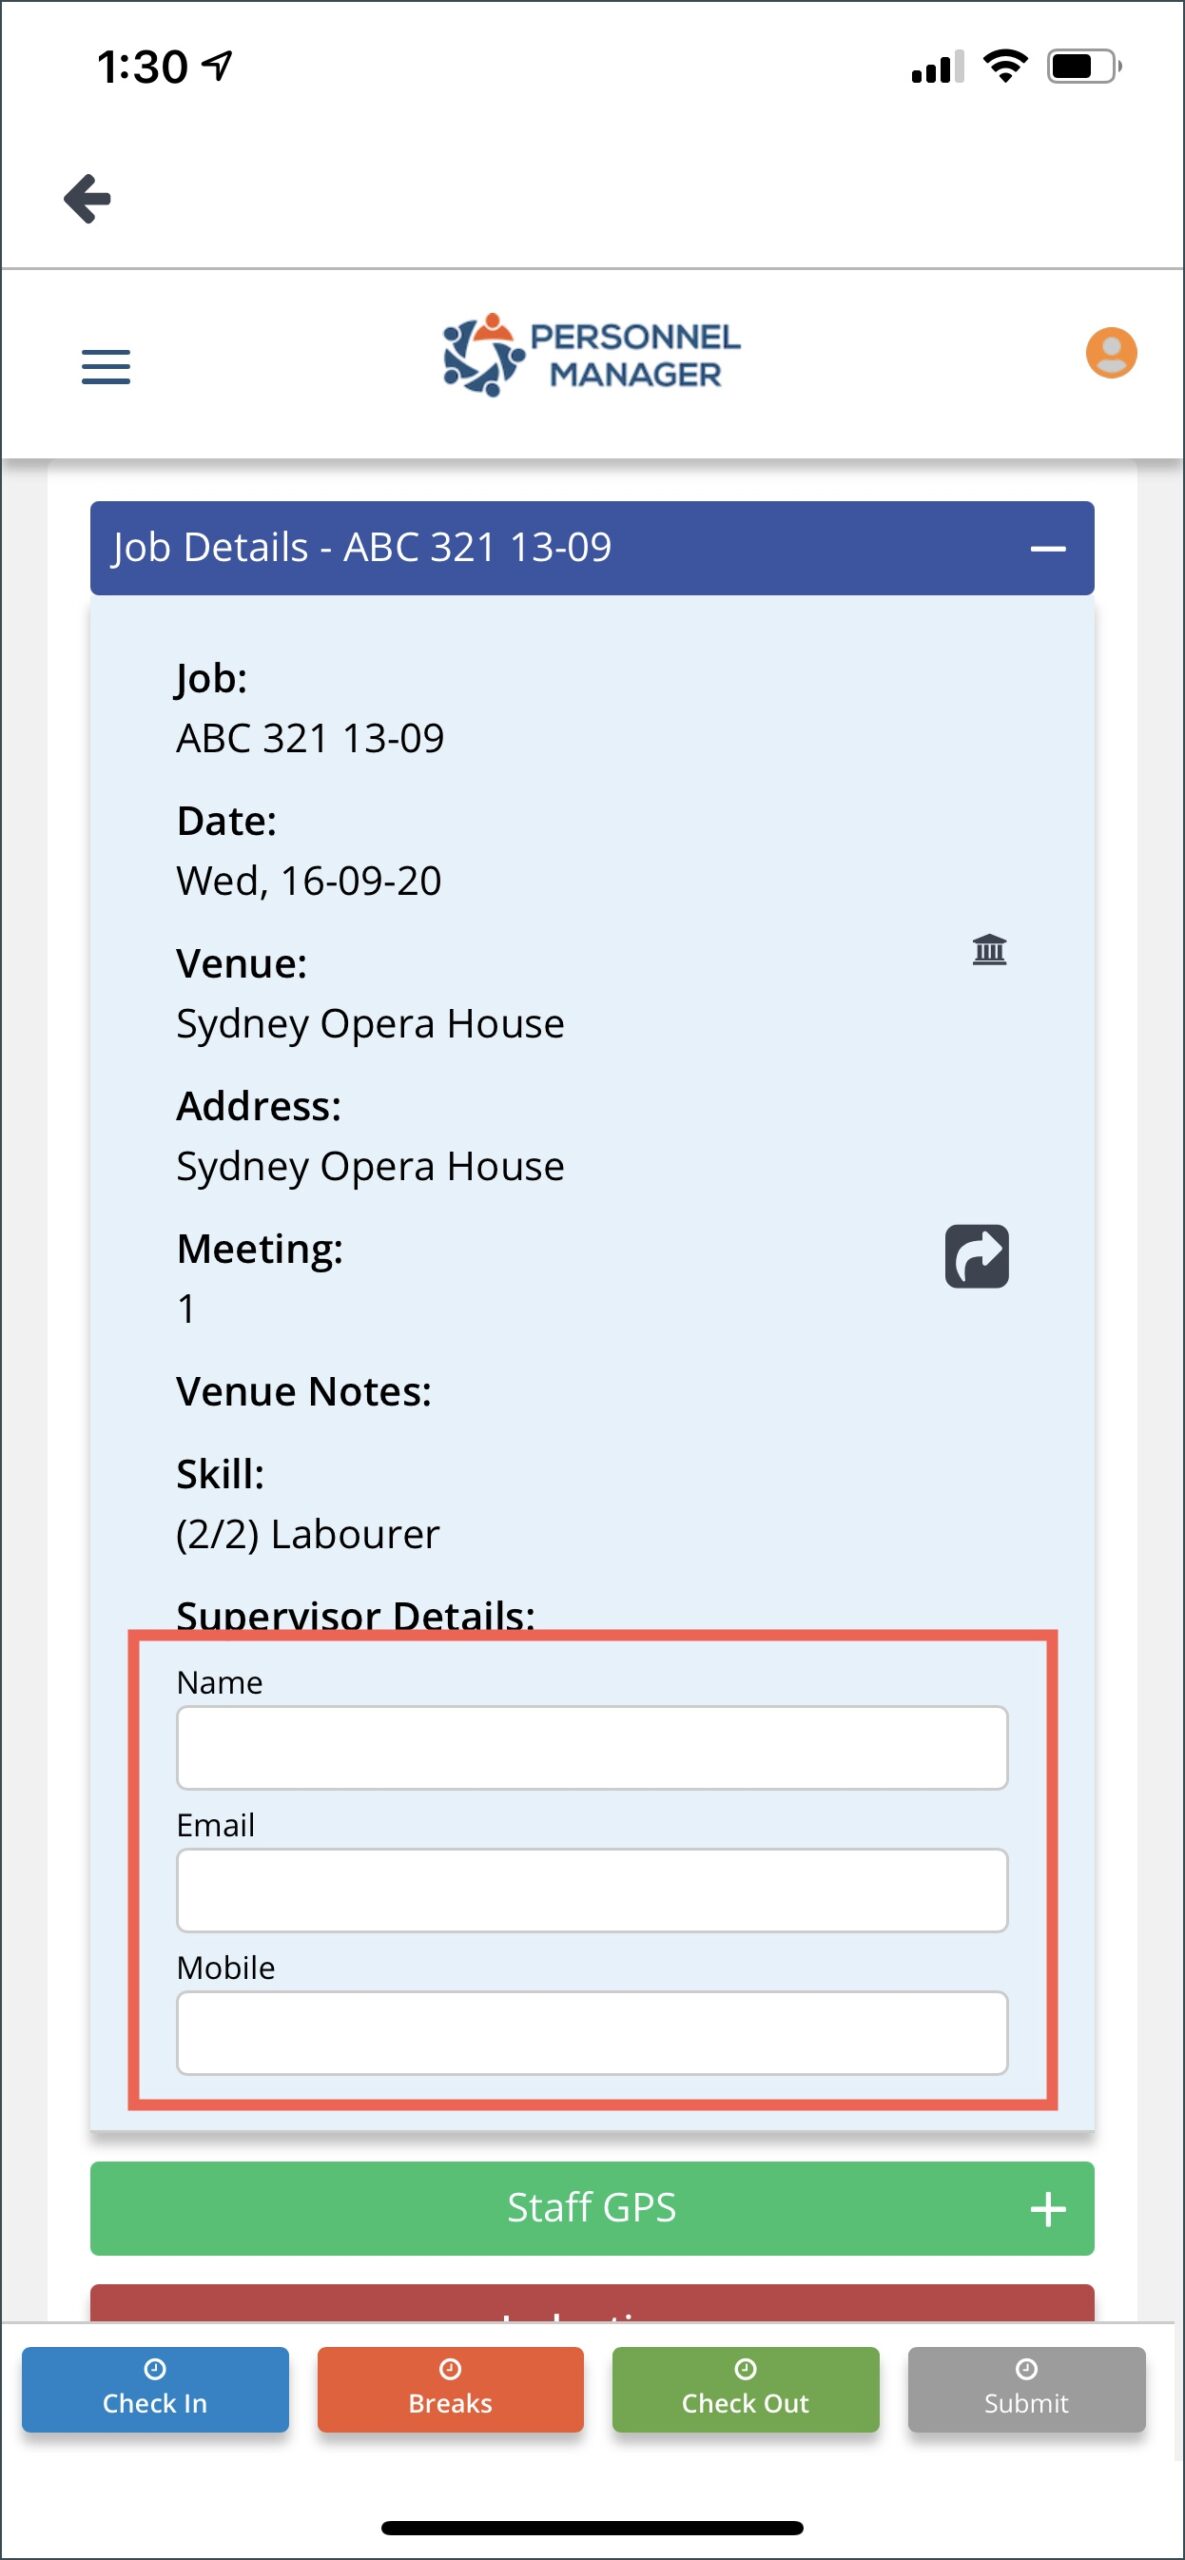
Job Details
Similar with the crew member, you also have the Job Details section on the Day Sheet. The only difference is that you have the Supervisor section. As Team Leader, you will be able to enter the details of the Supervisor on this field if it’s available.
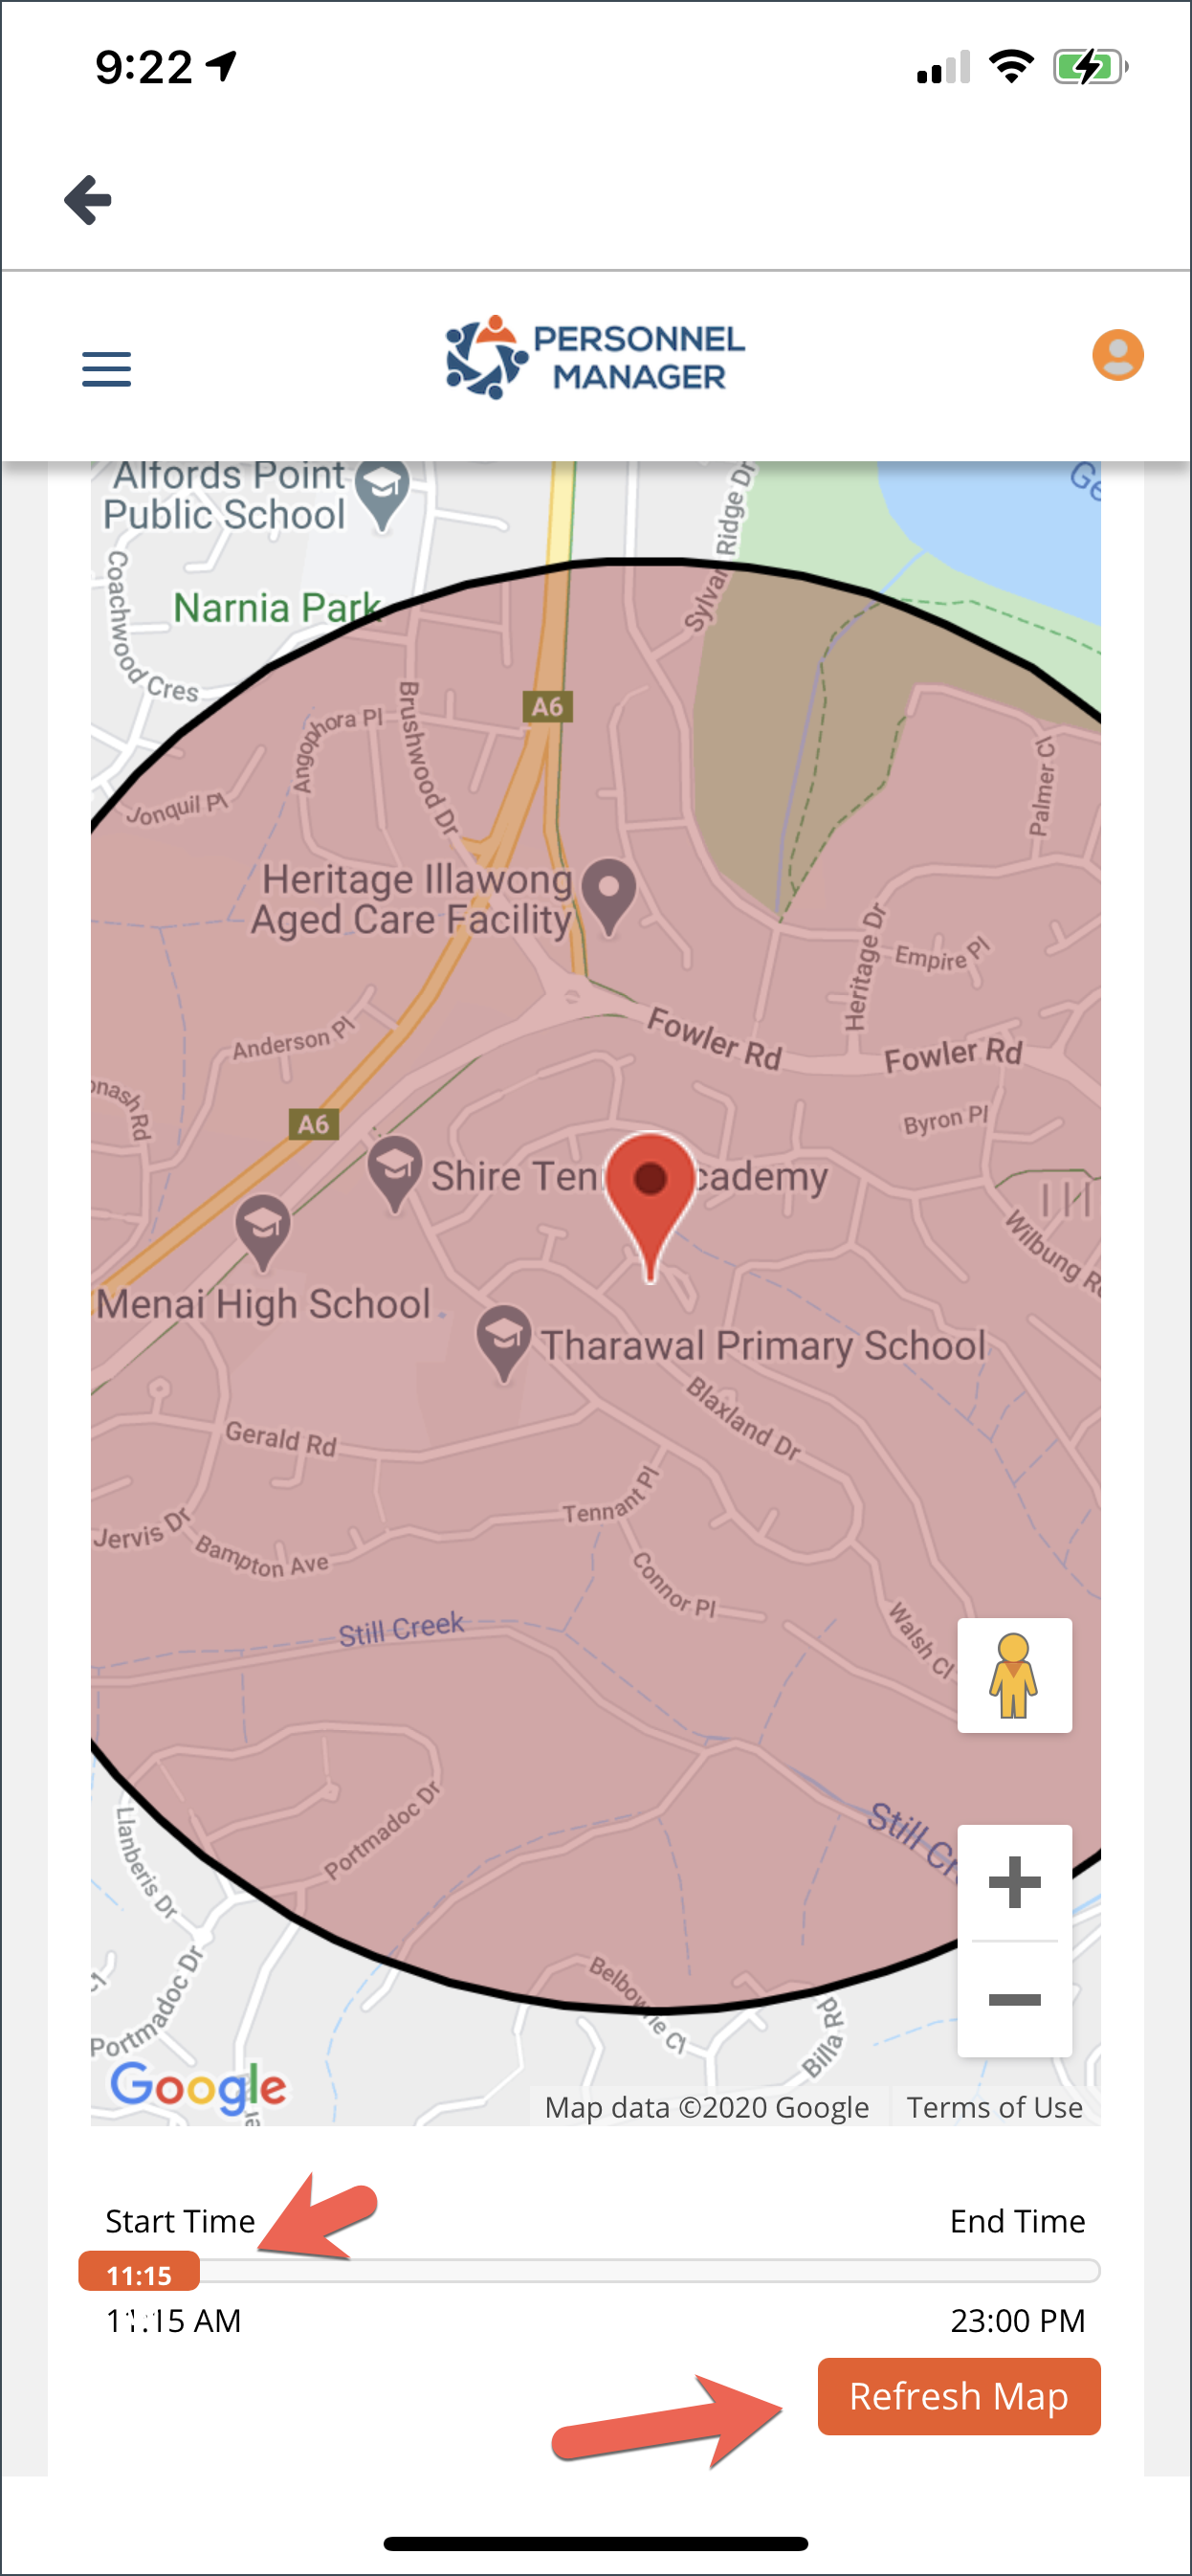
Staff GPS
The staff GPS will display the job location on the map. It will also show the location of the crew on the map.
You can drag the slider to show the pin of the crew on each given time. You can also click Refresh Map to display the most current location of the crew.
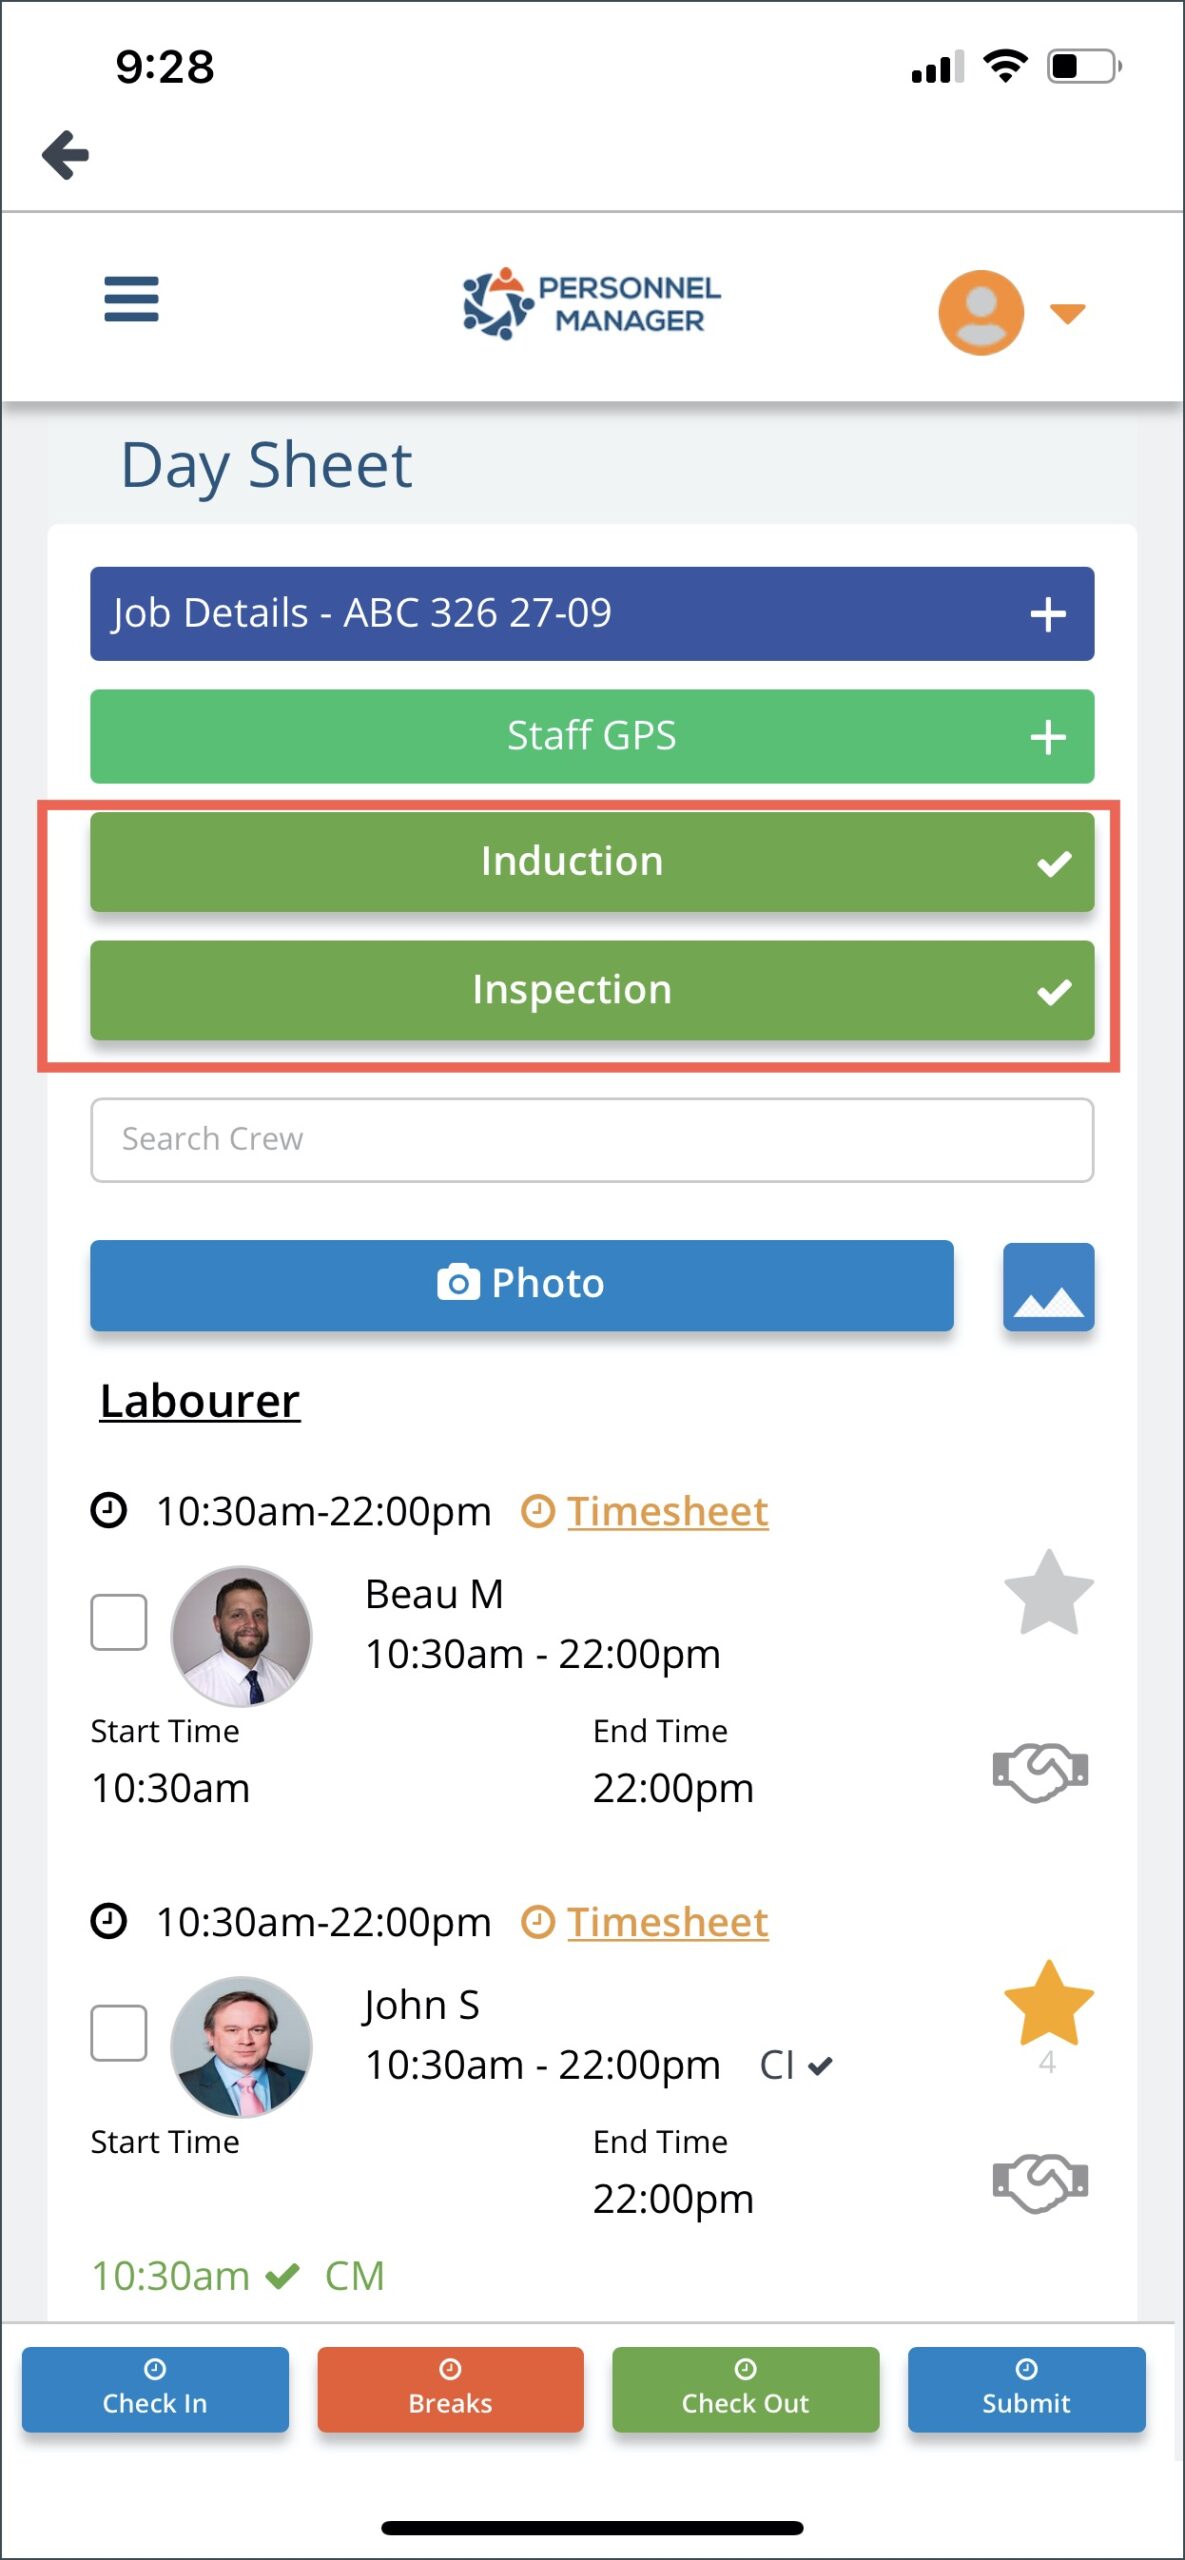
Induction & Inspection
The Team Leader Day Sheet has a tab for Induction and Inspection. Tap on these tabs and it will open the safety forms which you will need to complete and submit.
Once these forms have been accomplished, a check mark will appear on the tabs.
*You can follow the instructions on how to fill out Induction and Inspection on this page under Safety Forms.
Handshake Icon
After you have conducted the Safety Induction and other safety discussions, you need to instruct your crew member to click the Handshake icon on their PM Crew App to signify that they understood the SWMS/Tool Box, Induction, Policies, etc.
When they tap on the handshake icon, the colour will change to green and it will reflect back on your own Leader Day Sheet. Alternatively, you can ask them to tap the handshake icon on your Day Sheet to signify they agree with all the policies and other safety matters that have been discussed.
![]()
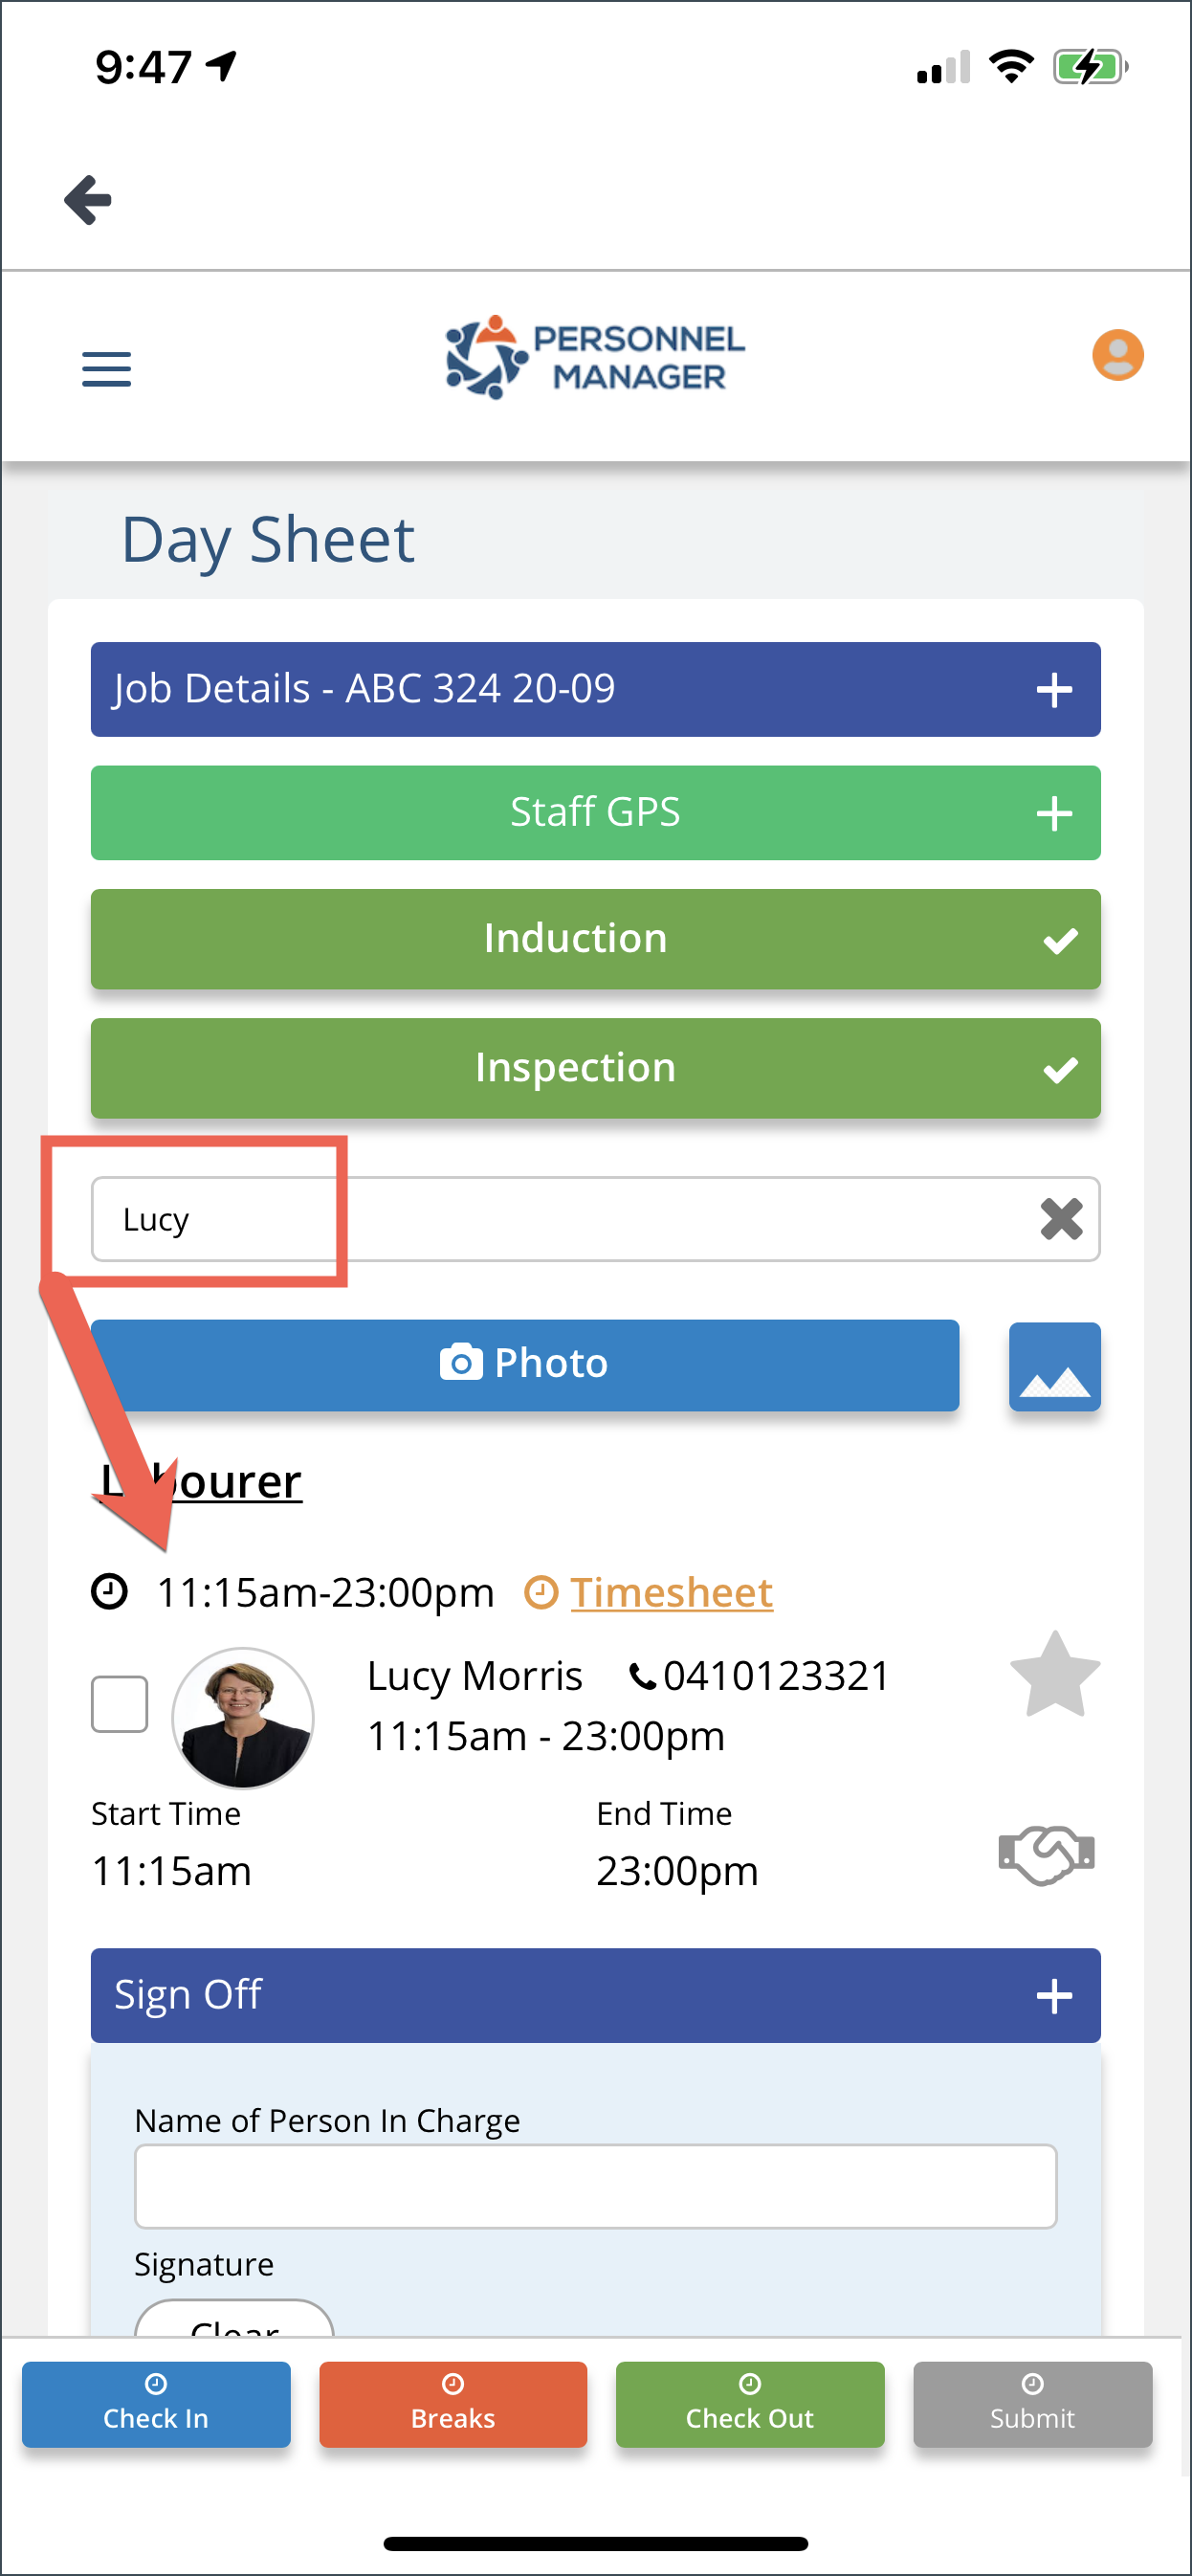
Search Crew
The search function is useful when there are a lot of crews confirmed in a job. Simply type on the search field and the crew will appear.
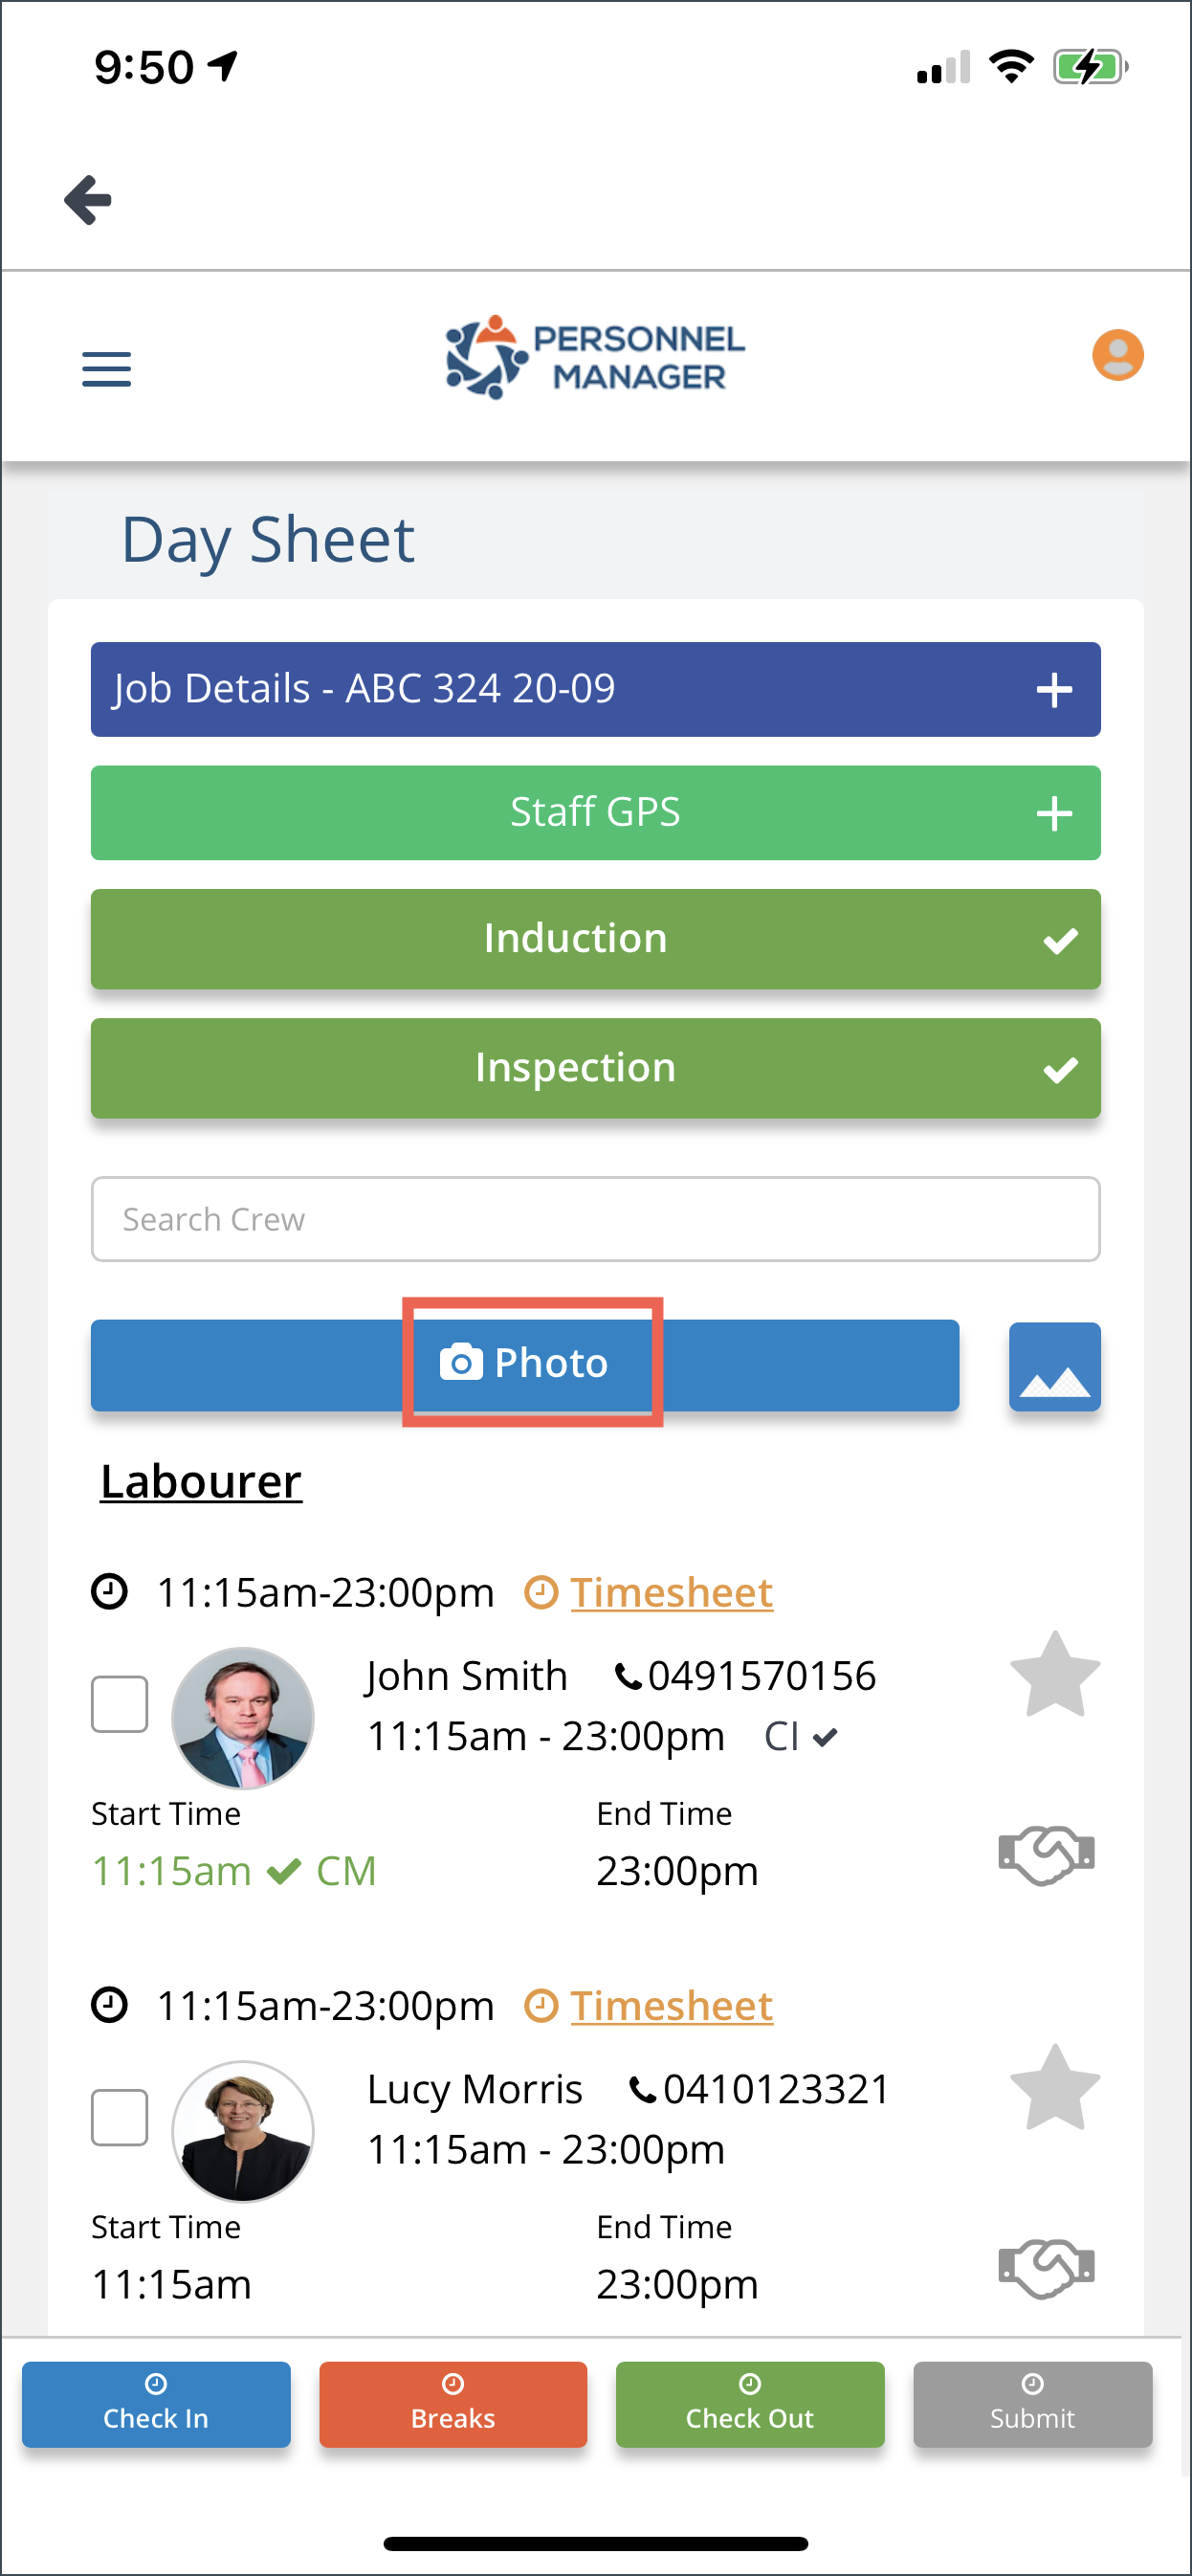
Photo
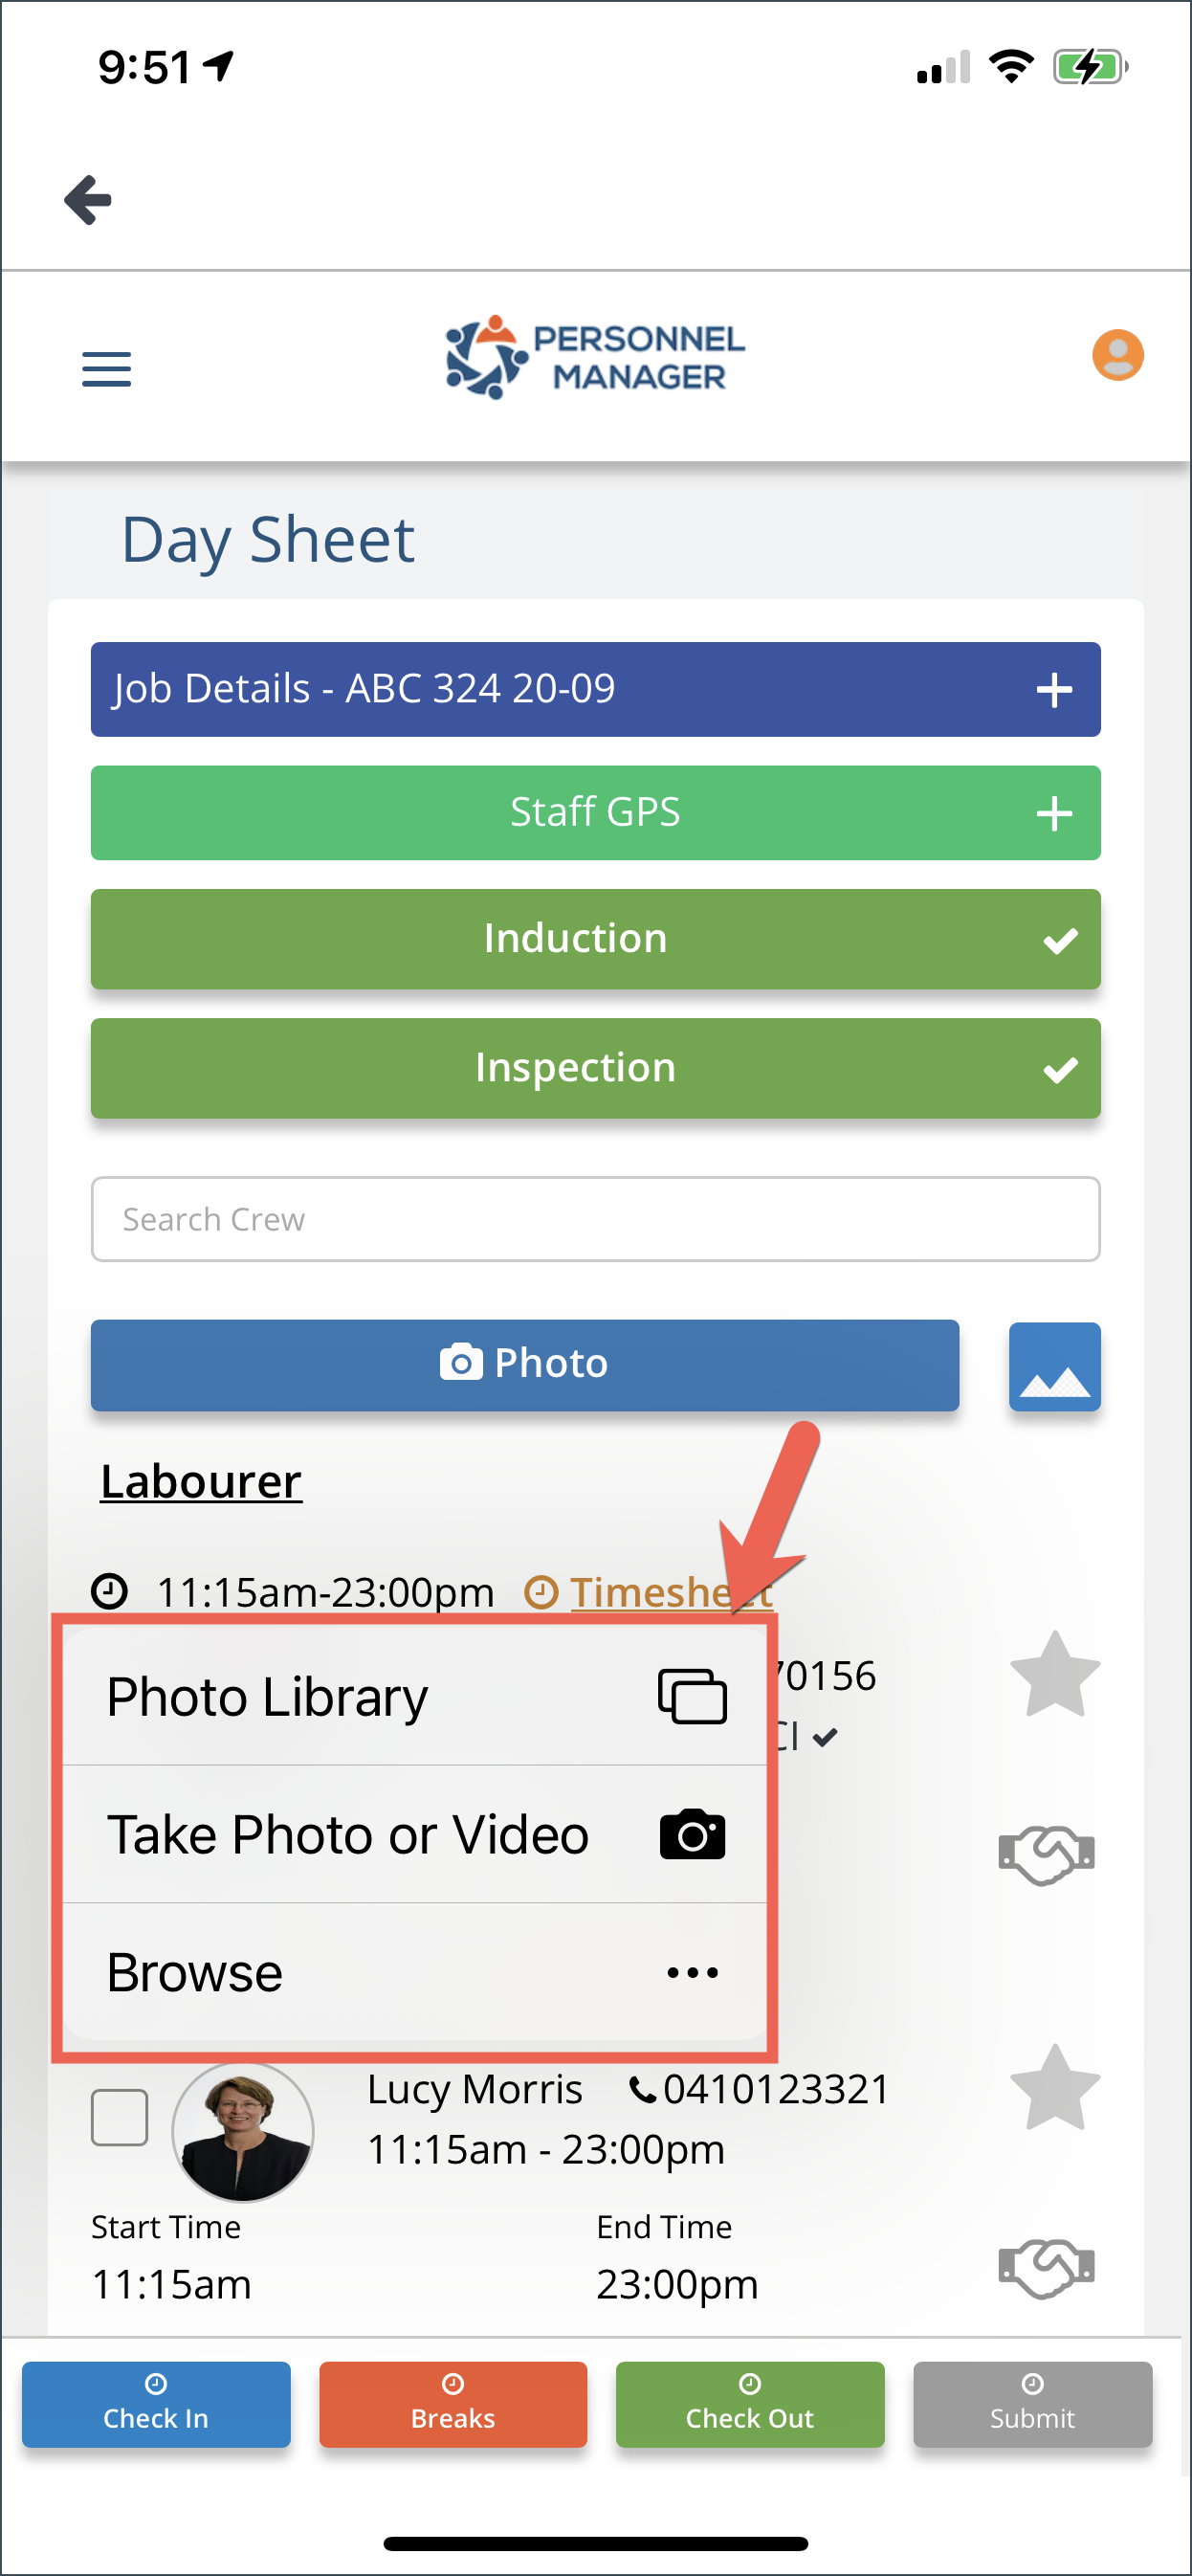
To upload a photo, simply click on the Photo button, then you can choose to select photos from your gallery or use the camera of your phone.
Once photo has been selected or taken, and you confirm to use the photo, it will appear on the Day Sheet.

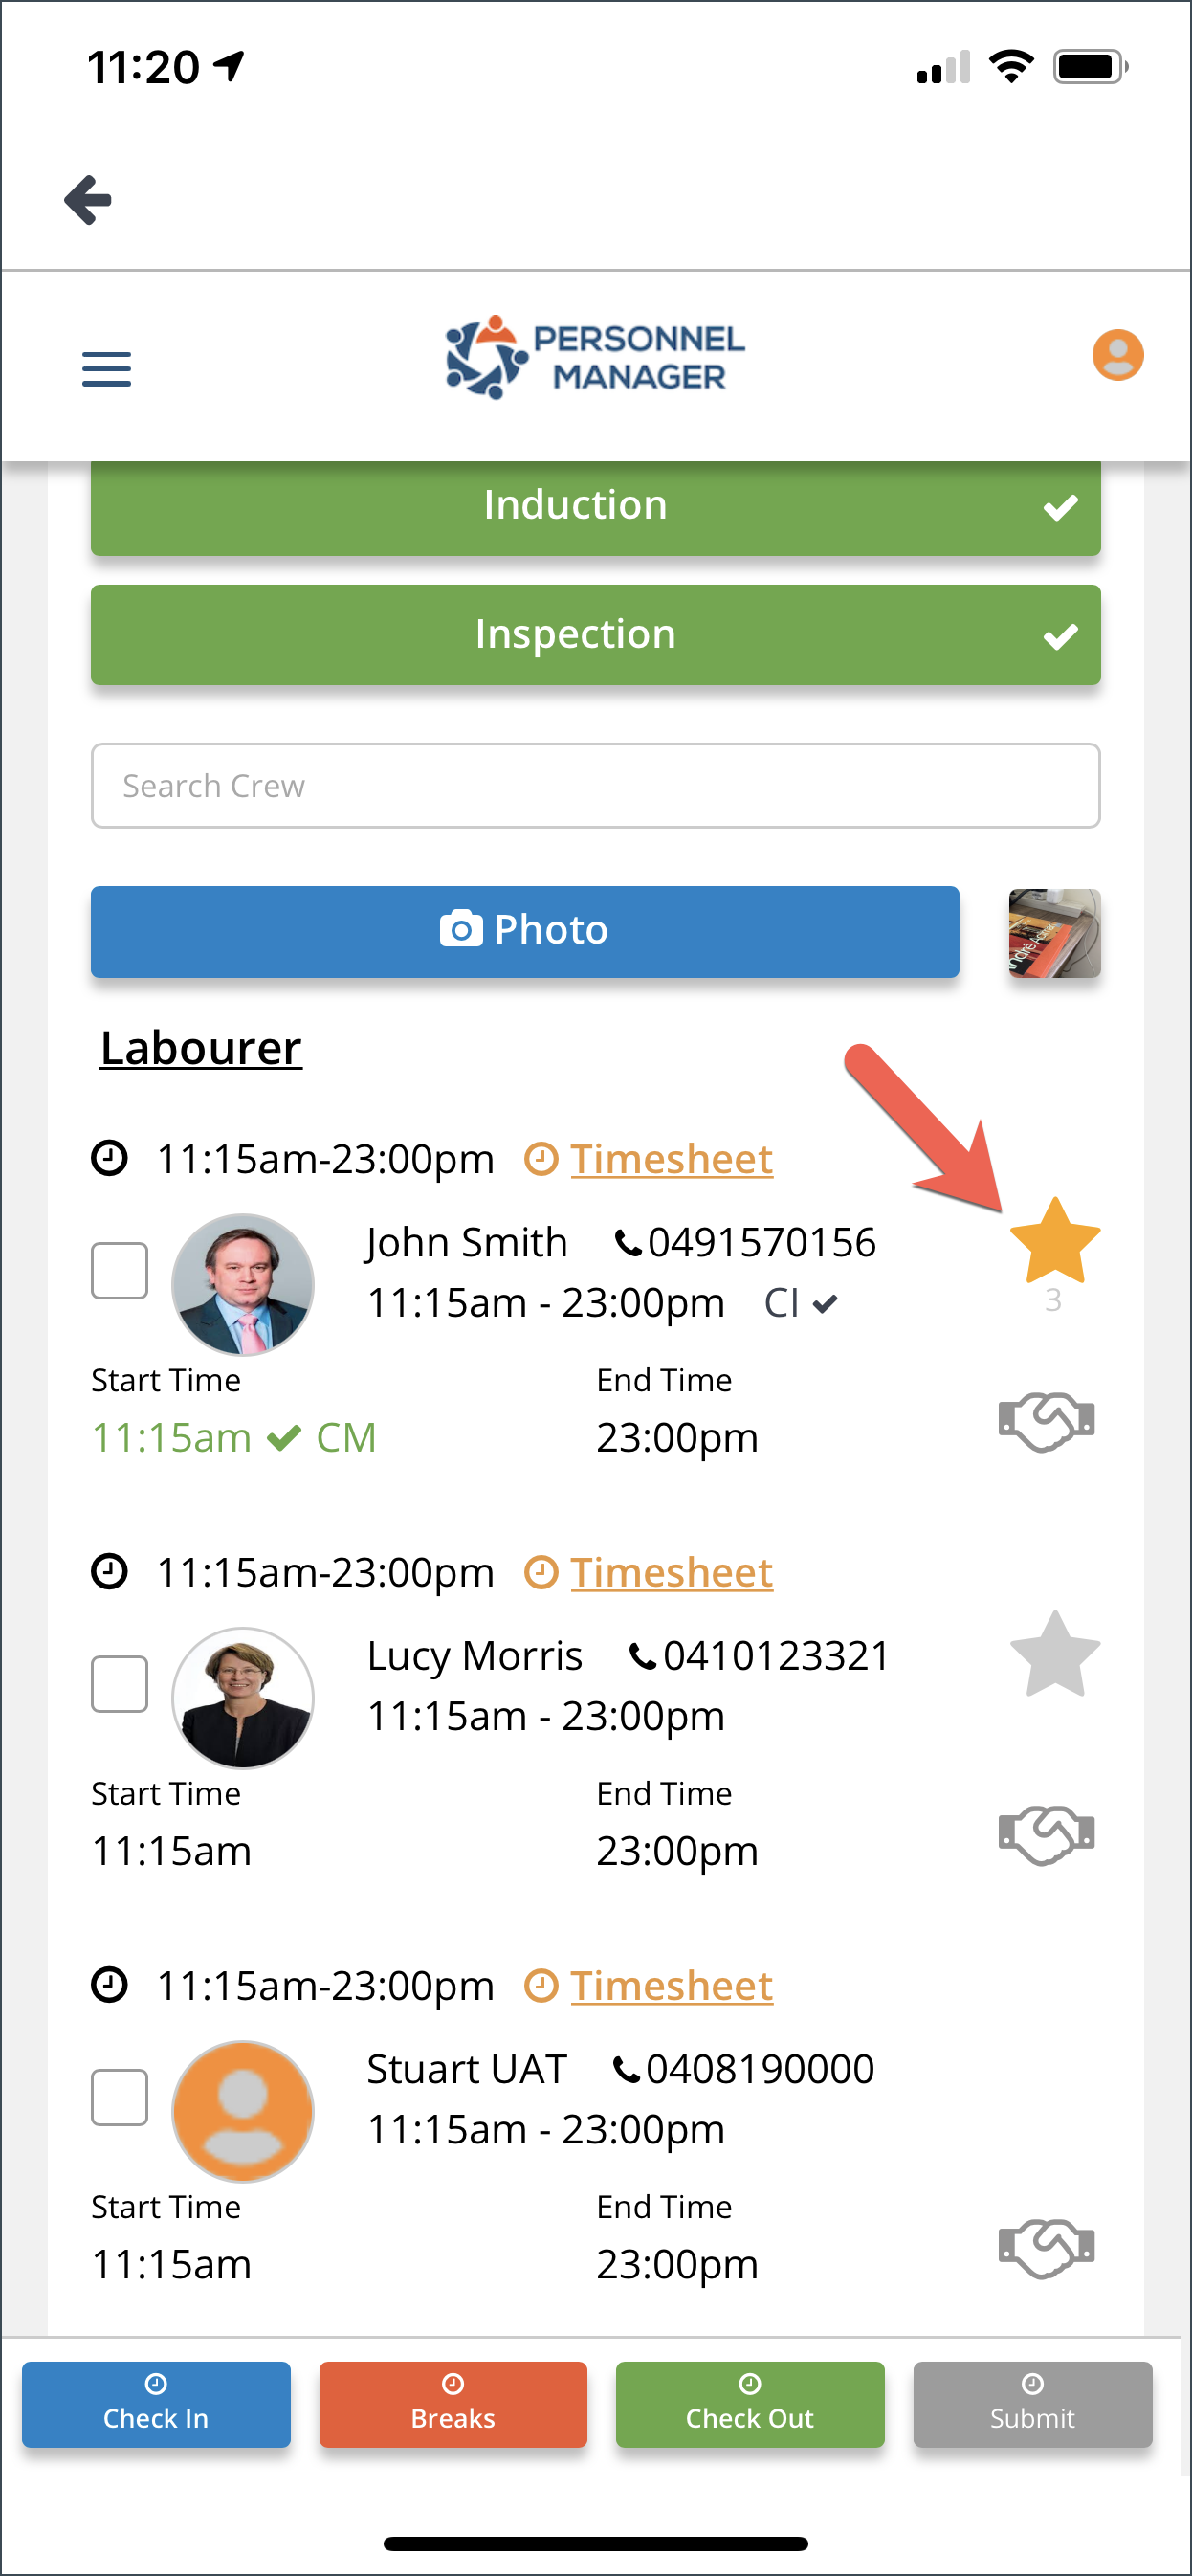
Crew Rating
You can give crew ratings based on their performance and other factors. Tap the star icon to start rating the crew.
Select the Rate by tapping on the stars. This will automatically select the Conditions. Add a Comment on the field then click Submit.

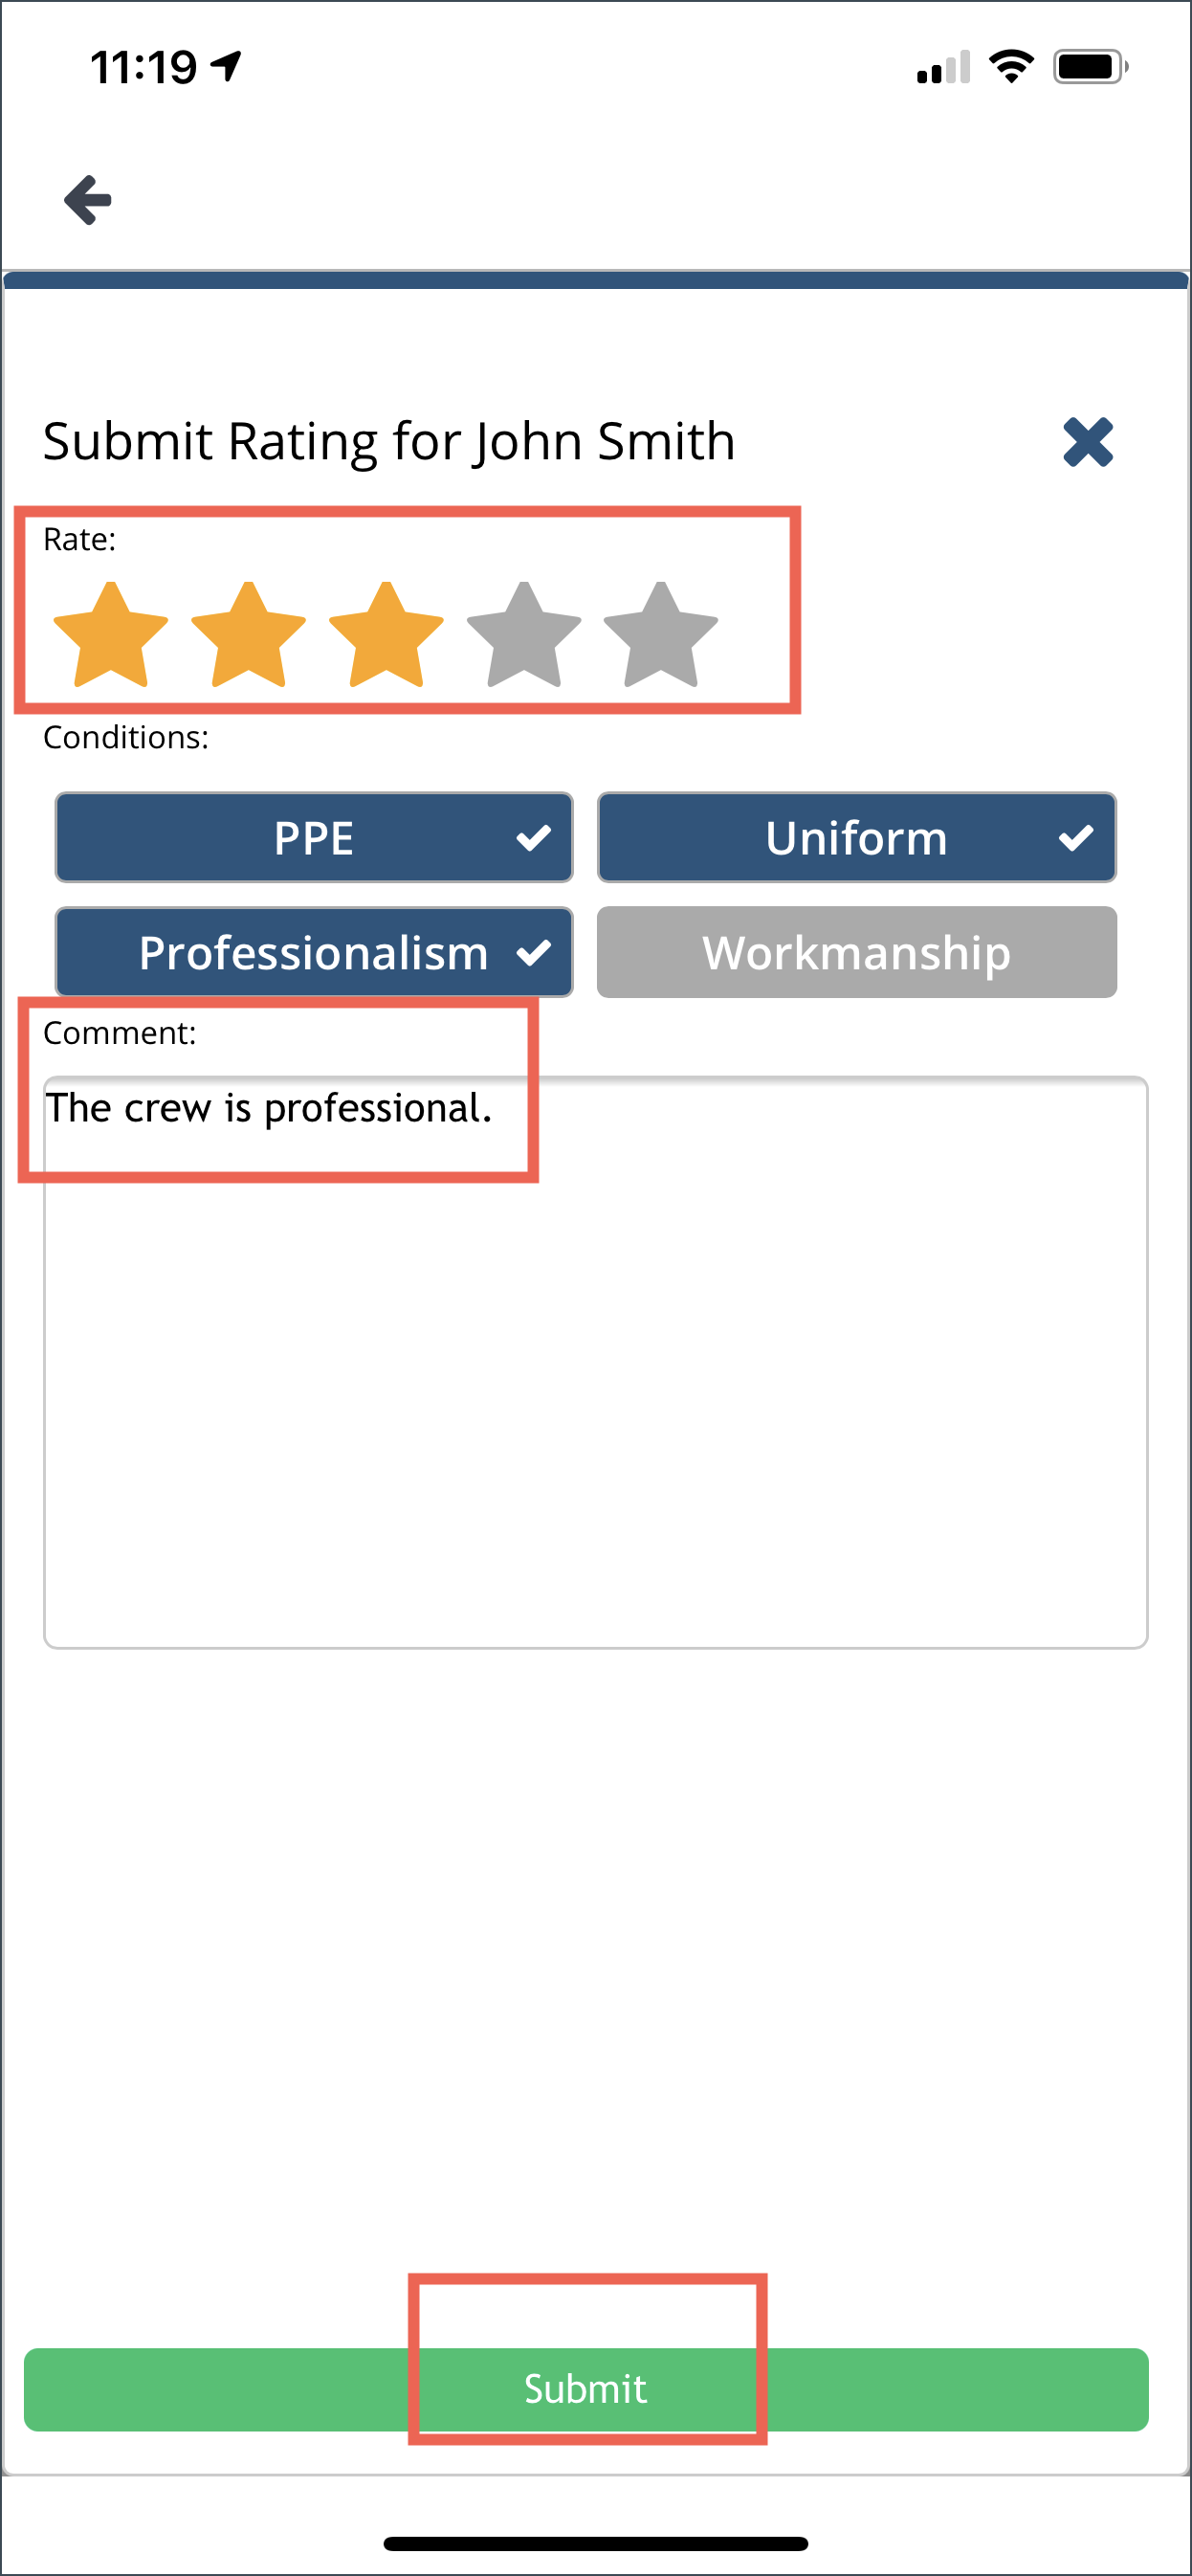
Once rating is submitted, the star will turn to yellow together with the rating you have selected.
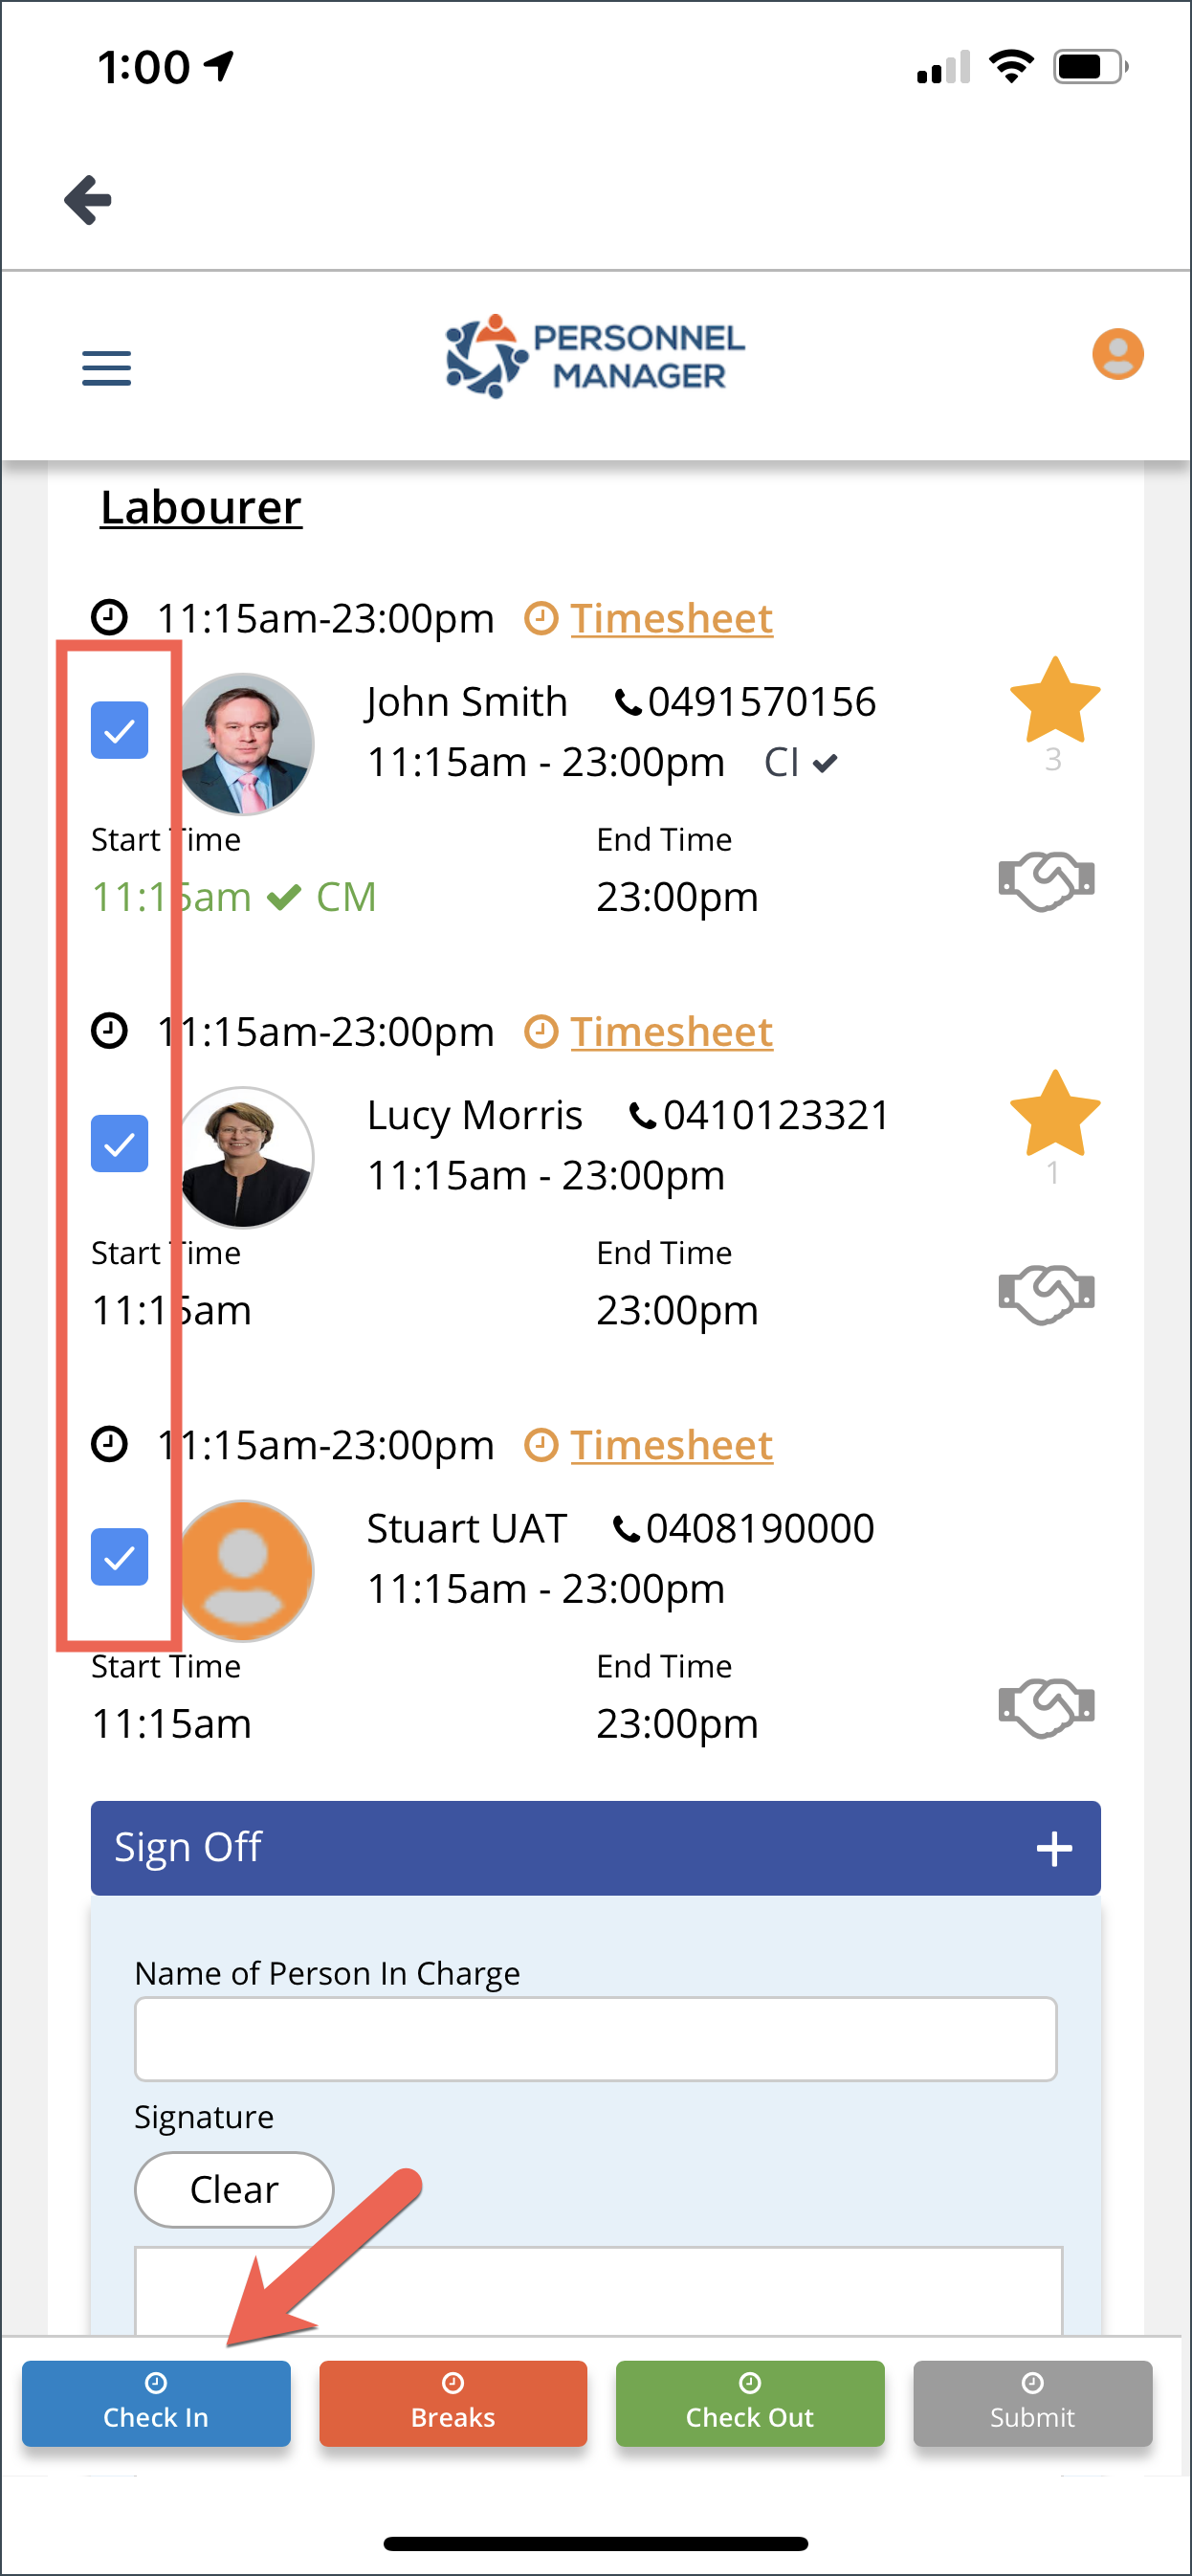
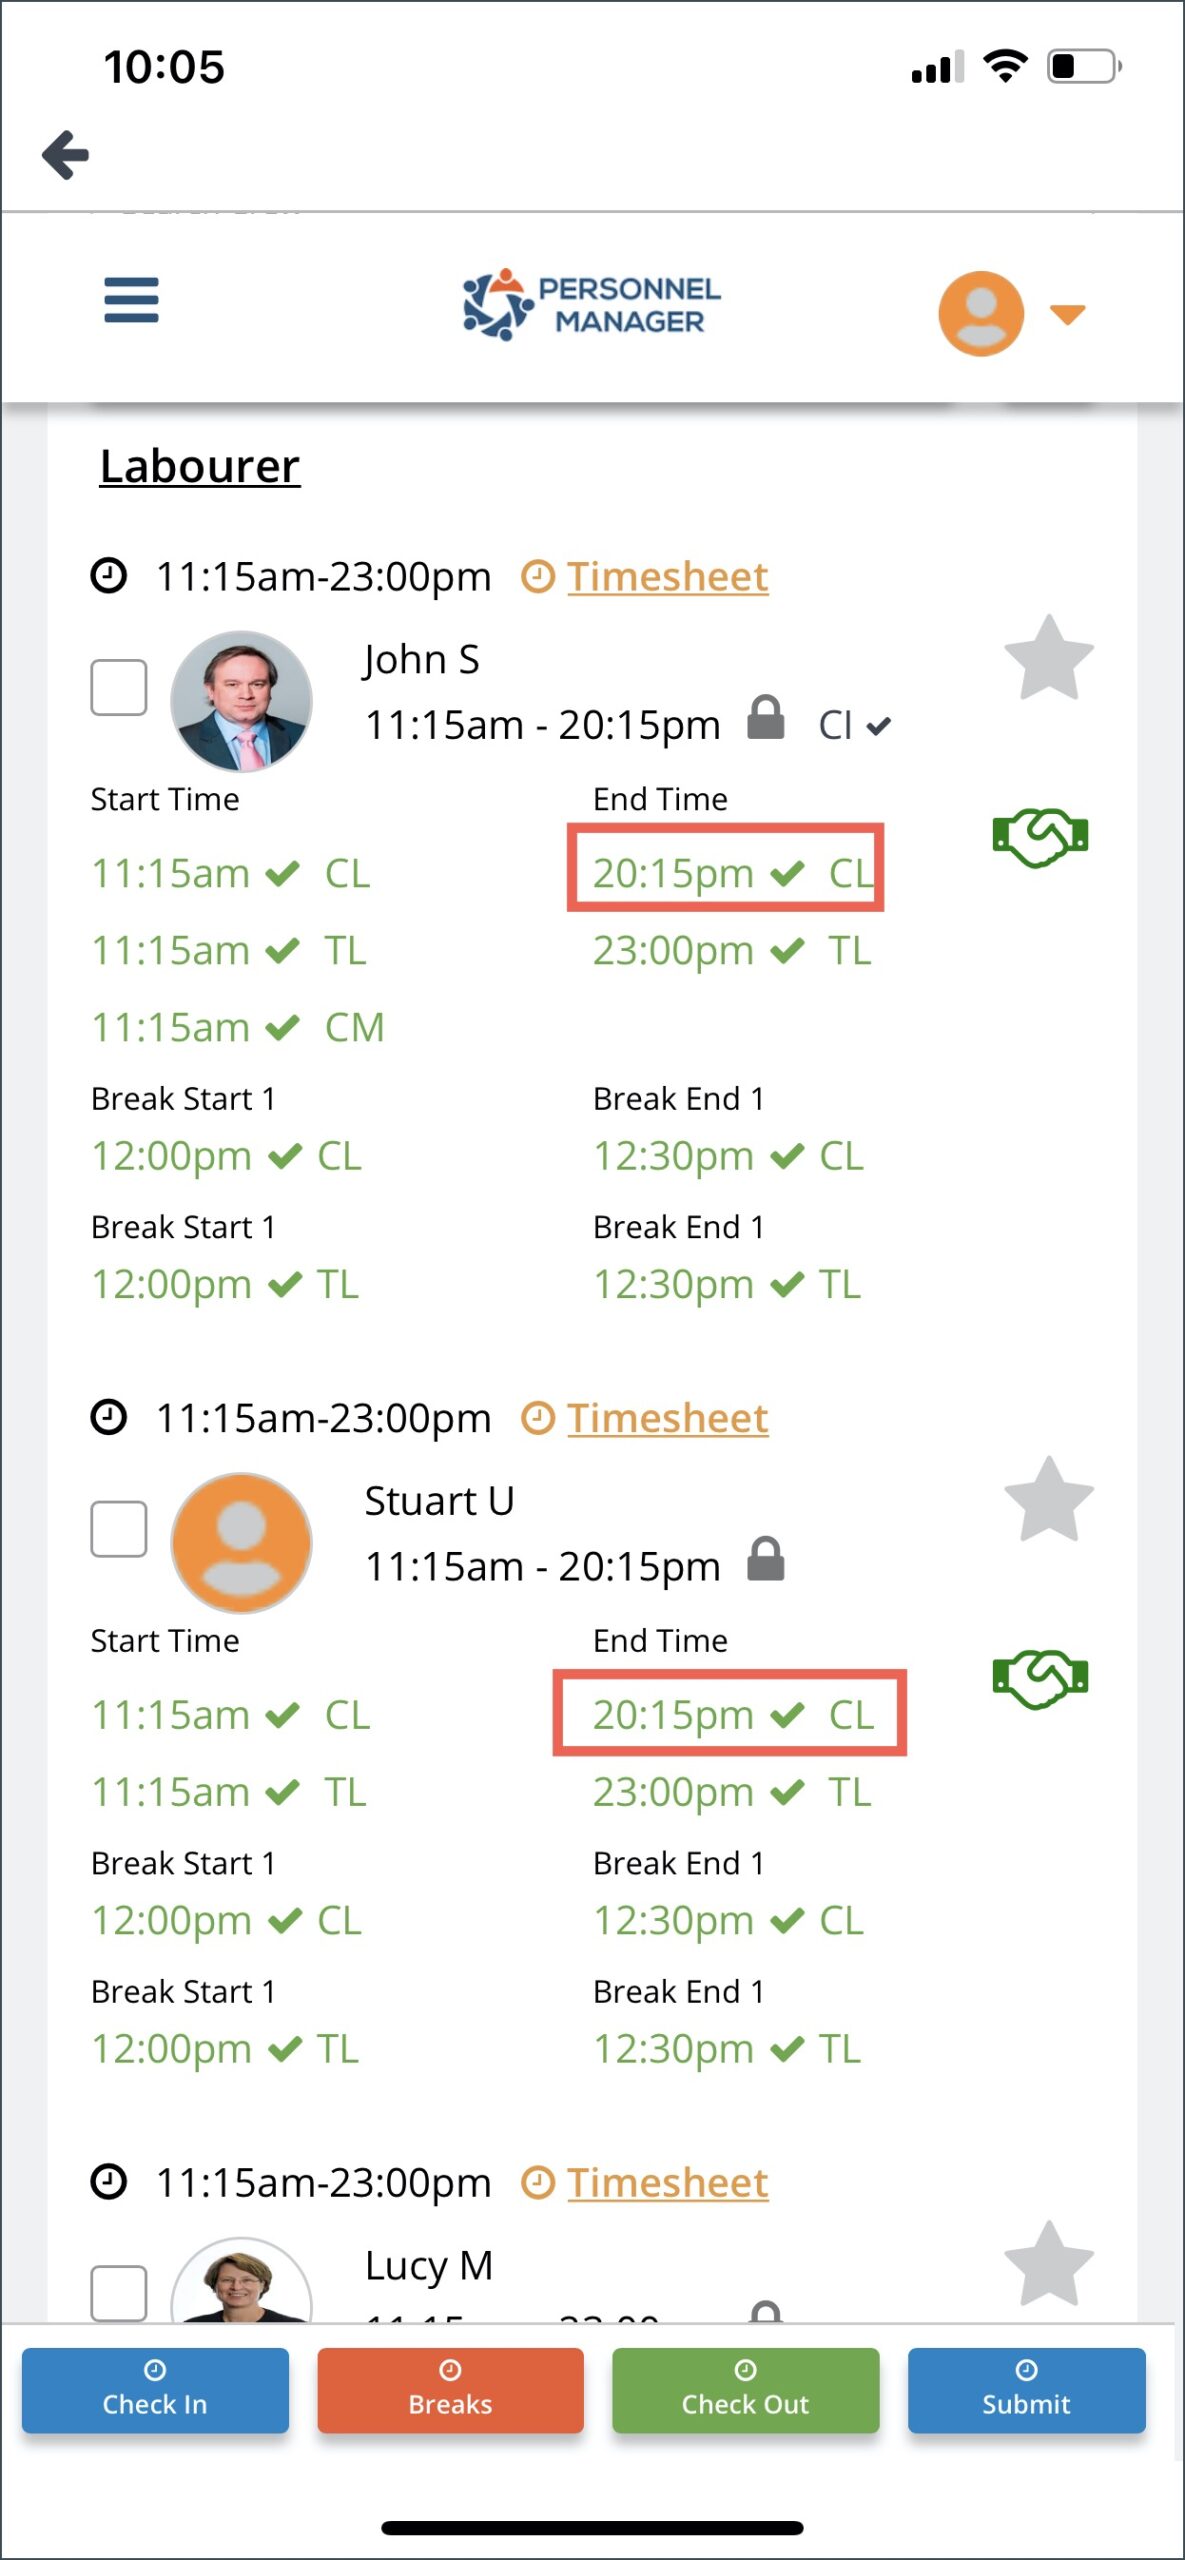
Check In, Check Out and Break
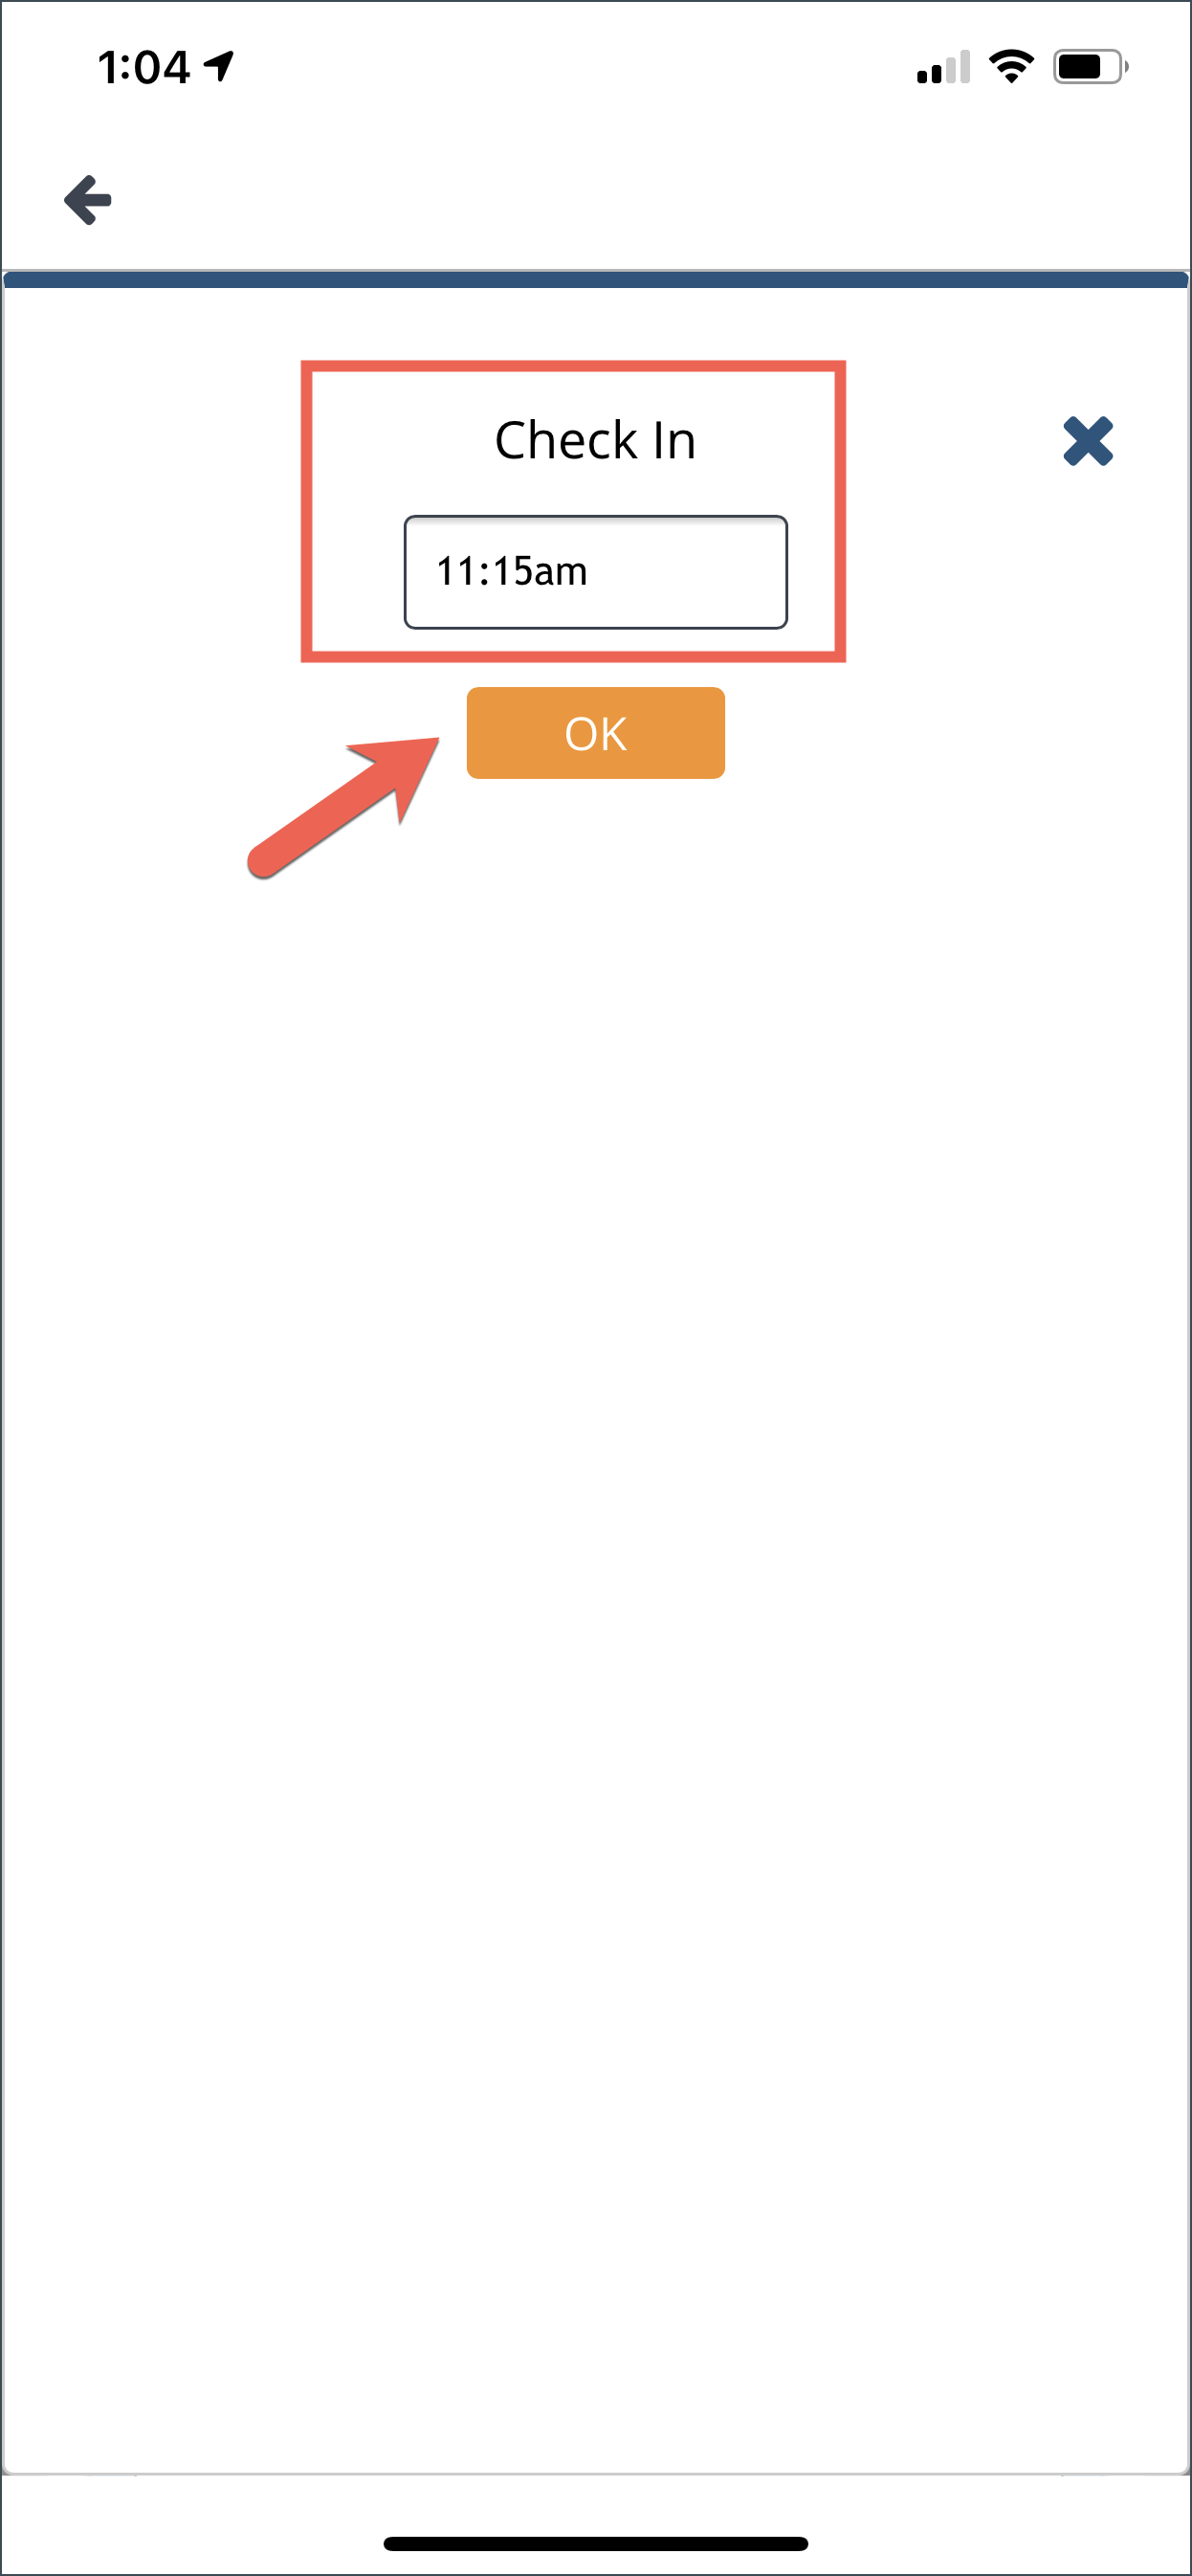
As a Client you can enter times for all the crew. Simply put a check on the box of the crew name, click the Check In button, select the time from the dropdown menu and click OK.
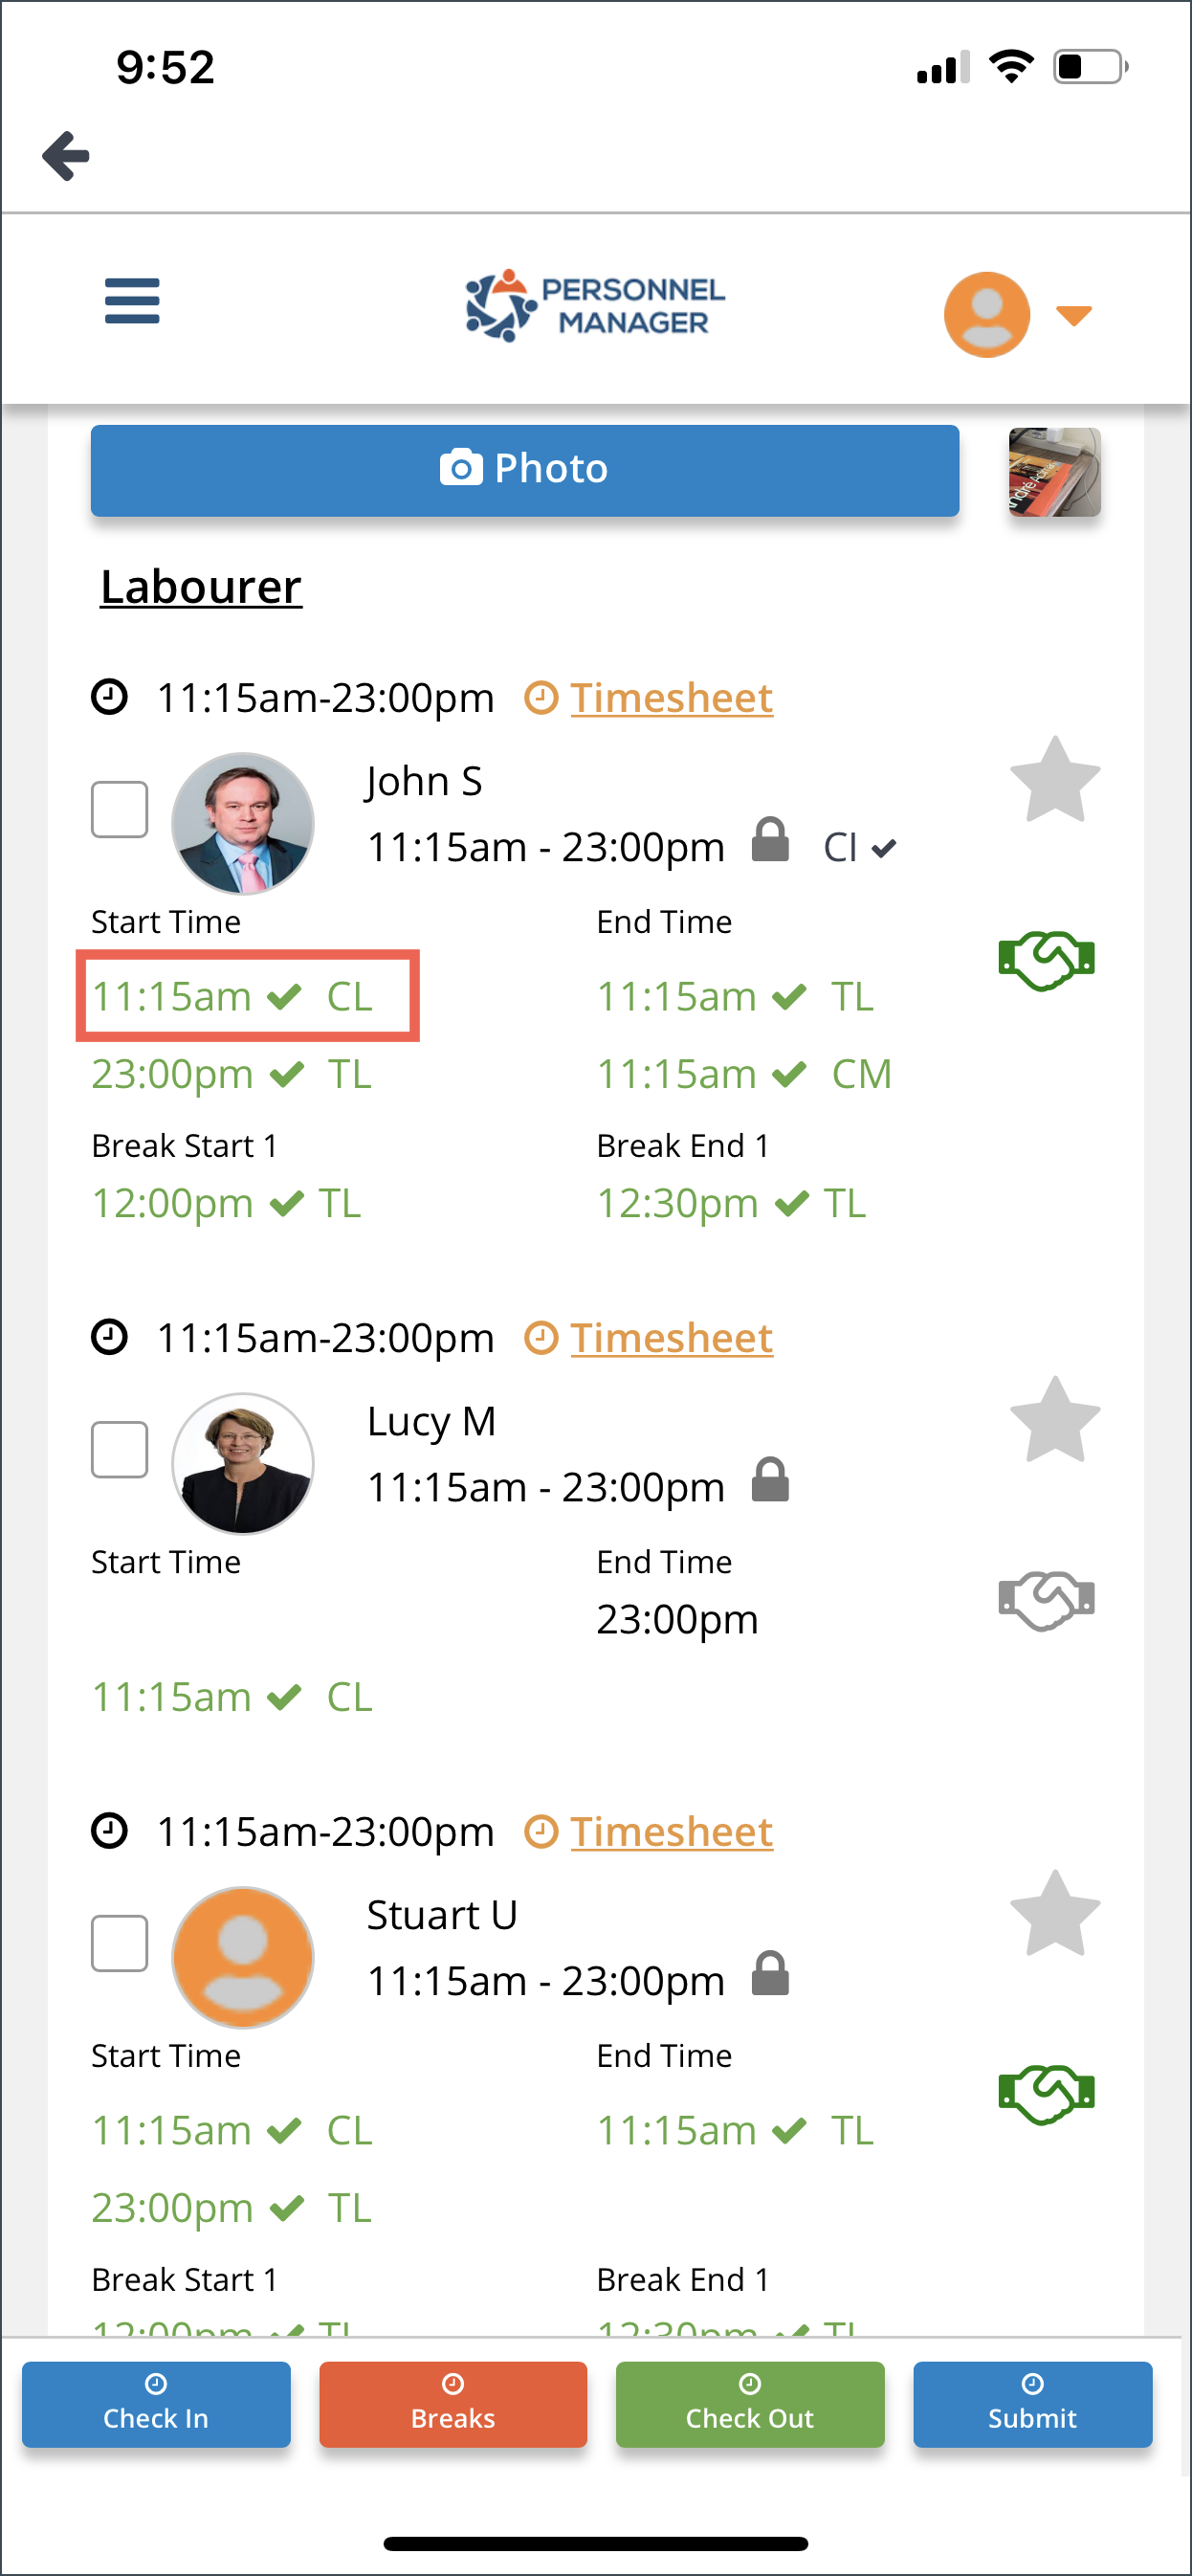
The Day Sheet will refresh and the selected Check In time will be reflected in green font with “CL” mark for Team Leader.
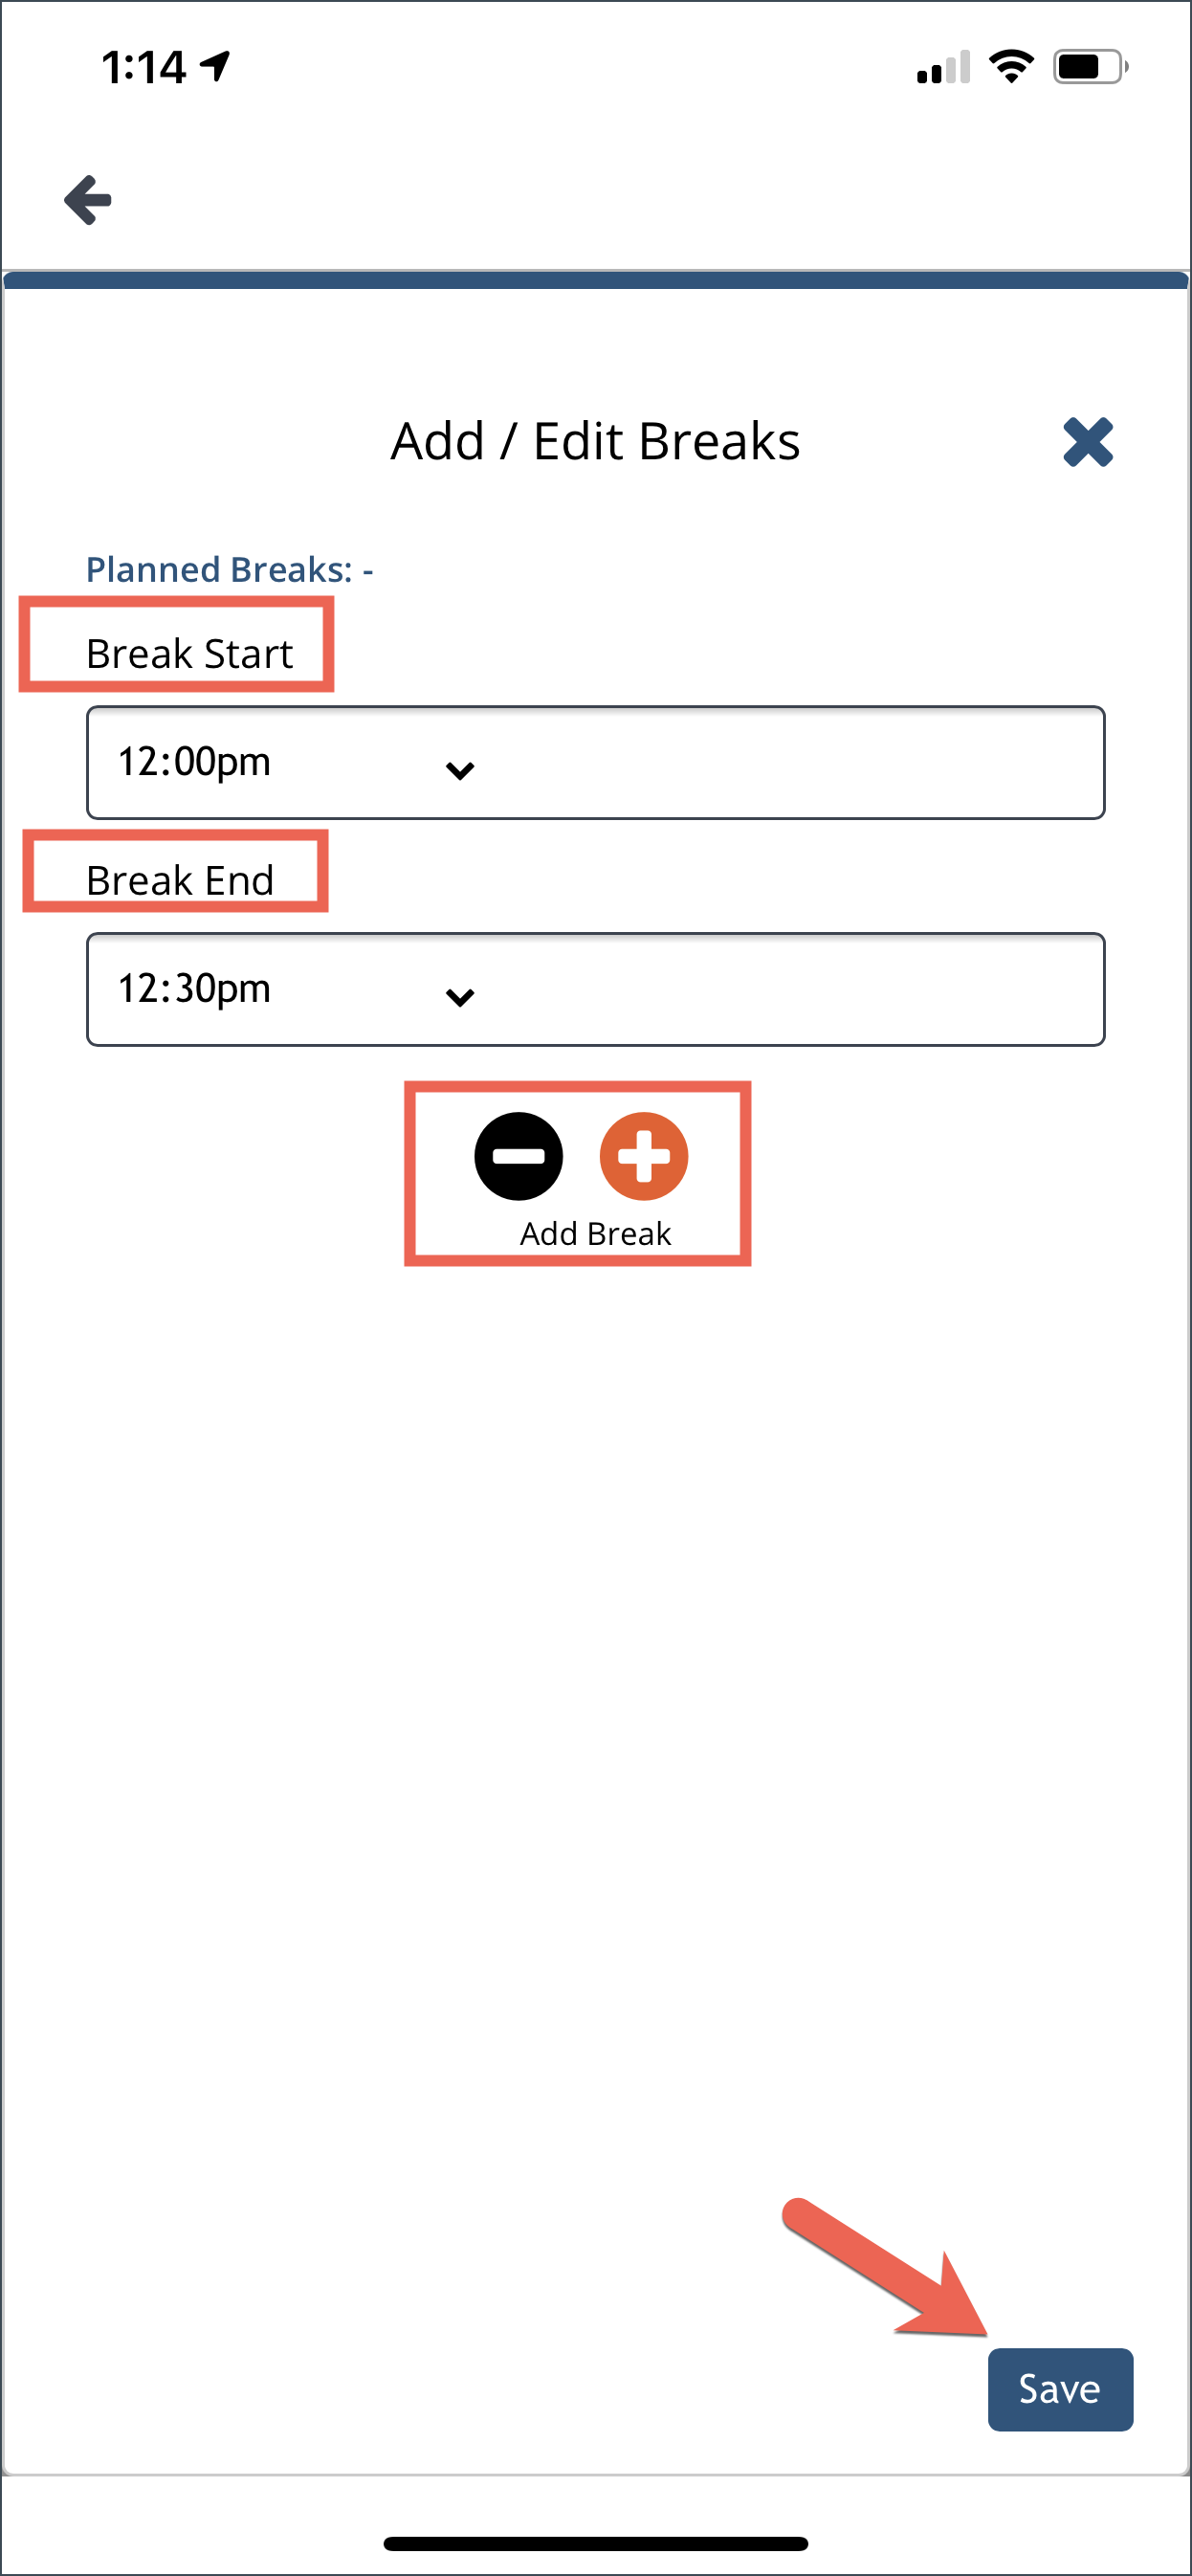
Do the same for break time, Tick the box of the crew where you want to add break time.
Click the plus icon to add a break time.
Then select time for Break Start and Break End. Click Save.

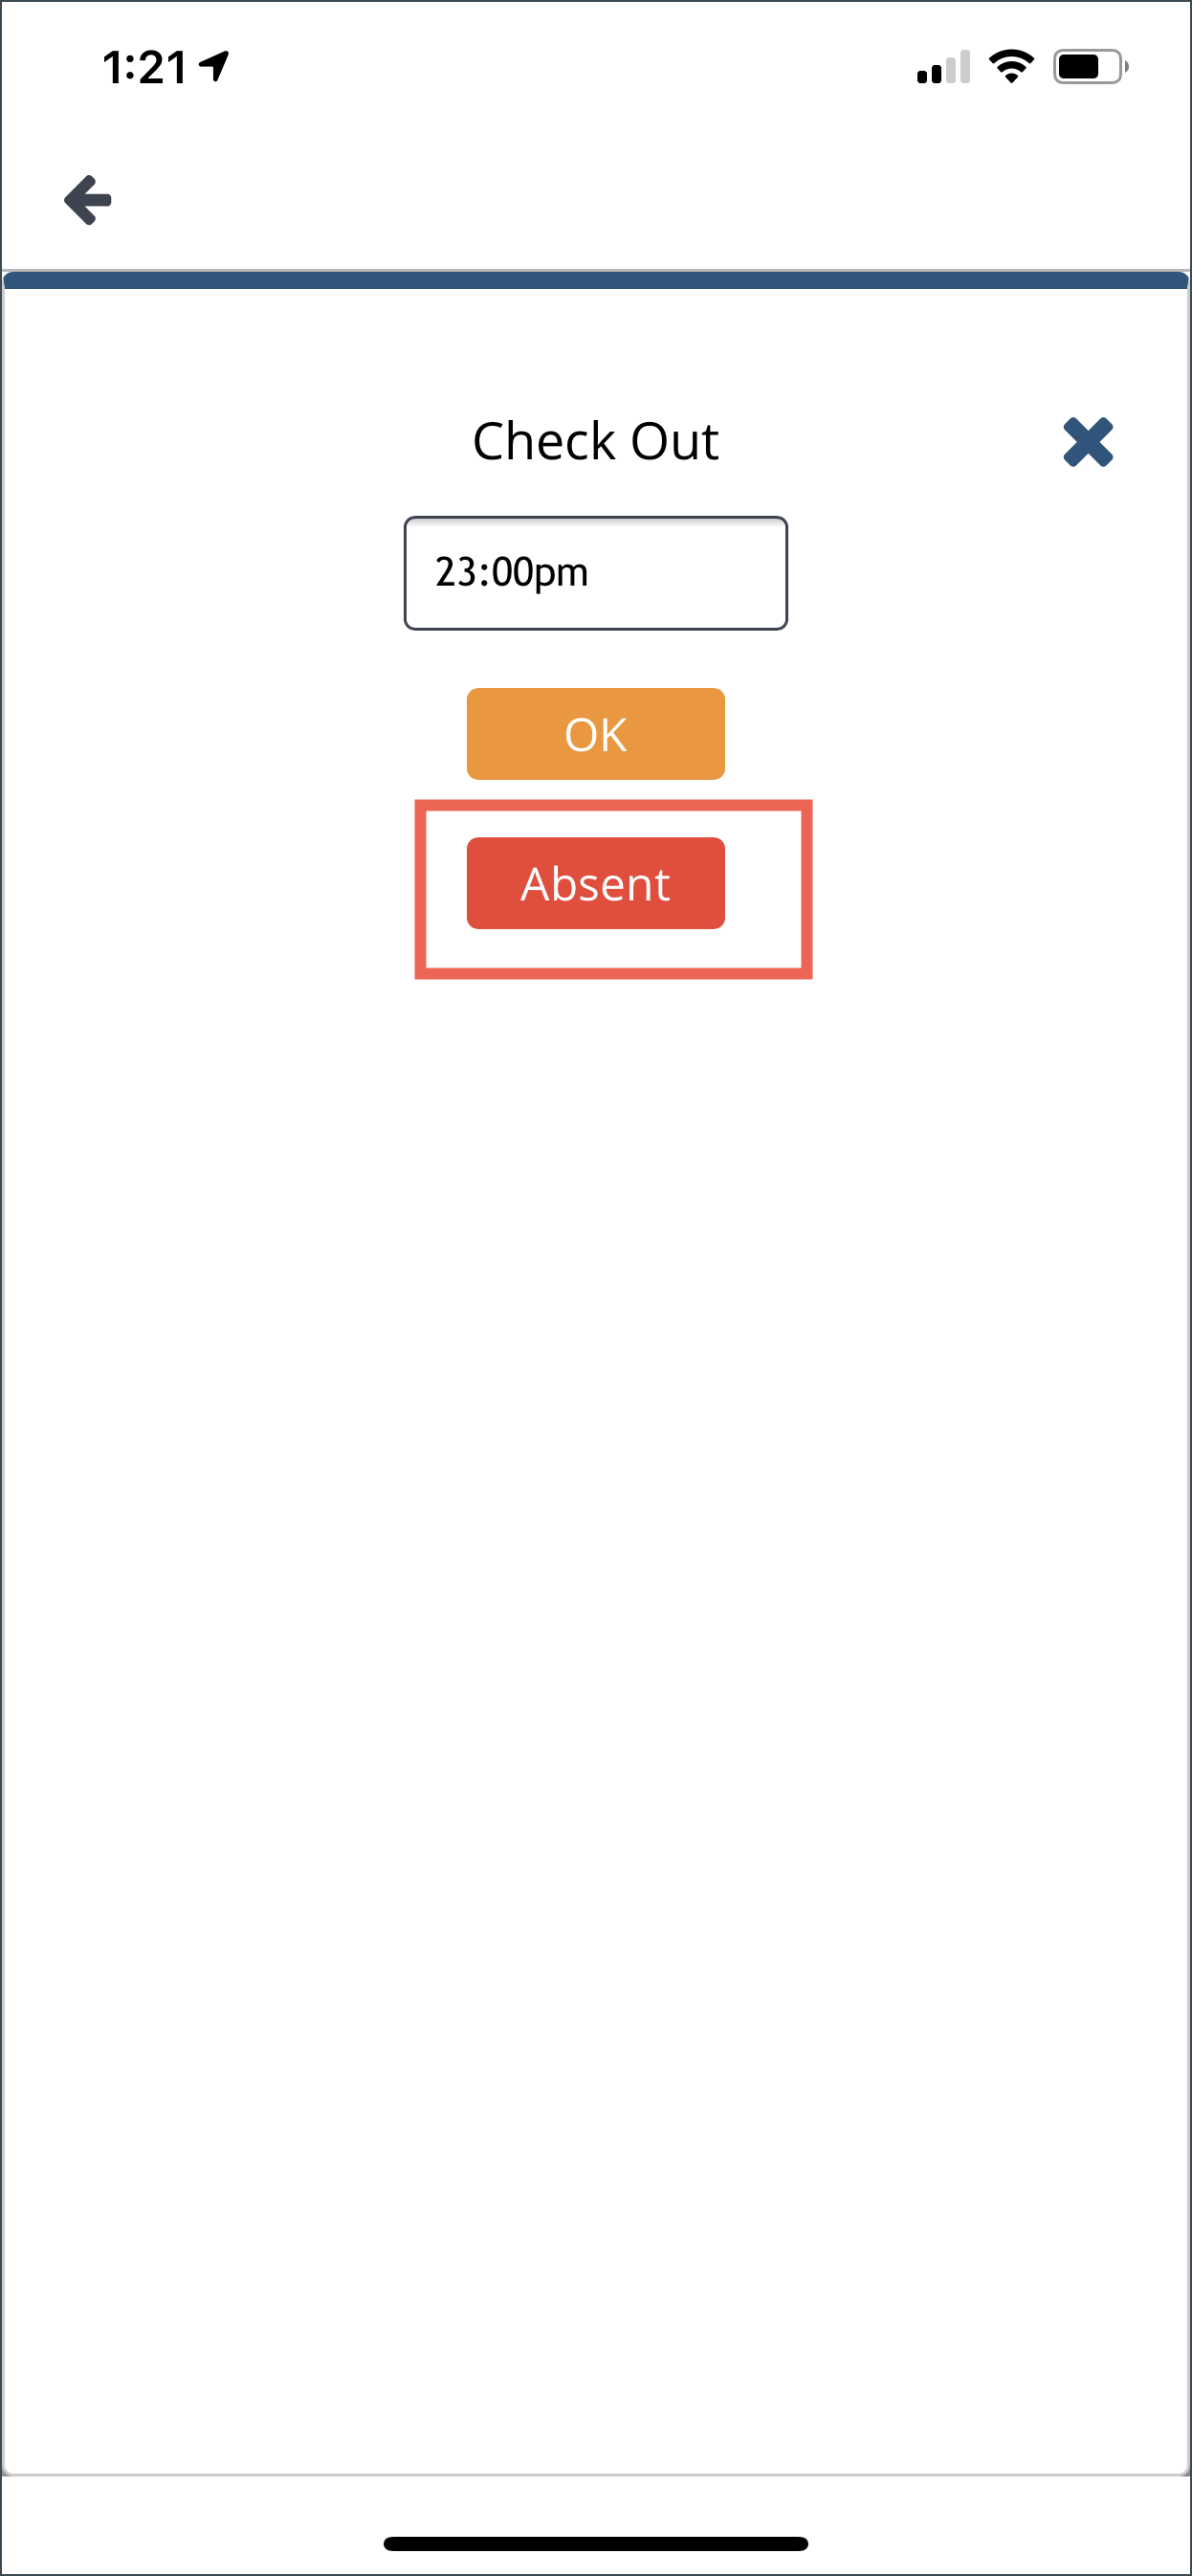
For the Check Out time, follow the steps in the Check In but instead of clicking Check In tap the button of Check Out.
Marking Crew Absent
To mark a crew absent, tick the box of the crew then tap the Check out button, then tap Absent button.

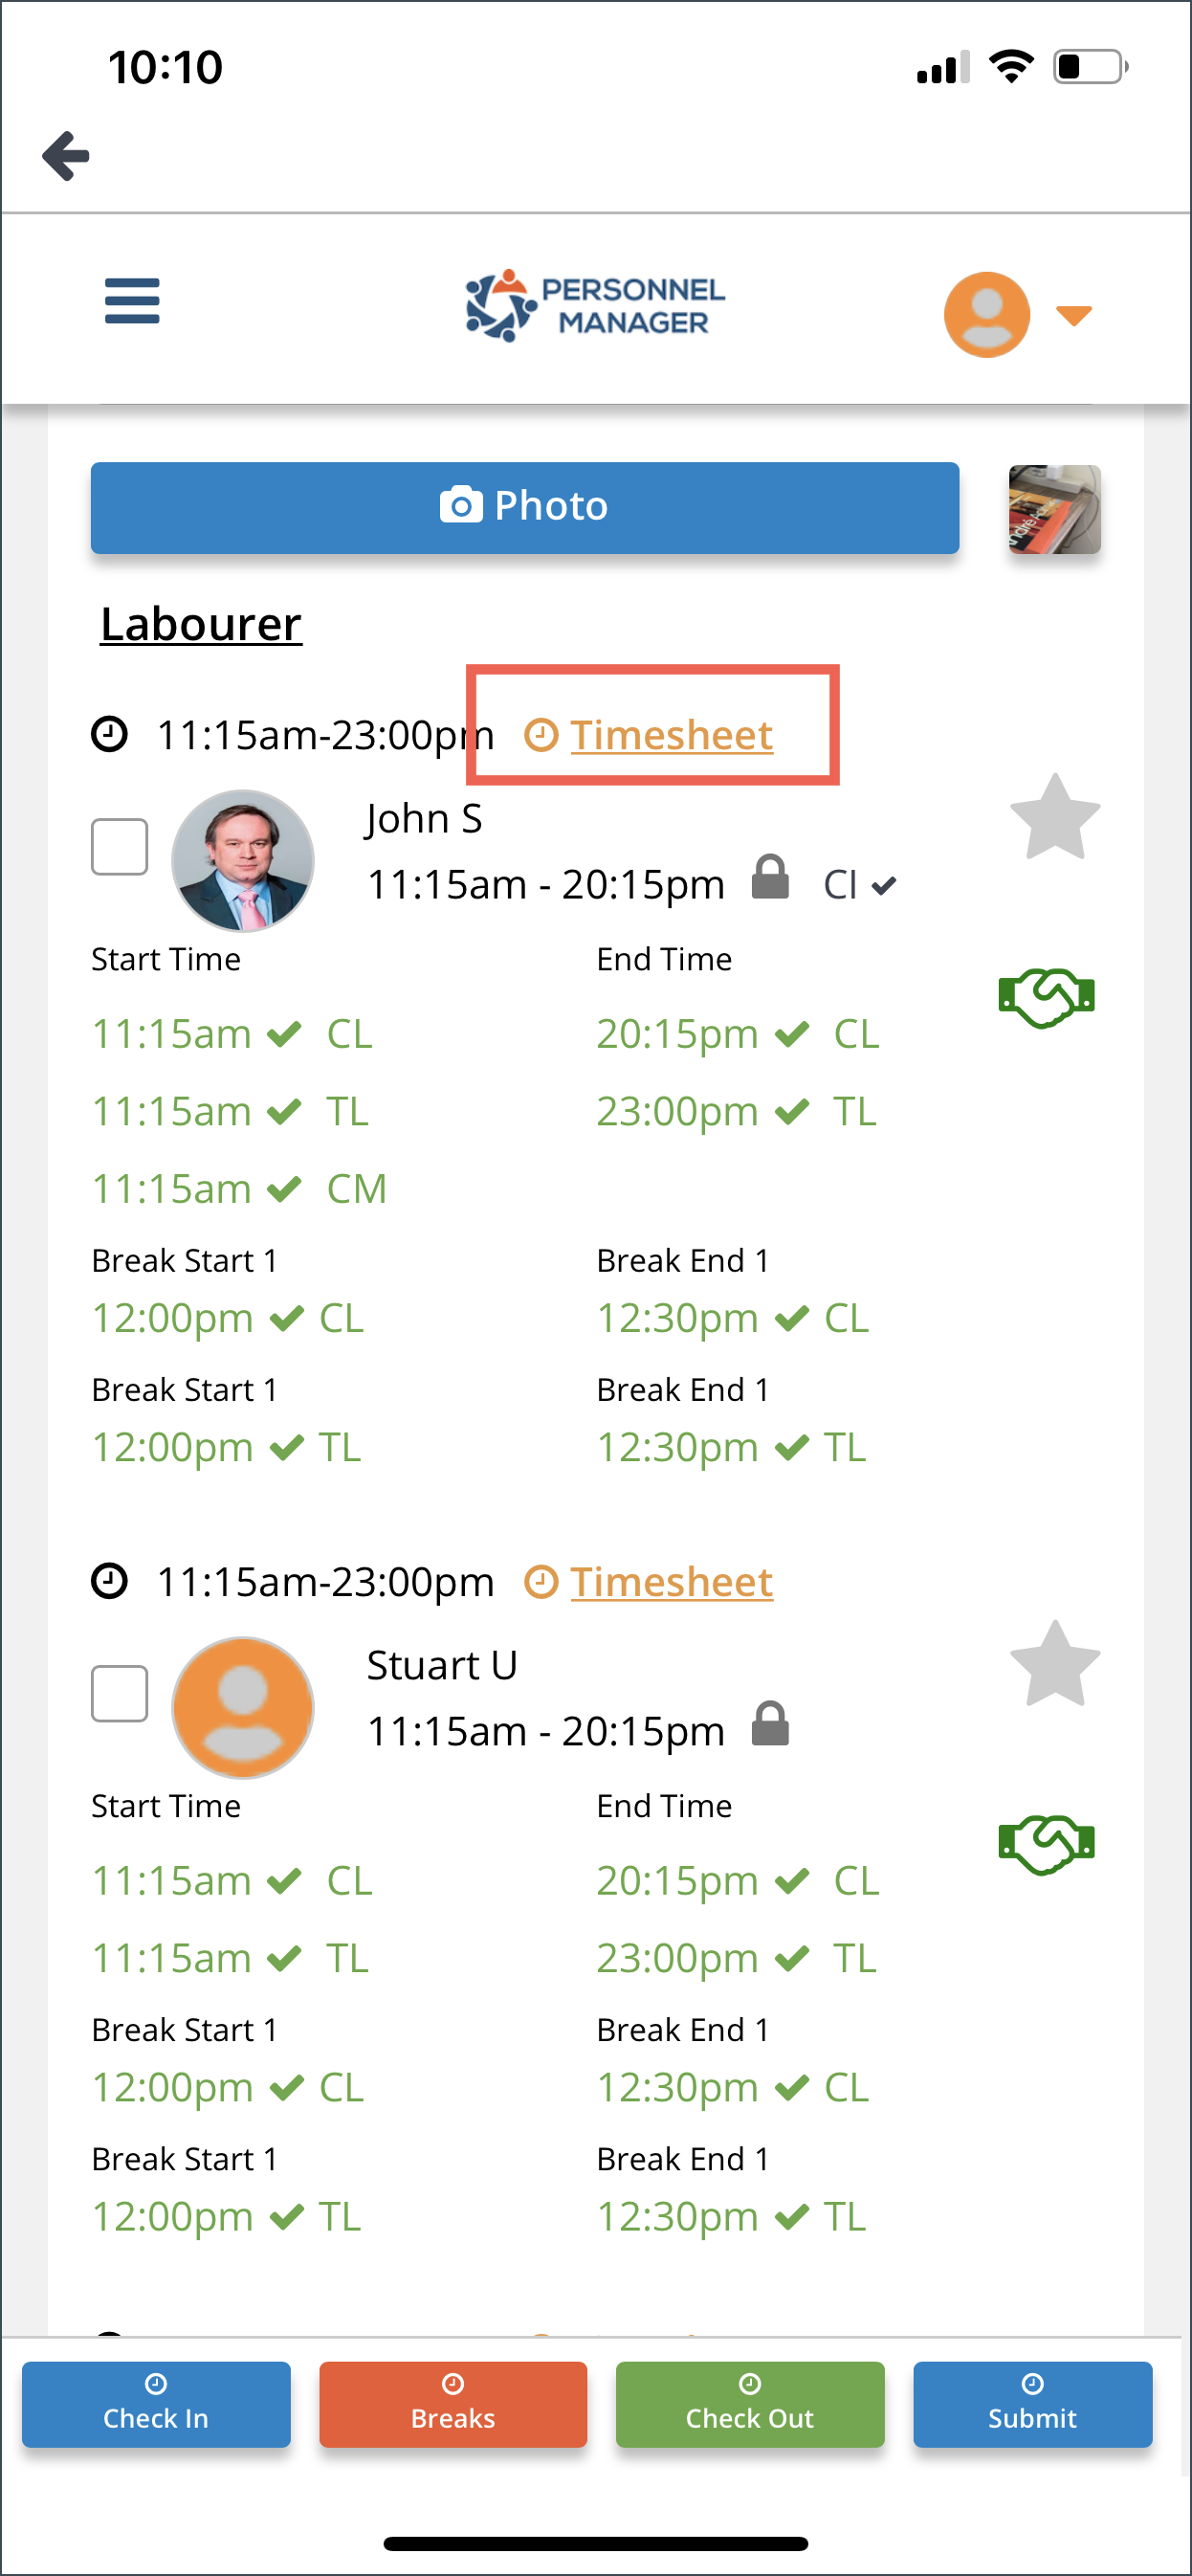
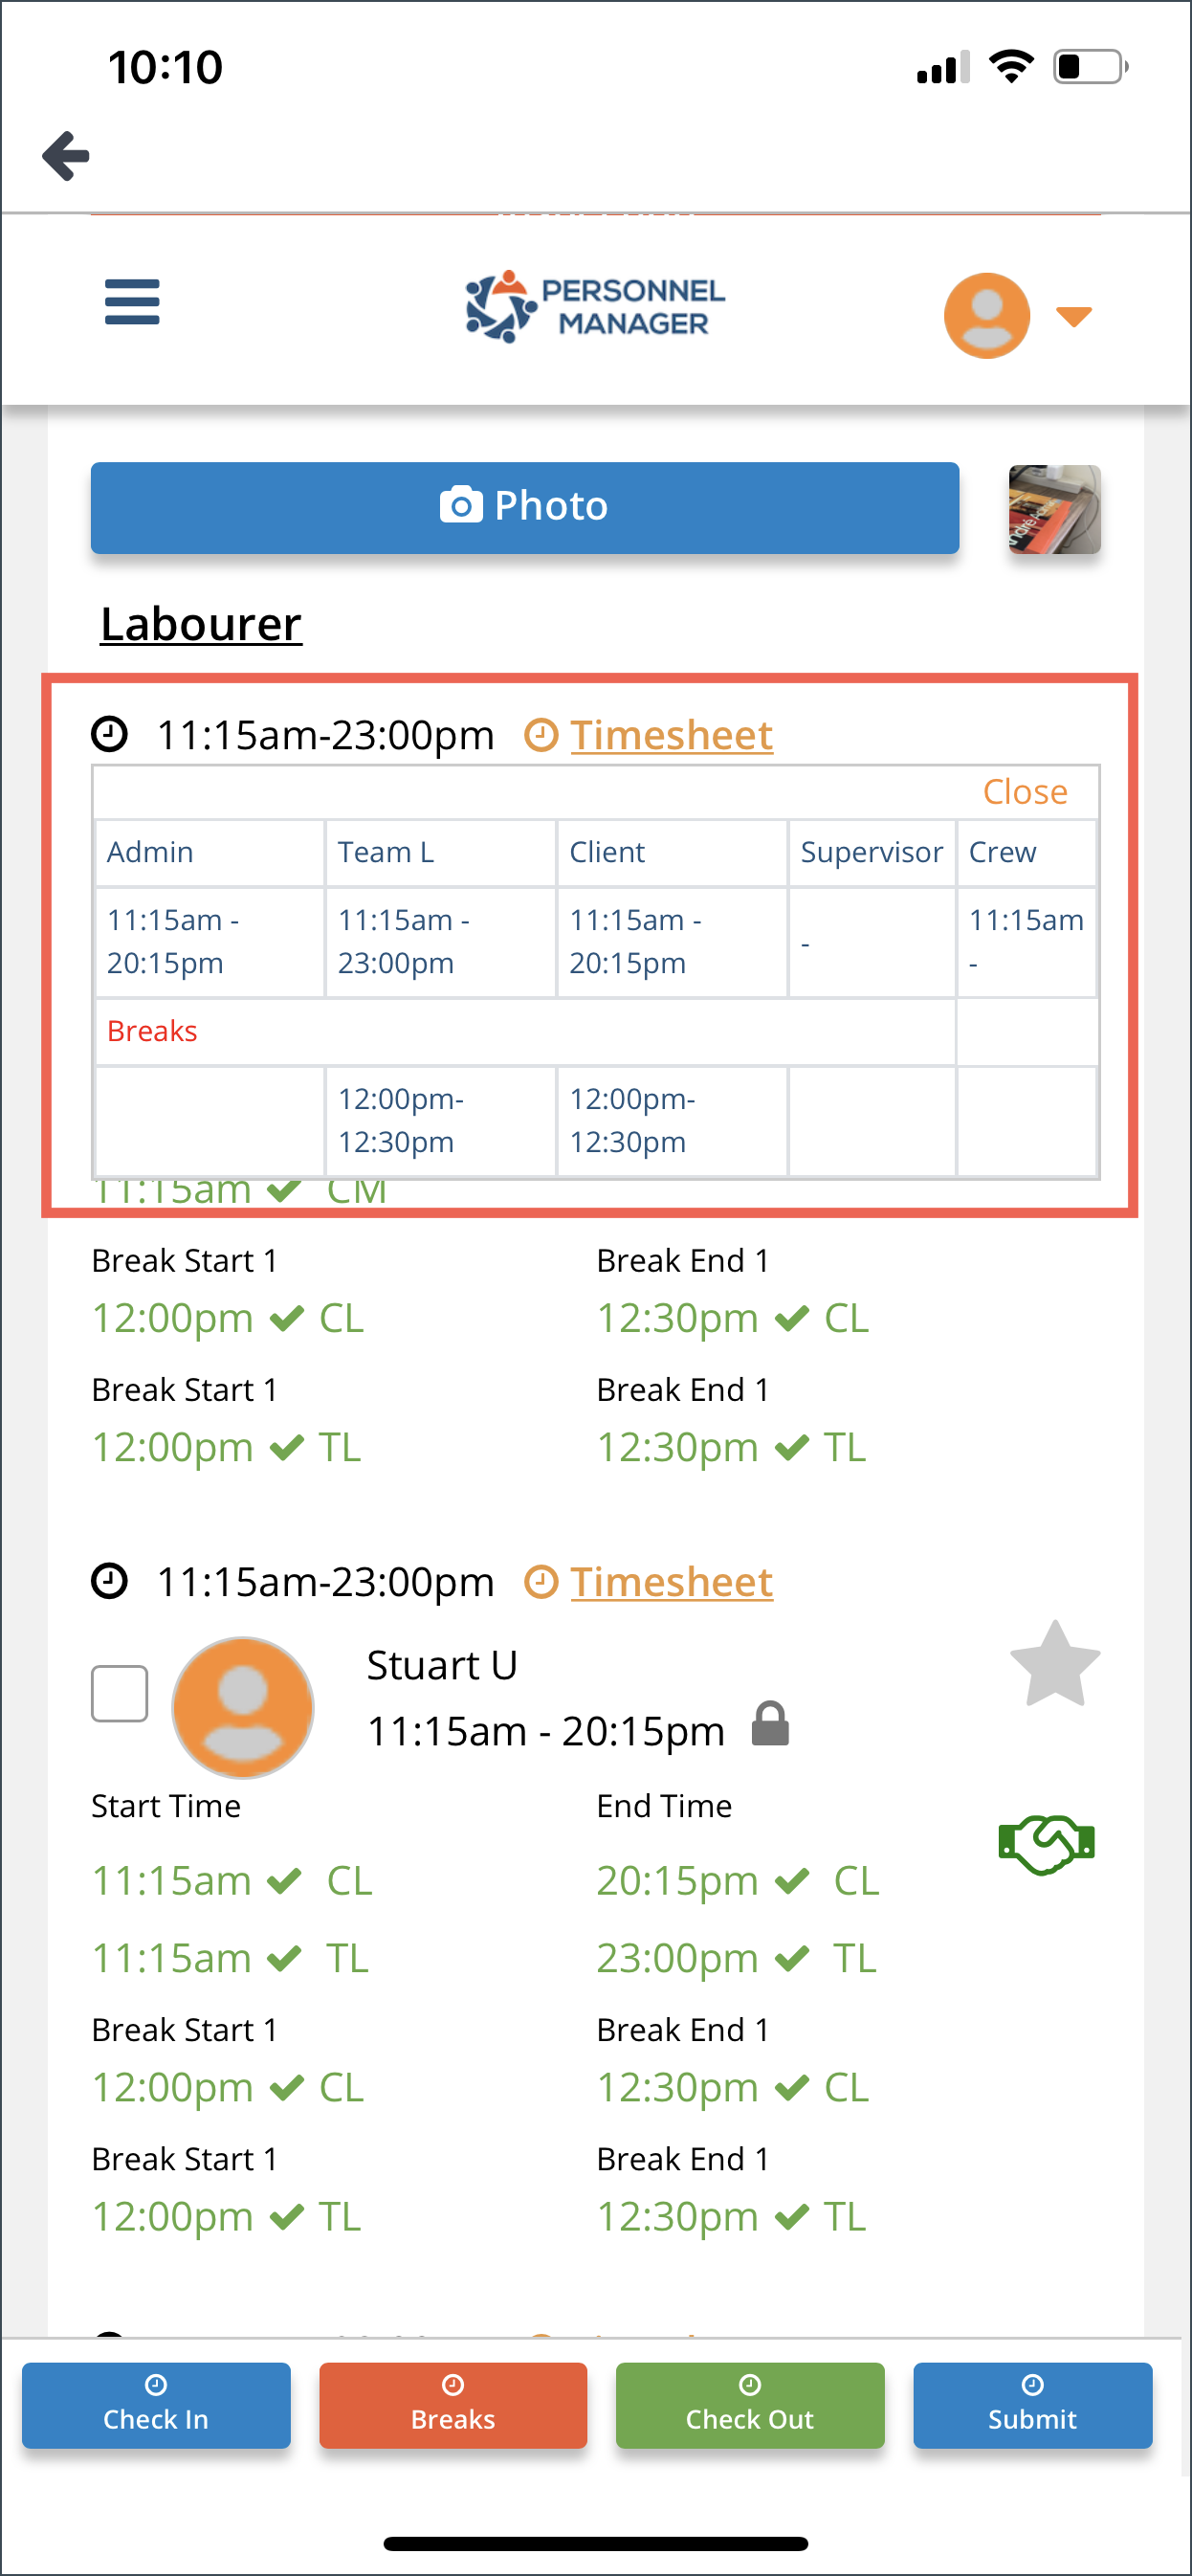
Timesheet
Click the Timesheet link on the Day Sheet to view the time entered by Crew, Supervisor, Team Leaders, Admin and Duty Managers.
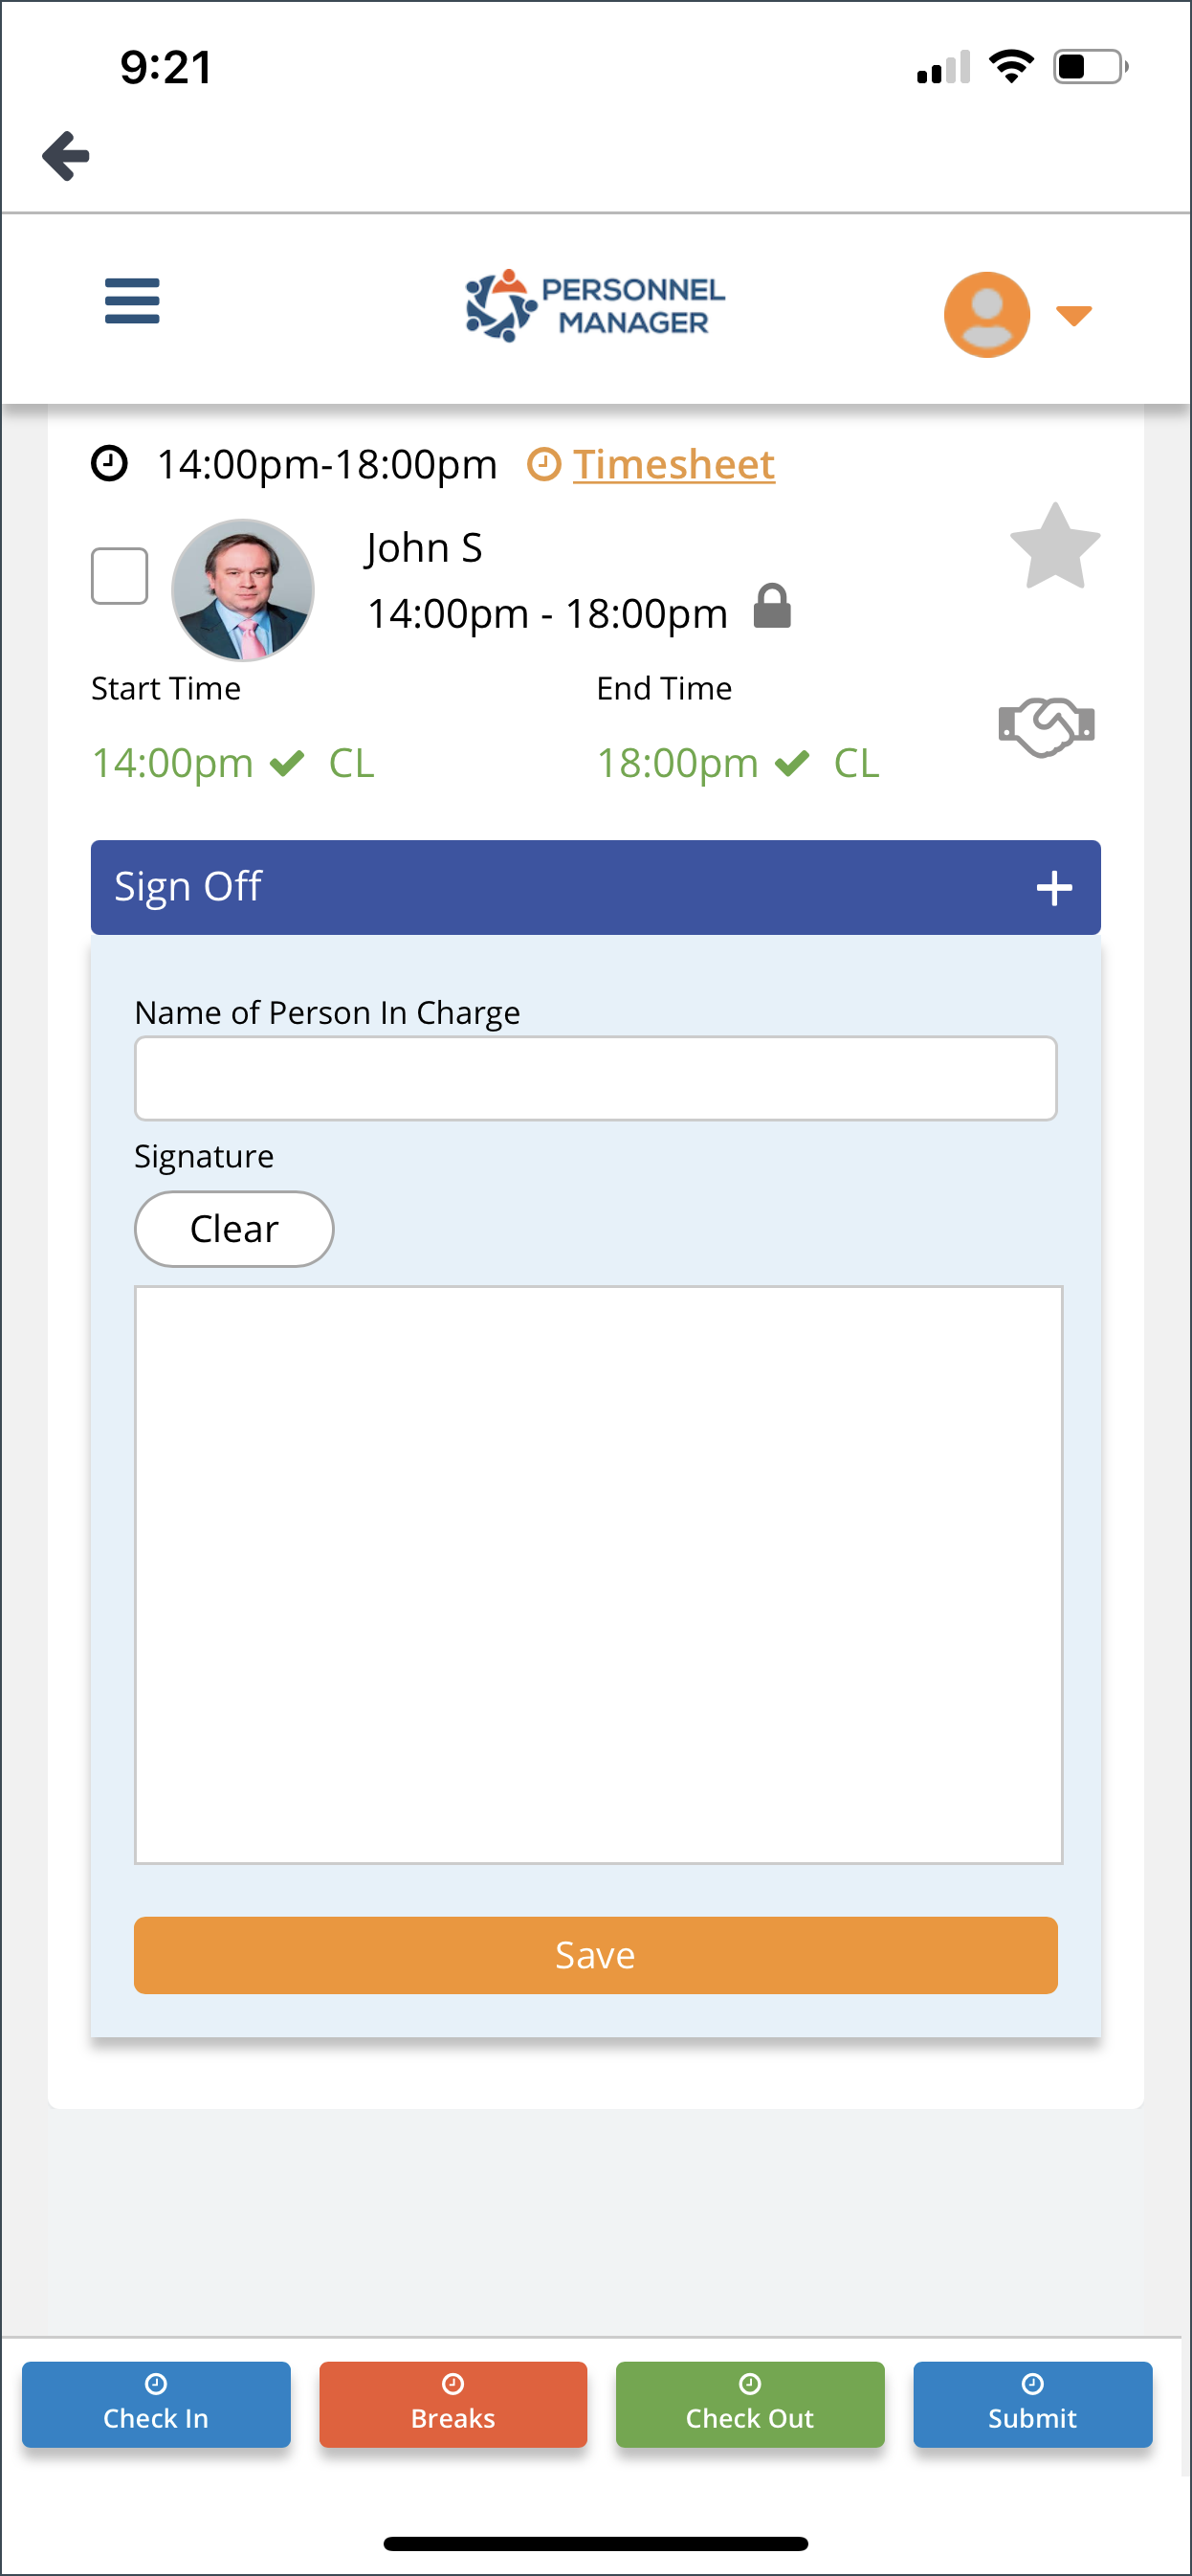
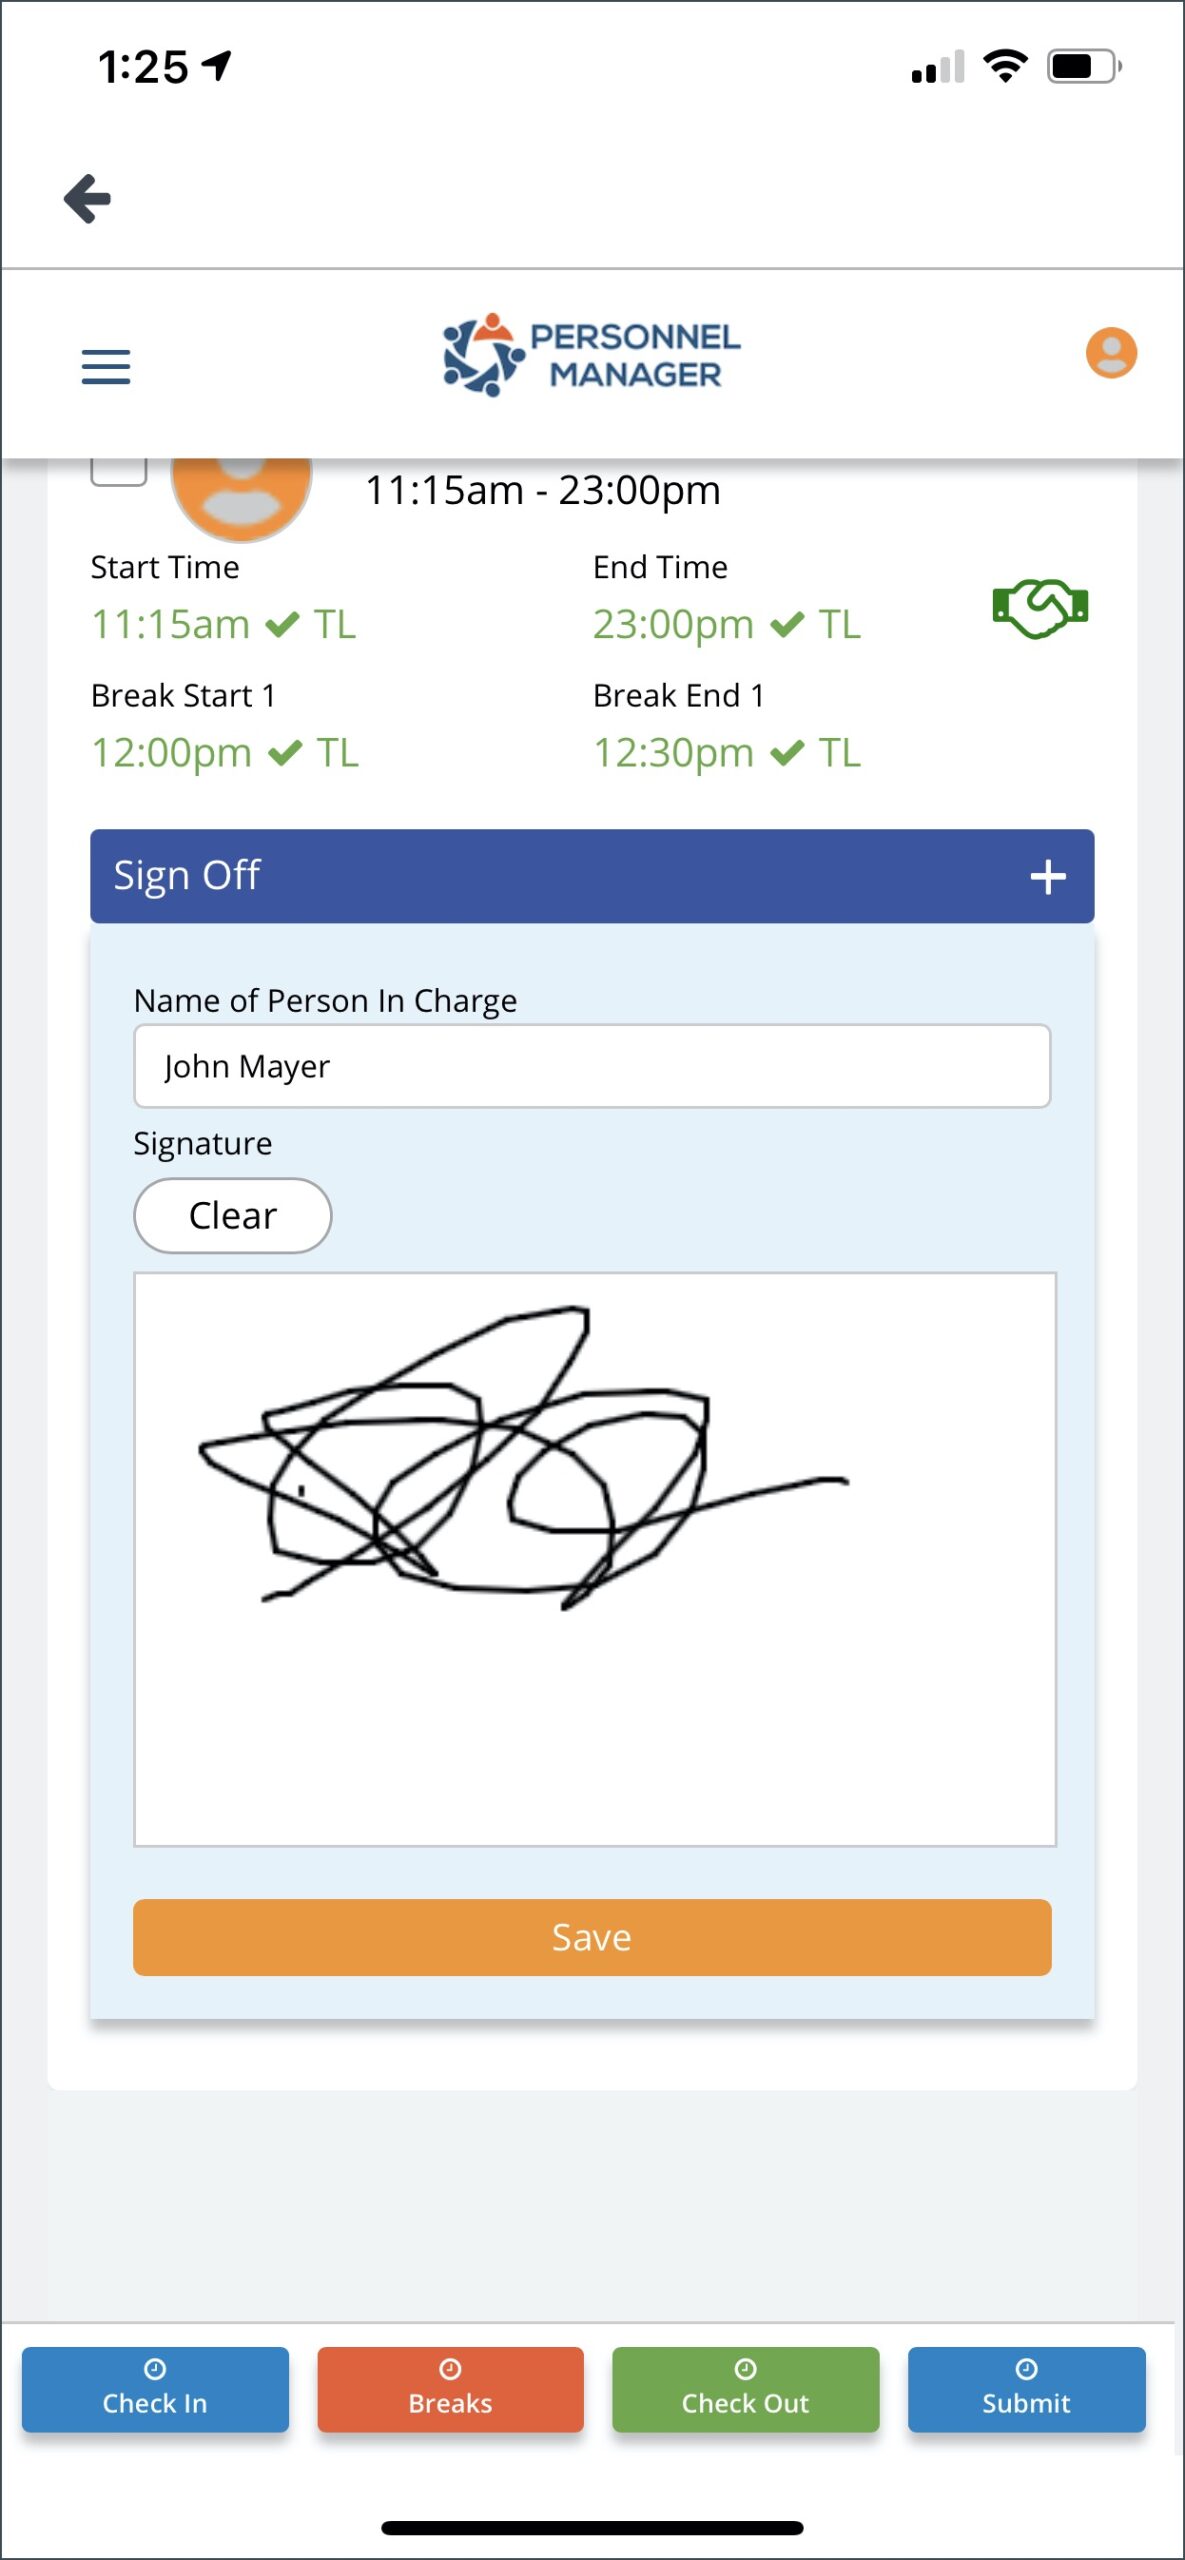
Sign Off
Affix your signature on this field if you are satisfied with the job rendered by the crew.
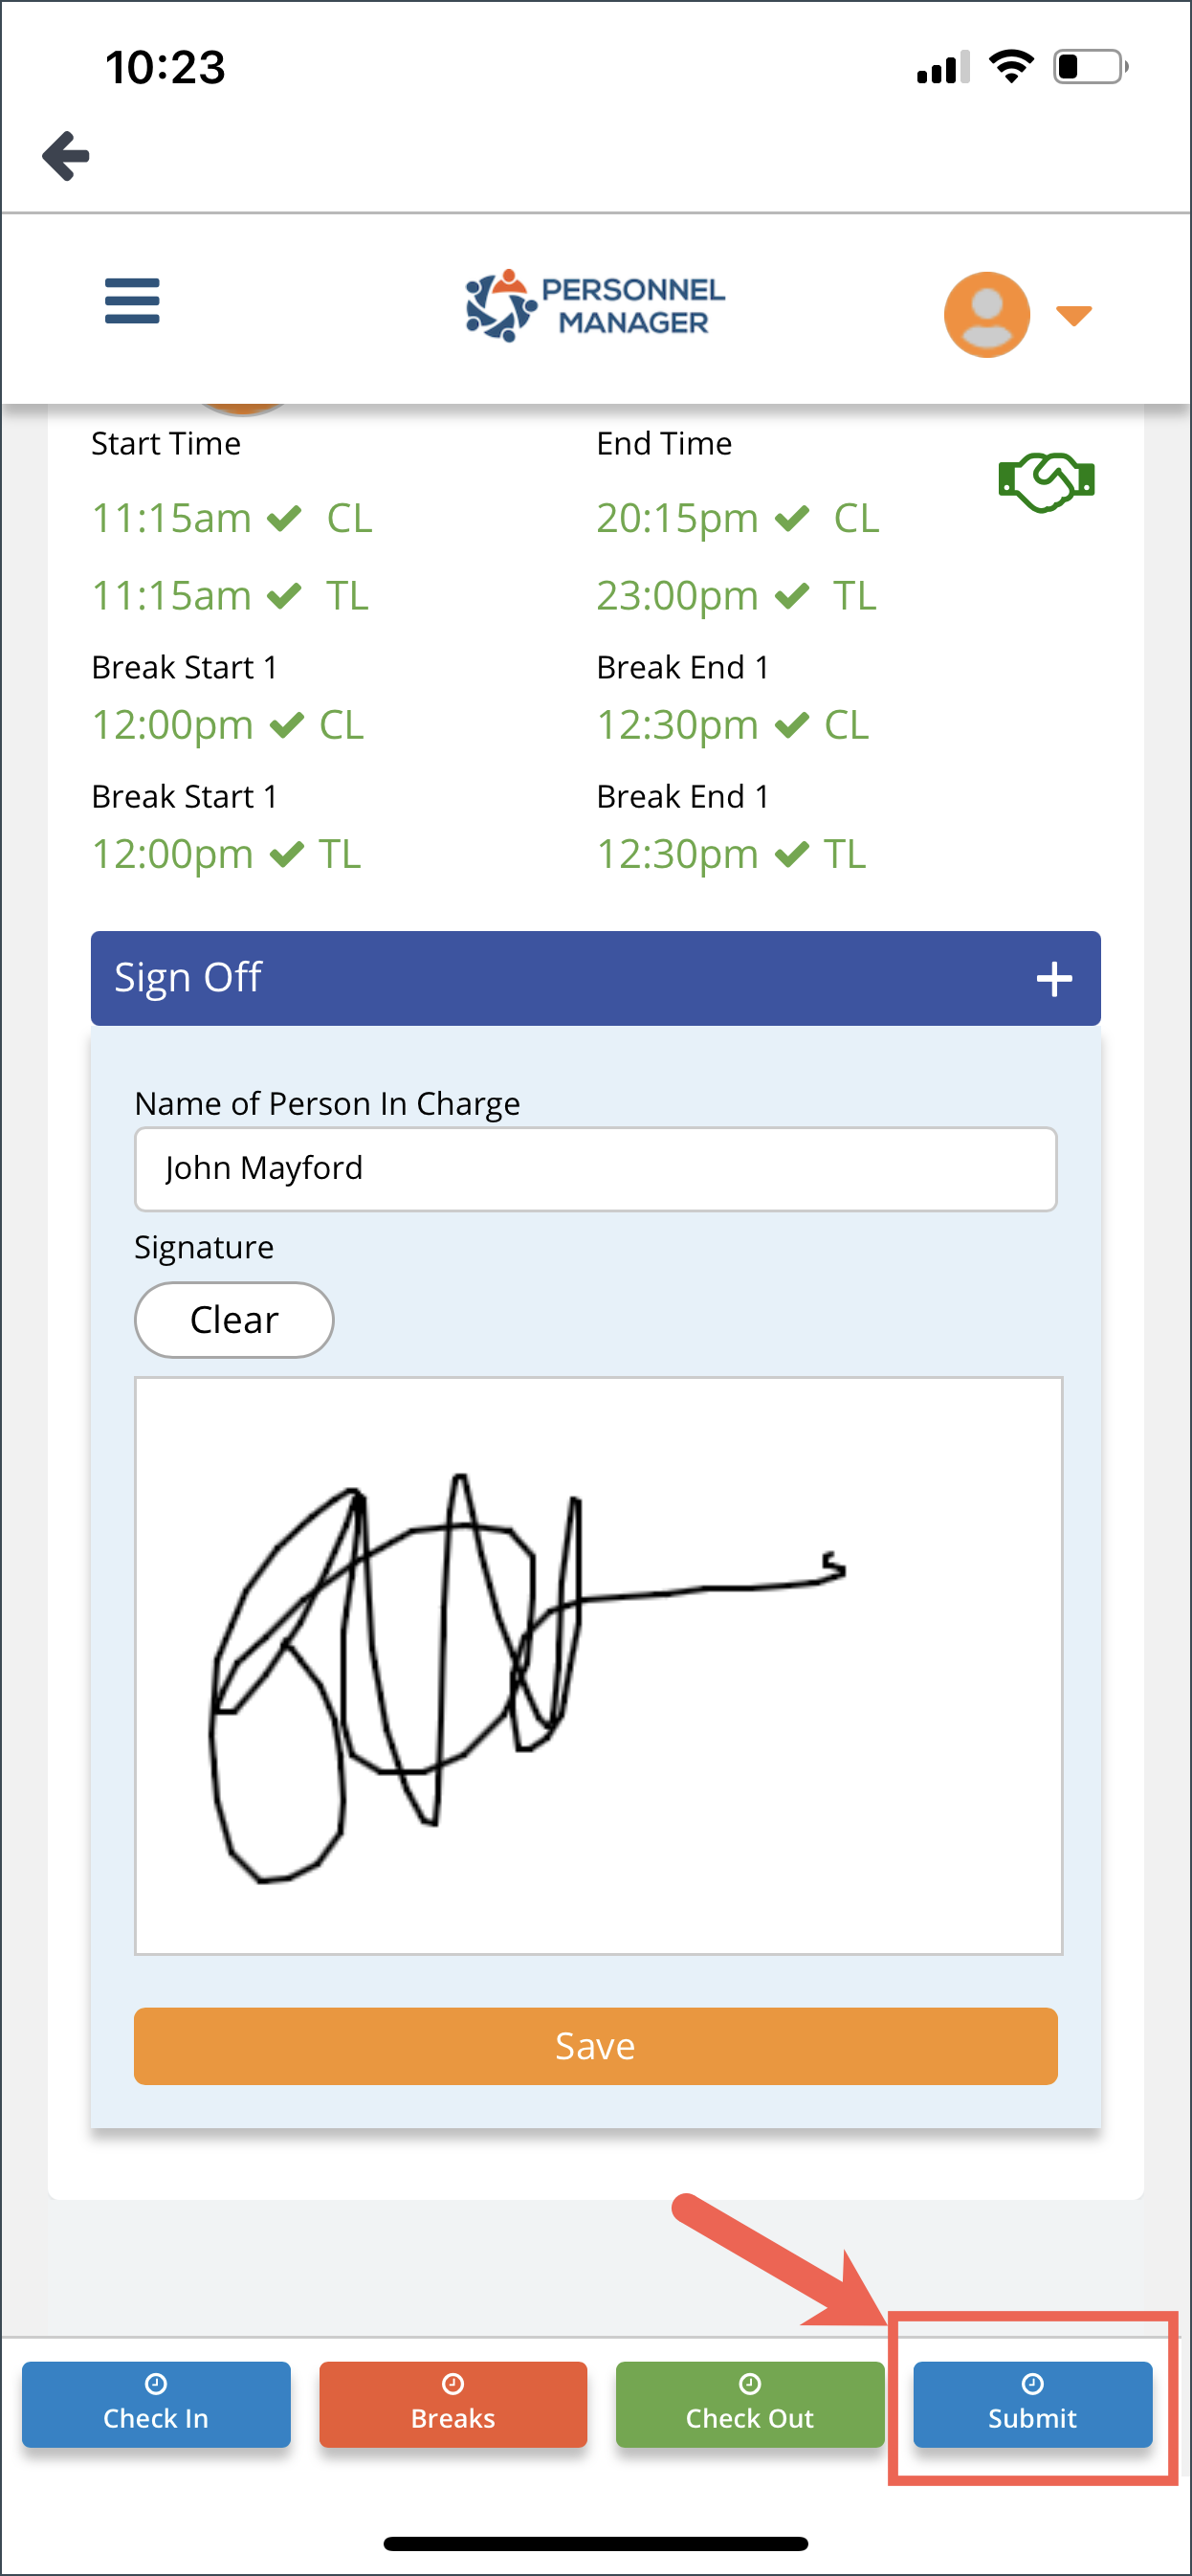
Day Sheet Submission
Click the Submit button to submit the Day Sheet. A checklist of requirements will appear for your review before submitting the Day Sheet.
Once you are certain that everything is in order, click Yes.

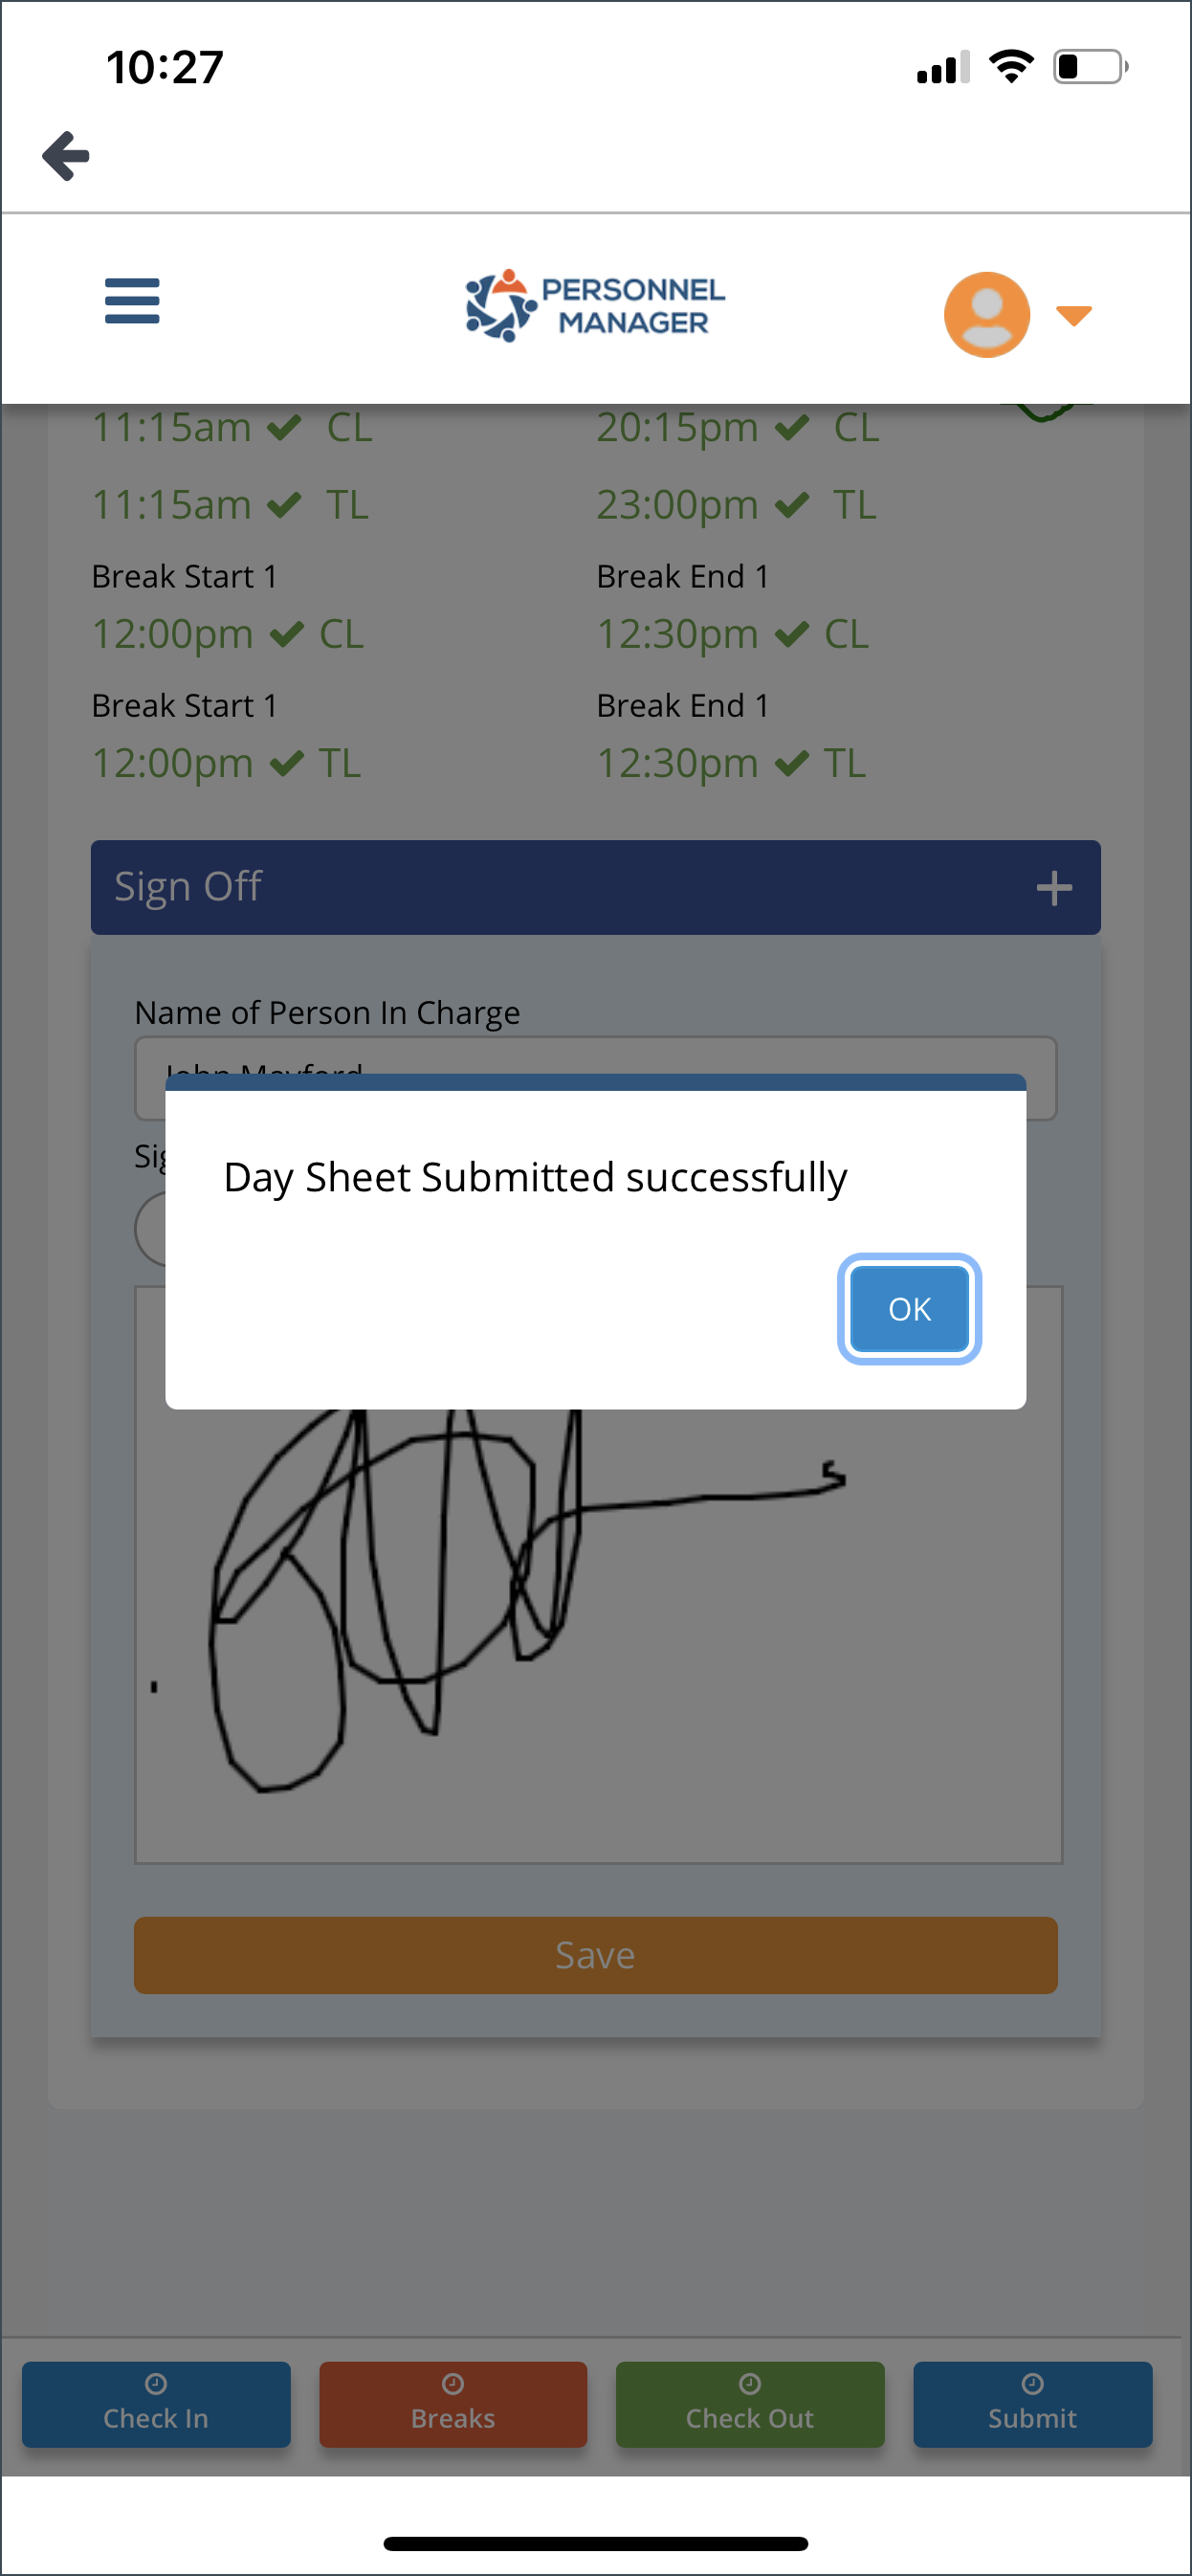
Click OK. Day Sheet is now submitted and lock icon will appear.
SAFETY FORMS
In the Jon Options, these are the safety forms included:
- Inspection
- Induction
- Incident Report
- Safety Issue
If you tap on these options, it will open the safety forms for you fill out.
To know more on how to fill out these forms go to Safety Forms.